Deploying ADF Applications to Oracle Cloud by Using OEPE
Overview
- Have an Oracle.com account.
- Have already completed the Oracle by Example (OBE) tutorial titled Signing Up for a Java Cloud Service.
- Have already completed the OBE tutorial titled Configuring Oracle Enterprise Pack for Eclipse for Oracle Cloud.
- Have access to or have installed the Oracle Express 11g, Release 2 (Oracle XE) database and unlocked the HR schema. (This example uses the human resources [HR] schema included in Oracle Database 11g. The Oracle Sample Schemas installation guide is part of the Oracle Database 11g documentation set, and is also available online at http://otn.oracle.com.
- Have access to or have installed Oracle SQL Developer (version 3.2.2 or later).
- Have read the Oracle Database Cloud Service documentation section titled Using SQL Developer for Data Loading to configure your SQL Developer instance for your Oracle Database Cloud Service.
- Have downloaded and unzipped the HRTEST.zip sample application.
Purpose
This tutorial covers how to modify and deploy Oracle Application Development Framework (Oracle ADF) applications to Oracle Cloud by using Oracle Enterprise Pack for Eclipse (OEPE).
Time to Complete
Approximately 30 minutes
Introduction
Oracle Cloud is a public, enterprise platform-as-a-service (Paas) offering. OEPE is a set of plug-ins designed for the Eclipse integrated development environment (IDE) to support Java Platform, Enterprise Edition (Java EE) development. OEPE 12.1.1.2 adds support of Oracle Cloud and updated tools for Oracle ADF development.
Scenario
In this tutorial, you modify an application created for a local
Oracle WebLogic Server and database instance so that it can run
on Oracle Cloud.
Prerequisites
Before starting this tutorial, you should:
Opening the Sample Application in OEPE
In this section, you import an existing sample application into the OEPE workspace.
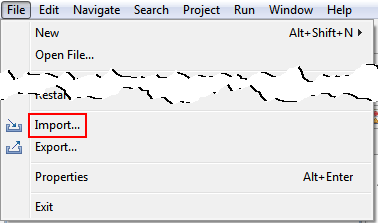
In OEPE, select File > Import to open the Import
dialog box.
On the Select screen, select Existing Projects into
Workspace and click Next.

On the Import Projects screen, perform the following steps:
a. Click Browse and select the directory where you
unzipped the HRTEST.zip file.
b. Make sure that the following HRTEST project components are selected: HRTEST, HRTESTModel, HRTESTWeb.
c. Select Copy projects into workspace.
d. Click Finish.

Running the HRTEST Application Locally
As written, the HRTEST application uses a local resource
connection to an Oracle XE database and HR schema. In this
section, you run the application against your local WebLogic
Server instance.
Expand HRTESTWeb and WebContent.

Select Window > Web Browser and then
select a browser other than Internal Web Browser; for
example, select Firefox.

Right-click emplist.jspx and select Run
As > Run on Server.

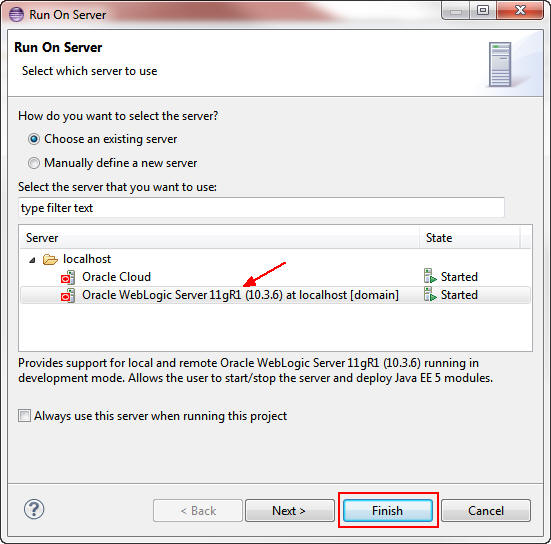
Make sure that Oracle WebLogic Server is selected and click
Finish.
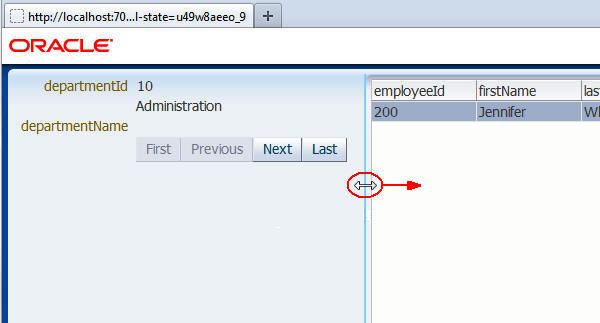
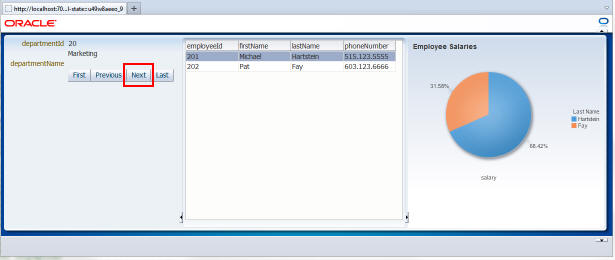
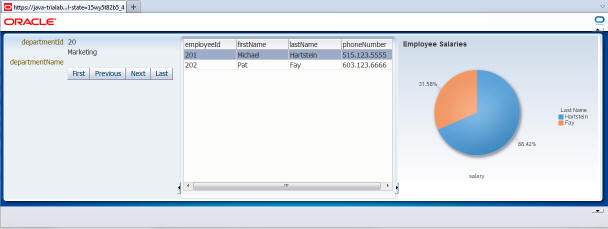
In the browser window, drag the left edge of the employee
table to the right until the navigation controls are
visible.
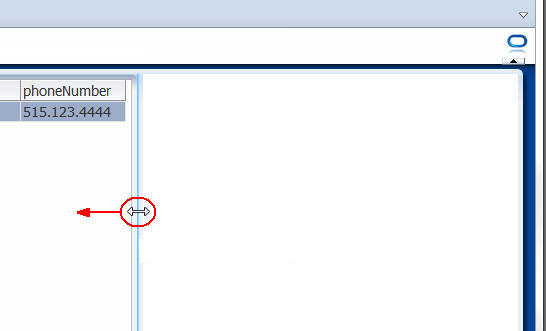
Drag the right edge of the employee table to the left, just
before the phoneNumber column.
Click Next to load the next set of employee
records and display the pie chart.
Connecting to Your Oracle Database Cloud Service
In order to run the application in Oracle Cloud, you must first
create the HR schema and data in your Oracle Database Cloud
Service. Oracle SQL Developer is a free IDE that simplifies the
development and management of Oracle Database. You can use SQL
Developer to copy the schema and contents of a local Oracle
database (such as Oracle XE) to your Oracle Database Cloud
Service instance.
In SQL Developer, right-click Connections and
select New Connection to create a connection to the
local Oracle XE database.

In the New / Select Database Connection dialog box, perform the following steps:
a. Enter HRDB in the Connection Name field.
b. Enter hr in the Username field.
c. Enter hr in the Password field.
d. Click Connect.

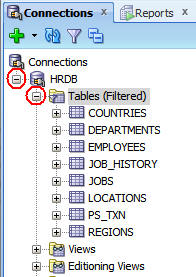
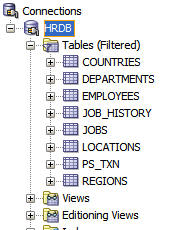
On the Connections tab, expand HRDB and Tables.
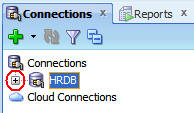
Collapse HRDB to make it easier to complete the
next steps.
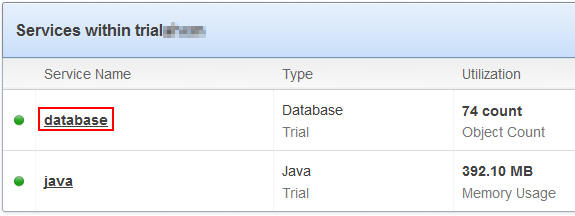
In a browser, log in to your Oracle Cloud account, which
has two services.
On the My Services page, click database to open
the Database Details page.
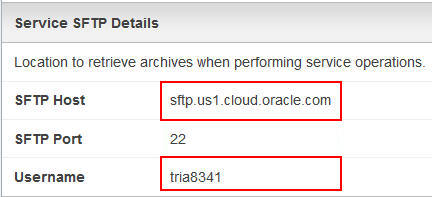
On the Database Details page, write down the host URL.

On the Service SFTP Details page, write down the SFTP host
and user name.
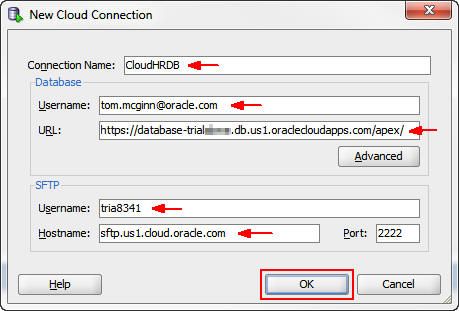
In SQL Developer, right-click Cloud Connections and
select New Cloud Connection to create a connection
to the Oracle Database Cloud Service instance.

In the New Cloud Connection dialog box, perform the following steps:
a. Enter CloudHRDB as the connection name.
b. Enter your Oracle Cloud user name.
c. Copy the host URL from the Details section of your Oracle Database Cloud Service console to the URL.
d. Copy the SFTP user name to the Username field in the SFTP section.
e. Copy the SFTP host to the Hostname field.
f. Click OK.
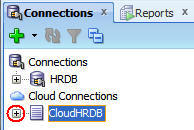
Expand CloudHRDB.
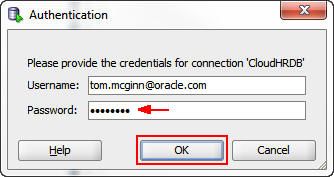
When you attempt to look at the contents of the connection,
the Authentication dialog box is displayed, and you must
authenticate with your Oracle Database Cloud Service.
Enter your Oracle Cloud password and click OK.
You are connected to your Oracle Database Cloud Service.
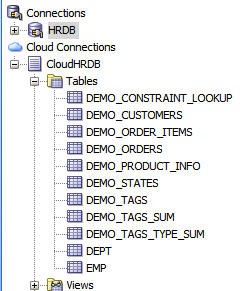
Expand Tables.
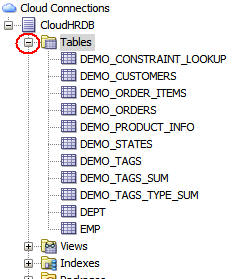
The default tables provided with the service are displayed.
Copying Database Schemas and Data Between Oracle Database Instances
SQL Developer provides a tool with which you can copy a
database schema and data from one database to another. You will
use this capability to copy the HR database schema and data from
your local Oracle XE instance to your Oracle Database Cloud
Service instance.
Select View > Cart.

Expand HRDB and Tables.
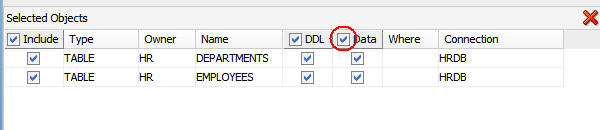
Press the Ctrl key and select DEPARTMENTS
and EMPLOYEES.

Drag the selected tables to the Cart window.
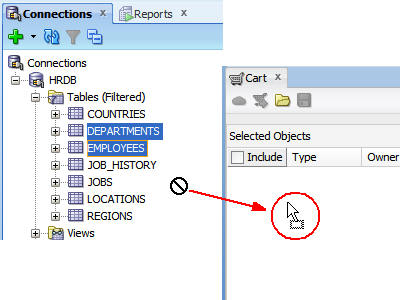
The cursor changes into a rectangle when you place it in the Cart window.
Select the Data check box so that the data is also
copied.
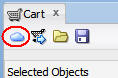
Click the Cloud button to deploy the selected HR
database entity objects to your Oracle Database Cloud
Service.
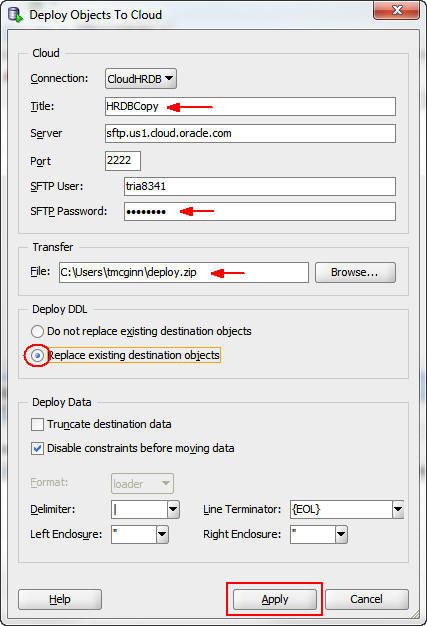
In the Deploy Objects to Cloud dialog box, perform the following steps:
a. Give the copy process a title; for example, HRDBCopy.
b. Enter the password for the SFTP user.
c. Enter the path and name to the file used to transfer the schema and data.
d. Select Replace existing destination objects.
e. Click Apply.
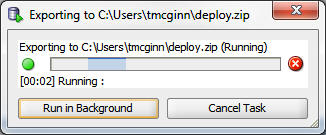
A progress bar displays the progress of the transfer.
Collapse the HRDB connection and expand the CloudHRDB
connection.
Perform the following steps:
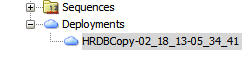
a. Scroll down to Deployments.
b. Expand Deployments.
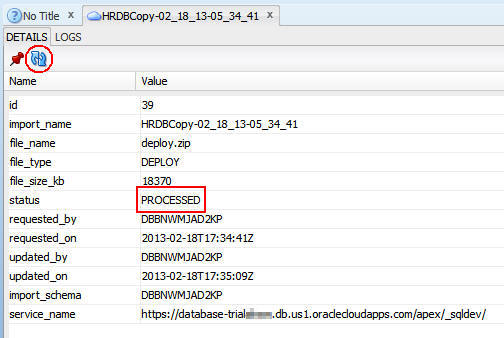
c. Double-click the HRDBCopy deployment.
The deployment log opens.

Click the Refresh button periodically until the
status changes to PROCESSED.
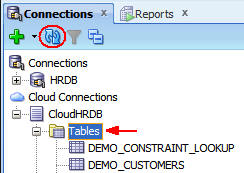
Perform the following steps:
a. Scroll up to CloudHRDB.
b. Select Tables.
c. Click Refresh.
The tables that you copied from your Oracle XE instance
were successfully created in your Oracle Database Cloud
Service instance.

Deploying the Sample Application to Oracle Cloud
The local version of the application uses a local JDBC resource
connection, so you must alter the application's persistence unit
before deploying and running it in Oracle Cloud.
In the Project Explorer, perform the following steps:
a. Expand HRTESTModel > src > META-INF.
b. Double-click persistence.xml to open it.

Click the Connection tab.

In the Connection panel, perform the following steps:
a. Select JTA from the "Transaction type" list.
b. Enter database as the Java Transaction API (JTA) data source.
c. Save the persistence.xml file.

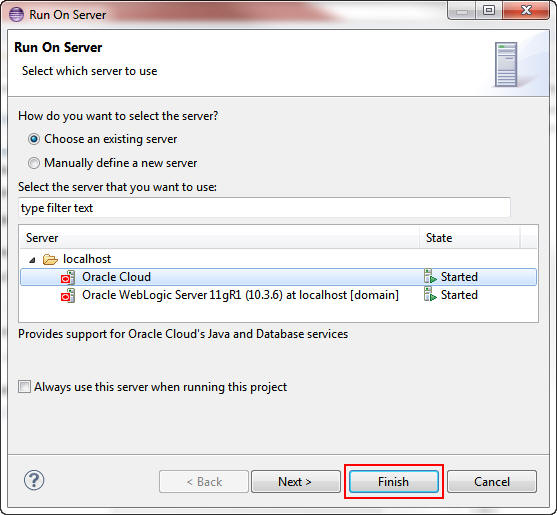
In the Project Explorer, right-click emplist.jspx and select Run As > Run on Server.

In the Run On Server dialog box, select Oracle Cloud and click Finish.
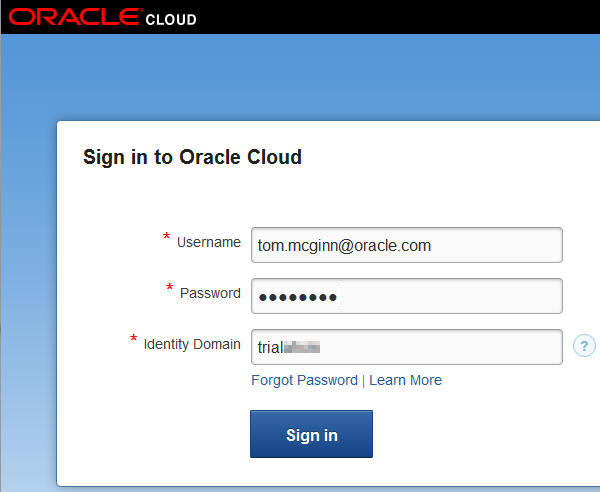
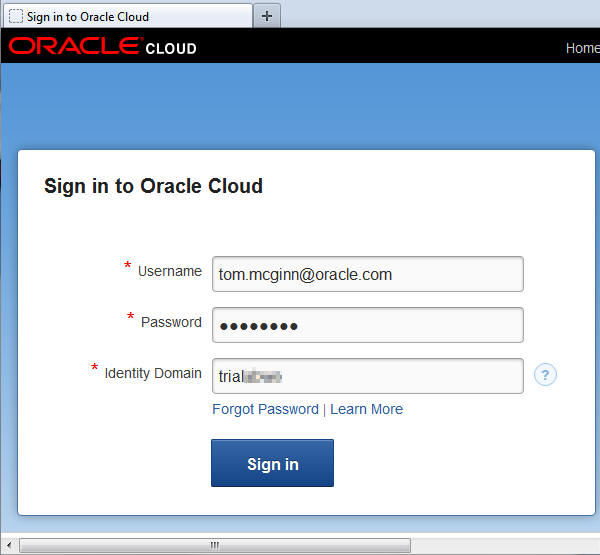
A browser window opens, but you must sign in to your Oracle Cloud account first.
Enter your user name, password, and identity domain and
click Sign in.
Perform the same changes and test that you performed when
you ran the application locally.
Summary
- Use SQL Developer to copy local HR database schema and data to your Oracle Database Cloud Service
- Deploy an Oracle ADF application to Oracle Cloud
- Oracle Cloud documentation
- Oracle
Enterprise Pack for Eclipse User's Guide
- WebLogic Server 11g documentation
- ADF
Application Development Using OEPE v12.1.1.2 (This blog
entry illustrates how to build the HR application used in this
tutorial.)
- To learn more about Oracle
Cloud, refer to additional OBEs in the Oracle Learning Library
- Lead Curriculum Developer: Tom McGinn
In this tutorial, you learned how to:
Resources
Credits
To help navigate this Oracle by Example, note the following:
- Hiding Header Buttons:
- Click the Title to hide the buttons in the header. To show the buttons again, simply click the Title again.
- Topic List Button:
- A list of all the topics. Click one of the topics to navigate to that section.
- Expand/Collapse All Topics:
- To show/hide all the detail for all the sections. By default, all topics are collapsed
- Show/Hide All Images:
- To show/hide all the screenshots. By default, all images are displayed.
- Print:
- To print the content. The content currently displayed or hidden will be printed.
To navigate to a particular section in this tutorial, select the topic from the list.