Utilizing Advanced Interactive Report Region Techniques
Purpose
This tutorial shows you how to use some advanced techniques with Interactive Report Regions in Oracle Application Express.
Time to Complete
Approximately 30 minutes
Overview
In this tutorial, you explore some of the more advanced tasks related to Interactive Report Regions in Oracle Application Express.
Note: All the files needed for this tutorial are located in the apex directory on your machine.
Prerequisites
Before starting this tutorial, you should:
|
. |
Enter the following URL to log in to Oracle Application Express. http://localhost:8080/apex
|
|---|---|
|
. |
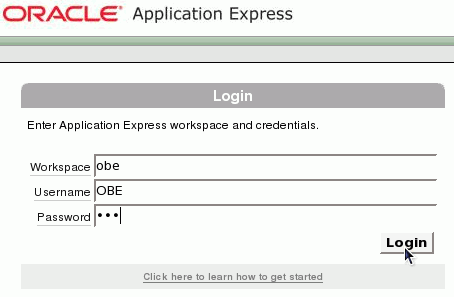
To log in to Oracle Application Express, enter the following details,
and click Login.
|
| . |
From SQL Workshop > SQL Commands, execute the following statement: update oehr_employees set job_id='AD_PRES' where employee_id=104 |
|
. |
In this tutorial, you use the same application you used in the Building and Customizing an Interactive Report tutorial. If you did not perform this tutorial, you will need to import the New Features application using the new_features_app.sql.
|
Note: The application numbers and page numbers may differ slightly from the screenshots.
Resetting your Interactive Report Manually
As a developer, you have the ability to include or exclude the Reset function, Actions Menu, or Search Bar all together. Without the Reset function on the Actions Menu, your end-users will not have the ability to reset their report after they have customized it using the Column Heading menu. To allow for resetting, you can programmatically provide a reset button.
In this topic, you will first create an Interactive Report, then exclude the Search bar, and lastly, create a reset button. Perform the following steps:
|
. |
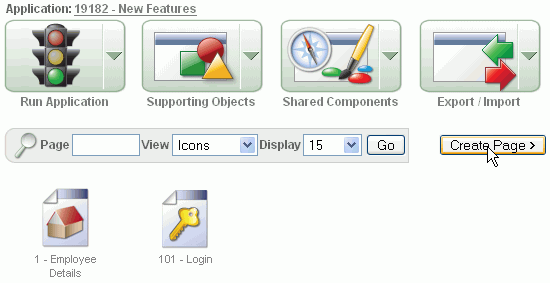
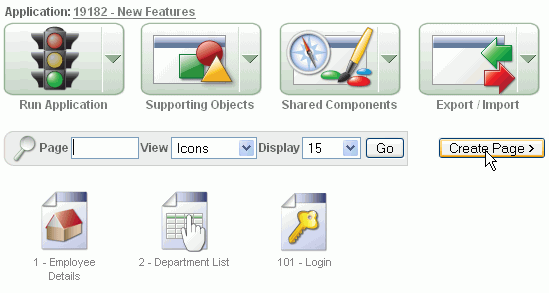
From your Application page, click Create Page.
|
|---|---|
|
. |
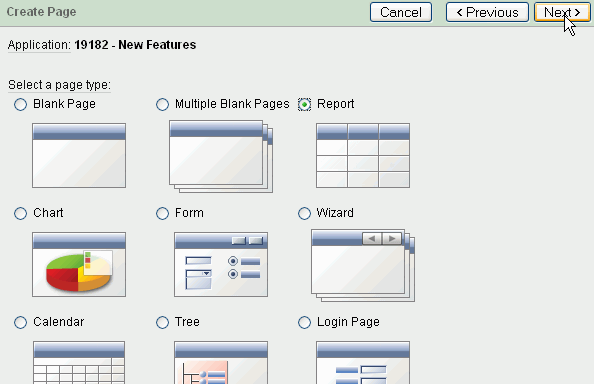
Select the Report radio button and click Next.
|
|
. |
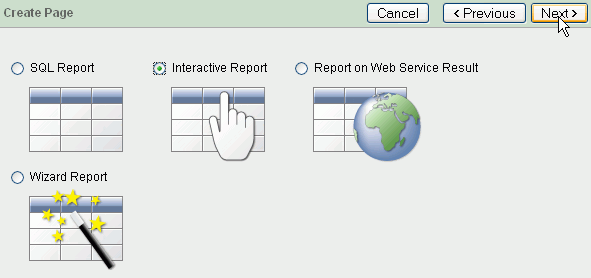
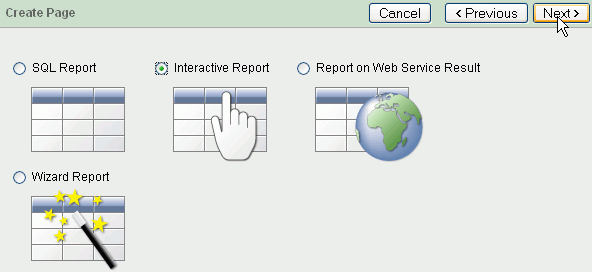
Select the Interactive Report radio button and click Next.
|
|
. |
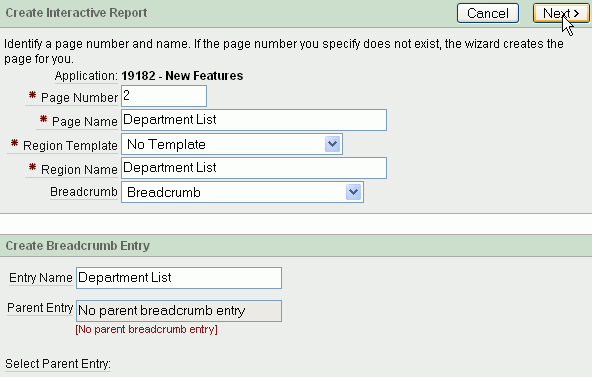
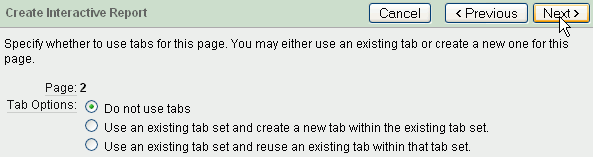
Enter Department List for the Page Name and Region Name. Select Breadcrumb for Breadcrumb and click Next.
|
|
. |
Accept the default and click Next.
|
| . |
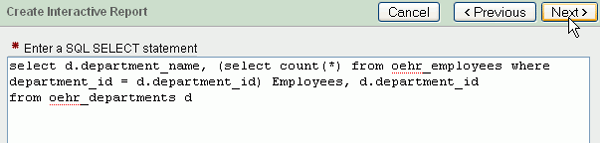
Enter the following SQL and click Next. select d.department_name, (select count(*) from oehr_employees where department_id = d.department_id) Employees, d.department_id from oehr_departments d |
| . |
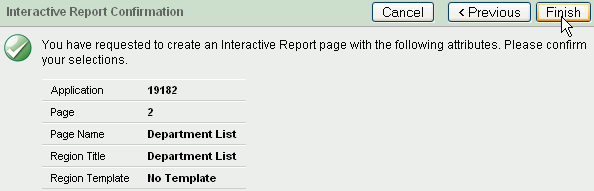
Click Finish.
|
| . |
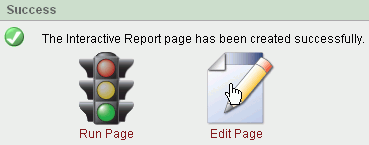
Your interactive report page was created successfully. Before you run the page, you need to make some changes. Click Edit Page.
|
| . |
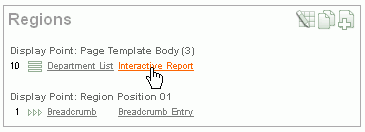
Under Regions, select the Interactive Report link.
|
| . |
Click the Search Bar tab.
|
| . |
Under Include in Actions menu, Select No for Include Search Bar and click Apply Changes.
|
| . |
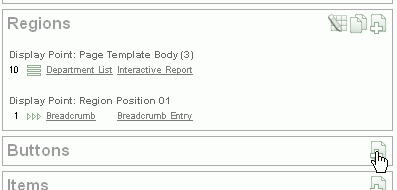
You will now create a button to perform the reset function. Under Buttons, click the Create icon.
|
| . |
Select the Department List region and click Next.
|
| . |
Accept the default Create a button in a region position and click Next.
|
| . |
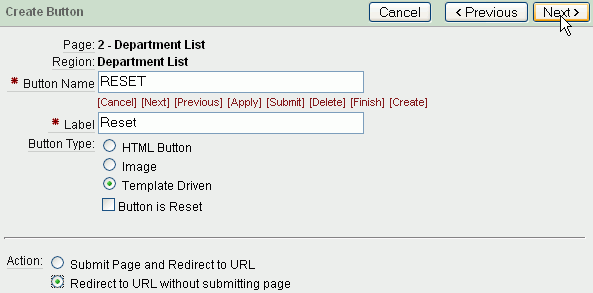
Enter Reset for the button name and select the Redirect to URL without submitting page and click Next.
|
| . |
Accept the default and click Next.
|
| . |
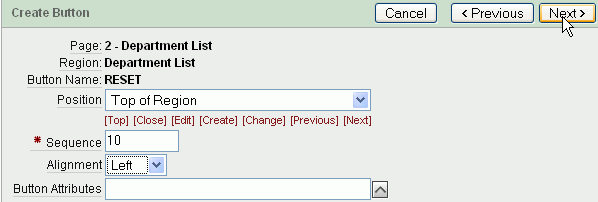
Click [Top] for Position and select Left for Alignment and click Next.
|
| . |
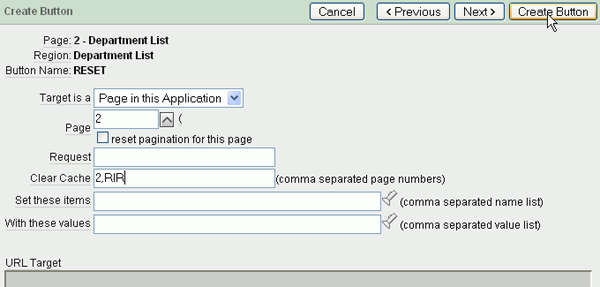
To reset an Interactive Report, you send a clear cache request of 'RIR'. This resets the Interactive Report on whichever page is called. Enter the current page for Page. For Clear Cache, and enter 2,RIR and click Create Button. Note: The RIR string is equivalent to the end user choosing the Reset option from the interactive report actions menu on the target page and causes the report to be returned to the default report settings specified by the developer.
|
| . |
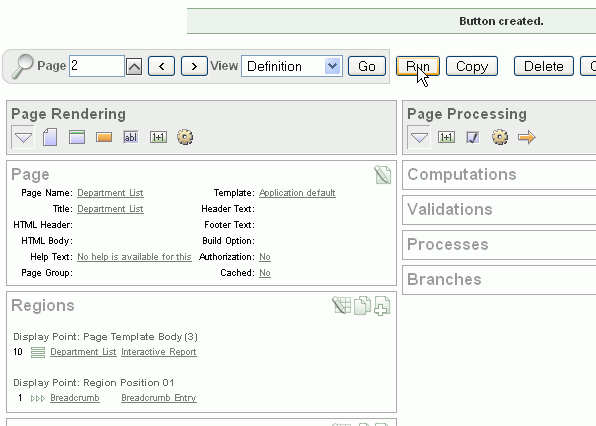
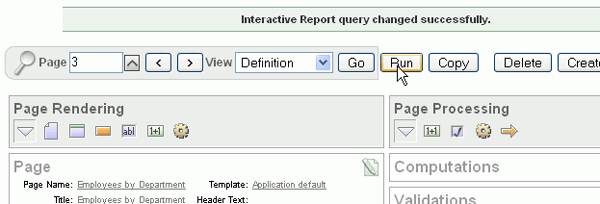
Your button was created successfully. Click Run Page.
|
| . |
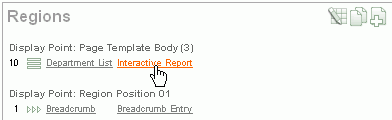
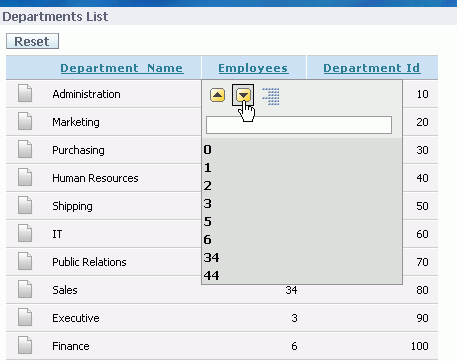
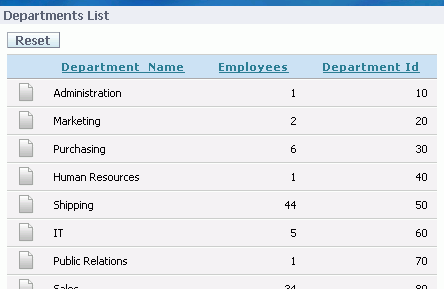
Your report is displayed. Select the Employees header and click the sort descending icon.
|
| . |
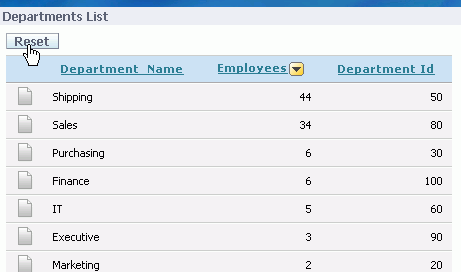
Your report is now ordered by Employees, in descending order. From the column heading menu, you can only change to ascending or sort by another column. If your end user wants to remove the sort entirely, they will need to use the Reset button. Click Reset.
|
|
. |
Notice that your report has been reset back to its original state.
|


Creating a Declarative Filter
You can define declarative filters on Interactive Reports by passing filter criteria using the URL item values. This allows you to define complex query criteria that can be translated into filters or drill downs from a report to an interactive report. To create a drill down from one interactive report to another perform the following steps:
|
. |
Navigate to the Application page. Click Create Page.
|
|---|---|
| . |
Select the Report radio button and click Next.
|
| . |
Click Interactive Report and click Next.
|
| . |
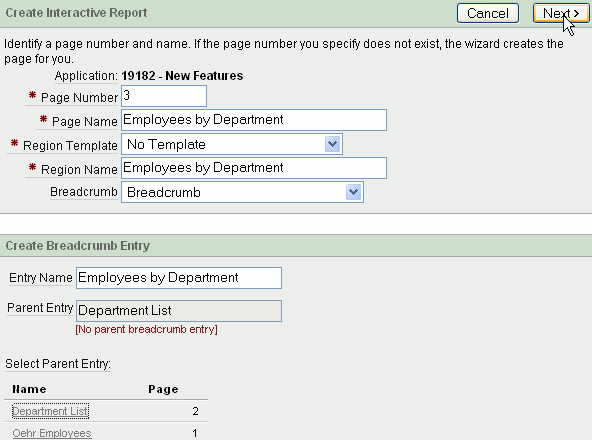
Enter Employees by Department for the Page Name and Region Name. Select Breadcrumb for Breadcrumb. Enter Employees by Department for Entry Name. Select the Department List link for the Parent Entry and click Next.
|
| . |
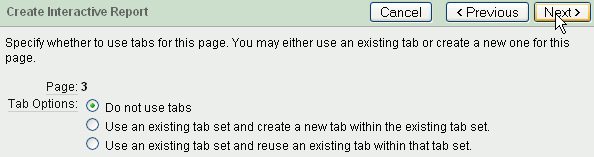
Accept the default and click Next.
|
| . |
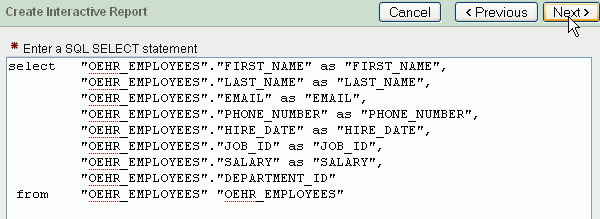
Enter the following SQL and click Next. select "OEHR_EMPLOYEES"."FIRST_NAME" as "FIRST_NAME", |
| . |
Click Finish.
|
| . |
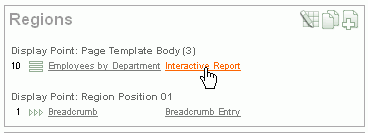
Your interactive report page was created successfully. Before you run the page, you need to make some changes. Click Edit Page.
|
| . |
Under Regions, select the Interactive Report link.
|
| . |
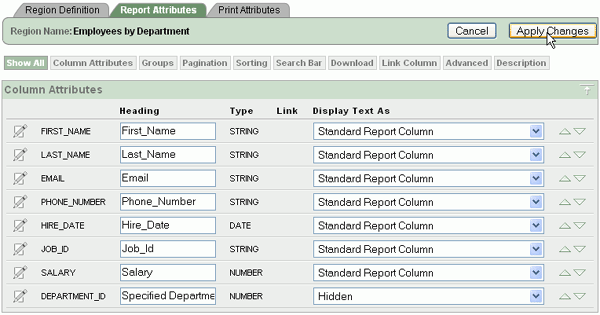
Select the Show All tab. You need to provide a Heading Name that will be used as the Filter name when this report is called and a DEPARTMENT_ID is specified (even though the DEPARTMENT_ID columns will not be displayed). Change the heading for DEPARTMENT_ID to Specified Department and select Hidden for Display Text As and click Apply Changes. Note that the column does not need to be hidden in order to have a value passed to it. If a value is passed to a non-hidden column, the resulting filter can be edited. If a value is passed to a hidden column, the resulting filter can only be disabled or deleted, but not edited (i.e. and your end user cannot change the filter to view a different department)
|
| . |
Now you need to create a link between the Department List page and this page and pass the Department ID. Select your Application breadcrumb.
|
| . |
This page was created in the previous topic of this tutorial. Select the Department List page.
|
| . |
Under Regions, select the Interactive Report link.
|
| . |
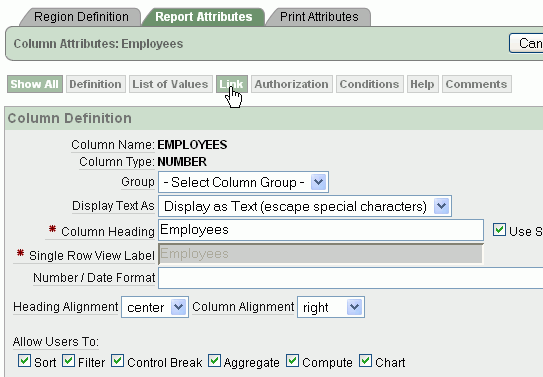
Select Hidden for DEPARTMENT_ID, select Display as Text (escape special characters) for the EMPLOYEES column, and click the Edit icon for the EMPLOYEES column.
|
| . |
Click the Link tab.
|
| . |
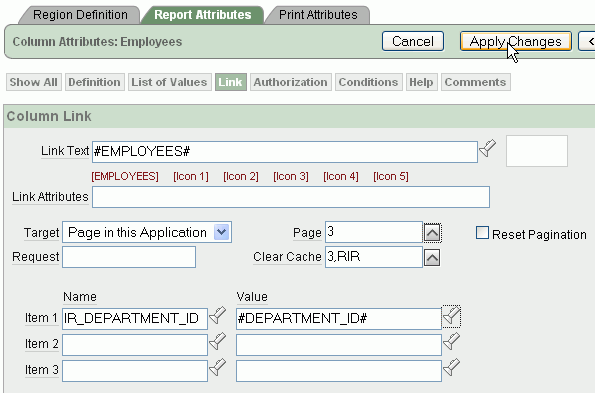
You need to define a link that will display the number of employees per department, call the new page you just created, clear the cache on that page and reset the interactive report region on that page to remove any previously set filters that might interfere with the filter being passed. In addition, you need to pass in a value for the hidden DEPARTMENT_ID. To reference a column within an interactive report, you preface the column alias with 'IR_'. Select [EMPLOYEES] for Link Text, enter the 3 for Page (which is the page you just created) and enter 3,RIR in the Clear Cache field. Enter IR_DEPARTMENT_ID in the Item 1 Name field and select #DEPARTMENT_ID# for Value. Then click Apply Changes. Note: By prefixing the item name with IR_, in this example IR_DEPARTMENT_ID, the URL item will be associated with an interactive report column rather than an item on a page.
|
| . |
Click Run Page.
|
| . |
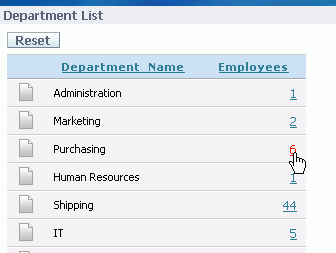
The Employees value now has a link. Click one of the numbers.
|
| . |
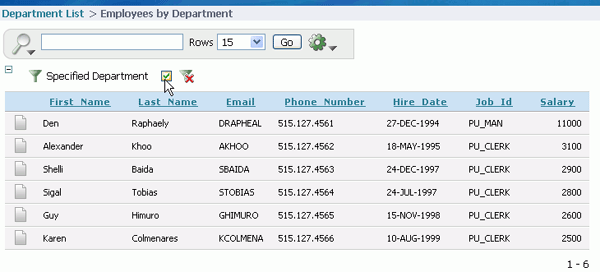
The Employees by Department Interactive report is now shown and there is a filter created on Department. Notice that you cannot click to edit the filter (because it was created on a hidden column) but you can disable the filter by deselecting the check box.
|
|
. |
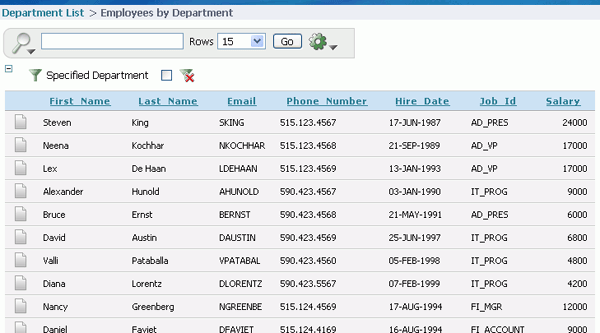
All the records are now displayed because the filter has been disabled. Click Edit Page in the developer toolbar.
|


Creating Derived Columns
In this section, you add a derived column to your query. Specifically, you use a case statement to determine whether an employee is underpaid based on the job they perform. You then use the value of this derived column to create a highlight rule to highlight all underpaid employees. Perform the following steps:
| . |
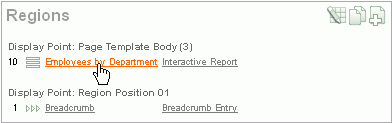
Navigate to the Employees by Department page (which is the page you were last on from the previous section). Under Regions, select the Employees by Department link.
|
|---|---|
|
. |
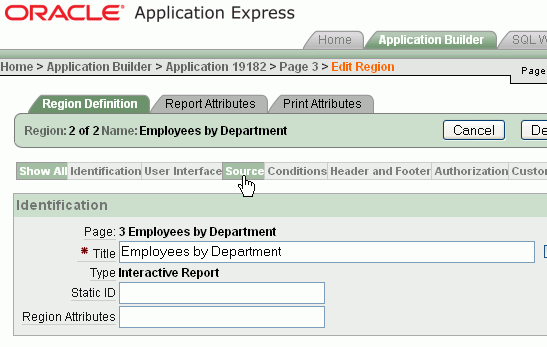
In the Region Definition tab click the Source tab.
|
| . |
Change the source to the following query and click Apply Changes . Note that the CASE statement in this SQL statement checks to see if the employee's salary is less than the minimum salary for their job. If so, the value of the derived column, UnderPaid_Yes_No, is set to Yes, otherwise, it is set to No. The derived column is not displayed initially but it is available for use with many actions on the Actions menu such as a Filter and Highlight. select (case when e.salary < j.min_salary then 'Yes' |
| . |
The additional columns will be added to your report. Click Apply Changes.
|
| . |
Click Run.
|
| . |
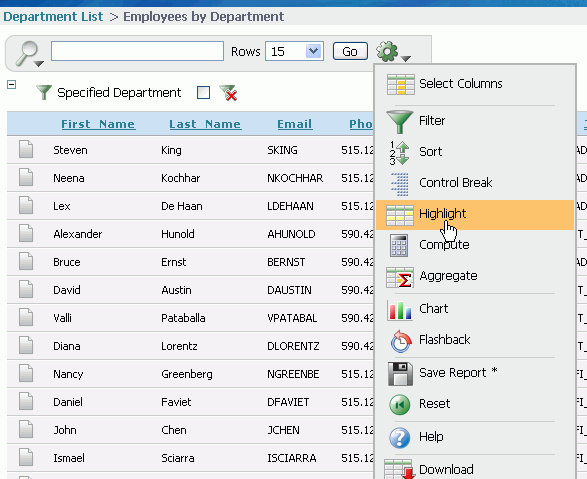
Your report is displayed. If the new derived columns appear on the report at runtime use the Actions menu > Select Columns action to change the columns to Do not Display and then save the report as the default report. To show the employees who are underpaid, select the Actions menu and click Highlight.
|
| . |
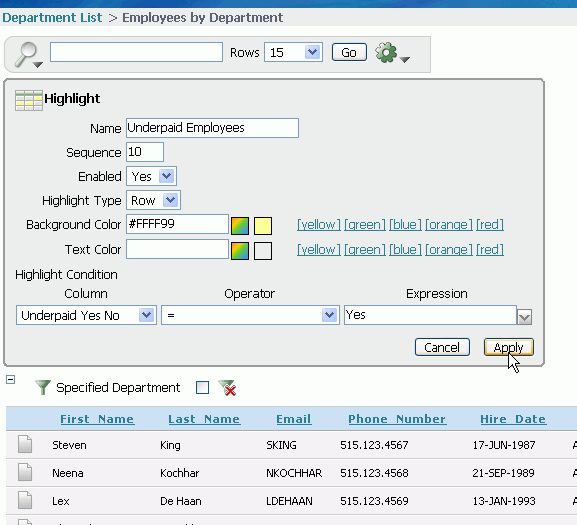
Enter Underpaid Employees for the Name and select [yellow] for Background Color. Select UnderPaid Yes No for Column and enter Yes for Expression and click Apply.
|
|
. |
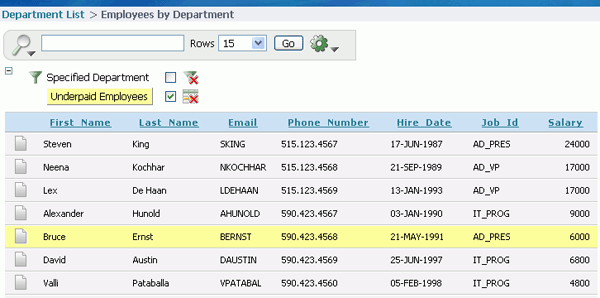
Notice that the employees who are underpaid are now highlighted in yellow.
|


Summary
In this tutorial, you have learned how to:
- Reset your Interactive Report Manually
- Create a declarative filter
- Create a derived predefined filter
Resources
To learn more about Application Express, you can review the following:
|
Related Documentation |
Description |
|
Online Help |
To access this help, click the Help button displayed in the top right corner of Application Express. Search on topics of interest. |
|
These notes contain important information not included in the Oracle Application Express documentation. |
|
|
This guide explains how to install and configure Oracle Application Express. |
|
|
This guide shows you how to set up a development environment or access a hosted demonstration environment to use with this guide. It then walks you through building an initial application, modifying it, and previewing it. |
|
|
This guide describes how to use the Oracle Application Express development environment to build and deploy database-centric Web applications. Oracle Application Express turns a single Oracle database into a shared service by enabling multiple workgroups to build and access applications as if they were running in separate databases. |
|
|
Tutorials with step-by-step instructions that explain how to create a variety of application components and entire applications using the Oracle Application Express development environment. |
![]()

|
About
Oracle |Oracle and Sun | |