Performing Point-In-Time Recovery for a Pluggable Database
Overview
- A user error or corruption removes needed data or introduces corrupted data. For example, a user or DBA erroneously deletes or updates the contents of one or more tables, drops database objects that are still needed during an update to an application, or runs a large batch update that fails midway.
- A database upgrade fails or an upgrade script goes awry.
- A complete database recovery after a media failure cannot
succeed because you do not have all of the needed redo logs or
incremental backups.
- Your database must be running in ARCHIVELOG mode.
- You must have backups of all data files before the target SCN for DBPITR.
- You must have archived redo logs between the SCN of the backups and the target SCN.
- Ensure that you have enough disk space to hold a complete
backup copy of the CDB, including all of the
PDBs.
- Install Oracle Database 12c.
- Create one CDB with two PDBs in
it.
Purpose
This tutorial covers the steps for using Oracle Recovery Manager (Oracle RMAN) to perform a point-in-time recovery for a pluggable database (PDB).
Time to Complete
Approximately 30 minutes
Introduction
A database point-in-time recovery (DBPITR) is sometimes referred to as an incomplete recovery. This recovery capability is suitable for the following situations:
Here are the DBPITR requirements:
Scenario
In this tutorial, you use Oracle RMAN to perform a point-in-time
recovery on a PDB. You make some
erroneous data updates and then recover the database to
the state it was just before you performed the data updates.
Prerequisites
Before starting this tutorial, you should:
- ORACLE_HOME: /u01/app/oracle/product/12.1.0
- TNS Listener port: 1521
- Container databases:
- SID: cdb1
- SID: cdb2
- Pluggable databases (in cdb1):
- pdb1
- pdb2
The environment used in the development of this tutorial is as follows:
Preparing to Back Up the CDB
Before backing up the database, you must create the backup directory and then put the database in ARCHIVELOG mode.
Creating a Backup Directory
Navigate to /stage or wherever you can find enough available space to store the backup files.
cd /stage
Create a subdirectory called db_backup_files
under /stage.
mkdir db_backup_files
Create a subdirectory called cdb1
under /stage/db_backup_files.
cd db_backup_files
mkdir cdb1
Placing the CDB in ARCHIVELOG
Mode
In SQL*Plus, connect as sysdba
to the cdb1 container database.
. oraenv
[enter cdb1 at the prompt]
sqlplus / as sysdba
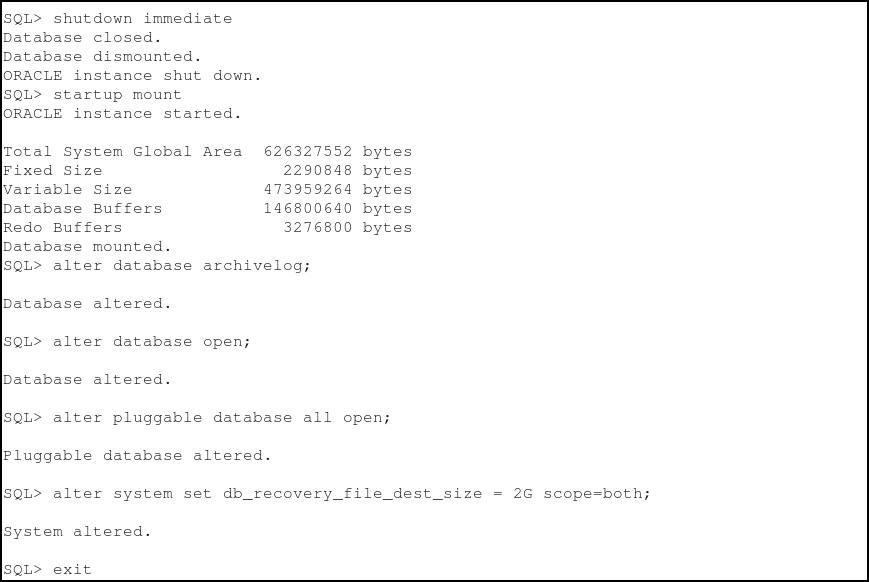
Shut down the database.
shutdown immediate
Start the database in mount mode.
startup mount
Turn on database archiving.
alter database archivelog;
Open the CDB.
alter database open;
Open all of the PDBs.
alter pluggable database all open;
Set the Flash Recovery Area (FRA) size.
alter system set db_recovery_file_dest_size = 2G scope=both;
exit
Backing Up the CDB
- Set the NLS_DATE_FORMAT environment variable so that the date and time values displayed by RMAN can be more easily read.
- Make sure that ORACLE_HOME is set correctly.
- Set ORACLE_SID to cdb1.
Use Oracle RMAN to back up the database to the directory that was specified in the previous section.
Perform the following steps in a new terminal window:
export NLS_DATE_FORMAT='DD-MM-YYYY HH:MI:SS'
Connect to Oracle RMAN.
rman target /
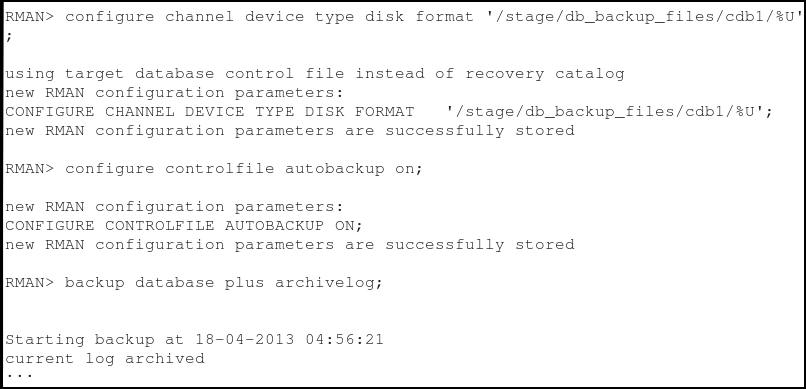
Set the Oracle RMAN backup device type and backup file location.
configure channel device type disk format '/stage/db_backup_files/cdb1/%U';
Turn on automatic backup of control files.
configure controlfile autobackup
on;
Back up the database and archive logs.
backup database plus archivelog;
exit
Note: The output is truncated for readability.

Performing Erroneous Updates in the PDB
In this section, you set up a tablespace, schema, and table
in each PDBs. Next, you insert
some records in the tables. One of the batch inserts will be
done "in error."
Creating a Tablespace, Schema, and
Table in PDB1
sqlplus
sys/oracle@localhost:1521/pdb1 as sysdba
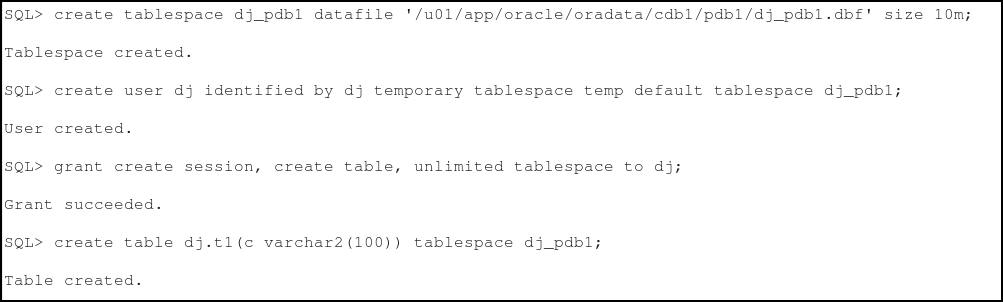
Create a small tablespace where a small table will be stored.
create tablespace dj_pdb1
datafile
'/u01/app/oracle/oradata/cdb1/pdb1/dj_pdb1.dbf' size
10m;
Create a schema that will own the table.
create user dj identified by
dj temporary tablespace temp default tablespace
dj_pdb1;
Grant the schema the necessary privileges.
grant create session, create
table, unlimited tablespace to dj;
Create the table in the schema.
create table dj.t1(c
varchar2(100)) tablespace dj_pdb1;
Performing Data Updates in PDB1
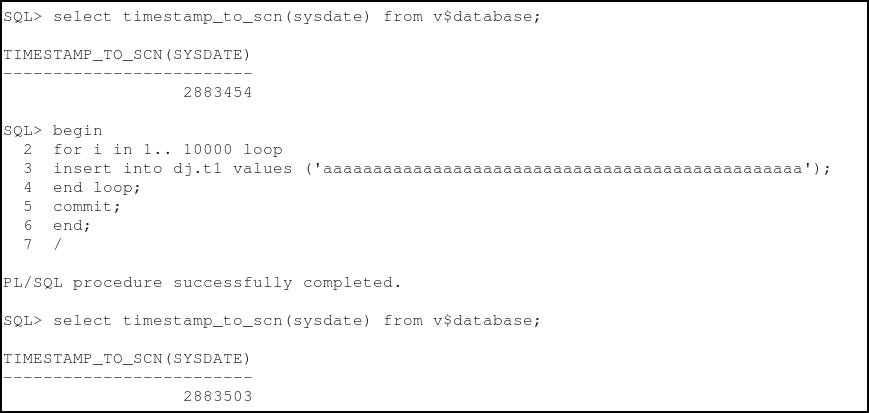
Make a note of the current SCN.
select timestamp_to_scn(sysdate) from v$database;
Insert data in the table.
begin
for i in 1.. 10000 loop
insert into dj.t1 values
('aaaaaaaaaaaaaaaaaaaaaaaaaaaaaaaaaaaaaaaaaaaaaaaa');
end loop;
commit;
end;
/
Make a note of the SCN and remain in SQL*Plus.
select timestamp_to_scn(sysdate) from v$database;
Creating a Tablespace, Schema, and
Table in PDB2
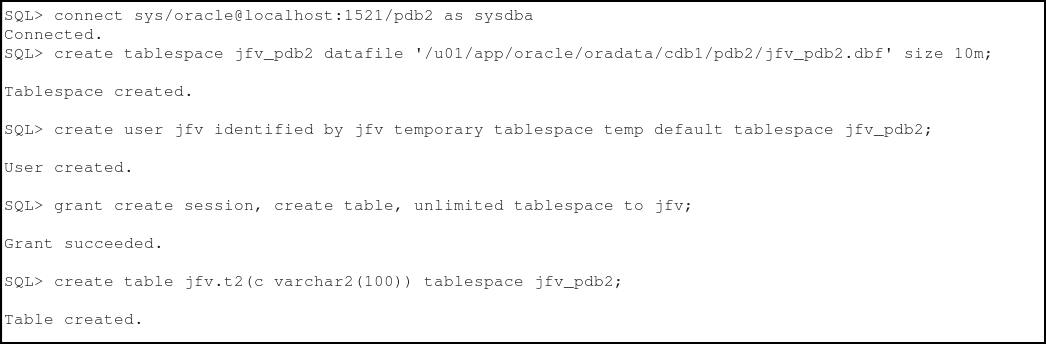
In SQL*Plus, connect to pdb2 as sysdba.
connect
sys/oracle@localhost:1521/pdb2 as sysdba
Create a small tablespace where a small table will be stored.
create tablespace jfv_pdb2 datafile '/u01/app/oracle/oradata/cdb1/pdb2/jfv_pdb2.dbf' size 10m;
Create a schema that will own the table.
create user jfv identified by jfv temporary tablespace temp default tablespace jfv_pdb2;
Grant the schema the necessary privileges.
grant create session, create table, unlimited tablespace to jfv;
Create the table in the schema.
create table jfv.t2(c varchar2(100)) tablespace jfv_pdb2;
Performing Data Updates in PDB2
Insert a row in the table and commit the transaction.
insert into jfv.t2 values
('bbbbbbbbbbbbbbbbbbbbbbbbbbbbbbbb');
commit;
Make a note of the current SCN, which is the point to which you will recover the database.
select timestamp_to_scn(sysdate) from v$database;
Insert 10,000 more rows into the table.
begin
for i in 1.. 10000 loop
insert into jfv.t2 values
('aaaaaaaaaaaaaaaaaaaaaaaaaaaaaaaaaaaaaaaaaaaaaaaa');
end loop;
commit;
end;
/
Make a note of the SCN.
select timestamp_to_scn(sysdate) from v$database;

Oh no! The insert should not have been done in PDB2! You need to perform a point-in-time recovery.
Recovering the PDB to a Certain Point in Time
To perform point-in-time recovery, you must first close the PDB. Use Oracle RMAN to recover until the SCN before the erroneous data updates to the table in PDB2.
Close the pdb2
pluggable database and exit SQL*Plus.
alter pluggable database pdb2 close;
exit
Connect to Oracle RMAN.
rman target /
Perform point-in-time recovery in Oracle RMAN.
Make sure that you change the SET UNTIL SCN value to the SCN that you recorded in step #1 in the "Performing Data Updates in PDB2" section. Also, set the AUXILIARY DESTINATION value to a location with enough free space to hold a copy of the database files.
run {
set until SCN = 2263440 ;
restore pluggable database pdb2;
recover pluggable database pdb2 auxiliary
destination='/stage/db_backup_files/cdb1';
alter pluggable database pdb2 open resetlogs;
}
Exit Oracle RMAN.
exit
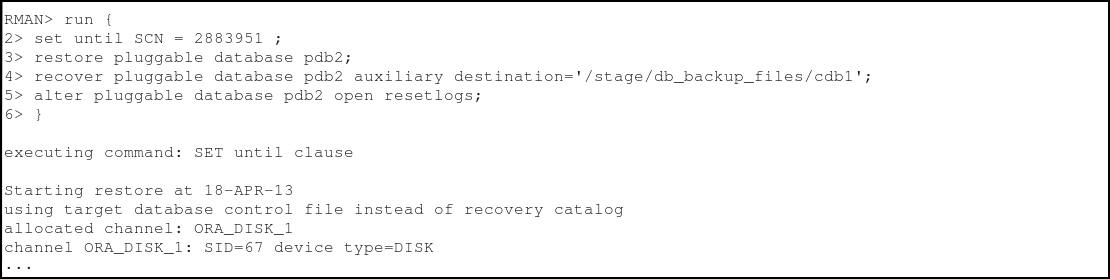
Note: The output is truncated for readability.

Verifying Success of the Point-In-Time Recovery
If the point-in-time recovery was successful, you should see only one row in the jfv.t2 table.
In SQL*Plus, connect to PDB2.
sqlplus jfv/jfv@localhost:1521/pdb2
Check to see that the table contains only the one
row inserted before the 10,000 record
batch insert.
select * from t2;
exit

Resetting Your Environment
Perform the following steps to reset your environment prior to repeating the activities covered in this OBE or starting another OBE.
Remove the jfv user and jfv_pdb2 tablespace from pdb2 .
. oraenv
[enter cdb2 at the prompt]
sqlplus
sys/oracle@localhost:1521/pdb2 as sysdba
drop user jfv cascade;
drop tablespace jfv_pdb2 including contents;
Remove the dj user and dj_pdb1 tablespace from pdb1.
connect sys/oracle@localhost:1521/pdb1 as sysdba
drop user dj cascade;
drop tablespace dj_pdb1 including contents;
Take the database out of ARCHIVELOG mode .
connect / as sysdba
shutdown immediate
startup mount
alter database noarchivelog;
alter database open;
alter pluggable database all open;
exit
Remove the backup files.
rm -rf /stage/db_backup_files
Summary
- Use Oracle RMAN to back up a CDB and its
PDBs
- Recover a PDB to a certain point in time
- To learn more about backup and recovery, refer to additional OBEs in the Oracle Learning Library.
- Curriculum Developers: Dominique Jeunot, Jean-Francois
Verrier
In this tutorial, you learned how to:
Resources
Credits
To help navigate this Oracle by Example, note the following:
- Hiding Header Buttons:
- Click the Title to hide the buttons in the header. To show the buttons again, simply click the Title again.
- Topic List Button:
- A list of all the topics. Click one of the topics to navigate to that section.
- Expand/Collapse All Topics:
- To show/hide all the detail for all the sections. By default, all topics are collapsed
- Show/Hide All Images:
- To show/hide all the screenshots. By default, all images are displayed.
- Print:
- To print the content. The content currently displayed or hidden will be printed.
To navigate to a particular section in this tutorial, select the topic from the list.