Overview
Purpose
Oracle WebLogic Server 12.1.3 supports several new Java Platform, Enterprise Edition (Java EE) 7 features. This tutorial demonstrates how to enable Java Persistence API (JPA) 2.1, enable Java API for RESTful Web Services (JAX-RS) 2.0, use the WebSocket Protocol, and use the Java API for JSON Processing.
Time to Complete
Approximately 30 minutes.
Introduction
This tutorial uses WebLogic Server 12.1.3 and a Java EE application named ActionBazaar - an application that uses REST services to implement a system for placing real-time bids for auction items, as well as monitoring the bid activity in real-time.
The ActionBazaar Java EE application requires JPA 2.1 and JAX-RS 2.0. This tutorial includes the steps to enable the JPA 2.1 and JAX-RS 2.0 Java EE 7 features in WebLogic Server 12.1.3.
The ActionBazaar Java EE application also demonstrates the use of the WebSockets protocol as well as JSON processing:
- WebSockets are used in the monitor feature of the ActionBazaar application; when item bids are submitted a monitor page can view the activity in real-time using Websockets.
- JSON is used as the serialized data representation throughout the application; for bids sent and received as well as the messages for monitoring the bidding activity.
Hardware and Software Requirements
- A Linux development machine with sufficient CPU, memory, and hard disk space.
- Sufficient hardware to run WebLogic Server (For details, see the list of certified platforms.)
- Java Development Kit (JDK 1.7) on the development machine.
- WebLogic Server 12.1.3 on the development machine.
Prerequisites
Completion of the Installing and Configuring the WebLogic Server Zip Distribution and Code Examples Oracle By Example tutorialEnabling JPA 2.1 in WebLogic Server 12.1.3
While WebLogic Server 12.1.3 supports JPA 2.1, the Java Archive (JAR) files are not configured by default; some additional configuration is required to enable JPA 2.1 support. In this tutorial, the JPA 2.1 implementation is configured on the WebLogic Server classpath.
-
On the Linux system, open an terminal session as the
oracleuser. -
In the terminal session, navigate to the WebLogic Server domain directory. Execute cd /u01/wls12130/user_projects/domains/mydomain.

-
Execute vi bin/setDomainEnv.shto edit the
setDomainEnv.shscript in thebindirectory.
-
In the vi editor, create a
PRE_CLASSPATH=/u01/wls12130/oracle_common/modules/javax.persistence_2.1.jar:/u01/wls12130/wlserver/modules/com.oracle.weblogic.jpa21support_1.0.0.0_2-1.jarPRE_CLASSPATHvariable that prepends both JPA 2.1 JAR files to the classpath.
export PRE_CLASSPATH

-
Execute wq to save and close
setDomainEnv.shscript. -
Execute ./startWebLogic.sh to start the WebLogic Server domain.

The WebLogic Server domain starts.

To validate that JPA 2.1 is in use, the two JPA 2.1 JAR files appear in the classpath.

Creating a Datasource Connection to a Derby Database
The ActionBazaar application requires a JDBC
Datasource connection to a Derby database named jdbc/ActionBazaarDB.
-
On the Linux system, open a browser. Navigate to the WebLogic Server console at http://localhost:7001/console.
-
In the WebLogic Server Administration Console, log in as the
weblogicuser. The password iswelcome1if this domain was setup by using the previous tutorial.
-
In the Domain Structure tree, expand Services and click Data Sources.

-
In the Summary of JDBC Data Sources panel, on the Configuration tab, click the New button and select Generic Data Source.

-
In the Create a New JDBC Data Source page, enter the information for the data source.
-
For Name, enter
ActionBazaarDB. -
For JNDI Name, enter
jdbc/ActionBazaarDB. -
For Database Type, select Derby.
-
-
Click Next.

-
For Database Driver, select Derby's Driver (Type 4 XA) Versions:Any and click Next.

-
Click Next.

-
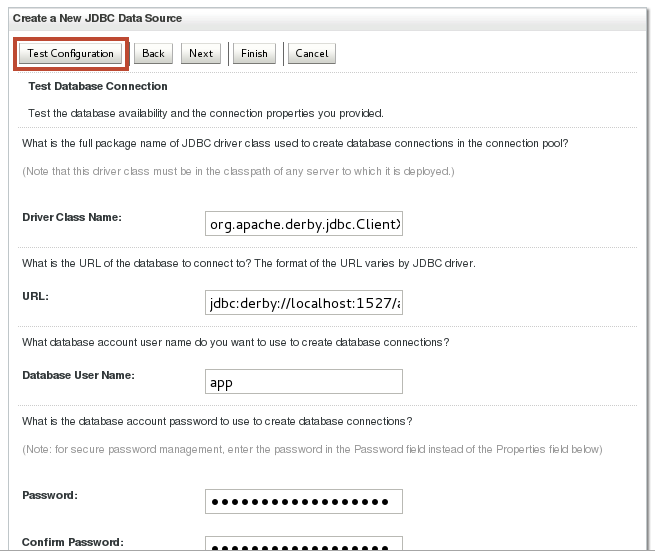
In the Connection Properties page, enter the connection information.
-
For Database Name, enter
actionbazaar. -
For Host Name, enter
localhost. -
For Port, select
1527. -
For Database User, enter
app. -
For Password, enter
app. -
For Confirm Password, enter
app.
-
-
Click Next.

-
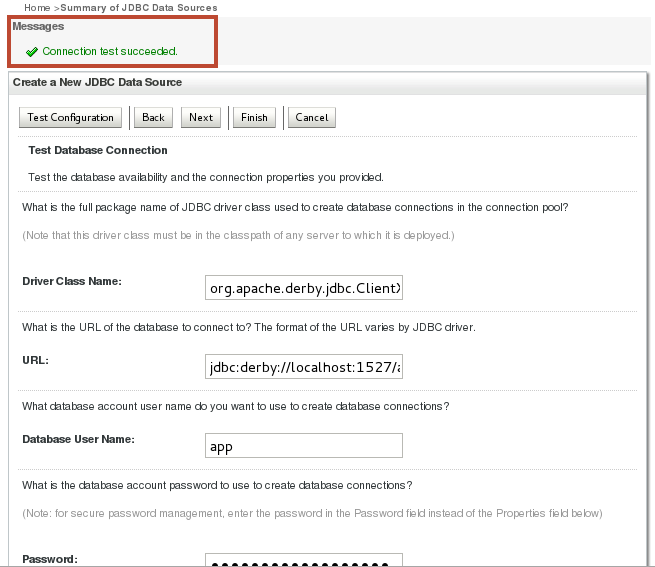
In the Test Database Connection page, click Test Configuration.
-
The connection test succeeds. Click Next.
-
In the Select Targets page, select the check box next to
myserver.Click Finish.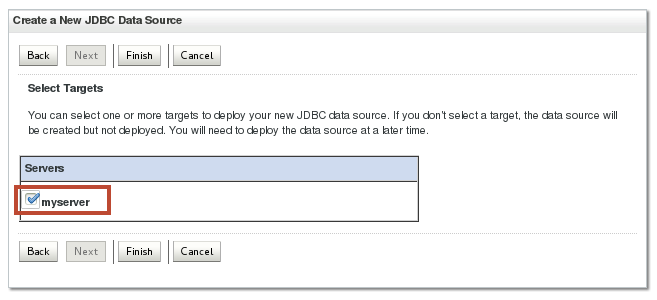
The Data Source configuration changes are activated.

Deploying JAX-RS 2.0 in WebLogic Server 12.1.3
The ActionBazaar application requires JAX-RS 2.0 deployed to the WebLogic Server 12.1.3 domain.
-
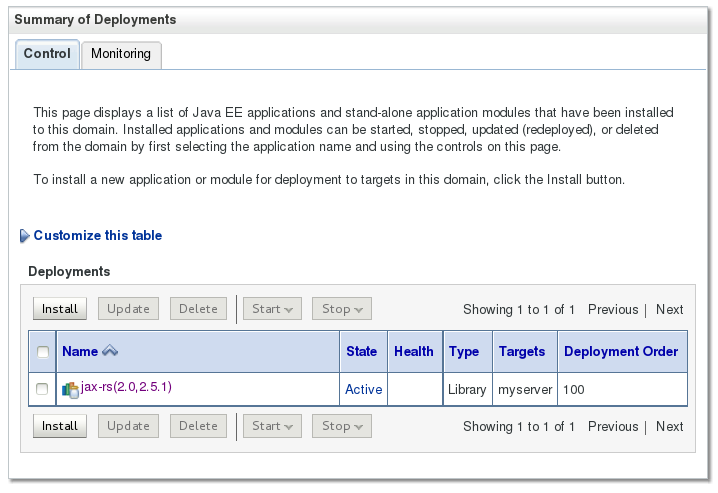
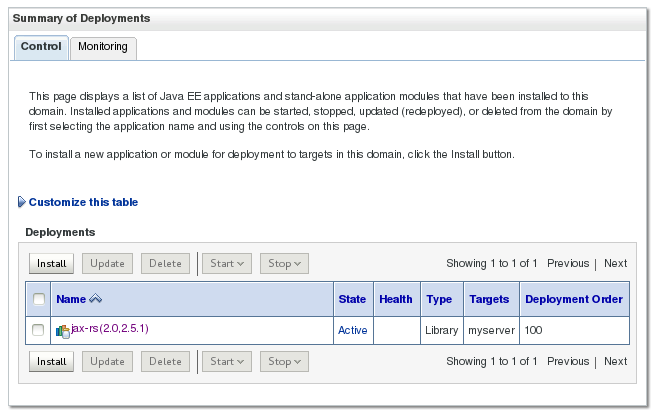
In the Domain Structure tree within the WeLogic Server Administration Console, click Deployments.

The Summary of Deployments is displayed.

- Click Install.
-
In the Install Application Assistant, navigate to
/u01/wls12130/wlserver/common/deployable-libraries/and select thejax-rs-2.0.warfile. -
Click Next.

-
Select Install this deployment as a library and click Next.

-
Accept the default name and security configuration and click Next.

-
Click Finish.

The JAX-RS library has been deployed.
Deploying the ActionBazaar Application to WebLogic Server
Now that the requirements are configured (JPA 2.1 and JAX-RS 2.0), the ActionBazaar application can be deployed.
-
Download the actionbazaar.war file from this Oracle By Example tutorial to the Linux system. In this tutorial the download location is
/home/oracle. -
In the Domain Structure tree, within the WebLogic Server Administration Console, click Deployments in the Domain Structure.

-
In the Summary of Deployments click Install.
-
In the Install Application Assistant, navigate to the
actionbazaar.warfile location. In this tutorial, the location is/home/oracle/actionbazaar.war. -
Select the
actionbazaar.warfile -
Click Next.

-
In the Install Application Assistant, select Install this deployment as an application and click Next.

-
In the Install Application Assistant, accept the default name and security configuration and click Next.

-
In the Install Application Assistant, click Finish.

-
In the Settings for actionbazaar page, click Save.

-
In the Domain Structure tree, click Deployments.

The actionbazaar deployment is in the Active state.

Running the ActionBazaar application on WebLogic Server
-
In the web browser, open the ActionBazaar application URL: http://localhost:7001/actionbazaar/bid.html.

-
In the browser, click the Set your name button and enter a name. In this tutorial the name is
testuser.
-
In the browser, click the Add button.

-
Enter a bid and click OK. In this tutorial the bid is
harddrive $100.
-
In the web browser, utilize the WebSocket Monitor by opening a new tab and browsing to http://localhost:7001/actionbazaar/bid_live.html.

-
In the browser, switch back to the Bid Portal tab.
Click Add, enter a new bid, and click OK. In this tutorial the bid is
monitor $200.
-
In the browser, switch back to the WebSocket Monitor tab.
The Bid Activity displays the new bid and the Debug Log is displayed.

The bid is accepted by the system and displayed.

Using the WebSocket Protocol in WebLogic Server
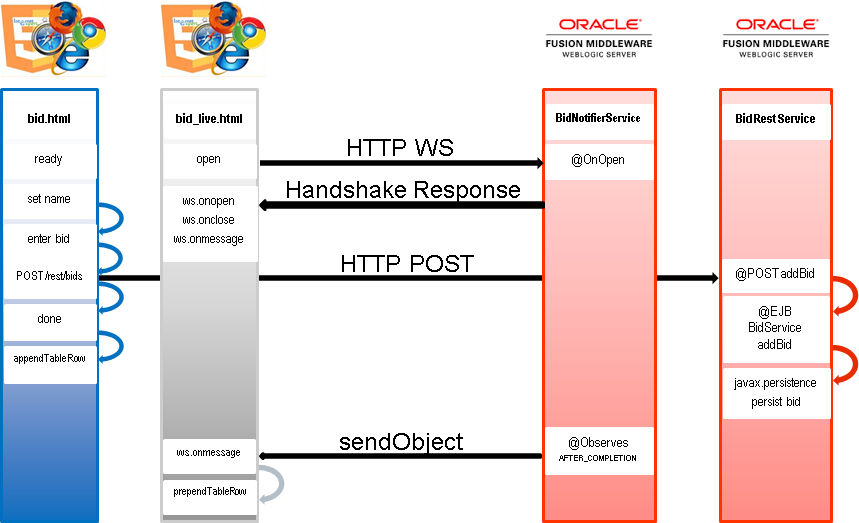
The ActionBazaar application uses the WebSocket Protocol in WebLogic Server in a scenario where there are two HTML application files: bid.html and bid_live.html.
The scenario includes the following interactions:
- The bid_live.html file opens a WebSocket connection to the endpoint published by the BidNotifierService class.
- The BidNotifierService provides a WebSocket handshake response so the bid_live.html file can setup the JavaScript WebSocket handlers such as ws.onmessage.
- When a user interacts with bid.html to set their name and enter a bid a HTTP POST is performed using the URI /rest/bids along with a JSON payload.
- The BidRestService accepts the HTTP POST and invokes the BidService EJB to persist the bid using JPA.
- The BidNotifierService is using the @Observes annotation for JPA transactions in the AFTER_COMPLETION phase; after it receives notification of a new bid it sends a new JSON object to the bid_live.html page.
- The bid_live.html page receives the message using the ws.onmessage handler and displays the message in the table.
The ActionBazaar source code is supplied as a Zip file in this tutorial.
In the bid_live.html source file displayed below:
- lines 82-86 construct the WebSocket endpoint URL ending with /bidnotifier
- line 89 opens the WebSocket connection
- lines 97-100 define the ws.onmessage function, which parses the JSON payload and displays it in a table on the page

In the BidNotifierService.java source file displayed below and lines 98-123 implement the broadcastBidNotification method which sends notification to all WebSocket sessions by observing the AFTER_COMPLETION transaction phase and using the injected bidEvent object.

Using the Java API for JSON Processing 1.0 (JSR 353) in WebLogic Server
The ActionBazaar application also uses the Java API for JSON Processing to encode/decode WebSocket messages between the JSON format and com.actionbazaar.domain.Bid objects.
In the BidEventEncoderDecoer.java source file displayed below:
- lines 44-50 construct a JSON representation of a Bid object by using the Json.createObjectBuilder method, which is part of the Java API for JSON Processing
- lines 71-82 create a Bid object from a JSON representation by using the Json.createReader method, parsing the fields and returning the Bid object.

Deploying a More Recent Version of JAX-RS RI in WebLogic Server
Note that this tutorial has been tested with JDK 1.7.0 release 79 and Jersey jaxrs-ri-2.17. While later releases may work, they have not been tested for this tutorial.
-
In the browser on the Linux machine, navigate to https://jersey.java.net/ and click the Download link.

-
Click the link for the Jersey JAX-RS 2.0 RI bundle.

-
Save the zip archive to the Linux machine. In this tutorial, the location is
/u01.
-
Open a secure shell into the Linux machine as the
oracleuser and executecd /u01to change to the working directory.
-
Execute
unzip jaxrs-ri-2.17.zipto extract the archive to this location.
The extracted archive contents are displayed.
-
Execute
mkdir jaxrs-ri-2.17to create a working directory for the new WebLogic Server JAX-RS library.
-
Execute
cd jaxrs-ri-2.17to change into the working directory. -
Execute
mkdir META-INFto create the directory used by a WebLogic Server library. -
Execute
mkdir WEB-INFto create the directory used by a WebLogic Server library. -
Execute
mkdir WEB-INF/libto create the directory to contain the Java JAR files for this WebLogic Server library.
-
Execute
cp /u01/jaxrs-ri/api/* WEB-INF/libto copy the Java JAR files for this WebLogic Server library. -
Execute
cp /u01/jaxrs-ri/ext/* WEB-INF/libto copy the Java JAR files for this WebLogic Server library. -
Execute
cp /u01/jaxrs-ri/lib/* WEB-INF/libto copy the Java JAR files for this WebLogic Server library.
-
Add a
MANIFEST.MFfile to the/u01/jaxrs-ri-2.17/META-INFdirectory. A file is supplied with this tutorial and the contents are listed below.Manifest-Version: 1.0 Ant-Version: Apache Ant 1.9.2 Created-By: 1.7.0_51-b13 (Oracle Corporation) Specification-Title: Weblogic JAX-RS 2.0 Specification-Version: 2.0 Implementation-Title: Weblogic JAX-RS 2.0 Reference Implementation Implementation-Version: 2.17 Extension-Name: jax-rs
-
Add a
weblogic.xmlfile to the/u01/jaxrs-ri-2.17/WEB-INFdirectory. A weblogic.xml file is supplied with this tutorial and the contents are listed below.
-
Execute
/u01/jdk1.7.0_79/bin/jar -cvf jaxrs-ri-2.17.war *to create the WebLogic Server library archive.
-
Execute
mv jaxrs-ri-2.17.war ../to move the WebLogic Server library archive to the/u01directory.
-
Execute
cd /u01/wls12130/user_projects/domains/mydomainto change to the WebLogic Server domain directory and then execute./startWebLogic.shto start WebLogic Server.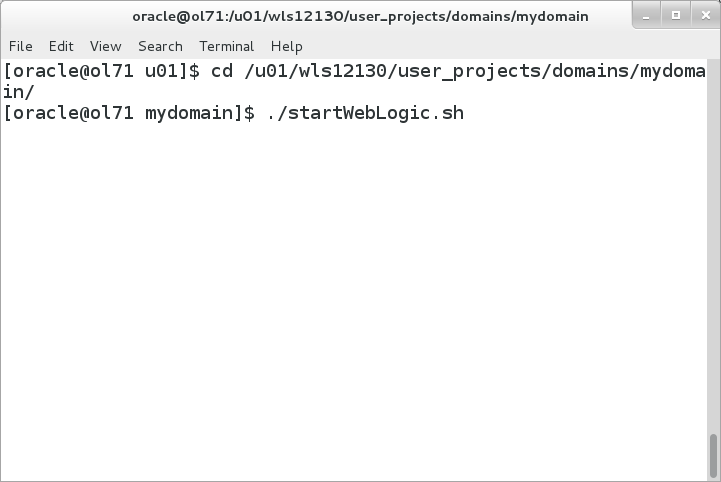
-
In the browser on the Linux machine, navigate to http://localhost:7001/console and the WebLogic Server Administration console is displayed. Login using
weblogicfor the username andwelcome1for the password.
The WebLogic Server Administration Console is displayed.

-
Click Deployments in the Domain Structure.

-
If the library and application from the previous activity are still deployed, delete these deployments.
Click the check box next to actionbazaar in the Summary of Deployments and click Delete.

-
Click the check box next to jax-rs in the Summary of Deployments and click Delete.

-
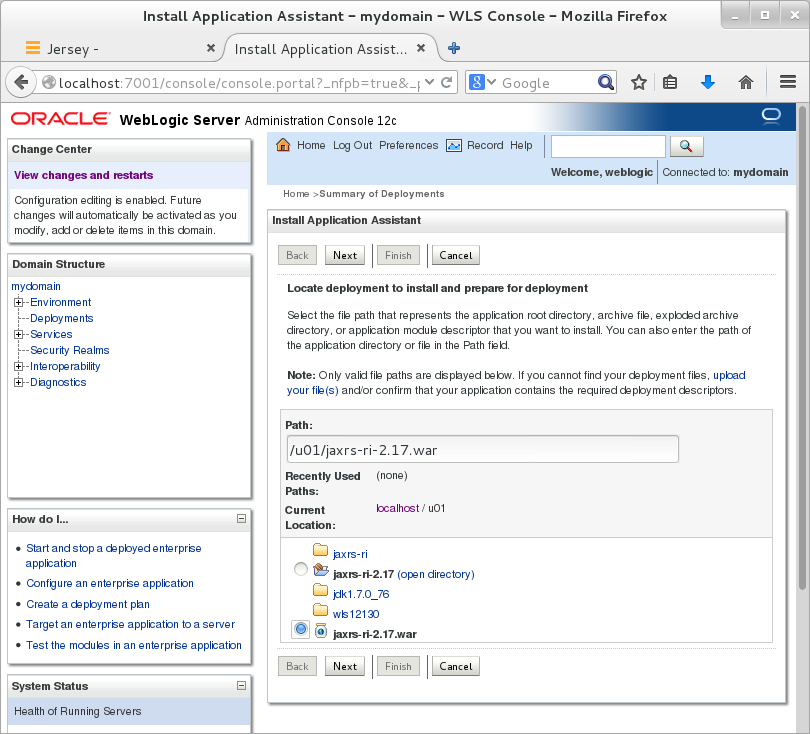
Click Deployments in the Domain Structure and click Install.

-
In the Install Application Assistant, navigate to the /u01 directory and select the jaxrs-ri-2.17.war file and click Next.
-
Select Install this deployment as a library and click Next.

-
Accept the Name and click Finish.

-
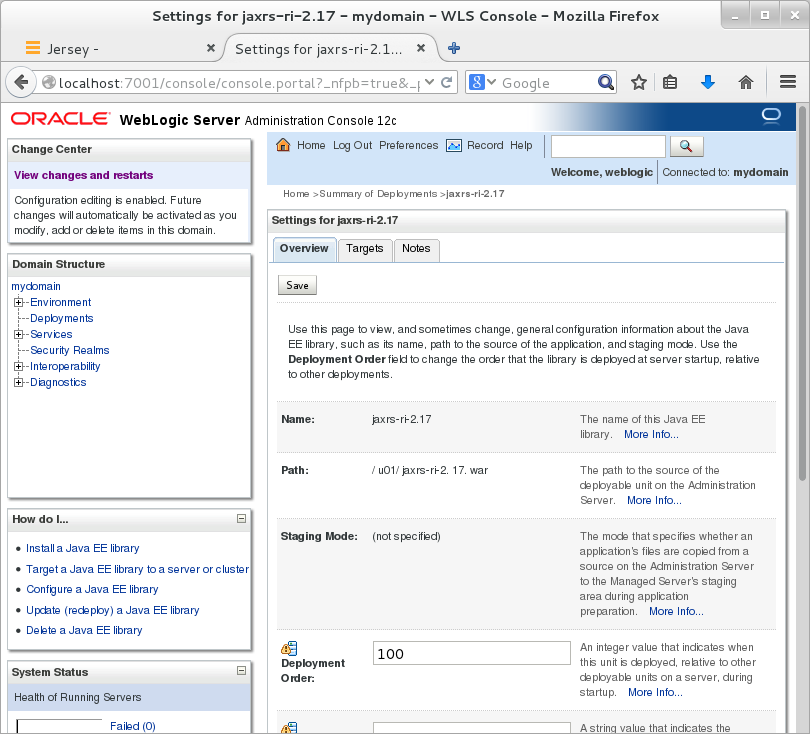
The jaxrs-ri-2.17 deploys and displays the settings for this library.
-
Click Deployments. The jaxrs-ri-2.17 deployment displays as active.

Summary
In this tutorial, you learned to:
- Enable JPA 2.1 with WebLogic Server 12.1.3
- Use JAX-RS 2.0 with WebLogic Server 12.1.3
- Use the WebSocket Protocol with WebLogic Server 12.1.3
- Use the Java API for JSON Processing (JSR 353) with WebLogic Server 12.1.3
Resources
- WebLogic Server 12.1.3 Documentation
- To learn more about WebLogic Server refer to additional OBEs in the Oracle Learning Library
- Enabling JPA 2.1
- Using JAX-RS 2.X
- Using WebSocket Protocol
- Using
the Java API for JSON Processing 1.0 (JSR 353)
- Developing with WebLogic Server
Credits
- Lead Curriculum Developer: Tom Eliason
- Other Contributors: TJ Palazzolo