Before You Begin
Purpose
This tutorial shows how to develop a simple Web application standalone using Servlets, JSPs, Bootstrap and Tomcat Embedded.
Time to Complete
45 minutes
Background
A web application is a software program that runs on a web server, usually they are packaged in a WAR file and deployed in a server container like Tomcat, JBOSS or GlassFish. However embedded servers provide an interesting alternative. Instead of deploying your app in a server, the server is embedded inside your application The result is a standalone application packaged in a jar file and that could be executed from a command line.
A web application is usually divided in two parts: front-end development and back-end development. The back-end, often called the server-side, defines how the site works and is responsible for things like calculations, business logic, database interactions, and performance. Front-end development refers to the part of the application web users interact with. It is usually a mixture of HTML, CSS, and JavaScript, controlled by the browser.
Most of the web projects in modern times utilize some kind of standard framework to make the web development process faster, easier and more standards compliant. Currently Bootstrap is the most popular and widely used framework for creating web applications.
Bootstrap is a front-end framework that contains a collection of tools designed to allow developers to quickly create web applications. It includes HTML and CSS based design templates for common user interface components like forms, typography, buttons, navigations, tables, tabs, dropdowns, alerts, modals, accordion, carousel and many other optional JavaScript extensions.
Bootstrap is very easy to use and it's compatible with all modern browsers such as Mozilla Firefox, Google Chrome, Safari, Internet Explorer, and Opera.
Scenario
You will build a simple Java web application of employees that implements the CRUD operations using Bootstrap to add UI styles, Tomcat as embedded server and Maven to compile and package the dependencies needed to run the web application standalone.
What Do You Need?
- Java Development Kit 8 (JDK8)
- Maven 3.0+
- Bootstrap v3.3.4
- A favorite text editor or IDE.
Creating a new Maven project
In this section, you create a basic Maven project from an archetype.
The first time you execute any Maven command, Maven will need to download all the plugins and related dependencies to fulfill the command. From a clean installation of Maven, this can take quite a while based on the internet connection. If you create other project, Maven will now have what it needs, so it won't need to download anything new and will be able to execute the command much more quickly.
-
Open a command line window (or Terminal in Linux).
-
Navigate to the directory where the new project should reside.
-
Execute the following Maven command:
mvn archetype:generate -DarchetypeArtifactId=maven-archetype-webapp -DarchetypeGroupId=org.apache.maven.archetypes -DinteractiveMode=false -DgroupId=com.example.employees -DartifactId=employees-app -DarchetypeVersion=1.0
You may observe some warnings during the project creation, please ignore them since they will not affect the correct execution of the command.
This command creates a standard Maven structure, once it is finished, you should see the new employees-app project directory created in your current location.
You can change the groupId and/or artifactId of this command for your particular project.
This project can be opened in Netbeans (File -> Open project) or in Eclipse (File -> Import -> Maven-> Existing Maven Project) but Maven must be configured in the IDE. Make sure the IDE version supports java 8. Version 7.4 (or later) of NetBeans includes support for JDK 8.
Configuring the pom.xml
Java web applications require a web container, such as Tomcat, to run on. Installing and configuring a web container on each development machine can be time consuming. Furthermore, other developers need to manage the dependencies manually if they want to run the web application.
Maven has a Tomcat plugin that allows us to run an embedded tomcat instance without the need of installing a local tomcat server.
This section configures the dependencies required to run Tomcat in an embedded mode and the plugins to compile and package the project in single uber-jar.
Adding Maven dependencies
-
Open the pom.xml located in the project root directory.
-
Add the following dependencies in the
<dependencies>tags:<properties> <tomcat.version>7.0.57</tomcat.version> </properties> <dependencies> <dependency> <groupId>org.apache.tomcat.embed</groupId> <artifactId>tomcat-embed-core</artifactId> <version>${tomcat.version}</version> </dependency> <dependency> <groupId>org.apache.tomcat.embed</groupId> <artifactId>tomcat-embed-logging-juli</artifactId> <version>${tomcat.version}</version> </dependency> <dependency> <groupId>org.apache.tomcat.embed</groupId> <artifactId>tomcat-embed-jasper</artifactId> <version>${tomcat.version}</version> </dependency> <dependency> <groupId>org.apache.tomcat</groupId> <artifactId>tomcat-jasper</artifactId> <version>${tomcat.version}</version> </dependency> <dependency> <groupId>org.apache.tomcat</groupId> <artifactId>tomcat-jasper-el</artifactId> <version>${tomcat.version}</version> </dependency> <dependency> <groupId>org.apache.tomcat</groupId> <artifactId>tomcat-jsp-api</artifactId> <version>${tomcat.version}</version> </dependency> <dependency> <groupId>jstl</groupId> <artifactId>jstl</artifactId> <version>1.2</version> </dependency> </dependencies>
JSTL (JSP Standard Tag Library) is a JSP based standard tag library which offers a collection of tags to control the flow in the JSP page, date/number formatting and internationalization facilities and several utility EL functions.
Adding build plugins
In the plugins section the following are configured:
- The Maven Compiler Plugin (maven-compiler-plugin) used to compile the sources of the project.
- The Maven Assembly Plugin (maven-assembly-plugin) allows users to aggregate the project output along with its dependencies, modules, site documentation, and other files into a single distributable archive..
Build plugins will be executed during the
build and they should be configured in the <build/>
element from the POM.
-
Copy and paste the following code into the pom.xml:
<build>
  <finalName>employees-app</finalName>
  <resources>
      <resource>
          <directory>src/main/webapp</directory>
          <targetPath>META-INF/resources</targetPath>
      </resource>
  </resources>
  <plugins>
      <plugin>
          <groupId>org.apache.maven.plugins</groupId>
          <artifactId>maven-compiler-plugin</artifactId>
          <version>2.3.2</version>
          <inherited>true</inherited>
          <configuration>
              <source>1.8</source>
              <target>1.8</target>
          </configuration>
      </plugin>
      <plugin>
          <groupId>org.apache.maven.plugins</groupId>
          <artifactId>maven-assembly-plugin</artifactId>
          <configuration>
              <descriptorRefs>
                  <descriptorRef>jar-with-dependencies</descriptorRef>
              </descriptorRefs>
              <finalName>employees-app-${project.version}</finalName>
              <archive>
                  <manifest>
                      <mainClass>com.example.employees.Main</mainClass>
                  </manifest>
              </archive>
          </configuration>
          <executions>
              <execution>
                  <phase>package</phase>
                  <goals>
                      <goal>single</goal>
                  </goals>
              </execution>
          </executions>
      </plugin>
  </plugins>
</build>
Usually Maven ignores all but .java files in src/main/java
when tasks are executed such as compile and
package. The <resource> tag
is used to include the jsp, css, js and fonts
files in the jar like resources.
Download pom.xml
Creating an Employee Class Model
To model the Employee representation, create a plain old java class with fields, constructors, and accessors for the fields.
- Create the package
java.com.example.employeesin the main directory. - Create the
Employee.javaclass.
Employee.java - Fragment
public class Employee {

    private long id;
    private String name;
    private String lastName;
    private String birthDate;
    private String role;
    private String department;
    private String email;
    private static final AtomicLong counter = new AtomicLong(100);

    public Employee(String name, String lastName, String birthDate, String role, String department, String email, long id) {
        this.name = name;
        this.lastName = lastName;
        this.birthDate = birthDate;
        this.role = role;
        this.department = department;
        this.email = email;
        this.id = id;
    }

    public Employee(String name, String lastName, String birthDate, String role, String department, String email) {
        this.name = name;
        this.lastName = lastName;
        this.birthDate = birthDate;
        this.role = role;
        this.department = department;
        this.email = email;
        this.id = counter.incrementAndGet();
    }
This class contains two constructors one that receives all the fields as parameters and the other without the id field. The reason for two constructors is that the second one creates a new Id for the employee. This constructor will used when we want to create a new Employee.
Download Employee.javaBecause this is a simple example, this tutorial
does not use a database to store Employee
objects. Instead, you will use an ArrayList,
and store the Employee objects in
memory.
EmployeeList.java
package com.example.employees;
import java.util.ArrayList;
import java.util.List;


public class EmployeeList {
    private static final List<Employee> employeeList = new ArrayList();

    private EmployeeList(){
    }

    static{
        employeeList.add(new Employee("John","Smith","12-12-1980","Manager","Sales","john.smith@abc.com"));
        employeeList.add(new Employee("Laura","Adams","02-11-1979","Manager","IT","laura.adams@abc.com"));
        employeeList.add(new Employee("Peter","Williams","22-10-1966","Coordinator","HR","peter.williams@abc.com"));
        employeeList.add(new Employee("Joana","Sanders","11-11-1976","Manager","Marketing","joana.sanders@abc.com"));
        employeeList.add(new Employee("John","Drake","18-08-1988","Coordinator","Finance","john.drake@abc.com"));
        employeeList.add(new Employee("Samuel","Williams","22-03-1985","Coordinator","Finance","samuel.williams@abc.com"));
    }

    public static List <Employee> getInstance(){
        return employeeList;
    }
}
Six employees are added to the list in order to have some data to retrieve for testing purposes.
Download EmployeeList.java
Building a Search Page
In this section, you create a user interface to search the employees that match the name or last name.
-
Create the
EmployeeService.javaclass in thecom.example.employeespackage.EmployeeService.java - Fragment
List<Employee> employeeList = EmployeeList.getInstance();

    //Get all employees.
    public List<Employee> getAllEmployees() {
        return employeeList;
    }
    //Get all employees whose Name or Last Name match the searchParam, order by name and last name.
    public List<Employee> searchEmployeesByName(String searchParam) {
        Comparator<Employee> groupByComparator = Comparator.comparing(Employee::getName)
                                                    .thenComparing(Employee::getLastName);
        List<Employee> result = employeeList
                .stream()
                .filter(e -> e.getName().equalsIgnoreCase(searchParam) || e.getLastName().equalsIgnoreCase(searchParam))
                .sorted(groupByComparator)
                .collect(Collectors.toList());
        return result;
    }
    //Get the employee by id
    public Employee getEmployee(long id) throws Exception {
        Optional<Employee> match
                = employeeList.stream()
                .filter(e -> e.getId() == id)
                .findFirst();
        if (match.isPresent()) {
            return match.get();
        } else {
            throw new Exception("The Employee id " + id + " not found");
        }
This class contains an instance of
EmployeeListand three methods to retrieve the employees using Lambda expressions.Download EmployeeService.java
-
Create the
EmployeeServlet.javaclass in thejava.com.example.employeespackage.@WebServlet( name = "EmployeeServlet", urlPatterns = {"/employee"} ) public class EmployeeServlet extends HttpServlet { EmployeeService employeeService = new EmployeeService();The
@WebServletannotation is used to declare a servlet instead of using XML in the web deployment descriptor (web.xml) . The annotation is processed by the container at deployment time. -
Override the
doGetmethod.EmployeeServlet.java - Fragment
@Override
    protected void doGet(HttpServletRequest req, HttpServletResponse resp) throws ServletException, IOException {
        String action = req.getParameter("searchAction");
        if (action!=null){
            switch (action) {
            case "searchById":
                searchEmployeeById(req, resp);
                break;
            case "searchByName":
                searchEmployeeByName(req, resp);
                break;
            }
        }else{
            List<Employee> result = employeeService.getAllEmployees();
            forwardListEmployees(req, resp, result);
        }
    }
The
doGetis used to process the HTTP GET request. In this case is implemented to process three kinds of searches: by Id, by Name and by default the complete list of employees.The
searchActionparameter is used to determine what kind of search it will be executed.The
forwardListEmployeesmethod is a helper method to dispatch the employee list tolist-employees.jsp. It is in a separate method because the code is re-used in other operations.Download EmployeeServlet.java
Creating the user interface
The purpose of this section is to build a User Interface to search employees by name or last name and show the results that match in a table. In the next sections other operations will be added. Bootstrap is used to add some styles.

There are two ways to start using Bootstrap on your own web site:
- Downloading Bootstrap from getbootstrap.com.
- Including Bootstrap from a CDN (Content Delivery Network).
For this tutorial we are going to download the precompiled and minified versions of Bootstrap CSS, JavaScript and fonts from getbootstrap.com and add them into our project.
-
Copy the directories js, fonts and css from the Bootstrap zip to the webapp folder.

Description of this image -
Delete the non-minified versions of the CSS and JS files.

Description of this image
The minified files are a compressed version of the css and js which means they be downloaded faster.
-
Create the
list-employees.jspin a new folder named jsp under webapp folder. -
Add the bootstrap.min.js and bootstrap.min.css files to the jsp.
<link rel="stylesheet" href="../css/bootstrap.min.css"> <script src="../js/bootstrap.min.js"></script> -
Add the tag lib for jstl support.
<%@ taglib uri="http://java.sun.com/jsp/jstl/core" prefix="c" %> -
Add the Search form.
list-employees.jsp - Fragment
<div class="container">
  <h2>Employees</h2>
  <!--Search Form -->
  <form action="/employee" method="get" id="seachEmployeeForm" role="form" >
    <input type="hidden" id="searchAction" name="searchAction" value="searchByName"/>
    <div class="form-group col-xs-5">
        <input type="text" name="employeeName" id="employeeName" class="form-control" required="true"
                 placeholder="Type the Name or Last Name of the employee"/>
    </div>
    <button type="submit" class="btn btn-info">
        <span class="glyphicon glyphicon-search"></span> Search
    </button>
    <br></br>
    <br></br>
  </form>
</div>
Individual form controls (input, textarea and select) automatically receive some global styling with Bootstrap.
Bootstrap requires a containing element to wrap site contents. The
containerclass is used for a responsive fixed width container.The
requiredattribute introduced in HTML5 specifies that the user is required to enter a value before submitting the form. Bootstrap validates the required fields before submitting the form and shows a predefined message in case of a missing field but you may also override this behavior by coding your specific rules and messages using jQuery.The
placeholderis other attribute introduced in HTML5 that describes the expected value of the input field.The class
.btnprovides the default look of a gray button with rounded corners, and thebtn-infoclass gives to the button the light blue color, is usually used for informational alert messages.Bootstrap includes 200 glyphs from the Glyphicon Halflings set. Glyphicons Halflings are normally not available for free, but there are some basic icons available for Bootstrap free of cost. The class
btn-infoprovides the magnifying glass icon. -
Add the table to display the result of the search. Make sure the new form is enclosed in
<div class="container">tags.list-employees.jsp - Fragment
<form action="/employee" method="post" id="employeeForm" role="form" > <c:choose> <c:when test="${not empty employeeList}"> <table class="table table-striped"> <thead> <tr> <td>#</td> <td>Name</td> <td>Last name</td> <td>Birth date</td> <td>Role</td> <td>Department</td> <td>E-mail</td> </tr> </thead> <c:forEach var="employee" items="${employeeList}"> <c:set var="classSucess" value=""/> <c:if test ="${idEmployee == employee.id}"> <c:set var="classSucess" value="info"/> </c:if> <tr class="${classSucess}"> <td>${employee.id}</td> <td>${employee.name}</td> <td>${employee.lastName}</td> <td>${employee.birthDate}</td> <td>${employee.role}</td> <td>${employee.department}</td> <td>${employee.email}</td> </tr> </c:forEach> </table> </c:when> <c:otherwise> <br> </br> <div class="alert alert-info"> No people found matching your search criteria </div> </c:otherwise> </c:choose> </form>employeeListis the attribute that contains the employee search results. This fragment of code iterates theemployeeListto display the employee information. If there are no results that match the search, an alert message is displayed.The
.table-stripedclass adds the zebra-striping style to any table row.Bootstrap has four contextual classes (
.alert-success,
                                  .alert-info, .alert-warning, .alert-danger
) that provide a way to style messages to the user.<div class="alert alert-success">Success! Well done its submitted.</div> <div class="alert alert-info">Info! take this info.</div> <div class="alert alert-warning">Warning ! Dont submit this.</div> <div class="alert alert-danger">Error ! Change few things.</div>Download list-employee.jsp
-
Modify the
index.jspto forward to the servlet.<jsp:forward page="/employee" />
Creating a launcher class
In this section you create a class with a main
method that creates an instance of Tomcat server,
this method will be executed when you run the jar
file.
Create the Main cass in the com.example.employees
package.
package com.example.employees;

import java.util.Optional;
import org.apache.catalina.startup.Tomcat;

public class Main {

    public static final Optional<String> port = Optional.ofNullable(System.getenv("PORT"));

    public static void main(String[] args) throws Exception {
        String contextPath = "/";
        String appBase = ".";
        Tomcat tomcat = new Tomcat();
        tomcat.setPort(Integer.valueOf(port.orElse("8080") ));
        tomcat.getHost().setAppBase(appBase);
        tomcat.addWebapp(contextPath, appBase);
        tomcat.start();
        tomcat.getServer().await();
    }
}
With org.apache.catalina.startup.Tomcat
class you may configure the port using the setPort
method, and the context path using the addWebapp
method.
Download Main.java
Running the Web Application
Compiling and Running the Web app
- Open a Command Line Window or Terminal
- Navigate to the root directory of the project (employees-app), where the pom.xml resides.
- Compile the project:
mvn clean compile. - Package the application:
mvn package. - Look in the target directory. You should see a
file with the following or a similar name:
employees-app-1.0-SNAPSHOT-jar-with-dependencies.jar - Change into the target directory.
-
Execute the jar:
java -jar
                                  employees-app-1.0-SNAPSHOT-jar-with-dependencies.jar
.
Description of this image This indicates that employees-app is running on
http://localhost:8080
Testing the web app
-
Open the Firefox or Chrome web browser.
-
Enter the following URL into the browser address window and open the URL:
http://localhost:8080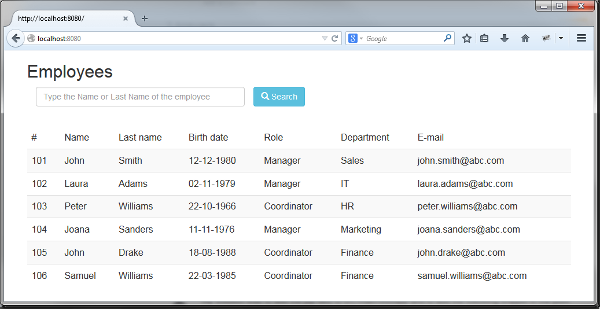
Description of this image -
Enter a Name or Last Name for example: Williams and click
Search.
Description of this image -
Search an employee name that does not exist in the pre-load list (e.g. Ivan ).

Description of this image This is how the Bootstrap's class
alert-infolooks for alert messages.
Adding editing operations
In this section three new operations will be added: Create, Remove and Edit an employee.
Editing the Service
Open the EmployeeService.javaclass
and add the new three operations:
EmployeeService.java - Fragment
public long addEmployee(Employee employee) {
        employeeList.add(employee);
        return employee.getId();
    }

    public boolean updateEmployee(Employee customer) {
        int matchIdx = 0;
        Optional<Employee> match = employeeList.stream()
                .filter(c -> c.getId() == customer.getId())
                .findFirst();
        if (match.isPresent()) {
            matchIdx = employeeList.indexOf(match.get());
            employeeList.set(matchIdx, customer);
            return true;
        } else {
            return false;
        }
    }

    public boolean deleteEmployee(long id) {
        Predicate<Employee> employee = e -> e.getId() == id;
        if (employeeList.removeIf(employee)) {
            return true;
        } else {
            return false;
        }
    }
Download EmployeeService.java updated.
Editing the Servlet
Open the EmployeeServlet.javaclass
and override the doPost method.
EmployeeServlet.java - Fragment
protected void doPost(HttpServletRequest req, HttpServletResponse resp)
            throws ServletException, IOException {
        System.out.println("En el doPost");
        String action = req.getParameter("action");
        switch (action) {
            case "add":
                addEmployeeAction(req, resp);
                break;
            case "edit":
                editEmployeeAction(req, resp);
                break;
            case "remove":
                removeEmployeeByName(req, resp);
                break;
        }

    }
Download EmployeeServlet.java updated.
Editing the View
- Open the
list-employee.jspfile. -
Add two input hidden in the
employeeForm<input type="hidden" id="idEmployee" name="idEmployee"> <input type="hidden" id="action" name="action">These inputs are used to pass the values of idEmployee and type of action to the servlet and execute the corresponding action.
-
Add add a div above the
employeeFormto display an alert message to show information.<c:if test="${not empty message}"> <div class="alert alert-success"> ${message} </div> </c:if> -
Add a link to the idEmployee column.
<td>
  <a href="/employee?idEmployee=${employee.id}&searchAction=searchById">${employee.id}</a>
</td>
This link is used to display the values for a particular employee on an edit page.
-
Add a new column next to the E-mail column for the remove button.
<a href="#" id="remove"
   onclick="document.getElementById('idEmployee').value='${employee.id}';
            document.getElementById('action').value='remove';
            document.getElementById('employeeForm').submit();">
    <span class="glyphicon glyphicon-trash"/>
</a>
The
glyphicon-trashprovides a Trash can icon. -
Add a new form below
employeeFormwith a button for creating a new Employee. Make sure the new form is enclosed in<div class="container">tags.<form action ="jsp/new-employee.jsp"> <br></br> <button type="submit" class="btn btn-primary btn-md">New employee</button> </form>Download updated list-employees.jsp.
-
Create the
new-employee.jspin thejspdirectory.<%@ taglib uri="http://java.sun.com/jsp/jstl/core" prefix="c" %> <html> <head> <link rel="stylesheet" href="../css/bootstrap.min.css"/> <script src="../js/bootstrap.min.js"></script> </head> <body> <div class="container"> <form action="/employee" method="post" role="form" data-toggle="validator" > <c:if test ="${empty action}"> <c:set var="action" value="add"/> </c:if> <input type="hidden" id="action" name="action" value="${action}"/> <input type="hidden" id="idEmployee" name="idEmployee" value="${employee.id}"/> <h2>Employee</h2> <div class="form-group col-xs-4"> <label for="name" class="control-label col-xs-4">Name:</label> <input type="text" name="name" id="name" class="form-control" value="${employee.name}" required="true"/> <label for="lastName" class="control-label col-xs-4">Last name:</label> <input type="text" name="lastName" id="lastName" class="form-control" value="${employee.lastName}" required="true"/> <label for="birthdate" class="control-label col-xs-4">Birth date</label> <input type="text" pattern="^\d{2}-\d{2}-\d{4}$" name="birthDate" id="birthdate" class="form-control" value="${employee.birthDate}" maxlength="10" placeholder="dd-MM-yyy" required="true"/> <label for="role" class="control-label col-xs-4">Role:</label> <input type="text" name="role" id="role" class="form-control" value="${employee.role}" required="true"/> <label for="department" class="control-label col-xs-4">Department:</label> <input type="text" name="department" id="department" class="form-control" value="${employee.department}" required="true"/> <label for="department" class="control-label col-xs-4">E-mail:</label> <input type="text" name="email" id="email" class="form-control" value="${employee.email}" placeholder="smith@aol.com" required="true"/> <br></br> <button type="submit" class="btn btn-primary btn-md">Accept</button> </div> </form> </div> </body> </html>This jsp contains a form to add a new employee or edit an existing one. All fields are marked as required.
The
data-toggle="validator"attribute automatically enables form validation for the form element.The
patternis an attribute introduced in HTML5 that specifies a JavaScript regular expression for the field’s value to be checked against. This form is used in thebirthdatefield to validate the format (dd-MM-yyyy).Download new-employee.jsp
Testing the new operations: Create, Edit and Remove
- Stop the application (if it is running).
- Execute the steps listed in the section Running the Web Application again.
-
Enter the URL into the browser address window and open the URL:
http://localhost:8080
Description of this image
Testing New employee
-
Click
New employee
Description of this image
-
Fill in all the fields.
Note: Try submitting the form leaving one inputbox empty, and see what happens.

Description of this image -
Click
Accept.
Description of this image
Testing Remove an employee
-
Click the Trash can icon to delete the employee (e.g. the 102 employee).

Description of this image
Testing Edit an employee
-
Click the id number.

Description of this image -
Edit some fields.

Description of this image -
Click
Accept.
Description fo this image As you can see, Bootstrap is a powerful front-end framework, this guide just shows you the basics to get started and how easy it is to use.
Resources
The Maven project with source code is in the following zip file.
employees-app.zipWant to Learn More?
Credits
- Curriculum Developer: Luz Elena Peralta Ayala
- QA: Veerabhadra Rao Putrevu