Installing and Managing Oracle Directory Server Enterprise Edition
Overview
- Install ODSEE and DSCC.
- Create a new WebLogic Server domain.
- Create and manage instances of ODSEE.
- Search and manage directory entries.
- Manage object classes and attributes of ODSEE schema.
- Enable and view ODSEE log files.
- Have access to a Linux machine
- Have installed WebLogic Server 10.3.6.0.
- Have downloaded ODSEE11_1_1_5_0_xxx.zip zip distribution to your Linux machine in a temporary space /tmp/dsee. The xxx can vary based on your version of ODSEE.
Purpose
This tutorial shows you how to install Oracle Directory Server Enterprise Edition (ODSEE) and manage directory data of ODSEE by using Directory Service Control Center (DSCC). You use Oracle WebLogic Server as the application server.
Time to Complete
Approximately 120 minutes: 90 minutes for installation and
setup, 30 minutes for managing ODSEE.
Introduction
ODSEE is a directory server with an embedded database. DSCC is a graphical user interface for creating instances and managing directory data and schemas for ODSEE.
In this tutorial you perform the following:
Prerequisites
Before starting this tutorial, you should:
Installing ODSEE and DSCC
In this section, you install ODSEE and DSCC.
Installing ODSEE by Using the Zip Distribution
Open a terminal
Install the ODSEE software by entering the following commands in a terminal. The <install-dir> variable indicates the path where the software elements are installed; for example, /home/oracle/my-install-dir. Be sure that the path includes the leading slash.
$ mkdir -p <install-dir>
$ cd /tmp/dsee
$ unzip -q ODSEE11_1_1_5_0_xxx.zip <replace xxx
with your version, or replace ODSEE11_1_1_5_0_xxx.zip
with your .zip file name for ODSEE>
$ cd ODSEE_ZIP_Distribution
$ unzip -q sun-dsee7.zip -d <install-dir>
$ cd <install-dir>/dsee7
Note: A minimum of 1 GByte of space is required in this directory. The <install-dir>/dsee7 directory contains all of the ODSEE components, with the exception of the idsktune utility. (idsktune is located in /tmp/dsee/ODSEE_ZIP_Distribution.)
You are now ready to start working with the ODSEE installation.
Preconfiguring DSCC and the DSCC Agent
Initialize the DSCC registry
$ <install-dir>/dsee7/bin/dsccsetup
ads-create
Choose password for Directory Service Manager:Welcome1
Confirm password for Directory Service
Manager:Welcome1
Creating DSCC registry...
DSCC Registry has been created successfully
Note: You will use the password that you choose for directory service manager, to authenticate in the DSCC login page and it is also used as a DSCC registry password. To simplify, use Welcome1 for directory service manager and weblogic domain password throughout this tutorial.
Note: DSCC uses its own local instance of Directory Server to store information about your directory service configuration. The instance is referred to as the DSCC Registry.
Create the WAR file for DSCC and make a note of the dscc-war-file-path. You will use this path of the DSCC WAR file later.
$ <install-dir>/dsee7/bin/dsccsetup
war-file-create
Created dscc-war-file-path
Note the port and the path assigned to DSCC registry.
$ <install-dir>/dsee7/bin/dsccsetup
status
...
Path of DSCC registry is dscc-registry-path
Port of DSCC registry is dscc-registry-port
...
Note: The
dscc-registry-port is the port assigned to the DSCC
registry by dsccsetup ads-create The default port that
is assigned to the DSCC registry is 3998. If this port
is being used elsewhere, a free port will
automatically be assigned.
Register the DSCC agent in Common Agent Container.
$ <install-dir>/dsee7/bin/dsccsetup
cacao-reg
Configuring Cacao...
Cacao will listen on port dscc-agent-port
Note: The dscc-agent-port specifies the port of the DSCC agent.
Creating a New WebLogic Server Domain
To create a new domain for the application server which is weblogic server in this tutorial, perform the following steps:
Open a new terminal. Unset environment variable $DOMAIN_HOME in case it is set for other WebLogic server domains.
$ unset DOMAIN_HOME
In the same terminal, navigate to location where WebLogic server is installed and start the configuration wizard.
$ cd <location where
weblogic server is installed -- most likely
$MW_HOME>/wlserver_10.3/common/bin
./config.sh
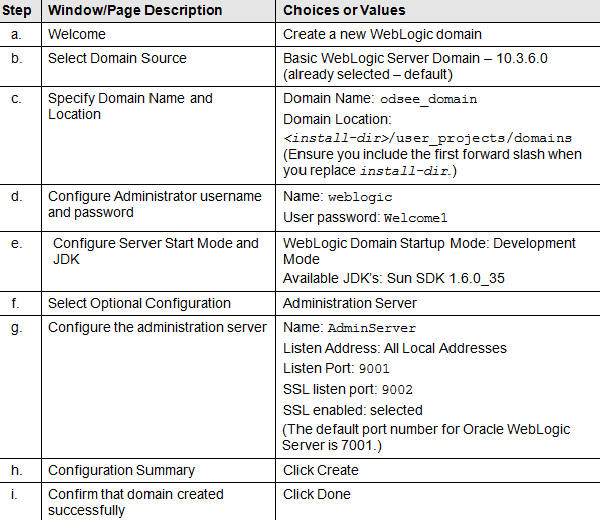
Enter the following information in the following steps to create a WebLogic server domain using the wizard.
Deploying the DSCC WAR File with Oracle WebLogic Server 10.3.x
For other supported application servers, such as GlassFish
Application Server 3.x,
Tomcat 6.x, Oracle iPlanet Web Server 7.0.9 (and Sun Java System
Web Server 7.0+), refer to Appendix
A, Deploying the DSCC WAR file.
Starting WebLogic server domain that you created in the previous step
Navigate to $DOMAIN_HOME and start WebLogic Server.
$ cd <install-dir>/user_projects/domains/odsee_domain
$ ./startWebLogic.sh
Confirm that WebLogic Server started in RUNNING mode. You should get a message similar to the following
<Apr 22, 2013 3:00:36 PM UTC> <Notice> <WebLogicServer> <BEA-000360> <Server started in RUNNING mode>
Minimize the terminal window and leave it open.
Note: To start DSCC, you start the WebLogic administration server—the web container in which DSCC runs
Deploying the DSCC WAR file in WebLogic console
Open a browser to browse the WebLogic console
http://localhost:9001/console
Enter the following values to login:
username: weblogic
password: Welcome1
The values of username and password are based on what you assigned in step d of Setting up a domain for the Application server. You may have different values based on what you entered in step d.
Navigate to odsee_domain > Deployments in the Domain Structure panel. Click Lock and Edit if your WebLogic console has this option. Click Install. Click upload your file(s).

In Deployment Archive, select <install-dir>/dsee7/var/dscc7.war and click Next.Select dscc7.war and click Next.

Select Install this deployment as an application
and click Next.
Accept all default Optional Settings and click Finish.
Note: This
name will appear under deployments in this console.

Click Activate Changes in the top left corner if you had the lock and edit option in previous steps. View confirmation messages.

Verify that the DSCC deployment must be in the active state.

Click dscc7 under Deployments and go to Testing tab. Find the default url under Test Point.

Click on the default link http://hostname:port/dscc7 to connect to DSCC. For example:
http://localhost:9001/dscc7
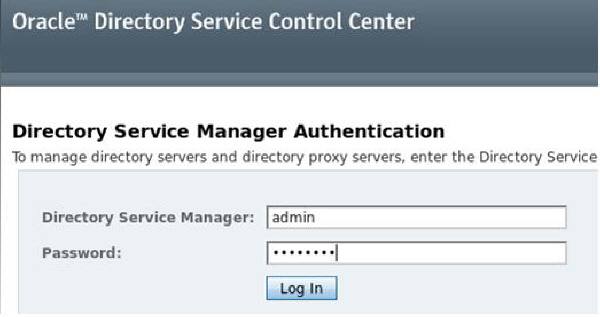
Enter the following values to login to the Oracle Directory Service Control Center authentication page :
Directory Service Manager:
admin
password: Welcome1
Note: You
set this password in the step: Initialize DSCC
registry as Welcome1
You log in to DSCC as Directory Service Manager.
Directory Service Manager's entry is stored in the
DSCC registry. Directory Service Manager also has
administrator access to the server instances
registered with DSCC
Note: If you
cannot log in, your DSCC registry may not be running
and cacao may be down.
Open a terminal and navigate to <install-dir>/dsee7/bin
$ ./dsccsetup status
You will see an output similar to the following:

If DSCC registry is not running, start it by using the following command:
$ <install-dir>/dsee7/bin/dsadm start <install-dir>/dsee7/var/dcc/ads
You will see an output similar to the following:
Directory Server instance '<install-dir>/dsee7/var/dcc/ads' started: pid=27556
If Cacao is down, start it by using the following command:
$ <install-dir>/dsee7/ext/cacao_2/cacao2/bin/cacaoadm start
You will see an output similar to the following
Directory Server instance '<install-dir>/dsee7/var/dcc/ads' started: pid=27556
Navigate to <install-dir>/dsee7/bin and confirm that you don’t see any of the two messages of DSCC registry is not running and Cacao is down with the following command
$ ./dsccsetup status
Enter the following in your browser:
http://localhost:9001/dscc7/
Enter the following values and click the Login button.
Directory
Service Manager: admin
Password: Welcome1
Note:
You set this password in the step: Initialize DSCC
registry as Welcome1.
You log in to DSCC as Directory Service Manager.
Directory Service Manager's entry is stored in the
DSCC registry. Directory Service Manager also has
administrator access to the server instances
registered with DSCC.
Creating an ODSEE instance using Directory Service Control Center (DSCC)
To create an ODSEE instance with DSCC, perform the following steps:
Making a directory for ODSEE instances
Open a terminal window, navigate to <install-dir> and create a directory for DSCC instances
$ mkdir dsee_instances
Creating a new server instance, dsee1 with DSCC
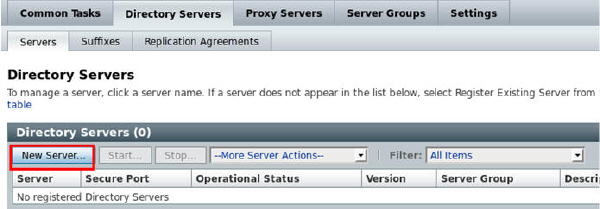
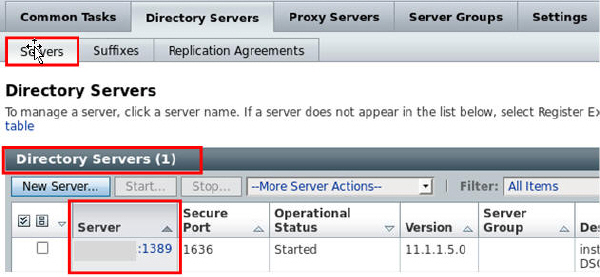
In your DSCC browser, go to Directory Servers tab > Servers tab and click New Server to start the New Directory Server wizard to create the server instance
Specify the following values for the required Settings page and click Next.
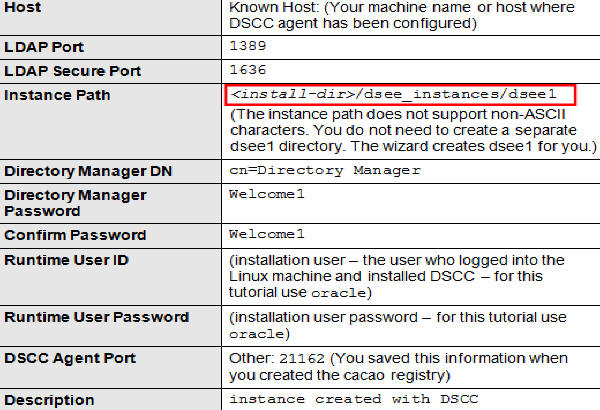
Note: If you don’t know your machine name, open a new terminal window. The following command will give your machine name:
hostname
Once you enter the above information, your screen will look similar to the following:

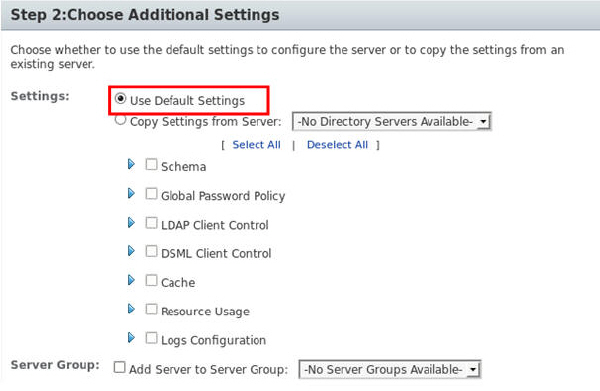
In Choose Additional Settings, use Default Settings and click Next.
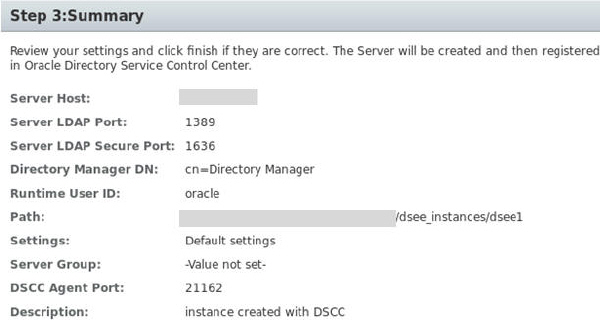
View Summary, confirm that you entered the values correctly and click Finish.
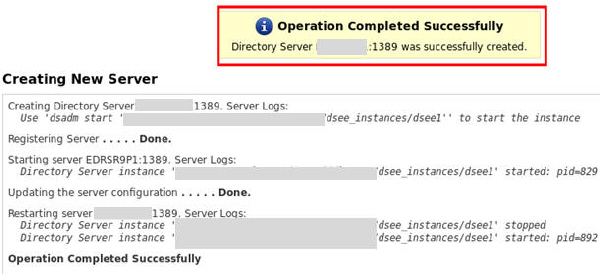
Confirm operation completed successfully and click Close. Output will be similar to the following:
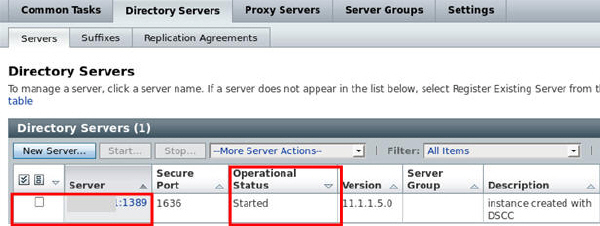
Confirm that server status is Started under Servers > Directory Servers > Operational Status.
Note: To successfully create an instance on Windows 2003 Primary Domain Controller, type domainname\username in Runtime User Id.
Similarly, you can
create Directory Proxy Server instances using the
Proxy Server tab.
For further configuration and administration of
Directory Server and Directory Proxy Server instances,
refer to Oracle
Fusion Middleware Administration Guide for Oracle
Directory Server Enterprise Edition.
See the online help for Directory Service Control
Center for hints on configuring Directory Server and
Directory Proxy Server through the graphical user
interface.
Note: If you setup your browser for your preferred
language, DSCC may sometimes report few messages in
other language. The language in which such messages
are shown is the language that was effective when the
dsccsetup cacao-reg command was executed. Such a
language usually is the default locale of the host.
Creating an empty suffix and populate it with data
Go to Directory Servers > Suffixes > New Suffix
Enter dc=example,dc=com for Suffix Name and click Next.
Select Do Not Replicate Suffix in Choose Replication Options and click Next.
Select the instance you created, ending in 1389 under Available Servers.
Click Add to add the instance that you created to chosen servers and click Next.
Select Use Default settings and click Next.
Use Default Database Location and click Next.
Enter the following path for location of LDIF file and click Next.
$ <install-dir>/dsee7/resources/ldif/Example.ldif
Example.ldif is a sample data file and comes with the ODSEE zip distribution.
View Summary, confirm that you entered the values correctly and click Finish.
Confirm operation completed successfully and click Close. Output will be similar to the following:
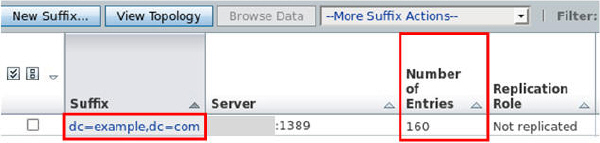
Go to Directory Servers > Suffixes and confirm
that dc=example,dc=com suffix is created.
View that Number of Entries is zero. Follow the next
few steps to restart the server to have the correct
number of entries. Skip the following restart steps if
the number of entries is 160.
Restarting the Server

Creating an ODSEE Instance by Using the Command Line Interface (CLI)
In this practice, you run the dsadm utility in CLI mode to create a new directory server instance that runs on port 2389. You used port 1389 in the previous step to create an instance in the GUI mode. You will use the dsee_instances folder that you created in the previous part for the location of your instance.
Creating a new directory server instance dsee2 on port 2389
$ ./dsadm create -p 2389 -P 2636 <install-dir>/dsee_instances/dsee2
Choose the Directory Manager
password: Welcome1
Confirm the Directory Manager password: Welcome1
Use 'dsadm start '<install-dir>/dsee_instances/dsee2''
to start the instance
Starting the Instance
$ ./dsadm start <install-dir>/dsee_instances/dsee2
Directory Server instance '<install-dir>/dsee_instances/dsee2' started: pid=17442
$ ls <install-dir>/dsee_instances/dsee2
alias bak config db ldif locks logs plugins tmp
Creating an Empty Suffix and Populating it with Data
$ ./dsconf create-suffix -p 2389 dc=example,dc=com
$ ./dsconf import -p 2389 <install-dir>/dsee7/resources/ldif/Example.ldif dc=example,dc=com
Enter "cn=Directory Manager"
password: Welcome1
New data will override existing data of the suffix
"dc=example,dc=com".
Initialization will have to be performed on replicated
suffixes.
Do you want to continue [y/n] ?y
Import complete. Processed 160 entries in 4 seconds.
$ ./ldapsearch -p 2389 -b dc=example,dc=com "(uid=bjensen)" mail
uid=bjensen,
ou=People, dc=example,dc=com
mail=bjensen@example.com
Registering the New Instance with DSCC
$ ./dsccreg add-server -h localhost -p 3998 <install-dir>/dsee_instances/dsee2
Note: 3998
is the default port of registry. Use the correct port
of registry number if you didn't use the
default. If you don’t remember your DSCC port of
registry use the following command:
./dsccsetup status
Enter DSCC administrator's
password: Welcome1
<install-dir>/dsee_instances/dsee2 is an
instance of DS
Enter password of "cn=Directory Manager" for <install-dir>/dsee_instances/dsee2:
Welcome1
This operation will restart <install-dir>/dsee_instances/dsee2.
Do you want to continue ? (y/n)y

Note: 3998 is the port of registry. If you don’t remember your DSCC port of registry use the following command:
$ ./dsccsetup status
$ ./dsccreg list-servers -h dscc-host -p 3998

Enabling ODSEE Logging
In this practice, you enable ODSEE logging all your next operations and later view them in the basic logging practice.
Enter the following URL in your browser to login to DSCC
http://localhost:9001/dscc7
Enter the following information in the DSCC login page and click Login
Directory Service Manager: admin
Password: Welcome1
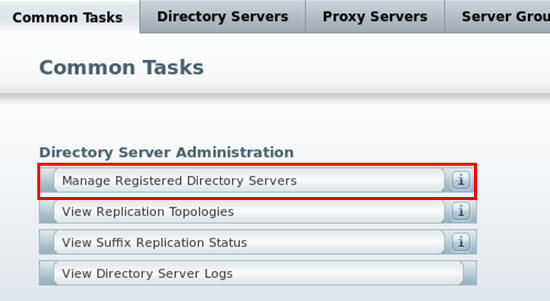
Go to Common Tasks > Directory Server Administration > Manage Registered Directory Servers
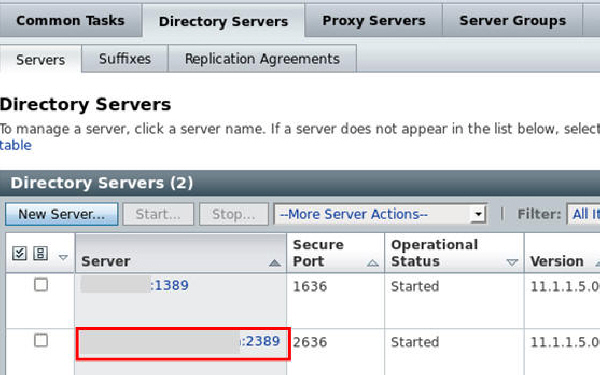
Click the link for dsee2 instance on port 2389.
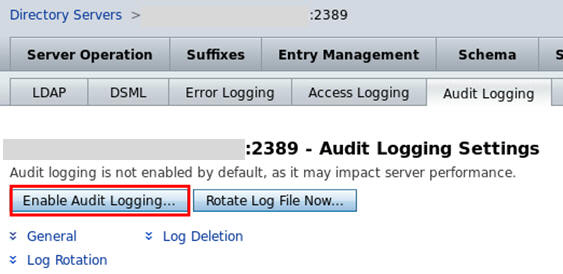
Go to Server Configuration tab > Audit Logging and click Enable Audit Logging.
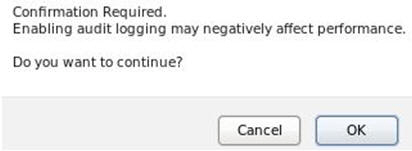
Click OK to confirm enabling audit logging and then click Save.
Confirm that changes saved successfully.

Stopping, Starting and Viewing the Status of ODSEE Instances
In this practice, you stop and start dsee1 instance.
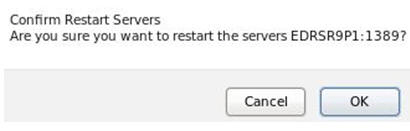
Go to Common Tasks > Directory Server Administration > Manage Registered Directory Servers. Select checkbox for instance on port 1389 and click Stop button to stop selected server.

Click OK to confirm stopping the server.

Enter User ID and password for runtime host and click OK.
User ID: oracle
Password: oracle
Note: You may have a different User ID – this is the user who installed DSCC and has administrative rights to change the log configuration and could be similar to the user ID to log into the Linux machine
Confirm that operation completed successfully and click Close.

Confirm that Operational Status is Stopped for dsee1 on port 1389.

Select checkbox for dsee1 server on port 1389 and click Start to start the server.

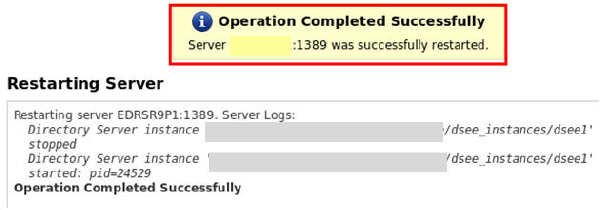
Confirm that operation completed successfully and click Close. You will see an output similar to the following:

Confirm that operational status is Started for dsee1.

Removing a Directory Server instance
In this practice, you remove the dsee1 instance.
Select checkbox for dsee1 server and go to More Server Actions drop-down menu and select Delete.

Click OK to confirm to deleting the server..

Confirm Operation Completed successfully and click Close. You will see an output similar to the following:

Confirm that the number of Directory Servers is one and dsee1 on port 1389 does not appear under Directory Servers any more.

Searching and Managing Directory Entries
In this practice, you will:
a. Search directory entries with DSCC Browse
option and change value of attributes
b. Search directory entries with DSCC Search
Directory Data tool
c. Delete and create entries
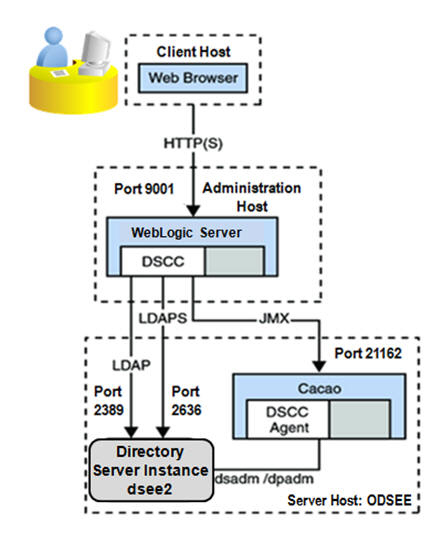
The deployment on your machine should have a similar topology to
the following graph. You use Directory Services Control Center
(DSCC), the graphical, browser-based tool on Administration port
9001to manage Oracle Directory Server Enterprise Edition
(ODSEE).
Searching Directory Entries by Using the DSCC Browse Option
In this practice you find and modify Barbara Jensen’s directory entry.
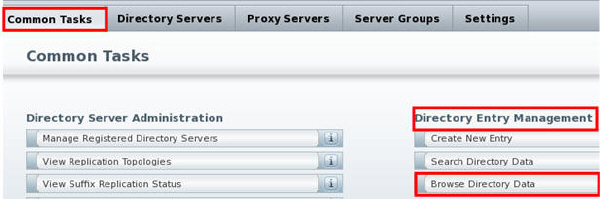
Go to Common Tasks > Directory Entry Management > Browse Directory Data
Choose Directory Server and Click OK.
Server: <your machine name>.us.oracle.com:2389>

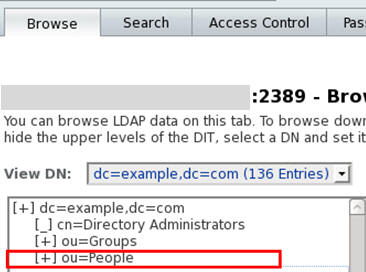
Expand the dc=example,dc=com branch. Then, expand the ou=People branch.
Scroll down to the uid=bjensen entry and select the uid=bjensen entry:
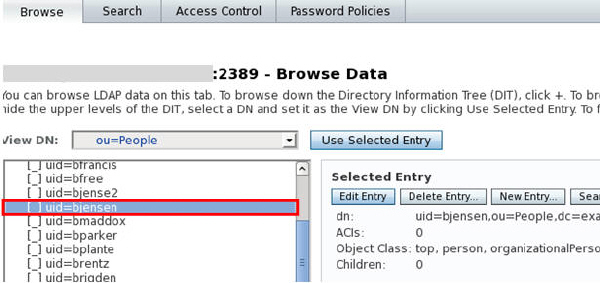
Double click uid=bjensen and view details for Barbara Jensen’s directory entry.
Modify value of Organizational Unit attribute from Product Development to Accounting and click OK.
Organizational Unit (ou) -
current value: Product Development
People
Organizational Unit (ou) - new value: Accounting
People

Click OK in the upper right side of page to update Organizational Unit value.
Searching Directory Entries by Using Simple Rules in the DSCC Search Directory Data Tool
In this section you search for Mike Carter with his last name.
Go to Entry Management > Search tab and specify the following values on the Search page and click Search.
Base Search DN: dc=example,dc=com
Search Filter - Specify Conditions: Last Name(sn) Equals Carter

Find Mike Carter in the records that meet the search criteria sn=Carter in the Search Results:

Searching Directory Entries by Using Compound Rules in the DSCC Search Directory Data Tool
In this section you search for all employees who work in the Cupertino office and are in Accounting.
Go to Entry Management > Search tab > Modify Search

Specify the following values under Modify Search:
Base Search DN:
dc=example,dc=com
Search Filter - Specify Conditions: Match All
Conditions Below
Locality (l) Equals Cupertino +
Organizational Unit (ou) Equals Accounting
Note: Object classes and attribute names and values are not case-sensitive unless you specify so while creating them, or modify them to be case-sensitive.

Verify that Barbara Jensen is in the result field. You modified ou for Barbara Jensen to Accounting in the previous steps.

Deleting an existing Entry
In this section you delete entry Daniel Smith.
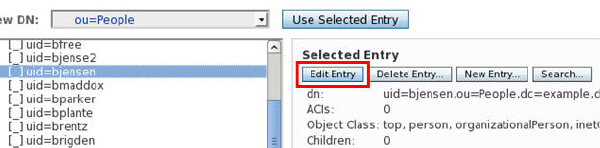
Navigate to Browse tab.
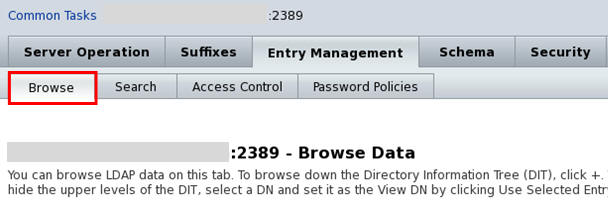
Select uid=dsmith under ou=People.
On the right pane, select the Delete Entry button under Use Selected Entry to delete the uid=dsmith entry.

Select OK when prompted to confirm delete entry.
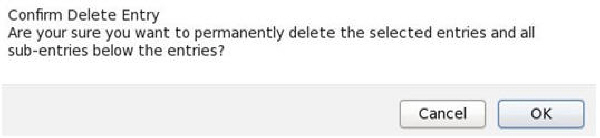
View confirmation for Delete Entry and click Close. You will see an output similar to the following:

Creating a New Entry
In this section you create a new entry Daniel Smith.
Navigate to the Browse tab. Select ou=People for View DN. Select New Entry button on the right pane.
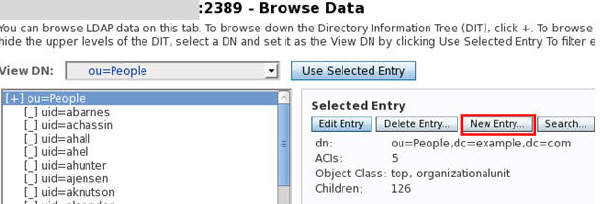
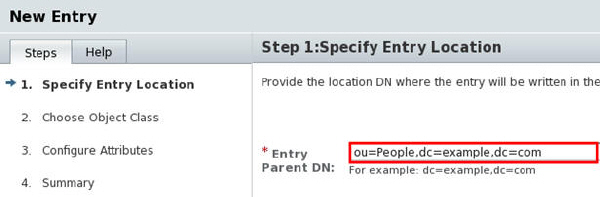
Specify Entry location and click Next.
Entry Parent DN:
ou=People,dc=example,dc=com
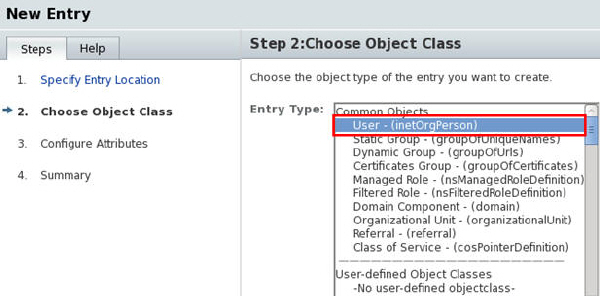
Choose Object Class, User - (inetOrgPerson) and click Next.
Entry Type: User – (inetOrgPerson)
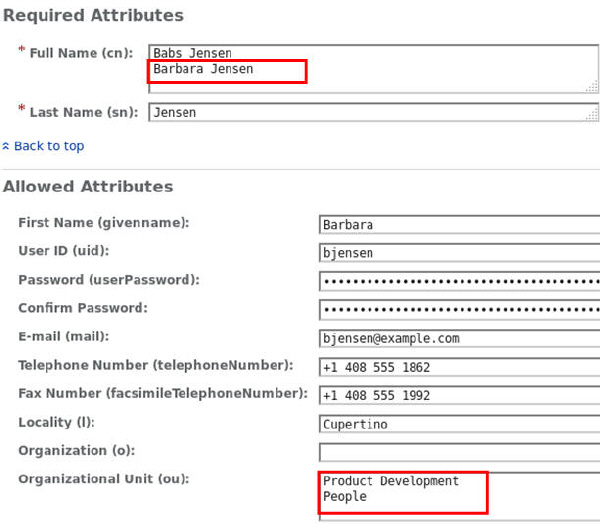
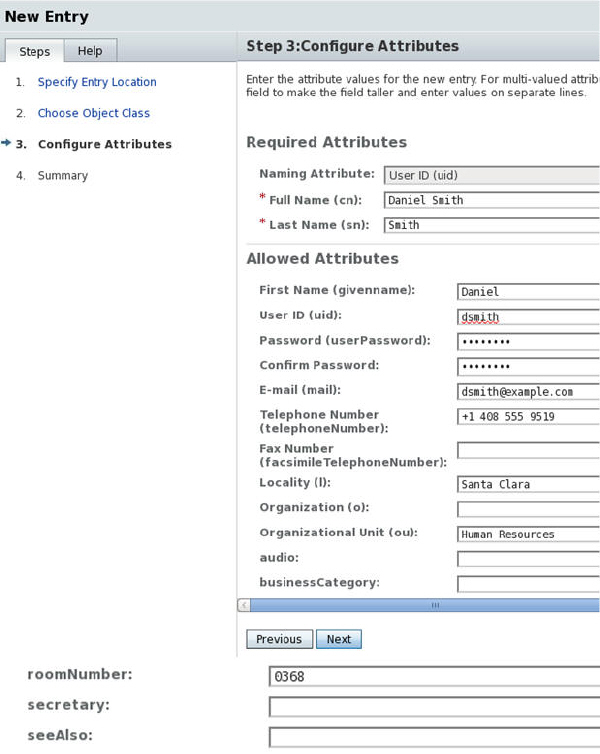
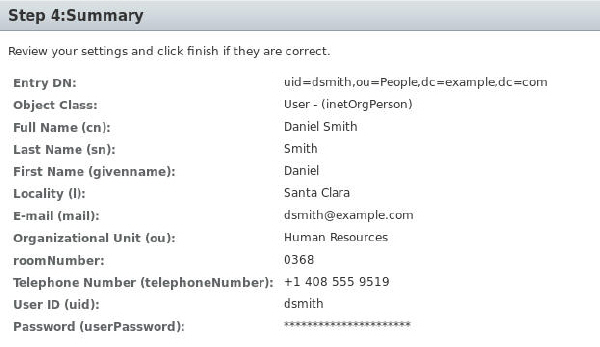
Configure Attributes - Enter the following values for Daniel Smith and leave the optional attributes blank if you don’t have the information and click Next.
Required Attributes
Naming Attribute:User ID (uid)
Full Name (cn): Daniel Smith
Last Name (sn):Smith
Allowed Attributes
First Name (givenname):Daniel
User ID (uid):dsmith
Password (userPassword):Welcome1
Confirm Password:Welcome1
E-mail (mail):dsmith@example.com
Telephone Number:+1 408 555 9519
Locality (l):Santa Clara
Organizational Unit (ou):Human Resources
roomNumber:0368
Review Summary and click Finish.

Verify that Barbara Jensen is in the result field. You modified ou for Barbara Jensen to Accounting in the previous steps.
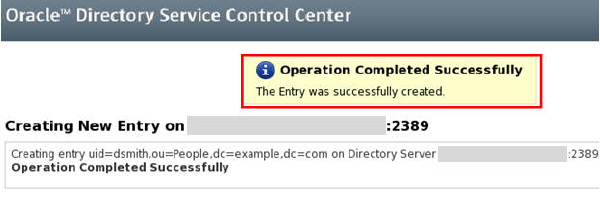
Confirm that operation completed successfully and click Close. You will see a message similar to the following
Double click on uid=dsmith to view Daniel Smith’s properties on the right side. From Entry View tab, switch to Text View tab and confirm whether attributes you entered along with all four object classes for Daniel Smith appear in the Text View:
objectClass:
organizationalPerson
objectClass: person
objectClass: inetOrgPerson
objectClass: top
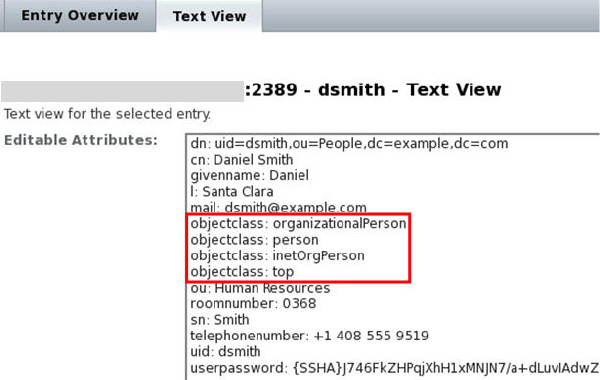
Note: The text view
shows the LDIF text format of the entry. All the
attributes of Daniel Smith that you created are
present here in the text view.
Viewing Schema Definition for Attributes and Object Classes by Using DSCC
To view schema definitions of attributes and object classes with DSCC perform the following tasks:
Viewing Schema Definitions of Attributes
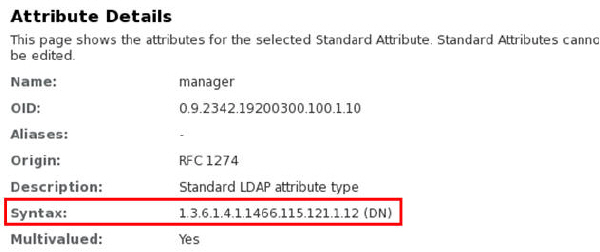
In this section you view schema definition for the manager attribute.
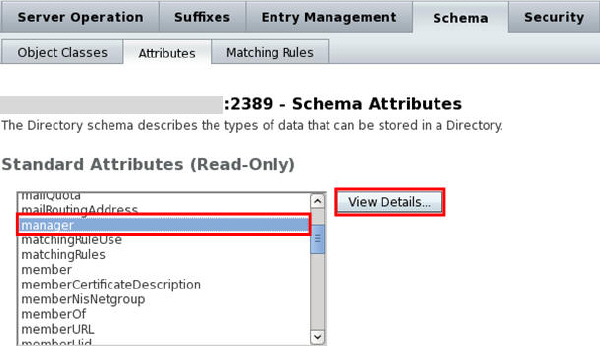
Go to Schema tab > Attributes tab. Select manager from Standard Attributes and select View Details.
Note: If you are in the home page, go to Common Tasks > Directory Entry Management > Browse Directory Data > Choose Directory Server and then select Schema tab > Attributes tab.
In the attribute details page find the syntax for manager attribute.
Note: For example, Daniel Smith’s DN is: .
uid=dsmith,ou=people,dc=example,dc=com
In the Attribute Details > Used as Allowed by, confirm that object class inetOrgPerson uses manager as an allowed attribute and then click Close.

Viewing Schema Definitions of Object Classes
In this section you view schema definition for the manager attribute.
Go to Schema tab > Object Classes tab. Select inetOrgPerson from Standard Object Classes and select View Details.

Find the manager attribute in the Allowed Attribute and then click Close.

Creating and Modifying User-Defined Object Classes and Attributes in DSCC
To create and modify user-defined object classes and attributes with DSCC perform the following tasks:
Creating a User-Defined Object Class
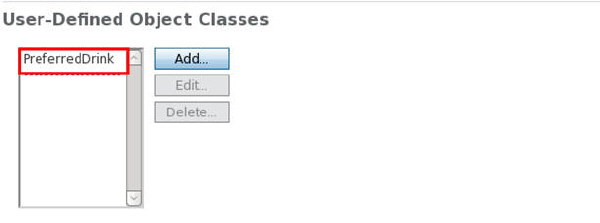
In this section you create a new user-defined object class, PreferredDrink.
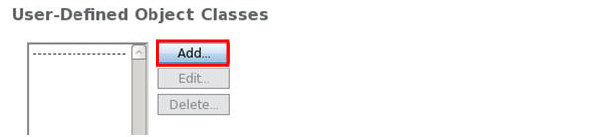
Click Add icon under Schema tab > Object classes > User-Defined Object Classes.
Enter the following information and click Next:
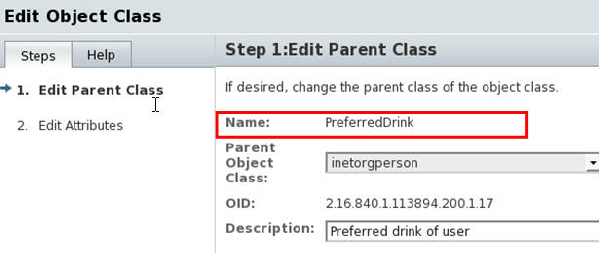
Name: PreferredDrink
Parent Object Class: inetorgperson
OID (Object ID): 2.16.840.1.113894.200.1.17
Description: Preferred drink of user

Select the attribute drink in the Available Attributes
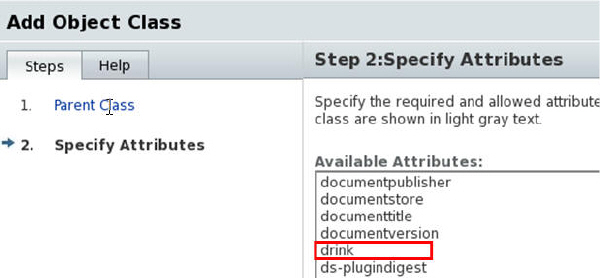
Click the Add button to add the attribute drink to the Allowed Attributes and click Finish.

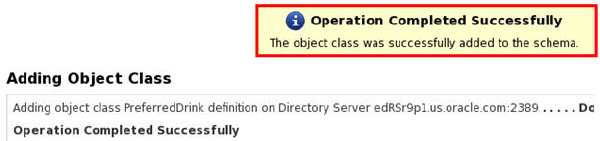
View that operation completed successfully and click Close.
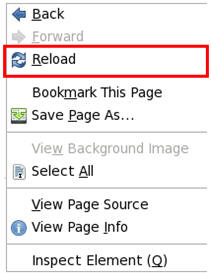
Verify that the new object class is created. On the Object Classes tab page right click and click Reload.
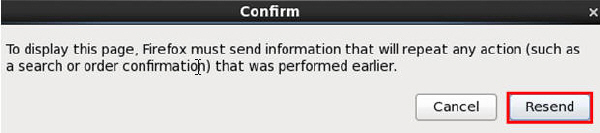
Confirm Firefox message and click Resend.
Adding the New Object Class to Entries
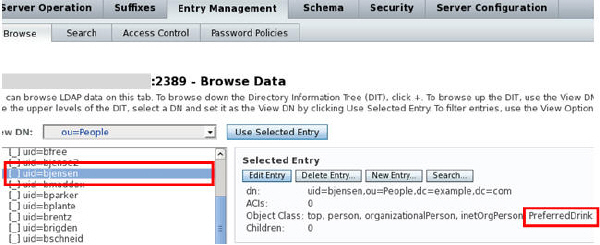
In this section you add the new object class, PreferredDrink to Barbara Jensen and Harry Miller.
Select uid=bjensen under Entry Management > Browse tab > View DN: ou=People. On the right side, select Edit Entry. Go to Text View tab for Barbara Jensen and add the following line after objectclass: top and click OK.
objectclass: PreferredDrink
Note: Ensure that you leave no spaces after objectclass: PreferredDrink since LDIF files cannot be read and give error messages for extra spaces left after the name: value pairs.

Repeat step one for uid=hmiller.
Adding Values to an Existing Attribute
In this section you add the value wine to Barbara Jensen's existing drink attribute and beer to Harry Miller's.
Select uid=bjensen in the Browse tab.
Confirm that PreferredDrink is on the right pane in front of Object Class names.
Click Edit Entry and add value wine to drink attribute for Barbara Jensen and click OK.

Note: The attribute drink belongs to the object class PreferredDrink.
Similarly add beer to drink attribute of uid=hmiller and click OK

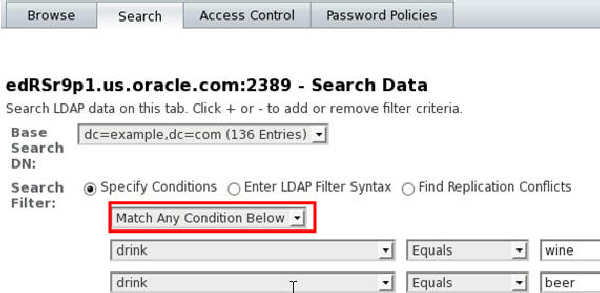
Search for entries with the wine or beer as their drink. Go to the Search tab. enter the following information and click Search:
Base Search DN:
ou=People,dc=example,dc=com
Search Filter - Specify Conditions: Match Any
Conditions Below
drink Equals wine +
drink Equals beer
Note: Match Any Condition is equivalent to the logic OR and Match All Conditions is equivalent to the logic AND.
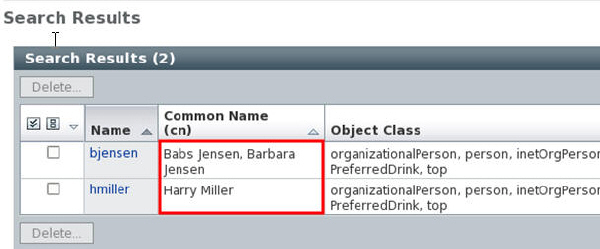
Confirm that Barbara Jensen and Harry Miller appear in the search results.
Creating a User-Defined Attribute
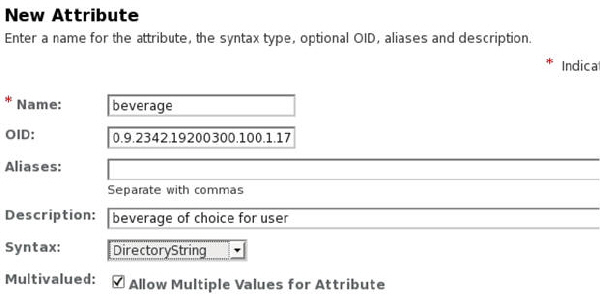
In this section you create a new user-defined attribute, beverage.
Navigate to Schema tab > Attributes tab and click Add under User-Defined Attributes.
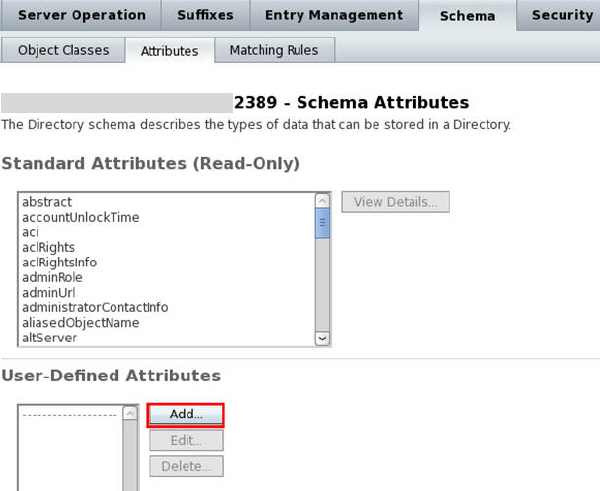
In the New Attribute window, enter the following information and click OK:
Name: beverage
OID (Object ID): 0.9.2342.19200300.100.1.17
Description: beverage of choice for user
Syntax: Directory String
Multivalued: Selected - Allow Multiple
Values for Attributes
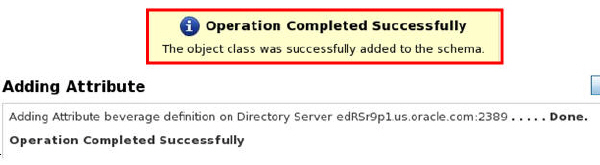
Confirm that you get the message “Operation Completed Successfully” and click Close.
Confirm that now beverage appears under Schema> Attributes > User-Defined Attributes list.

Adding the User-Defined Attribute to the User-Defined Object Class
In this section you add the user-defined attribute, beverage to PreferredDrink object class
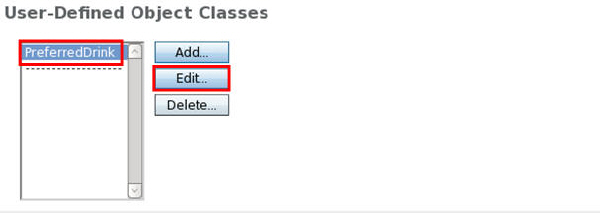
Select PreferredDrink under Schema tab > Object Classes > User-Defined Object Classes and click Edit.
Click Next for Edit Parent Class and do not modify anything in this step.
Select beverage in Available Attributes.

Use Add button to add beverage to Allowed Attributes and click Finish.

Confirm that you get the message “Operation Completed Successfully” and click Close.

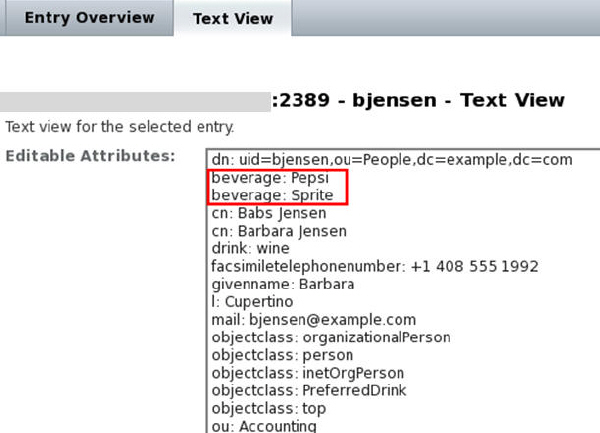
Go to Entry Management > Browse > View DN: ou=people and double click uid=bjensen to view Barbara Jensen’s allowed attributes. Since you defined beverage as multi-valued, enter multiple values for beverage, each on a separate line and click OK.
beverage: Pepsi
Sprite

Select uid=bjensen again and click Edit Entry. From Entry View switch to Text View. Confirm that beverage has multiple values (Pepsi and Sprite) and click OK.
Deleting User-Defined Object Classes and Attributes in DSCC
To delete user-defined object classes and attributes with DSCC pay attention to the order of deletion.
Deleting Attributes in Use
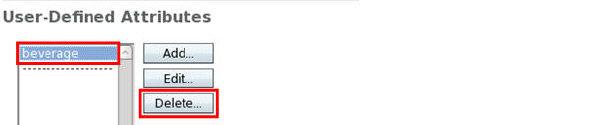
In this section you try to delete the user-defined attribute, beverage.
Select beverage in Schema tab > Attributes tab > User-Defined Attributes. Click Delete to delete beverage.
Click OK when prompted to delete the attribute.
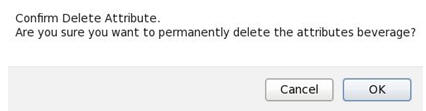
Verify that you get an error message that you must remove this attribute from the PreferredDrink object class definition first and click Close.

Deleting User-Defined Object Classes in Use
In this section you try to delete the user-defined object class PreferredDrink.
Select PreferredDrink in Schema tab > Object Classes tab > User-Defined Object Classes. Click Delete to delete PreferredDrink..

Click OK when prompted to delete the attribute

Verify that you get an error message that you must remove entries that use the PreferredDrink object class definition first and click Close.

Deleting drink, beverage and PreferredDrink from Barbara Jensen’s Entry
In this section you delete drink, beverage and PreferredDrink from Barbara Jensen’s entry.
Select uid=bjensen under Entry Management tab > Browse tab> Vew DN: ou=people
Click Edit Entry on the right side
Switch to Text View tab and delete the following two lines in Editable Attributes and click OK. Ensure that you leave no extra lines.
Lines to delete from Text
View of uid=bjensen properties:
beverage: Pepsi
beverage: Sprite
drink: wine
objectclass: PreferredDrink

Note: If you leave spaces and see error messages in the Text View, delete your extra spaces and those error messages and click OK.
Deleting drink and PreferredDrink from Harry Miller’s entry
In this section you delete drink and PreferredDrink from Harry Miller’s entry.
Select uid=hmiller under Entry Management tab > Browse tab> Vew DN: ou=people
Click Edit Entry on the right side
Switch to Text View tab and delete the following two lines in Editable Attributes and click OK. Ensure that you leave no extra lines.
Lines to delete from Text
View of uid=hmiller properties:
drink: beer
objectclass: PreferredDrink

Note: If you leave spaces and see error messages in the Text View, delete your extra spaces and those error messages and click OK.
Deleting the User-Defined Object Class, PreferredDrink
In this section you delete object class PreferredDrink.
Go to Schema tab > Object Classes > User-Defined Object Classes. Select PreferredDrink and click Delete.

Click OK to confirm to delete object class

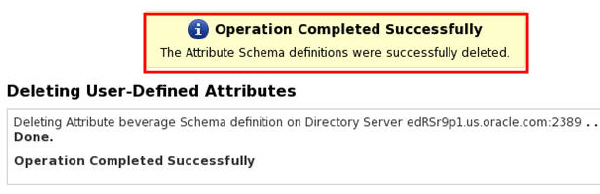
Confirm operation completed successfully and click Close.

Verify that the object class PreferredDrink does not exist under User-Defined Object Classes anymore.

Verify that the object class PreferredDrink does not exist in the object classes listed for beverage anymore: Select beverage in Schema tab > Attributes > User-Defined Attributes and click Edit. Verify that PreferredDrink is not listed in Used as Allowed by field and click OK.

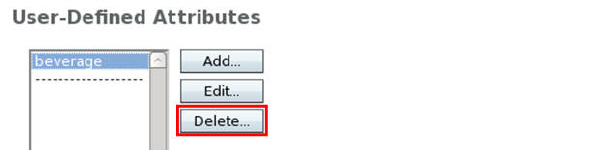
Deleting the User-Defined Attribute, beverage
In this section you delete user-defined attribute, beverage.
Select beverage in Schema tab > Attributes > User-Defined Attributes and click Delete.
Click OK when prompted to delete attribute.

Verify that the attribute beverage does not exist anymore: Go to Schema tab > Attributes > User-Defined Attributes and verify that beverage is not listed in User-Defined Attributes.

Viewing ODSEE Log Files in DSCC
To view ODSEE log files in DSCC, perform the following tasks:
Getting Access to Log Files by Using DSCC
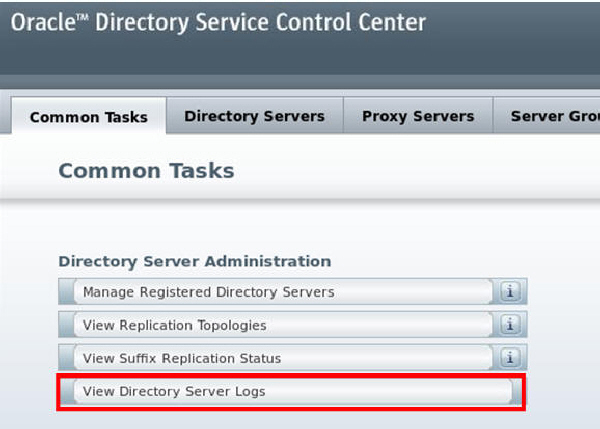
In DSCC, navigate to Common Tasks > Directory Server Administration > View Directory Server Logs.
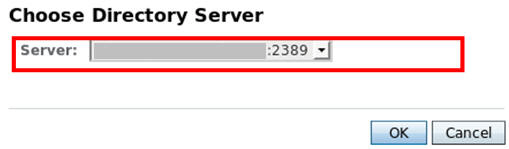
Choose Directory Server ending in 2389 from the Server drop down list and click OK.
Click the link under Warning sign to enter user ID and password:

Enter user ID and password for runtime user and click OK. For these practices, oracle, oracle is used. You may have different values set up for your system. You did not set this user id and password in this tutorial. However, you used it when you created a new server instance.
User ID: oracle (runtime
user id)
Password: oracle (runtime user password)

Note: Once you enter User ID and password, as long as you are logged in, you do not need to re-enter this information again.
Confirm that operation completed successfully and click Close.

Viewing Error Logs
In this section you view error logs
Go to Error Logs tab > Log Viewer and click the arrow in Log Level to sort by Log Level to view Warnings.

Search for the word LDIF in the search field and click Search.


Viewing Access Logs
In this section you view access logs
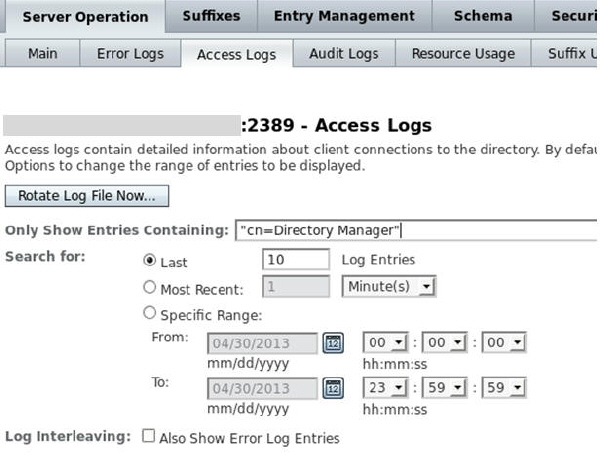
Go to Access Logs tab and Click More View Options.

Enter the following values and click Search.
Only Show Entries
Containing: "cn=Directory Manager"
Last 10 Log Entries
Viewing Audit Logs
In this section you view audit logs
Go to Audit Logs tab, enter dsmith in search field and click Search. Daniel Smith was an entry you created earlier.


Note: Audit log file is not enabled by default. You enabled it earlier to view your operations later.

Viewing ODSEE Log Files by Using the Command Line Interface (CLI)
To view and manage ODSEE log files in CLI, perform the following tasks:
View location and modification time of log files.
In this section,you view the location and modification time of dsee2 log files.
Type in the following in a terminal.
ls -l <install-dir>/dsee_instances/dsee2/logs
Confirm log files access, audit and errors are among the output files. You should see an output similar to the following:

Viewing Error Logs
In this section, you view the last 25 lines of the errors log file.Remember to place a '/' in front of the path when you replace the italic <install-dir> with the actual path of installation directory.
Navigate to the following location:
$ cd <install-dir>/dsee7/bin
Note: The log files are not under <install-dir>/dsee7/bin, but the command dsadm and dsconf are under this folder. You will invoke the log files from this location, by specifying the location of the instance that you want to see its log file.
Use dsadm command to show the last 25 lines of the errors log file.
$ ./dsadm show-error-log -L 25 <install-dir>/dsee_instances/dsee2/
You will get an output similar to the following:

Viewing Access Logs
In this section, you view the access log file for the duration of the last two days.
Navigate to the following location:
$ cd <install-dir>/dsee7/bin
Use dsadm command to view the access log file for the duration of the last two days.
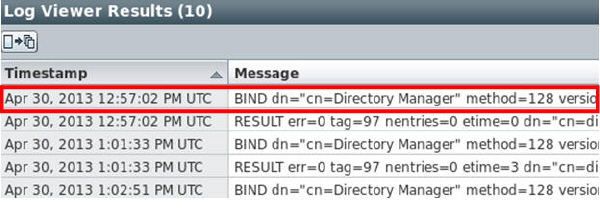
$ ./dsadm show-access-log -A 2d <install-dir>/dsee_instances/dsee2 | grep BIND
You will get an output similar to the following:

Viewing Audit Logs
In this section, you search for beverage in audit logs to find which operations were performed on it, who performed it and its time stamp.
Navigate to the following location:
$ cd <install-dir>/dsee7/bin
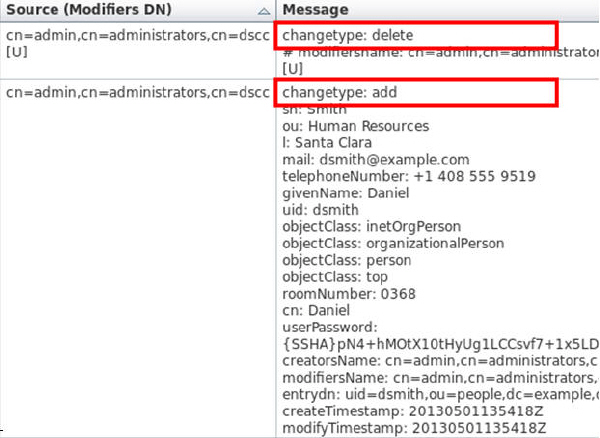
Use dsadm command to view the audit log and find beverage in it.
$ ./dsadm show-access-log <install-dir>/dsee_instances/dsee2/
You will get an output similar to the following:

Viewing and Modifying Log File Settings
In this section, you view log file settings for audit log file.
Navigate to the following location:
$ cd <install-dir>/dsee7/bin
Use dsconf command to view log file settings for audit log file. Enter password Welcome1 for cn=Directory Manger when prompted.
./dsconf get-log-prop –h localhost –p 2389 audit
Note: A general form of the above command is:
$ ./dsconf get-log-prop –h host –p port log-type
You will get an output similar to the following:

Use dsconf command to set enabled to off for audit. Enter password Welcome1 for cn=Directory Manger when prompted.
$ ./dsconf set-log-prop -p 2389 audit enabled:off
Note: In general, to change the values in the settings in the first column in step 3, such as perm, rotation –interval, or rotation-time, use:
$ ./dsconf set-log-prop -h host -p port log-type property:value
Confirm that audit is not enabled. Enter password Welcome1 for cn=Directory Manger when prompted.
$ ./dsconf get-log-prop -p 2389 audit
You will get an output similar to the following:

Note: To view ODSEE log files with CLI, navigate to the logs directory and use any CLI text editor such as gedit.
Note: Use any command such as dsconf or dsadm in the <install-dir>/dsee7/bin location with --help to get more information on it. For example:
$ ./dsadm --help
Summary
- Install ODSEE and DSCC
- Create a new WebLogic Server domain
- Create and manage instances of ODSEE
- Search and manage directory entries
- Manage object classes and attributes of ODSEE schema
- Enable and view ODSEE log files
- Introduction to Oracle Directory Server Enterprise Edition - ODSEE
- Installing ODSEE
- ODSEE Installation Guide
- ODSEE
Administration Commands
- Lead Curriculum Developer: Laleh Haghshenass
- Other Contributors: Ramaa Mani, Nagavalli Pataballa, Anjulaponni Azhagulekshmi Subbiahpillai, Vijaya Karothi, Deeran Peethamparan, Etienne Remillon, Gautam Gopalakrishnan
In this tutorial, you have learned how to:
Resources
Credits
To navigate this Oracle by Example tutorial, note the following:
- Hide Header Buttons:
- Click the title to hide the buttons in the header. To show the buttons again, click the title again.
- Topic List:
- Click a topic to navigate to that section.
- Expand All Topics:
- Click the button to show or hide the details for the sections. By default, all topics are collapsed.
- Hide All Images:
- Click the button to show or hide the screenshots. By default, all images are displayed.
- Print:
- Click the button to print the content. The content that is currently displayed or hidden is printed.
To navigate to a particular section in this tutorial, select the topic from the list.