Configuring Oracle Enterprise Pack for Eclipse for Oracle Cloud
Overview
- Have an Oracle.com account.
- Have already completed the Oracle by Example tutorial titled Signing Up for a Java Cloud Service.
- Have installed Oracle
Enterprise Pack for Eclipse (OEPE) 12.1.1.2 Runtime Bundle (OEPE
12c + WebLogic Server 10.3.6 + Oracle Application
Development Framework [Oracle ADF] 11.1.1.6).
- Have downloaded the Oracle
Cloud Software Development Kit (SDK) and unzipped it to
a directory (for example,
C:\Oracle\oracle-javacloud-sdk). - Have downloaded and unzipped the ajaxguessnumber.zip project.
Purpose
This tutorial covers how to set up the Oracle Enterprise Pack
for Eclipse (OEPE) integrated development environment (IDE) for
use with Oracle Cloud.
Time to Complete
Approximately 30 minutes
Introduction
Oracle Cloud is a public, enterprise, platform-as-a-service (Paas) offering. Two services provided by Oracle Cloud are particularly interesting to Java applications developers: Oracle Java Cloud Service and Oracle Database Cloud Service. You can configure these services through a web interface, a command-line tool, or an IDE such as OEPE.
Scenario
In this tutorial, you configure OEPE with a local instance of Oracle WebLogic Server 11g (10.3.6) and with a remote instance of Oracle Cloud. Next, you deploy a simple Java Platform, Enterprise Edition (Java EE) application locally, and then you deploy the same application to Oracle Cloud.
Prerequisites
Before starting this tutorial, you should:
Adding WebLogic Server 11g
to OEPE
Oracle Java Cloud Service is powered by WebLogic Server 11g with some specific additions and exclusions (white-listed APIs and services). As an application developer, you may want to create and test applications locally before deploying the application to Oracle Java Cloud Service.
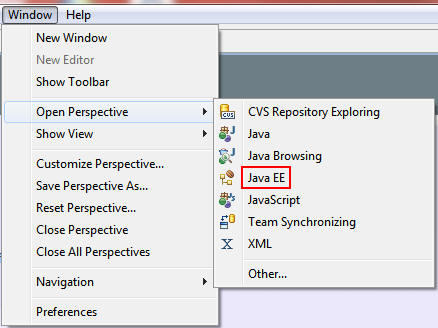
In OEPE, select Window > Open Perspective > Java
EE.
On the Welcome tab, click the x to close the
window and increase the visible space of the center edit
panel.

Click the Servers tab to open the Servers panel.

In the Servers panel, click the link to open the New Server
Wizard.

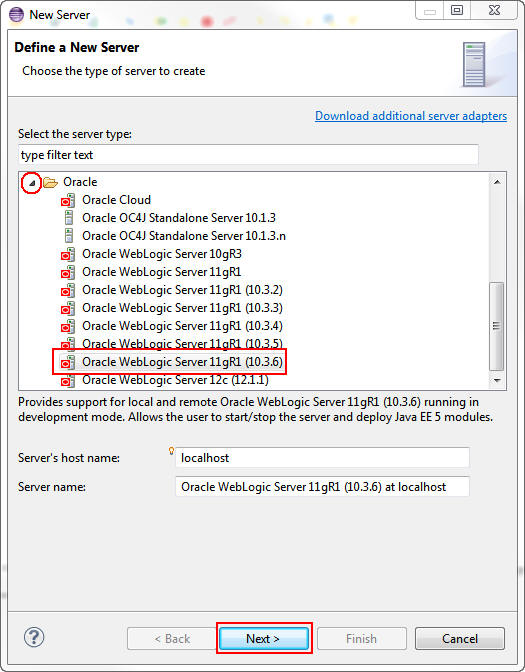
On the “Choose the type of server to create” page, perform the following steps:
a. Scroll down and expand Oracle.
b. Select Oracle WebLogic Server 11gR1 (10.3.6).
c. Click Next.
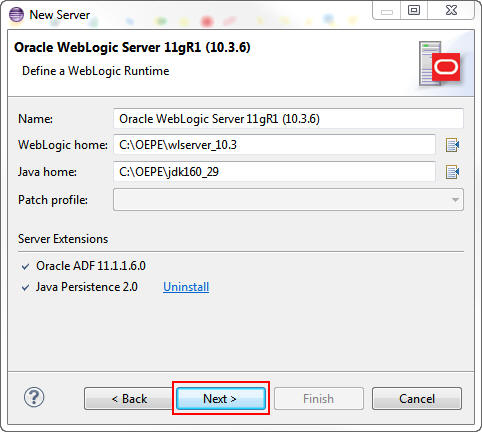
On the Define a WebLogic Runtime page, perform the following steps:
a. For WebLogic home, browse to the location of your
WebLogic Server 11g installation. Look for the wlserver_10.3
directory below the installed OEPE. If you installed OEPE in
C:\OEPE, the full path to the directory is C:\OEPE\wlserver_10.3.
b. Click Install to install the Java Persistence
2.0 server extension.
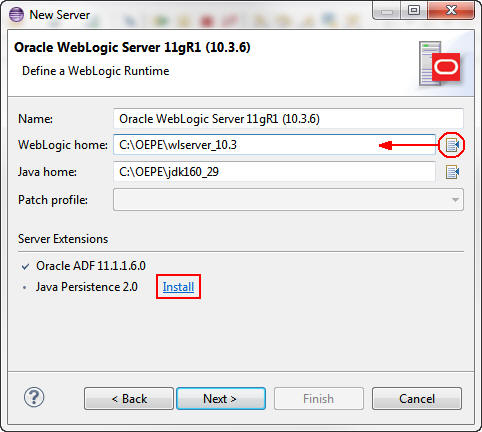
Note: The Java Development Kit is included in the
OEPE bundle installation, and Oracle ADF11.1.1.6.0 is
already installed.
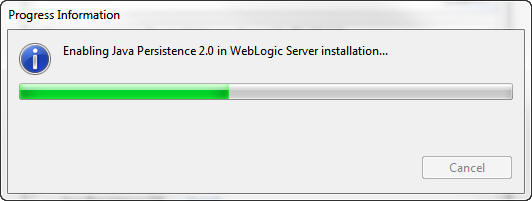
The Progress Information dialog box indicates the progress
of the installation. When the installation is completed, the
dialog box closes automatically.
On the Define a WebLogic Runtime page, click Next.
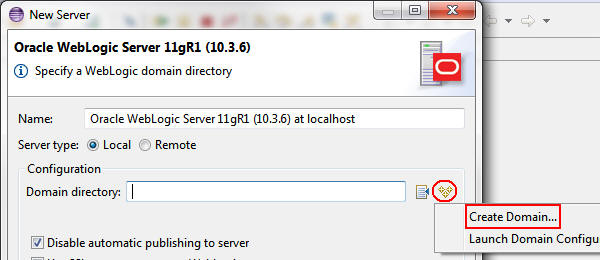
On the “Specify a WebLogic domain directory” page, click the Create icon and select Create Domain.
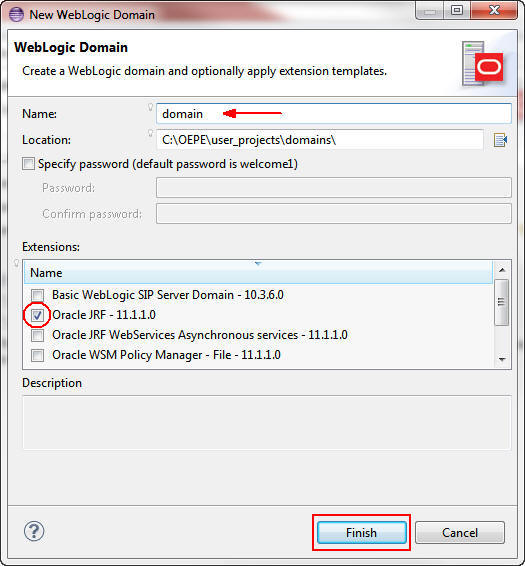
In the New WebLogic Domain dialog box, perform the following steps:
a. Enter domain as the name.
b. Make sure Oracle JRF is selected.
c. Click Finish.
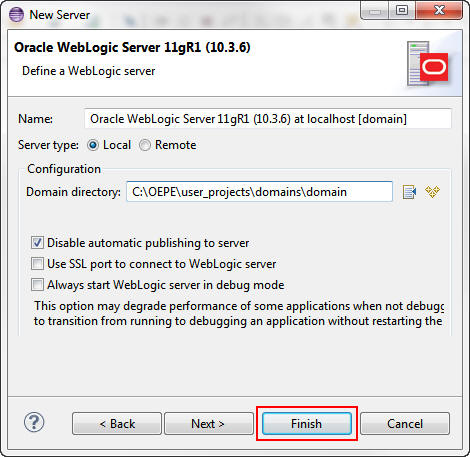
On the “Define a WebLogic server” page, click Finish.
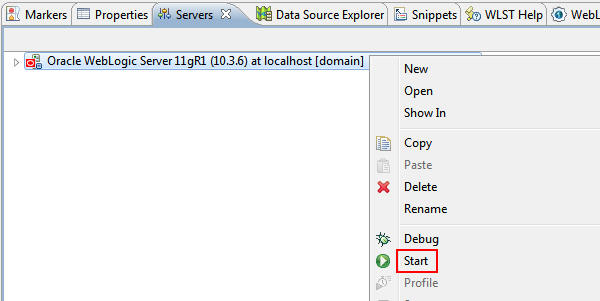
In the Servers panel, right-click the new server
instance and select Start.
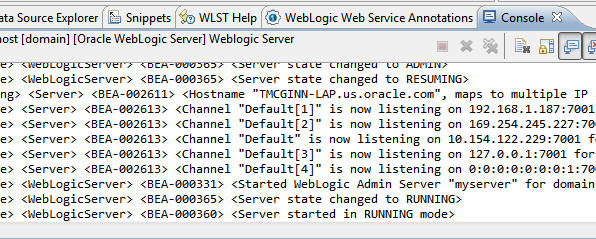
The Console panel displays progress messages.
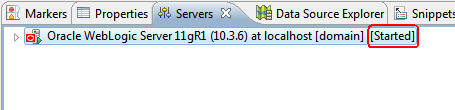
When the server has completed startup, the WebLogic Server instance shows the status of Started in the Servers panel.
(Optional) Configuring OEPE to Use a Proxy
This section is optional. If your machine is behind a firewall or inside a corporate network, you must configure OEPE to communicate with the Internet through a proxy.
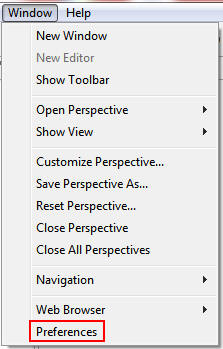
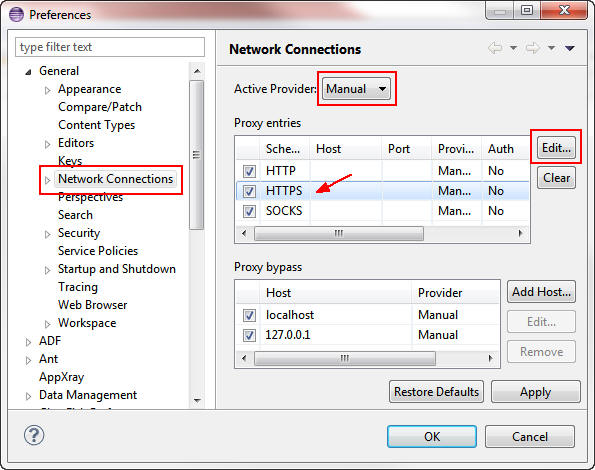
Select Window > Preferences.
In the Preferences dialog box, perform the following steps:
a. Expand General.
b. Select Network Connections.
c. Select Manual as the active provider.
d. Select HTTPS.
e. Click Edit.
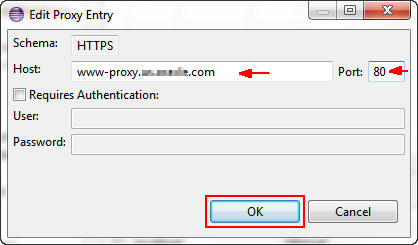
In the Edit Proxy Entry dialog box, enter your proxy host
and port number and click OK.
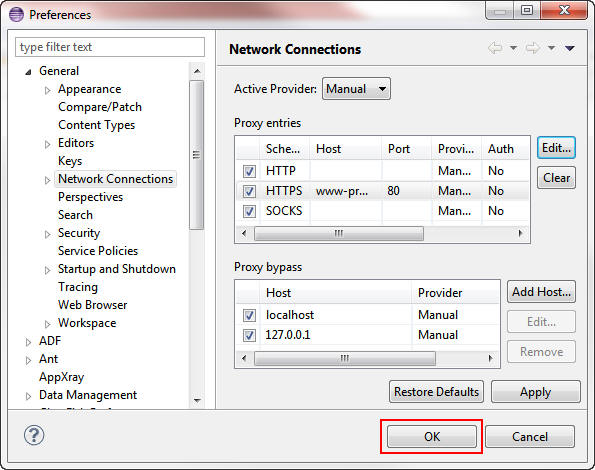
In the Preferences dialog box, click OK.
Adding an Oracle Java Cloud Service Instance to OEPE
In this section, you add your Oracle Java Cloud Service
instance to OEPE.
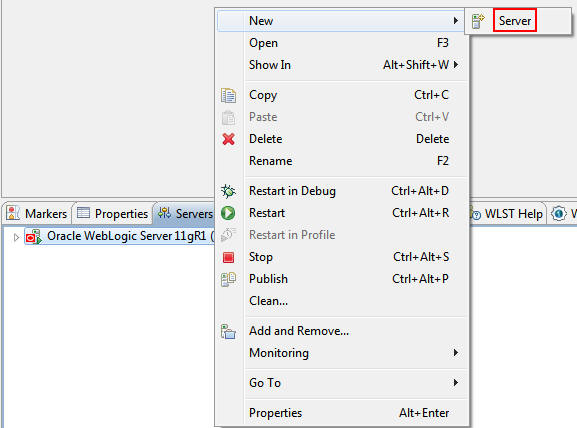
Right-click in the Servers panel and select New >
Server to open the New Server Wizard.
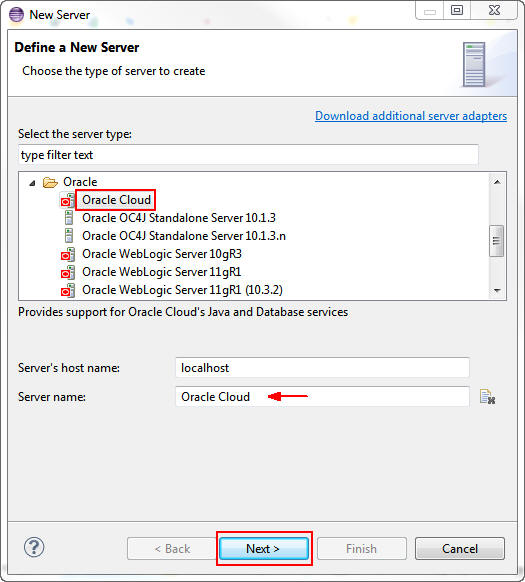
On the “Choose the type of server to create” page, perform the following steps:
a. Select Oracle Cloud.
b. Enter Oracle Cloud as the server name.
c. Click Next.
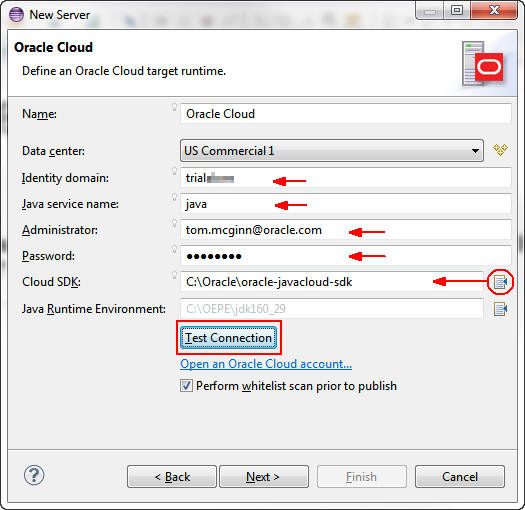
On the "Define an Oracle Cloud target runtime" page, perform the following steps:
a. Select the data center of your Oracle Java Cloud Service instance.
b. Enter the identity domain name provided in your Oracle Cloud trial account.
c. Enter java as the Java service name.
d. Enter your Oracle Cloud administrator user name.
e. Enter your Oracle Cloud administrator password.
f. Browse to the location where you installed the SDK.
g. Click Test Connection.
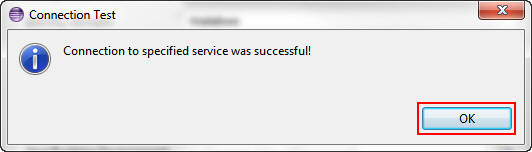
If you entered the data correctly, the Connection Test dialog box indicates that the connection was successful.
Click OK to close the Connection Test dialog box.
Click Next.
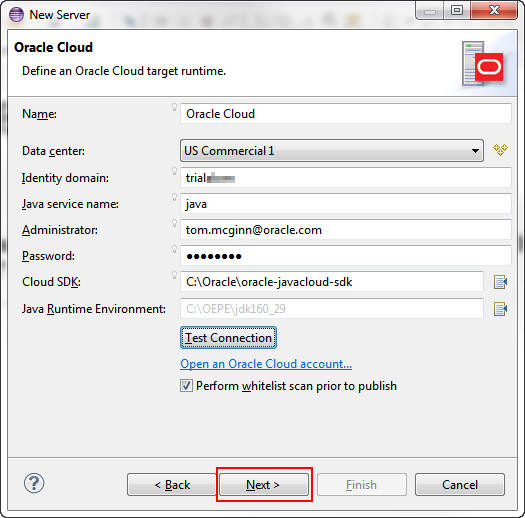
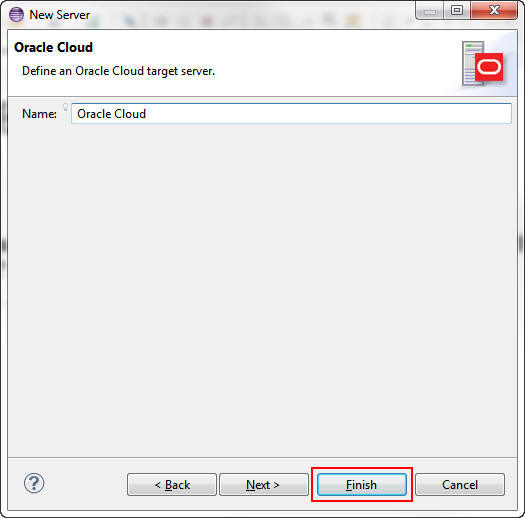
On the "Define an Oracle Cloud target server" page, click Finish.
In the Secure Storage dialog box, click No.

Deploying and Running the Sample Application Locally
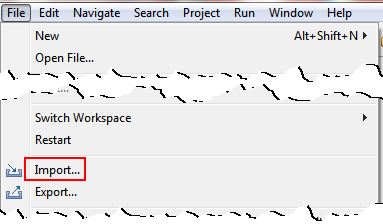
Select File > Import.
In the Import dialog box, perform the following steps:
a. Expand General.
b. Select Existing Projects into Workspace.
c. Click Next.

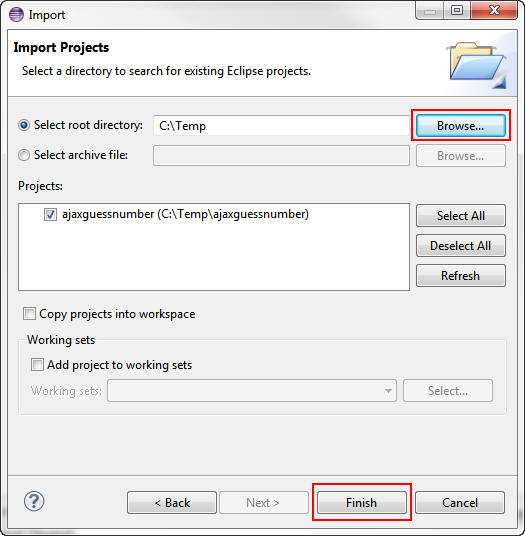
On the “Select a directory to search for existing Eclipse projects” screen, perform the following steps:
a. Browse to the directory where you unzipped the
ajaxguessnumber.zip file.
b. Select the ajaxguessnumber project. (If it is
the only project in the directory, it is selected by
default.)
c. Click Finish.
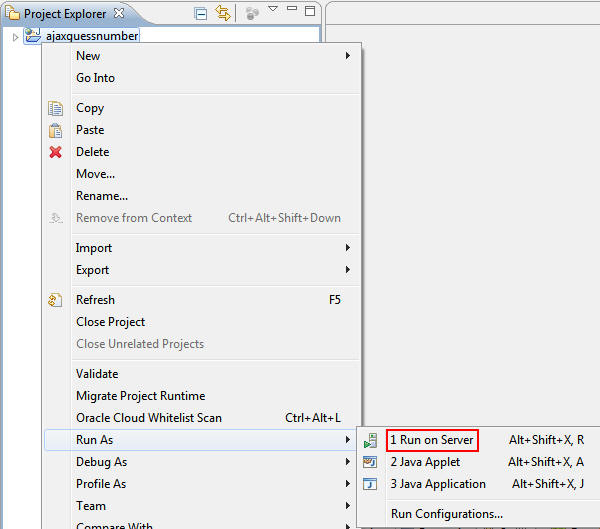
In the Project Explorer, right-click the ajaxguessnumber
project folder and select Run As > Run On
Server.
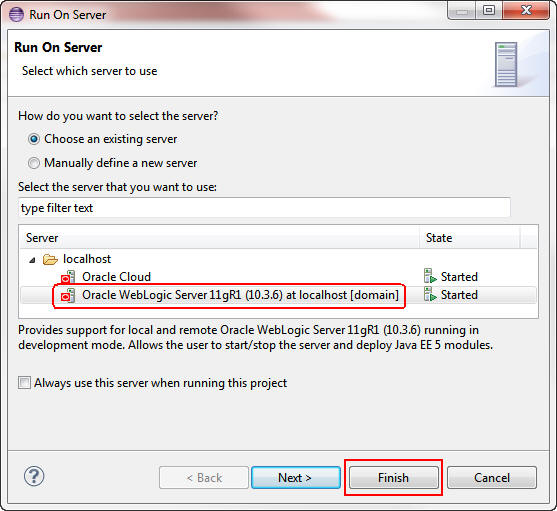
In the Run On Server dialog box, select Oracle WebLogic
Server 11gR1 and click Finish.
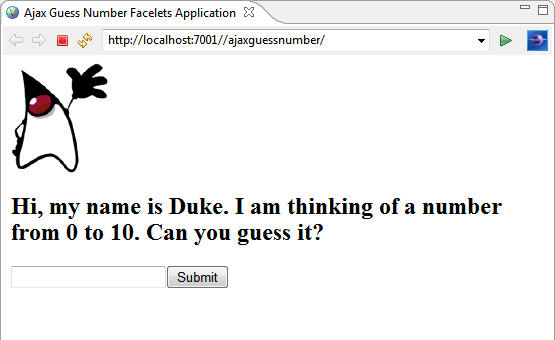
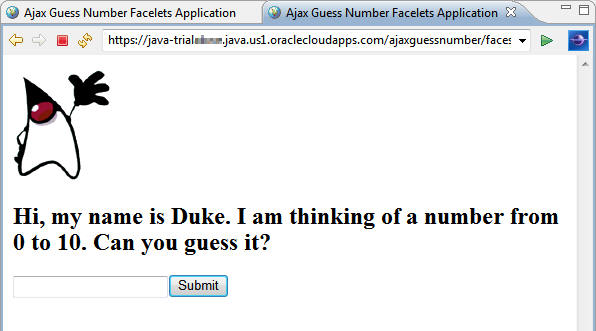
The application opens in the browser built into OEPE.
Click the Console tab to see the output of the
ajaxguessnumber project.
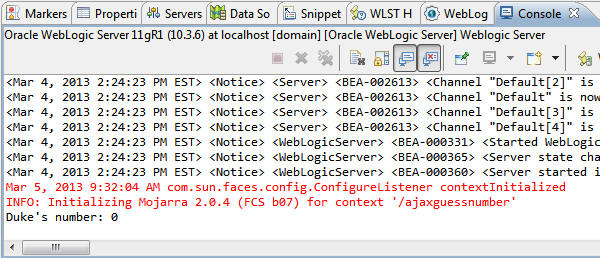
Note: The number is randomly generated.
Deploying the Sample Application to Your Oracle Cloud
Instance
In this section, you deploy the ajaxguessnumber project to your Oracle Cloud instance.
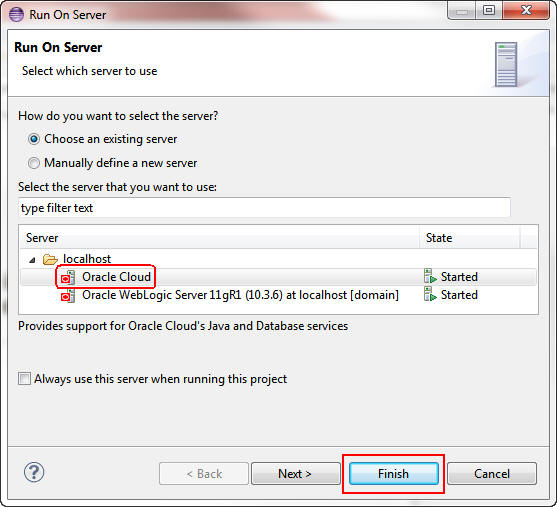
In the Project Explorer, right-click the ajaxguessnumber project folder and select Run As > Run On Server.

In the Run On Server dialog box, select Oracle Cloud
as the server and click Finish.
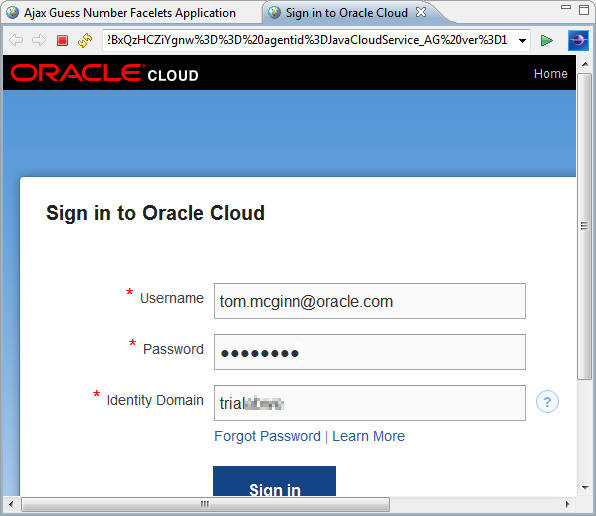
The lower-left corner of the OEPE IDE indicates the progress of the deployment. The application opens in the default browser built into OEPE, but you must first sign in to your Oracle Cloud account.

Enter your user name, password, and identity domain and click Sign in.
The application opens in the same browser window.
Monitoring Your Oracle Java Cloud Service from OEPE
Through OEPE, you can monitor your Oracle Java Cloud Service.
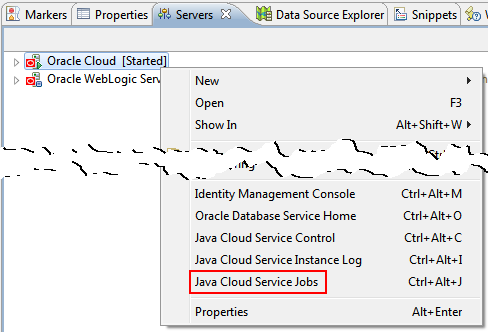
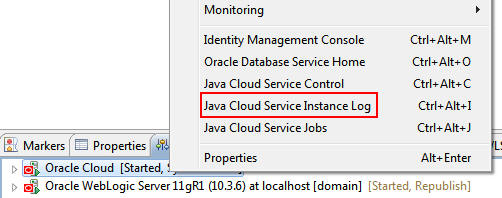
In the Servers panel, right-click your Oracle Cloud server
and select Java Cloud Service Jobs.
Select a job to load the detailed logs for this job.

Expand deploy to see the detailed results of this
application deployment.
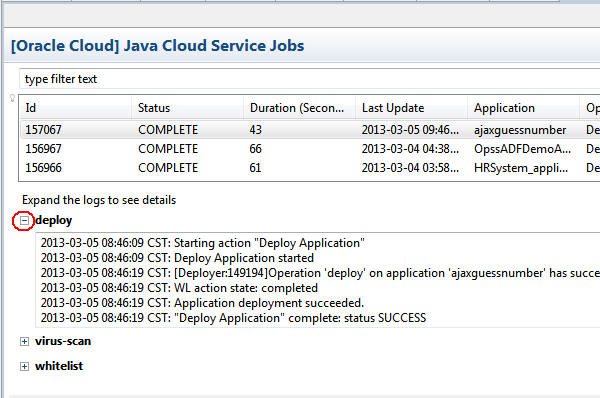
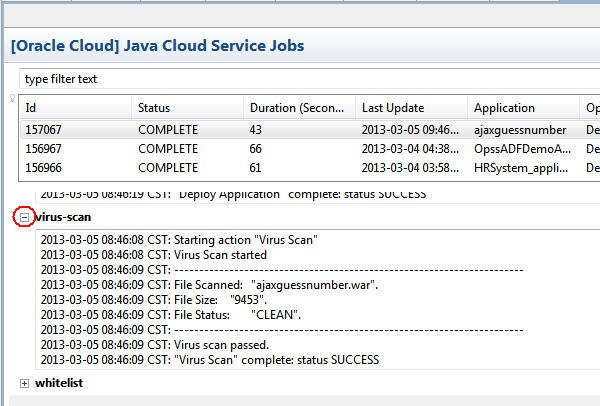
Expand virus-scan to see the detailed results of
the virus-scan test for this application.
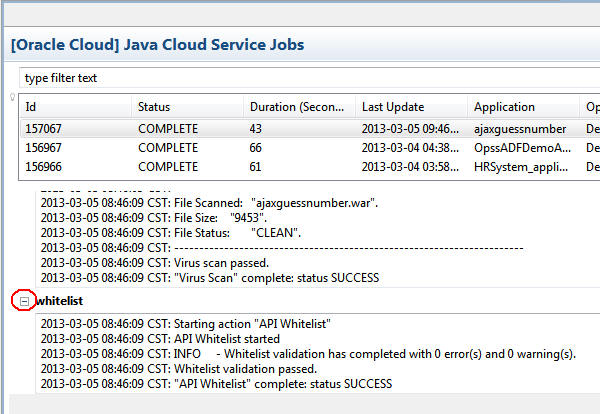
Expand whitelist to see the detailed results of
the white-list test for this application.
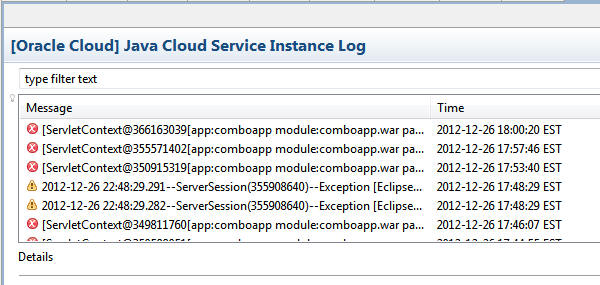
In the Servers panel, right-click your Oracle Cloud Server and select Java Cloud Service Instance Log.
All errors and warnings generated by the Oracle Java Cloud
Service are displayed in the instance log. They are ordered
by the event time stamp.
Summary
- Add a local instance of WebLogic Server 11g to OEPE
- Configure OEPE to use a proxy host
- Add your Oracle Java Cloud Service to OEPE
- Deploy a sample application locally to your WebLogic Server instance and remotely to your Oracle Java Cloud Service
- Use OEPE tools to access your Oracle Java Cloud Service job
and instance logs
- Oracle Cloud documentation
- Oracle
Enterprise Pack for Eclipse User's Guide
- WebLogic
Server 11g documentation
- To learn more about Oracle
Cloud, refer to additional OBEs in the Oracle Learning Library
- Lead Curriculum Developer: Tom McGinn
In this tutorial, you learned how to:
Resources
Credits
To help navigate this Oracle by Example, note the following:
- Hiding Header Buttons:
- Click the Title to hide the buttons in the header. To show the buttons again, simply click the Title again.
- Topic List Button:
- A list of all the topics. Click one of the topics to navigate to that section.
- Expand/Collapse All Topics:
- To show/hide all the detail for all the sections. By default, all topics are collapsed
- Show/Hide All Images:
- To show/hide all the screenshots. By default, all images are displayed.
- Print:
- To print the content. The content currently displayed or hidden will be printed.
To navigate to a particular section in this tutorial, select the topic from the list.