 Read more...
Oracle Application Development Framework (Oracle ADF) is an end-to-end Java EE framework that simplifies application development by providing out of the box infrastructure services and a visual and declarative development experience.
Oracle ADF minimizes the need to write code that implements the application‘s infrastructure allowing the developers to focus on the features of the actual application. Oracle ADF provides these infrastructure implementations as part of the framework.
Oracle ADF implements the Model-View-Controller (MVC) design pattern and offers an integrated solution that covers all layers of the MVC architecture. Oracle ADF provides object-relational mapping, data persistence, a reusable controller layer, a rich web user interface framework, data binding to UI components, security, and customization.
| Before you begin |
|---|
Before starting this tutorial you should:
|
| Purpose | Duration | Application |
|---|---|---|
| This tutorial shows you how to work with ADF using the Eclipse environment. To see the complete application you will create, click the Download button to download a zip of the finished application, and unzip it to your OEPE working folder. | 3 hours |  |
 Read more...
do the following before you run the application:
-
Follow all the instructions in Before You Begin.
-
Unzip the application into your workspace directory, for example C;\MyOEPEWorkspace. Start Oracle Enterprise Pack for Eclipse. Launch OEPE (if you are unsure how, see Step 1 below). Select File > Import from the Main OEPE menu. In the Import dialog, select General > Existing Projects into Workspace and click Next. Use the Browse button to find and select the workspace directory where you unzipped the application file. The 3 projects will be displayed in the Projects list. Click Finish to import the projects.
To start Oracle Enterprise Pack for Eclipse (OEPE), complete the following steps:
-
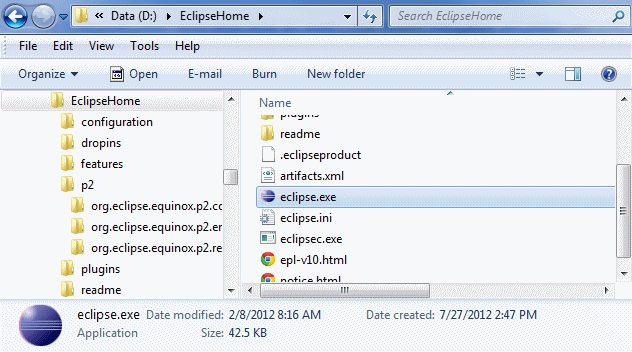
To start Eclipse, double-click the eclipse.exe file found in the ECLIPSE_HOME directory where you installed Eclipse.
-
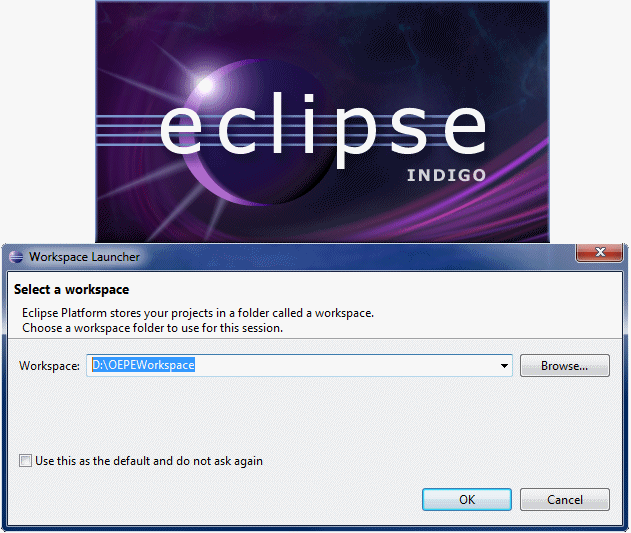
Eclipse starts loading and a Workspace Launcher dialog opens. Specify a Workspace folder for your work. In this sample we use D:/OepeWorkspace. Click OK to continue.
-
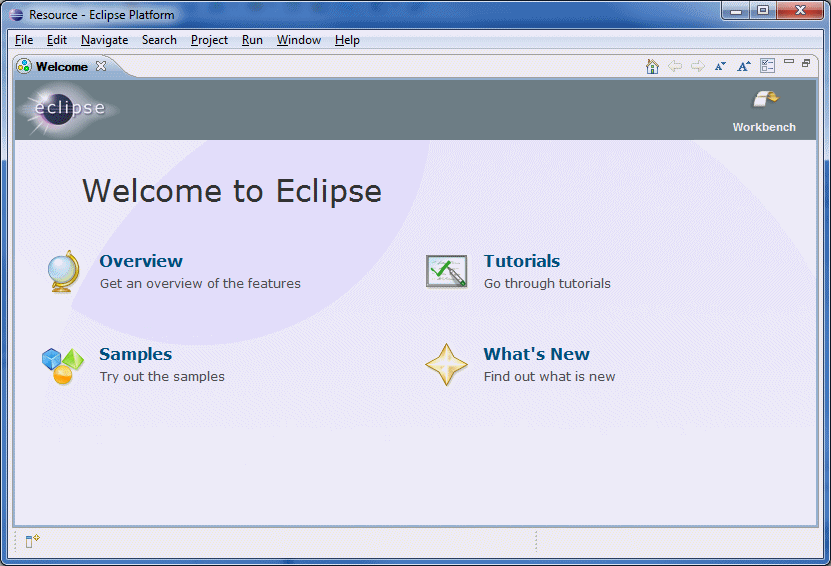
The Eclipse Welcome screen opens. On the Welcome screen, hover your mouse over each icon to review the possible options. You can take a tutorial, look at samples, get an overview of the Eclipse features, or take a look at what's new.
-
To start working, click the Workbench icon.

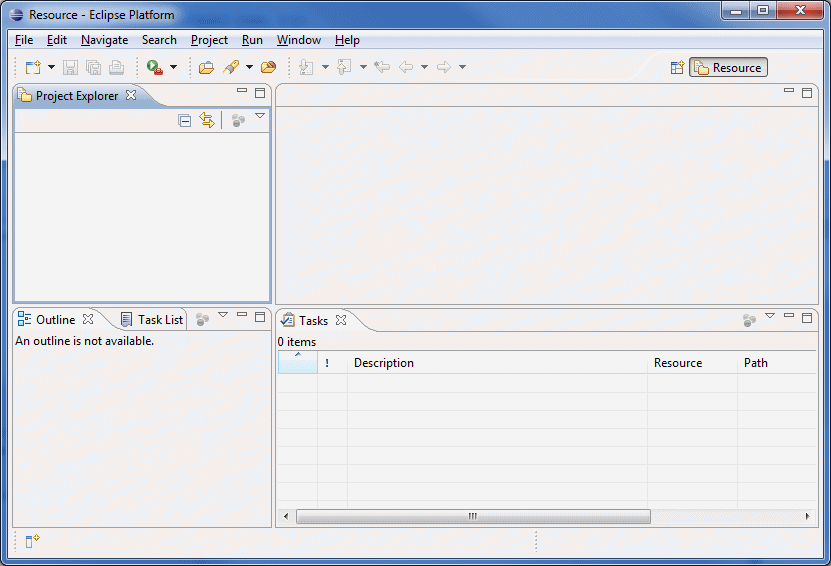
The Eclipse IDE opens.
 Read more...
The Workbench aims to achieve seamless tool integration by providing a common paradigm for the creation, management, and navigation of workspace resources. A Workbench window offers one or more perspectives. A perspective contains editors and views, such as the Project Explorer.
Multiple Workbench windows can be opened simultaneously.
Initially, in the first Workbench window that is opened, the Java perspective is displayed.
To set the Workbench to your development needs, you use one of the predefined perspectives. A perspective defines the initial set of views and the layout of the Workbench window. Within the window, each perspective shares the same set of editors.
-
Click the Open Perspective icon
 to select the appropriate perspective for your development needs.
 -
Select Java EE from the drop-down list.
-
Notice that the Java EE perspective is now displayed.
-
Notice that the IDE updates to a new set of views and editors that are best suited to performing Java EE tasks.
-
Review each of the tabs in the bottom section of the IDE. Later in the tutorial, you get a chance to explore the content of some of the tabs.
-
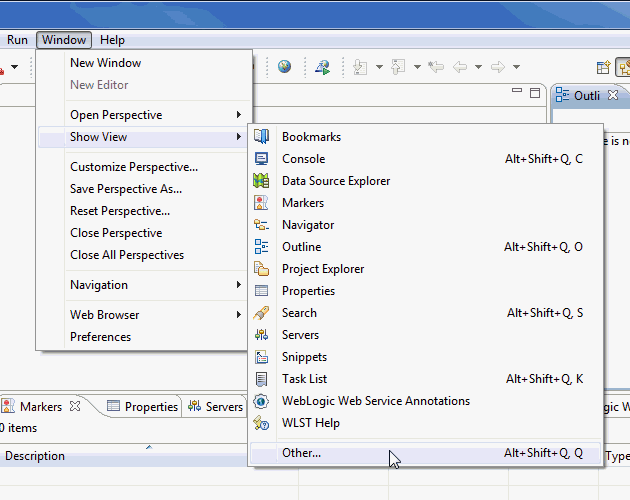
From the main menu, select Window > Show View to open or reopen specific views. Select Other.
-
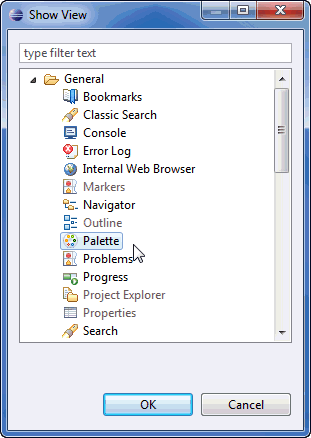
In the Show View dialog box, expand the General node. Notice that views or editors that are already open are grayed out. Select the Palette view and click OK.
-
In the bottom pane, the Palette tab is added to your current environment. You can customize your environment by showing any views that you require.


 Read more...
Perspectives can be opened either in the same (existing) Workbench window, which hides the current perspective, or in a new Workbench window.
Perspectives define visible action sets, which you can change to customize a perspective.
You can save a perspective that you build in this manner, making your own custom perspective that you can open again later.
The Workbench displays the Resource perspective by default. This perspective shows views that are relevant to resource management.


When developing your application, you need to have an application server defined so that you can deploy and run your application for testing purposes. You can deploy an ADF application to any supported application server, however this tutorial requires Oracle Weblogic Application Server.
-
Click the Servers tab and then click the new server wizard link. This link opens the wizard that you use to define the server context for running, testing, and deploying the application. (You can also open the wizard by right-clicking inside of the Servers tab and selecting New > Server from the context menu.)
-
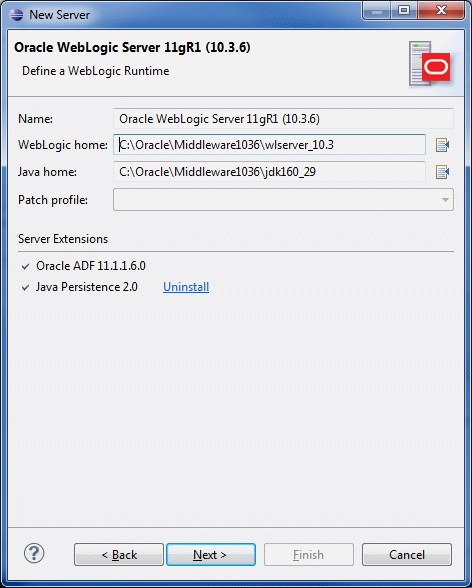
In the New Server Wizard, expand the Oracle node and select Oracle WebLogic Server 11gR1 (10.3.6). Type localhost as the server's host name and click Next.
-
Click the Browse icon
 next to the WebLogic home field.
 -
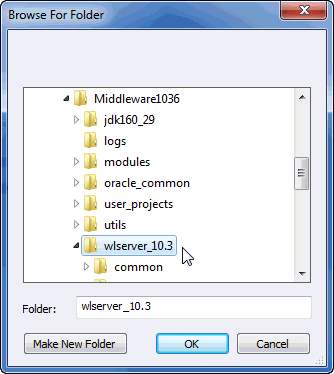
In the Browse For Folder dialog box, select your WLS 10.3.6 home folder (for example, wlserver_10.3) and click OK.
-
If Java Persistence 2.0 is not already installed, under Server Extensions, click the Install link. Click Next.
-
In the Configuration area, next to the Domain directory field, click the Create icon
 and select Create Domain from the pop-up list.
-
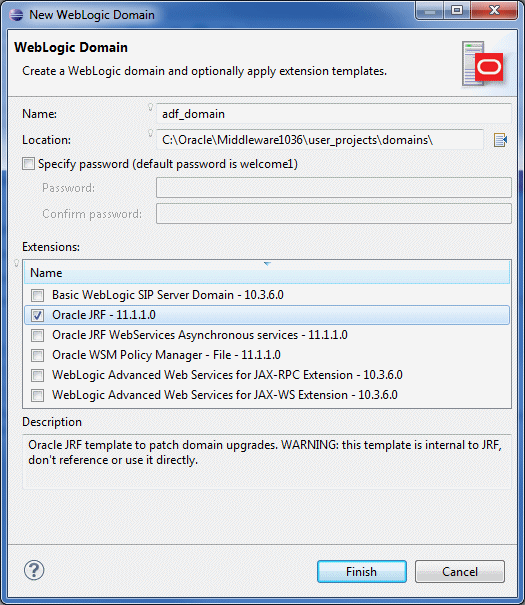
In the New WebLogic Domain dialog box, type adf_domain as the Name and select the Oracle JRF - 11.1.1.0 extension. Click Finish.
-
Click Finish again to create the new server.
-
The status for the new WebLogic Server is displayed in the Servers tab. (Notice that the server is currently stopped.)




This tutorial uses a database with the standard Oracle HR schema. In this tutorial you create objects that are based on the HR schema. The following steps describe how to create the design-time connection to the database. Later, when you deploy the application, you define a JDBC connection that is deployed with the application.
-
Click the Data Source Explorer tab.
-
Right-click the Database Connections node and select New.
-
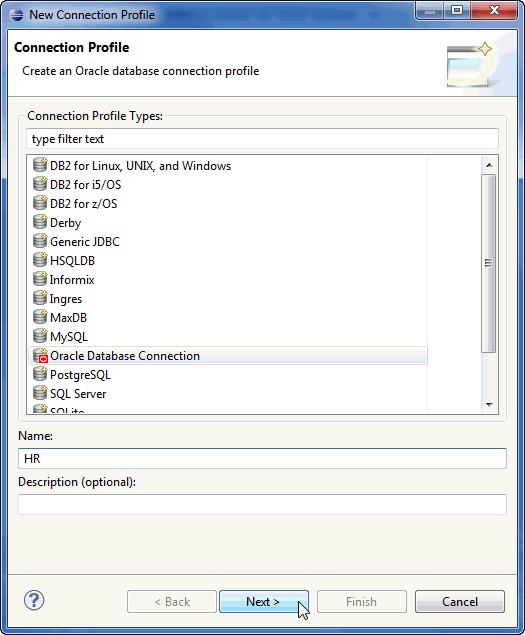
In the New Connection Profile Wizard, under Connection Profile Types, select Oracle Database Connection. Type HR as the name for the connection and click Next.
-
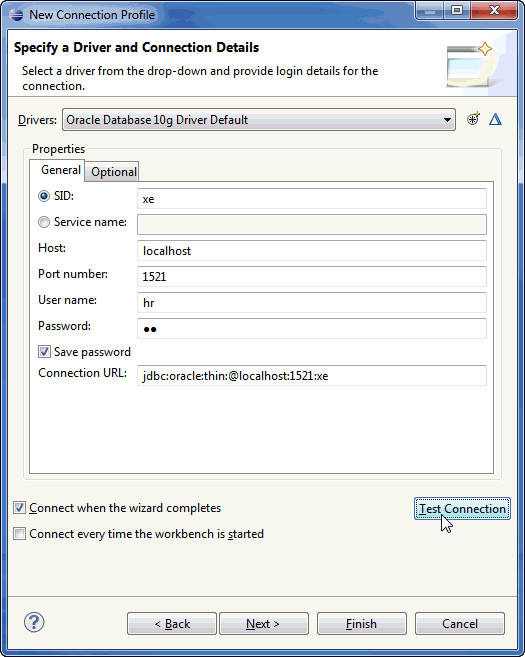
In the Specify a Driver and Connection Details page, enter the following values:
-
Click Test Connection to validate the connection.
-
Click OK to acknowledge that the Ping test succeeded and then click Next.
-
Review the connection summary page and then click Finish.
-
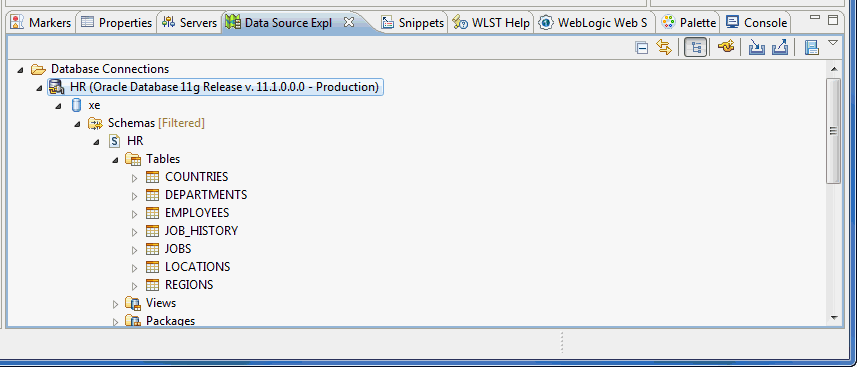
In the Data Source Explorer tab, expand the HR > XE (or your sid) > Schemas > HR > Tables nodes. You should see the following list of tables:
-
Right-click the Tables node and select Show in Schema Viewer.
-
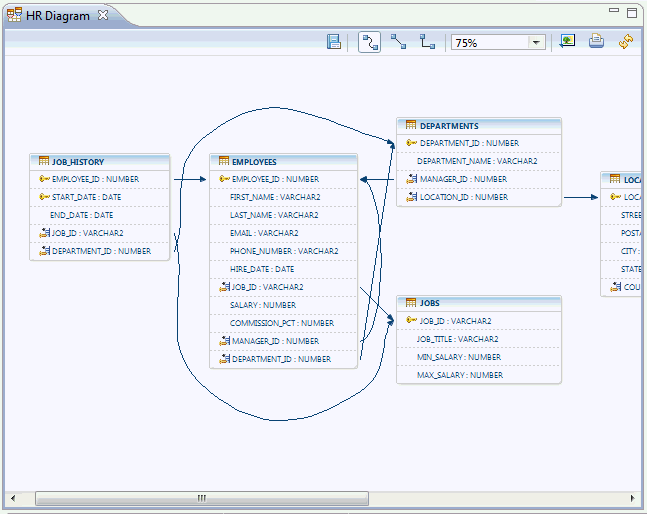
Notice that selecting this option creates a diagram of the HR schema that shows table names, column names, column types, keys, and relationships between tables.
-
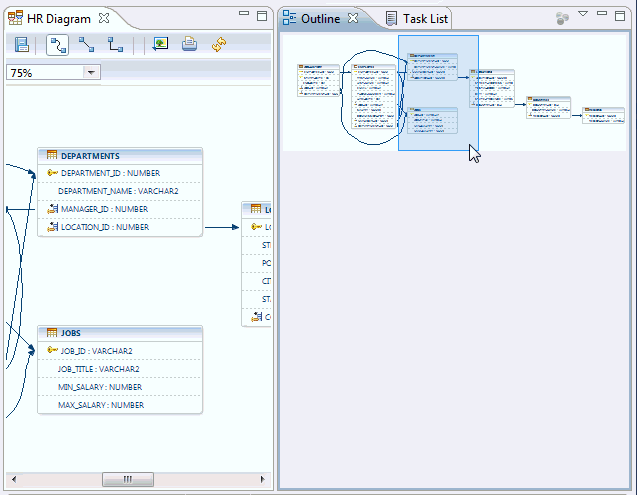
In the Outline tab (in the right pane), move the blue transparent window to display other areas of your diagram.
-
Close the HR Diagram tab.


| Property | Value |
|---|---|
| SID | XE, orcl... (the SID of your database) |
| Host | localhost (the name of your database host) |
| Port number | 1521 |
| User name | hr |
| Password | hr |
| Save password | selected |

If the connection is unsuccessful, review the connection parameters and make sure the database is up and running. Make any necessary corrections or adjustments until the Ping test is successful.




 Part 2: Building the Data Model