Before You Begin
Purpose
Learn how to build an intelligent bot with little coding.
Time to Complete
About 40 minutes
Background
Oracle Intelligent Bots (Bots) provides a set of sample bots that you can reference when you build your own. For this OBE, you'll be deconstructing and then rebuilding one of these, the PizzaBot.
What do you need?
-
An OMCe user account. Contact your administrator if you don't have one.
-
The sample bots need to be deployed to your OMCe instance. Again, contact your adminstrator.
You'll need the files in the ZIP that accompanies this tutorial. Click here to download it, then extract it to your local system.
Using the PizzaBot
The PizzaBot typifies the quick transitions that are typical for a bot. To access this bot:
-
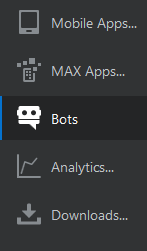
Click Mobile Apps in the left navbar and then click Bots.
-
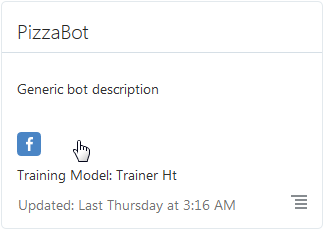
In the bots catalog, click the PizzaBot tile.
-
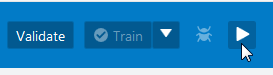
To start chatting, click Test.
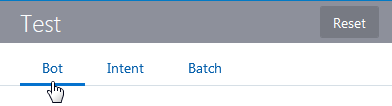
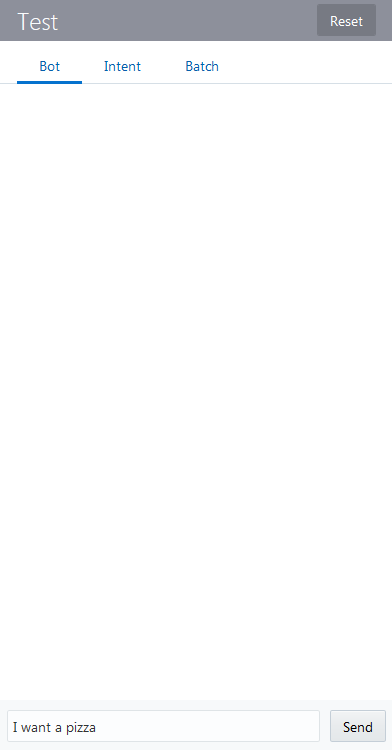
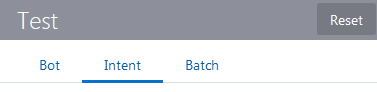
In the test window, select Bot.
-
Enter "I want a pizza" and then click Send.
-
When Pizzabot asks you for your age, enter "18" and then click Send.

-
Pick the pizza crust and size from the list options when the bot prompts you.
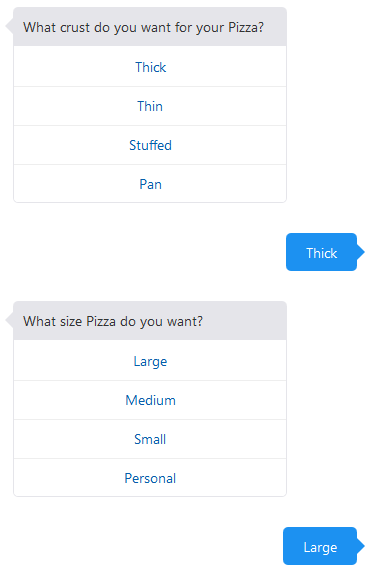
When the bot asks you for a pizza type, enter "mushroom" and then click Send.
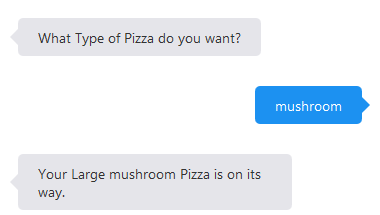
-
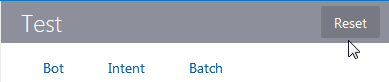
Now that you've seen the bot complete your order, click Reset to begin again.
This time, things won't go so smoothly, because you're stated age is under 18.
Enter "Can I order a pizza?" and then click Send.
-
When prompted for your age, enter "17".
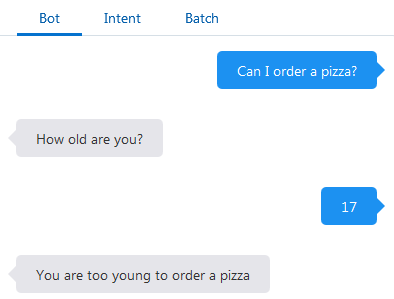
Taking a Look at How the PizzaBot Works
Before you build your own version of this bot, first get acquainted with the different pieces that make up the PizzaBot and find out about the Bot Builder along the way.
To get started:
-
If you exited the Pizzabot, click the Pizzabot tile again.
-
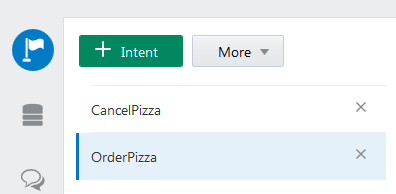
The Bot Builder opens to the intents page, which shows the two tasks that this bot performs for its users: OrderPizza and CancelPizza. You'll come back to this (and other) pages later when you build your own version of this bot.

Description of this image -
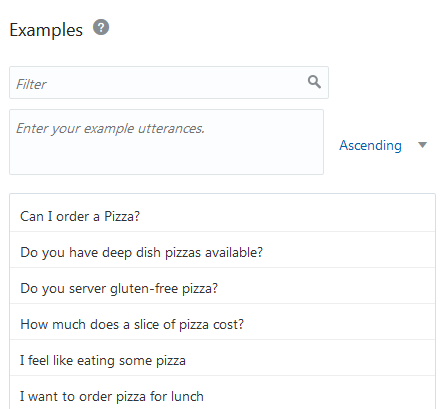
Click OrderPizza and then take a look at the Examples section of the page to see the set of sample user requests, which are also known as "utterances". Intents are comprised of groupings of these utterances, which are meant to represent typical user statements. Think of an intent as categorizing different types of user input. Your bot draws on these intents to detect what the user wants.
-
The Intent Entities section of the page displays the entities associated with these intents. Entities identify vital pieces of information from the user input. When you pair them with an intent, you give it the context it needs to complete the user request.
-
-
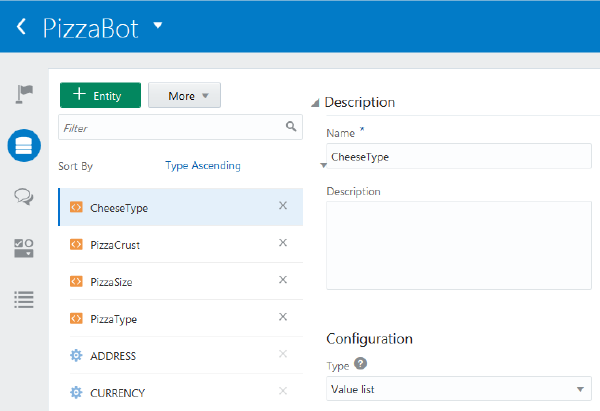
In the left navbar, click Entities. The entities page displays two types of entities: entities that are specific to this bot that describe pizza-specific concerns like CheeseType and PizzaCrust and entities that cover general topics, like time, currency, and location. CheeseType and PizzaCrust are among the custom entities created for this bot. They have little, or no, application outside of this bot, but you can use the other entities -- the built-in ones that we provide -- in any bot.
-
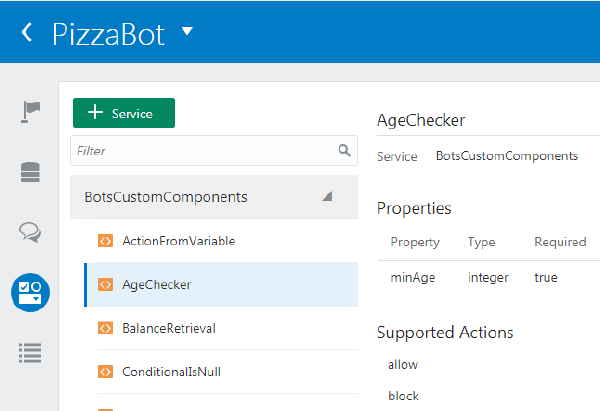
Next, open the Components page. Components are individual functions that, when integrated into your bot's dialog definition (which we'll get to in the next step) propel the bot-user dialog forward. They can perform generic bot functions like prompting input from users and outputting your bot's replies. They also perform actions that are specific to your bot as well. The Components page lists all of these bot-specific components, which are known as custom components.
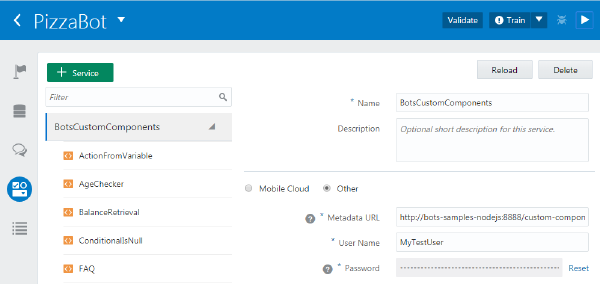
Description of this image The PizzaBot uses one of these components, AgeChecker. Its properties and actions enable it to function as the virtual gatekeeper, only allowing customers 18 years or older to continue.
Description of this image -
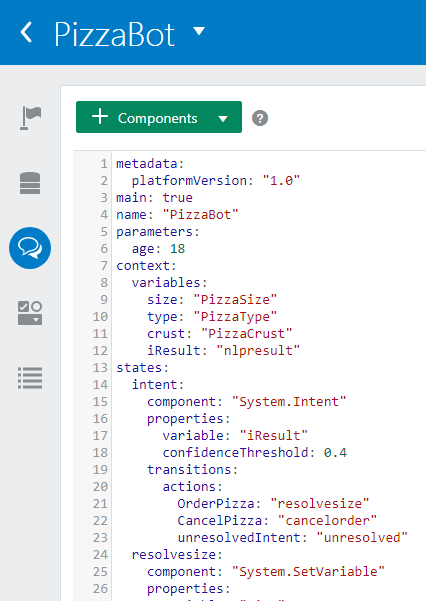
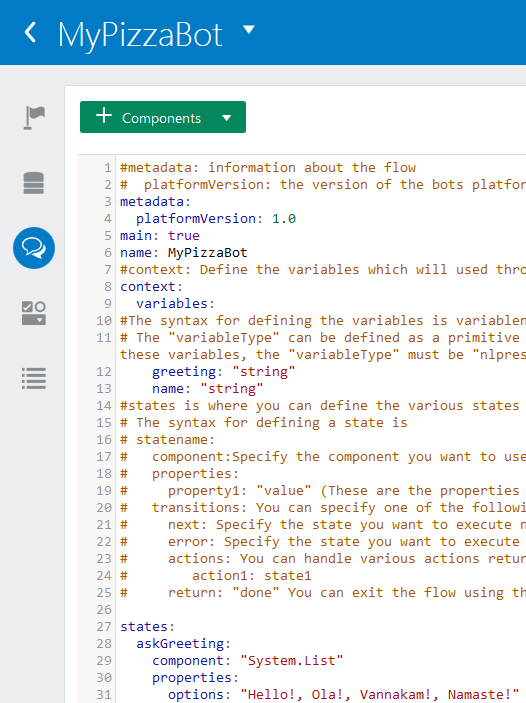
To see how the intents, entities, and components fit together, click the Flows icon in the left navbar. You define the entire interaction that your bot has with its users using our version of YAML, OBotML.
Find Out About the Dialog Flow
Later on, you'll be updating this dialog flow to give PizzaBot users another option: specifying cheese! But before you get to that point, you'll need to get acquainted with some dialog flow concepts and how they apply to the PizzaBot's dialog flow definition.
Dialog flows have two main parts: the context and the states. You define the variables that are used throughout the dialog flow (that is, through the entire user-bot interaction) in the context section. You can define these variables to hold literals, primitives, or the values extracted from from the user input by the entities.The variables defined for the Pizzabot do just that -- they are defined by the Pizzabot entities that detect the user's preferences from the input text. There's another variable, iResult, that's also defined by an entity called nlpresult. Unlike the other entities in the context declaration, nlpresult is not specific to the PizzaBot. Instead, it's used widely -- you'll see it in almost every reference bot's dialog flow. As its name implies ("nlp" stands for Natural Language Processing), this entity
holds the intent that's resolved from the user input. You would probably define a variable for this entity in every flow you write.

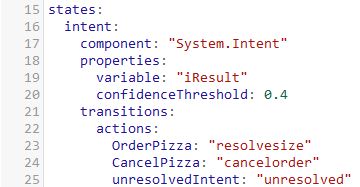
The states section follows the variable definitions. States manage the logic within the bot flow. Each state definition is built around a component, which executes some function. At runtime, the Dialog Engine traverses the state nodes from the top-down and executes the components. For the Pizzabot, the first state that the Dialog Engine encounters is called Intent. Like nlpresult, Intent is common to most bot dialog definitions. This state initializes the dialog flow using the intent that's held by the iResult variable to trigger a subsequent state. For the PizzaBot, the possible entry points reflect the two intents already defined for it (OrderPizza: "resolvesize" and CancelPizza: "cancelorder")There's a third outcome, though it's not specific to any PizzaBot intent: unreslovedIntent: "unresolved". This handles the user requests and statements that can't be resolved to either of the other intents. When this happens, the bot outputs "I do not understand. What do you want to do?" in the chat window.
Build Your Own PizzaBot
With the basics out of the way, you're reading to create your own version of the PizzaBot. You can build it the ground up by following these steps in this section, or you can clone the Pizzabot by choosing Clone from the tile menu.
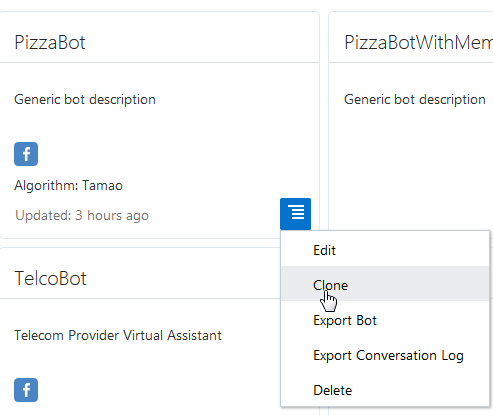
If you clone the PizzaBot, you can skip ahead to Building a Robust Corpus. Keep in mind that if you clone the bot, you may need to connect to the component service that hosts BotsCustomComponents service, which provides the PizzaBot with the AgeChecker component. See Modifying the Dialog.
To get the end-to-end experience, click here:
-
Go back to the catalog.
-
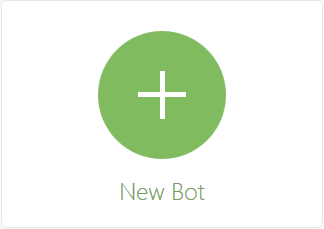
Click New Bot.
-
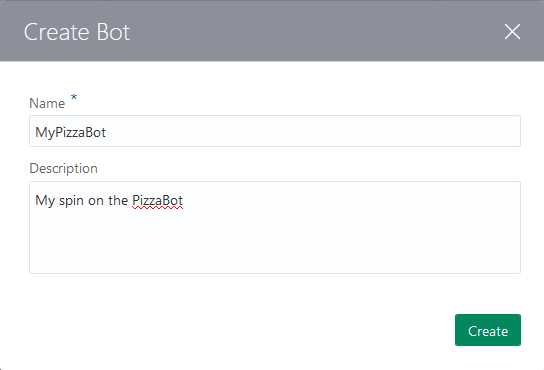
Complete the dialog by entering a name for your pizza bot and optionally, a description. Click Create.
Parsing User Input with Natural Language Processing
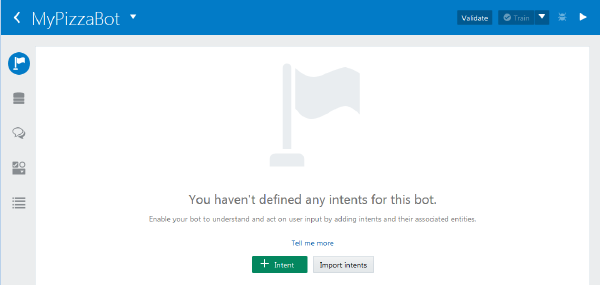
After you click Create, the Bot Builder opens to the Intents page. Here's where you begin to express your use case (that is, the pizzabot-customer activity flow) in terms of the concepts that support Natural Language Processing (NLP): intents and entities.
Adding the Intents
For the Pizzabot, which, as its name implies, handles orders, there are the two intents that you saw earlier: OrderPizza and CancelPizza.
To create these intents:
First, click Add Intent.

By default, Bots calls this first intent Intent1. Rename it OrderPizza.
-
Add these three utterances in the Examples section:
-
can I order a Pizza
I feel like eating a pizza
I want to order a pizza
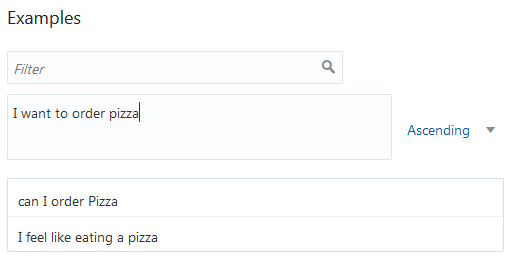
The Bot builder adds each statement after click Enter or click outside of the field.
Tip: You don't need to end your statements with question marks (?) or periods (.).
-
Repeat these steps to add the CancelOrder intent. Add the following utterances for this intent:
I don't want the pizza anymore
-
I want to cancel my pizza order

Building Your Bot's Cognition
You've now provided the basic ingredients that allow your bot to recognize user input for ordering a pizza, but right now, your bot has no cognition. It can't understand any user input.
-
To enable it to use the intents, you need to train one or more of the models. Click Train.

The Train button deactivates after training completes (which is usually less than a second when you train the default model).

-
To gauge how accurately the model resolves user input to an intent, click Test to open the test window.
-
Click Intents in the test window.
-
Enter one of the phrases that you used to define the intent and then click Send.
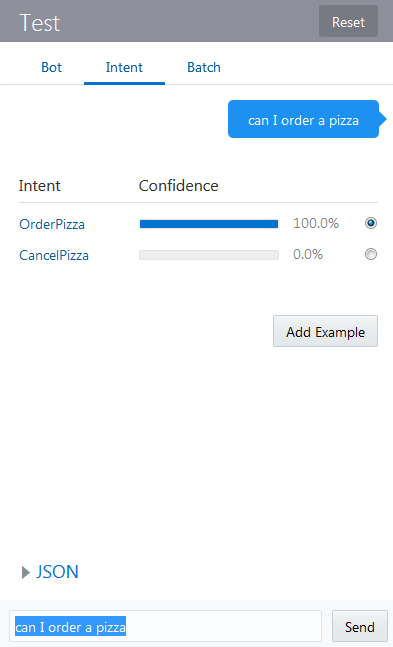
Description of this image The model resolves these phrases with 100% accuracy (as long as you stick to your training corpus, that is).
Building a Robust Training Corpus
While the model resolves with perfect accuracy for phrases that you've included in your training corpus, the odds become less certain when you enter a variant of one of these phrases, such as "order a pizza."
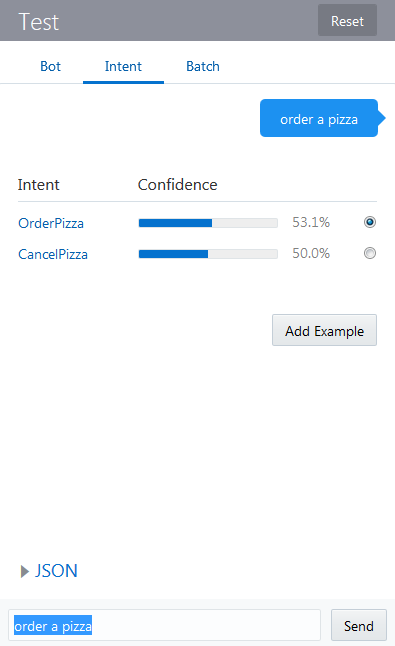
To improve the intent resolution when your users go "off-script", you need to expand your training corpus, both in terms of its volume and diversity. Typically, you should create about 12 to 24 sample phrases for each intent that can include common expressions, colloquialisms, and even misspellings.
| Intents | Contrasting Sentences | Unusual Sentence Structure | Alternate words | Common Misspellings | Intent-Specific Words and Phrases | OrderPizza | I want to order a pizza |
|
I want a pie | I want a piazza | Give me a pizza |
|---|---|---|---|---|---|
| CancelOrder | I do not want to order a pizza | I want not this pizza | forget this pizza. | I do not want this pizza |
-
While you can add the utterances individually here in the Bot Builder, you can also define them in a CSV file that you later import. To save time, you're going to populate your corpus by following the latter approach using a file called
MyPizzaBot-corpus.csvthat's included in the accompanying ZIP.-
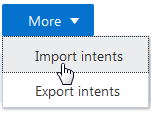
Click More and then choose Import intents.
-
Browse for, and select
MyPizzaBot-corpus.csvto populate the sample phrases.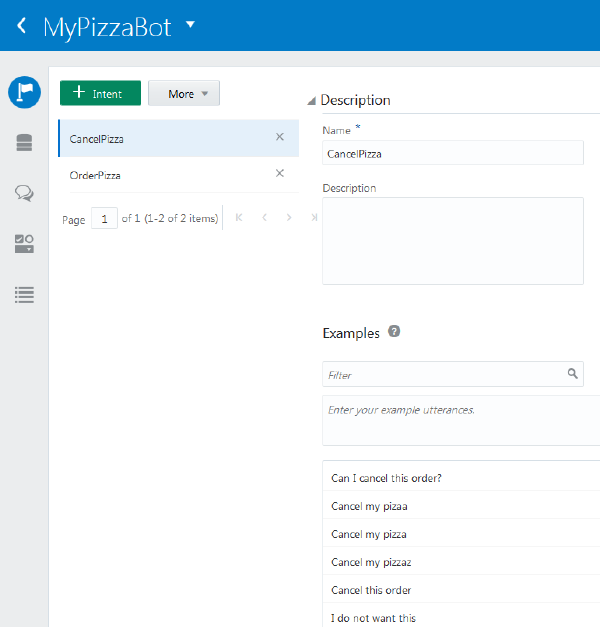
-
Whenever you add a sample utterance, you need to retrain the model, so click Train.
-
-
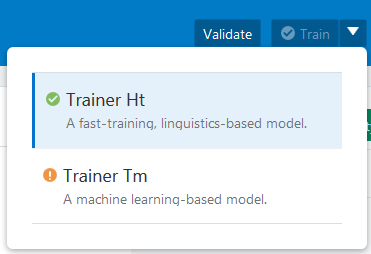
So far, you've trained the default model, which is rules-based. To allow your bot to predict user input which falls outside of your training corpus, like "Forget this pizza!", you need to train another model called Trainer Tm, which uses a different approach to machine-based learning. To train this model:
-
Click the menu and then choose Trainer Tm.
-
Click Train.
-
Adding the Entities
Now, its time to add entities, which help the intent fulfill a user request by providing vital piece of information. As you saw in the original PizzaBot, the PizzaType, PizzaSize, and PizzaCrust entities enable the OrderPizza intent to complete an order. This step shows you different ways of adding entities: you can populate them by uploading a CSV file like you did when you added the intents, and you can also use the Bot Builder to add them on your own. First, let's import the entities and then find out more about them. If you cloned the bot, then you already have these entities.
To import the entities:
-
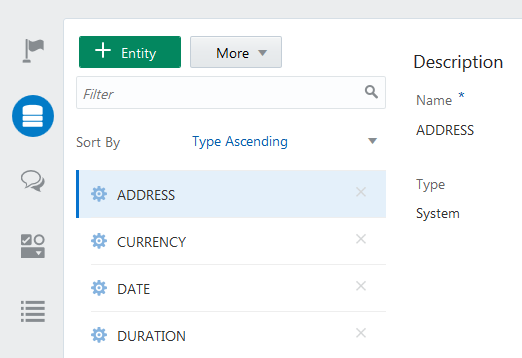
Click Entities in the left navbar. Right now, the Entities page lists only the built-in (or system) entities that we provide. They extract generic information from the user input like addresses, dates, and time.
-
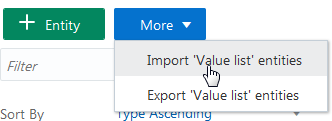
Click More and then choose Import 'Value list' entities.
-
Browse to the extracted ZIP file, and then open the
MyPizzaBot-Entities.csvfile. You've populated your bot with three new entities: PizzaCrust, PizzaType, and PizzaSize. These are are known as value list entities. By clicking one, you can see that it's comprised of a set of predetermined values, like thick, thin, stuffed, and pan for PizzaCrust. When you have a short list, you can expose these as a list of values, or as a value expression, as you'll see later on.
-
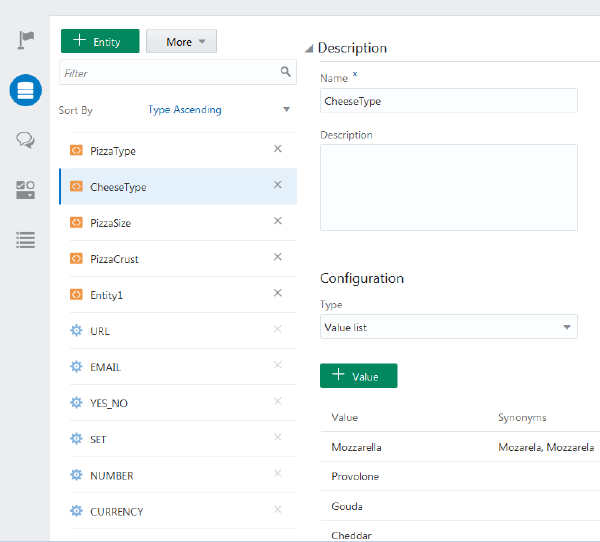
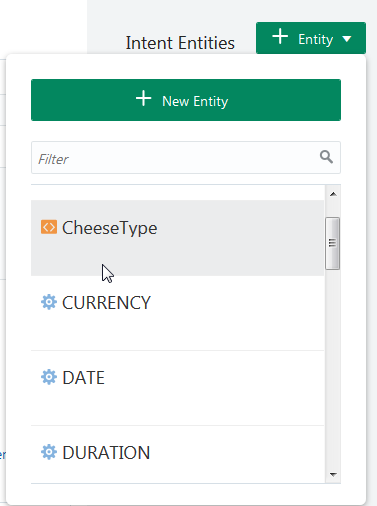
Next, add a new list value entity, CheeseType:
-
Click Add Entity.

-
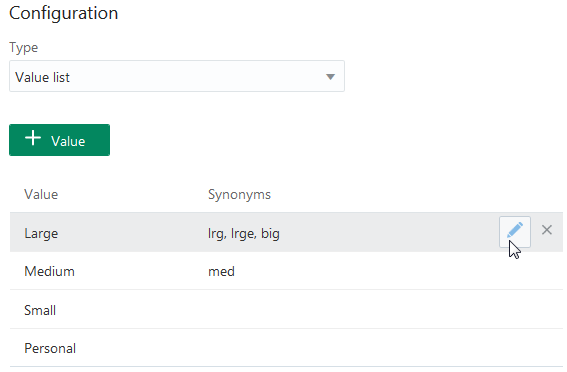
Rename the entity "CheeseType". In the Configuration section, accept Value list (the default option)

- Next, add the values themselves along with some synonyms (or in this case, common misspellings) that optimize the entity's ability to tag words from sloppy user input. To do this, click Add Value to open the Create Value dialog and then complete this dialog for each of the following values.
Value Synonyms Mozzarella Mozarela, Mozzarela Provolone Gouda Cheddar 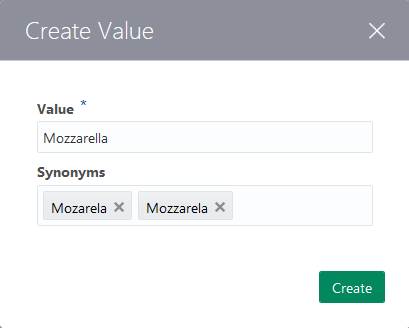
When you're done, the Entities page should look like this:
-
-
Here's an optional step: To make the confirmation text look a bit better, change the letter case for the PizzaSize values from uppercase to lowercase:
-
Select the PizzaSize entity.
-
Select the Large value and then click Edit. While you're here, take a look at the synonyms that allow the entity to match free-form user input.
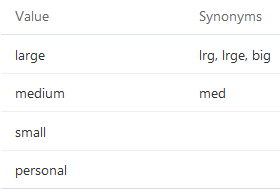
Using the Editing Value dialog, change the letter casing and then click Update.
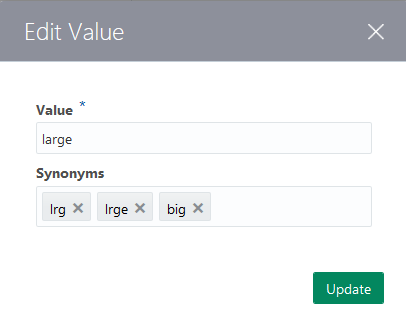
When you're done, the values should look like this:
-
- The OrderPizza intent only needs these entities to complete the user requests. it doesn't use any of the built-in entities, so you don't want intent to waste time by iterating through the ones that it doesn't need. Instead, you can limit it to just the custom entities that you've added by doing the following:
-
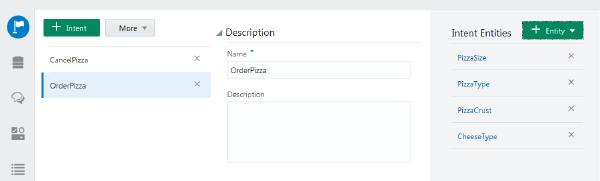
Click Intents in the left navbar and then select OrderPizza (if it's not already selected).
-
Click Add Entity.

Tip: If the test window is still open, close it by clicking Test.
-
Scroll through the list, and select CheeseType from the list.
-
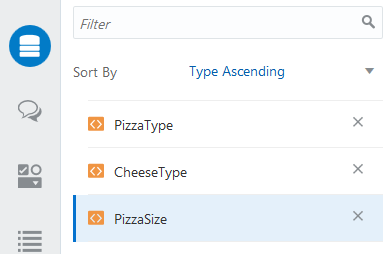
Repeat this for PizzaSize, PizzaType, and PizzaCrust. When you're done, the page should look like this:
-
Modifying the Dialog
You write the dialog in our own version of OBotML. It's divided into two main sections: one where you declare the variables and another where you define the states.
To create that dialog flow:
-
Click Dialog Flow in the left navbar.

-
If you started this bot from scratch (meaning that you didn't clone it), then the dialog flow definition is the Hello bot that echoes your user input. We're going to start over, so delete everything.
-
Copy in the following dialog flow definition into the Dialog screen. You can copy it from here or from the
PizzaBot-dialog_flow.txtfile that's included in the accompanying ZIP file.metadata: platformVersion: "1.0" main: true name: "MyPizzaBot" parameters: age: 18 context: variables: size: "PizzaSize" type: "PizzaType" crust: "PizzaCrust" iResult: "nlpresult" states: intent: component: "System.Intent" properties: variable: "iResult" confidenceThreshold: 0.4 transitions: actions: OrderPizza: "resolvesize" CancelPizza: "cancelorder" Intent.None: "unresolved" resolvesize: component: "System.SetVariable" properties: variable: "size" value: "${iResult.value.entityMatches['PizzaSize'][0]}" transitions: {} resolvecrust: component: "System.SetVariable" properties: variable: "crust" value: "${iResult.value.entityMatches['PizzaCrust'][0]}" transitions: {} resolvetype: component: "System.SetVariable" properties: variable: "type" value: "${iResult.value.entityMatches['PizzaType'][0]}" transitions: {} askage: component: "System.Output" properties: text: "How old are you?" transitions: {} checkage: component: "AgeChecker" properties: minAge: 18 transitions: actions: allow: "crust" block: "underage" crust: component: "System.List" properties: options: "Thick,Thin,Stuffed,Pan" prompt: "What crust do you want for your Pizza?" variable: "crust" transitions: {} size: component: "System.List" properties: options: "${size.type.enumValues}" prompt: "What size Pizza do you want?" variable: "size" transitions: {} type: component: "System.Text" properties: prompt: "What Type of Pizza do you want?" variable: "type" transitions: {} done: component: "System.Output" properties: text: "Your ${size.value} ${type.value} Pizza is on its way." transitions: return: "done" underage: component: "System.Output" properties: text: "You are too young to order a pizza" transitions: return: "underage" cancelorder: component: "System.Output" properties: text: "Your order is cancelled" transitions: return: "cancelOrder" unresolved: component: "System.Output" properties: text: "I don't understand. What do you want to do?" transitions: return: "unresolved"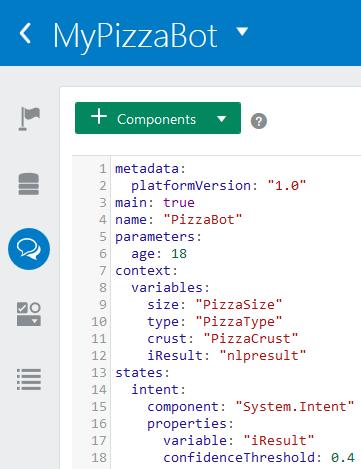
-
Click Validate.

You might see an error because the dialog flow definiiton references the AgeChecker component that we checked out in Taking a Look at How the PizzaBot Works, but it can't find it.
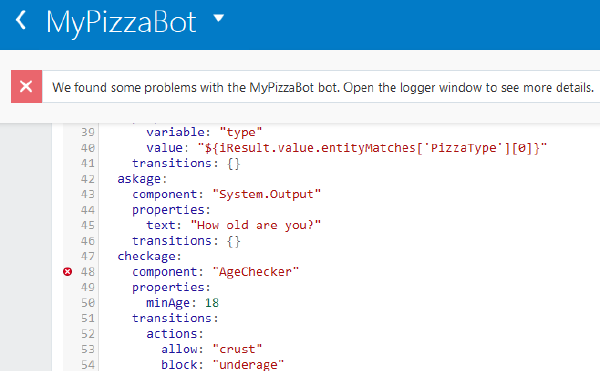
Tip: You can find out more by opening the logger window.

-
You have two options if you get this error: you can create the BotsCustomComponents service for this bot, or you use this alternate flow, which doesn't use the AgeChecker component. You can copy and paste the dialog flow directly from here, or from
PizzaBot-dialog_flow_noAgeChecker.txtwhich is included in the accompanying ZIP file.metadata: platformVersion: "1.0" main: true name: "MyPizzaBot" parameters: age: 18 context: variables: size: "PizzaSize" type: "PizzaType" crust: "PizzaCrust" iResult: "nlpresult" states: intent: component: "System.Intent" properties: variable: "iResult" confidenceThreshold: 0.4 transitions: actions: OrderPizza: "resolvesize" CancelPizza: "cancelorder" Intent.None: "unresolved" resolvesize: component: "System.SetVariable" properties: variable: "size" value: "${iResult.value.entityMatches['PizzaSize'][0]}" transitions: {} resolvecrust: component: "System.SetVariable" properties: variable: "crust" value: "${iResult.value.entityMatches['PizzaCrust'][0]}" transitions: {} resolvetype: component: "System.SetVariable" properties: variable: "type" value: "${iResult.value.entityMatches['PizzaType'][0]}" transitions: {} crust: component: "System.List" properties: options: "Thick,Thin,Stuffed,Pan" prompt: "What crust do you want for your Pizza?" variable: "crust" transitions: {} size: component: "System.List" properties: options: "${size.type.enumValues}" prompt: "What size Pizza do you want?" variable: "size" transitions: {} type: component: "System.Text" properties: prompt: "What Type of Pizza do you want?" variable: "type" transitions: {} done: component: "System.Output" properties: text: "Your ${size.value} ${type.value} Pizza is on its way." transitions: return: "done" underage: component: "System.Output" properties: text: "You are too young to order a pizza" transitions: return: "underage" cancelorder: component: "System.Output" properties: text: "Your order is cancelled" transitions: return: "cancelOrder" unresolved: component: "System.Output" properties: text: "I don't understand. What do you want to do?" transitions: return: "unresolved" - Before you can create the BotsCustomComponent service, you need its metadata URL (
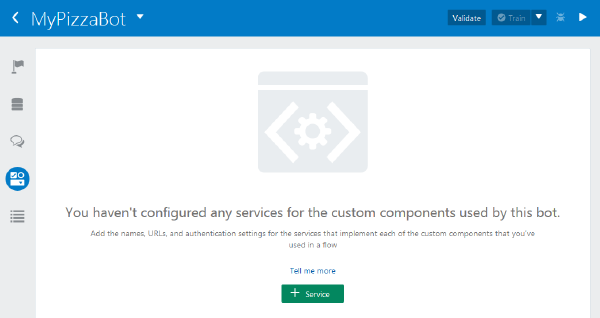
http://bots-samples-nodejs:8888/custom-components/samples-service/components) and its username and password from your administrator. To create the service:Click Components in the left navbar.

Click Add Service.
-
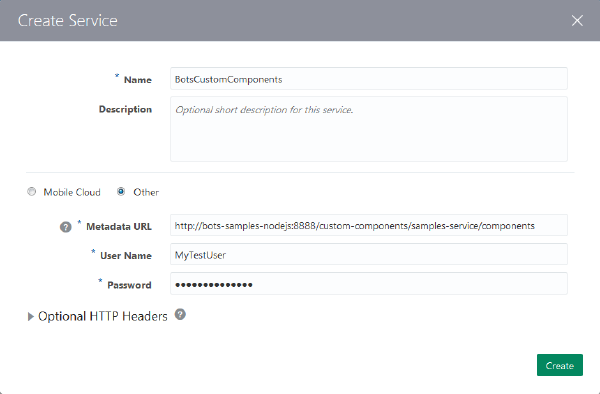
Complete the Create Service dialog:
Name-- BotsCustomComponents
-
Choose Other because this service is not handled by a mobile backend.
Metadata URL--
http://bots-samples-nodejs:8888/custom-components/samples-service/components. You can copy this URL from the Components page for the original PizzaBot that you looked at in Taking a Look at How the PizzaBot Works.Enter the username and password for the BotsCustomComponents service.
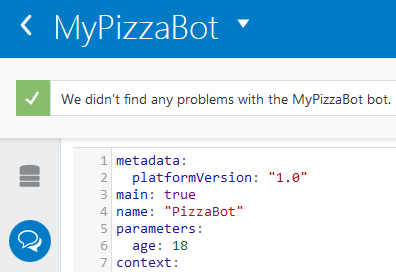
- Open the dialog flow and then click Validate. The dialog flow definition is now valid because your bot can connect with the BotsCustomComponents service.
Updating the Dialog Flow
Since you added the CheeseType entity, you need to update the flow to enable the bot to present this new option. Since you need to slot user values for the cheese type, you need first declare the variable, set the value and then define a state for a list component.
-
You can declare variables as a literal, a primitives, or as in this case, an entity -- the CheeseType entity. You need to declare this variable within the
contextsection because it's referenced in a couple of different places in the dialog flow: first to check if any value entered by the bot user matches any of the values that you added to the entity (Mozzaella, Cheddar, etc.) and then later on where bot presents the user with the cheese options.Within the context section of the dialog flow add
cheese: "CheeseType"after thecrustvariable. Be sure that the value matches the entity name exactly. If you enter"Cheesetype"instead of "CheeseType", you'll get an error.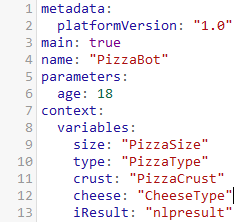
-
Next, add the state that verifies the user input against the CheeseType definition. Because the flow is basically sequential, you need to add this state somewhere after the
intentstate, whoseSystem.Intentcomponent initializes the dialog flow, but before you prompt users to select some type of cheese from a list of options (thecheesestate, which you'll add in the next step), or thecheckAgeandaskAgestates that verify the user's age (and fork the dialog flow accordingly). For the revised sequence, add this new state to the ones that define theSystem.SetVariableusing a value expression to user input for pizza size, crust, and pizza type.To add this state to the flow:
-
You don't want to add this above the first of these states,
resolvesize, because theintentstate already defines that state as the starting point of the dialog flow (OrderPizza: "resolveSize"). Instead, add it to end of this group by positioning your cursor after thetransitions{}property of theresolveTypestate.
-
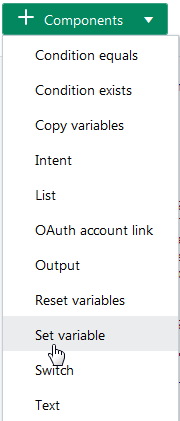
Click Add Components (located at the top of the page).

-
Choose Set variable.
Bots generates a scaffold state node for a
System SetVariablecomponent.
-
Define the state as follows:
-
Change the state name from
setVariabletoresolvecheese. -
Define the variable property as
"cheese"(a literal value). -
Define the
valueproperty by copying in the following value expression. It uses theiResultvariable (another variable declared in the context section used to hold the results of resolved intents and entities) to set the value for thecheesevariable. The CheeseType entity is associated with the OrderPizza intent, which is resolved by Intent component. For example, this expression sets the cheese variable to any value that's extracted from the user input by the CheeseType entity."${iResult.value.entityMatches['CheeseType'][0]}" -
Finally, click Return to create a new space after the
valueproperty and then inserttransitions: {}. As noted by the empty brackets ({}), this state moves directly onto theasksagestate.
Important: Be sure that you indent
transitionsso that it's at the same level asproperties. To ensure that the OBotML syntax is valid, click Validate whenever you make changes to the dialog flow.
-
As an alternate approach, you can paste this code block directly into the dialog flow.
resolvecheese: component: "System.SetVariable" properties: variable: "cheese" value: "${iResult.value.entityMatches['CheeseType'][0]}" transitions: {} -
- Next,
add the state that prompts the user for input using the
System.Listcomponent.-
First, position your cursor after the
transitions {}definition in thetypestate (which is right above thedonestate).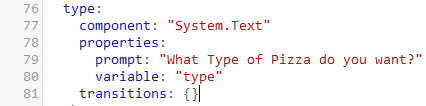
-
Click Components and then select List.
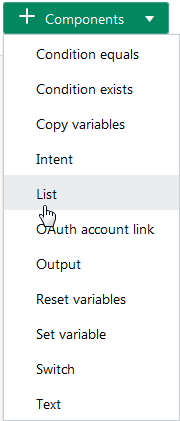
Your dialog flow now includes a scaffolding for a state node for a
System.Listcomponent.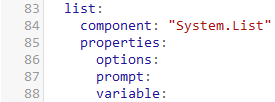
Configure the state as follows:
-
Change the state name from
listtocheese. -
You have two choices for defining the
optionsproperty: you add literals ("Mozzarella,Provolone,Gouda,Cheddar") or a value expression that calls the variable values:"${cheese.type.enumValues}". For the
prompt, enter a text string like"What kind of cheese do you want?".Enter
"cheese"as thevariable.You can delete or ignore the
maxPromptsproperty.-
Complete the state by clicking Return to create a new line after the
variableproperty and then by addingtransitions {}. Again, there are no actions defined because the dialog moves on next state, one that prompts the bot user for enter the pizza type before confirming the order.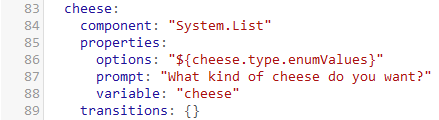
-
To make sure that these additions adhere to the YAML spacing conventions, click Validate.

The code for defining
optionswith literals looks like this:cheese: component: "System.List" properties: options: "Mozzarella,Provolone,Gouda,Cheddar" prompt: "What kind of cheese do you want?" variable: "cheese" transitions: {}The code for the value expression
optionsdefinition looks like this:cheese: component: "System.List" properties: options: "${cheese.type.enumValues}" prompt: "What kind of cheese do you want?" variable: "cheese" transitions: {}
-
-
-
Finally, update the confirmation message to include both the cheese preference
${cheese.value}and crust type (${crust.value}, which wasn't included in the original PizzaBot message) to thetextproperty in thedonestate:-
Go the
textproperty in thedonestate.
-
Add
${crust.value}to the definition. -
Add
${cheese.value}to the definition. -
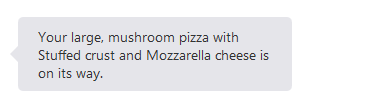
If you like, you can reword the message to accommodate these new additions. For example, change the
textproperty to"Your ${size.value}, ${type.value} pizza with ${crust.value} crust and ${cheese.value} cheese is on its way."
The code for the
donestate looks like this:done: component: "System.Output" properties: text: "Your ${size.value}, ${type.value} pizza with ${crust.value} crust and ${cheese.value} cheese is on its way." transitions: return: "done"
-
Taking a Look at System.List and System.Text Components (Optional Step)
You might have noticed by now that along with the CheeseType entity, the PizzaCrust and PizzaSize entities are exposed as list of values (LOV) in the chat. LOVs work well for entities like these, which have have only a few values each. But for an entity like PizzaType, which has a number of values, LOVs become cumbersome in the small chat window. Because of this, the type state uses the System.Text component to prompt the user to enter a value rather than pick one from a list. If you want the type state to output a list instead, substitute the following code:
  type:
    component: "System.List"
    properties:
      prompt: "What Type of Pizza do you want?"
      options: "${type.type.enumValues}"
      variable: "type"
    transitions: {}
Chatting with Your Bot
When you used the tester with the initial version of the Pizzabot earlier, you saw how it functioned in terms of its dialog definition and the intents that it was trained with. Here, you're going to see how the bot reacts now that it's equipped with an updated dialog flow definition and more training.
Click Test.
Click Bot
-
Start ordering the pizza.

-
Continue the prompts, including the one for the cheese selection.
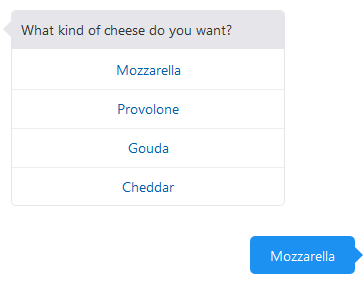
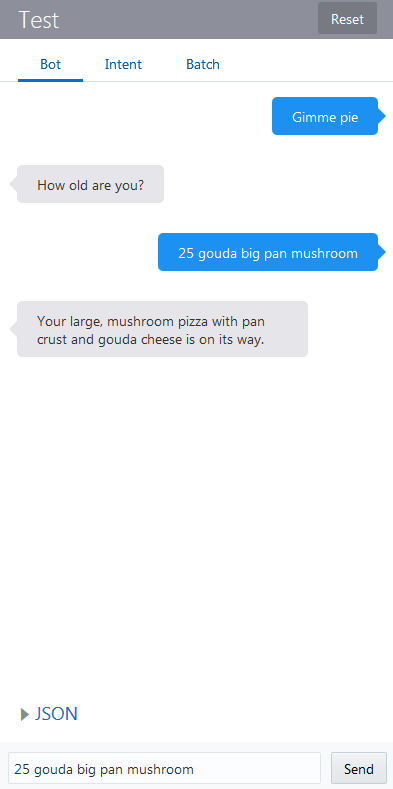
When you're done ordering, take a look at your revised confirmation message:
-
Although the PizzaBot is menu-driven, you don't need to follow the sequence and choose your options. You can enter them directly in any order that you like. At the age prompt, try loading your messages with different combinations words to see the response. For example, enter "25 gouda big pan mushroom".
Next Steps
-
Find out more about Bots -- including how to run your PizzaBot on Facebook Messenger -- in Creating Intelligent Bots with Oracle Mobile Cloud, Enterprise.
-
Update the training corpus. Remember to retrain the models whenever you edit, delete, or add utterances.
-
Try updating the dialog flow. For example, add an option that lets users cancel or confirm their order. To do this, add a new variable,
confirm: "YES_NO"in thecontextsection. This variable is defined by one of the built-in system entities, YES_NO. Add theconfrmandconfirmOrderstates above thedonestate:confirm: component: "System.List" properties: options: "Yes,No" prompt: "You ordered a ${size.value}, ${type.value} pizza with ${crust.value} crust and ${cheese.value} cheese. Is this correct?" variable: "confirm" transitions: {} confirmOrder: component: "System.ConditionEquals" properties: variable: "confirm" value: "No" transitions: actions: equal: "cancelorder" notequal: "done"
You can find the OBotML defintion that includes the cheese type state, the pizza types list, and this confirmation in PizzaBot-dialog_flow_list_type.txt.
Want to Learn More?
-
Oracle Cloud Documentation in the Oracle Help Center