
 Before You Begin
This tutorial shows you how to create a custom instance in Oracle SOA Cloud Service on Oracle Cloud Infrastructure Classic and associate it with an existing Oracle Database Cloud Service deployment. The custom instance you create will have a 2-node WebLogic Server cluster on Oracle Cloud Infrastructure Classic VMs, Oracle Traffic Director as a load balancer, with backup to object storage enabled.
This tutorial takes approximately 15 minutes to complete, excluding the wait time needed for provisioning to complete.
October 2018, Release 18.4.1
Background
The SOA Cloud Service environment provides Oracle SOA Suite versions 12.1.3 and 12.2.1.2 on a single virtual machine, Oracle WebLogic Server default configurations, simplified provisioning for a single node instance, self-management tools, and secure shell (SSH) access to the virtual machine. The environment also provides simplified node cluster provisioning; simplified configuration to preexisting DBaaS and SaaS environments; and cloud self-management tools for automated backup/recovery, patching, and scaling, local and central monitoring and management, centralized provisioning, comprehensive APIs, and upgrading.
What Do You Need?
- An active subscription to Oracle SOA Cloud Service. See Begin with Oracle SOA Cloud Service Subscriptions.
- An existing Oracle Database Cloud Service deployment with backups enabled. See Select an Oracle Database Cloud Service When Provisioning an Oracle SOA Cloud Service.
- An object storage container in Oracle Cloud Infrastructure Object Storage Classic. See Select an Object Storage Container When Provisioning an Oracle Database Cloud Service.
 Launch
the Service Creation Wizard
Launch
the Service Creation Wizard
- Sign in to Oracle My Services application at https://cloud.oracle.com/en_US/sign-in .
- On the My Services Dashboard, locate the Storage
tile and click its name.
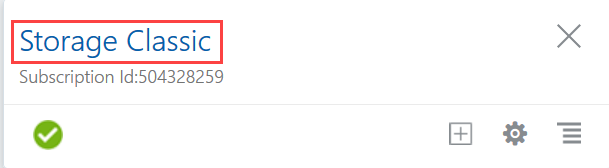
Description of the illustration rest_api.png - If this tile is not visible, click Customize Dashboard.
- Record the value of the REST Endpoint.
For example,
https://foo.storage.oraclecloud.com/v1/MyService-bar. You will need this REST endpoint later when you configure backups. - Click the Dashboard button at the top of the page.
- Locate the SOA tile. Click the Action
menu
 ,
and then select Open Service Console.
,
and then select Open Service Console. - If this is the first time you have accessed SOA Cloud Service then you may be presented with a Welcome screen. If this happens then you can continue to the console by clicking Go to Console.
- Click Create Instance.
 Configure
Basic Service Information
Configure
Basic Service Information
- Enter a unique Instance Name for your
SOA Cloud Service instance. This tutorial uses the name
MySOACS. - If it is not configured by default, enter your email address in Notification Email.
- If the Region field is displayed, accept the default option No Preference.
- Leave the Tags field blank.
- Click Edit next to the SSH Public Key field.
- Select the radio button Create a New Key
and then click Enter.
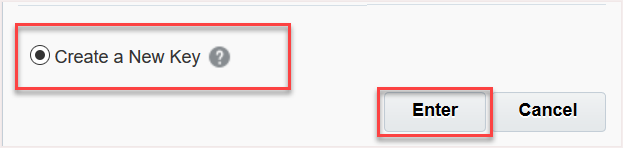
Description of the illustration create_key.png - Click Download to save the file
sshkeybundle.zipto your local machine. - Click Done.
- Accept the default values for the remaining fields on
this page:
Field Value Software Release Oracle 12c, 12.2.1.2.0 Metering Frequency Monthly - Note that this field does not appear on this page if you have a Universal Cloud Credits subscription. License Type Accept the default selection.
 Configure Service Details
- Click Next.
- Select the Service Type as SOA
with SB & B2B Cluster..

Description of the illustration service_type.png - In the WebLogic Access section, accept the default Compute Shape, OC1m (1 OCPU, 15.0 GB RAM).
- Select the required Cluster Size or accept the default value.
- Enter suitable values for the User Name and Password, and then reenter the password in the Confirm Password field.
 Configure
the Database and Load Balancer
Configure
the Database and Load Balancer
- In the Database Configuration section, use the Database
Instance Name field to select an existing Oracle
Database Cloud Service deployment not associated with any
other Oracle SOA Cloud Service instance.
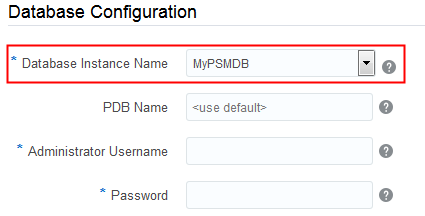
Description of the illustration select_dbcs.png - Enter values for the remaining fields in this section. If
necessary, contact your database administrator:
Field Value PDB Name If you do not want to use the default Pluggable Database (PDB) in this deployment, enter a different value Administrator User Name Enter a database user with system privileges, so that SOA Cloud Service can create the required schemas. Password Enter the password for this database user. - In the Load Balancer section, for the Provision Local Load Balancer field, select the check box.
- Accept the default values for the remaining Load Balancer
fields:
Field Value Compute Shape OC3 (1 OCPU, 7.5GB RAM) Load Balancer Policy Least Connection Count
 Configure
Backups
Configure
Backups
- For Cloud Storage Container, delete the
name of the default container and enter the URL
STORAGE_REST_ENDPOINT/MySOACS-Backup.
Use the Oracle Storage Cloud REST endpoint that you identified earlier. For example:https://foo.storage.oraclecloud.com/v1/MyService-bar/MySOACS-Backup - Enter the user name and password of an Oracle Cloud user
with the Oracle Cloud Infrastructure Object Storage
Container Administrator role in the Storage User
Name and Cloud Storage Password
fields, respectively.
The user name and password you used to log into Oracle Cloud will normally have the correct permissions required to create the container. - Select the Create Cloud Storage Container checkbox.
 Complete
the Service Creation
Complete
the Service Creation
- Click Next.
- On the Confirmation page, review your selections and click
Create.
When you return to the Oracle SOA Cloud Service console, you will see your new service instance listed. It will have a status of "Creating Service".
Description of the illustration creating_service_soacs.png - Periodically refresh this page until the service instance
creation is completed.

Description of the illustration soace_instance_created.png - You will also receive an email notification when the instance is ready.
- Click the instance name, MySOACS, to view the Instance Overview page.