This tutorial shows you how to log in to
the Oracle Autonomous Data Warehouse Cloud
console, create a service instance, and
create a user. This tutorial takes
approximately 15 minutes to complete.
Oracle Autonomous Data Warehouse Cloud
Tutorial Series
This is the first in a series of tutorials
for the Oracle Autonomous Data Warehouse
Cloud. Perform the tutorials sequentially.
Oracle Autonomous Data Warehouse Cloud is
fully-managed, offers high-performance, and
is elastic. You have all of the performance
of the market-leading Oracle Database in a
fully-managed environment that is tuned and
optimized for data warehouse workloads.
Autonomous Data Warehouse Cloud supports all
standard SQL and business intelligence (BI)
tools and delivers scalable analytic query
performance.
In this tutorial, you create a service
instance, connect SQL Developer to
Autonomous Data Warehouse Cloud, and create
a database end user to use in all subsequent
tutorials.
What Do You Need?
Subscription to Oracle Autonomous Data
Warehouse Cloud
Your
Oracle Cloud user name, password, and
identity domain
Locate your account details in the New
Account Information email that you
received from Oracle Cloud when your
user account was set up. If you don't
have your New Account Information email,
contact your account administrator.
Tenancy in Oracle Cloud Infrastructure,
including the creation of a compartment
and the setting of access to resources
(see Oracle
Cloud Infrastructure documentation
for setting up your tenancy).
Oracle SQL Developer (see Oracle
Technology Network download site).
We recommend that you download version
18.2.0 or later, because this version
contains enhancements for key Autonomous
Data Warehouse Cloud features. SQL
Developer 17.3.1 will also work with
Autonomous Data Warehouse Cloud; versions
earlier than 17.3.1 will not. Note:
If you are a Windows user on 64-bit
platform, download the 'Windows 64-bit
with JDK 9 included' distribution as it
includes both Java 9 and the Java
Cryptography Extension (JCE) files
necessary to run SQL Developer and connect
to your Autonomous Data Warehouse Cloud.
If you are a non-Windows user, download
and install the appropriate Java
8 JDK or later version for your
Operating System.
Create an Instance
The first step is to sign in to the
Autonomous Data Warehouse Cloud and create
an instance.
Sign in from
https://cloud.oracle.com/home. On the
Oracle Cloud page, click Sign In.
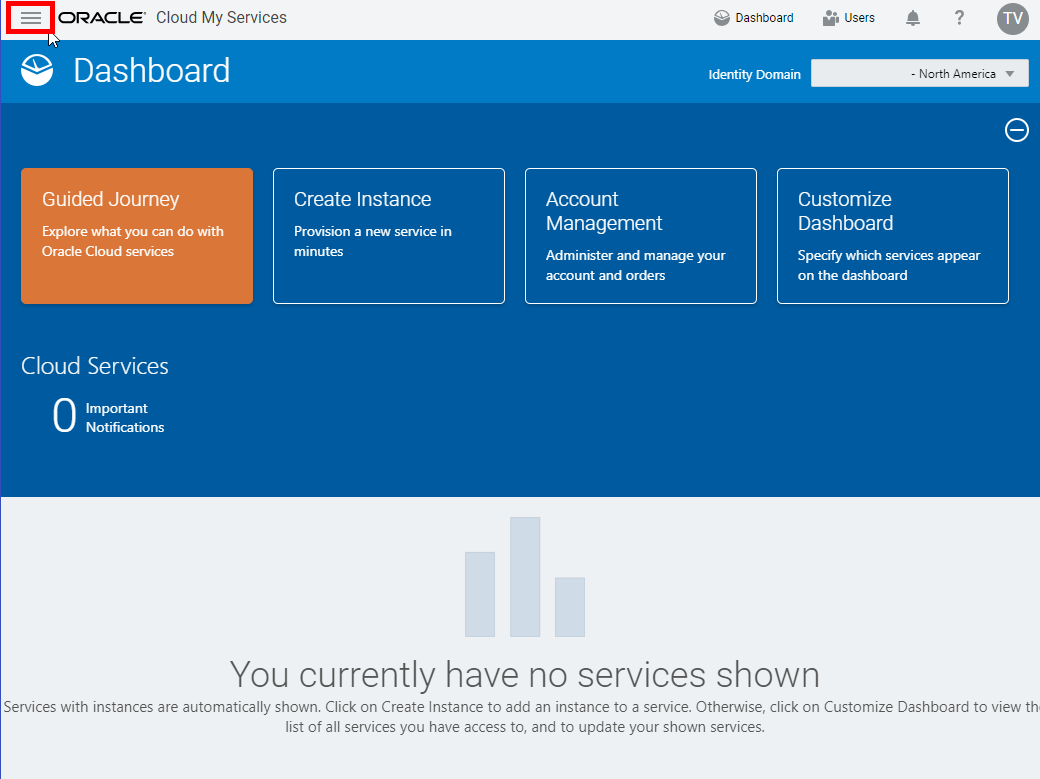
The console for Autonomous Data
Warehouse displays. You can use the List Scope
drop-down menu to select a compartment; in
this example the SQLDev compartment
is selected.
Although this console shows that no data
warehouses have yet been created, if there
were a long list of data warehouses, you
could filter the list by using the Filters drop-down
menu to filter by the state of the data
warehouse (available, stopped, terminated,
and so on.)
Click Create
Autonomous Data Warehouse. Description
of the illustration
click_create_autonomous_data_warehouse
The Create Autonomous Data Warehouse
dialog appears. At the top of the dialog,
click the Click
here link to select a compartment
for the data warehouse.
Description
of the illustration
create_adw_instance
In the Create Autonomous Data Warehouse
dialog, enter the following information:
Display Name -
Enter a name for the data warehouse
for display purposes.
Database Name -
Use letters and numbers only, starting
with a letter. Maximum length is 14
characters. (Underscores not initially
supported.)
CPU Core Count -
Number of CPUs for your service.
Storage (TB) -
Select your storage capacity in
terabytes. It is the actual space
available to your service instance,
including system-related space
allocations.
Administrator Credentials-
Password for ADMIN user of the service
instance. The password must meet the
following requirements:
The password must be between 12
and 60 characters long and must
include at least one uppercase
letter, one lowercase letter, and
one numeric character.
The password cannot contain the
double quote (") character.
The password must be different
from the last 4 passwords used.
License
Type - select whether you are
bringing your own license or
subscribing to new database software
licenses.
Tags - (Optional) Tagging is
a metadata system that allows you to
organize and track resources within
your tenancy. Tags are composed of
keys and values which can be attached
to resources.
The Create Autonomous Data Warehouse
dialog closes. On the console, the State
field indicates that the data warehouse is
provisioning. When creation
is completed, the State field changes from
Provisioning to Available.
Description
of the illustration adw
provisioning_state
Download the
Credentials Zip File
Once you have created the data
warehouse, download the credentials zip
file for client access to that data
warehouse. You will use this file in the
next tutorial to connect SQL Developer to
your Autonomous Data Warehouse database.
Store the zip file and make note of
the password. You will use the zip file
and password in the next step to define
a SQL Developer connection to your
Autonomous Data Warehouse Cloud
database. Note: Version 18.2.0 of SQL
Developer drops the requirement to enter
the Autonomous Data Warehouse keystore
password and does not provide the
keystore password field in the dialog
for creating a connection. If using SQL
Developer version 18.2.0 or newer, you
do not use this password.
Define a SQL
Developer Connection
First, define a SQL Developer connection
to the database in your Autonomous Data
Warehouse Cloud service.
Open SQL Developer on your local
computer. In the Connections panel,
right-click Connections
and select New
Connection. Note:
Depending on your version of SQL
Developer, do not
right-click Cloud
Connection or Database
Schema Service Connections.
That menu selection is for connecting to
a different Oracle cloud service, the
Oracle Database Schema Service. Description
of the illustration
select_new_connection
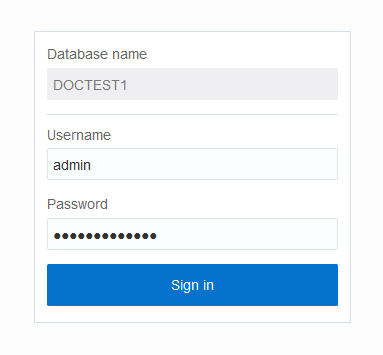
The New/Select Database Connection
dialog appears. Enter the following
information:
Connection Name - Enter the name for
this cloud connection.
Username - Enter the database
username. Use the default
administrator database account (admin)
that is provided as part of the
service.
Password - Enter the admin user's
password that you or your Autonomous
Data Warehouse Cloud administrator
specified when creating the service
instance.
Connection Type - Select Cloud
PDB.
Configuration File - Click Browse,
and select the Client
Credentials zip file,
downloaded from the Autonomous Data
Warehouse Cloud service console by
you, or given to you by your
Autonomous Data Warehouse Cloud
administrator.
Keystore Password - If using SQL Developer 18.2.0 or
newer: Starting with
version 18.2.0, SQL Developer does not
require that you enter a Keystore
Password and does not provide the
Keystore Password field. If using a version of SQL Developer
older than 18.2.0: Enter the
password that was generated when you
or your Autonomous Transaction
Processing administrator downloaded
the Client Credentials zip file from
the Autonomous Data Warehouse Cloud
console.
Service - In the drop-down menu,
service selections are prepended with
database names. Select the low, medium
or high menu item for your database.
These service levels map to the LOW,
MEDIUM, and HIGH consumer groups,
which provide different levels of
performance and concurrency. Note:
Earlier versions of SQL Developer may
not support this feature.
Click Test.
Status: Success displays at the
left-most bottom of the New/Select
Database Connection dialog.
Click Connect.
An entry for the new connection appears
under Connections.
Create a User in
your Autonomous Data Warehouse Cloud
Database
Once you have connected SQL Developer to
your Autonomous Data Warehouse Cloud
database, use a SQL Developer worksheet to
define a create user
statement to create the user adwc_user.
In the next tutorial, you will create
sales history tables in the adwc_user
schema and load data into these tables
from an object store.
Open a SQL Developer worksheet and run
the following SQL statements to create
the user adwc_user,
swapping in a password with the
guildelines provided in the following
Note section.
create user adwc_user identified by "<password>";

grant dwrole to adwc_user;
Description
of the illustration
sql_developer_create_user
Note: Autonomous Data Warehouse requires
strong passwords. The password you specify must meet the
default password complexity rules. This database checks for
the following requirements when you create or modify
passwords:
The password must be between 12 and 30 characters long
and must include at least one uppercase letter, one
lowercase letter, and one numeric character.
The password cannot contain the username.
The password cannot be one of the last four passwords
used for the same username.
The password cannot contain the double quote (")
character
Note: Autonomous Data Warehouse Cloud databases come with a
pre-defined database role named DWROLE.
This role provides the common privileges for a data
warehouse user: CREATE ANALYTIC VIEW, CREATE
ATTRIBUTE DIMENSION, ALTER SESSION, CREATE HIERARCHY,
CREATE JOB, CREATE MINING MODEL, CREATE PROCEDURE, CREATE
SEQUENCE, CREATE SESSION, CREATE SYNONYM, CREATE TABLE,
CREATE TRIGGER, CREATE TYPE, CREATE VIEW, READ,WRITE ON directory
DATA_PUMP_DIR, EXECUTE privilege on the PL/SQL
package DBMS_CLOUD
In the next tutorial, "Connecting SQL Developer and
Creating Tables", you will connect SQL Developer to your
Autonomous Data Warehouse Cloud database as user adwc_user,
and define SH tables (sales history tables from an
Oracle sample schema) for that user.
Later, you will load data into those tables from an Object
Store.
 Provisioning Autonomous Data
Warehouse Cloud
Provisioning Autonomous Data
Warehouse Cloud  Before
You Begin
Before
You Begin Create an Instance
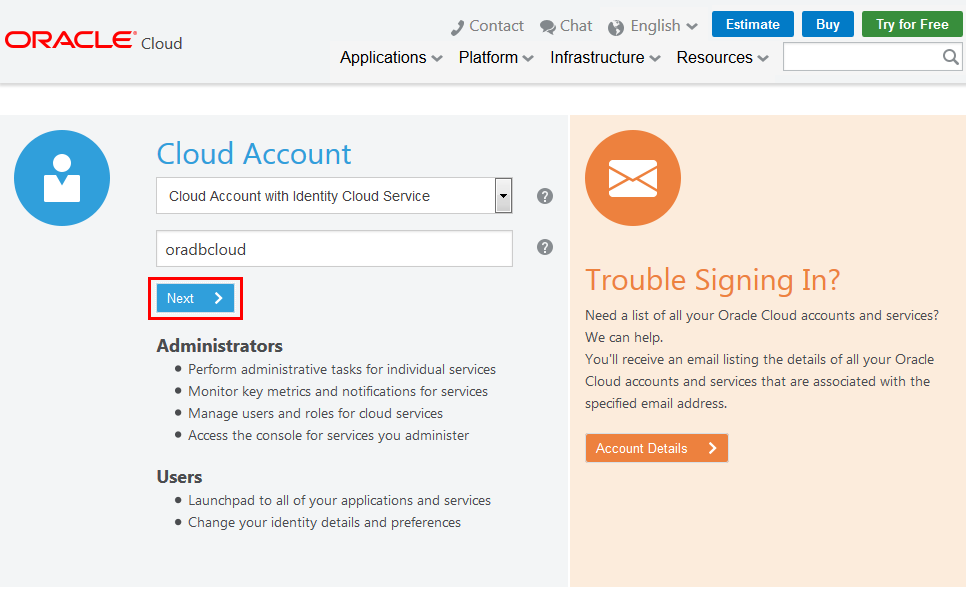


 Download the
Credentials Zip File
Download the
Credentials Zip File


 Define a SQL
Developer Connection
Define a SQL
Developer Connection

 Create a User in
your Autonomous Data Warehouse Cloud
Database
Create a User in
your Autonomous Data Warehouse Cloud
Database
 Next
Tutorial
Next
Tutorial Want
to Learn More?
Want
to Learn More?