Before You Begin
Purpose
This tutorial shows you how to create a simple REST application in Java using Jersey and Grizzly and how to implement the caching feature of Oracle Application Container Cloud Service.
Time to Complete
30 minutes
Background
The new caching capability of Oracle Application Container Cloud Service allows applications to accelerate access to data, share data among applications, and offload state management.
What Do You Need?
- An Oracle Cloud account with Oracle Application Cloud Container Service
- Java Development Kit 8 (JDK 8)
- Maven 3.0+
- employee-client.zip
Creating the REST Service
-
In a terminal (uix or Mac) or command prompt (Windows), go to the folder you want to create the Java project and type this command:
mvn archetype:generate -DarchetypeArtifactId=jersey-quickstart-grizzly2 -DarchetypeGroupId=org.glassfish.jersey.archetypes -DinteractiveMode=false -DgroupId=com.example -DartifactId=caching-java-api -Dpackage=com.example -DarchetypeVersion=2.25.1 -
In the
com.examplepackage, create theEmployeeclass./* Copyright © 2017 Oracle and/or its affiliates. All rights reserved. */ package com.example; import com.fasterxml.jackson.annotation.JsonProperty; public class Employee { private long id; private String firstName; private String lastName; private String birthDate; private String title; private String dept; private String email; private String phone; public static int countId = 100; public long generateId(){ this.id = countId++; return this.id ; } @JsonProperty public long getId() { return id; } public void setId(long id) { this.id = id; } @JsonProperty public String getFirstName() { return firstName; } public void setFirstName(String firstName) { this.firstName = firstName; } @JsonProperty public String getLastName() { return lastName; } public void setLastName(String lastName) { this.lastName = lastName; } @JsonProperty public String getBirthDate() { return birthDate; } public void setBirthDate(String birthDate) { this.birthDate = birthDate; } @JsonProperty public String getTitle() { return title; } public void setTitle(String title) { this.title = title; } @JsonProperty public String getDept() { return dept; } public void setDept(String dept) { this.dept = dept; } @JsonProperty public String getEmail() { return email; } public void setEmail(String email) { this.email = email; } @JsonProperty public String getPhone() { return phone; } public void setPhone(String phone) { this.phone = phone; } @Override public String toString() { return "Employee{" + "id=" + id + ", firstName=" + firstName + ", lastName=" + lastName + ", birthDate=" + birthDate + ", title=" + title + ", dept=" + dept + ", email=" + email + ", phone=" + phone + '}'; } } -
In the same package, create the
CacheACCSclass./* Copyright © 2017 Oracle and/or its affiliates. All rights reserved. */ package com.example; import com.oracle.cloud.cache.basic.RemoteSessionProvider; import com.oracle.cloud.cache.basic.Session; import com.oracle.cloud.cache.basic.options.Transport; import java.util.logging.Logger; public class CacheACCS { private final static Logger LOGGER = Logger.getLogger(CacheACCS.class.getName()); private final Session cacheSession; //Read the CACHING_INTERNAL_CACHE_URL environment variable created by Oracle Application Container Cloud Service private final String CACHE_HOSTNAME = System.getenv("CACHING_INTERNAL_CACHE_URL"); private final int CACHE_PORT = 8080; public CacheACCS() { String cacheHost = "http://" + CACHE_HOSTNAME + ":" + CACHE_PORT + "/ccs/"; LOGGER.info(cacheHost); cacheSession = new RemoteSessionProvider(cacheHost).createSession(Transport.rest()); } public Session getCacheSession() { return cacheSession; } } -
Create the
EmployeeResourceclass./* Copyright © 2017 Oracle and/or its affiliates. All rights reserved. */ package com.example; import com.oracle.cloud.cache.basic.Cache; import com.oracle.cloud.cache.basic.options.ValueType; import java.util.logging.Level; import java.util.logging.Logger; import javax.ws.rs.DELETE; import javax.ws.rs.GET; import javax.ws.rs.NotFoundException; import javax.ws.rs.POST; import javax.ws.rs.PUT; import javax.ws.rs.Path; import javax.ws.rs.PathParam; import javax.ws.rs.Produces; import javax.ws.rs.core.MediaType; import javax.ws.rs.core.Response; @Path("/employees") public class EmployeeResource { private final static Logger LOGGER = Logger.getLogger(EmployeeResource.class.getName()); //Get the Cache Sesion Cache <Employee> cache = new CacheACCS().getCacheSession().getCache("employees-example", ValueType.of(Employee.class)); @GET @Path("{id}") @Produces(MediaType.APPLICATION_JSON) public Response getEmployee(@PathParam("id") long id) { LOGGER.log(Level.INFO, "GET Method by ID {0}",id); Employee employee = null; try { employee = cache.get(Long.toString(id)); }catch (Exception e){ e.printStackTrace(); } return Response.ok(employee) //200 .build(); } @POST @Produces(MediaType.APPLICATION_JSON) public Response addEmployee(Employee employee) { long id = employee.generateId(); LOGGER.log(Level.INFO, "POST Method {0}",employee.toString()); try{ cache.put(Long.toString(id), employee); }catch(Exception e){ e.printStackTrace(); } return Response.status(201) .build(); } @PUT @Path("{id}") @Produces(MediaType.APPLICATION_JSON) public Response updateEmployee(@PathParam("id") long id, Employee employee) { LOGGER.log(Level.INFO, "PUT Method {0}", id); try{ cache.replace(Long.toString(id), employee); }catch(Exception e){ e.printStackTrace(); } return Response.status(Response.Status.OK).build(); } @DELETE @Path("{id}") public void deleteEmployee(@PathParam("id") long id) { LOGGER.log(Level.INFO, "DELETE Method {0}", id); Employee emp = cache.remove(Long.toString(id)); if (emp != null) { throw new NotFoundException("Error Employee " + id + " not found"); } else { Response.status(Response.Status.OK) .build(); } } }Note: When the cache service is scaled out, scaled in or restarted on the cache may receive connection refused exceptions. You should implement a retry mechanism to handle these potential exceptions. For more information see the Handling Connection Exceptions with Retries section in the Oracle Help Center.
-
Unzip the
employee-client.zipfile directly into the project directory.Note: Make sure the
wwwdirectory is at the same level as thepom.xmlfile. -
Open the
Mainclass and add two variables to read thePORTandAPP_HOMEenvironment variables.private static final Optional<String> PORT = Optional.ofNullable(System.getenv("PORT")); private static final Optional<String> APP_HOME = Optional.ofNullable(System.getenv("APP_HOME")); -
Modify the
BASE_URIvariable to run the server on thehost and use thePORTenvironment variable.public static final String BASE_URI = "http://0.0.0.0:" + PORT.orElse("8080") + "/myapp/"; -
In the
mainmethod, add the following lines to specify the static content, which is the employee client.StaticHttpHandler staticHttpHandler = new StaticHttpHandler(APP_HOME.get()+"/www/static/"); server.getServerConfiguration().addHttpHandler(staticHttpHandler, "/"); -
Add the required imports and save the file.
import java.util.Optional;
import org.glassfish.grizzly.http.server.StaticHttpHandler;
The completed
Mainclass should look like this:package com.example; import org.glassfish.grizzly.http.server.HttpServer; import org.glassfish.jersey.grizzly2.httpserver.GrizzlyHttpServerFactory; import org.glassfish.jersey.server.ResourceConfig; import java.io.IOException; import java.net.URI; import java.util.Optional; import org.glassfish.grizzly.http.server.StaticHttpHandler; /** * Main class. * */ public class Main { private static final Optional<String> PORT = Optional.ofNullable(System.getenv("PORT")); private static final Optional<String> APP_HOME = Optional.ofNullable(System.getenv("APP_HOME")); // Base URI the Grizzly HTTP server will listen on public static final String BASE_URI = "http://0.0.0.0:" + PORT.orElse("8080") + "/myapp/"; /** * Starts Grizzly HTTP server exposing JAX-RS resources defined in this * application. * * @return Grizzly HTTP server. */ public static HttpServer startServer() { // create a resource config that scans for JAX-RS resources and providers // in com.example package final ResourceConfig rc = new ResourceConfig().packages("com.example"); // create and start a new instance of grizzly http server // exposing the Jersey application at BASE_URI return GrizzlyHttpServerFactory.createHttpServer(URI.create(BASE_URI), rc); } /** * Main method. * * @param args * @throws IOException */ public static void main(String[] args) throws IOException { final HttpServer server = startServer(); StaticHttpHandler staticHttpHandler = new StaticHttpHandler(APP_HOME.get()+"/www/static/"); server.getServerConfiguration().addHttpHandler(staticHttpHandler, "/"); System.out.println(String.format("Jersey app started with WADL available at " + "%sapplication.wadl\nHit enter to stop it...", BASE_URI)); System.in.read(); server.stop(); } } -
Open the
pom.xmlfile and add the project dependencies:<dependency> <groupId>org.glassfish.jersey.media</groupId> <artifactId>jersey-media-json-jackson</artifactId> </dependency> <dependency> <groupId>com.oracle.cloud.caching</groupId> <artifactId>cache-client-api</artifactId> <version>1.0.0</version> </dependency>
Preparing the Application for Cloud Deployment
-
Create the
manifest.jsonfile in the root directory and add the following content:{ "runtime": { "majorVersion": "8" }, "command": "java -jar caching-java-api-1.0-SNAPSHOT-jar-with-dependencies.jar" } -
Create the
assemblydirectory in thesrcfolder. -
Create the
distribution.xmlfile in theassemblyfolder and add the following content:<assembly xmlns="http://maven.apache.org/plugins/maven-assembly-plugin/assembly/1.1.3" xmlns:xsi="http://www.w3.org/2001/XMLSchema-instance" xsi:schemaLocation="http://maven.apache.org/plugins/maven-assembly-plugin/assembly/1.1.3 http://maven.apache.org/xsd/assembly-1.1.3.xsd"> <id>dist</id> <formats> <format>zip</format> </formats> <includeBaseDirectory>false</includeBaseDirectory> <fileSets> <fileSet> <directory>${project.basedir}</directory> <outputDirectory>/</outputDirectory> <includes> <include>manifest.json</include> <include>www/**/*.*</include> </includes> </fileSet> <fileSet> <directory>${project.build.directory}</directory> <outputDirectory>/</outputDirectory> <includes> <include>caching-java-api-1.0-SNAPSHOT-jar-with-dependencies.jar</include> </includes> <excludes> <exclude>*.zip</exclude> </excludes> </fileSet> </fileSets> </assembly> -
Open the
pom.xmlfile in a text editor and add following code inside the<plugins>tags.<plugin> <groupId>org.apache.maven.plugins</groupId> <artifactId>maven-assembly-plugin</artifactId> <executions> <execution> <!-- Build Executable Jar with all Dependencies --> <id>build-jar</id> <phase>package</phase> <goals> <goal>single</goal> </goals> <configuration> <descriptorRefs> <descriptorRef>jar-with-dependencies</descriptorRef> </descriptorRefs> <finalName>${project.artifactId}-${project.version}</finalName> <archive> <manifest> <mainClass>com.example.Main</mainClass> </manifest> </archive> </configuration> </execution> <execution> <!-- Build Archive Zip File --> <id>build-zip</id> <phase>package</phase> <goals> <goal>single</goal> </goals> <configuration> <descriptors> <descriptor>src/assembly/distribution.xml</descriptor> </descriptors> </configuration> </execution> </executions> </plugin> -
In the command line window, build your application using the maven command:
mvn clean package In the
targetdirectory you'll find thecaching-java-api-1.0-SNAPSHOT-dist.zipfile. This is the archive of your application that will be deployed to Oracle Application Container Cloud Service.
The distribution.xml
script creates a zip
file that includes
the fat jar (caching-java-api-1.0-SNAPSHOT-jar-with-dependencies.jar),
the manifest.json
file, and the
employee client (the
www
directory).
Creating an Application Cache
-
Log in to your Oracle Cloud account. Enter your Identity Domain, User Name, and Password.
-
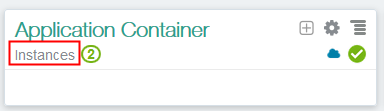
To open the Oracle Application Container Cloud Service console, click Instances in the Dashboard.
Description of this image -
Click
 and select Application Cache.
Description of this image -
Click Create Service.
-
Enter the following information, and then click Next.
-
Service Name:
MyCacheApplication -
Service Description (optional)
-
Deployment Type: Basic
-
Cache Capacity (GB):
1
-
-
In the confirmation page, click Create.
You see the status: Creating service... and the hourglass icon.

Description of this image -
Click
 Refresh . The
status and
hourglass icon
disappear when the
instance is ready.
It could take a
few minutes.
Refresh . The
status and
hourglass icon
disappear when the
instance is ready.
It could take a
few minutes.Note: The cache won't be visible to any applications until it's ready.

Description of this image
Deploying the Application to Oracle Application Container Cloud Service
-
Go back to the Oracle Application Container Cloud Service console page.
-
In the Applications list view, click Create Application.
Click Java SE.
-
In the Application section, enter a name for your application and click Browse next to Archive.
-
In the File Upload page, select the
caching-java-api-1.0-SNAPSHOT-dist.zipfile, and click Open. -
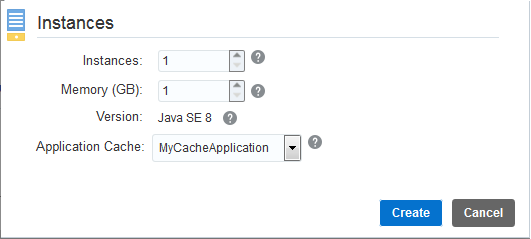
In the Instances section, enter the following information and click Create.
- Instances:
1 - Memory (GB):
1 - Application Cache:
MyCacheApplication
Description of this image - Instances:
-
When the confirmation dialog box is displayed, click OK.
Your application could take a few minutes to deploy.

Description of this image Wait until the application is completely created to continue with the next section.

Description of this image
Testing the Application
-
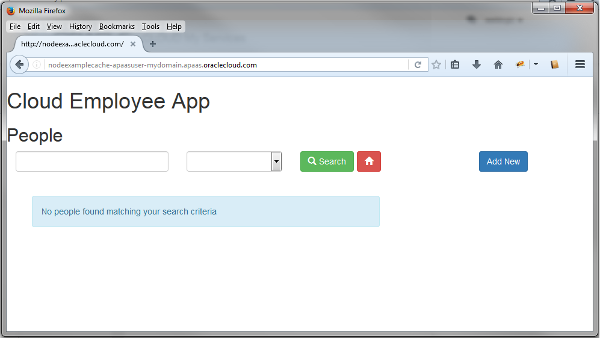
In the Oracle Application Container Cloud Service console, click the URL of your application.
-
Click Add New.
Description of this image -
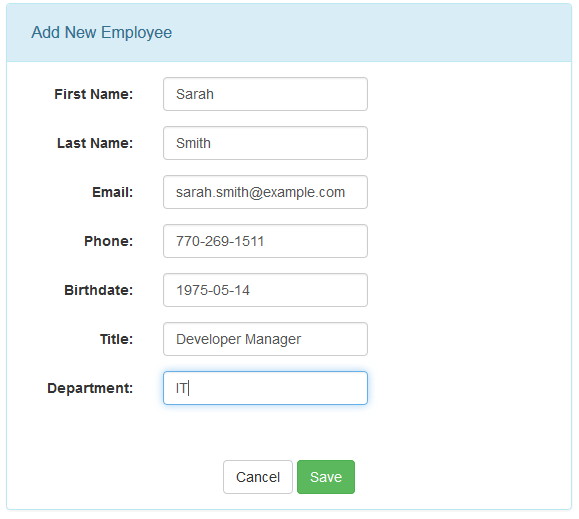
Enter the First Name, Last Name, Email, Phone, Birthdate, Title, and Department values and click Save.
Description of this image Note: The default starting value of ID is 100 and will increment by 1 for each record.
-
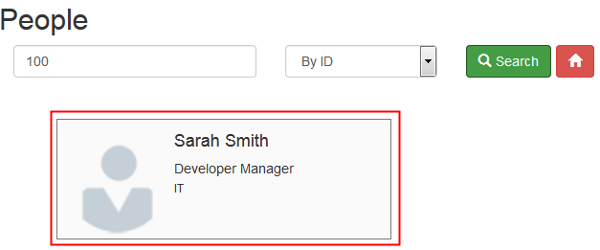
Enter the ID of the new employee which is 100, select By ID, and click Search.
-
Click the employee card.
Description of this image -
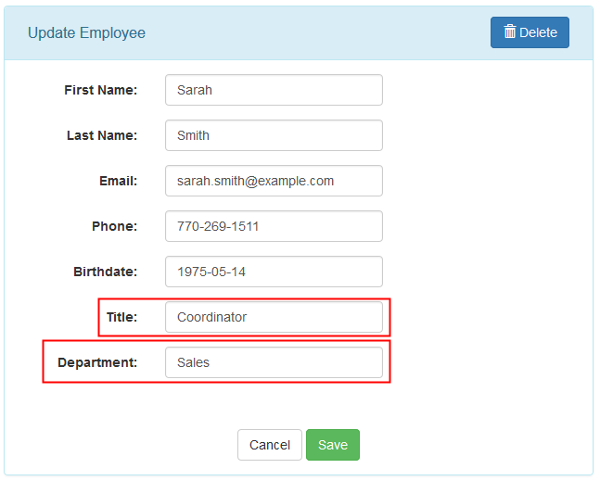
Update the information of the employee and click Save.
Description of this image -
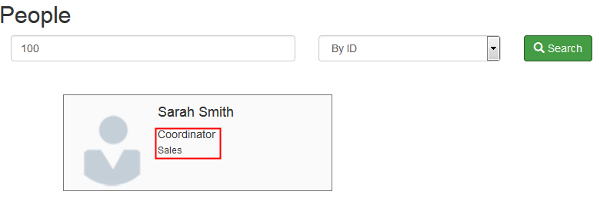
Search the same employee to confirm the data was updated.
Description of this image -
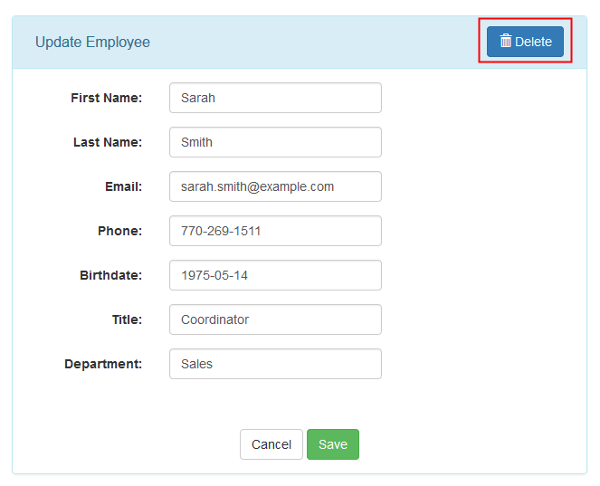
Click the employee card, and then click Delete.
Description of this image -
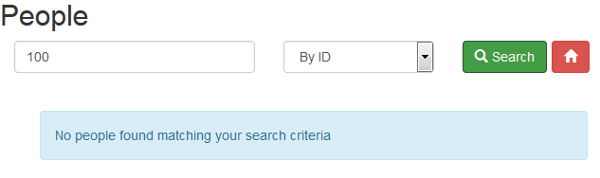
Search the employee to confirm the employee was deleted.
Description of this image
Want to Learn More?
- Oracle Application Container Cloud Service in the Oracle Help Center
- Using Caches in Oracle Application Container Cloud Service in the Oracle Help Center
- REST API for Caching Applications in the Oracle Help Center