Before You Begin
Purpose
This tutorial explains how you can develop a RESTful web service in Java Platform Standard Edition 8 (Java SE 8) using Spring Boot and Oracle Database Cloud Service. The application will deploy to Oracle Application Container Cloud Service.
The following REST (Representational State Tranfer) endpoints will be implemented in this application:
| Method | URL | Description |
|---|---|---|
| GET | /employees | Get All Employees: Retrieve a list of all employees. |
| GET | /employees/{id} | Get Employee: Retrieve the employee item identified by an integer value called id. |
| GET | /employees/lastname/{name} | Get All Employees by Name: Get all the employees identified by name. Looks for strings that contain the value provided in "name", not an exact match. |
| GET | /employees/title/{title} | Get All Employees by Title: Get all the employees identified by "title". Looks for strings that contain the value provided in "title", not an exact match. |
| GET | /employees/department/{name} | Get All Employees by Title: Get all the employees identified by "name". Looks for strings that contain the value provided in "name", not an exact match. |
| POST | /employees | Add an Employee: Add an employee to the data store. |
| PUT | /employees/{id} | Update an Employee: Update an employee given the value of "id". The employee data is passed in a JSON string included in the body of the HTTP request. |
| DELETE | /employees/{id} | Delete an employee identified by the value in "id". |
You use JavaScript Object Annotation (JSON) for data interchange. Use an Oracle Database 12c pluggable database for persistent storage.
Time to Complete
Approximately 90 minutes
Background
RESTful services are easy to develop and deploy, lightweight, inexpensive to host and maintain, and ideal for typical online applications. They're completely stateless and particularly useful for restricted-profile devices such as mobile phones. They don't have native support for Simple Object Access Protocol (SOAP) services but do for HTTP, XML, and JSON.
Spring Boot is an easy-to-use framework for creating Spring-powered applications and services. Spring Boot lets you embed Tomcat or Jetty servers directly into your application without the need for WAR files or traditional Java EE application servers. You create standalone Java applications that can be started using java -jar on the command line. Applications are created with Maven starter Project Object Model (POM) files that simplify configuration and make application development fast. By default, Spring Boot creates uberJAR files, which include any required or dependent library needed to run your application.
Context
This tutorial covers developing, configuring, and packaging your application. To deploy your application see: Deploying an Application to Oracle Application Container Cloud.
What Do You Need?
Oracle JDBC Driver.
ojdbc6.jarfor Oracle Database 11g.ojdbc7.jarfor Oracle Database 12c.- A text editor or integrated development environment (IDE).
The complete project source code:
employee-prj.zip. (The file includes all Maven projects, Java source code, and other files that you need to complete the project.)
Creating a Maven Project
Create an empty Maven project from a Maven archetype.
Open a command-prompt window (or terminal in UNIX), and go to the directory where you want to store the project.
Generate the Maven artifacts:
mvn archetype:generate -DgroupId=com.example.rest -DartifactId=EmployeeRESTApp -DarchetypeArtifactId=maven-archetype-quickstart -DinteractiveMode=falseNote: You can change the
groupId,packagel, andartifactIdfor your particular project.This command creates a standard Maven structure. After it's finished, the
EmployeeRESTAppproject directory is created in your current location.. ├── pom.xml └── src ├── main │ └── java │ └── com │ └── example │ └── rest │ └── App.java └── test └── java └── com └── example └── rest └── AppTest.java
Note: You can open the project in NetBeans (from the File menu, select Open Project) or in Eclipse (from the File menu, select Import, then Maven, and then Existing Maven Project), but you must configure Maven in your IDE.
The generated App class is a simple Main class that serves as a placeholder for application development.
package com.example.rest;

/**
 * Hello world!
 *
 */
public class App
{
    public static void main( String[] args )
    {
        System.out.println( "Hello World!" );
    }
}
Note: You can compile your Maven project at this point.
Configuring the pom.xml File for Spring Boot
With the Maven project framework created, you configure your pom.xml file to turn this project into a Spring Boot application. The default pom.xml file generated by the quick-start archetype looks like this.
<project xmlns="http://maven.apache.org/POM/4.0.0" xmlns:xsi="http://www.w3.org/2001/XMLSchema-instance"
  xsi:schemaLocation="http://maven.apache.org/POM/4.0.0 http://maven.apache.org/maven-v4_0_0.xsd">
  <modelVersion>4.0.0</modelVersion>
  <groupId>com.example.rest</groupId>
  <artifactId>EmployeeRESTApp</artifactId>
  <packaging>jar</packaging>
  <version>1.0-SNAPSHOT</version>
  <name>EmployeeRESTApp</name>
  <url>http://maven.apache.org</url>
  <dependencies>
    <dependency>
      <groupId>junit</groupId>
      <artifactId>junit</artifactId>
      <version>3.8.1</version>
      <scope>test</scope>
    </dependency>
  </dependencies>
</project>
- Remove the
packagingandurltags. - Change the version to 1.0. Remove the
-SNAPSHOTtext. - Add a
propertiessection with the values as shown. Add the
parentanddependenciestags to the configuration. These tags add support for Spring Boot, the Jackson XML and JSON package, and JUnit.<parent> <groupId>org.springframework.boot</groupId> <artifactId>spring-boot-starter-parent</artifactId> <version>1.4.0.RELEASE</version> </parent> <dependencies> <dependency> <groupId>org.springframework.boot</groupId> <artifactId>spring-boot-starter-web</artifactId> </dependency> <!-- databinding; ObjectMapper, JsonNode and related classes are here --> <dependency> <groupId>com.fasterxml.jackson.core</groupId> <artifactId>jackson-databind</artifactId> <version>2.8.1</version> </dependency> <dependency> <groupId>junit</groupId> <artifactId>junit</artifactId> <version>4.12</version> <scope>test</scope> </dependency> </dependencies>Add a
buildsection and the Maven plug-ins. This code adds support for Spring, the execution plug-in, and the assembly plug-in.
<?xml version="1.0" encoding="UTF-8"?>
<project xmlns="http://maven.apache.org/POM/4.0.0" xmlns:xsi="http://www.w3.org/2001/XMLSchema-instance"
         xsi:schemaLocation="http://maven.apache.org/POM/4.0.0 http://maven.apache.org/xsd/maven-4.0.0.xsd">
    <modelVersion>4.0.0</modelVersion>

    <groupId>com.example.rest</groupId>
    <artifactId>EmployeeRESTApp</artifactId>
    <version>1.0</version>
    <name>EmployeeRESTApp</name>

    <properties>
        <java.version>1.8</java.version>
        <project.build.sourceEncoding>UTF-8</project.build.sourceEncoding>
    </properties>
<build>
<plugins>
<plugin>
<groupId>org.springframework.boot</groupId>
<artifactId>spring-boot-maven-plugin</artifactId>
</plugin>
<plugin>
<groupId>org.codehaus.mojo</groupId>
<artifactId>exec-maven-plugin</artifactId>
<version>1.5.0</version>
<executions>
<execution>
<goals>
<goal>java</goal>
</goals>
</execution>
</executions>
<configuration>
<mainClass>com.example.rest.App</mainClass>
</configuration>
</plugin>
<plugin>
<artifactId>maven-assembly-plugin</artifactId>
<version>2.6</version>
<configuration>
<descriptors>
<descriptor>bin.xml</descriptor>
</descriptors>
<finalName>${project.build.finalName}-dist</finalName>
<appendAssemblyId>false</appendAssemblyId>
</configuration>
<executions>
<execution>
<id>make-assembly</id>
<phase>package</phase>
<goals>
<goal>single</goal>
</goals>
</execution>
</executions>
</plugin>
</plugins>
</build>
In this example, the assembly plug-in is configured to create a JAR file, and in addition, it's also configured to create the application archive required for Oracle Application Container Cloud Service. The XML references a bin.xml, file which defines how application archives are created. The application archives, in .zip or .tar.gz format, are ready-to-deploy application archive packages for Oracle Application Container Cloud Service.
Creating Oracle Application Container Cloud Service Application Archives with Maven
Create a
bin.xmlfile in the same directory as thepom.xmlfile. This should be the root directory of your project.Insert the following code into the
bin.xmlfile and save it.Create a file named
manifest.jsonin the same project root directory.Copy the following code into
manifest.jsonand save the file.Add links to the Spring Boot repositories which are available on the Internet.
That completes the updates to the
pom.xmlfile. Here's the complete file with all edits included.
<assembly xmlns="http://maven.apache.org/plugins/maven-assembly-plugin/assembly/1.1.3"
xmlns:xsi="http://www.w3.org/2001/XMLSchema-instance"
xsi:schemaLocation="http://maven.apache.org/plugins/maven-assembly-plugin/assembly/1.1.3 http://maven.apache.org/xsd/assembly-1.1.3.xsd">
<id>distribution</id>
<formats>
<format>zip</format>
<format>tar.gz</format>
</formats>
<includeBaseDirectory>false</includeBaseDirectory>
<files>
<file>
<source>manifest.json</source>
<outputDirectory></outputDirectory>
</file>
</files>
<fileSets>
<fileSet>
<directory>${project.build.directory}</directory>
<outputDirectory></outputDirectory>
<includes>
<include>EmployeeRESTApp-1.0.jar</include>
</includes>
</fileSet>
</fileSets>
</assembly>
{
"runtime": {
"majorVersion": "8"
},
"command": "java -jar EmployeeRESTApp-1.0.jar",
"release": {
"version": "1.0",
"build": "24",
"commit": "1A2B345"
},
"notes": "Employee Spring Boot Web Service"
}
The manifest.json file is a configuration file for Oracle Application Container Cloud Service. It specifies the platform version, in this case Java 8, and the command to run your application. Additional metadata about your application is also specified.
After these configuration changes, Maven creates the following files in the target directory: EmployeeRESTApp-1.0.jar, EmployeeRESTApp-1.0-dist.zip, and EmployeeRESTApp-1.0-dist.tar.gz. You don't need to create both .zip and .tar.gz files, but both are produced as examples.
<repositories>
<repository>
<id>spring-releases</id>
<url>https://repo.spring.io/libs-release</url>
</repository>
</repositories>
<pluginRepositories>
<pluginRepository>
<id>spring-releases</id>
<url>https://repo.spring.io/libs-release</url>
</pluginRepository>
</pluginRepositories>
</project>
<project xmlns="http://maven.apache.org/POM/4.0.0" xmlns:xsi="http://www.w3.org/2001/XMLSchema-instance"
xsi:schemaLocation="http://maven.apache.org/POM/4.0.0 http://maven.apache.org/maven-v4_0_0.xsd">
<modelVersion>4.0.0</modelVersion>
<groupId>com.example.rest</groupId>
<artifactId>EmployeeRESTApp</artifactId>
<version>1.0</version>
<name>EmployeeRESTApp</name>
<properties>
<java.version>1.8</java.version>
<project.build.sourceEncoding>UTF-8</project.build.sourceEncoding>
</properties>
  <parent>
        <groupId>org.springframework.boot</groupId>
        <artifactId>spring-boot-starter-parent</artifactId>
        <version>1.4.0.RELEASE</version>
    </parent>

    <dependencies>
        <dependency>
            <groupId>org.springframework.boot</groupId>
            <artifactId>spring-boot-starter-web</artifactId>
        </dependency>

        <!-- databinding; ObjectMapper, JsonNode and related classes are here -->
        <dependency>
            <groupId>com.fasterxml.jackson.core</groupId>
            <artifactId>jackson-databind</artifactId>
            <version>2.8.1</version>
        </dependency>

        <dependency>
            <groupId>junit</groupId>
            <artifactId>junit</artifactId>
            <version>4.12</version>
            <scope>test</scope>
        </dependency>

    </dependencies>
    <build>
        <plugins>
            <plugin>
                <groupId>org.springframework.boot</groupId>
                <artifactId>spring-boot-maven-plugin</artifactId>
            </plugin>

            <plugin>
                <groupId>org.codehaus.mojo</groupId>
                <artifactId>exec-maven-plugin</artifactId>
                <version>1.5.0</version>
                <executions>
                    <execution>
                        <goals>
                            <goal>java</goal>
                        </goals>
                    </execution>
                </executions>
                <configuration>
                    <mainClass>com.example.rest.App</mainClass>
                </configuration>
            </plugin>

            <plugin>
                <artifactId>maven-assembly-plugin</artifactId>
                <version>2.6</version>
                <configuration>
                    <descriptors>
                        <descriptor>bin.xml</descriptor>
                    </descriptors>
                    <finalName>${project.build.finalName}-dist</finalName>
                    <appendAssemblyId>false</appendAssemblyId>
                </configuration>
                <executions>
                    <execution>
                        <id>make-assembly</id>
                        <phase>package</phase>
                        <goals>
                            <goal>single</goal>
                        </goals>
                    </execution>
                </executions>
            </plugin>
        </plugins>
    </build>
<repositories>
<repository>
<id>spring-releases</id>
<url>https://repo.spring.io/libs-release</url>
</repository>
</repositories>
<pluginRepositories>
<pluginRepository>
<id>spring-releases</id>
<url>https://repo.spring.io/libs-release</url>
</pluginRepository>
</pluginRepositories>
</project>
Creating the Employee Class
The Employee class serves as the model for this application. The class is a plain old Java class that represents an employee of a typical company. The fields included in the class are: id, firstName, lastName, email, phone, birthDate, title, and department.
Create a new class called
Employeein thecom.example.restpackage.Copy the following code into the file and save the file.
/* Copyright © 2017 Oracle and/or its affiliates. All rights reserved. */
package com.example.rest;
public class Employee {
private final long id;
private final String firstName;
private final String lastName;
private final String email;
private final String phone;
private final String birthDate;
private final String title;
private final String department;
public Employee(){
super();
id = 0;
firstName = "";
lastName = "";
email = "";
phone = "";
birthDate = "";
title = "";
department = "";
}
public Employee(long id, String firstName, String lastName, String email, String phone, String birthDate, String title, String department){
this.id = id;
this.firstName = firstName;
this.lastName = lastName;
this.email = email;
this.phone = phone;
this.birthDate = birthDate;
this.title = title;
this.department = department;
}
public long getId(){
return this.id;
}
public String getFirstName() {
return this.firstName;
}
public String getLastName() {
return this.lastName;
}
public String getEmail(){
return this.email;
}
public String getPhone(){
return this.phone;
}
public String getBirthDate() {
return this.birthDate;
}
public String getTitle() {
return this.title;
}
public String getDepartment(){
return this.department;
}
@Override
public String toString(){
return "ID: " + id
+ " First Name: " + firstName
+ " Last Name: " + lastName
+ " EMail: " + email
+ " Phone: " + phone
+ " Birth Date: " + birthDate
+ " Title: " + title
+ " Department: " + department;
}
}
Creating a MockEmployeeList Class
For initial testing, we're using an ArrayList of Employee objects as our database. The MockEmployeeList class generates this data from 40 rows of sample data stored in a JSON string.
Create a
MockEmployeeList.javafile in thecom.example.restpackage.Copy the following code into the file and save it.
/* Copyright © 2017 Oracle and/or its affiliates. All rights reserved. */
package com.example.rest;
import com.fasterxml.jackson.databind.ObjectMapper;
import java.io.IOException;
import java.util.Arrays;
import java.util.concurrent.CopyOnWriteArrayList;
public class MockEmployeeList {
private static final CopyOnWriteArrayList eList = new CopyOnWriteArrayList<>();
static {
String jsonString = "[{\"id\":100,\"firstName\":\"Hugh\",\"lastName\":\"Jast\",\"email\":\"Hugh.Jast@example.com\",\"phone\":\"730-715-4446\",\"birthDate\":\"1970-11-28T08:28:48.078Z\",\"title\":\"National Data Strategist\",\"department\":\"Mobility\"},{\"id\":101,\"firstName\":\"Toy\",\"lastName\":\"Herzog\",\"email\":\"Toy.Herzog@example.com\",\"phone\":\"769-569-1789\",\"birthDate\":\"1961-08-08T11:39:27.324Z\",\"title\":\"Dynamic Operations Manager\",\"department\":\"Paradigm\"},{\"id\":102,\"firstName\":\"Reed\",\"lastName\":\"Hahn\",\"email\":\"Reed.Hahn@example.com\",\"phone\":\"429-071-2018\",\"birthDate\":\"1977-02-05T19:18:57.407Z\",\"title\":\"Future Directives Facilitator\",\"department\":\"Quality\"},{\"id\":103,\"firstName\":\"Novella\",\"lastName\":\"Bahringer\",\"email\":\"Novella.Bahringer@example.com\",\"phone\":\"293-596-3547\",\"birthDate\":\"1961-07-25T10:59:55.485Z\",\"title\":\"Principal Factors Architect\",\"department\":\"Division\"},{\"id\":104,\"firstName\":\"Zora\",\"lastName\":\"Sawayn\",\"email\":\"Zora.Sawayn@example.com\",\"phone\":\"923-814-0502\",\"birthDate\":\"1978-03-18T17:00:12.938Z\",\"title\":\"Dynamic Marketing Designer\",\"department\":\"Security\"},{\"id\":105,\"firstName\":\"Cordia\",\"lastName\":\"Willms\",\"email\":\"Cordia.Willms@example.com\",\"phone\":\"778-821-3941\",\"birthDate\":\"1989-03-31T23:03:51.599Z\",\"title\":\"Human Division Representative\",\"department\":\"Optimization\"},{\"id\":106,\"firstName\":\"Clair\",\"lastName\":\"Bartoletti\",\"email\":\"Clair.Bartoletti@example.com\",\"phone\":\"647-896-8993\",\"birthDate\":\"1986-01-04T01:19:47.243Z\",\"title\":\"Customer Marketing Executive\",\"department\":\"Factors\"},{\"id\":107,\"firstName\":\"Joe\",\"lastName\":\"Beahan\",\"email\":\"Joe.Beahan@example.com\",\"phone\":\"548-890-6181\",\"birthDate\":\"1990-07-11T23:42:02.063Z\",\"title\":\"District Group Specialist\",\"department\":\"Program\"},{\"id\":108,\"firstName\":\"Daphney\",\"lastName\":\"Feest\",\"email\":\"Daphney.Feest@example.com\",\"phone\":\"143-967-7041\",\"birthDate\":\"1984-03-26T16:32:41.332Z\",\"title\":\"Dynamic Mobility Consultant\",\"department\":\"Metrics\"},{\"id\":109,\"firstName\":\"Janessa\",\"lastName\":\"Wyman\",\"email\":\"Janessa.Wyman@example.com\",\"phone\":\"498-186-9009\",\"birthDate\":\"1985-09-06T10:34:05.540Z\",\"title\":\"Investor Brand Associate\",\"department\":\"Markets\"},{\"id\":110,\"firstName\":\"Mara\",\"lastName\":\"Roob\",\"email\":\"Mara.Roob@example.com\",\"phone\":\"962-540-9884\",\"birthDate\":\"1975-05-11T09:45:58.248Z\",\"title\":\"Legacy Assurance Engineer\",\"department\":\"Usability\"},{\"id\":111,\"firstName\":\"Brennon\",\"lastName\":\"Bernhard\",\"email\":\"Brennon.Bernhard@example.com\",\"phone\":\"395-224-9853\",\"birthDate\":\"1963-12-05T20:32:26.668Z\",\"title\":\"Product Web Officer\",\"department\":\"Interactions\"},{\"id\":112,\"firstName\":\"Amya\",\"lastName\":\"Bernier\",\"email\":\"Amya.Bernier@example.com\",\"phone\":\"563-562-4171\",\"birthDate\":\"1972-06-23T15:25:40.799Z\",\"title\":\"Global Tactics Planner\",\"department\":\"Program\"},{\"id\":113,\"firstName\":\"Claud\",\"lastName\":\"Boehm\",\"email\":\"Claud.Boehm@example.com\",\"phone\":\"089-073-7399\",\"birthDate\":\"1965-02-27T14:09:28.325Z\",\"title\":\"National Marketing Associate\",\"department\":\"Directives\"},{\"id\":114,\"firstName\":\"Nyah\",\"lastName\":\"Schowalter\",\"email\":\"Nyah.Schowalter@example.com\",\"phone\":\"823-063-7120\",\"birthDate\":\"1969-02-19T19:34:55.044Z\",\"title\":\"Dynamic Communications Assistant\",\"department\":\"Metrics\"},{\"id\":115,\"firstName\":\"Imogene\",\"lastName\":\"Bernhard\",\"email\":\"Imogene.Bernhard@example.com\",\"phone\":\"747-970-6062\",\"birthDate\":\"1958-02-09T15:03:53.070Z\",\"title\":\"Dynamic Assurance Supervisor\",\"department\":\"Paradigm\"},{\"id\":116,\"firstName\":\"Chanel\",\"lastName\":\"Kuhlman\",\"email\":\"Chanel.Kuhlman@example.com\",\"phone\":\"882-145-9513\",\"birthDate\":\"1985-03-03T18:12:15.936Z\",\"title\":\"District Paradigm Representative\",\"department\":\"Integration\"},{\"id\":117,\"firstName\":\"Cierra\",\"lastName\":\"Morar\",\"email\":\"Cierra.Morar@example.com\",\"phone\":\"273-607-2209\",\"birthDate\":\"1965-01-25T20:17:32.836Z\",\"title\":\"Dynamic Data Planner\",\"department\":\"Paradigm\"},{\"id\":118,\"firstName\":\"Faye\",\"lastName\":\"Grimes\",\"email\":\"Faye.Grimes@example.com\",\"phone\":\"750-139-1344\",\"birthDate\":\"1962-08-21T07:52:29.284Z\",\"title\":\"Central Applications Analyst\",\"department\":\"Tactics\"},{\"id\":119,\"firstName\":\"Doyle\",\"lastName\":\"Rohan\",\"email\":\"Doyle.Rohan@example.com\",\"phone\":\"093-457-5621\",\"birthDate\":\"1991-11-29T17:19:01.536Z\",\"title\":\"Corporate Accountability Supervisor\",\"department\":\"Applications\"},{\"id\":120,\"firstName\":\"Jonathan\",\"lastName\":\"Barrows\",\"email\":\"Jonathan.Barrows@example.com\",\"phone\":\"262-503-2161\",\"birthDate\":\"1963-12-15T07:40:48.738Z\",\"title\":\"Regional Configuration Liason\",\"department\":\"Implementation\"},{\"id\":121,\"firstName\":\"Myriam\",\"lastName\":\"Luettgen\",\"email\":\"Myriam.Luettgen@example.com\",\"phone\":\"951-924-8295\",\"birthDate\":\"1962-02-08T10:09:10.361Z\",\"title\":\"Central Functionality Specialist\",\"department\":\"Accountability\"},{\"id\":122,\"firstName\":\"Johnnie\",\"lastName\":\"Schiller\",\"email\":\"Johnnie.Schiller@example.com\",\"phone\":\"534-025-2200\",\"birthDate\":\"1965-04-11T02:03:48.333Z\",\"title\":\"Principal Creative Developer\",\"department\":\"Interactions\"},{\"id\":123,\"firstName\":\"Laila\",\"lastName\":\"White\",\"email\":\"Laila.White@example.com\",\"phone\":\"468-939-2298\",\"birthDate\":\"1956-01-04T02:01:09.619Z\",\"title\":\"Corporate Optimization Engineer\",\"department\":\"Assurance\"},{\"id\":124,\"firstName\":\"Alessandra\",\"lastName\":\"Becker\",\"email\":\"Alessandra.Becker@example.com\",\"phone\":\"081-724-0866\",\"birthDate\":\"1984-08-12T05:32:50.509Z\",\"title\":\"Central Identity Associate\",\"department\":\"Quality\"},{\"id\":125,\"firstName\":\"Shannon\",\"lastName\":\"McCullough\",\"email\":\"Shannon.McCullough@example.com\",\"phone\":\"101-995-1089\",\"birthDate\":\"1989-02-25T07:47:10.774Z\",\"title\":\"Global Data Engineer\",\"department\":\"Division\"},{\"id\":126,\"firstName\":\"Garnet\",\"lastName\":\"Labadie\",\"email\":\"Garnet.Labadie@example.com\",\"phone\":\"147-954-6624\",\"birthDate\":\"1990-01-01T05:31:28.531Z\",\"title\":\"Senior Communications Producer\",\"department\":\"Program\"},{\"id\":127,\"firstName\":\"Mark\",\"lastName\":\"Graham\",\"email\":\"Mark.Graham@example.com\",\"phone\":\"462-746-7388\",\"birthDate\":\"1991-08-23T11:17:47.950Z\",\"title\":\"Legacy Directives Agent\",\"department\":\"Assurance\"},{\"id\":128,\"firstName\":\"Tristin\",\"lastName\":\"Bayer\",\"email\":\"Tristin.Bayer@example.com\",\"phone\":\"882-044-3996\",\"birthDate\":\"1964-03-26T17:49:29.143Z\",\"title\":\"Internal Marketing Officer\",\"department\":\"Intranet\"},{\"id\":129,\"firstName\":\"Maurice\",\"lastName\":\"Renner\",\"email\":\"Maurice.Renner@example.com\",\"phone\":\"383-435-0943\",\"birthDate\":\"1973-11-05T18:41:06.678Z\",\"title\":\"National Accountability Planner\",\"department\":\"Accounts\"},{\"id\":130,\"firstName\":\"Preston\",\"lastName\":\"Stark\",\"email\":\"Preston.Stark@example.com\",\"phone\":\"080-698-9552\",\"birthDate\":\"1994-02-02T10:24:40.312Z\",\"title\":\"Corporate Program Orchestrator\",\"department\":\"Integration\"},{\"id\":131,\"firstName\":\"Mabelle\",\"lastName\":\"Herman\",\"email\":\"Mabelle.Herman@example.com\",\"phone\":\"778-672-2787\",\"birthDate\":\"1956-11-30T09:45:45.699Z\",\"title\":\"Human Identity Officer\",\"department\":\"Integration\"},{\"id\":132,\"firstName\":\"Juvenal\",\"lastName\":\"Swaniawski\",\"email\":\"Juvenal.Swaniawski@example.com\",\"phone\":\"349-906-2745\",\"birthDate\":\"1963-11-17T06:51:48.742Z\",\"title\":\"Future Program Planner\",\"department\":\"Response\"},{\"id\":133,\"firstName\":\"Rachelle\",\"lastName\":\"Okuneva\",\"email\":\"Rachelle.Okuneva@example.com\",\"phone\":\"134-565-3868\",\"birthDate\":\"1992-05-27T04:39:16.831Z\",\"title\":\"District Creative Architect\",\"department\":\"Paradigm\"},{\"id\":134,\"firstName\":\"Macey\",\"lastName\":\"Weissnat\",\"email\":\"Macey.Weissnat@example.com\",\"phone\":\"210-461-3749\",\"birthDate\":\"1978-06-24T06:38:18.125Z\",\"title\":\"Product Accountability Facilitator\",\"department\":\"Data\"},{\"id\":135,\"firstName\":\"Ena\",\"lastName\":\"Gerlach\",\"email\":\"Ena.Gerlach@example.com\",\"phone\":\"429-925-7634\",\"birthDate\":\"1976-04-09T22:36:01.397Z\",\"title\":\"Human Tactics Agent\",\"department\":\"Creative\"},{\"id\":136,\"firstName\":\"Darrick\",\"lastName\":\"Deckow\",\"email\":\"Darrick.Deckow@example.com\",\"phone\":\"549-222-4121\",\"birthDate\":\"1956-10-25T01:05:22.507Z\",\"title\":\"Lead Solutions Producer\",\"department\":\"Metrics\"},{\"id\":137,\"firstName\":\"Palma\",\"lastName\":\"Torp\",\"email\":\"Palma.Torp@example.com\",\"phone\":\"346-556-3517\",\"birthDate\":\"1967-06-24T15:42:05.485Z\",\"title\":\"Product Infrastructure Consultant\",\"department\":\"Response\"},{\"id\":138,\"firstName\":\"Lucious\",\"lastName\":\"Steuber\",\"email\":\"Lucious.Steuber@example.com\",\"phone\":\"977-372-2840\",\"birthDate\":\"1961-11-24T16:19:53.598Z\",\"title\":\"District Creative Supervisor\",\"department\":\"Mobility\"},{\"id\":139,\"firstName\":\"Kacey\",\"lastName\":\"Kilback\",\"email\":\"Kacey.Kilback@example.com\",\"phone\":\"268-777-2011\",\"birthDate\":\"1957-09-06T10:07:09.719Z\",\"title\":\"Corporate Mobility Agent\",\"department\":\"Infrastructure\"}]";
try {
ObjectMapper mapper = new ObjectMapper();
Employee[] myEmployees = mapper.readValue(jsonString, Employee[].class);
eList.addAll(Arrays.asList(myEmployees));
} catch (IOException exception) {
System.out.println("Error: " + exception.getMessage());
}
}
private MockEmployeeList(){}
public static CopyOnWriteArrayList getInstance(){
return eList;
}
}
Creating DAO Classes with an ArrayList
Remember that, the first version of the application uses an ArrayList to store its data. The sample application uses the Data Access Object (DAO) pattern for data access. This way, the data access code for the REST application has to be written only once. Only a change to the DAO's initialization is required to switch to a new type of data store.
Create an interface in the
com.example.restpackage namedEmployeeDAO.java.Copy the the following code into the file and save it.
/* Copyright © 2017 Oracle and/or its affiliates. All rights reserved. */ package com.example.rest; import java.util.List; public interface EmployeeDAO { public ListgetAllEmployees(); public Employee getEmployee(long id); public List getByLastName(String name); public List getByTitle(String title); public List getByDepartment(String department); public boolean add(Employee employee); // False equals fail public boolean update(long id, Employee employee); // False equals fail public boolean delete(long id); // False equals fail } Note: The
getmethods all returnEmployeeobjects orList<Employee>objects. The other methods return abooleanvalue indicating the success or failure of the operation.Create a Java class in the
com.example.restpackage namedEmployeeListDAO.java.Copy the following code into the file and save it.
/* Copyright © 2017 Oracle and/or its affiliates. All rights reserved. */
package com.example.rest;
import java.util.List;
import java.util.concurrent.CopyOnWriteArrayList;
import java.util.stream.Collectors;
public class EmployeeListDAO implements EmployeeDAO{
private final CopyOnWriteArrayList eList = MockEmployeeList.getInstance();
@Override
public List getAllEmployees(){
return eList;
}
@Override
public Employee getEmployee(long id){
Employee match = null;
match = eList.stream()
.filter(e -> e.getId() == id)
.findFirst().orElse(match);
return match;
}
@Override
public List getByLastName(String name){
List matchList =
eList.stream()
.filter((e) -> (e.getLastName().contains(name)))
.collect(Collectors.toList());
return matchList;
}
@Override
public List getByTitle(String title){
List matchList =
eList.stream()
.filter((e) -> (e.getTitle().contains(title)))
.collect(Collectors.toList());
return matchList;
}
@Override
public List getByDepartment(String department){
List matchList =
eList.stream()
.filter((e) -> (e.getDepartment().contains(department)))
.collect(Collectors.toList());
return matchList;
}
@Override
public boolean add(Employee employee){
long next = eList.size() + 100;
Employee nextEmployee =
new Employee( next, employee.getFirstName(), employee.getLastName(),
employee.getEmail(), employee.getPhone(),
employee.getBirthDate(), employee.getTitle(), employee.getDepartment());
eList.add(nextEmployee);
return true;
}
@Override
public boolean update(long id, Employee employee){
int matchIndex = -1;
matchIndex = eList.stream()
.filter(e -> e.getId() == id)
.findFirst()
.map(e -> eList.indexOf(e))
.orElse(matchIndex);
if (matchIndex > -1){
eList.set(matchIndex, employee);
return true;
} else {
return false;
}
}
@Override
public boolean delete(long id){
int matchIndex = -1;
matchIndex = eList.stream()
.filter(e -> e.getId() == id)
.findFirst()
.map(e -> eList.indexOf(e))
.orElse(matchIndex);
if (matchIndex > -1){
eList.remove(matchIndex);
return true;
} else {
return false;
}
}
}
Note: Lambda expressions perform most of the operations. Notice that the search methods use the contains method rather than looking for an exact match.
Updating the App.java Class for Spring Boot
To add Spring Boot support to the application, update the App.java class.
First make changes to initialize the
App.java. The@SpringBootApplicationannotation adds Spring Boot features to your application. For a Java application to deploy properly on Oracle Application Container Cloud Service, theHOSTNAMEandPORTenvironment variables must be read and used to start the application. Notice that theOptional<String>class gets the environment variables and stores their values. If no values are set for the environment variables, thennullwill be stored initially.With the
Optionalvariables set, the next step is to set the start upProperties. Spring Boot can be configured at runtime using thePropertiesclass. The code uses theOptionalclass to get the value of the environment variables or sets a default value using theorElsemethod. This code effectively lets you test the application locally or deploy it to Oracle Application Container Cloud Service without any code change.With all the configuration variables set, start the application with the
Propertiesobject as a parameter.
@SpringBootApplication
public class App {
// Get PORT and HOST from Environment or set default
public static final Optional<String> host;
public static final Optional<String> port;
public static final Properties myProps = new Properties();
static {
host = Optional.ofNullable(System.getenv("HOSTNAME"));
port = Optional.ofNullable(System.getenv("PORT"));
}
public static void main(String[] args) {
// Set properties
myProps.setProperty("server.address", host.orElse("localhost"));
myProps.setProperty("server.port", port.orElse("8080"));
SpringApplication app = new SpringApplication(App.class);
app.setDefaultProperties(myProps);
app.run(args);
The following source code is summary of all the changes made to App.java.
/* Copyright © 2017 Oracle and/or its affiliates. All rights reserved. */
package com.example.rest;
import java.util.Optional;
import java.util.Properties;
import org.springframework.boot.SpringApplication;
import org.springframework.boot.autoconfigure.SpringBootApplication;
@SpringBootApplication
public class App {
// Get PORT and HOST from Environment or set default
public static final Optional host;
public static final Optional port;
public static final Properties myProps = new Properties();
static {
host = Optional.ofNullable(System.getenv("HOSTNAME"));
port = Optional.ofNullable(System.getenv("PORT"));
}
public static void main(String[] args) {
// Set properties
myProps.setProperty("server.address", host.orElse("localhost"));
myProps.setProperty("server.port", port.orElse("8080"));
SpringApplication app = new SpringApplication(App.class);
app.setDefaultProperties(myProps);
app.run(args);
}
}
Creating a Spring Boot REST Controller Class
For a REST application, Spring Boot will load any class that's annotated as a @RestController. The complete source code for the controller class is included at the end of this section.
In the
com.example.restpackage, add a Java class namedEmployeeController.java.Annotate the class.
@CrossOrigin @RestController @RequestMapping("/employees") public class EmployeeController { EmployeeDAO edao = new EmployeeListDAO();Three annotations are added to the class. Notice also that all data operations will be handled by
edao, which is anEmployeeDAO. This way, only a simple change to thenewstatement is needed to change to a different kind of data store.@CrossOrigin- Adds cross-domain headers to the HTTP request to allow REST clients from other domains to connect to this server. This allows a REST client on your local machine hard drive to connect to your REST application.@RestController- Makes this class a REST controller for Spring Boot.@RequestMapping("/employees")- Specifies that all REST endpoints for this class will be contained under the/employeesendpoint.
Create a method to get all employees.
// Get all employees @RequestMapping(method = RequestMethod.GET) public Employee[] getAll() { return edao.getAllEmployees().toArray(new Employee[0]); }The
@RequestMappingannotations specifies that this method handles allGETrequests for the/employeesendpoint. Note the return type of the method,Employee[]. Thus, anEmployeearray is automatically converted into a JSON format and returned without any additional code. An HTTP status code of 200 is returned automatically.Create a method to get an employee specified by ID.
// Get an employee @RequestMapping(method = RequestMethod.GET, value = "{id}") public ResponseEntity get(@PathVariable long id) { Employee match = null; match = edao.getEmployee(id); if (match != null) { return new ResponseEntity<>(match, HttpStatus.OK); } else { return new ResponseEntity<>(null, HttpStatus.NOT_FOUND); } }This time, the
@RequestMappingannotation specifies that an ID appended to the URI will return a matchingEmployee(for example,/employees/101). The ID field is identified by{id}and a@PathVariableannotation. The value retrieved from the URI is passed to the method. If a match is found, then theEmployeeobject is returned in JSON format. An HTTP status 200 (OK) is also returned. If no match is found, then an HTTP response code of 404 (Not Found) is returned. Spring Boot provides theResponseEntityclass to return data or set an HTTP status code.Create a method to search for employees by last name.
// Get employees by lastName @RequestMapping(method = RequestMethod.GET, value = "/lastname/{name}") public ResponseEntity getByLastName(@PathVariable String name) { ListmatchList = edao.getByLastName(name); if (matchList.size() > 0) { return new ResponseEntity<>(matchList.toArray(new Employee[0]), HttpStatus.OK); } else { return new ResponseEntity<>(null, HttpStatus.NOT_FOUND); } } For this method, the
@RequestMappingannotation adds a new endpoint for this service. Searching for/employees/lastname/targetnamewill return any employees with a last name that containstargetname. AnArrayListofEmployeeobjects is returned if matches are found. TheResponseEntityclass is used in a similar manner to the previous method.Create methods to search by title and department. Because both methods are very similar to the previous method, the method details are omitted here.
Create a method to add an employee to the data store.
// Add an employee @RequestMapping(method = RequestMethod.POST) public ResponseEntity add(@RequestBody Employee employee) { if (edao.add(employee)) { return new ResponseEntity<>(null, HttpStatus.CREATED); } else { return new ResponseEntity<>(null, HttpStatus.INTERNAL_SERVER_ERROR); } }This example shows that the
@RequestMappingannotation sets the HTTP method toPOST. Using the@RequestBodyannotation, the employee data is uploaded to the server as JSON data and automatically converted into anEmployeeobject. The HTTP status code is updated appropriately for possible outcomes: a 201 code for created and a 500 code for server error.To finish the class
updateanddeletemethods have been added. Theupdateanddeletemethods have a similar structure to theaddmethod./* Copyright © 2017 Oracle and/or its affiliates. All rights reserved. */ package com.example.rest; import java.util.List; import org.springframework.http.HttpStatus; import org.springframework.http.ResponseEntity; import org.springframework.web.bind.annotation.CrossOrigin; import org.springframework.web.bind.annotation.PathVariable; import org.springframework.web.bind.annotation.RequestBody; import org.springframework.web.bind.annotation.RequestMapping; import org.springframework.web.bind.annotation.RequestMethod; import org.springframework.web.bind.annotation.RestController; @CrossOrigin @RestController @RequestMapping("/employees") public class EmployeeController { EmployeeDAO edao = new EmployeeListDAO(); // Get all employees @RequestMapping(method = RequestMethod.GET) public Employee[] getAll() { return edao.getAllEmployees().toArray(new Employee[0]); } // Get an employee @RequestMapping(method = RequestMethod.GET, value = "{id}") public ResponseEntity get(@PathVariable long id) { Employee match = null; match = edao.getEmployee(id); if (match != null) { return new ResponseEntity<>(match, HttpStatus.OK); } else { return new ResponseEntity<>(null, HttpStatus.NOT_FOUND); } } // Get employees by lastName @RequestMapping(method = RequestMethod.GET, value = "/lastname/{name}") public ResponseEntity getByLastName(@PathVariable String name) { ListmatchList = edao.getByLastName(name); if (matchList.size() > 0) { return new ResponseEntity<>(matchList.toArray(new Employee[0]), HttpStatus.OK); } else { return new ResponseEntity<>(null, HttpStatus.NOT_FOUND); } } // Get employee by title @RequestMapping(method = RequestMethod.GET, value = "/title/{name}") public ResponseEntity getByTitle(@PathVariable String name) { List matchList = edao.getByTitle(name); if (matchList.size() > 0) { return new ResponseEntity<>(matchList.toArray(new Employee[0]), HttpStatus.OK); } else { return new ResponseEntity<>(null, HttpStatus.NOT_FOUND); } } // Get employee by dept @RequestMapping(method = RequestMethod.GET, value = "/department/{name}") public ResponseEntity getByDept(@PathVariable String name) { List matchList = edao.getByDepartment(name); if (matchList.size() > 0) { return new ResponseEntity<>(matchList.toArray(new Employee[0]), HttpStatus.OK); } else { return new ResponseEntity<>(null, HttpStatus.NOT_FOUND); } } // Add an employee @RequestMapping(method = RequestMethod.POST) public ResponseEntity add(@RequestBody Employee employee) { if (edao.add(employee)) { return new ResponseEntity<>(null, HttpStatus.CREATED); } else { return new ResponseEntity<>(null, HttpStatus.INTERNAL_SERVER_ERROR); } } // Update an employee @RequestMapping(method = RequestMethod.PUT, value = "{id}") public ResponseEntity update(@PathVariable long id, @RequestBody Employee employee) { if (edao.update(id, employee)) { return new ResponseEntity<>(null, HttpStatus.OK); } else { return new ResponseEntity<>(null, HttpStatus.NOT_FOUND); } } // Delete a employee @RequestMapping(method = RequestMethod.DELETE, value = "{id}") public ResponseEntity delete(@PathVariable long id) { boolean result = edao.delete(id); if (result) { return new ResponseEntity<>(null, HttpStatus.OK); } else { return new ResponseEntity<>(null, HttpStatus.NOT_FOUND); } } }
Testing your Application with Your Browser
You're now ready to test your application. Check your pom.xml file to make sure it is updated as specified in the Configuring pom.xml for Spring Boot section of this tutorial. In addition, make sure you have created a bin.xml file and a manifest.json file as outlined in that same section.
From your Maven project root directory, build your project:
mvn clean packageFrom the same directory, start your application:
java -jar target/EmployeeRESTApp-1.0.jarOpen a web browser and test any of the following URLs:
http://localhost:8080/employeeshttp://localhost:8080/employees/lastname/Bernhttp://localhost:8080/employees/department/Mobilityhttp://localhost:8080/employees/title/District
Any of these URLs should provide employee records that match the specified criteria. For example, the last URL would provide the following results in the browser:
[{"id":107,"firstName":"Joe","lastName":"Beahan","email":"Joe.Beahan@example.com","phone":"548-890-6181","birthDate":"1990-07-11T23:42:02.063Z","title":"District Group Specialist","department":"Program"},{"id":116,"firstName":"Chanel","lastName":"Kuhlman","email":"Chanel.Kuhlman@example.com","phone":"882-145-9513","birthDate":"1985-03-03T18:12:15.936Z","title":"District Paradigm Representative","department":"Integration"},{"id":133,"firstName":"Rachelle","lastName":"Okuneva","email":"Rachelle.Okuneva@example.com","phone":"134-565-3868","birthDate":"1992-05-27T04:39:16.831Z","title":"District Creative Architect","department":"Paradigm"},{"id":138,"firstName":"Lucious","lastName":"Steuber","email":"Lucious.Steuber@example.com","phone":"977-372-2840","birthDate":"1961-11-24T16:19:53.598Z","title":"District Creative Supervisor","department":"Mobility"}]
Note: To perform additional testing, cURL scripts are provided in the complete project zip file for this tutorial.
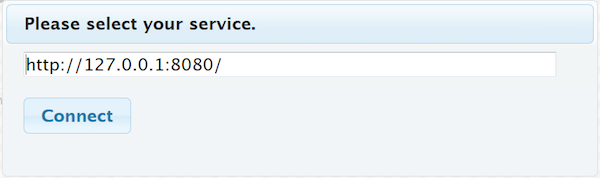
Testing with an HTML5 Client
A standalone HTML5/Javascript client is also available for your testing. If you open the final project .zip for this tutorial, open the client.html file in the clients/standalone directory. You'll be prompted for the URL to your application and then the client should connect.
The output from a client search should look like this:
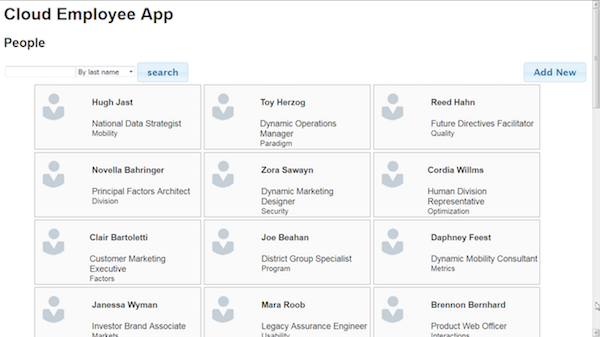
Embedding an HTML5 Client in Your Application
You can also embed the client application into your Spring Boot application. To do this, you need to add some static HTML content to your Maven project.
Go to the root directory of your Maven project and then change into the
src/maindirectory.Create a
resourcesdirectory if it does not exist. Change into theresourcesdirectory.Create a
publicdirectory.Note: Spring Boot can serve static HTML content from the
/META-INF/resources/,/resources/,/static/, or/public/directories. So for this example, static content is in thesrc/main/resources/publicdirectory. All the static content is automatically included in theJARfile created by Maven.From this tutorial's project archive, copy the contents of the
clients/embeddeddirectory into thesrc/main/resources/publicdirectory.The
embeddeddirectory includes anindex.htmlfile that loads automatically when you openhttp://localhost:8080. The client application is linked from this file.When clicked, the client application automatically starts and loads the
/employeesendpoint.
When testing locally, start your application and open http://localhost:8080 in a browser. The index.html page should load as shown.

Setting Up Oracle Database Cloud Service
Before you enable database support for your application, you need a database to connect to. The following is an overview of steps needed to set up a database on Oracle Database Cloud Service. For more detailed information, see the Oracle Database Cloud Service Tutorials.
Create a service instance in Oracle Database Cloud Service.
Download and install SQL Developer to make changes to your database. See the Oracle SQL Developer site.
Log in to your database using the
SYSTEMaccount.Create a user account to use for your application.
Log in to the database using the account that you created for this application.
- Create an
employeetable. Load the table with sample employee data.
Note: Sample SQL code for performing all of these steps is bundled with the final project source code in the sql directory.
Adding Database Support to the Application
With the database set up, add Oracle Database support to your application.
Add the Oracle Database driver to your Maven project.
Change to the root directory for your project. Then, execute the command appropriate for your Oracle Database version.
Oracle Database 11g
mvn install:install-file -DgroupId=com.oracle -DartifactId=ojdbc6 -Dversion=11.2.0.4 -Dpackaging=jar -Dfile=PathToFile/ojdbc6.jar -DgeneratePom=trueOracle Database 12c
mvn install:install-file -DgroupId=com.oracle -DartifactId=ojdbc7 -Dversion=12.1.0.2 -Dpackaging=jar -Dfile=PathToFile/ojdbc7.jar -DgeneratePom=trueAfter the driver file is installed, update the
pom.xmlfile with the Oracle database driver dependency. For example, the dependency for Oracle Database 12c would be:<dependency> <groupId>com.oracle</groupId> <artifactId>ojdbc7</artifactId> <version>12.1.0.2</version> </dependency>Add a connection class to your application. Create a class named
DBConnection.javain thecom.example.restpackage.Copy the following source code into
DBConnection.javaand save the file./* Copyright © 2017 Oracle and/or its affiliates. All rights reserved. */ package com.example.rest; import java.sql.Connection; import java.sql.SQLException; import java.util.Optional; import oracle.jdbc.pool.OracleDataSource; public class DBConnection { private static final String URL = "jdbc:oracle:thin:@"; private static final String DRIVER = "oracle.jdbc.driver.OracleDriver"; //Environment Variable Cloud public static final Optional<String> DBAAS_USERNAME = Optional.ofNullable(System.getenv("DBAAS_USER_NAME")); public static final Optional<String> DBAAS_PASSWORD = Optional.ofNullable(System.getenv("DBAAS_USER_PASSWORD")); public static final Optional<String> DBAAS_DEFAULT_CONNECT_DESCRIPTOR = Optional.ofNullable(System.getenv("DBAAS_DEFAULT_CONNECT_DESCRIPTOR")); //Local settings public static final String LOCAL_USERNAME = "oracleusr"; public static final String LOCAL_PASSWORD = "oracle"; public static final String LOCAL_DEFAULT_CONNECT_DESCRIPTOR = "localhost:1521/PDB1.identity-domain.oraclecloud.internal"; private static Connection connection = null; private static DBConnection instance = null; private DBConnection() { try { Class.forName(DRIVER).newInstance(); } catch (Exception sqle) { sqle.getMessage(); } } public static DBConnection getInstance() { if (connection == null) { instance = new DBConnection(); } return instance; } public Connection getConnection() { if (connection == null) { try { OracleDataSource ods = new OracleDataSource(); ods.setURL(URL + DBAAS_DEFAULT_CONNECT_DESCRIPTOR.orElse(LOCAL_DEFAULT_CONNECT_DESCRIPTOR)); ods.setUser(DBAAS_USERNAME.orElse(LOCAL_USERNAME)); ods.setPassword(DBAAS_PASSWORD.orElse(LOCAL_PASSWORD)); connection = ods.getConnection(); } catch (SQLException e) { e.getMessage(); } } return connection; } }Note: The
DBConnectionclass usesOptional<String>variables like theAppclass. In this case, the database user name, password, and connect descriptor make the database connection. When you deploy your application, you specify in the Oracle Application Container Cloud Service configuration which Oracle Database Cloud Service you want to connect to. Then theDBAASenvironment variables are populated and used at application start to make the database connection.Note: Make sure your connect descriptor points to the Oracle portable database service name. This example shows a connection to a 12c portable database with the local port 1521 forwarded to the database service:
localhost:1521/PDB1.identity-domain.oraclecloud.internalNext create a database DAO class to make queries to the Oracle Database. Create a file named
EmployeeDbDAO.javain thecom.example.restpackage.Copy the following source code into the
EmployeeDbDAOand save it./* Copyright © 2016 Oracle and/or its affiliates. All rights reserved. */ package com.example.rest; import java.util.List; import java.sql.Connection; import java.sql.PreparedStatement; import java.sql.ResultSet; import java.sql.SQLException; import java.util.ArrayList; public class EmployeeDbDAO implements EmployeeDAO{ List<Employee> eList = null; private final Connection conn = DBConnection.getInstance().getConnection(); public List<Employee> query(String sqlQueryStr) { List<Employee> resultList = new ArrayList<>(); try (PreparedStatement stmt = conn.prepareStatement(sqlQueryStr)) { ResultSet rs = stmt.executeQuery(); while (rs.next()) { resultList.add( new Employee(rs.getLong("ID"), rs.getString("FIRSTNAME"), rs.getString("LASTNAME"), rs.getString("EMAIL"), rs.getString("PHONE"), rs.getString("BIRTHDATE"), rs.getString("TITLE"), rs.getString("DEPARTMENT")) ); } } catch (SQLException e) { System.out.println("SQL Query Error: " + e.getMessage()); } catch (Exception e) { System.out.println("Query Error: " + e.getMessage()); } return resultList; } @Override public List<Employee> getAllEmployees(){ String queryStr = "SELECT * FROM EMPLOYEE"; List<Employee> resultList = this.query(queryStr); return resultList; } @Override public Employee getEmployee(long id){ String queryStr = "SELECT * FROM EMPLOYEE WHERE ID=" + id; List<Employee> resultList = this.query(queryStr); if (resultList.size() > 0) { return resultList.get(0); } else { return null; } } @Override public List<Employee> getByLastName(String name){ String queryStr = "SELECT * FROM EMPLOYEE WHERE LASTNAME LIKE '" + name + "%'"; List<Employee> resultList = this.query(queryStr); return resultList; } @Override public List<Employee> getByTitle(String title){ String queryStr = "SELECT * FROM EMPLOYEE WHERE TITLE LIKE '" + title + "%'"; List<Employee> resultList = this.query(queryStr); return resultList; } @Override public List<Employee> getByDepartment(String department){ String queryStr = "SELECT * FROM EMPLOYEE WHERE DEPARTMENT LIKE'" + department + "%'"; List<Employee> resultList = this.query(queryStr); return resultList; } @Override public boolean add(Employee employee){ String insertTableSQL = "INSERT INTO EMPLOYEE " + "(ID, FIRSTNAME, LASTNAME, EMAIL, PHONE, BIRTHDATE, TITLE, DEPARTMENT) " + "VALUES(EMPLOYEE_SEQ.NEXTVAL,?,?,?,?,?,?,?)"; try (PreparedStatement preparedStatement = this.conn .prepareStatement(insertTableSQL)) { preparedStatement.setString(1, employee.getFirstName()); preparedStatement.setString(2, employee.getLastName()); preparedStatement.setString(3, employee.getEmail()); preparedStatement.setString(4, employee.getPhone()); preparedStatement.setString(5, employee.getBirthDate()); preparedStatement.setString(6, employee.getTitle()); preparedStatement.setString(7, employee.getDepartment()); preparedStatement.executeUpdate(); return true; } catch (SQLException e) { System.out.println("SQL Add Error: " + e.getMessage()); return false; } catch (Exception e) { System.out.println("Add Error: " + e.getMessage()); return false; } } @Override public boolean update(long id, Employee employee){ String updateTableSQL = "UPDATE EMPLOYEE SET FIRSTNAME=?, LASTNAME=?, EMAIL=?, PHONE=?, BIRTHDATE=?, TITLE=?, DEPARTMENT=? WHERE ID=?"; try (PreparedStatement preparedStatement = this.conn .prepareStatement(updateTableSQL);) { preparedStatement.setString(1, employee.getFirstName()); preparedStatement.setString(2, employee.getLastName()); preparedStatement.setString(3, employee.getEmail()); preparedStatement.setString(4, employee.getPhone()); preparedStatement.setString(5, employee.getBirthDate()); preparedStatement.setString(6, employee.getTitle()); preparedStatement.setString(7, employee.getDepartment()); preparedStatement.setLong(8, employee.getId()); preparedStatement.executeUpdate(); return true; } catch (SQLException e) { System.out.println("SQL Update Error: " + e.getMessage()); return false; } catch (Exception e) { System.out.println("Update Error: " + e.getMessage()); return false; } } @Override public boolean delete(long id){ String deleteRowSQL = "DELETE FROM EMPLOYEE WHERE ID=?"; try (PreparedStatement preparedStatement = this.conn .prepareStatement(deleteRowSQL)) { preparedStatement.setLong(1, id); preparedStatement.executeUpdate(); return true; } catch (SQLException e) { System.out.println("SQL Delete Error: " + e.getMessage()); return false; } catch (Exception e) { System.out.println("Delete Error: " + e.getMessage()); return false; } } }Note:The same data type is returned as before. Now the data is retrieved using SQL queries rather than lambda expressions.
Make the following change in your
EmployeeController.javafile to switch to an Oracle Database data store.EmployeeDAO edao = new EmployeeDbDAO();Rebuild your application. It should now be ready to connect to an Oracle database back end.
Deploying Your Application to the Cloud
You're now ready to deploy your application to to the cloud. If you followed this tutorial or downloaded the project zip file, then the Maven configuration files pom.xml and bin.xml will automatically generate an Oracle Application Container Cloud Service application archive in .zip or .tar.gz format. Upload your application archive to Oracle Application Container Cloud Service and your application will be deployed. See Deploying an Application to Oracle Application Container Cloud Service for detailed steps.
Using the manifest.json File
A manifest.json file must be included in any application archive that's uploaded to Oracle Application Container Cloud Service. The file specifies metadata about your application, including which version of Java to use and the command used to start your application. The following is a sample manifest.json file:
{
    "runtime": {
        "majorVersion": "8"
    },
    "command": "java -jar EmployeeRESTApp-1.0.jar",
    "release": {
        "version": "1.0",
        "build": "24",
        "commit": "1A2B345"
    },
    "notes": "Employee Spring Boot Web Service"
}
If you change the application name or change the Java version, then you must update this file. For this example, the manifest.json file is stored in your project root directory with your pom.xml file.
Generating an Uberjar
An uber JAR file contains all the required and dependent libraries needed to run your application. Spring Boot Maven projects automatically generate uber JAR files. Therefore, no additional configuration is required to make them.
Connecting to Your Database
After your application is deployed, connect it to your database service instance.
Open the Service Console for Oracle Application Container Cloud Service.
Select your application from the application list.
Click the Deployments tab.
Click Add Service Binding.
For Service Type, select
Database Cloud Service.For Service Name, select the name that you used to create your database service instance.
Enter a user name and password. Use the user name and password that you used to create your database table and data. You should not use the
SYSTEMaccount.Click Save.
A message asks if you want to Apply Edits. Click Apply Edits. This adds the service binding and restarts your application. When the application restarts, it will connect to your database service instance.
Downloading Completed Project and Application Source Files
Download the complete project source code from this link: employee-prj.zip.
Want to Learn More?
Credits
Curriculum Developer: Michael Williams