 Creating
an API
Creating
an API Before You Begin
This 20-minute tutorial shows you how to create an API on the Apiary platform and how to manage the API using the Oracle API Platform Cloud Service. After your API is created, you will also learn how to invoke it by using a REST client.
Background
Oracle API Platform Cloud Service offers an easy way to manage, secure, and publish services for application developers. You can create APIs that expose the functionality of your organization's back-end systems or other services.
In this tutorial, you are an API Manager working for NextGen company. You have been tasked with creating an API for mobile devices. You create your WarrantyClaim API on the Apiary platform and in the Management Portal, you configure and deploy it. To verify your API, you invoke it using the REST client.
What Do You Need?
- An account on Apiary
- Access to an Oracle API Platform Cloud Service instance with the API Manager role and the Deploy API Grant assigned
- An active gateway in Oracle API Platform Cloud Service to deploy your APIs
- A REST client tool
 Design
an API in Apiary
Design
an API in Apiary
- Download the
warrantyclaim.ymlfile (download) into a local directory on your system. This file contains the Swagger API that will be published in Apiary. It also contains the sample data that's used as the service response. - Open a browser window and go to Apiary:
https://apiary.io/ - On the Apiary Sign in page, provide your email address and password, and then click Sign in.
- The first time you log in to Apiary, enter
Warranty
                    Claim
as the name of your first API, and then click the down arrow to select the Swagger option. Click SAVE AND START USING APIARY.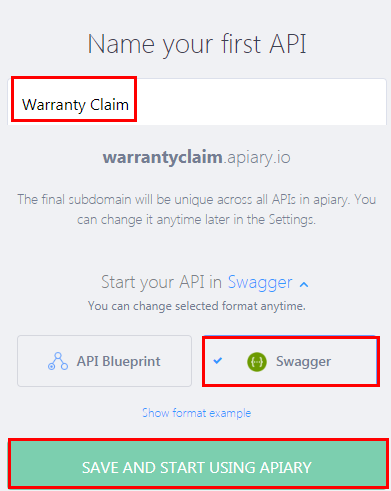
Description of the illustration firstapi.png - On the Editor page, replace the existing text with the
contents of the
warrantyClaim.ymlSwagger file.The document is automatically validated.
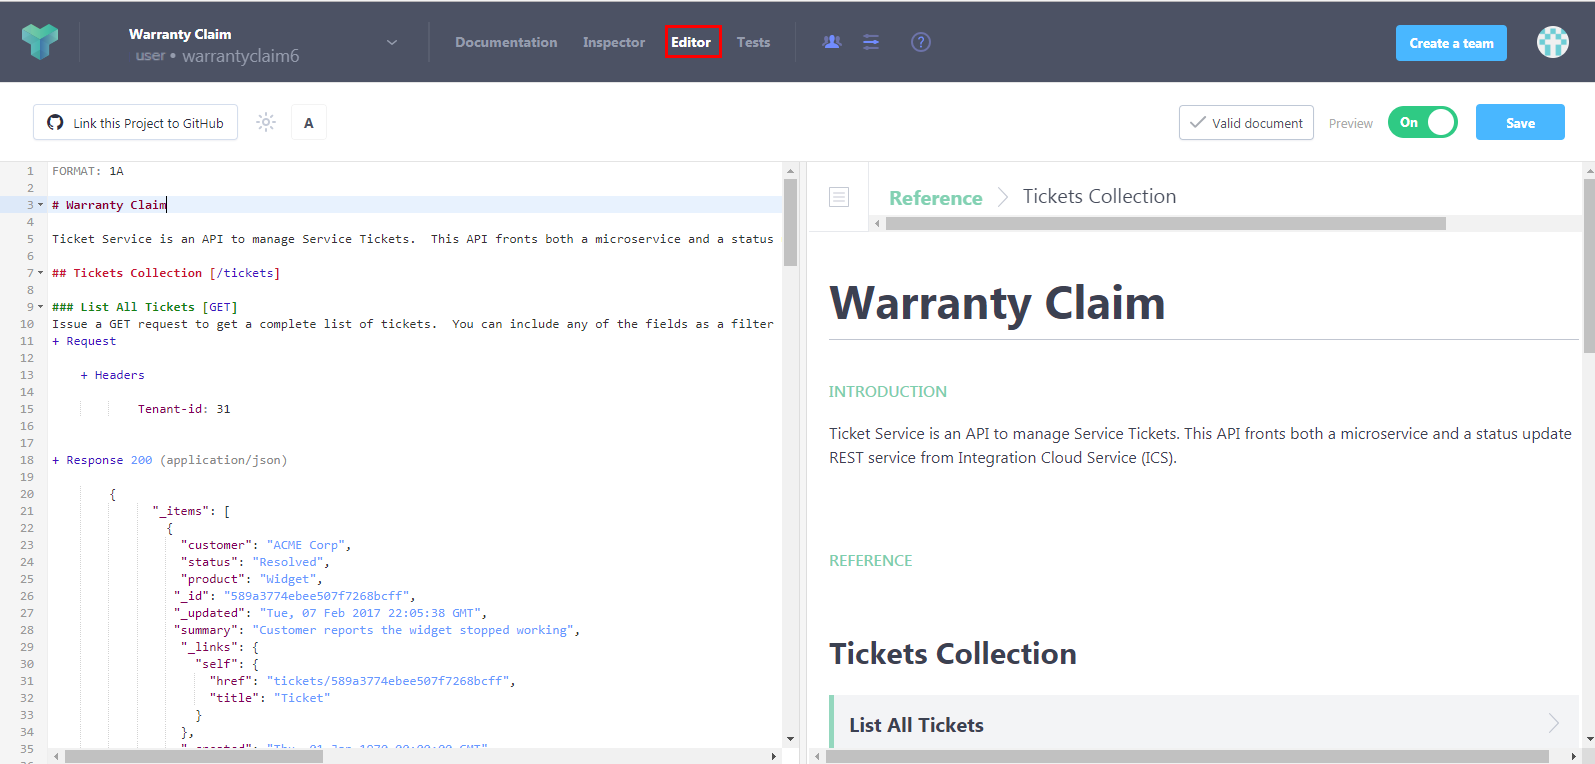
Description of the illustration warrantyclaim.png - Click Save.
If you have trouble saving the document, then verify that the text is copied correctly as it appears in the Swagger file.
- Click Inspector.
On the Inspector page, note the listening URL of your API.

Description of the illustration inspector.png
 Create
an API
Create
an API
- Sign in to the API Platform Cloud Service Management Portal
by entering the following URL format:
https://instance-identityDomain>.apiplatform.ocp.oraclecloud.com/apiplatform/managementWhere,
instance-identitydomainrefers to the identity domain of your Oracle API Platform Cloud Service instance. For example,https://apidemo-paasproducm.apiplatform.ocp.oraclecloud.com/apiplatform/management - On the API Platform Cloud Management Portal login page, enter your user name and password, and then click Sign In.
- In the Management Portal navigation menu, click APIs.
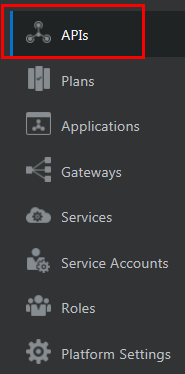
Description of the illustration nav_pane.png - On the APIs page, click Create.
- In the Create API dialog, enter the following values:
- Name:
Warranty Claim - Version:
1
- Name:
- Click Create to create a new API.
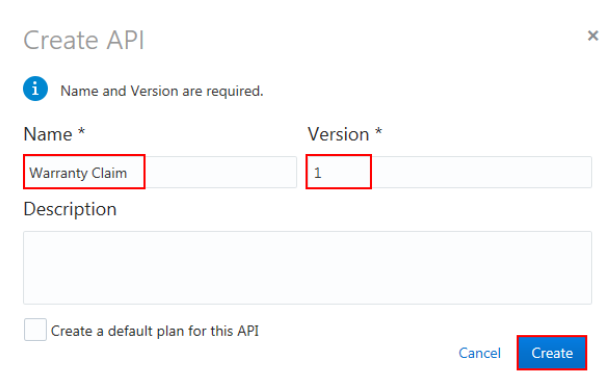
Description of the illustration nameapi.png
 Configure
the API Request URL
Configure
the API Request URL
- On the APIs page, click Warranty Claim.
- In the API's navigation pane, click API
Implementation
 .
. - On the API Implementation page, hover the mouse over the API Request section and then click Edit.
- In the Edit Policy dialog, select HTTP
from the Protocol drop-down list, enter
warrantyclaim/1in the API Endpoint URL field, and then click Apply.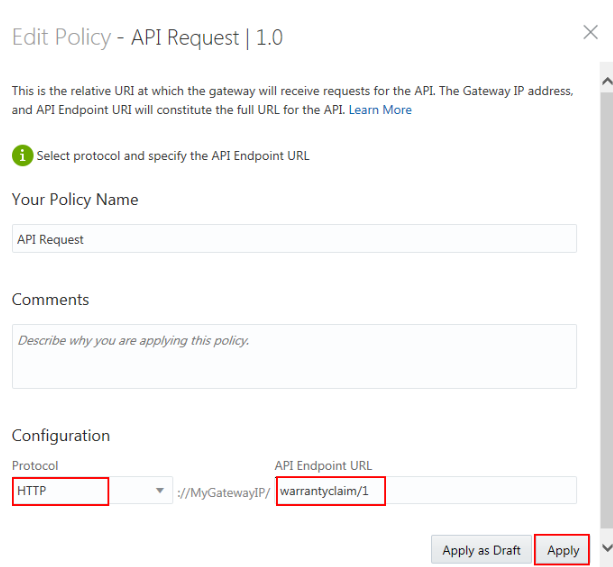
Description of the illustration editpolicy.png - Click Save to save the changes.
 Configure
the Service Request URL
Configure
the Service Request URL
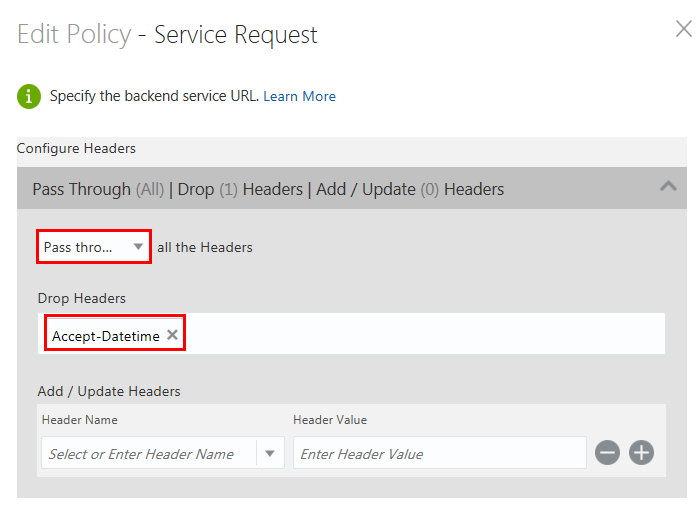
- On the API Implementation page, hover the mouse over the Service Request section and then click Edit.
- In the Edit Policy dialog, expand the Configure
Headers section. From the all the Headers
list, select Pass through and from the Drop
Headers list, select the Accept-Datetime
header name.
Description of the illustration passthru.png - In the Service section, select Enter a URL
and then specify the API URL from Apiary. If you have set up
your gateway node in your corporate Intranet and a proxy that
is required to reach to the external addresses, then select
the Use Gateway Node Proxy check box.
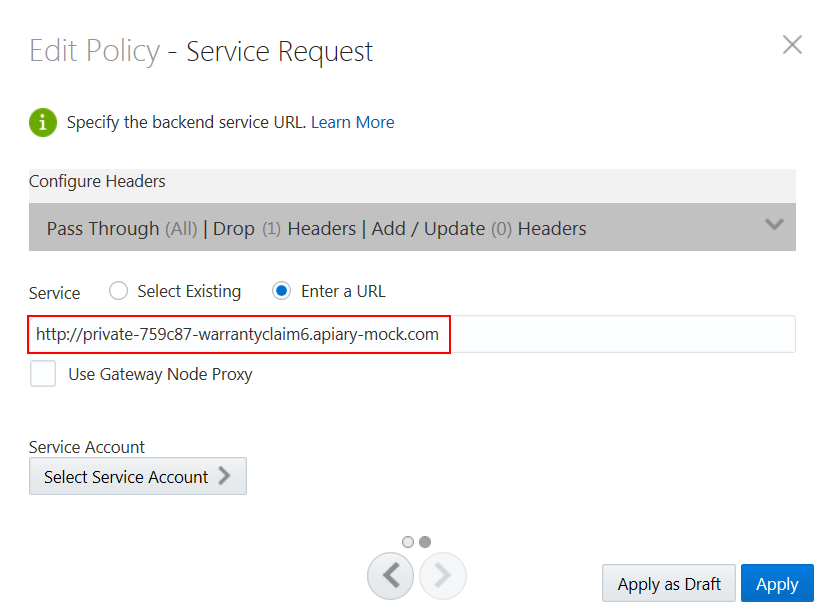
Description of the illustration url.png - Click Apply and then click Save to save your changes.
 Issue
API Grants
Issue
API Grants
- In the API's navigation pane, click Grants
 .
. - On the Grants page, the default Manage API tab is selected. Click Add Grantee to add users who can access the API.
- In the Add Grantee dialog, select the user(s) or group(s) to
which you want to issue the grant. You can select multiple
users and groups. Click Add.
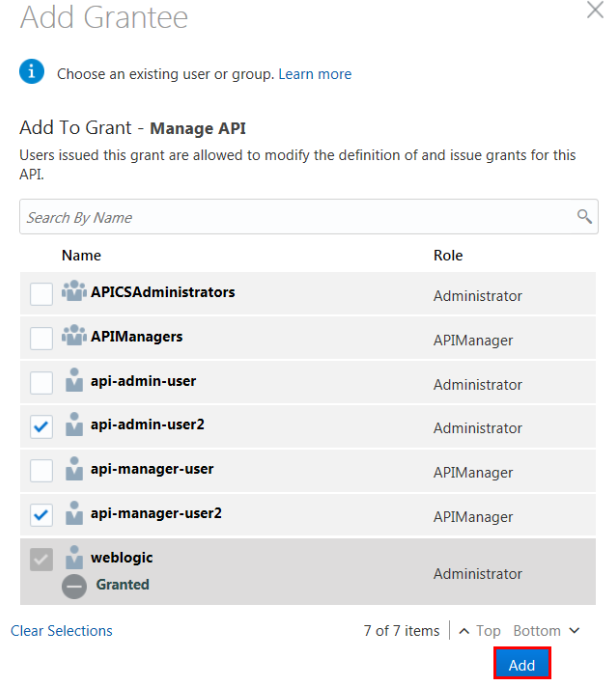
Description of the illustration addgrantee.png The API grant is issued to the users you chose.
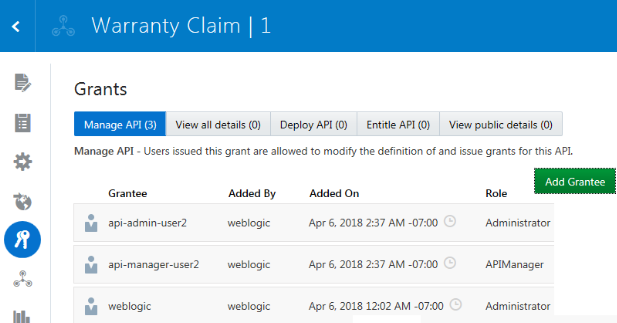
Description of the illustration addgrant.png
 Deploy
the API
Deploy
the API
- In the API's navigation pane, click Deployments
 .
. - On the Deployments page, click Deploy API.
- In the Deploy API dialog, select the gateway you want to
deploy to and set the Initial Deployment State
to Active to deploy the API in an active
state and then click Deploy.
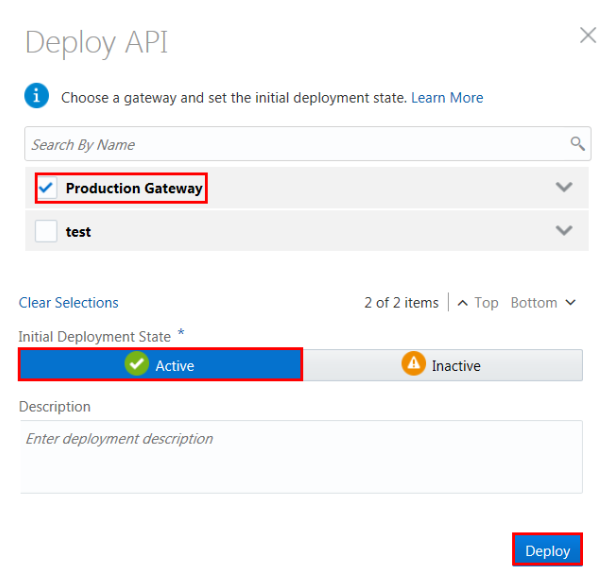
Description of the illustration deploy2.png - Now, your API is deployed to the production gateway. Verify
that the runtime state appears as ACTIVE before testing your
API and note the Load Balancer URL to invoke your API.
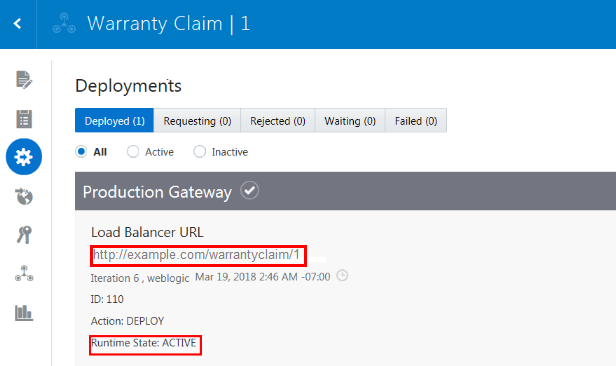
Description of the illustration deploy3.png
 Invoke
the API
Invoke
the API
- Get the Load Balancer URL for your API from the previous
section. For example,
http://example.com/warrantyclaim/1 - Open the REST client tool of your choice to invoke the API.
- Set the verb, for example
GET. Optionally set the header, and then send the request to the API. The following example shows how to invoke the API using theGETrequest:curl -X GET -H 'Accept: application/json' -H 'Content-Type: application/json' 'http://example.com/warrantyclaim/1/tickets'Where,
example.comrefers to the path of the gateway where API is deployed,warrantyclaimrefers to your API,ticketsrefers to a resource defined in your API.Note: In this scenario, the Apiary document represents the back end service. In a production environment, a separate Apiary document should be created for an API that will be published to a gateway, as its interactions are altered by the gateway policies.
 Want
to Learn More?
Want
to Learn More?
- Manage APIs in the Oracle Help Center