 Implementing
a Plan
Implementing
a Plan Before You Begin
This 15-minute tutorial shows you how to create and publish a plan in Oracle API Platform Cloud Service.
In this series of tutorials, you'll learn how to create and manage plans. This is the first tutorial in Managing Plans in Oracle API Platform Cloud Service. Read the tutorials in the order listed.
- Implementing a Plan
- Managing Plan Grants and Subscriptions
Background
In Oracle API Platform Cloud Service, you use plans to group a set of APIs and entitle client applications to subscribe to plans to access the APIs.
In this series of tutorials, you are a plan manager tasked with creating and implementing a plan and subscribing applications to the plan. The plan provides entitlement to an API to enable customers to submit warranty claims. In this tutorial, you will create the plan, configure the rates, add an API entitlement, and publish the plan to the Developer Portal. In the next tutorial, you’ll assign grants to users and manage subscription of applications to the plan.
What Do You Need?
- An Oracle API Platform Cloud Service instance
- Access to the instance as a user with the Plan Manager role
- Access to the WarrantyClaim API or any other published API
- An active gateway
 Create
a Plan
Create
a Plan
Begin by creating your plan.
- Sign in to the Management Portal in Oracle API Platform
Cloud Service as a plan manager using the following URL
format:
https://instance-identityDomain.apiplatform.ocp.oraclecloud.com/managementWhere,
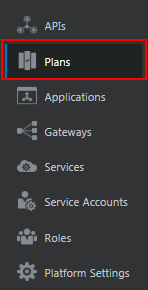
instance-identityDomainrefers to the identity domain of your Oracle API Platform Cloud Service instance. - In the Management Portal navigation menu, click Plans.
Description of the illustration nav_pane.png - On the Plans page, click Create.
- In the Create Plan dialog, enter the following details:
- Plan Name:
LifeTime Protection - Version:
1 - Description:
A warranty claim
                        plan to protect mobile devices
Description of the illustration create_plan_dialog.png
- Plan Name:
- Click Create.
The Plans page displays the newly created plan.

Description of the illustration plans_page_result.png
 Configure
the Plan Rate Limit and Gateway
Configure
the Plan Rate Limit and Gateway
After you create the plan, set its rate limits and choose the gateway through which the plan will invoke APIs.
- On the Plans page, click your plan.
- On the Settings page, click Limited to set a specific rate limit for the plan.
- Click the text [Enter number of requests].

Description of the illustration settings_page.png - Type
100and click Apply Editor Changes .
.
- Click the time interval drop-down arrow and select
Minute.
Your plan now allows 100 requests per minute to its APIs.
- In the Gateways section, click Specific to specify the gateway through which the plan can invoke APIs.
- Click the text Select one or more gateways. (If no
gateways are selected, the entitled APIs will not be
accessible.)

Description of the illustration settings_gateways.png - Select a gateway.
- Click Save.
 Add an
API Entitlement to the Plan
Add an
API Entitlement to the Plan
Now add entitlement to an API that’ll be available through the plan. A plan can include entitlements to multiple APIs, and a given API can be entitled by multiple plans.
- In the plan’s navigation pane, click Entitlements
 .
. - On the Entitlements page, click Add Entitlement.
- In the Add API Entitlement dialog, select the WarrantyClaim
API.

Description of the illustration add_api_dialog.png - Click Add.
The entitlement to the API is added to the plan.
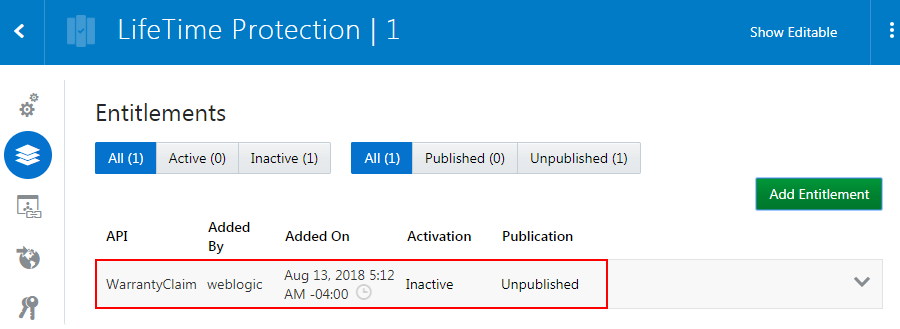
Description of the illustration api_added.png
 Publish
and Activate API Entitlements
Publish
and Activate API Entitlements
Next, publish and activate each API entitlement to make it available for use to application developers in the Developer Portal. Publishing a plan does not automatically publish the APIs entitled in the plan.
- On the Entitlements page, click the WarrantyClaim API entitlement that you want to publish.
- Click Publish.
- In the WARNING dialog, click Yes to
confirm.
The status of the API entitlement is shown as Published.
- Click the API entitlement again, and select Activate.
- In the WARNING dialog, click Yes to
confirm.
The status of the published API entitlement is shown as Active.

Description of the illustration api_active.png
 Publish
the Plan
Publish
the Plan
Publish your plan to enable application developers to discover and consume it in the Developer Portal.
- In the plan’s navigation pane, click Publication
 .
.
- In the Developer Portal URL section of the
Publication page, click [ Enter Portal Name ],
and enter
WarrentyClaimsas the plan name that will appear in the Developer Portal URL. Then, click Apply Editor Changes .
.

Description of the illustration publish_plan_portal.png - In the Plan Overview section, click Markdown, then click Text to specify the plan overview.
- Enter the following text as the plan overview that will
appear in the Developer Portal, and then click OK.
Warranty Claim plan to protect your
                      mobile device from any manufacturing defects for lifetime
Description of the illustration publish_plan_overview.png - In the Publication Summary Information
section, select the items you want to display in the plan's
summary in the Developer Portal. Select the following check
boxes:
- Show plan icon
- Show description
- Show rate limit
- Mark as recommended plan
- Click Save.
- Click Publish to Portal.
Your plan is now published to the Developer Portal.