 Creating a Service Account and Service
 Before You Begin
This 15-minute tutorial shows how to create a service account and a service, and issue service grants in Oracle API Platform Cloud Service.
In this series of tutorials, you learn how to implement APIs. This is the first tutorial in Implementing APIs in Oracle API Platform Cloud Service. Read the tutorials in the order listed.
- Creating a Service Account and Service
- Applying API Policies
Background
In Oracle API Platform Cloud Service, you can apply API policies to secure, limit, and route requests sent to APIs. If the API requests do not meet the API policy criteria you specify, requests to APIs are rejected. A service account contains credentials. Policies using outbound calls or routing, refer to the account to provide the necessary credentials.
In this series of tutorials, you are an API manager working for the NexGen Company and you are given a task of creating service accounts and issuing service grants and applying policies to the Warranty Claims API that helps handle warranty claim tickets. In this tutorial, you create a service account and issue service grants that help you control access to the service account.
What Do You Need?
- An Oracle API Platform Cloud Service instance
- Access to the instance as a user with the API Manager role
 Create a Service Account
Create an entry for a service account you want to manage in the Management Portal of Oracle API Platform Cloud Service.
- Sign in to the Management Portal in Oracle API Platform Cloud Service as an API Manager using the following URL format:
https://instance-identityDomain.apiplatform.ocp.oraclecloud.com/managementWhere
instance-identityDomainis the identity domain of your Oracle API Platform Cloud Service instance. - In the Management Portal navigation menu, click Service Accounts.

Description of the illustration service-account_screen.png - On the Service Accounts page, click Create.
- In the Create Service Account dialog, enter the following:
- Service Account Name: Enter
Warranty Claim Service Account. - Description: Enter
This is a service account for Warranty Claim API. - Account Type: Select Basic Auth.
- Username: Enter
Manager. - Password: Enter
Manager!23.

Description of the illustration service-account_create-account.png - Service Account Name: Enter
- Click Create.
The Service Accounts page lists Warranty Claim Service Account.
 Create a Service
A service is a resource that represents the backend service for an API.
- In the Management Portal navigation menu, click Services.
- In the Services page, click Create.
- In the Create Service dialog, enter the following:
- Name: Enter
Warranty Claim Service. - Version: Enter
1 - Description: Enter
This is a service for Warranty Claim API. - Service Type: Select HTTP.
- Endpoint Name: Enter
Warranty Claim Endpoint. - Endpoint URL: Enter
http://warrantyclaim.com. - Select Use Gateway Node Proxy option.
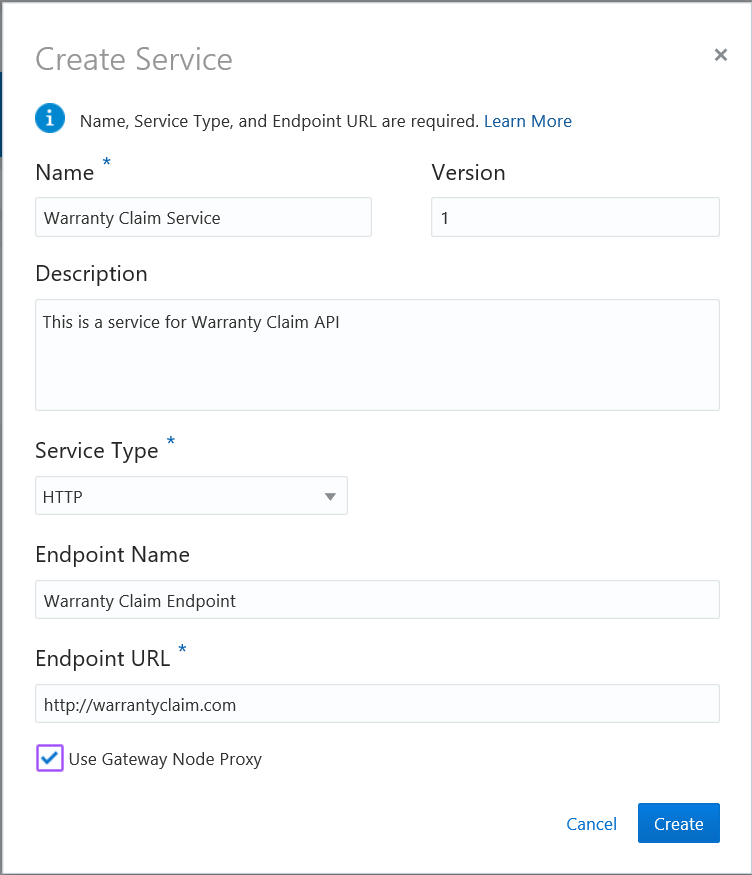
Description of the illustration service-account_create-service.png - Name: Enter
- Click Create.
The Services page lists Warranty Claim Service.
 Select Service Account for Service
Select Warranty Claim Service Account for Warranty Claim Service.
- In the Services page, click Warranty Claim Service.
- Click Select Account.
- In the Select Service Account dialog, select Warranty Claim Service Account.

Description of the illustration service-account_select-account.png - Click Select.
- In the Warranty Claim Service page, click Save.
Warranty Claim Service Account is added to Warranty Claim Service.
 Issue Service Account Grants
Service account grants allow you to issue fine-grained permissions to users or groups for each service account.
- In the Services page, click Warranty Claim Service.
- Click User Management
 .
. - On the Manage Service tab, in the Grants page, click Add Grantee.
- In the Add Grantee dialog, choose a user or group and click Add.
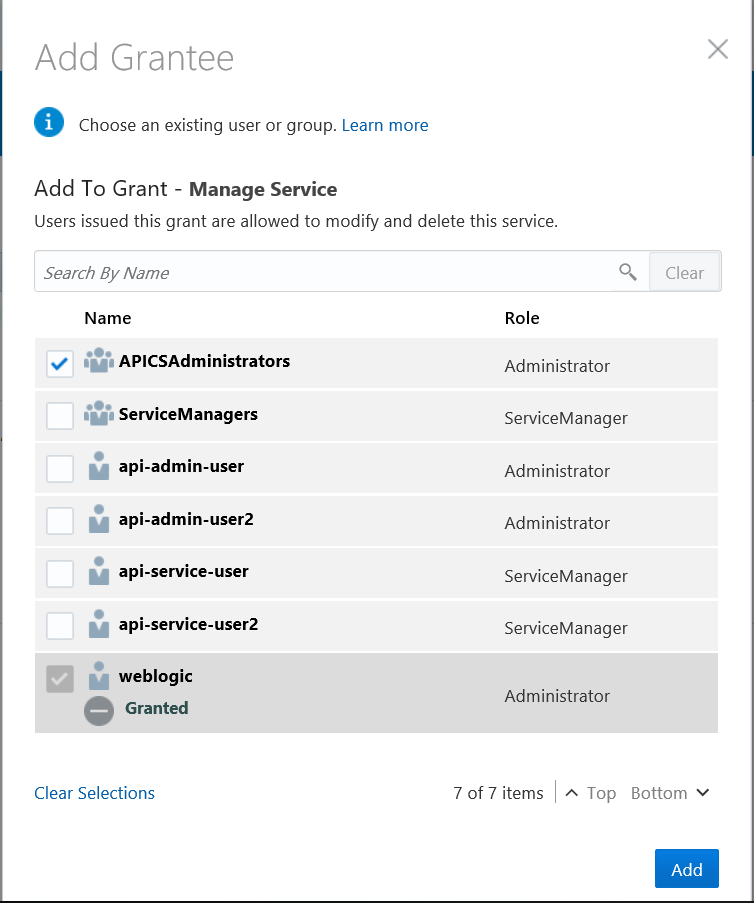
Description of the illustration service-account_account-grant.png
The Manage Service tab lists the grantee