Getting Started with Oracle Big Data on Oracle Cloud Infrastructure
Before You Begin
This 20-minute tutorial shows you how to create an Oracle Big
Data Cloud (BDC) cluster on Oracle Cloud Infrastructure (OCI)
region.
Background
Oracle Big Data Cloud combines open source technologies such as
Apache Spark and Apache Hadoop to deliver a complete Big Data
platform for running and managing Big Data Analytics
applications.
Oracle Big Data Cloud leverages Oracle’s Infrastructure Cloud
Services to deliver a secure, elastic, integrated platform for
all Big Data workloads.
You can create Oracle Big Data Cloud clusters in
Oracle Cloud Infrastructure and in Oracle
Cloud Infrastructure Classic. The infrastructure a
cluster gets created in depends on the region you select when
you create the cluster. If you see the Availability
Domain and Subnet fields
when you select a region for the cluster you're creating, that
means the cluster will be created in Oracle Cloud
Infrastructure. Otherwise, the cluster is created in Oracle
Cloud Infrastructure Classic.
If you don't have the user name and password, contact your
organization's Oracle Cloud administrator. Note that the
credentials for Oracle Cloud My Services might be different from
the credentials for Oracle Cloud Infrastructure.
Gather
Required OCI Storage Information
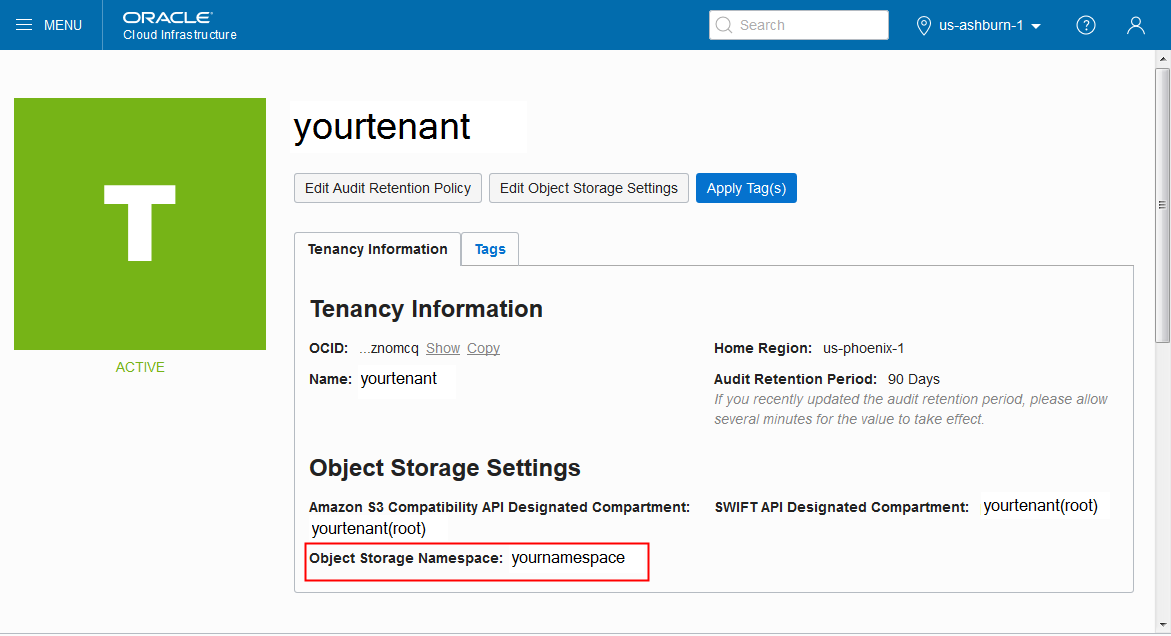
Sign in to the Oracle Cloud Infrastructure web console.
In the OCI web console, check the region-selector field near
the upper right corner for your region identifier which looks
like us-ashburn-1 or us-phoenix-1. Substitute this identifier
into the OCI Cloud Storage URL template
https://objectstorage.<region>.oraclecloud.com/.
For example:
https://objectstorage.us-ashburn-1.oraclecloud.com/.
Note: When you
provision BDC you must include the trailing slash for OCI
Cloud Storage URL.
Description of the illustration
a2.png
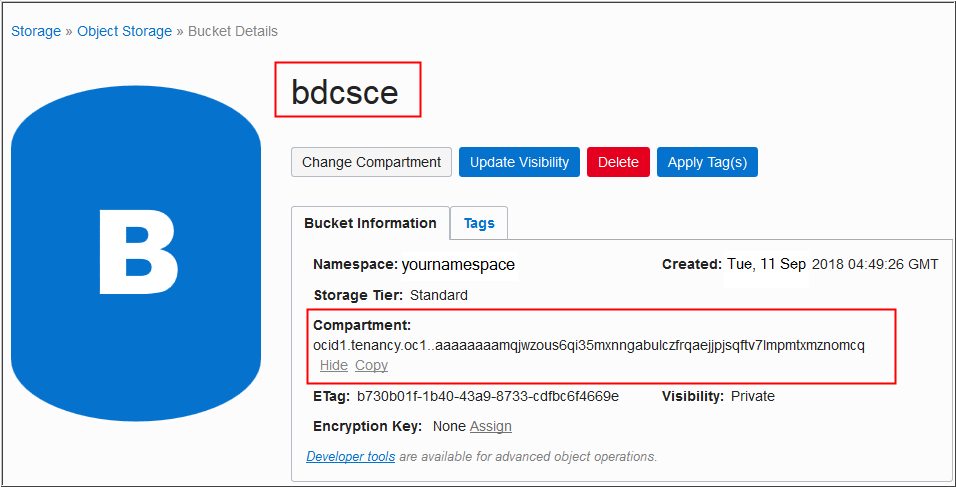
Open
thenavigation
menu. UnderCore
Infrastructure, clickObject
Storage. A list of the buckets is displayed in
the compartment that you have selected.
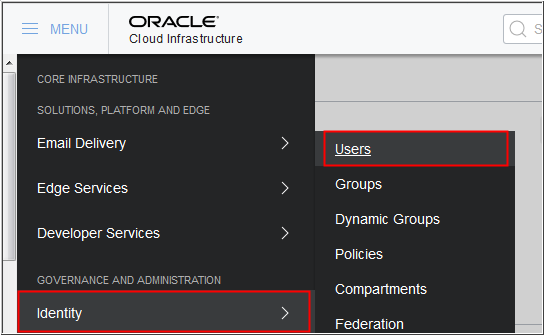
Open the navigation menu and click Identity
underGovernance
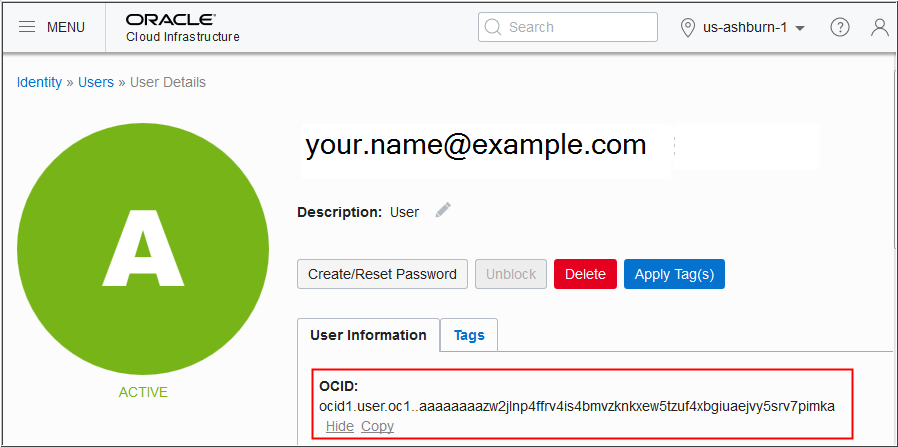
and Administration. Click Users.The OCI
Cloud Storage User OCID is specific to a particular OCI user.
This OCI user have access to all object storage data within
the BDC cluster. Description of the illustration
a6.png
The OCI users are displayed. Select the user from the list
and note the value of the OCID, which uniquely identifies them
within OCI.
Description of the illustration
a7.png
The user selected above must be granted the ability to
manage bucket data via API. This is done by registering a
cryptographic key for this user. On your local computer use
the following command to create a directory to store the keys
that you're going to generate.
mkdir ~/.oci
Enter the following command to generate a private key.
openssl genrsa -out ~/.oci/oci_api_key.pem 2048
Note:PEM
key must be generated without passphrase.
Change the permission for the private key file to read-only.
chmod go-rwx ~/.oci/oci_api_key.pem
Important: Make a note of the full path to the
private key file.
You’ll need the full path and file name while
configuring the object storage settings for your Big Data
Cloud cluster.
-----BEGIN PUBLIC KEY-----
MIIBIjANBgkqhkiG9w0BAQEFAAOCAQ8AMIIBCgKCAQEA75bcmb2HuKwZNpYxeP5X
WjxeKg3rFLUUp1RMK6YAnGOilON98jTGpDRMVMNbYXH4Y2D9c7QYByQa1qcdMH+I
wumWZCfTIb6Y5yXXHHJLJoS8dclEX1p2lqQf73BUGPpd/3ymrhjZKjW14gpfBs7p
ZNLa5k97TLV/IlqefIAJktndKLGggUJZLUReX9hZY2e27VpW1OSMyZImwnSnJct6
3rRqi2bANUf7ojN5OcOnZ5bZrn2YfxpcZaWWV1/xFU+ODChnoM4Z7O1+JtFzw+Mi
takns0aiDyvUjWkR3cYrO3g+MHHMgOzrhpfYBPrNHVZDLykhDfvR+A/gnWtqw5EB
bQIDAQAB
-----END PUBLIC KEY-----
Copy the public key, including the BEGIN and END
lines.
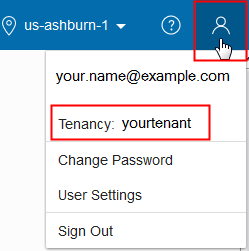
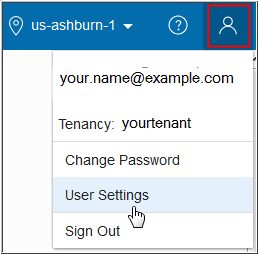
In the Oracle Cloud Infrastructure web console, click your
username in the top-right corner of the Console,
and then click User Settings.
Description of the illustration
a15.png
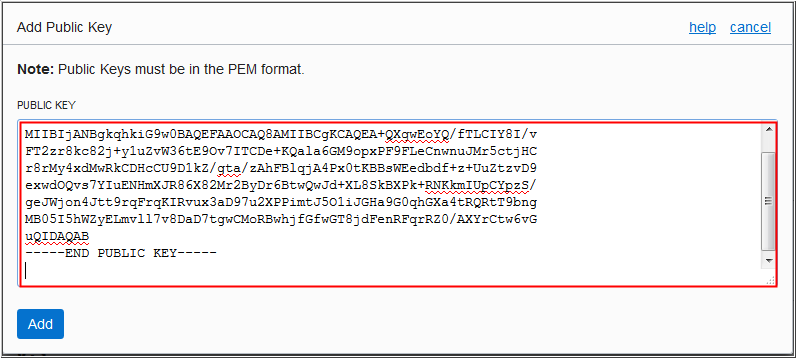
In the Resources navigation pane, click API
Keys, and then click Add Public Key.
In the Add Public Key dialog box, paste the
public key that you generated and copied earlier, and then
click Add.
Description
of the illustration a16.png
The fingerprint of the key is displayed. It
should match the fingerprint that you had generated earlier.
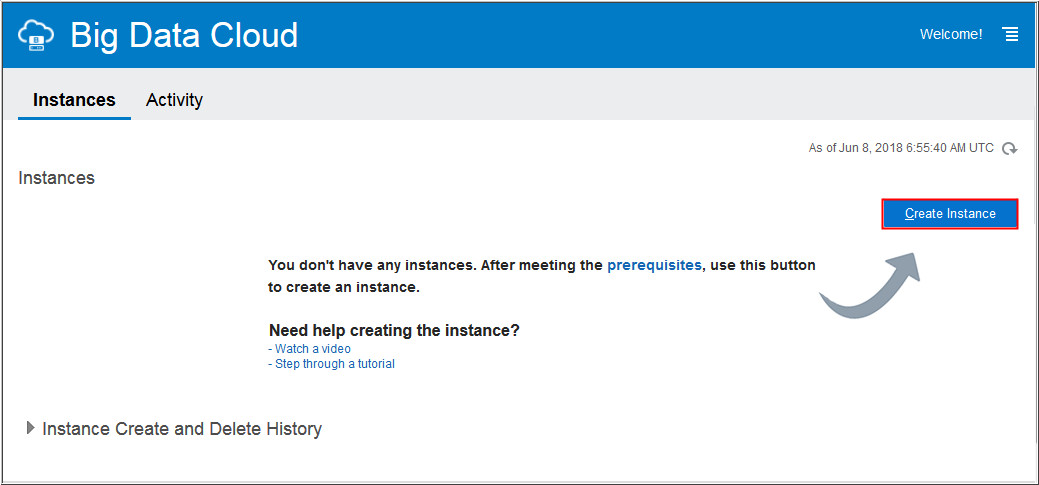
On the My Services Dashboard page, locate the Big
Data Cloud tile. Click the Action
menu ,
and select Open Service Console.
If this is the first time that you're
accessing the web console of Oracle Big Data Cloud, the
Welcome page is displayed. You can continue to the web
console by clicking Go to Console.
On the Instance page of the wizard, complete the following
steps:
Enter a unique Instance Name for your Big
data Cloud instance.
Enter your email address in the Notification Email
field.
In the Region field, select an Oracle
Cloud Infrastructure region: us-phoenix-1, us-ashburn-1,
eu-frankfurt-1, or uk-london-1. The field shows only those
regions that are in the default region of your account.
In the Availability Domain field, select
an availability domain.
In the Subnet field, select a subnet from
a virtual cloud network (VCN) that you had created previously
in Oracle Cloud Infrastructure.
Note: If you want the subnet to be assigned
automatically, then select Select No Preference.
In the Tags field, click the drop-down icon to
assign tags to the service instance or click the icon to add new tags.
On the Service Details page of the wizard, complete the
following steps:
In the Cluster Configuration section, choose
appropriate values for Deployment
Profile, Number of Nodes, Compute Shape,
Queue Profile, and Spark Version , or leave
them at their default values. Description of the
illustration d1.png
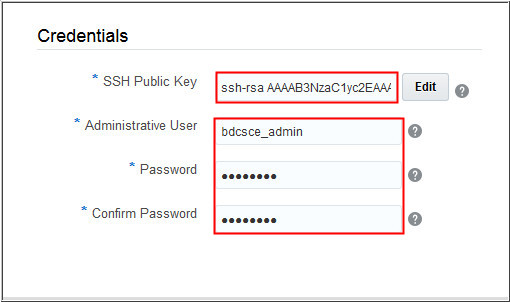
In the Credentials section, click Edit
next to the SSH Public Key field.
Select Create a New Key and then click Enter.
In the Download Keys dialog box, click Download
and save the file sshkeybundle.zip to your local
machine.
Note: The option to download
the SSH keys won't be available again. You'll need the
private key to SSH to the compute nodes of the Big
Data Cloud instance. So don't skip this step.
In the Associations section, select the Cloud Service that
you want to associate with your Oracle Big Data Cloud cluster.
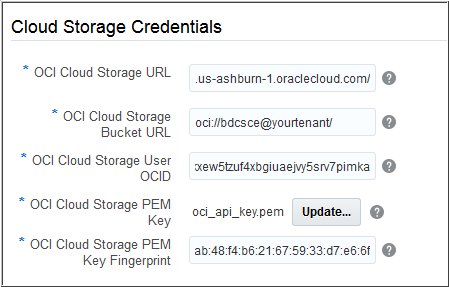
In the Cloud Storage Credentials section,enter the following
values:
OCI Cloud Storage URL:
enter OCI Cloud Storage URL.
OCI Cloud Storage Bucket
URL: enter the URL of the object-storage bucket
that you created earlier in Oracle Cloud Infrastructure. Note: You must add the trailing slash / at
the end of the OCI Cloud Storage Bucket URL for successful
provisioning.
OCI Cloud Storage User
OCID: enter the Oracle Cloud Infrastructure
Object Storage User OCID.
OCI Cloud Storage PEM
Key:click Browse
and select the OCI Cloud
Storage private key that you created earlier in Oracle Cloud
Infrastructure.
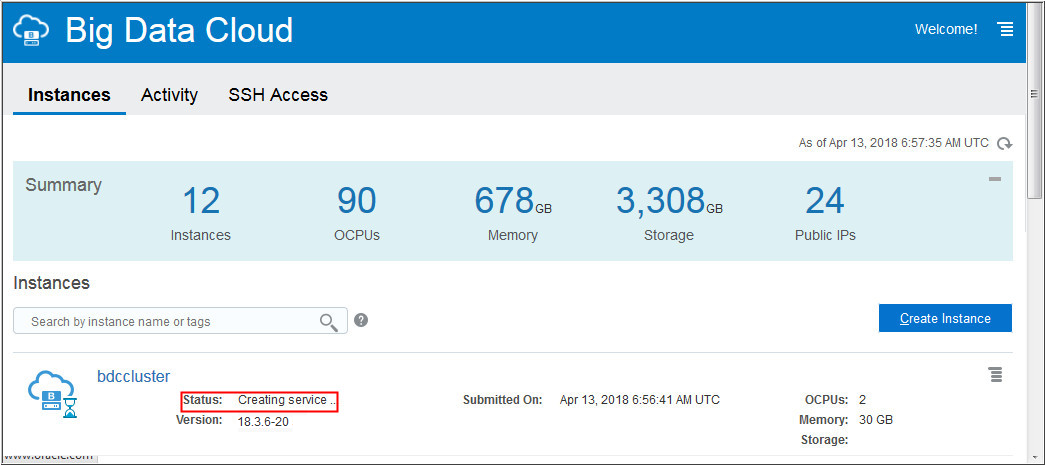
In the Oracle Big Data Cloud instances page, the new cluster
is displayed, with the status Creating Service.
Refresh the page periodically, until the instance is created.
Description of the
illustration e2.png
After the instance is created, you'll receive a notification
at the email address that you specified earlier.
To view details of the instance, click the cluster name.
Validate
OCI Storage Attributes
Perform the following steps to validate OCI Storage details
added to BDC :
Open oci-curl.sh
script file and update the following values with your OCI
Storage values.
local tenancyId=<your tenancy OCID>
    local authUserId=<your OCID>
    local keyFingerprint=<your fingerprint>
local privateKeyPath=<your oci_api_key.pem path location>
Add the following codes at the bottom of the script file:

 Before You Begin
 Gather
Required OCI Storage Information
Gather
Required OCI Storage Information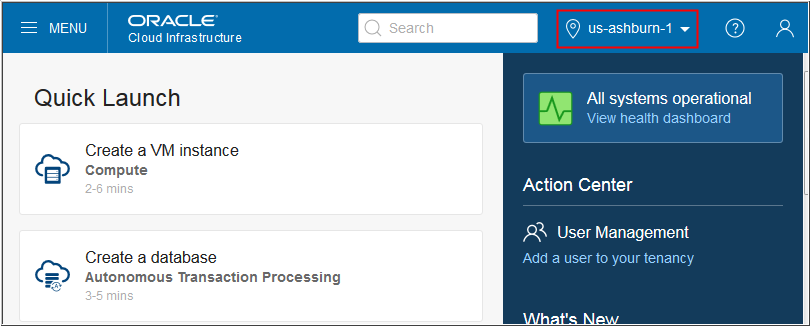


 Start
the Instance-Creation Wizard
Start
the Instance-Creation Wizard ,
and select Open Service Console.
,
and select Open Service Console.
 Configure
Basic Cluster Information
Configure
Basic Cluster Information icon to add new tags.
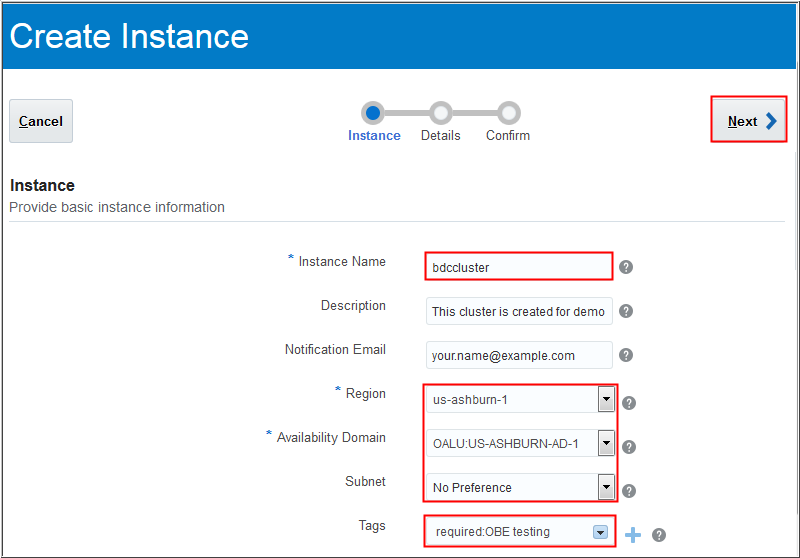
 Configure
Service Details
Configure
Service Details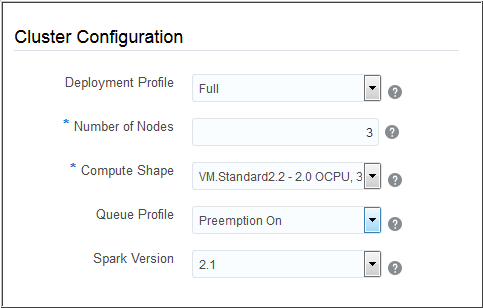
 Complete
the Instance Creation
Complete
the Instance Creation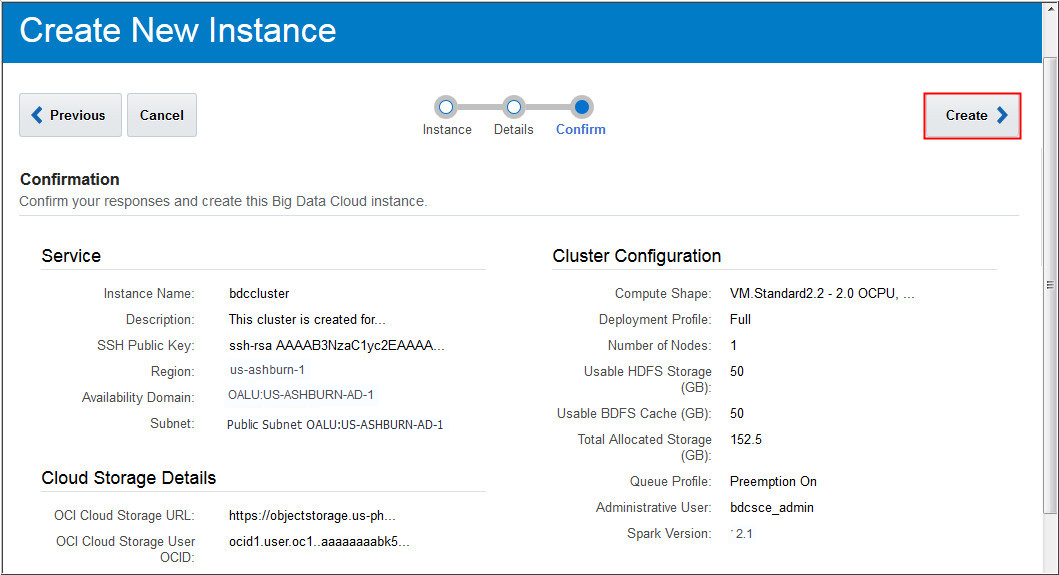
 Validate
OCI Storage Attributes
Validate
OCI Storage Attributes