Before You Begin
Purpose
This tutorial shows you how to allow ping requests from a particular host outside Oracle Cloud to a set of Compute Classic instances.
Time to Complete
10 minutes
Background
When you create Compute Classic instances, ping requests to the instances are not permitted by default. To allow ping requests, you must configure your Compute Classic instance to permit pings.
What Do You Need?
To perform the steps in this tutorial, you must be
a service user with the Compute_Operations
role. If you don't have this role, ask your service
administrator to assign the role to you in Oracle
Cloud My Services.
Creating a Security IP List
To allow ping requests from a host outside Oracle Cloud to your Compute Classic instances, store that external host's IP address in a security IP list in Compute Classic.
- Sign in to Oracle Cloud My Services and go to the Compute Classic console.
- Click the Network tab.
- On the Network page, click the Security IP Lists tab in the left pane.
- On the Security IP Lists page, click Create Security IP List.
- In the Create Security IP List
dialog box, do the following:
- Name: Enter a name for the new security IP list (for example, admin_host). Note this name. You'll use it later in this tutorial.
- IP List: Enter the IP address of the host from which you want to allow ping requests.
- Description: Enter a description for the new security IP list (for example, Admin host).
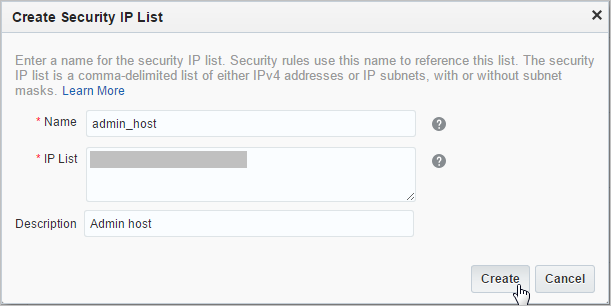
- Click Create.
Next, create a security list to group the Compute Classic instances for which you want to permit ping requests.
Creating a Security List
A security list is a group of Compute Classic instances.
To open a port or protocol for specific instances, you must first group those instances in a security list.
- Click the Security Lists tab in the left pane.
- Click Create Security List.
- In the Create Security List
dialog box, do the following:
- Name: Enter a name for the new security list (for example, ping_seclist). Note this name. You'll use it later in this tutorial.
- Leave the Inbound Policy and Outbound Policy fields at the default values.
- Description: Enter a description for the new security list (for example, Pingable VMs).

- Click Create.
Next, add your Compute Classic instances to the security list that you just created.
Adding Instances to the Security List
- Click the Instances tab.
- From the list of instances displayed, identify
the first instance that you want to add to a
security list. From the
 menu,
select View.
menu,
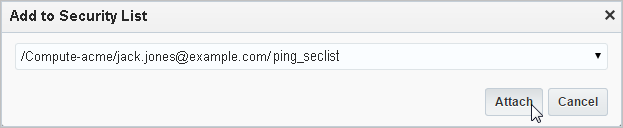
select View. - On the instance details page, click Add
to Security List.
The Add to Security List dialog box is displayed.
- Select the security list that you created earlier.
- Click Attach.
- Repeat this procedure for the other Compute Classic instances for which you want to permit ping requests.
At this point, all the instances for which you want
to permit ping requests have been grouped in the ping_seclist
security list.
Next, create a security rule to permit ping requests from the external host to your Compute Classic instances.
Creating a Security Rule
- Click the Network tab.
- Click Create Security Rule,
and do the following:
- Name: Enter a name for the rule (for example, allow_p2vm_pings).
- Status: Select Enabled.
- Security Application: Select the pings security application.
- Source: From the Security IP Lists drop-down list, select admin_host, which is the security IP list you created earlier in this tutorial.
- Destination: Select the ping_seclist security list, to which you added your Compute Classic instances earlier in this tutorial.
- Description: Enter a description for the rule (for example, Allow pings to VMs from a specific host).
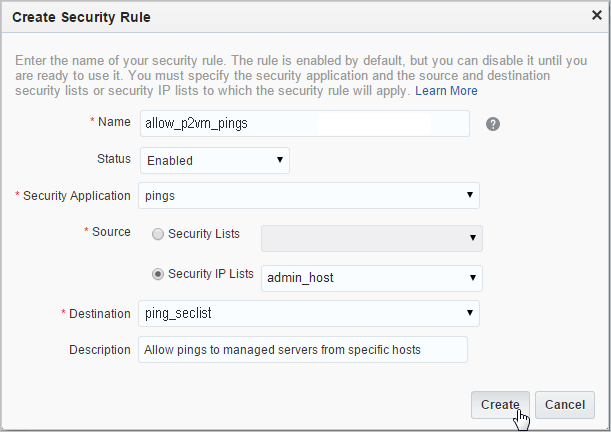
- Click Create.
You can now ping all the Compute Classic instances in the ping_seclist
security list from the host you defined in the admin_host
security IP list.
At any time, you can temporarily suspend security rules by disabling them. You can also delete security rules that you no longer need.
Disabling and Deleting Security Rules
Disabling a Security Rule
- Sign in to Oracle Cloud My Services and go to the Compute Classic console.
- Click the Network tab.
- Identify the security rule that you want to disable.
- From the Actions menu, select Update.
- In the resulting dialog box, change Status to Disabled.
- Click Update.
Deleting a Security Rule
- Sign in to Oracle Cloud My Services and navigate to the Compute Classic console.
- Click the Network tab.
- Identify the security rule that you want to delete.
- From the Actions menu, select Delete.
- At the confirmation prompt, click Yes.
Want to Learn More?
-
Managing Security Rules in Using Oracle Cloud Infrastructure Compute Classic
-
Managing Security IP Lists in Using Oracle Cloud Infrastructure Compute Classic
Credits
-
Lead Curriculum Developer: Kumar Dhanagopal
-
Other Contributors: Eshwar Narayan, Anamika Mukherjee