Configuring Network Settings
Overview
Purpose
This tutorial covers Configuring Network Settings for a DBaaS Instance in the Oracle Database Cloud Service.Time to Complete
Approximately 15 minutes.
Introduction
In this tutorial, you learn how to view and configure the network settings using the Oracle Compute Cloud Service Console.
Prerequisites
Before starting this tutorial, you should have performed the Signing Up for a Database Cloud Service, and Creating a Database Cloud Service (DBaaS) Instance tutorials.Software Requirements
- You need one of the supported browsers listed in the following table:
| Browser | Version |
| Microsoft Internet Explorer | 9 or 10; set Browser Mode to IE9 or IE10 |
| Mozilla Firefox | 24 and later |
| Google Chrome | 29 and later |
| Apple Safari | 6 |
Viewing Network Settings Using the Oracle Compute Cloud Service Console
Log in to the Oracle Cloud My Services (DBaaS) console using the credentials provided by your Oracle Cloud account administrator. For details on accessing the console, see the documentation on Accessing the Database Cloud Service (DBaaS) Console.
- Your administrator may provide you a link to the My Services console, from which you can choose Oracle Compute Cloud Service (DBaaS).
- Or, your administrator may provide you a direct link to the Oracle Database Cloud Service (DBaaS) console.
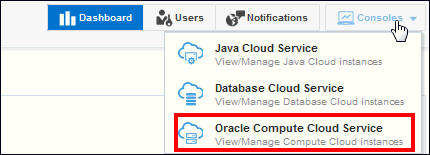
- From the Oracle Cloud My Cloud service, click the Consoles
tab at the upper right of the page and hen select Oracle Compute
Cloud Service from the drop down menu. This will display the
Oracle Compute Cloud Services console.
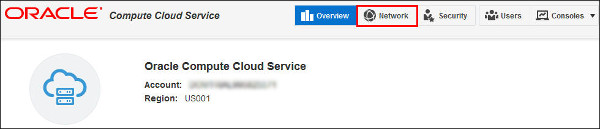
- On the Oracle Compute Cloud Services Overview page, select the
Network near the top right of the page.
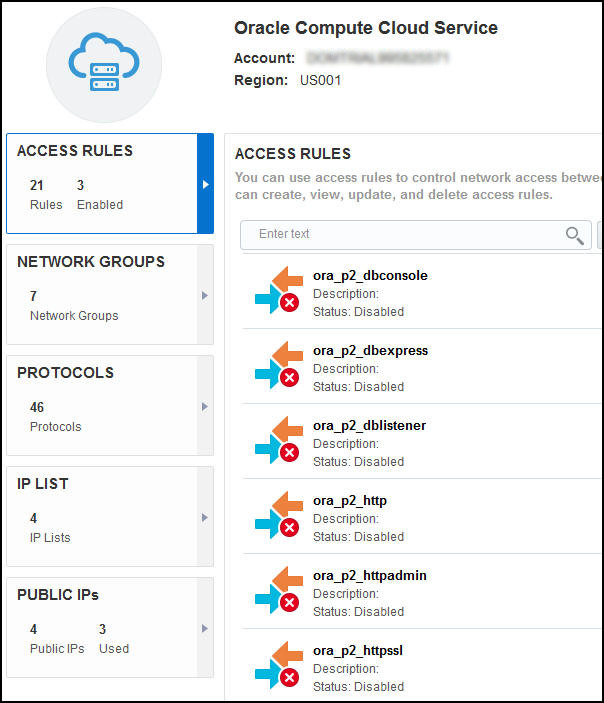
- On the Network page, observe the tabs along the right side of
the page.These tabs are the object types that are used to
control the Network Settings.The Access Rules tab is
selected.The other tabs will direct you to pages that allow you
to access Network groups, Protocols, IP List, and Public IPs.
Each of these work together to allow you to tailor the network
access to your needs. Access rules control the communication in
the domain for packets going from a source, to a destination,
using a particular port. Sources and destinations are defined by
a Network group or an IP List. The port is defined by a
Protocol. In the next steps you will view each of the object
types
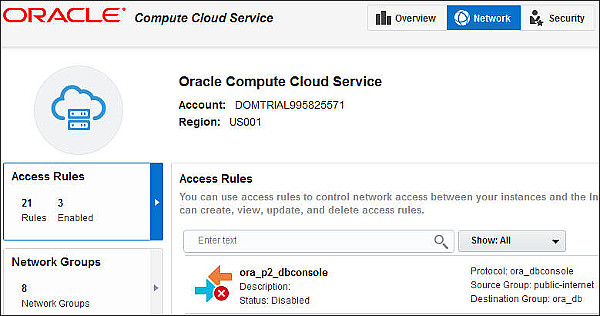
- The Access Rules tabs display Access Rules that are applied
over the entire domain. In the image below, several access rules
are displayed, only the one with the arrow is enabled. An
enabled rule allows the protocol from the source to the
destination, this also allows responses from the destination to
the source, when initiated by the source. Note:
The Protocol defines the port used,Source can specify either an
IP List or a Network Group, and Destination specifies a Network
Group.
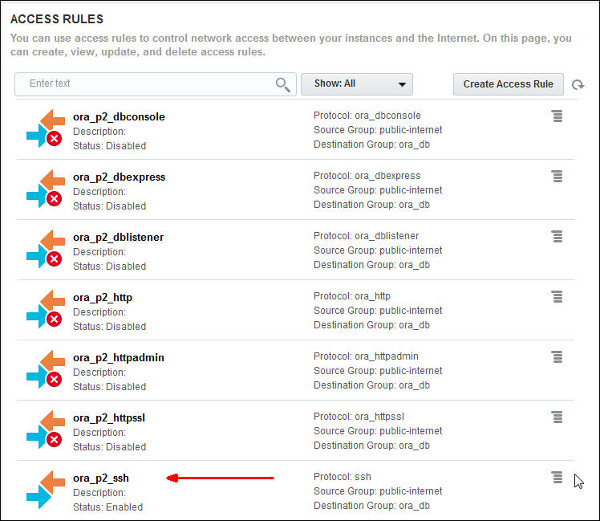
- The menu icon associated with each Access Rule allows you to
Update (modify), or Delete the rule.

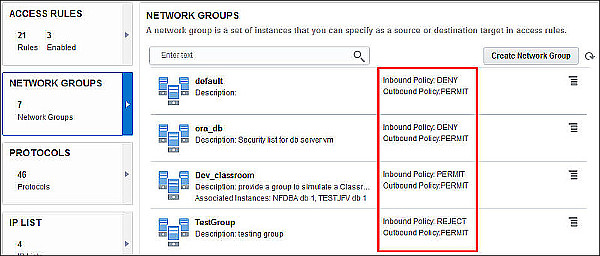
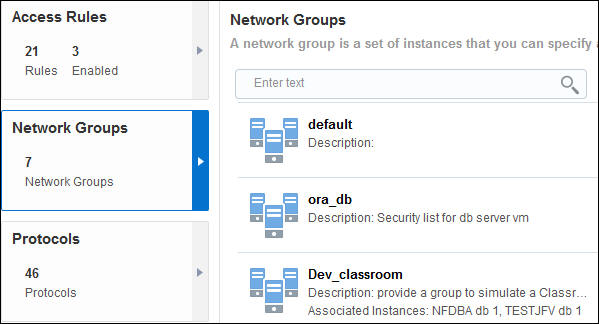
- When Network Groups is selected, the list of network groups is
displayed The red box highlights the various Policies that may
defined. Inbound Policy is for communication that originates
outside the network group, Outbound policy is for communication
originating inside the network group. The Policies are blanket
rules. Access Rules override network group policies. For example
the default network group allows outbound communication but
denies inbound. If an access rule allows ssh connections from
the internet to the default network group any machine on the
internet could establish an ssh connection to any DBaaS instance
in the default group within the restrictions of the ssh server
configuration. The DENY option drops the packet with no
acknowledgement, REJECT refuses the packet and acknowledges it,
PERMIT passes the packet to the application. DbaaS instances may
be assigned to one or more network groups. When more than one
network policy could be applied the most restrictive policy is
used. Note: By default each DBaaS instance is
assigned to its own Network Group on creation.
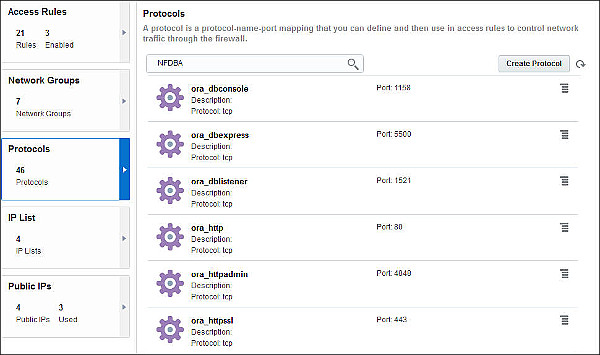
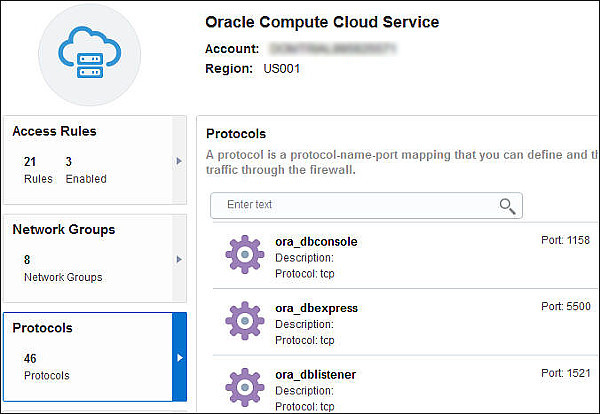
- Click Protocols tab on the left side of the
page. The search field has been used to limit the listing to
Protocols associated with the NFDBA instance. This instance was
created in this domain as an example. The name of your DBaaS
instance will be different. Notice there are 6 protocols
created, These are the protocols created by default for every
instance. Each protocol is named. the names of the default
protocols are associated with the application the protocol
services. Each protocol is for a port, and application, and, a
network protocol such as tcp or udp.
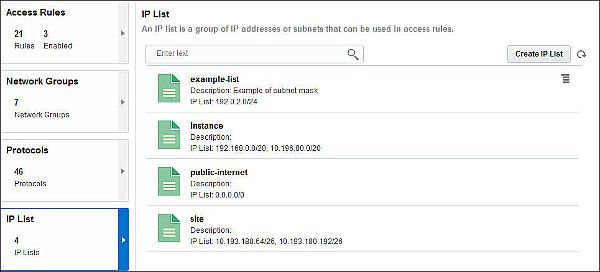
- Click IP List on the left side of the page.
A list of all the defined IP will be shown. Notice the
predefined IP lists do not have a menu icon to the right, so
they cannot be modifed. The example list uses a subnet mask to
include all the IP addresses in the mask range without have to
specify each one. Notice that the IP list may also be made up of
a set of comma separated addresses.
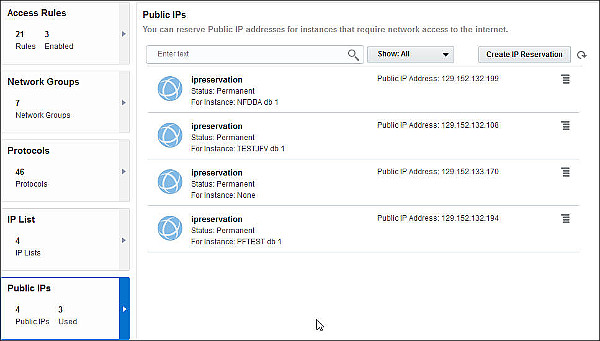
- Click Public IPs. The IP addresses that have
been reserved for your public use are shown. The menu icon to
the right of the ipreservation will allow you to: remove an
instance from the IP address (Remove Instance), associate an
instance with an IP address (Update), and delete the public IP
address (Delete).
 .
.
Configure Network Settings
In this section you will create an access rule, to allow https access from 3 machines on the internet to the TESTJFV instance. You will create the components required to create an access rule, then create the access rule.
Create an IP List
- An IP_list or a network group is required to specify the
source of an Access Rule, we will create an IP_list to
specify certain machines on the internet. On the Network
page of the Oracle Compute Cloud services console, click
IP List tab on the left side of the page.
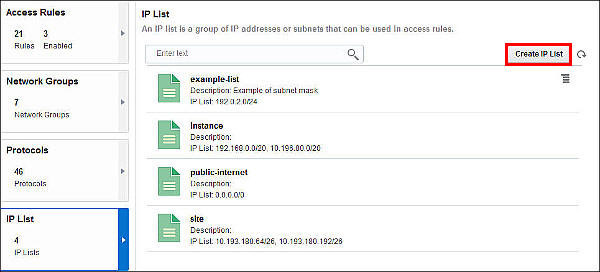
- Click Create IP List, the Create IP List
Dialog appears.
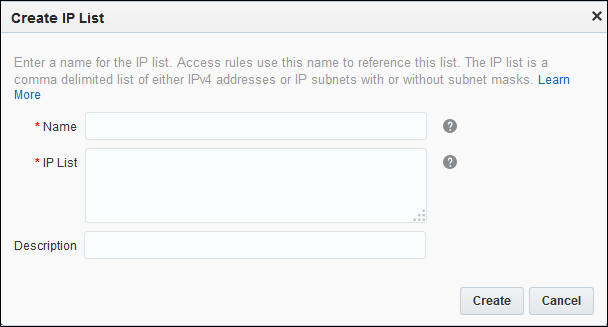
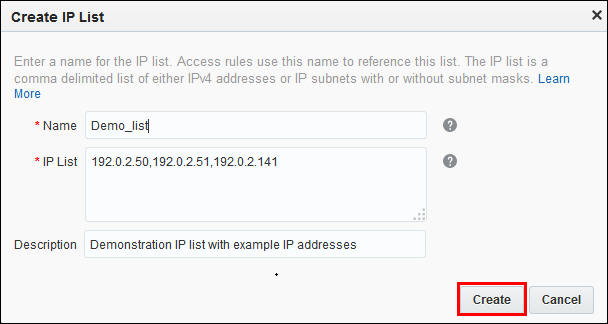
- In the Create IP List dialog, Enter:
- Name: demo_list,
- list of IP addresses: 192.0.2.50,192,0.2.51,192.0.2.141,
- Description: "Demonstration IP list with example IP addresses",
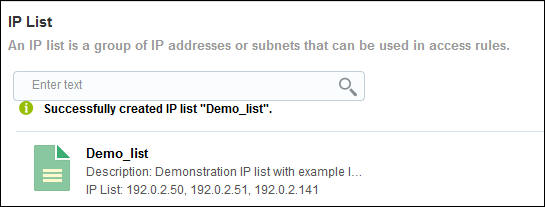
- The IP List, Demo_list, appears in the IP List page with a
confirmation message.
Create a Network Group
- A Network Group for the destination portion of the access
rule is required, since the TESTJFV instance is the only
instance to which we wish to open the https protocol, we
must create a network group for this instance and assign the
TESTJFV instance to the group. To reduce the
complexity of rule evaluations, we will also remove TESTJFV
from any other network groups that may exist. On the Network
page, click Network Groups tab on the
left.
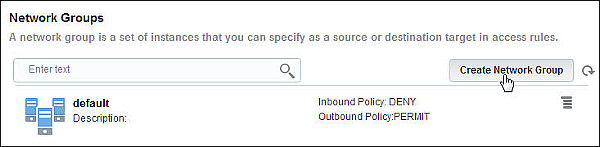
- Click Create Network Group button in
upper right of the page.
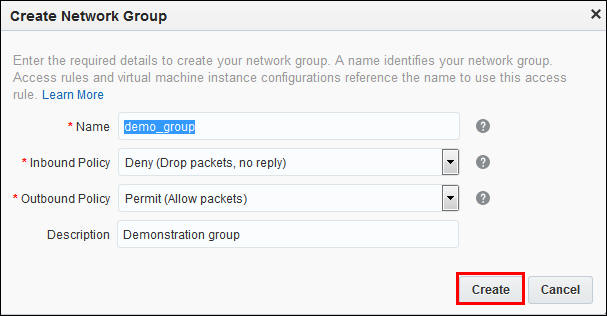
- In the Create Network Group dialog, Enter the requested
information:
- Name: demo_group,
- Inbound Policy: Deny,
- Outbound policy: Permit.
Click Create.
- The Network Groups page is displayed with a confirmation
message the demo_group was created.

- The TESTJFV instance will be added to the demo_group and removed from all other network groups in the next step.
Add and Remove an Instance from Network Groups
- On the Compute Cloud Service console, click Overview.

- On the Overview page, with Instances tab (on left side)
selected, click the Instance, that you wish to modify. In
our example, it is TESTJFV.

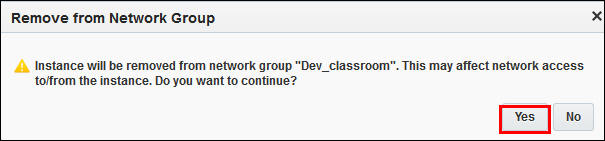
- Scroll down to the Network Groups section, click the menu
icon, and select Remove.

- A confirmation message appears, click Yes.
- In the Network Groups section of the Instance details
page, click Add to Network Group

- In the Add to Network group dialog, use the pull-down to
find and select the demo_group.
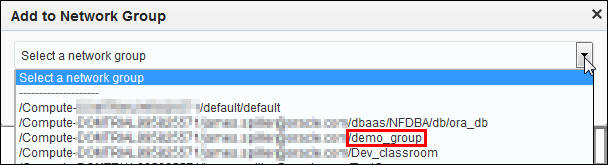
- Then click Attach.

- The Instance Details page is displayed, and the TESTJFV
instance now is associated with the demo_group.

Create a Protocol
- Create a Protocol to allow https to port 443. Click the Network
tab in the Compute Cloud Service Console header. Note:
a protocol for this port already exists, this protocol is
created for demonstration purposes.

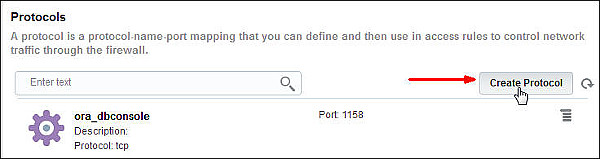
- Click the Protocols tab on the left side of the page.
- Click Create Protocol in the upper right of the Protocols
pane.
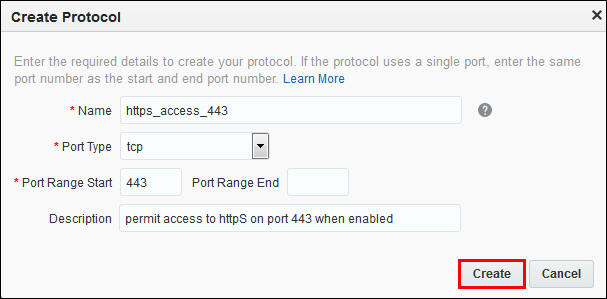
- In the Create Protocol enter the required information.
Enter:
- Name:https_access_443,
- Port Type: tcp,
- Port Range Start: 443,
- Description:permit access to https on port 443 when enabled.
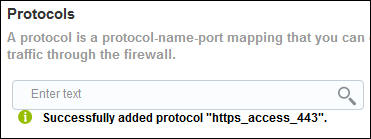
- Confirmation message appears in the protocols pane.
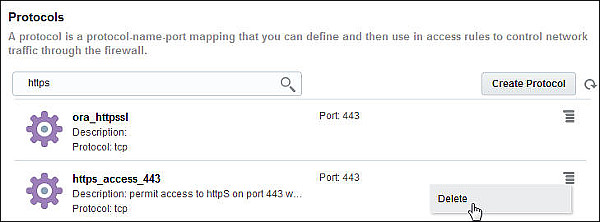
- Scroll down or search for the https_access_443 protocol.
in the example a search is shown. Notice from this page the
menu only allows Delete of the Protocol.
Creating an Access Rule
- In the Compute Cloud Service console, on the network
page, click Access Rules tab on right
side.
- Click Create Access Rule button in Access Rules pane,
upper right.

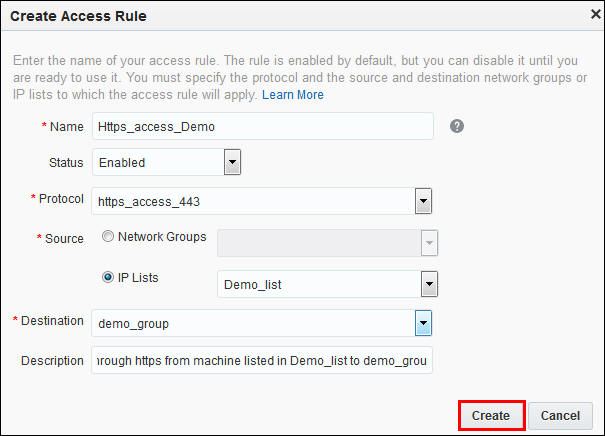
- In the Create Access Rule dialog, enter the information to
allow access:
- Name: Https_access_Demo,
- Status:Enabled,
- Protocol: https_access_443,
- Source: IP Lists, Demo_list,
- Destination: demo_group,
- Description:Allow access through https from machine listed in Demo_list to demo_group.
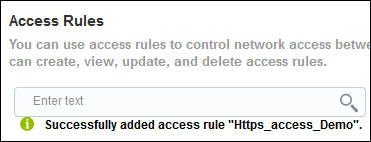
- In the Access Rules pane a Confirmation message appears.
- Enter search Https_access and click the
Search icon.
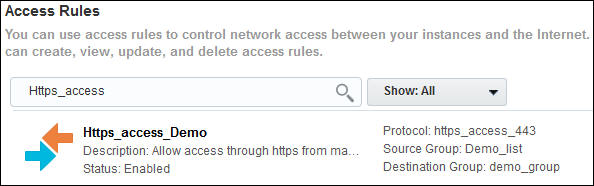
- Because the Access Rule is enabled and it takes precedence over the Network group policies, any machine in the Demo_list, can initiate an https connection to any machine in the demo_group using port 443.
Summary
-
You can configure network access to DBaaS instances using the
Compute Cloud Service console.
-
In this tutorial, you learned to:
- View the components of the Network configuration settings.
- Create the various components required to create an Access Rule.
- For more detailed information about connecting to Oracle Database instances in the Oracle Database Cloud Service (DBaaS), see the documentation.
- To learn more about Oracle Database Cloud Service, visit the Database Cloud Service.
- For training on the Oracle Cloud platform-as-a-service (PaaS) Services, visit the Oracle Learning Library
- Look at these videos on working with the Oracle Database Cloud Service:
- Lead Curriculum Developer: James Spiller
- Other Contributors: Dominique Jeunot
Resources
Credits
Put credits hereTo navigate this Oracle by Example tutorial, note the following:
- Topic List:
- Click a topic to navigate to that section.
- Expand All Topics:
- Click the button to show or hide the details for the sections. By default, all topics are collapsed.
- Hide All Images:
- Click the button to show or hide the screenshots. By default, all images are displayed.
- Print:
- Click the button to print the content. The content that is currently displayed or hidden is printed.
To navigate to a particular section in this tutorial, select the topic from the list.