Before You Begin
Purpose
In this tutorial, you will learn how to perform code reviews using Oracle Developer Cloud Service and NetBeans IDE.
Time to Complete
Approximately 30 minutes
Introduction
The Reviews component of Oracle Developer Cloud Service allows you to do the following:
- Create code reviews and assign them to members of your team
- As a team member, complete an assigned code review
Scenario
You have been assigned a task to add a Java web service to a project. You'll need to create a Git repository branch to make the code change. Then you'll get your code change reviewed by a team member. Once it has been reviewed, you will merge the changes from the branch back to the master.
In the environment you are using for this tutorial, you may be the only team member. For this reason, you'll submit the code changes for review and then perform the review yourself.
Context
The work you do for this tutorial would normally be done as part of an assigned issue. See the tutorial Managing Issues Using Oracle Developer Cloud Service for information about working on issues.
What Do You Need?
-
A login to an Oracle Developer Cloud Service instance
-
One of the following supported browsers:
- Internet Explorer 11 or 12
- Firefox 31 or later
- Chrome 37 (also for Android)
- Safari 7 or 8
- Safari Mobile 5 (iOS)
-
An installation of NetBeans IDE with the Oracle Developer Cloud Service plugin. See Using NetBeans IDE with Oracle Developer Cloud Service.
-
Some experience developing applications in Java
-
Some familiarity with the Git source control system
-
Some familiarity with Oracle Java Cloud Service
-
Some familiarity with NetBeans IDE
It would be helpful if you first completed the tutorials Creating a Project Using Oracle Developer Cloud Service and Managing Issues Using Oracle Developer Cloud Service. This tutorial uses the project created in the first tutorial, but you can use any project to which you have access.
Creating a Repository Branch for the Code Review
-
Open NetBeans IDE and click the Projects tab.
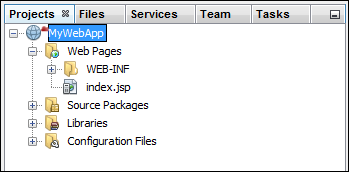
Description of this image -
Right-click your project (MyWebApp, if you completed the tutorial "Creating a Project Using Oracle Developer Cloud Service"), and then select Git > Branch/Tag > Switch to Branch.
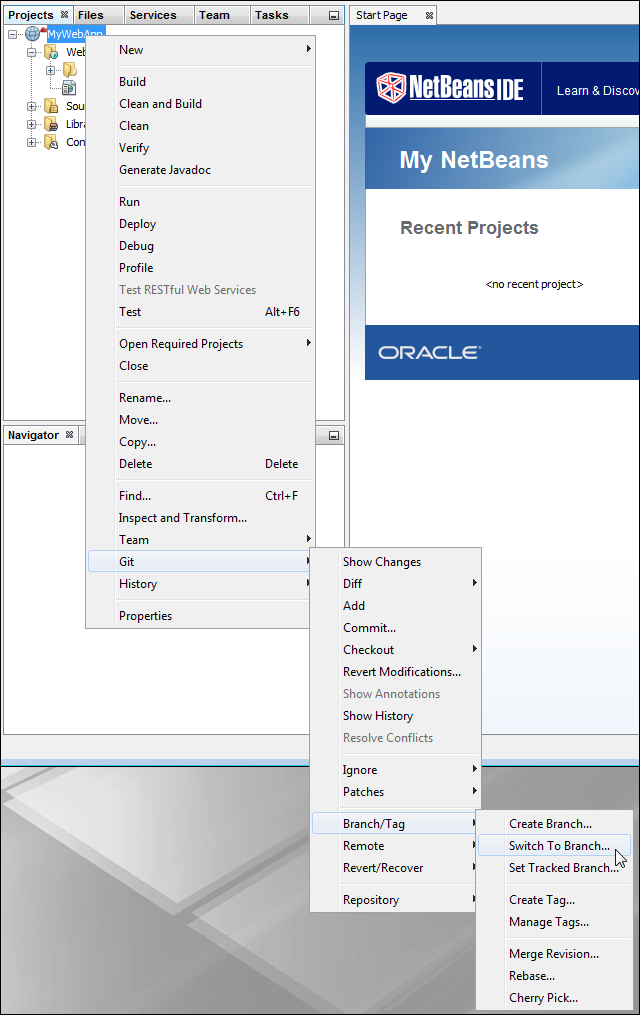
Description of this image -
In the dialog, select the Checkout as New Branch check box, then enter a branch name, such as SvcBranch.
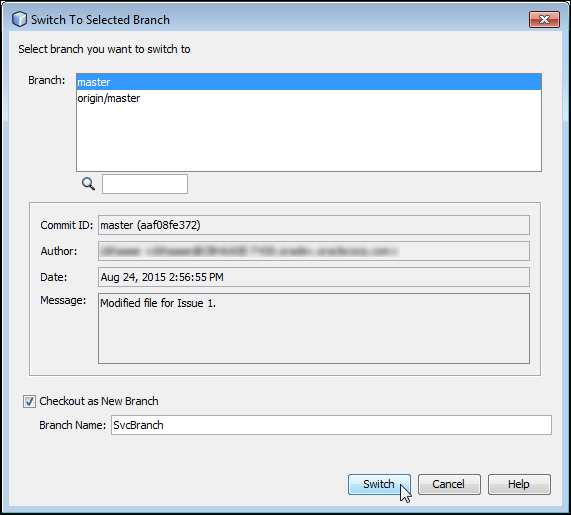
Description of this image -
Click Switch. The branch is created.
You will complete your work in this branch.
Making Code Changes
-
In NetBeans IDE, right-click your project and select New > Web Service.
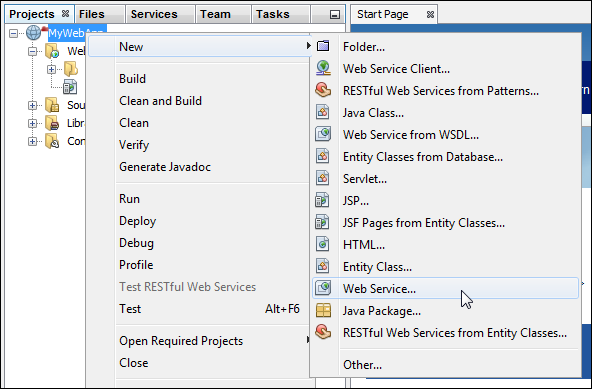
Description of this image -
On the Name and Location page, enter a name for the web service (
MyService, for example). In the Package field, enterservice.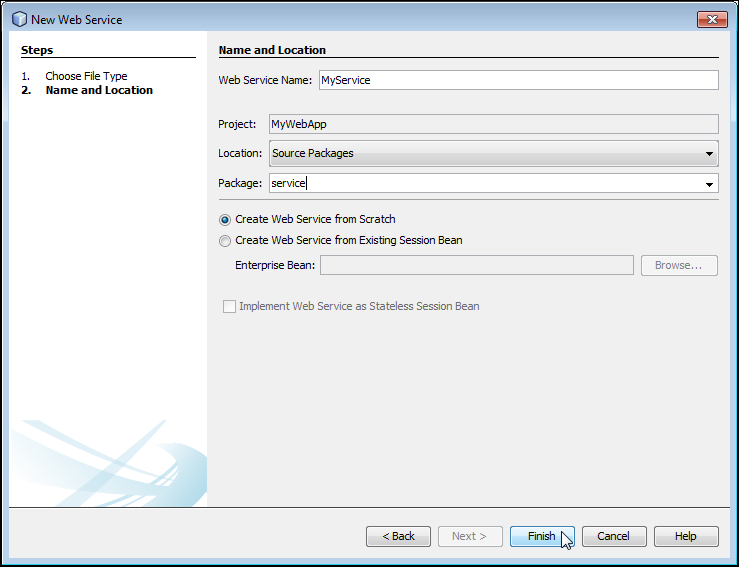
Description of this image -
Click Finish. The service is created, and the source file
MyService.javaappears in the Source Packages area.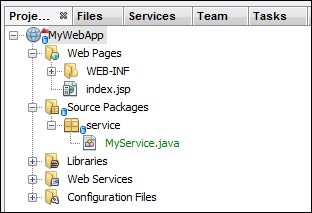
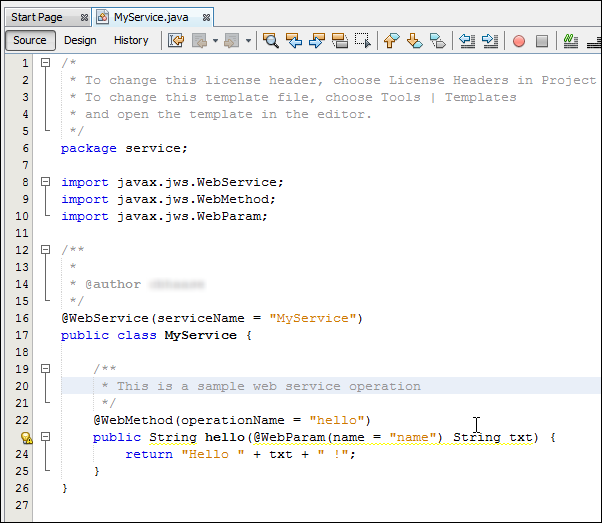
Description of this image The source file also opens in an editor window.
Description of this image -
NetBeans IDE shows a yellow warning icon next to the
hellomethod. Click the icon and make the suggested changes to add@Paramand@Returnannotations to the Javadoc comments, then save the file.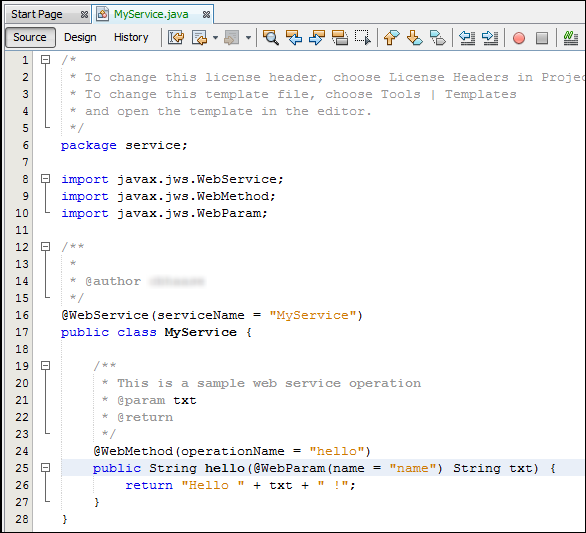
Description of this image -
Right-click your project and select Git > Commit.
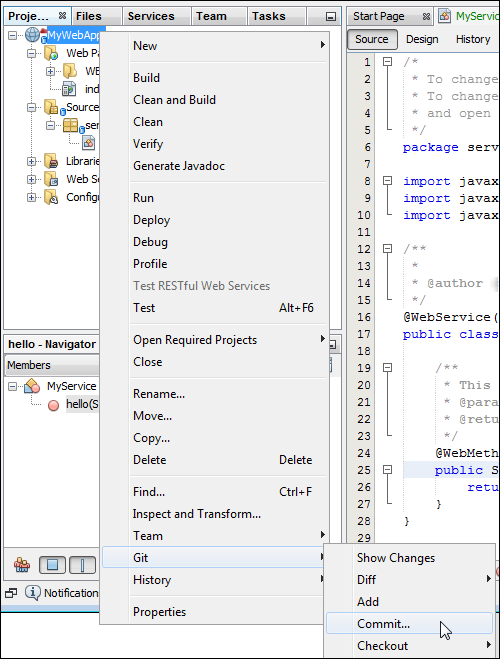
Description of this image -
Enter
Added web servicein the Commit Message text area, making sure that the correct file is being added. Some other NetBeans IDE files may be added and modified as well.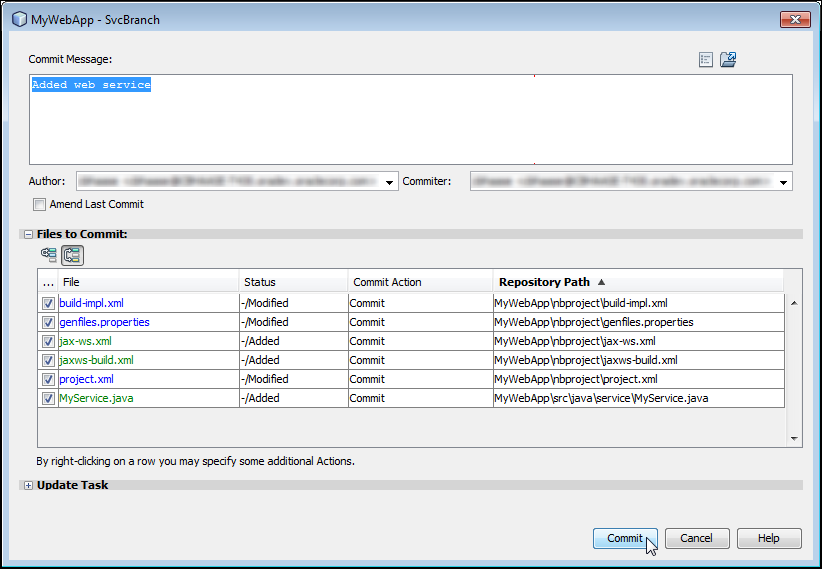
Description of this image -
Click Commit. The files are committed.
-
Right-click your project and select Git > Remote > Push to upstream.
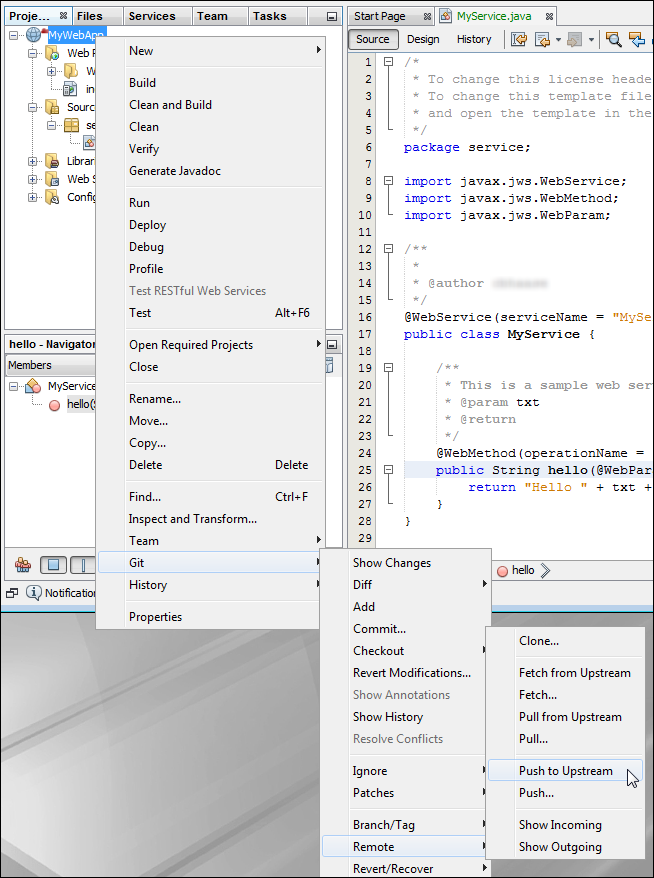
Description of this image -
In the Create New Branch? dialog, click Yes.
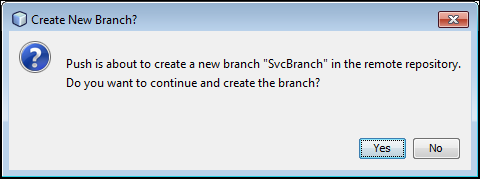
Description of this image -
In the Set Up Remote Tracking? dialog, click Yes.
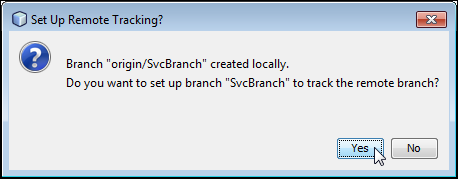
Description of this image The remote branch is created.
Verifying the Commits in Oracle Developer Cloud Service
-
In the browser, verify that your changes are displayed in Oracle Developer Cloud Service.
If you are not already logged in, launch your Oracle Developer Cloud Service, following the instructions in "Accessing Oracle Developer Cloud Service Using the Web Interface" in Using Oracle Developer Cloud Service.
-
You are on the Home page of the last project you worked on, which is My Web Application if you recently completed the OBE tutorial Creating a Project Using Oracle Developer Cloud Service or Managing Issues Using Oracle Developer Cloud Service. First, verify that the commit you made appears in the activity feed on the project Home page.
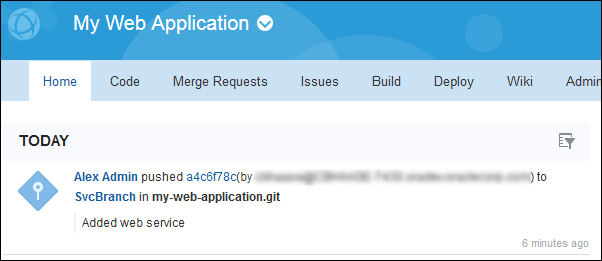
Description of this image -
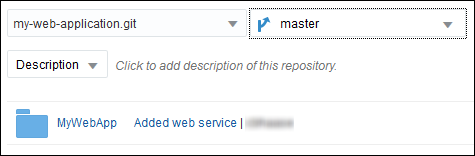
Click Code, then click Commits. What you see are the commits to the master.
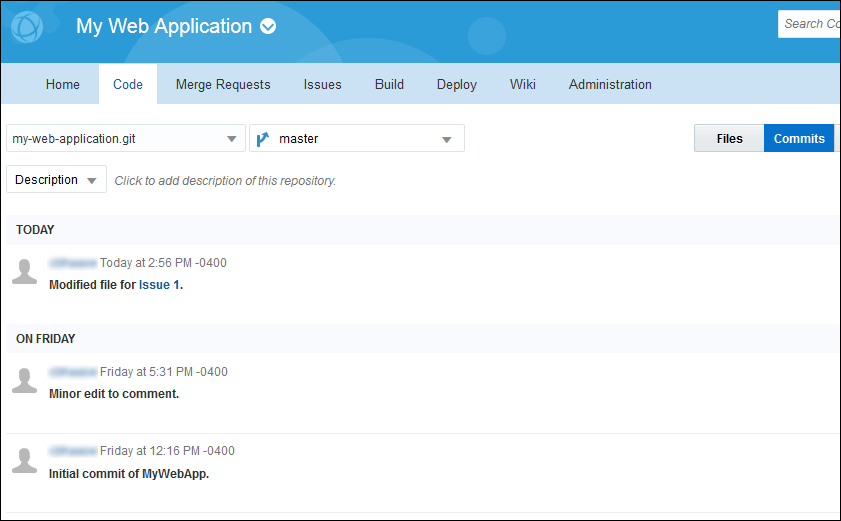
Description of this image -
From the right drop-down list, select SvcBranch.
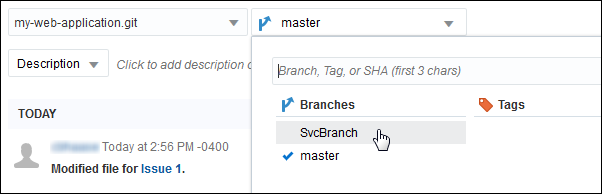
Description of this image -
To verify that the new file was committed, click Show Details on the right side of the commit.
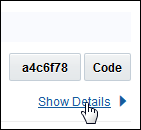
Description of this image The commit details are displayed.
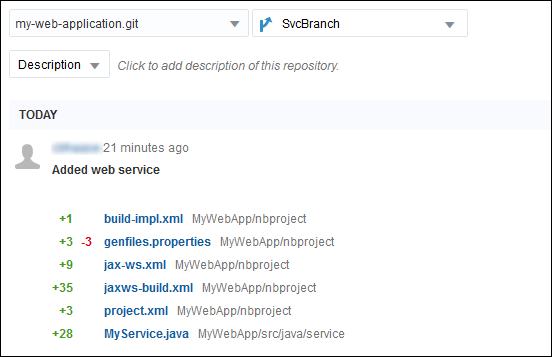
Description of this image
You are now ready to create a code review.
Creating a Review
-
In the browser, click the Merge Requests tab to see the My Requests table.
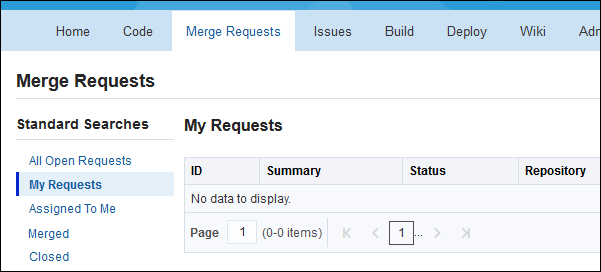
Description of this image -
Click the New Request button on the right to open the New Request dialog.
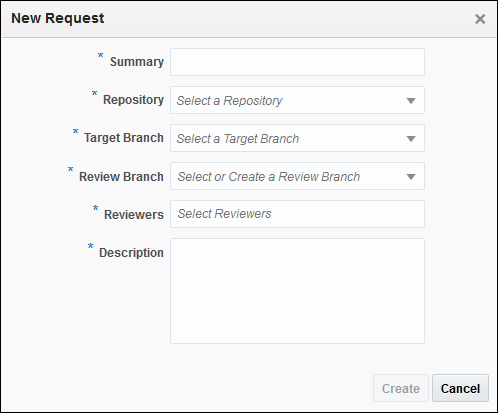
Description of this image -
In the Summary field, enter a title for the review, such as
WebServiceReview.From the Repository drop-down list, select my-web-application.git.
From the Target Branch drop-down list, select master.
From the Review Branch drop-down list, select SvcBranch.
In the Reviewers field, select your own name.
In the Description field, enter a message such as
Please review this new web service.
Description of this image -
Click Create.
The review opens in a page of its own with three tabs: Conversation, Commits, and Changed Files.
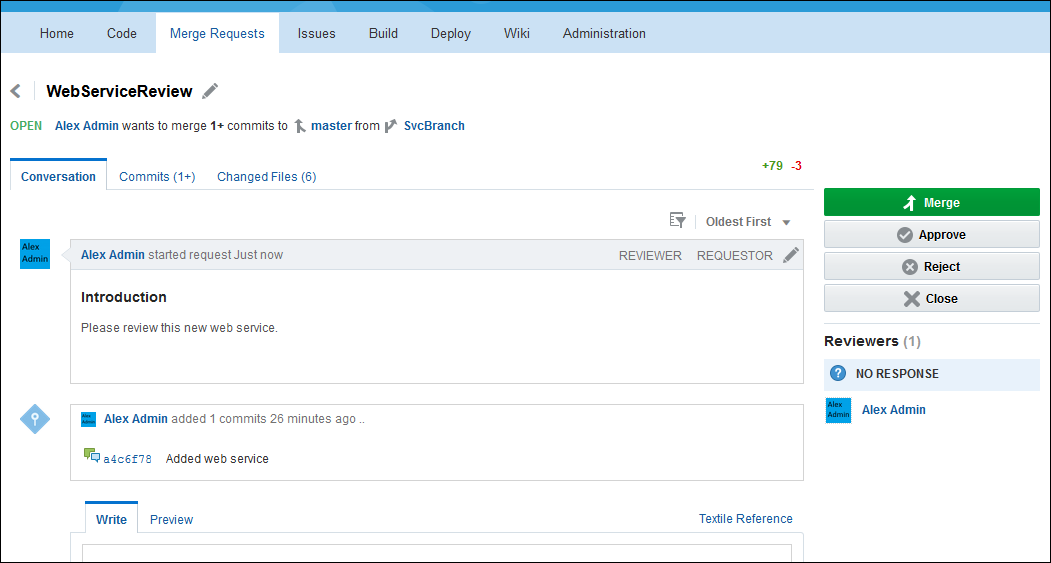
Description of this image
Performing a Review
-
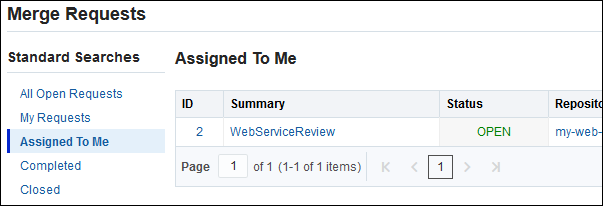
Click the Back arrow or Merge Requests to return to the Merge Requests page. Under Standard Searches, click Assigned to Me. The table shows the review you assigned to yourself, with the status OPEN. (It also appears under My Requests, since you created it.)
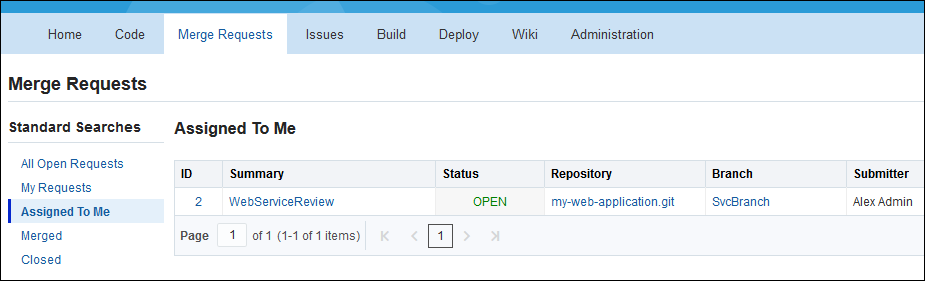
Description of this image -
Click the WebServiceReview Summary link to go to the review page, which displays the actions related to the review: conversations, commits, file changes, and buttons for possible actions you might take. It looks just as it did in Step 4 of the previous section.
-
To review the code changes, click the Changed Files tab. You will see the new Java source file along with any other added or modified files. The changes have a green or pink background to indicate code additions and deletions.
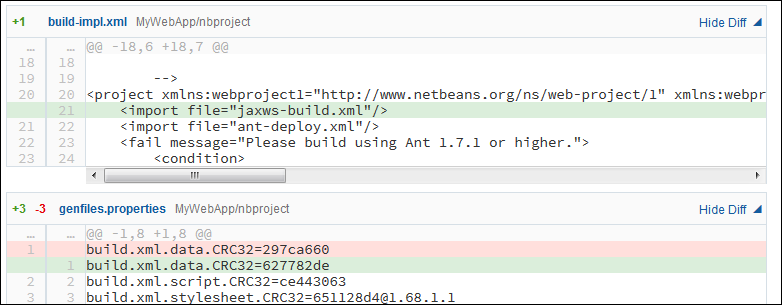
Description of this image -
Scroll down to the source file
MyService.javaand mouse over the line numbers to the left of the code. A plus (+) sign is displayed to indicate that you can add a comment.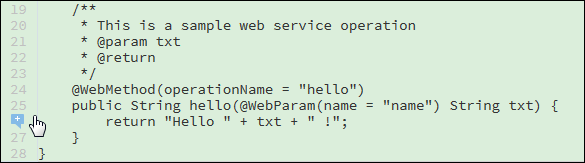
Description of this image -
Click the plus sign and insert a comment in the dialog. Set the Comment Visibility to Publish Now, but deselect the Publish All check box.
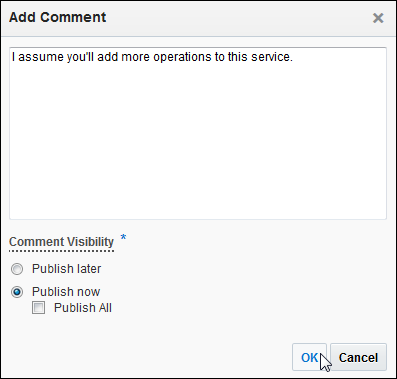
Description of this image -
Click OK to add the comment to the code.
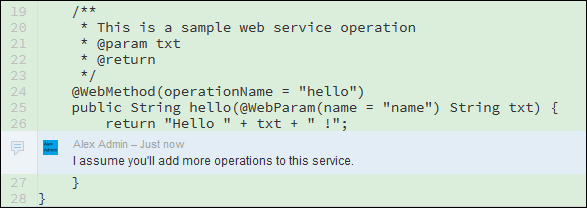
Description of this image If you had set the Comment Visibility to Publish Later, the comment would have been added to a Pending Comments tab at the top of the page. You could then publish it when and if you wished.

Description of this image -
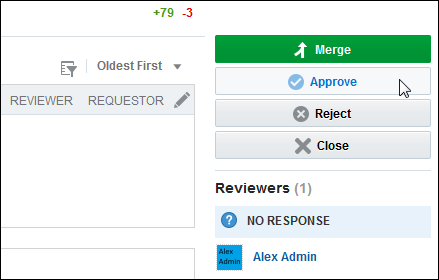
Return to the Conversation tab, then click Approve to approve the changes.
Description of this image -
In the dialog box that is displayed, add a comment (for example,
Looks fine so far), and then click OK.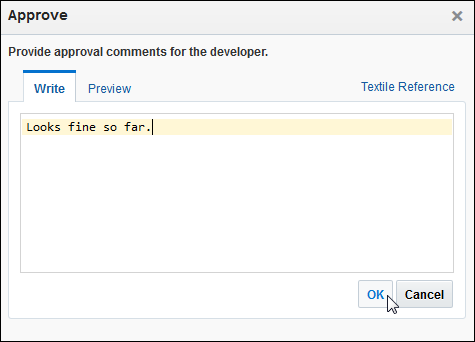
Description of this image The approval appears on the right side of the page.
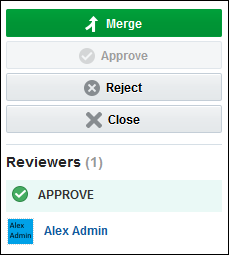
Description of this image The approval also appears at the bottom of the Conversation area.
You can also post a general comment at the bottom of the page, using your chosen Wiki markup language.

Description of this image
You have now completed your role as a reviewer. Since you are the only reviewer, the submitter (also you) can now consider the review complete.
Merging the Code
-
Click the Back arrow or Merge Requests to return to the Merge Requests page. The Status column still shows the review as OPEN. Either the submitter or a reviewer can perform the merge.
Description of this image Note: A submitter or reviewer can merge a branch or close a review, whether or not code changes have been approved by reviewers. Approving or rejecting a merge request is just a special way to add a comment that you approve or disapprove the changes made to the source code.
-
Click the review link to go to the review page. On the review page, click Merge.
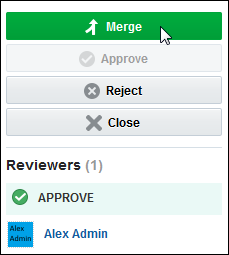
Description of this image -
In the Merge Request dialog, add a comment (
Merging
                                  new web service after review
, for example), then click OK.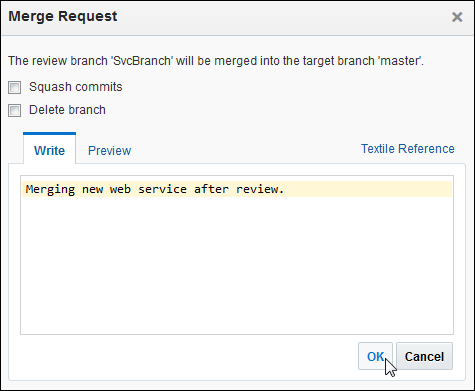
Description of this image The review status is shown as MERGED.

Description of this image -
Click Merge Requests, then My Requests. The completed review appears in the My Requests, Merged, and Closed tables only, with the status MERGED.
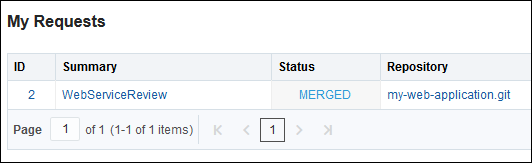
Description of this image -
Click Home. The main review actions appear in the activity feed.
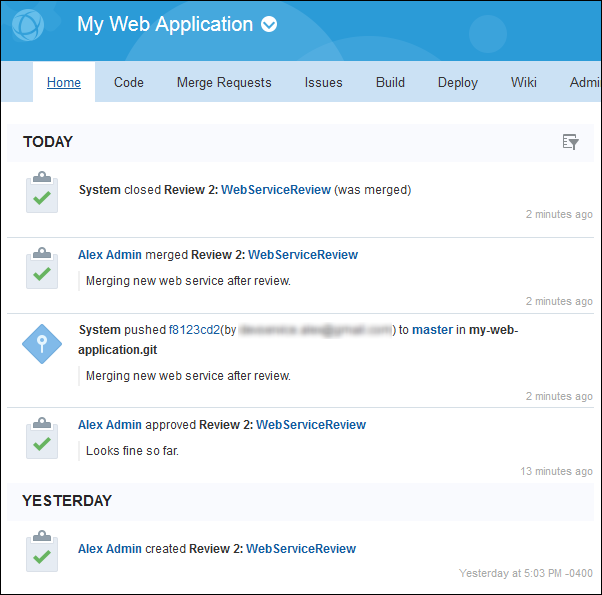
Description of this image -
Click Code and look at the comment on the SvcBranch branch.
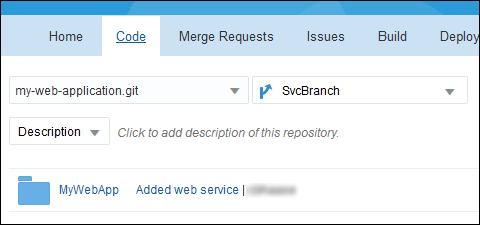
Description of this image -
In the right drop-down list, switch to master.
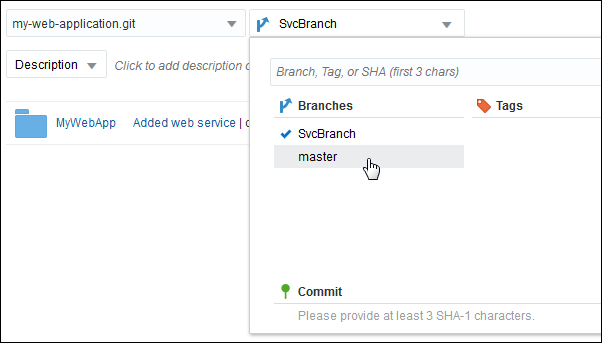
Description of this image View the comment on the master. You can see that the comments are the same on the branch and the master.
Description of this image
Now you can pull the changes down to your local repository using NetBeans IDE.
Pulling the Changes to Your Local Repository
-
In NetBeans IDE, go to the Projects tab. Right-click the MyWebApp project and select Git > Remote > Pull from Upstream.
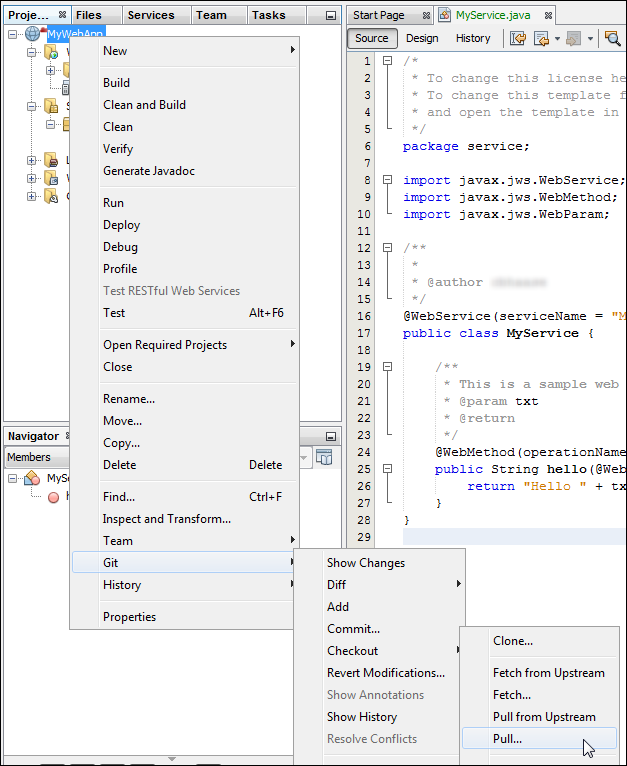
Description of this image -
On the Remote Repository screen of the Pull from Remote Repository dialog box, click Next.
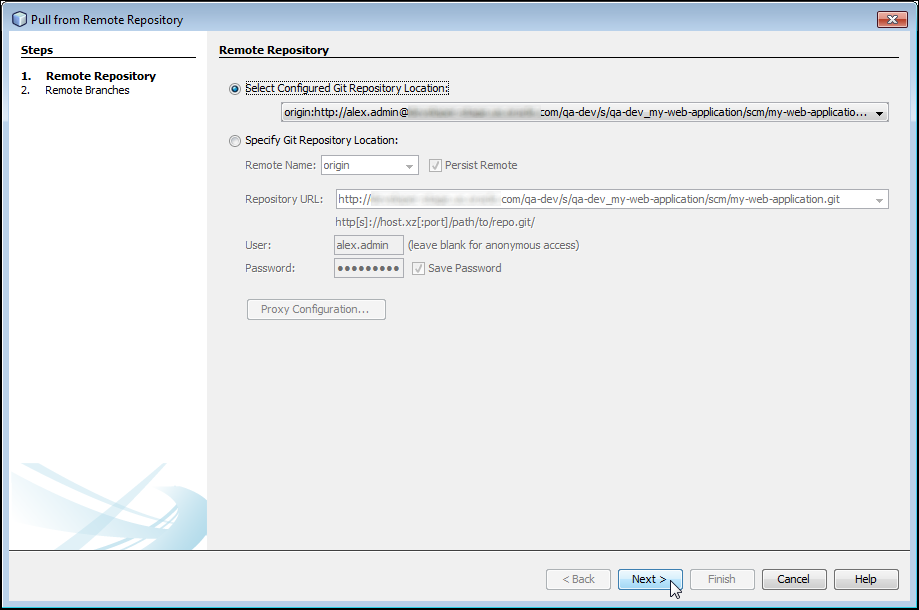
Description of this image -
On the Remote Branches screen, verify that both branches are checked, and then click Finish.
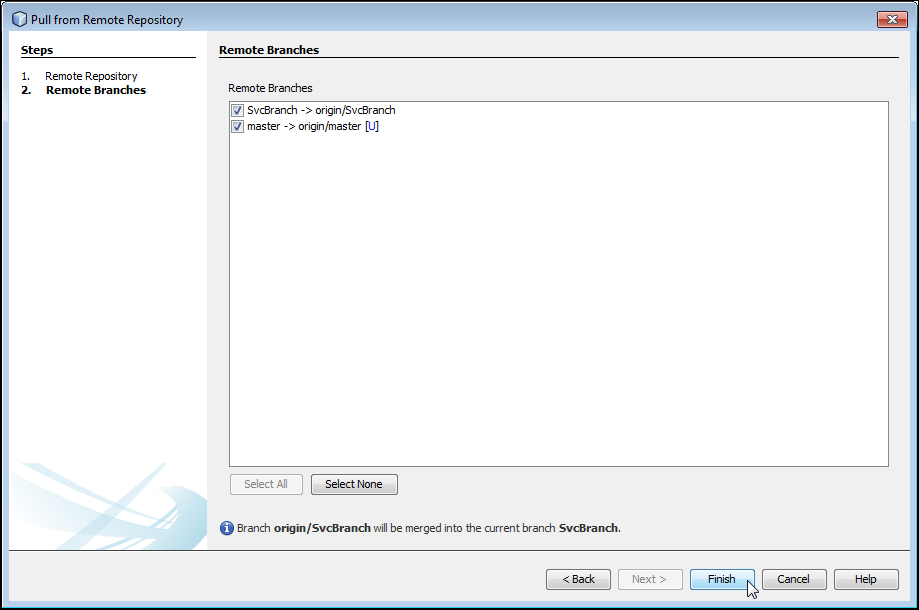
Description of this image The local master is updated with the changes from the remote one. The local and remote branches have identical code except possibly for a generated NetBeans IDE file. If you see a dialog about conflicts, it is safe to click Revert.
Want to Learn More?
- Creating a Project Using Oracle Developer Cloud Service OBE
- Managing Issues Using Oracle Developer Cloud Service OBE
- Oracle Developer Cloud Service in the Oracle Help Center
- Using Oracle Developer Cloud Service in the Oracle Help Center
Credits
- Lead Curriculum Developer: Kim Haase
- Other Contributors: Ken Ganfield