Configuring and Building an ADF Application using Ant in Oracle Developer Cloud Service Classic
Before You Begin
This 15-minute tutorial shows you how to configure and build an Oracle Application Development Framework (Oracle ADF) application with Apache Ant using Oracle JDeveloper and Oracle Developer Cloud Service.
Background
Oracle Developer Cloud Service can build Oracle ADF applications by using Ant, JDeveloper, OJMake and OJDeploy utilities.
In this tutorial, you use the Oracle Alta UI Work Better sample application and configure it in JDeveloper to use Ant build files. You configure the Ant build files file to access the JDeveloper, ADF libraries, OJMake and OJDeploy utilities on the Oracle Developer Cloud Service build system. You then create a job in Oracle Developer Cloud Service that runs an Ant build and generates the artifacts.
The Alta UI Work Better sample application is a demo application that uses the Alta UI to develop the most recent Oracle Cloud products.
What Do You Need?
A web browser
Your Oracle Cloud account credentials
An Oracle Cloud account with an active Oracle Developer Cloud Service instance
In this section, you add Ant build files, build.xml and build.properties, to an Oracle ADF application in JDeveloper.
In JDeveloper, if you aren't using the Studio Developer role, from the Tools menu, select Switch Roles, and then select Studio Developer (All Features). Save all files and restart JDeveloper.
Open the WorkBetterFaces application application from the cloned Git repository of the project.
In this section, you configure the Ant buildfiles to access Ant libraries, OJMake, and OJDeploy utilities on the Oracle Developer Cloud Service build system using Oracle Developer Cloud Service system environment variables.
Add the following code line before <property file="build.properties"/>.
<property environment="env"/>
The <property environment="env"/> code in build.xml enables Ant to access the system environment variables and store them in properties, prefixed with env.
Description of the illustration config_ant_02.png
Save build.xml.
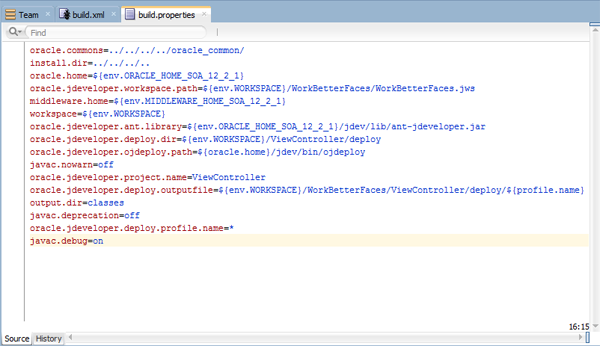
Double-click build.properties to open it in the code editor.
Remove the existing code of build.properties and add the following code to it.
Make sure there are no spaces at the end of each property definition.
Description of the illustration config_ant_03.png
In the above code, you are configuring Ant to use the Oracle Developer Cloud Service environment variables.
oracle.home uses the ORACLE_HOME_SOA_12_2_1 environment variable to define the path of the JDeveloper 12.2.1 directory installed on the Oracle Developer Cloud Service build system.
middleware.home uses the MIDDLEWARE_HOME_SOA_12_2_1 environment variable to define the path of the Oracle Fusion Middleware directory installed on the Oracle Developer Cloud Service build system.
oracle.jdeveloper.ant.library defines the path of the Ant library on the Oracle Developer Cloud Service build system.
oracle.jdeveloper.ojdeploy.path defines the path of OJDeploy on the Oracle Developer Cloud Service build system.
oracle.jdeveloper.deploy.outputfile defines the path of the output file.
oracle.jdeveloper.deploy.dir defines the path of the deployed artifacts directory.
To learn more about Oracle Developer Cloud Service environment variables on the build system, see the Using the Oracle Developer Cloud Service Build Executor Environment Variables reference in the Want to Learn More section.
Save the build.properties file.
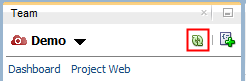
Using the Team > Git menu options, use the Add option to add the build.xml and build.properties files to the Git repository index, use the Commit option to commit them, and the Push coption to push the commit to the project Git repository.
Configure a Build Job in Oracle Developer Cloud Service
In this section, you configure a build job to run Ant and deploy the archived artifacts.
In the Oracle Developer Cloud Service web interface, create a ADF_Ant_Build job and open its configuration page. See the Create and Configure a Build Job in Developer Cloud OBE in the Want to Learn More section to learn about how to create and congigure a job in Oracle Developer Cloud Service.
After the build is successful, in the Deploy page of Oracle Developer Cloud Service, create a deployment configuration and deploy the ADF application to Oracle Java Cloud Service. See the Deploying an Application from Oracle Developer Cloud Service to Oracle Java Cloud Service OBE in the Want to Learn More section to learn about how to deploy an application to Oracle Java Cloud Service.
 Configuring and Building an ADF Application using Ant in Oracle Developer Cloud Service Classic
 Before You Begin
 Add Ant Build Files to the Oracle ADF Application


 Configure the Ant Buildfiles

 Configure a Build Job in Oracle Developer Cloud Service
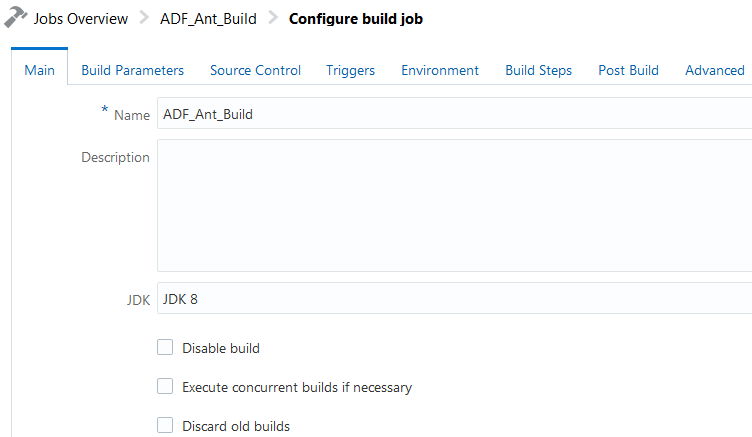


 Want to Learn More?