Creating an Apache Cassandra Cluster in Oracle Data Hub Cloud Service
 Before You Begin
This 10-minute tutorial shows you how to create and use an Apache Cassandra cluster in Oracle Data Hub Cloud Service (DHCS) on Oracle Cloud Infrastructure Classic.
Background
Oracle Data Hub Cloud Service enables you to consistently provision and manage NoSQL database clusters such as Apache Cassandra on Oracle Cloud.
Oracle Data Hub Cloud Service leverages Oracle’s Infrastructure Cloud Services to deliver a secure and elastic integrated platform.
What Do You Need?
- See prerequisites at Before You Begin with Oracle Data Hub Cloud Service.
 Create an Apache Cassandra Cluster
Perform the following steps to create a cluster.
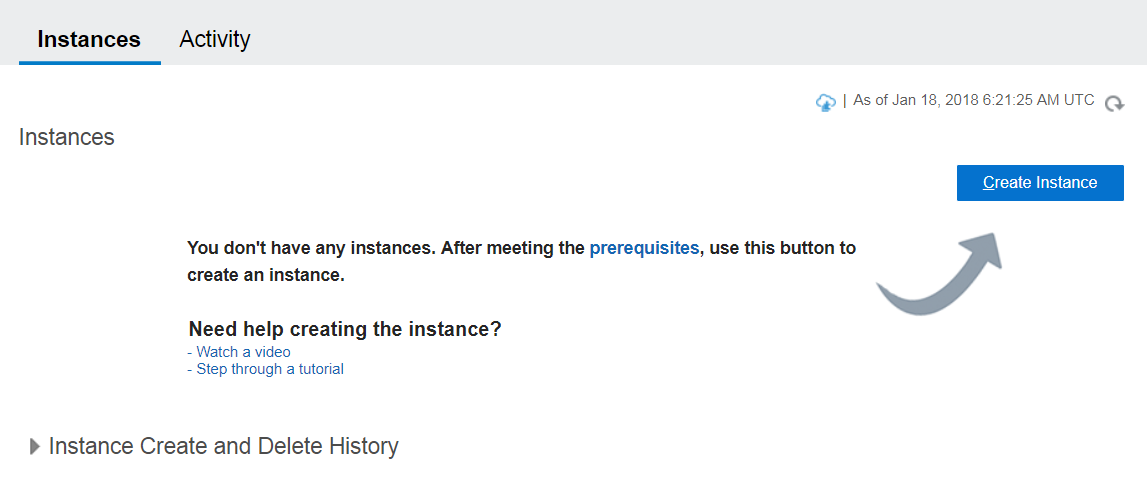
- Login to your DHCS account and navigate to the Instances page.
- Click the Create Instance button.
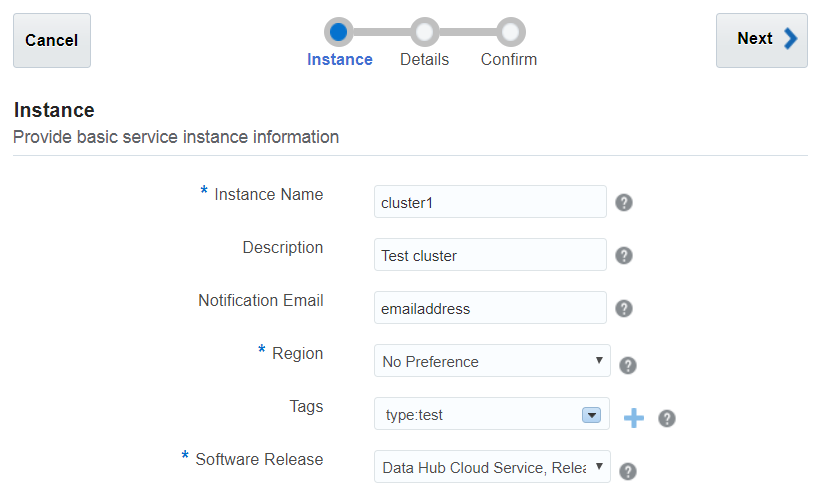
- The Instance section appears. Provide basic instance information here. Enter the values for the following parameters and then click Next.
- Instance Name: cluster1
- Description: Test cluster.
- Notification Email: Enter email address for receiving provisioning status updates.
- Region: Choose No Preference to let Oracle Data Hub Cloud Service choose an Oracle Cloud Infrastructure Classic region for you.
- Tags: Create a tag or assign an existing tag for categorizing your cluster, for example, by purpose, owner, or environment.
- Software Release: Select the version of Data Hub software and release you wish to use.
If you choose a region that supports Oracle Cloud Infrastructure, the Availability Domain and Subnet fields are displayed, and the deployment is created on Oracle Cloud Infrastructure.
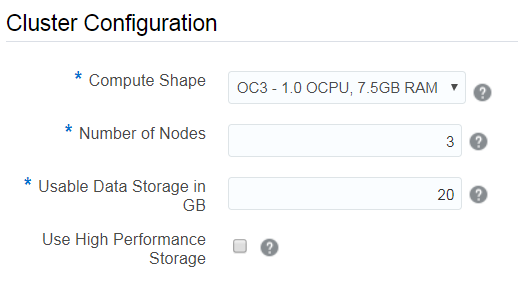
Description of the illustration a3.png - The Service Details section appears. Provide additional configuration parameters for your cluster here. Modify the parameter values as per your requirement.
- In the Cluster Configuration sub-section, enter the values for the following parameters.
- Compute Shape: OC3 - 1.0 OCPU, 7.5GB RAM
- Number of Nodes: 3
- Usable Data Storage in GB: 20
- Use High Performance Storage: Select to use high performance SSDs (solid state drives) instead of HDDs (hard disk drives). An additional cost is associated with this type of storage.
Description of the illustration a5.png - In the Backup and Recovery Configuration sub-section, enter the values for the following parameters.
- Backup Destination: Select your preferred backup destination (Both Cloud and Local Storage, Cloud Storage Only or None)
Enter the values for the following parameters only if Backup Destination is set to Both Cloud and Local Storage or Cloud Storage Only:
- Cloud Storage Container: Enter the complete REST URL for Oracle Storage Cloud Service, appended by the container name. For example:
http://a9999999.storage.oraclecloud.com/Storage-a9999/dhcs-container - Cloud Storage Username: Enter user name of the specified storage container.
- Cloud Storage Password: Enter password of the user specified.
- Create Cloud Storage Container: Select this to create a new storage container.

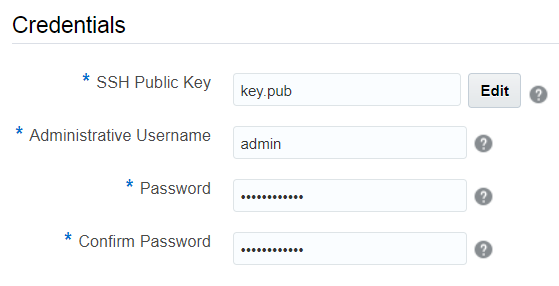
Description of the illustration a6.png - In the Credentials sub-section, enter the values for the following parameters and click Next.
- SSH Public Key: Click Edit to specify the public key. You can upload a file containing the public key value, paste in the value of a public key, or have the wizard generate a key pair for you.
- Administrative Username: Specify the username to use to log in to the tools, such as cqlsh, nodetool, and service console.
- Password: Password of the user specified in
Administrative Username. - Confirm Password: Repeat the password specified.
Description of the illustration a7.png - The Confirmation page appears. Confirm your responses and click Create to create the Apache Cassandra cluster. To edit or update any parameter, click Previous to navigate back to the Service Details page.
 View Cluster Details
Perform the following steps to view details of your cluster, after it is successfully provisioned.
- Navigate to the Instances page. All the clusters with their details are listed here.
- After the cluster is successfully created, click on your cluster name. The Instance Overview page is displayed.
- Click Administration on the left to view the administration page.
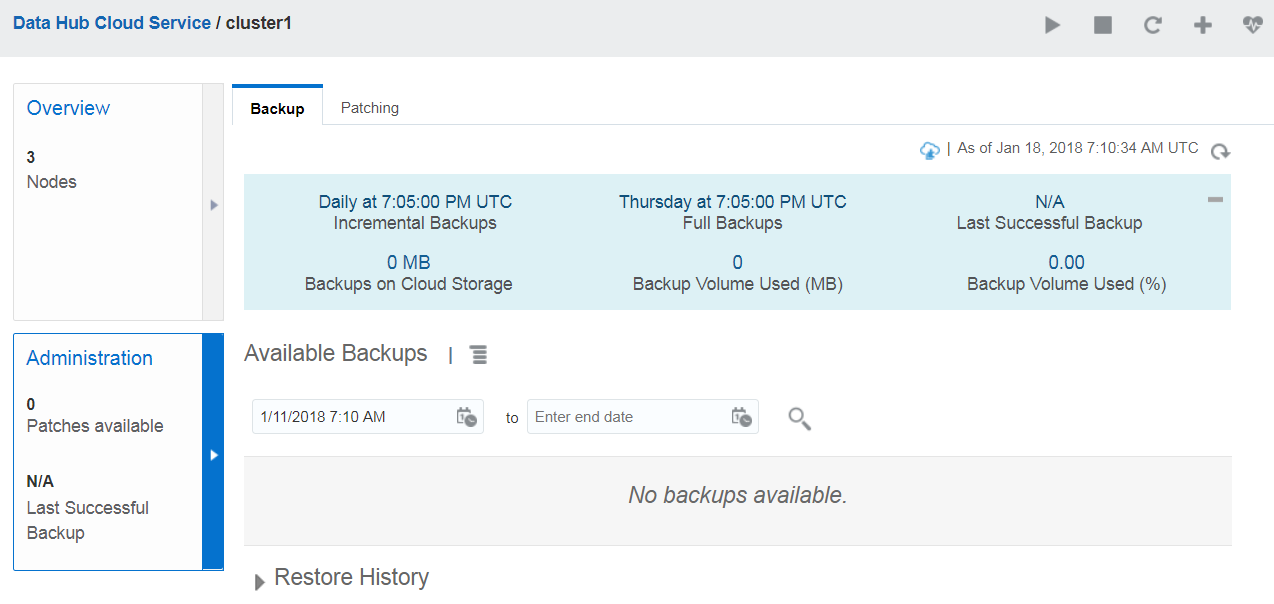
Description of the illustration b3.png If backup is enabled, the Backup page is displayed by default. Else, the Patching page is displayed.


 View the Service Console
Perform the following steps to view the DHCS service console.
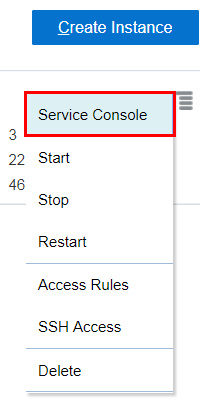
- In the Instances page, click
 and then click Service Console.
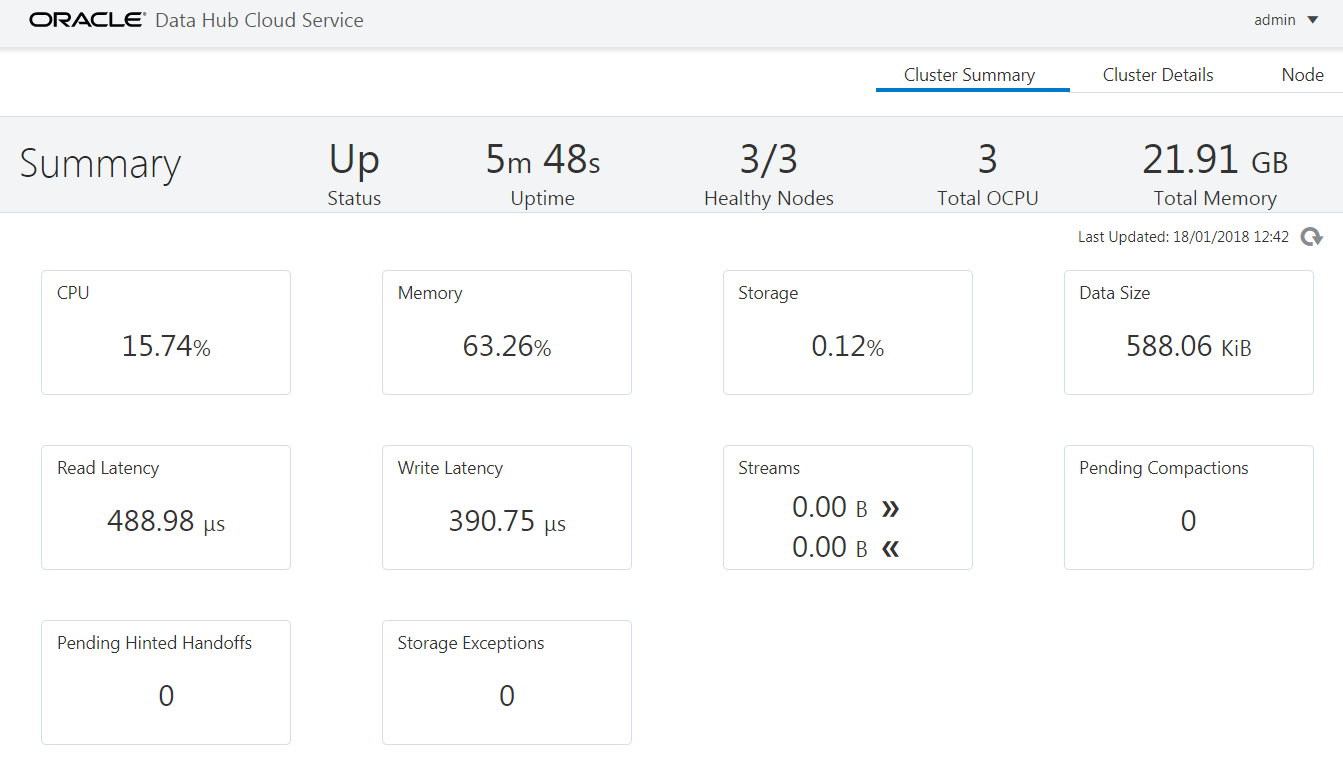
- The Service Console login page appears. Enter your Administrative username and password and click Submit.
- The Data Hub Service Console is displayed. Observe the page. This page can be used to monitor the cluster status, usage, performance, and activity on a real-time basis.