Designing Forms and Managing Task Lists in Planning
 Before You Begin
This 55-minute tutorial shows you how to design forms and manage task lists in Planning.
Background
Forms empower your operational planners with flexibility, scalability, and the ownership to plan the way they want, while still offering the transparency and control required for corporate finance.
While it looks similar to a spreadsheet, forms are directly connected to your data, minimizing manual processes. You can design forms to support data entry, summary reporting, and review. Then, transform them into charts to help planners analyze results. This solution strikes an ideal balance between providing best-practice planning while maintaining the ability to be highly configured for planning processes that are unique.
Forms, when designed effectively, make planning easy. You can create simple forms to meet your needs and then you can use the simple forms and other artifacts to design dashboards to summarize the data.
With task lists, you can guide users through the planning process by listing tasks, instructions, and end dates. You can create task lists to organize groups of tasks for users. After you create task lists, you can add tasks to those lists.
What Do You Need?
Before starting this tutorial, you should:
- Have Service Administrator access to Planning for EPM Enterprise Cloud Service.
- Upload and import this snapshot into your Planning instance.
- Verify or set the navigation flow to Financial Flow - Admin.
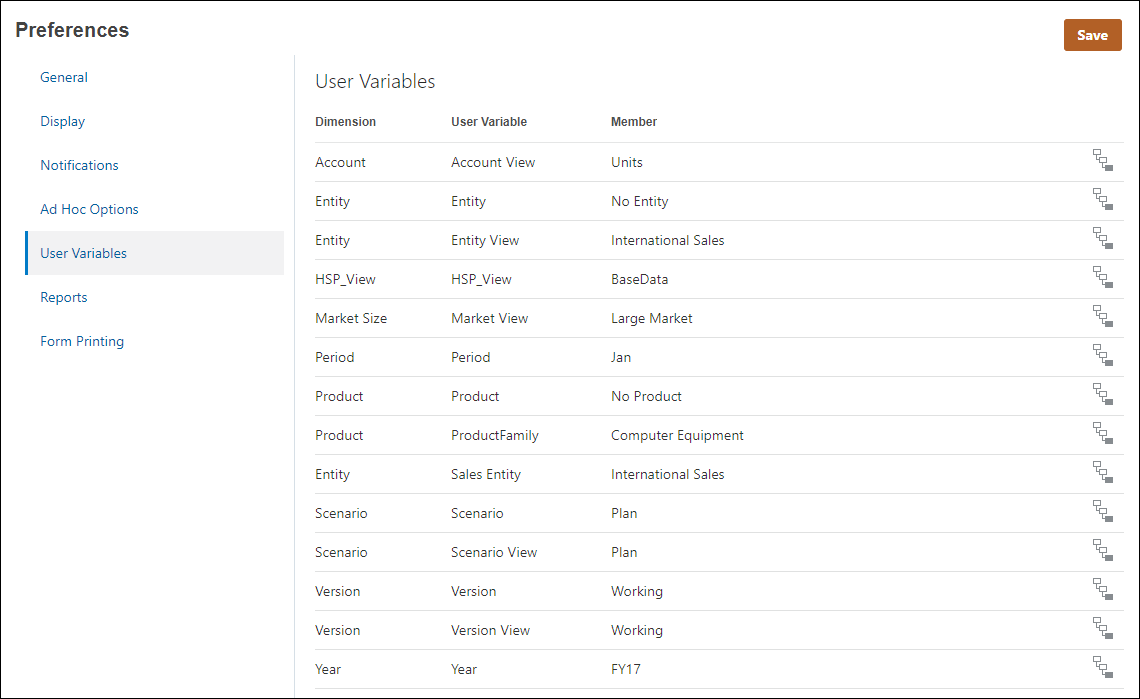
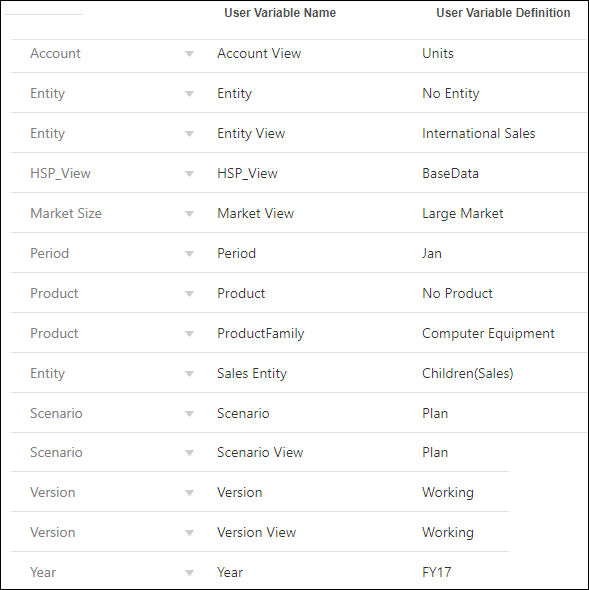
- Ensure that the user variables are set for Service Administrator. Base your selections on the following example:
 Forms Overview
In this section, you learn about forms, and form components. You also learn about form design considerations.
Form Components in Planning
You can create simple forms based on your company’s planning requirements. Simple forms are created with dimension members from a single cube.
Forms are designed to be easy and intuitive for its users. Visual indicators convey information, such as the cell’s accessibility.
Associated business rules enable the user to push and allocate target data across entities and products based on historical patterns.
There are several sections to forms:
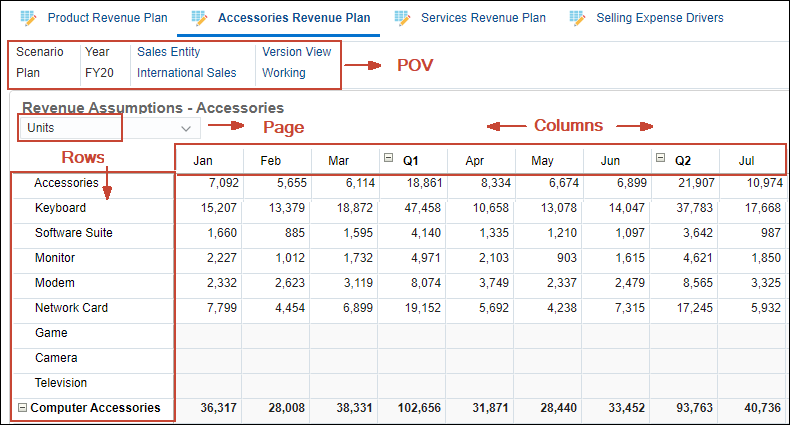
- Point of View - Select point of view (POV) dimensions such as year, scenario, and version to define the context for pages, rows, and columns. For example, if Scenario is Budget, all data displayed and entered in pages, rows, and columns is written to the Budget scenario dimension member. Each POV dimension is set to one member, which planners can't change.
- Page Axis – Use the page axis to specify member combinations that may span dimensions so that users can work with data in smaller, logical views. Each page axis item can have members selected from different dimensions. Users see only members they can access.
- Rows and Columns - Rows and columns define the grid into which planners enter data. For example, you can assign Unit Sales to the row axis and January to the column axis. When planners access forms, they can enter data into the cell where the Unit Sales row intersects with the January column.
- Attribute Dimensions - In addition to using attribute dimensions as filters, you can define attributes as unique dimensions within Planning so that they can be placed on an axis other than their associated base dimension. This enables you to perform cross-dimensional rollups across attribute members.
To simplify a form’s POV, or better tailor it to the needs and roles of planners, you specify only relevant members or define user variables.
You can specify multiple page drop-down lists, and select members using relationship functions or attributes. Switch between member sets by selecting them from the page axis.
You display member names or aliases on the page axis. You can specify the number of members in a page dimension that enables a search drop-down list on the data entry page, useful if dimensions contain many members.
By default, forms have one set of rows and columns. You can add rows and columns to create asymmetrical combinations of members.
Attribute dimensions are optional on form grids and are listed separately on the Layout tab of the Form Designer. To use an attribute dimension in a form, drag the attribute dimension to the point of view, page, row, or column.
Form Design Considerations Tips and Features in Planning
Consider the following tips and features when designing forms:
- Separate input-type forms from reporting forms.
- Design forms with end-users in mind. Best practice is for Data entry forms to include a consumable amount of information for users such as the input form.
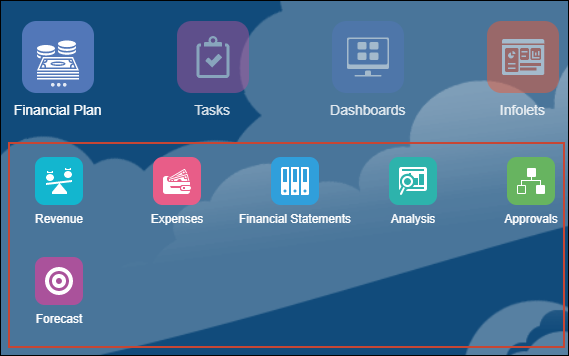
- Set up navigation flows to help users navigate through their planning process.
- Use dashboards to combine data entry and reporting forms to enhance user experience.
Input Form:

Reporting Form:

Applying Best Practices to Form Design in Planning
In this section, you learn how to implement best practices in form design, by reviewing several best practices that are applied to a form.
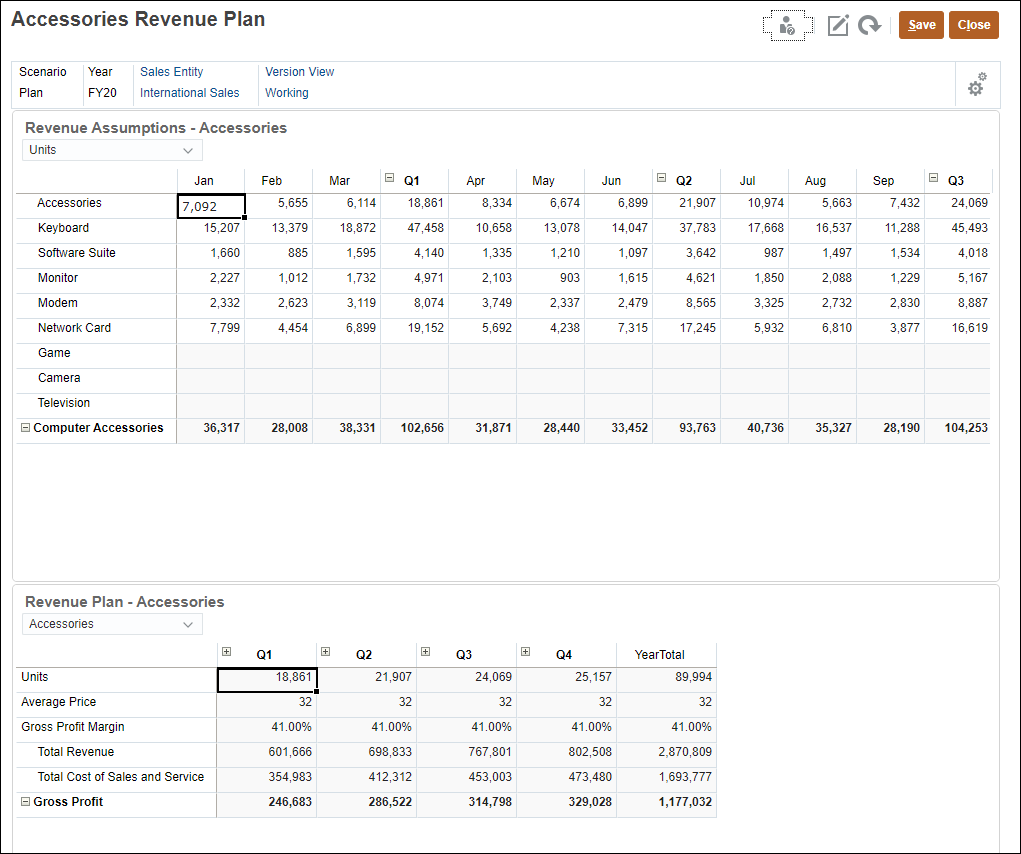
The Expenses by Category form applies the following best practices:
- Typically, accounts or periods are placed on the row or column.
- Other dimensions can be placed in any of the form sections: on the page, POV, column, or row.
- Consider the total number of member rows displayed on the form.
- Consider the number of dimensions on a row. Placing multiple dimensions on the row will affect form performance.
- Use functional relationships such as Children(7001).
- Set up substitution variables such as &LastYr and &CurYr.
- Set up user variables for dimension selection such as &Entity View.

To reduce form maintenance:
In this tutorial, you will be assigning values to user variables.
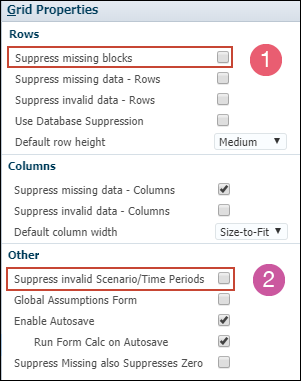
For form properties and settings, best practices are highlighted in the following example:
- Select Suppress missing blocks to improve performance if sparse dimensions with functions are used in the rows.
- Select the Suppress invalid Scenario/Time Periods option, to align the form to the Start and End Year period set for the Scenario, and automatically update as the Scenario is updated. You can leverage this option instead of using substitution variables.
Some other best practices for form properties and settings are highlighted in the following example:
- Set valid intersections between different dimensions. Suppressing invalid combinations can be set in rows or columns to make only valid intersections available to end users. By default only valid intersections will be available to the end users when the dimensions are set in the Page selection.

- Use settings to control precision, display, and menus, and to associate the proper rules with your form.

For business rules that may take longer to run, consider these best practices:
- Set rules to launch from an Action menu
- Associate rules with the form instead of setting it to run on save
To improve performance on forms using runtime prompts:
- Use runtime prompts to limit the scope of the rule
- Consider the amount of runtime prompts required and simplify a planning task
- Use form member selections to fill prompts
Run on Save and Run on Open performance depends on the amount of calculation required on the form data.
 Setting Up the Form Layout in Planning
In this section, you set up the form layout.
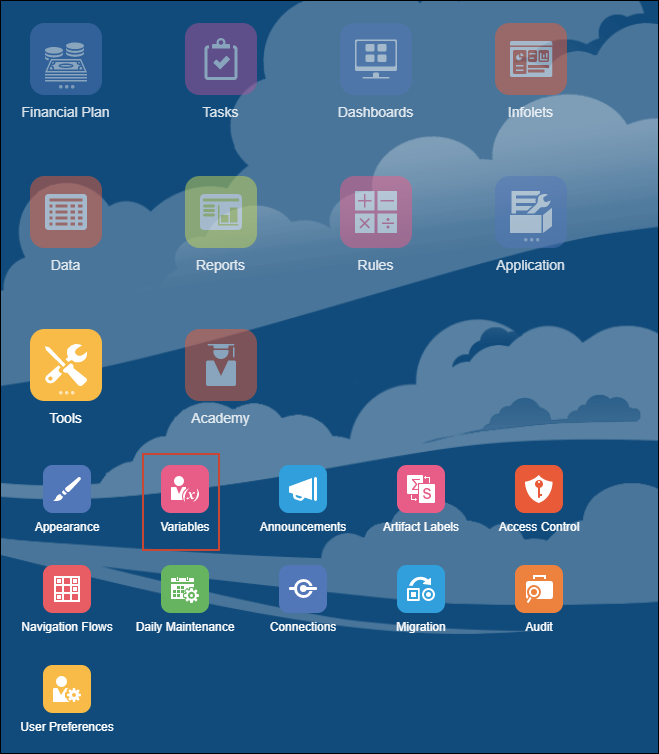
Assigning Values to User Variables
- From the Planning home page, select Tools, then Variables.
- Set the user variables based on the following information, and click Save when done:
Opening a Form in Form Designer in Planning
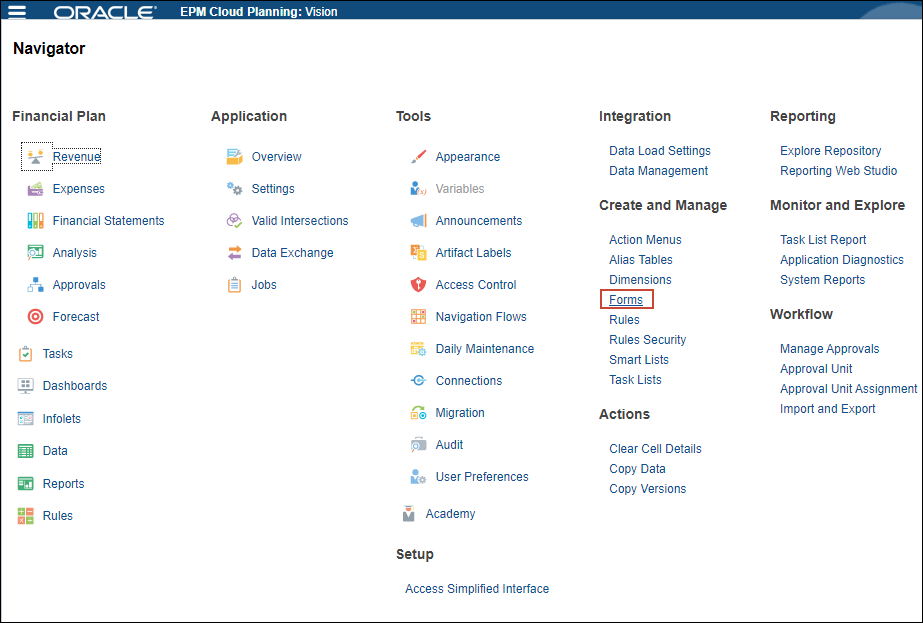
- Click (
 ) Navigator.
 - Under Create and Manage, select Forms.
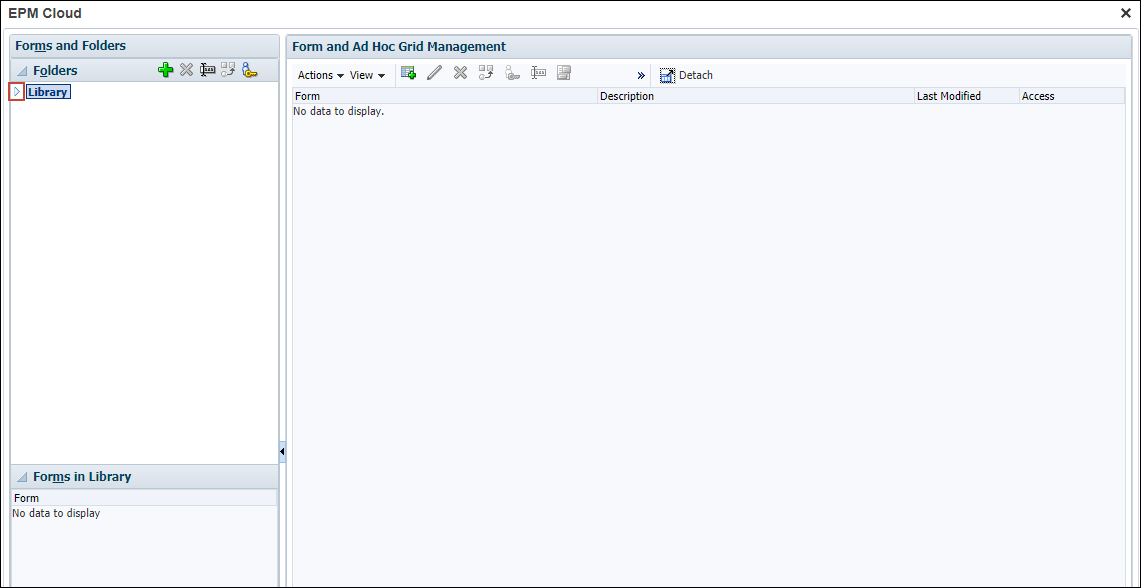
- Expand Library.
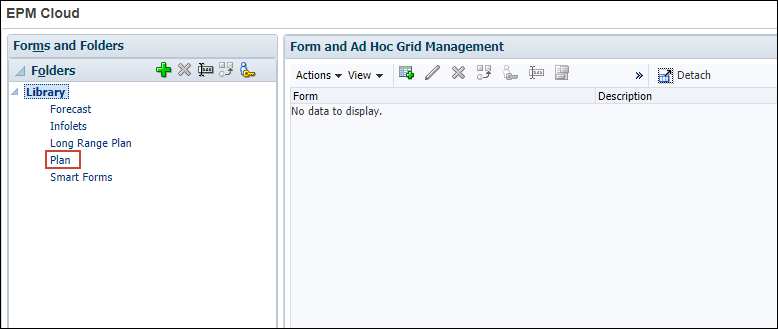
- Select the Plan folder.
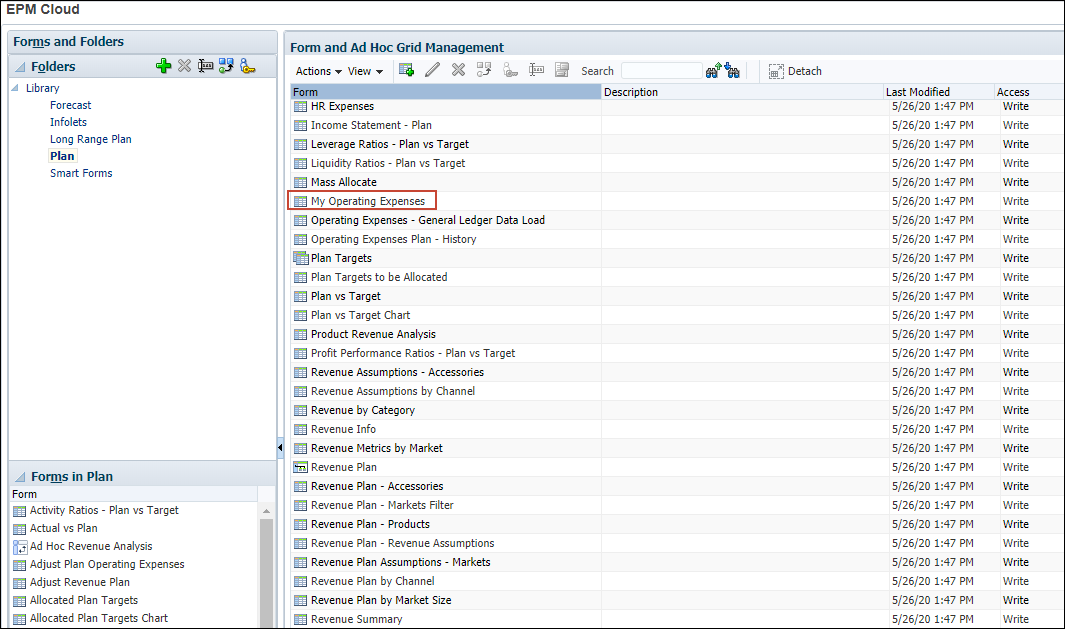
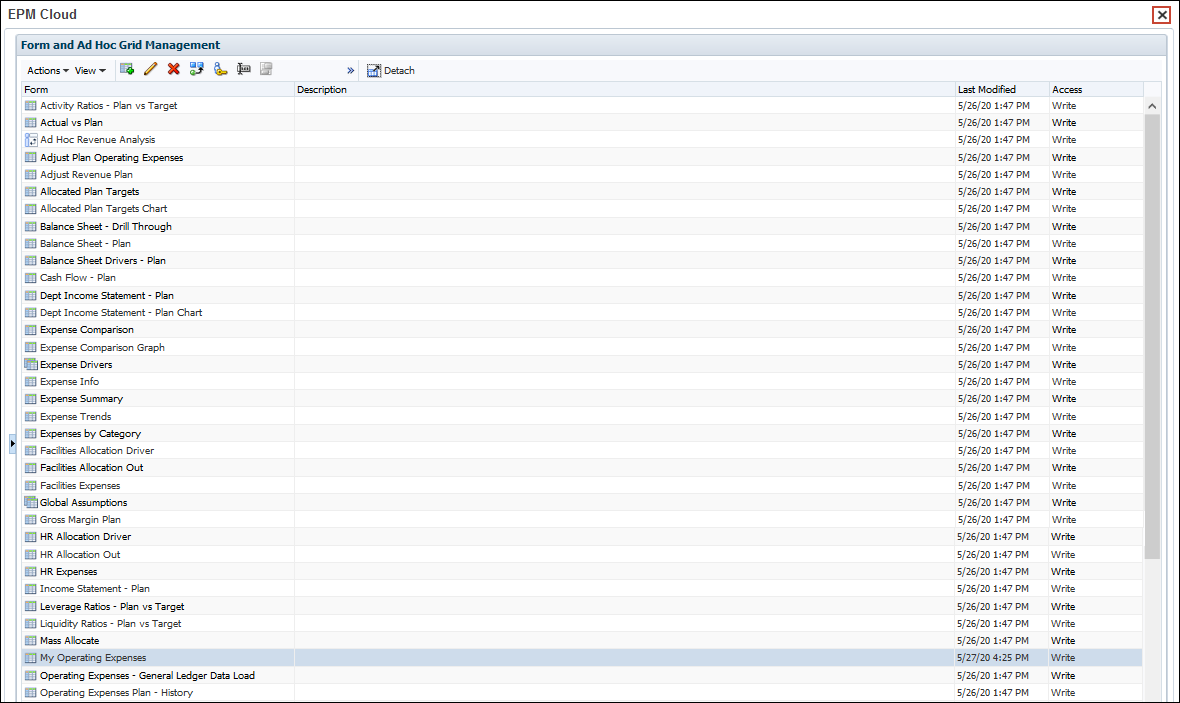
- On the right-hand side, in Form and Ad Hoc Grid Management, scroll and select My Operating Expenses.
- Click
 (Edit).
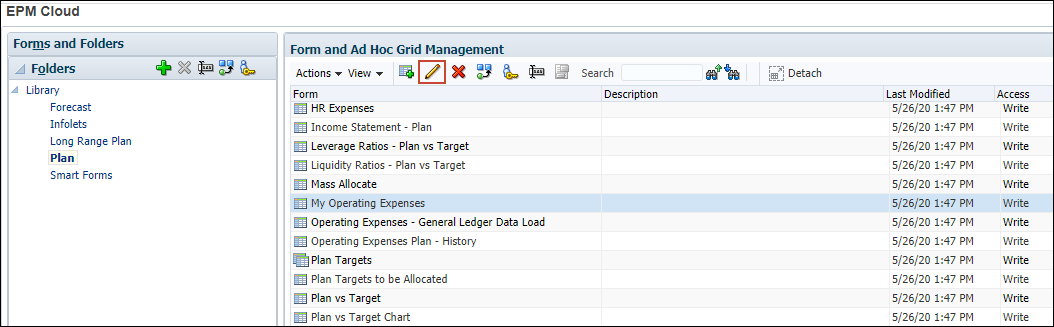
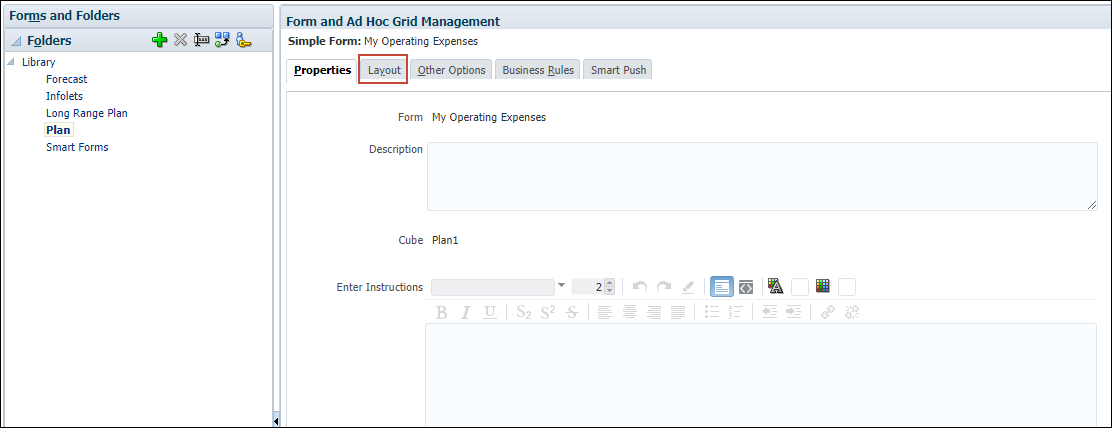
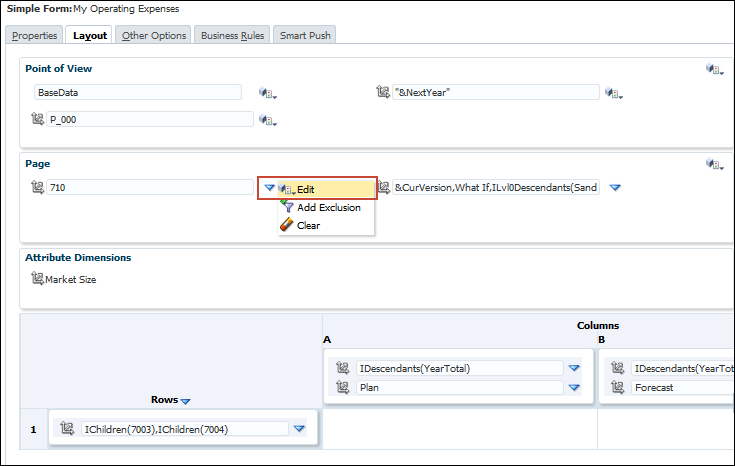
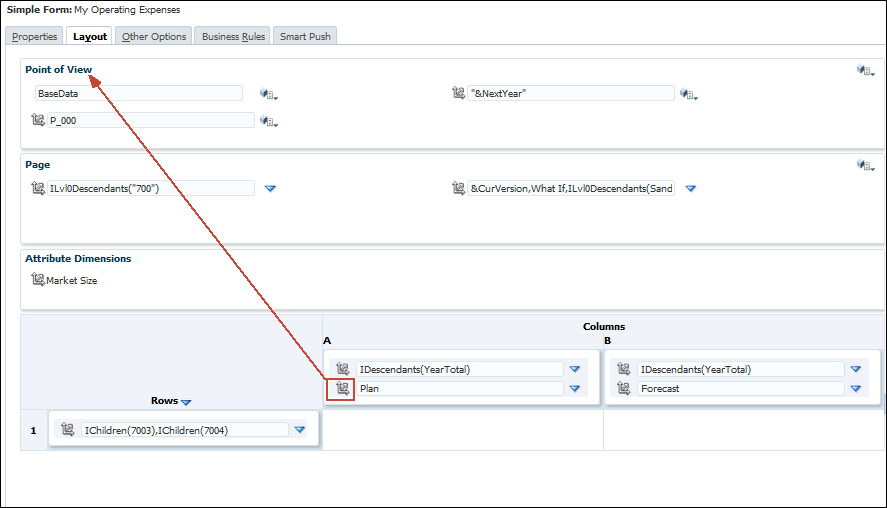
- Click the Layout tab.
Selecting Members in Planning
You can select members for each section of the form.
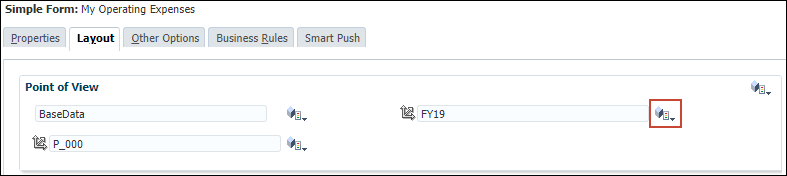
- In the Point of View, for FY19, click
 (Member Selector).
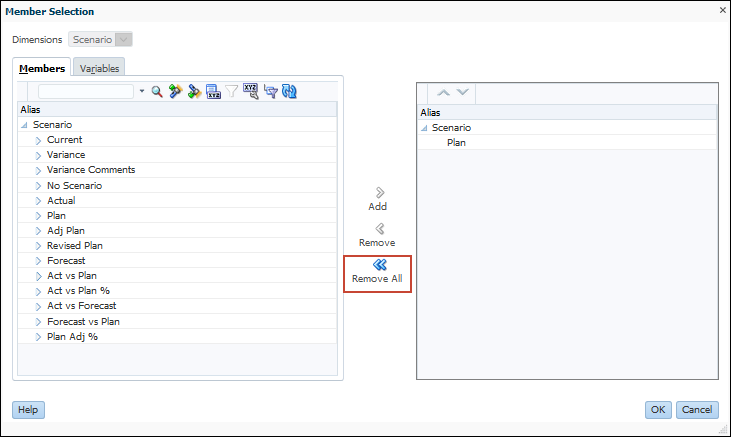
- In the Member Selection dialog, click Remove All.

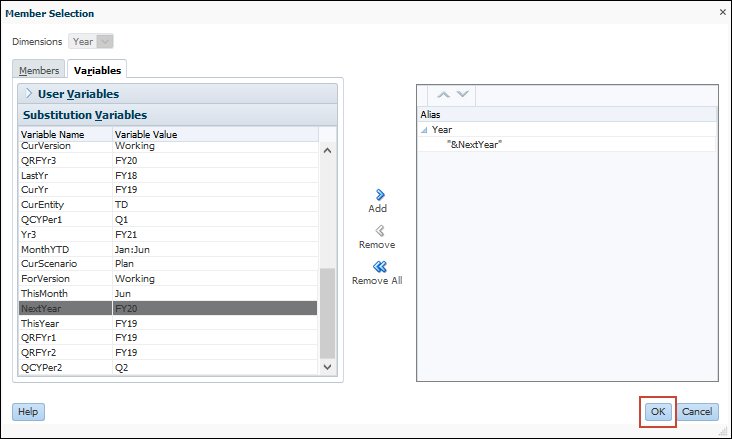
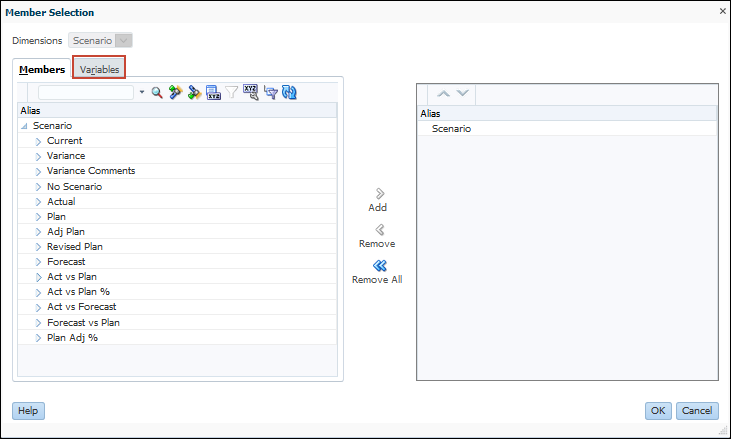
- To set up the year dynamically, click the Variables tab.

- Expand Substitution Variables.

- Select NextYear.
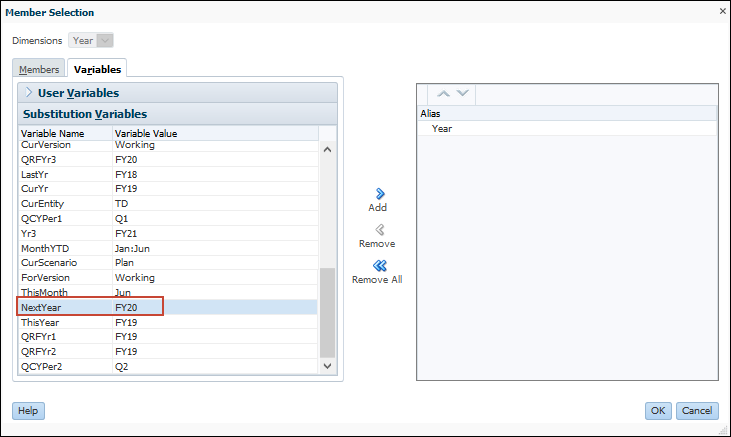
- Click Add.

- To see the variable you selected, expand Year.

- Click OK.
- To make our entity selection, more efficient, in the Page, click
 and select Edit.
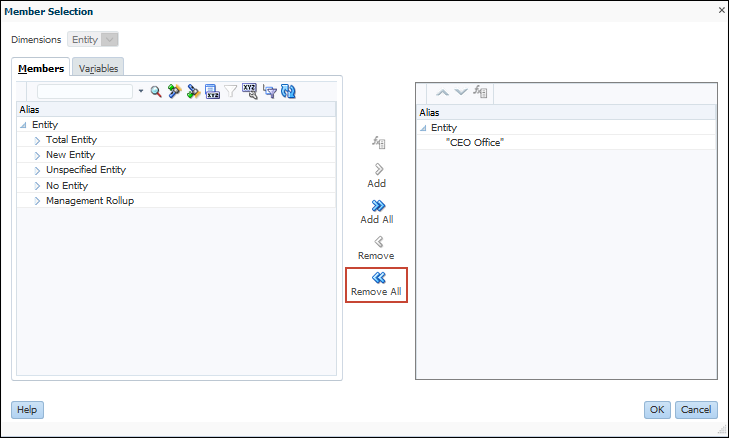
- On the Member Selection dialog, click Remove All.
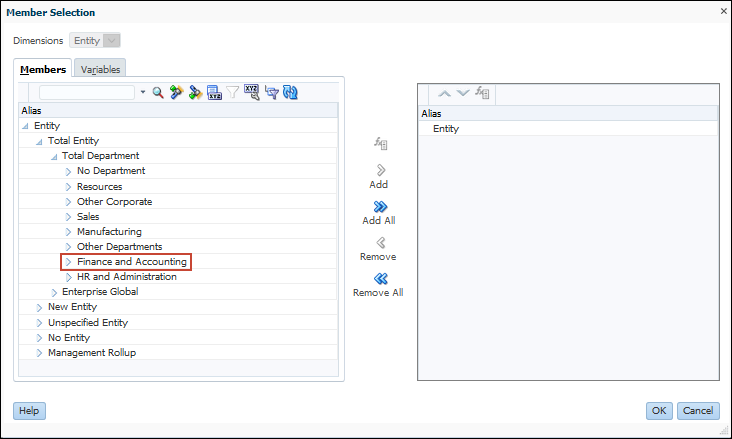
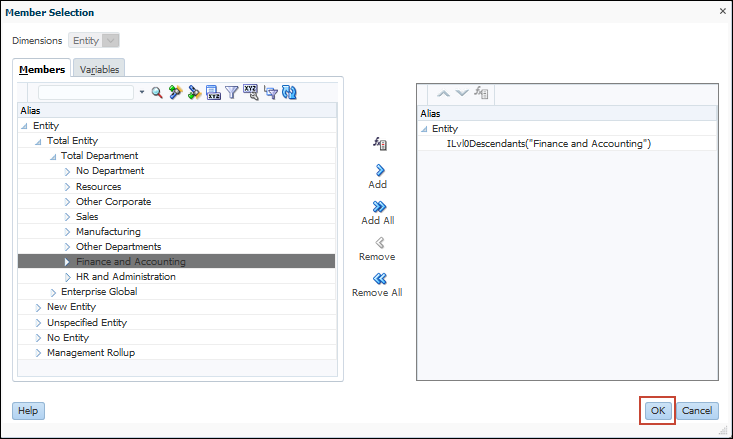
- Expand Total Entity.
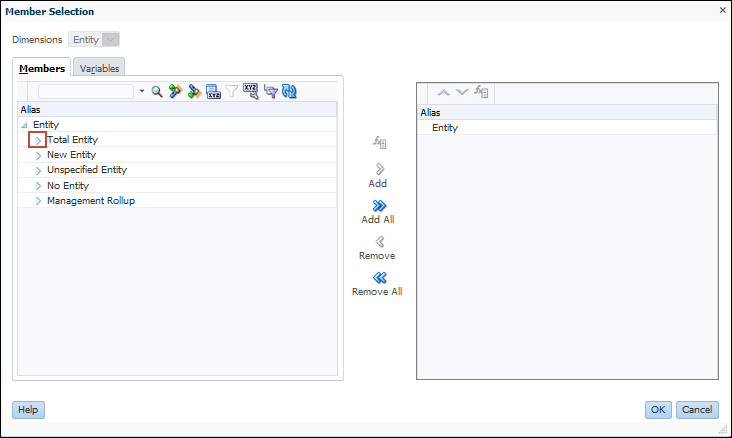
- Expand Total Department.
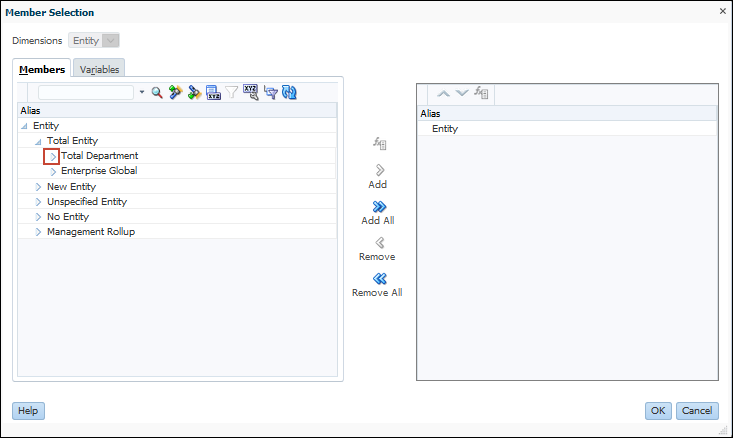
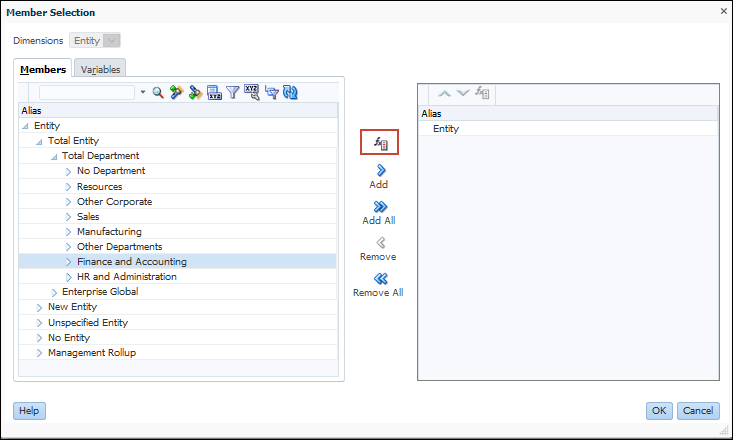
- Select Finance and Accounting.
- Click
 (Function Selector).
- Select Level 0 Descendants.
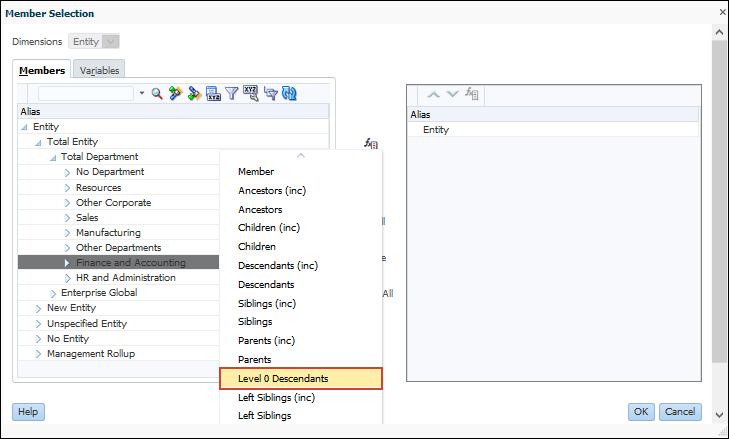
- Click OK.
Setting Up Layout Properties in Planning
You can set up properties for the grid, and for dimensions.
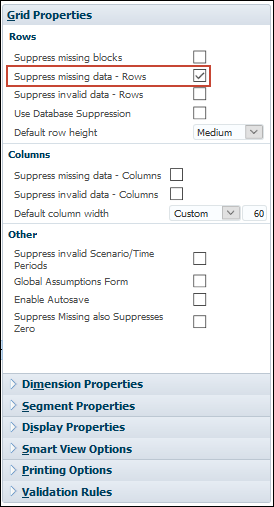
- Ensure Grid Properties is selected, and because this is a data entry form, select Suppress missing data – Rows to turn it off.
- To help make data entry more efficient, turn on auto save: In Grid Properties Other, Select Enable AutoSave.
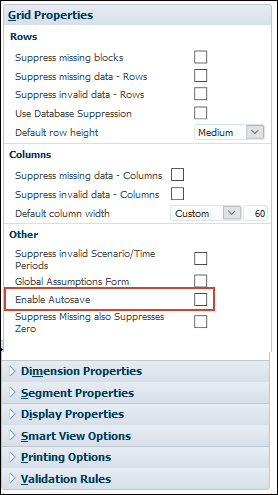
- Select Run Form Calc on Autosave so the form is calculated when form data is saved.
- Click the row for Account.

- Since we want to show both the account name and alias, in Dimension Properties, select Alias.
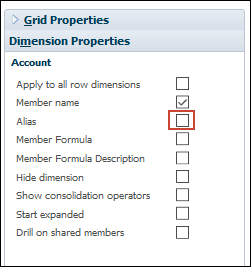
- Since we want to display the accounts expanded when the form is opened, in Dimension Properties, select Start expanded.

- To change the column width from Medium to Default, first select the first column, column A.

- In Segment Properties, for Column width, click the arrow, and select Default.

- So that you can move the Scenario dimension to a different section of the form, to the left of Plan, select Scenario and drag it, and drop it on the Point of View.
- To make the scenario selection more efficient, for Scenario, click (Member Selector).

- Click Remove All.
- Click the Variables tab.
- Select Scenario View.
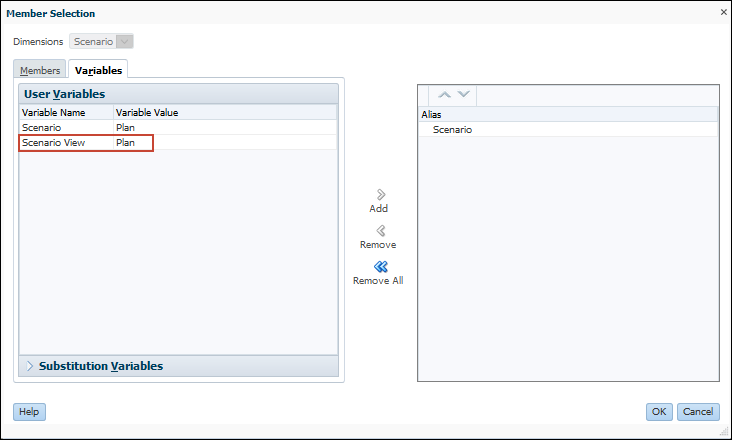
- Click Add.

- Click OK.

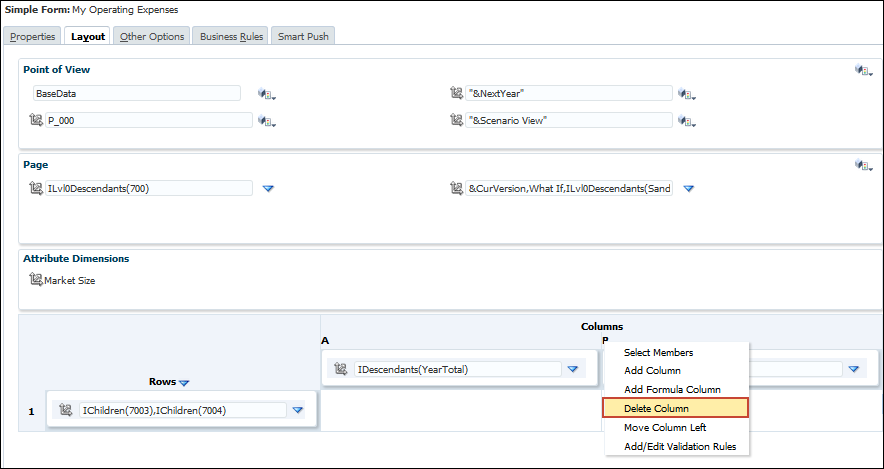
- Since the entire form now references the Scenario View scenario, we can remove column B. Right-click Column B, and select Delete Column.

Setting Form Display and Print Options in Planning
You can set how the form is displayed on the screen. You can also set printing options.
- In the POV, select the scenario.

- Expand Display Properties, and select Enable Grid Spread.

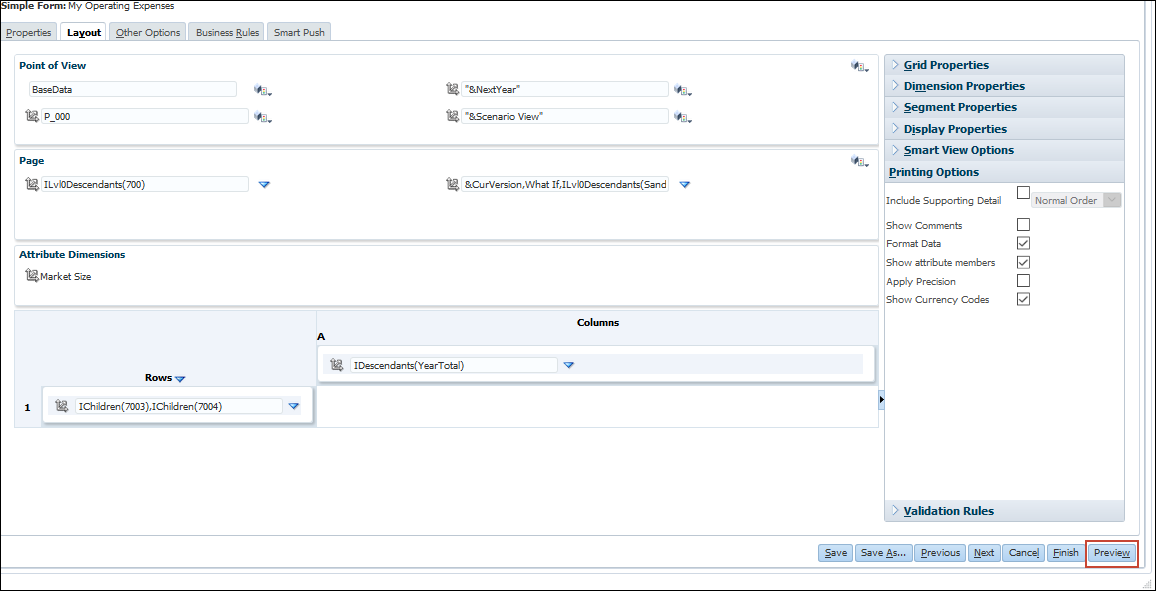
- Expand Printing Options, and select the following options: Format Data, Show attribute members, and Show Currency Codes.

Previewing and Saving Forms in Planning
You can see how the form is designed by previewing it.
- Click Preview.
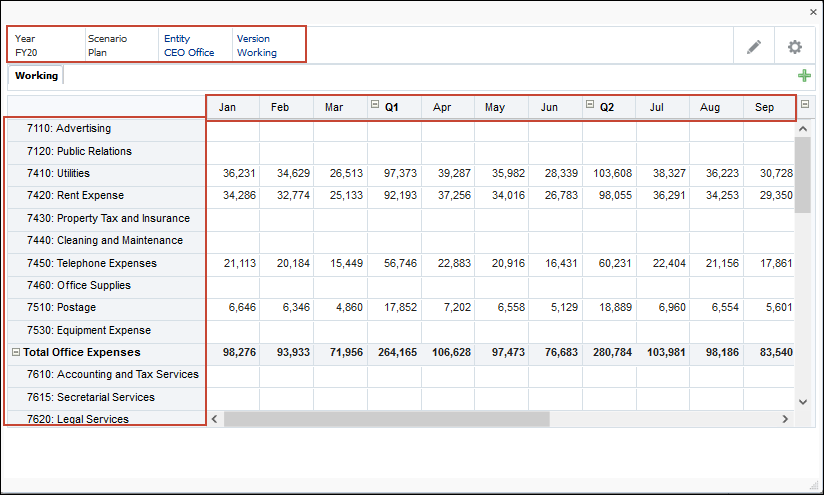
Notice the POV, Pages, Rows, and Columns.
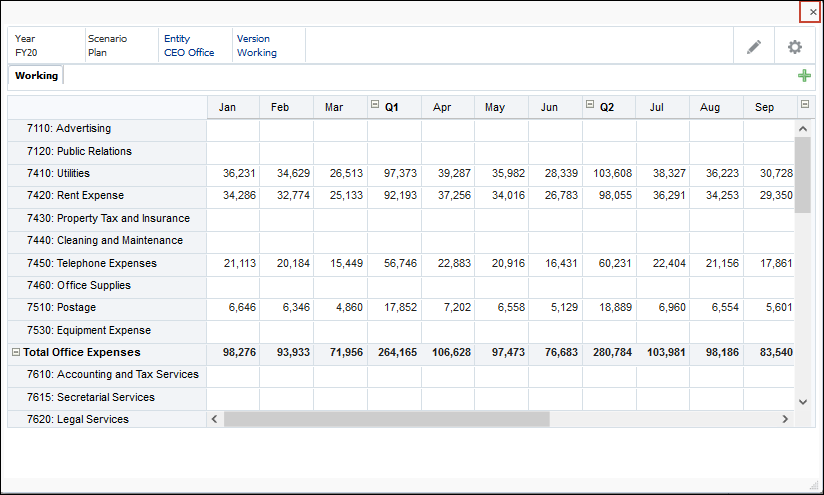
- To close the preview of the form, in the upper-right hand side of the preview, click X.
- To save the form and exit the form designer, click Finish.

- In the upper right, click X.
 Managing Task Lists in Planning
In this section, you learn about managing task lists.
Task List Overview
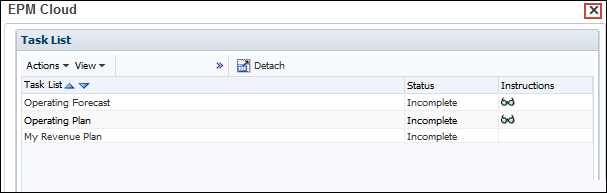
Task lists organize groups of tasks for users. Administrators set up tasks lists to guide users through the planning process. Task lists help you organize, track, and prioritize your workload.
For example, a task might help you complete forms, launch business rules, or promote approval units. You can also launch a website or internal company page.
In this example, tasks for completing the Operating Plan are displayed. There are several tasks for data entry and one for submitting the plan.

Creating Task Lists in Planning
First you create task lists. Then you can add tasks to those lists.
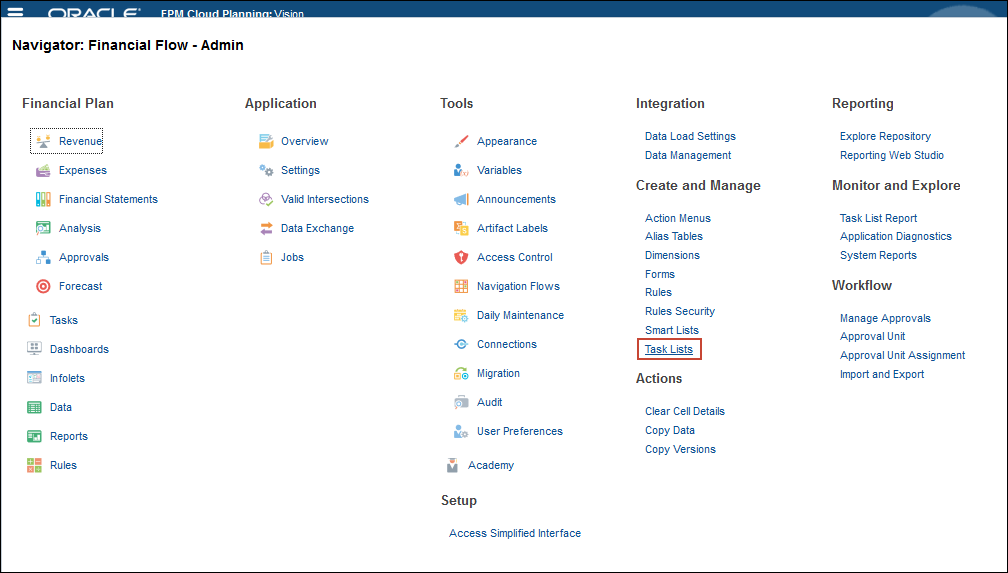
- From the Planning home page, click ( ) Navigator, and under Create and Manage, select Task Lists.
- To create a new task list, on the right, click (
 ) Create New Task List.

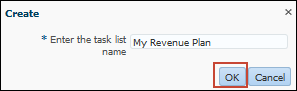
- Enter the task list name “My Revenue Plan”, and click OK.
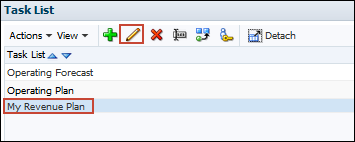
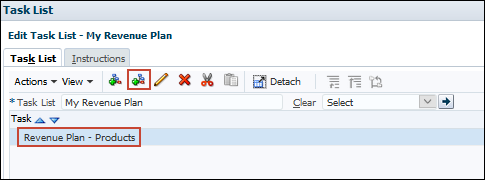
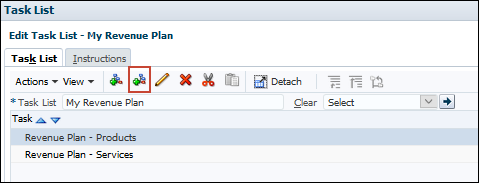
- Select My Revenue Plan, and click (Edit).
- Click
 (Add Child).
 - For Task, enter Revenue Plan – Products.
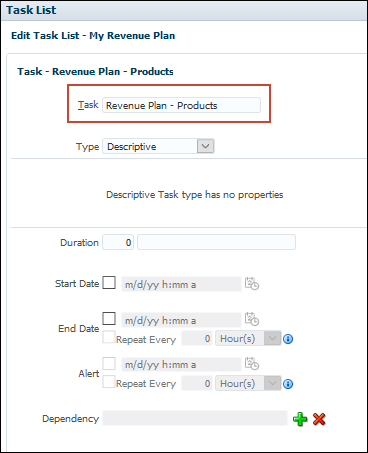
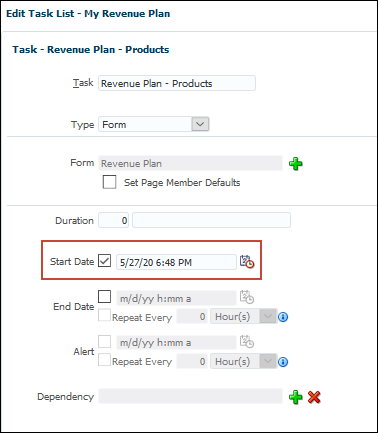
- For Type, select Form.

- For Form, click ( ) Add Form.

- In Search, enter Revenue Plan, and click
 (Search Down).

- Click (Search Down) again.
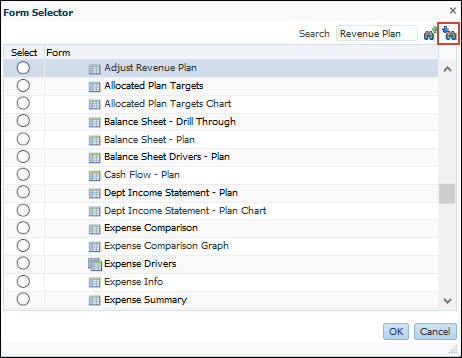
- Select Revenue Plan, and click OK.

- For Start Date, select the box to the left of the date, and enter today’s date so if today is May 27, 2020, enter 5/27/20.
- For End Date, select the box to the left of the End Date, and enter a date two months from today’s date, so if today is May 27, 2020, enter 7/27/20.

- For Alert, select the box to the left of the date and enter a date one week before the end date, so if the end date is 7/27/20, enter 7/20/20.

- For task instructions, enter the following text: You can change your assumptions about volume, pricing, and gross margin on this form for each product, or you can make adjustments for all products in a region, and click Save.

- At the information message, click OK.

- Select the new task – Revenue Plan - Products, and click
 (Add Sibling).
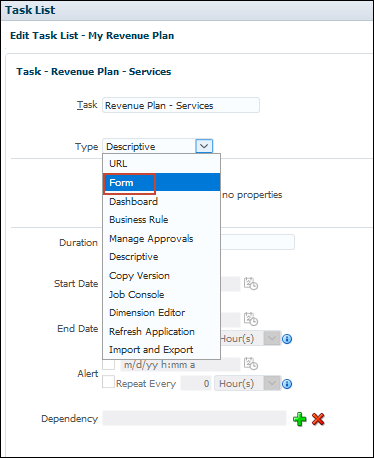
- In Task, enter Revenue Plan - Services.

- From the Type drop-down list, select Form.
- For Form, click (Add Form).

- In Search, enter Set Services Revenue Assumptions, and click (Search Down).
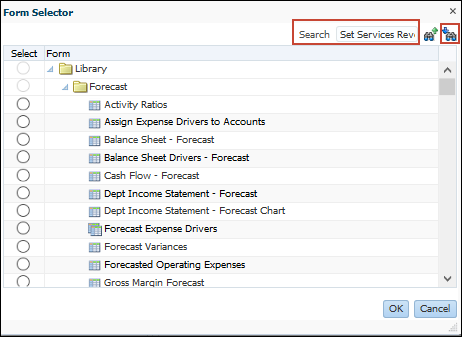
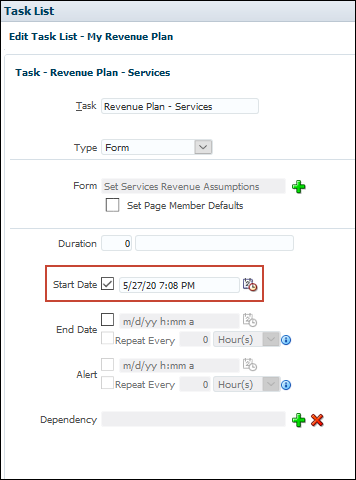
- Select the Set Services Revenue Assumptions form, and click OK.

- For Start Date, select the box to the left of the date, and enter today’s date so if today is May 27, 2020, enter 5/27/20.
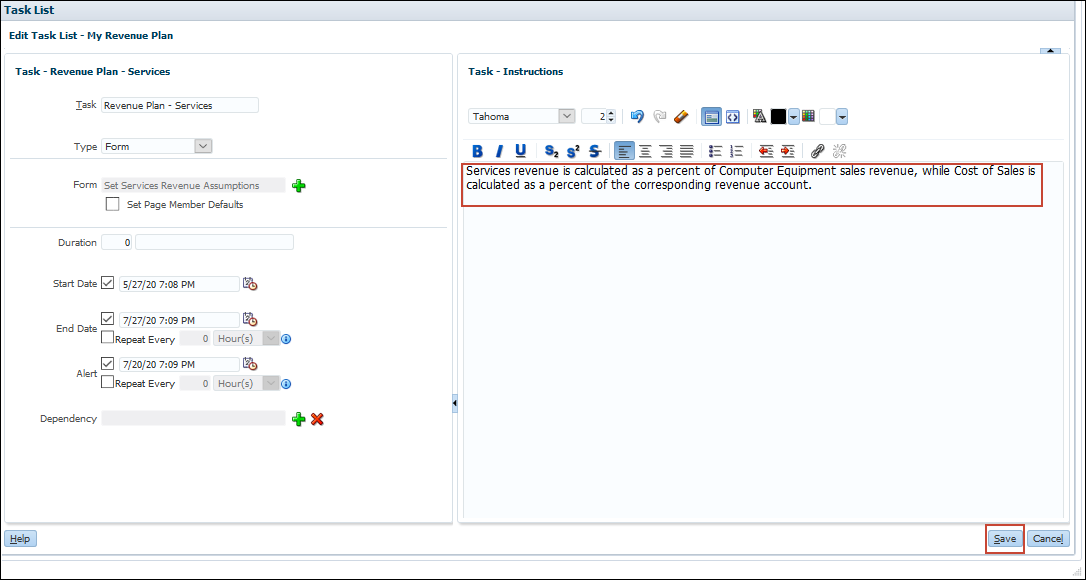
- For End Date, select the box to the left of the date, and enter a date two months from today’s date, so if today is May 27, 2020, enter 7/27/20.

- For Alert, enter a date one week before the end date, so if the end date is 7/27/20, enter 7/20/20.

- For Task Instructions, enter the following text: Services revenue is calculated as a percent of Computer Equipment sales revenue, while Cost of Sales is calculated as a percent of the corresponding revenue account, and click Save.
- At the information message, click OK.
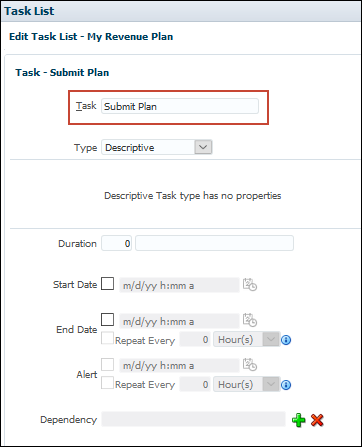
- With a task selected, click (Add Sibling).
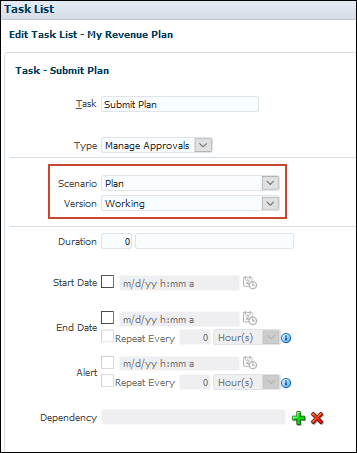
- In Task, enter Submit Plan.
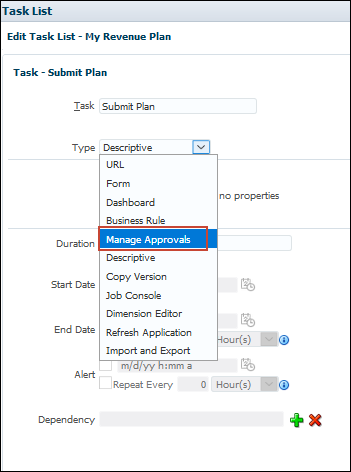
- In the Type drop-down list, select Manage Approvals.
- In the Scenario drop-down list, select Plan, and in the Version drop-down list, select Working.
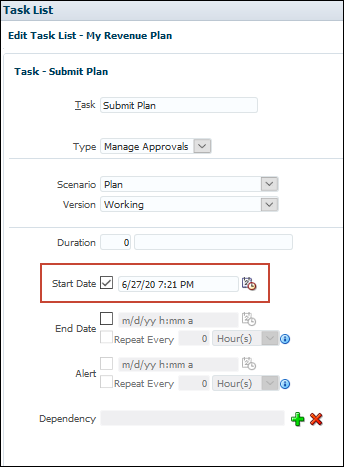
- In Start Date, select the box to the left of the date, and enter a date one month from today, so if today is May 27, 2020, enter a date of 6/27/20.
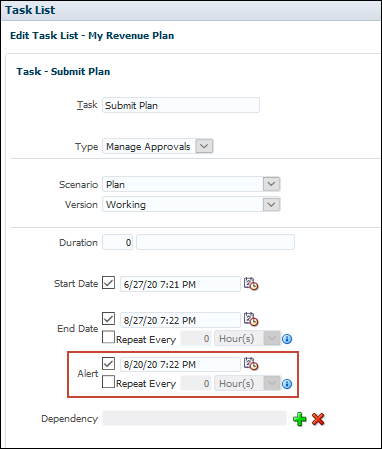
- In End Date, select the box to the left of the date, and enter a date 2 months after the start date, so if the start date is 6/27/20, then enter a date of 8/27/20.

- In Alert, enter a date 1 week before the End Date so if the End date is 8/27/20, then enter an alert date of 8/20/20.
- In Task Instructions, enter the following text: In this task, you can submit plans to reviewers or approvers. Approval units can be submitted individually or as a group, e.g., Sales, and click Save.
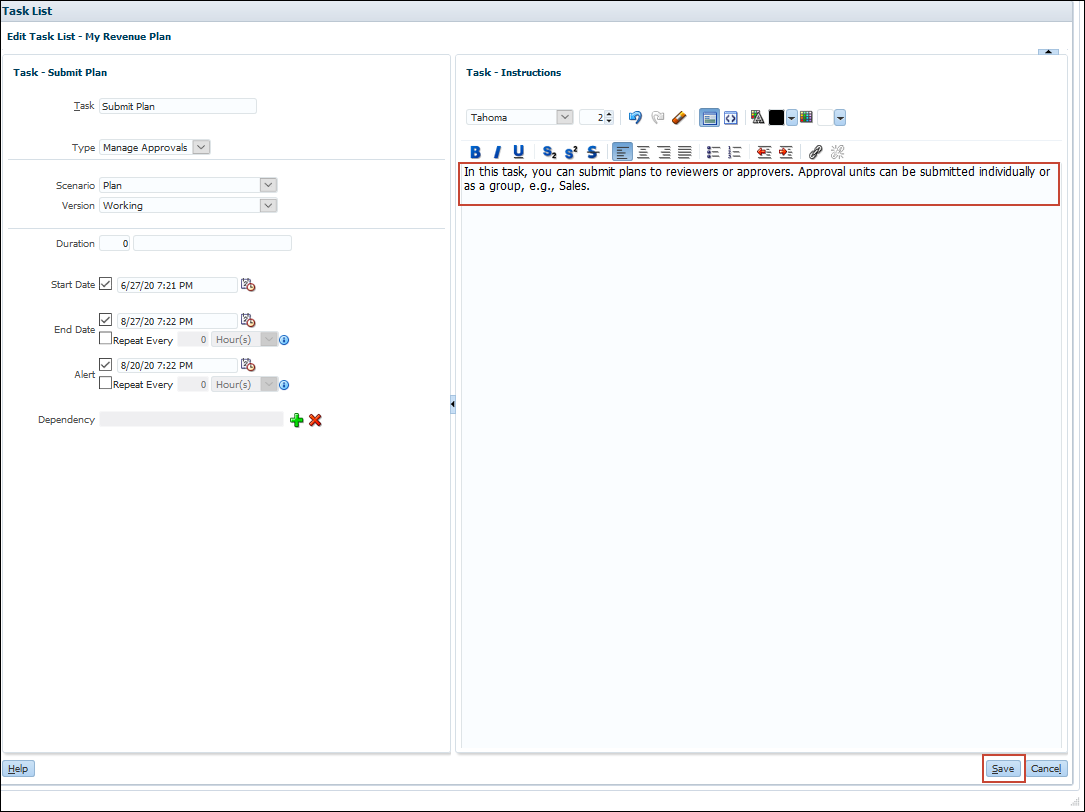
- At the information message, click OK.
- On the Edit Task List page, click Save.
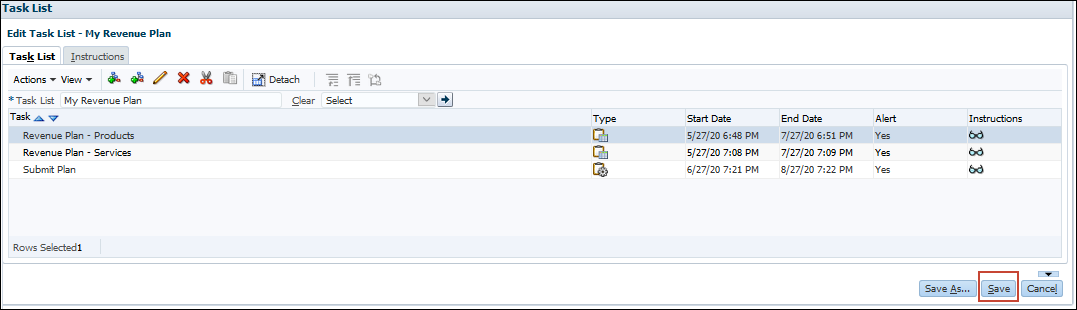
- At the Information message, click OK.
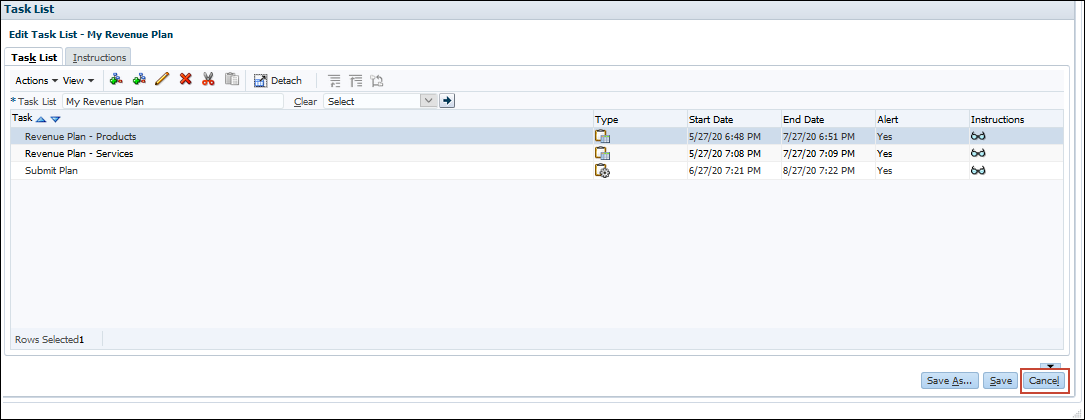
- On the Edit Task List page, click Cancel.
- In the upper right, click X.