
 Print
PrintBefore you begin
This 30-minute hands-on tutorial shows you how to plan using driver-based data in Financials. The sections build on each other and should be completed sequentially.
Background
Enhance your ability to manage and analyze finances at any business level using driver-based or trend-based income statement, balance sheet, and cash flow planning, or simply plan revenue and expenses. With the best practice, out of box drivers and accounts, Financials accelerates your planning process. You can also bring in your own chart of accounts while retaining the benefits of an integrated Financials framework.
Learn more on how to bring in your own chart of accounts from these tutorials:
- Configuring Financials to Bring In Your Own Chart of Accounts in Planning
- Leveraging Best Practice Planning in Financials using your Chart of Accounts
With driver-based planning, you can create business plans and models that focus on key factors or criteria in your organization that impact and drive performance. You can identify operational metrics, and cause and effect mathematical relationships between drivers and financial outcomes. For example, you can identify and focus on revenue or expense items in your profit and loss model or the balance sheet.
What do you need?
An EPM Cloud Service instance allows you to deploy and use one of the supported business processes. To deploy another business process, you must request another EPM Enterprise Cloud Service instance or remove the current business process.
- Have Service Administrator access to EPM Enterprise Cloud Service. The instance should not have a business process created.
- Upload and import this snapshot into your Planning instance.
For more information on uploading and importing migration snapshots, refer to the Administering Migration for Oracle Enterprise Performance Management Cloud documentation.
- Save this data file locally. You will be importing data using this data file.
Out-of-the-box drivers in Financials
Revenue drivers
Here are revenue drivers you can use in income statement planning:
- Product Revenue
- Volume
- Avg Selling Price
- Discount %
- Return %
- Services Revenue
- Services %
- Services Hours
- Services Rate
- Cost of Sales
- Material Unit Cost
- COGS %
- Overhead %
- Freight %
- Commission %
- Bad Debt %
Expense drivers
Here are expense drivers you can use in income statement planning:
- Compensation
- Headcount
- Attrition Rate
- Avg Salary
- Direct Labor %
- Overtime %
- Bonus %
- Other Benefits %
- Pension Rate
- Car Allowance Rate
- Payroll Tax %
- Marketing Expense
- Events
- Avg Cost per Event
- Campaigns
- Cost per Campaign
- Other Marketing %
- Selling Expense
- Sales calls
- Calls
- Travel & Entertainment
- Trips
- Nights per Trip
- Avg Airfare per Trip
- Hotel per night
- Meal Expense %
- Other Travel Exp %
- Car Rental Rate
- Facilities Expense
- Square Footage
- Cost per Square Foot
- Utilities %
- Repair & maintenance %
Balance sheet drivers
Here are the predefined balance sheet drivers that you can enable:
- DSO
- Write-off %
- Days in Inventory
- Prepaid Expense % of OpEx
- Accrued Comp % of Total Comp
- Accrued Expense % of OpEx
Cash flow drivers
For cash flow, you’ll specify the sources and timings of your revenue and expense categories. Here are the predefined cash flow drivers:
- Sources of Cash
- Cash from Sales
- Cash from Sales of Assets
- Uses of Cash
- Payables
- Tax Payments
- Payment of Compensation
- Capital Purchases
- Cost of Materials
- Op Expenses
- Non-Operating Cash Activities
- Cash from Investing Activities
- Cash from Financing Activities
Setting up the foundation for your plans and forecasts
In this section, you review enabled features, time frame granularity, and set values for user variables.
Reviewing enabled features
In Enable Features, you select which parent key members, accounts, and drivers you want to enable for your Financials business process, as well as add and map custom dimensions. Based on your selections, dimensions, drivers, forms, accounts, and KPIs are created.
You must define all custom dimensions the first time you enable features. You can’t define these later.
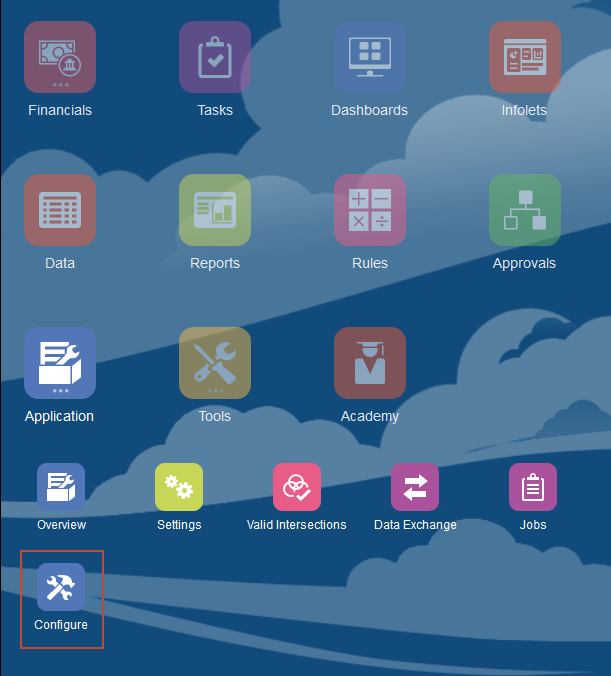
- On the Planning home page, click Application then Configure.
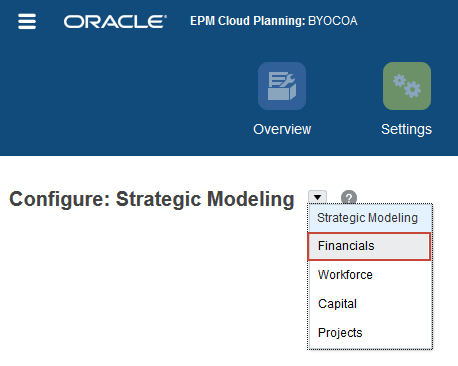
- From the Configure drop-down, select Financials.
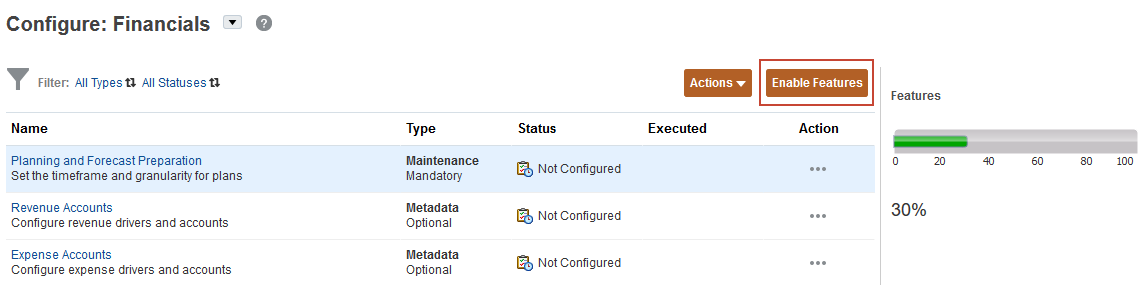
- Click Enable Features.
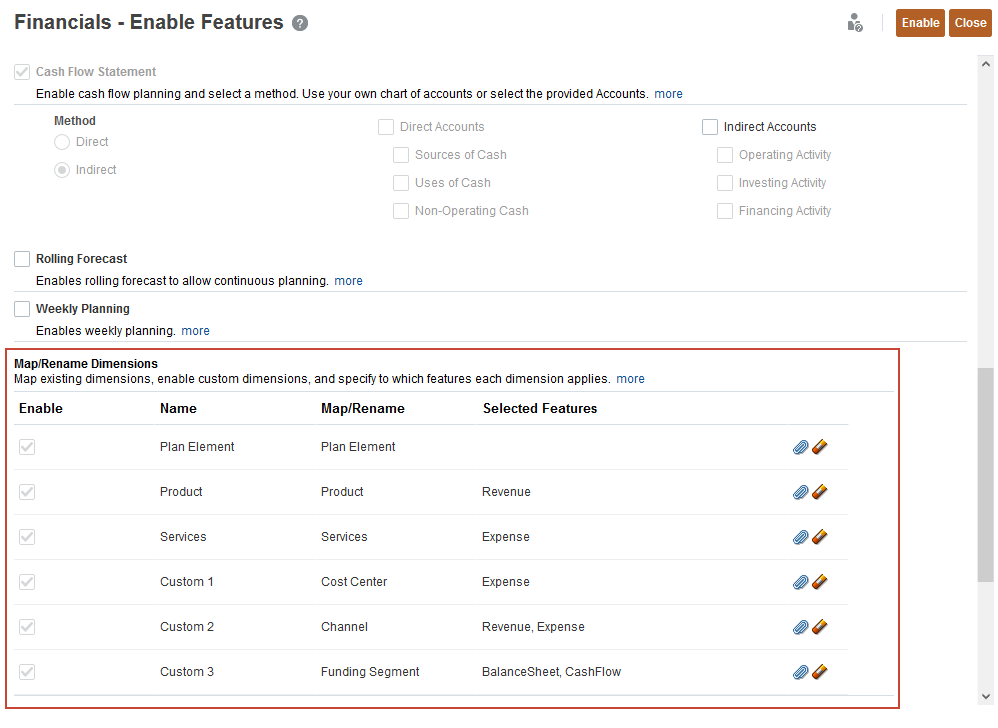
Revenue and Expense planning is enabled. Expenses are configured so that you can plan with drivers and related accounts.

- Scroll down.
Income Statement, Balance Sheet and Cash Flow are configured. Currently, rolling forecast and weekly planning are not configured.

- Scroll down.
Existing and custom dimensions are displayed. Product dimension is enabled for Revenue and the Services dimension is enabled for Expense. Cost Center is enabled for Expense. Channel is enabled for both Revenue and Expense. Funding Segment is enabled for Balance Sheet and Cash Flow.
- Click Close.
You can’t disable features later.
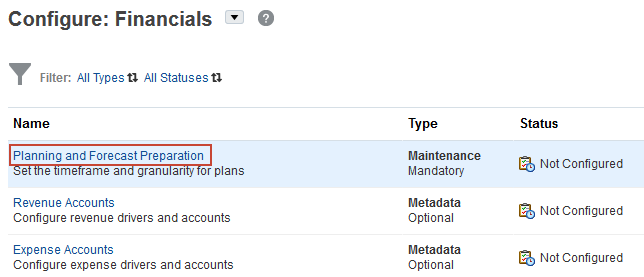
Reviewing time periods and granularity
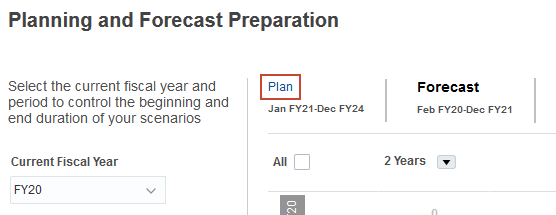
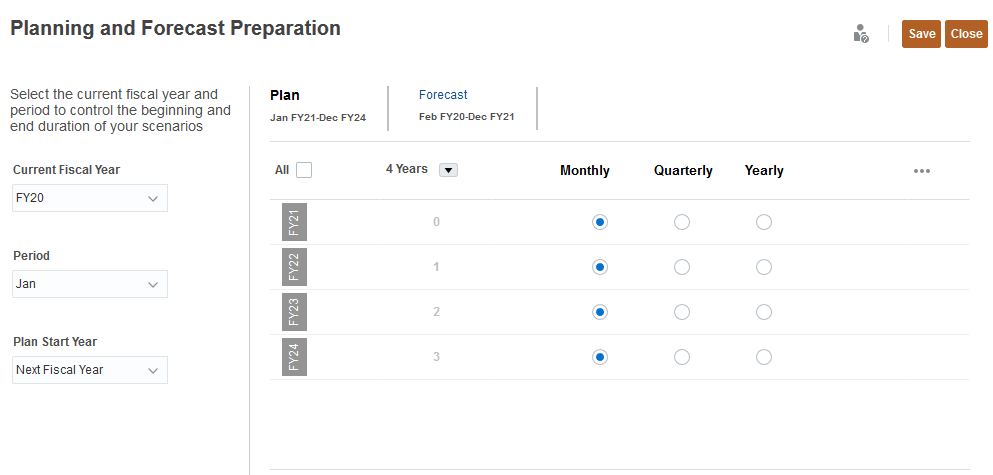
In Planning and Forecast Preparation, you select the current fiscal year, period (month), and plan start year to control the beginning and end duration of your scenarios. You also set the period granularity for the Plan, Forecast, and Rolling Forecast (if enabled) scenarios in your business process.
- In Configure: Financials, click Planning and Forecast Preparation.
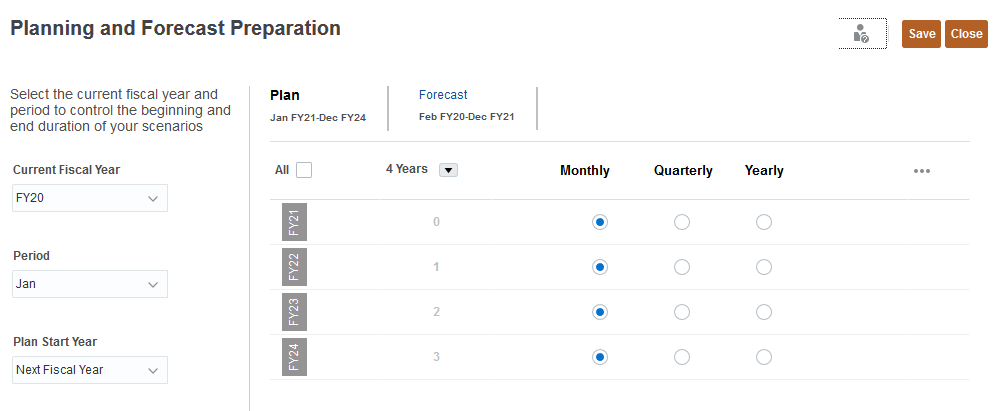
Notice that Current Fiscal Year is FY20, the Period is January, and the Plan Start Year is set to Next Fiscal Year.
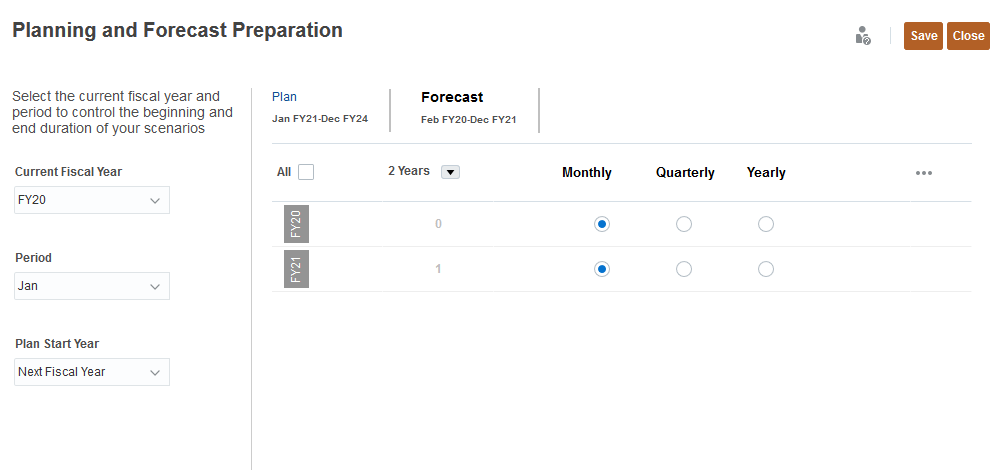
- Click Forecast.
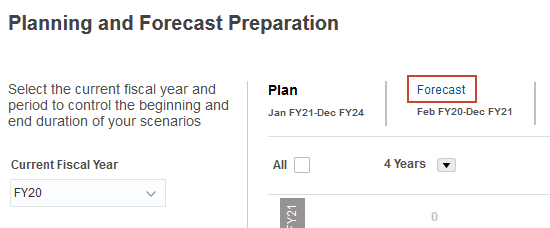
The Forecast starts in February FY20 and runs through December of FY21. The two year forecast is set on a monthly basis.
- Click Plan.
The four year Plan which runs from January FY21 through December of FY24, and has each year's data planned on a monthly basis.
- Click Close.

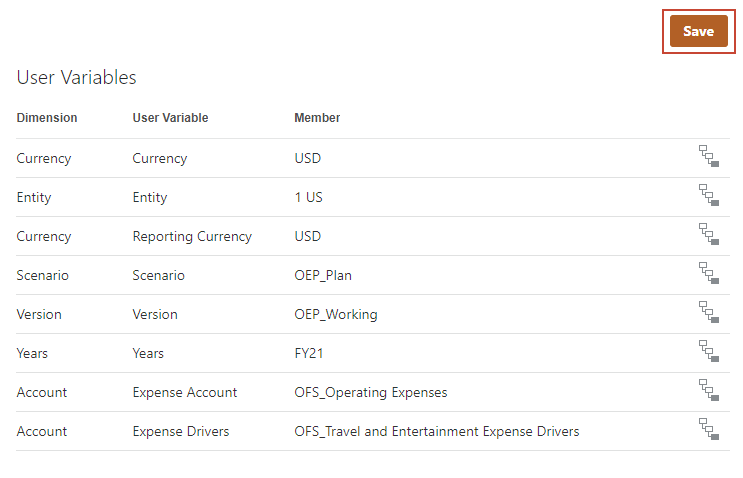
Selecting values for user variables
User Variables were added when the business process was created. User variables act as filters in forms, enabling planners to focus only on certain members. In this section, you set values for users values.
- Click
 (Navigator), and under Tools, click User Preferences.

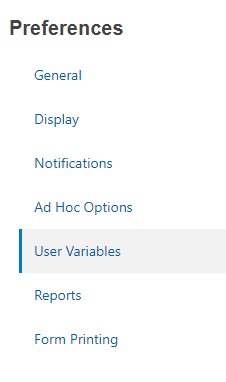
- Under Preferences, click User Variables.
- For each variable, click its
 (Member Selector) to select a member as the variable's value:
- Currency: USD
- Entity: "1 US"
- Reporting Currency: USD
- Scenario: OEP_Plan
- Version: OEP_Working
- Years: FY21
- Expense Account: OFS_Operating Expenses
- Expense Drivers: OFS_Travel and Entertainment Expense Drivers
- Verify your selections, and click Save.
- At the information message, click OK.

Loading and calculating data
In this section, you load historical expense data and run calculations before viewing plans in forms.
Loading expense data
As a basis for plans and forecasts, you load actual expense data for three fiscal years.
- Click (Navigator), and under Application, click Overview.
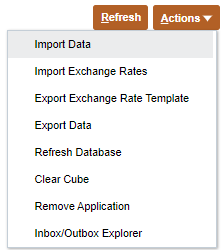
- Click Actions, and select Import Data.
- In Import Data, click Create.

- Keep all the default selections, and click Choose File to select a file.
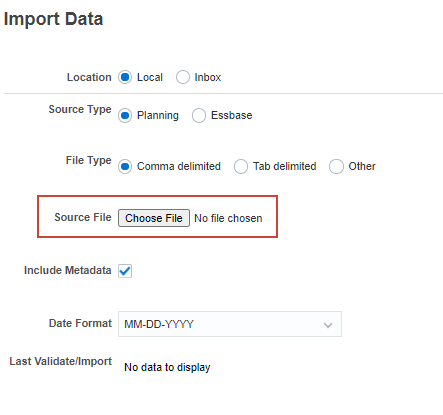
Depending on your browser, the button label may display Choose File or Browse.
- Locate and select Expense_Data FY19_FY20_FY21.csv, and click Open.
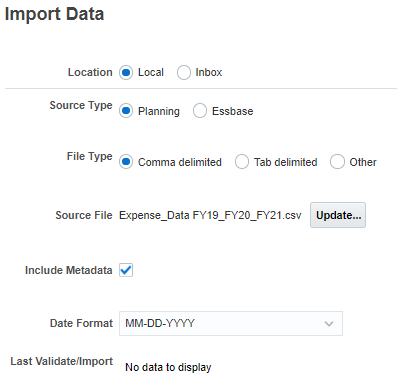
- Click Import.

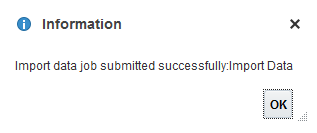
- At the information message, click OK.
- Click Close twice.
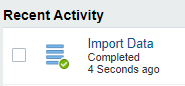
- Click Jobs.

- Verify that the job completed successfully.
- Go to the Planning home page. Click
 (Home).
Calculating actuals and preparing plans
In this section, you run calculation rules to make sure your data is up to date and aggregated.
- On the Planning home page, click Rules.
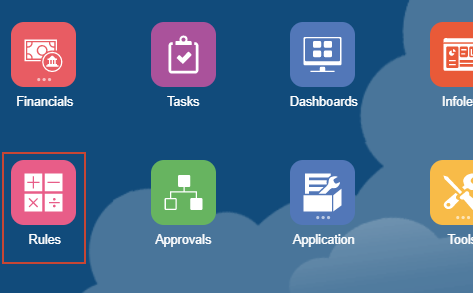
The Rules page lists predefined calculations in Financials.
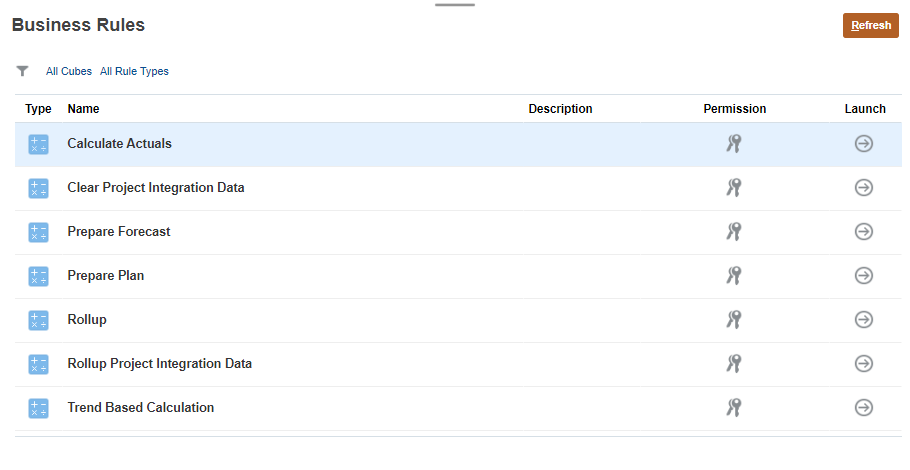
- Calculate drivers and aggregates data in Actuals. For Calculate Actuals, click
 (Launch).
 - For each item in the dialog box, click its (Member Selector) to select a member as its value:
- Entity: "1 US"
- Periods: ILvl0Descendants(YearTotal)
- Select Years: FY19,FY20,FY21

- Click Launch.
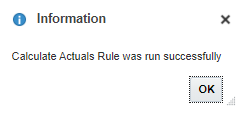
- At the information message, click OK.
- Aggregate data to update reports or analyze data at various levels of the business hierarchy. For Rollup, click (Launch).

- For each item in the dialog box, click its (Member Selector) to select a member as its value:
Change the value of the Scenario dimension first.
- Scenario: OEP_Actual
- Select Years: FY19,FY20
- Currency: USD
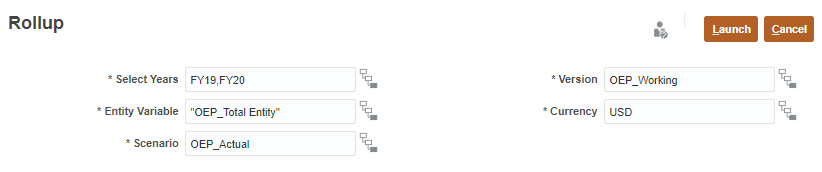
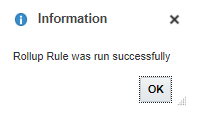
- Click Launch.
- At the information message, click OK.
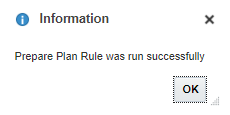
- Calculate plans based on the trends and drivers set up in Financials. For Prepare Plan, click (Launch).
- For each item in the dialog box, click its (Member Selector) to select a member as its value:
- Entity: "1 US"
- Currency: USD
- Years: FY19,FY20,FY21

- Click Launch.
- Click OK.
- Go to the Planning home page. Click (Home).
Viewing plan data
Verify loaded data by opening forms.
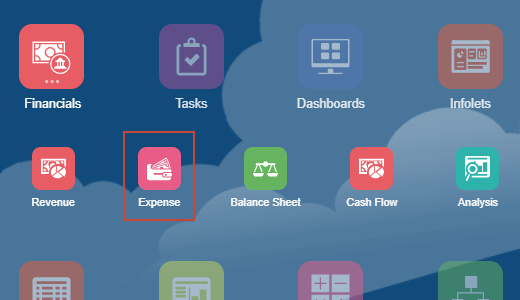
- Click Financials, then Expenses.
- In the left, click the
 (Income Statement) tab.
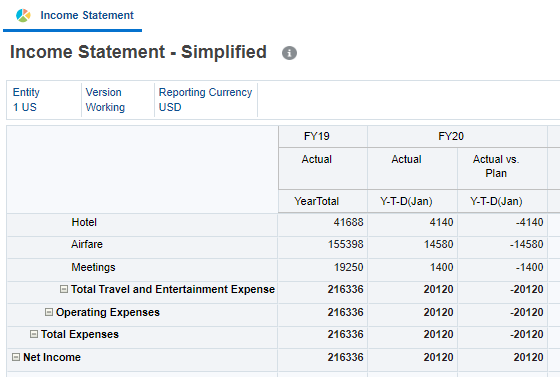
The Income Statement tab includes data from the Actual and Plan scenarios. The accounts displayed are from the chart of accounts that was previously loaded.
- In the left, click the
 (Driver and Trend Based) tab.
- Verify and modify as needed, the POV selections on the page:
- Version: Working
- Currency: USD
- Expense Drivers: Travel and Entertainment Expense Drivers
- Entity: 1 US
- Scenario: Plan
- Expense Account: Operating Expenses

- Years: FY21
- Services: No Services
- Cost Center: 1 Sales
- Channel: 1 Direct

- Click
 (Go).
(Go).
The page is updated with your POV selections.
Entering and adjusting data using driver-based accounts
The Financials Expense component provides several options that help you plan and forecast.
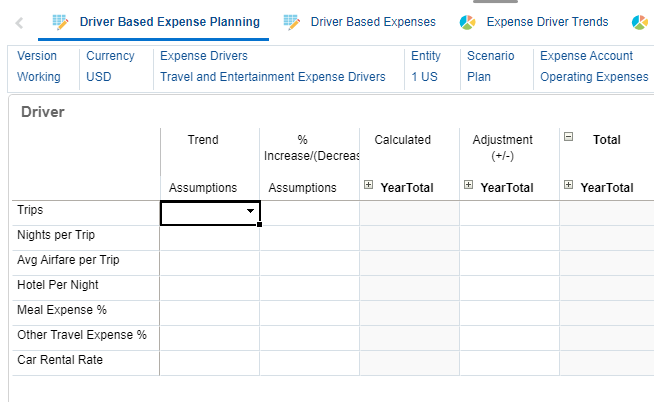
Planning for driver-based expenses
In this section, you plan using drivers. Enter rate assumptions to take advantage of built-in accounts and calculations to drive the planning process.
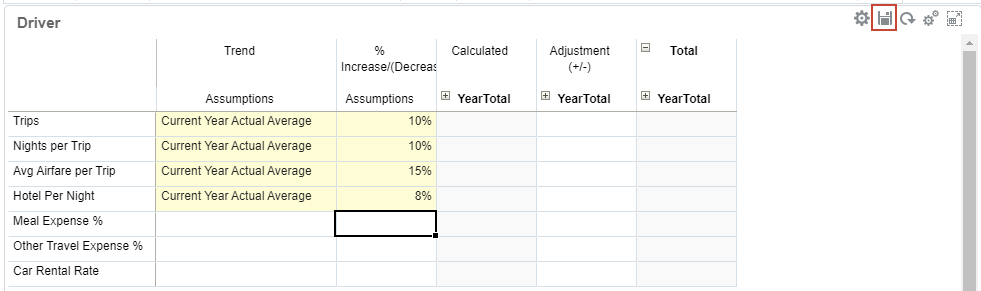
- For Trips, Nights per Trip, Avg Airfare per Trip, and Hotel Per Night, in Trend Assumptions, select Current Year Actual Average.
- For Trips, Nights per Trip, Avg Airfare per Trip, and Hotel Per Night, in %Increase/(Decrease), enter the following:
- Trips: 10%
- Nights per Trip: 10%
- Avg Airfare per Trip: 15%
- Hotel Per Night: 8%
- In the right side of the grid, click
 (Save).
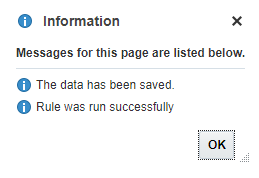
- At the information message, click OK.
- Verify calculated driver-based expenses. Click the Driver Based Expenses horizontal tab.

The page displays updated expense data.
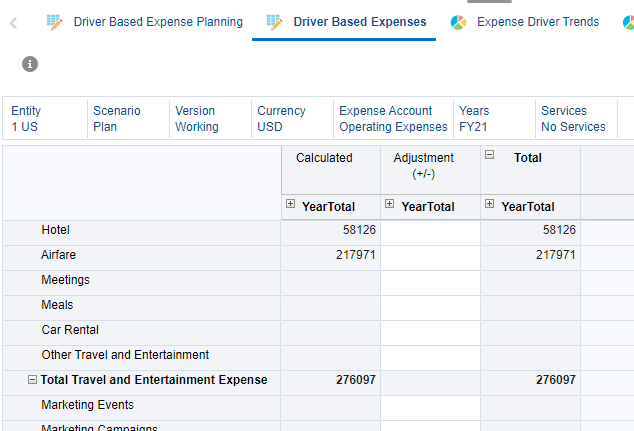
Before navigating to the Total Expense - Plan tab to run and view aggregated data, proceed to the next section to enter direct expenses.
Planning expenses directly
Plan, without any driver-based logic, at the individual account level by manually entering and adjusting expenses.
- In the left, click the
 (Direct Entry) tab.
 - In Enter Expenses, collapse YearTotal to hide all other periods.
- In the grid, scroll down and locate the following accounts:
- For the following accounts, enter YearTotal data:
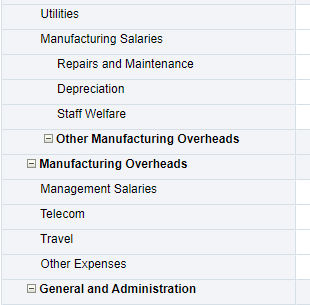
Manufacturing Overheads
- Utilities: 45k
- Manufacturing Salaries: 22k
- Repairs and Maintenance: 25k
- Depreciation: 89k
- Staff Welfare: 82k
General and Administration
- Management Salaries: 34k
- Telecom: 75k
- Click Save.
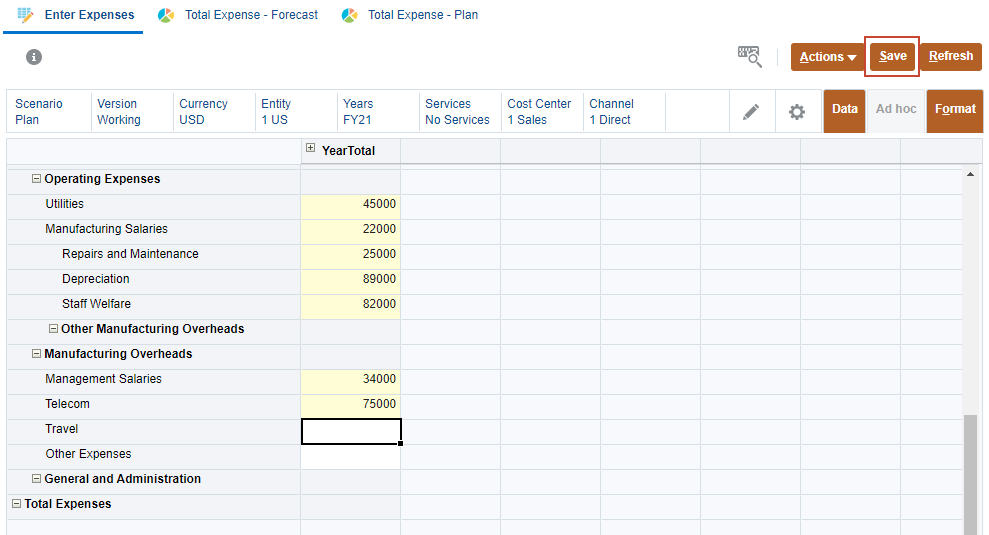
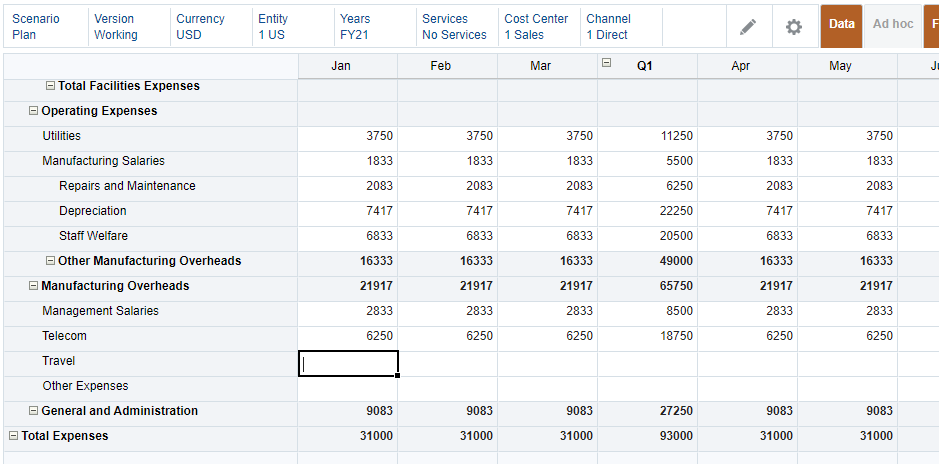
- Expand the periods to display the distributed data for each account.
Rolling up expense plan data
Running the Rollup rule aggregates plans or forecasts and is required to run report or analyze data at various levels of the business hierarchy.
- From the horizontal tabs, click Total Expense - Plan.

- In Total Expense - Plan, click Actions then select Business Rules.
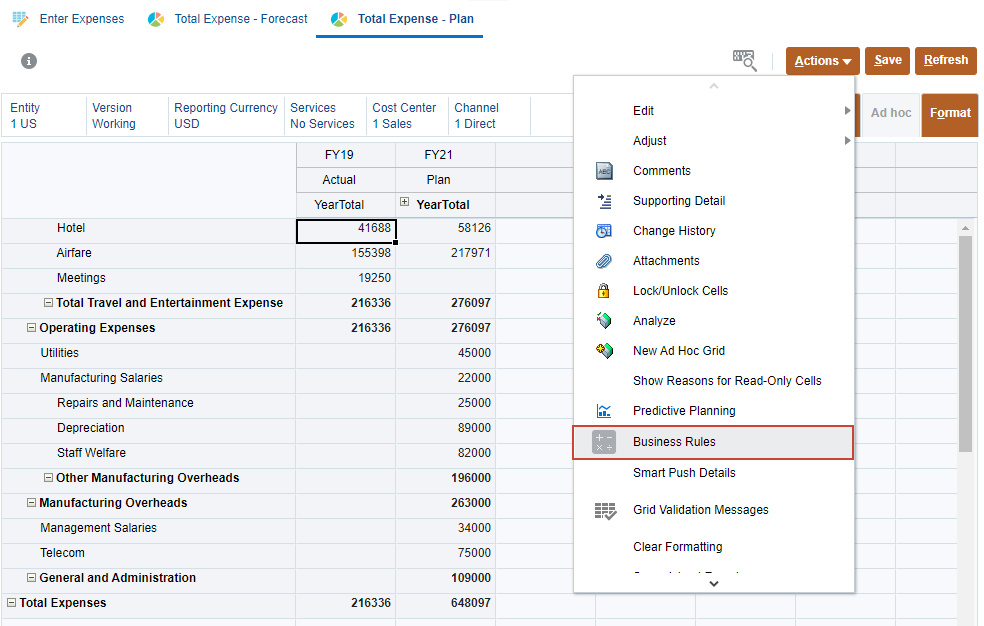
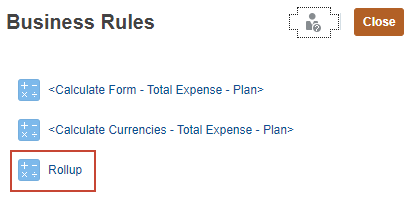
- In Business Rules, click Rollup.
- In Rollup, verify the default selections for Entity, Scenario, and Version:
- Entity: "OEP_Total Entity"
- Scenario: OEP_Plan
- Version: OEP_Working
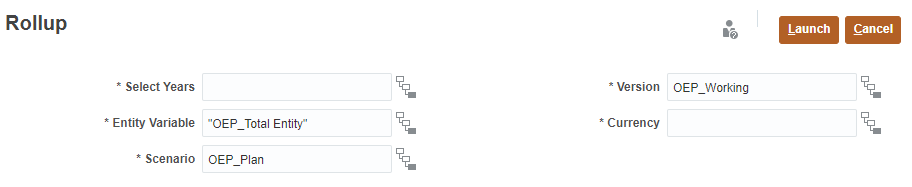
- For Years and Currency, click its (Member Selector) to select a member as its value:
- Select Years: FY21
- Currency: USD
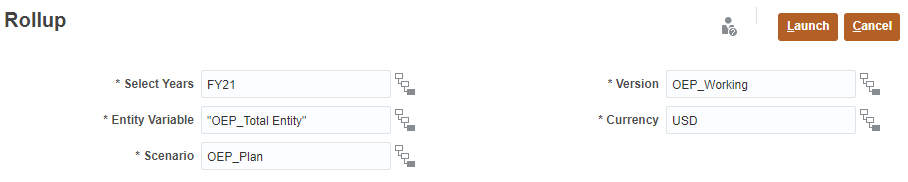
- Click Launch.
- Click OK.
The updated data is displayed.

- Review financial statement entries. In the left, click the (Income Statement) tab.
The Income Statement now includes expense plan data for FY21.
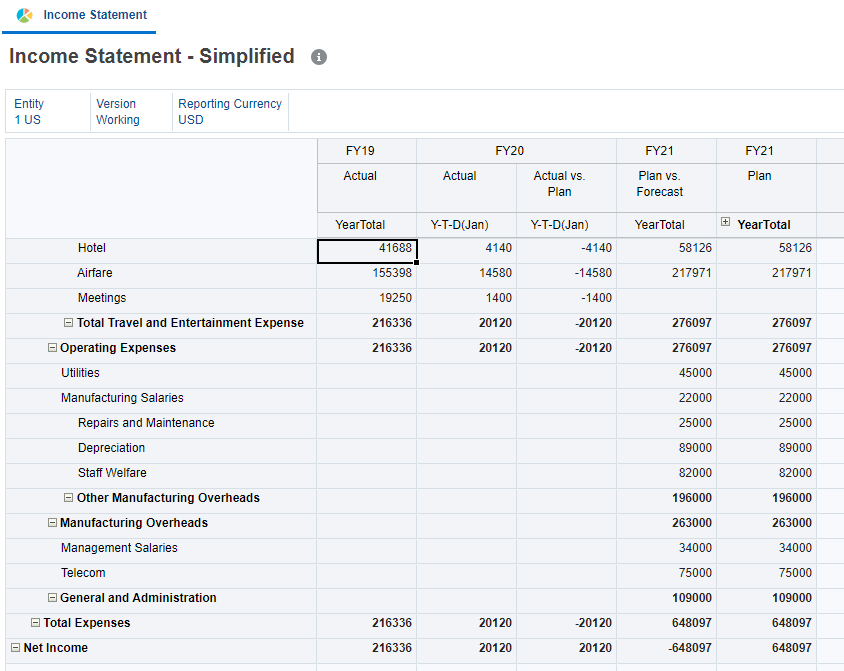
The options you choose when you enable Income Statement affect the income statement rollup. As you incrementally enable more accounts and drivers and bring in your own chart of accounts, the income statement and other forms are also updated.
- Go to the Planning home page. Click (Home).
Managing account drivers
Depending on the number of custom drivers members, account members, and other artifacts you need, you can add or modify account drivers.
- On the Planning home page, click Application then Configure.
- From the Configure drop-down, select Financials.
- In Configure: Financials, click one of the following components:
- Revenue Accounts
- Expense Accounts
- Balance Sheet Accounts
- Cash Flow Accounts
- Select a category and, if enabled, a component.
- Perform a task:
- To add a driver, select Add from the Actions menu, and then enter details in the new row.
- To modify a group of artifacts, or to add many new ones, export the set of predefined artifacts (select Export from the Actions menu), and then modify the export file in Microsoft Excel.
You can edit predefined artifacts, make a copy of an artifact and modify it to create a new one, or add new artifacts. Then, import the modified file (select Import from the Actions menu). If available, use categories and subcategories to group functionally related artifacts.
- To export or import all drivers, regardless of their category or grouping, use Batch Export or Batch Import.
- To export or import only certain kinds of drivers, specify a Category or a Component, and then use Import or Export.
- To view or modify calculations associated with the account:
- Click its
 (Member Formula) icon.
 - View, add, or modify the member formula.
- Click Validate.
- If the validation returns an error, click OK, then modify the member formula. Then, revalidate.
- If the validation prompt states that the member formula is valid, click OK.
- Click OK to close the member formula dialog box.
- Click its
- Click Save, then OK.
- Click Close.