Loading Data Into Planning Using Data Integration
 Before You Begin
This 55-minute tutorial shows you how to define and run file-based data integrations in Planning.
Background
In Data Integration, you can:
- Create Integrations
- Refresh the page to display an updated list of Integrations
- Run Integrations
- Search the list of integrations based on selected text in any of the fields
You must be assigned with the Service Administrator or Power User predefined roles, Create Integration and Run Integration Planning roles to access and use Data Integration.
Data Integration is used in conjunction with Data Management to complete setup tasks, such as registering source systems or target applications. Data Management is still fully supported and remains available as a menu selection on the Navigator menu. Between Data Integration and Data Management, integration-related activities are bidirectional and synchronized. For example, when you map dimensions in Data Integration, any saved mappings are populated automatically in Data Management.
What Do You Need?
An EPM Cloud Service instance allows you to deploy and use one of the supported business processes. To deploy another business process, you must request another EPM Cloud Service instance or remove the current business process.
 Reviewing Data Management Tasks
The following tasks must be completed in Data Management:
- Register Source System
- Register Target Application
- Period Mapping
- Category Mapping
Navigating to Data Management
- Click
 (Navigator), then under Integration, click Data Management.

Data Management opens in a separate window with the Workflow tab displayed.
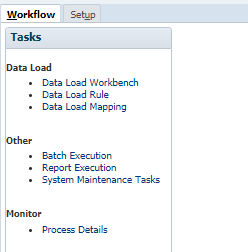
- Click Setup.
In Setup, you can perform legacy Data Management setup tasks.
Reviewing Source and Target Systems
You register supported source and target systems in Data Management. Predefined source and target systems are typically included when you create an application.
- Under Register, click Source System.
The predefined File source system is displayed.
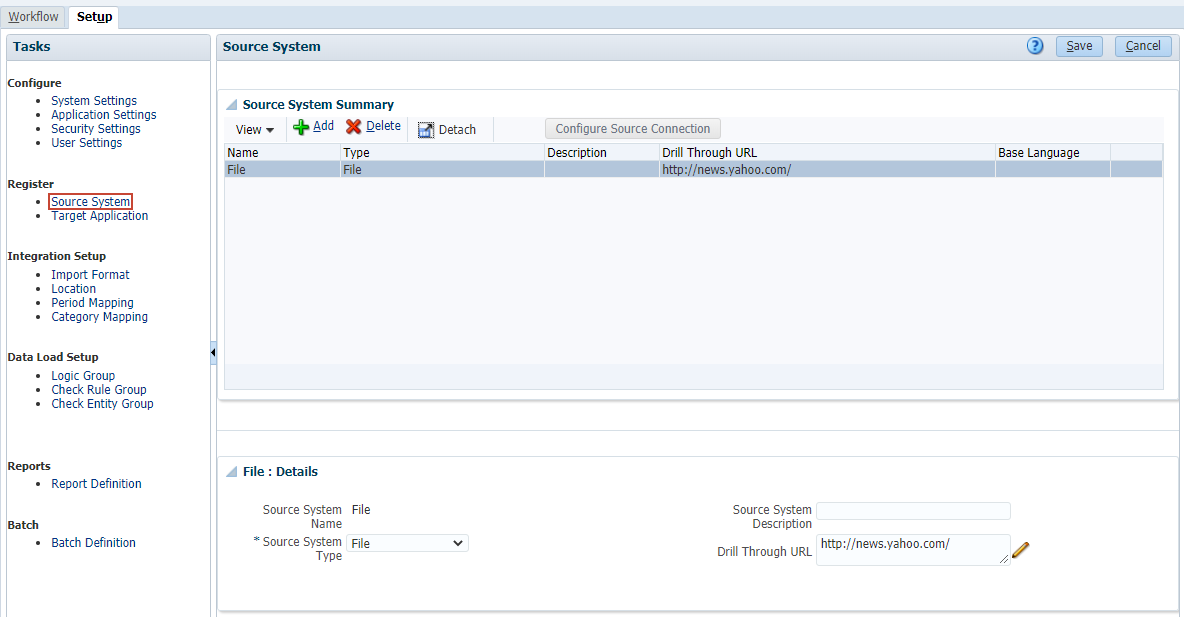
- On the left, under Register, click Target Application.
The predefined target application is displayed.

Reviewing Period Mappings
- On the left, under Integration Setup, click Period Mapping.
Global period mappings apply to registered source and target systems in Data Management.

- In Period Mapping, click Application Mapping.
You can specify period mappings specific to an application.

Here are period mappings created for the sample application.

Reviewing Category Mappings
- On the left, under Integration Setup, click Category Mapping.

Category mappings are used to map source and target scenarios.
- Close Data Management and return to Planning.
 Creating a File-Based Data Integration
In this section, you create a data integration that loads data from a file into Planning.
Navigating to Data Integration
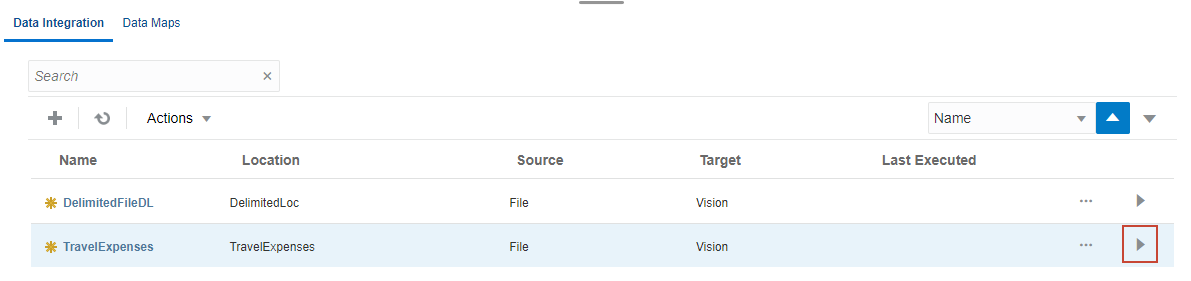
- From the home page, click Application, then click Data Exchange.

- Make sure that the Data Integration tab is selected.
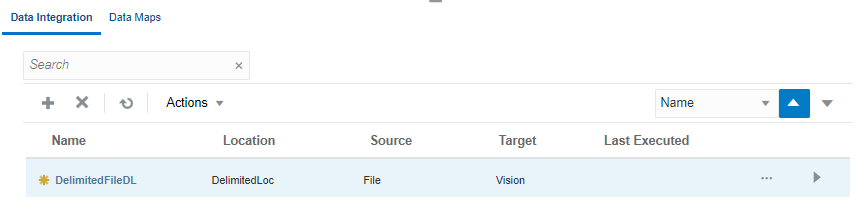
Data Integration details include the name of the associated location, source, target, and date/time stamp of when it was last executed. Each integration is identified by an icon to determine if it is
 (New),
  (Processed with warnings),
  (Successful), or
  (Failed).
Defining Integrations
- In Data Integration, click
 (Create Integrations).
Data Integration guides you through a workflow to complete Data Management tasks. Navigate between tasks by clicking a task on the workflow bar, or the Next and Back buttons.

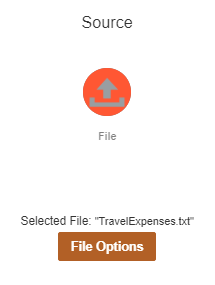
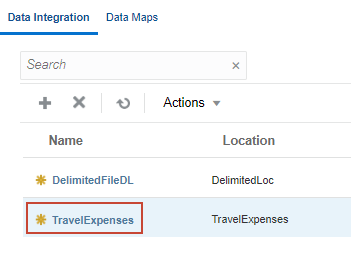
- Enter TravelExpenses as the name.
- Optional: Enter a description.
- Click the Location dropdown list to view existing locations.
For location, you can select an existing location, or create a new one.
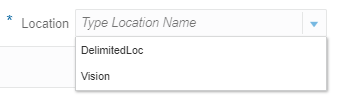
If you select an existing location for your file-based source system, the target application is preselected for you. If you enter a new location for your file-based source system, make sure to select a target application.
- Enter a new location: TravelExpenses.
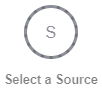
- Click Select a Source.
When your Planning business process is created, the system creates a file-based source system and a target system that points to your business process. If you need to work with a different source or target system, you must define them in Data Management.

- Click File.
File Browser for Inbox/Outbox Explorer is displayed.
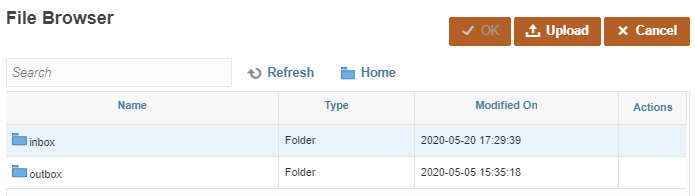
- Upload to an existing folder in the Inbox:
- Double-click inbox.
- Double-click TravelExpenses.
If EPBCS does not exist, click inbox from the folder navigation links, and then select Create Folder. In Create Folder, enter TravelExpenses as the folder name and click OK. When the folder is displayed, double-click TravelExpenses.
- Click Upload.
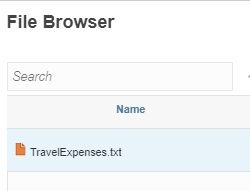
- In the Open dialog box, locate TravelExpenses.txt, select it, and click Open.
The file is displayed in File Browser.
You can later reuse your uploaded file for other integrations. You can also create a file-based load in which you designate the file to be loaded at runtime. However, the column number and column name are designated only when you map the dimensions.
- Make sure that TravelExpenses.txt is selected, and then click OK.
The file is now associated with your source system.
- Click File Options.
The File Import - File Options dialog box displays the file properties and a preview of file contents.
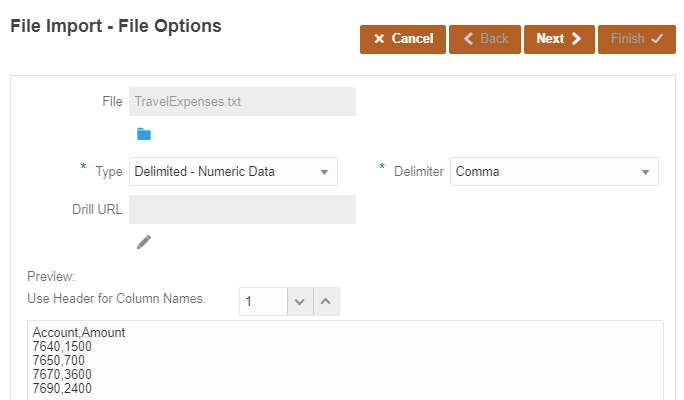
- Click Next.
- When finished reviewing file properties, click Finish.
- Click Select a Target.
The predefined target is displayed.

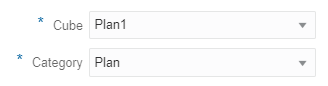
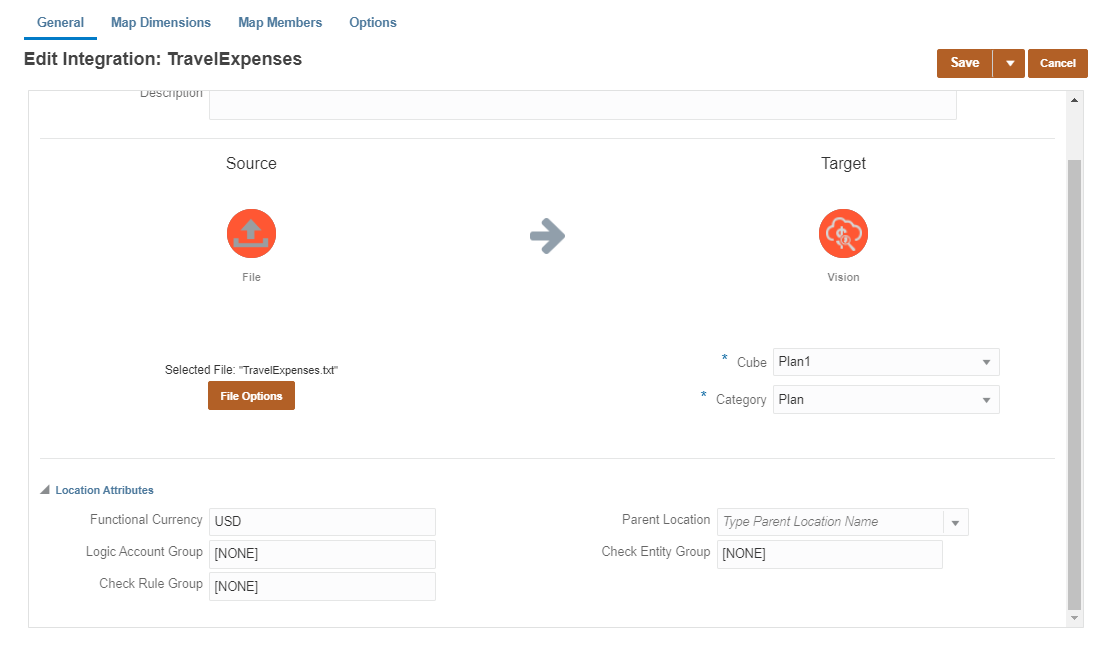
- Click Vision.
- For Cube, select Plan1.
- For Category, select Plan.
This maps to the Plan Scenario in the business process.
- Expand Location Attributes.
Add or edit attributes assigned to a location.
- For Functional Currency, enter USD.
- Review your selections.

Save your integration before proceeding to the next task in the workflow. You can also continue working on your integration at a later time.
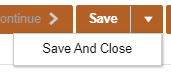
- Click the arrow next to Save, then click Save and Close.

TravelExpenses is saved and listed in Data Integration.

Editing integrations
- In Data Integration, click TravelExpenses to open and edit the saved integration.
- Review your previous selections before proceeding to the next section.
 Mapping Dimensions and Members
In this section, you map dimensions and members between the source and target systems.
Mapping Dimensions
You map dimensions to specify how source dimensions or columns map to the dimensions' columns in the target application. This task corresponds to defining an Import Format in legacy Data Management.
- From the workflow bar, click Map Dimensions.
- In Map Dimensions, verify the following selections:
- Import Format: TravelExpenses
- Type: Delimited - Numeric Data
- Delimiter: Comma
- For each source dimension, click
 (arrow) and select a dimension based on the following example:
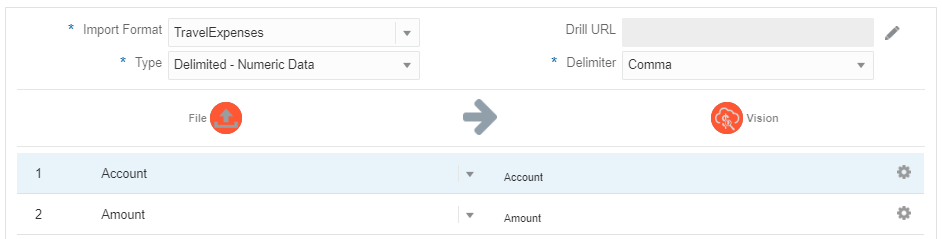
The field number is automatically updated when you select dimensions. The field number is based on the column number in the load file.
Multiple source columns of the same dimension can be mapped to target dimensions.
You can also use source or target expressions to map dimensions. Aside from the standard expressions, you can use the SQL expression type to assign any SQL expression that can be used in a SQL INSERT statement for a value. - Click Save.
Mapping Members
Map Members is where you define your data load mappings.
You map members to identify how source dimensionality translates to target dimensionality based on source values during the data load. Member mappings define relationships between source members and target dimension members within a single dimension.
- From the workflow bar, click Map Members.
- Display the list of dimensions. Click
 (dropdown arrow) next to the dimension name.
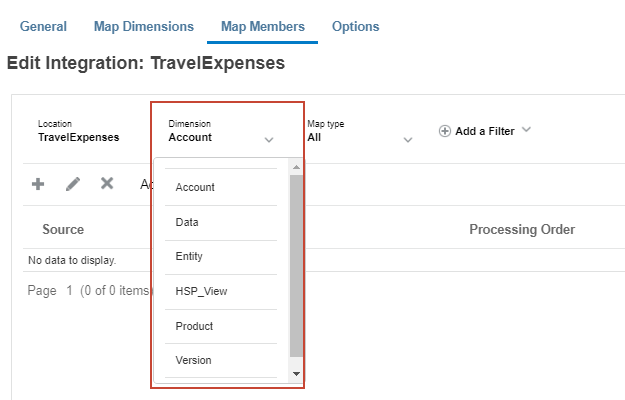
A member mapping must be defined for each target dimension.
- For Dimension, select Account.
- Click
 (Add).
- For Source, click
 and select Is Like.
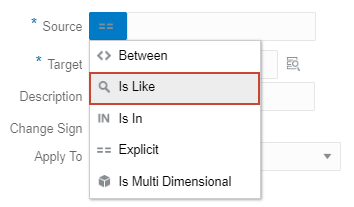
- In the textbox next to the Source icon, enter *.
- In the Target textbox, enter *.
- In the Processing Order textbox, enter Accounts.
- Click OK.

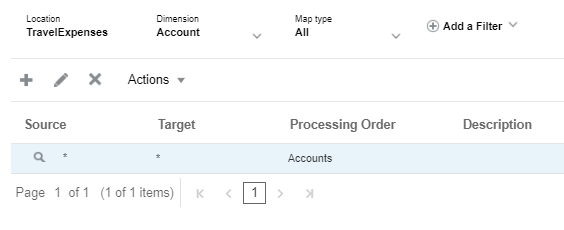
The Account member mapping is listed on the page.
- Import the rest of the mappings. Click Actions, then select Import, and All Dimensions.
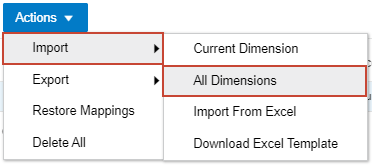
- In Select a file to import, double-click inbox, then TravelExpenses.
- Click Upload.
- In the Open dialog box, locate spcmap.txt, select it, and click Open.
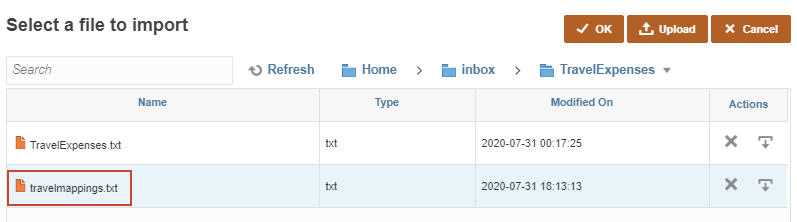
- Select travelmappings.txt and click OK.
-
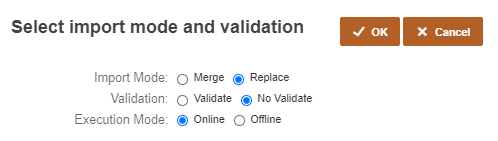
In Select import mode and validation, set Import Mode to Replace and Validation to No Validate, and then click OK.
- For each dimension, click (dropdown arrow), select a dimension, and verify that mappings were added for each dimension.
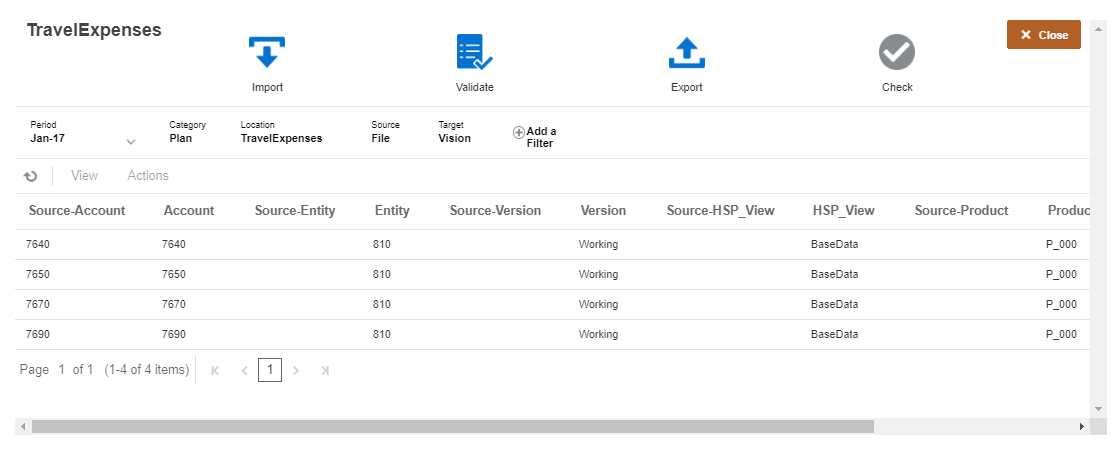
Dimension Source Type Source Value Target Processing Order Data Is Like * * Data Entity Is Like * 810 Entity HSP_View Is Like * BaseData HSP_View Product Is Like * P_000 Product Version Is Like * Working Version - Click Save.
 Setting File-Based Integration Options
In Options, you can select general and target options for your data integrations.
- From the workflow bar, click Options.
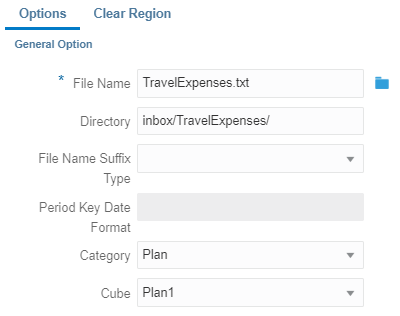
- Review and verify the selections in General Options.
- Verify or set the following Target Options:

- Click the arrow-down icon next to Save and select Save and Close.
- Return to the home page. Click
 (Home).
Running the File-Based Integration
Reviewing the Data Load Point-of-View
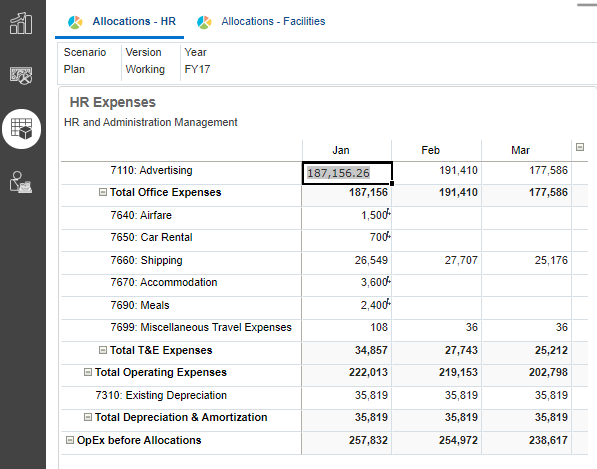
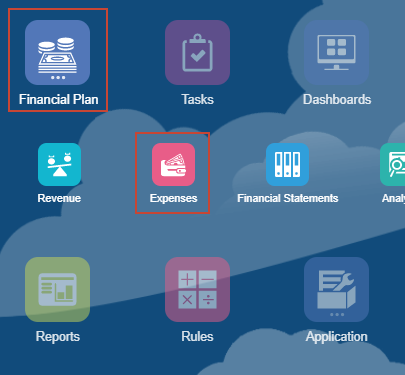
- From the home page, open the HR Expenses form. Click Financial Plan, then Expenses.
- On the left, click the third icon,
 (Allocations).

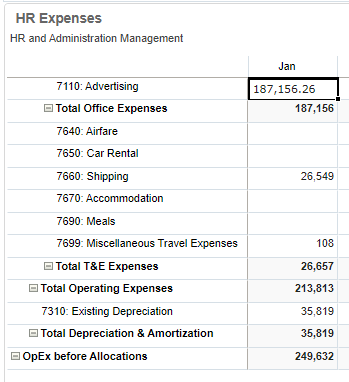
The HR Expenses form is displayed in the left side of the dashboard.
- In the grid, expand YearTotal, then Q1.
The integration will be loading data into the January period of these accounts: Airfare, Car Rental, Accomodation, and Meals.
Running the Integration Process
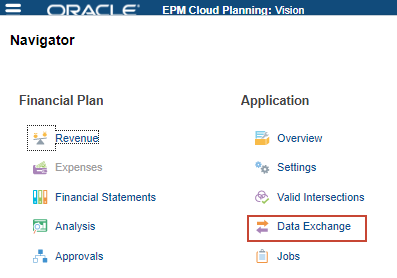
- Click (Navigator), then under Application, click Data Exchange.
- In Data Integration, for TravelExpenses, click
 (Run).
The Run Integration dialog box is displayed.
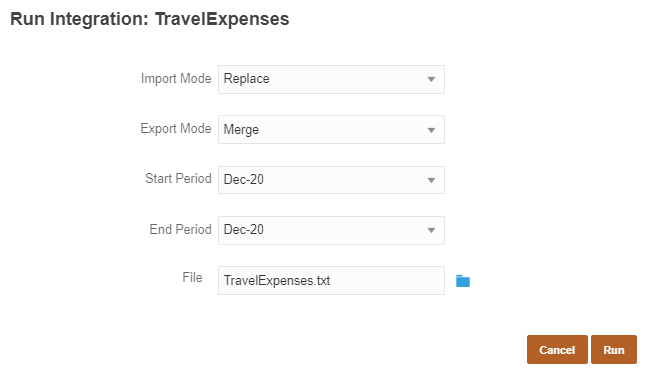
- Make or verify the following selections:
- Import Mode: Replace
Setting the import mode to Replace clears all the data for the data point-of-view in the Workbench.
- Export Mode: Merge
Setting the export mode to Merge overwrites existing data with the data in the load file. If data does not exist, it loads the new data.
- Start Period: Jan-17
The End Period is typically updated to match the Start Period.
- End Period: Jan-17
- File: TravelExpenses.txt
- Import Mode: Replace
- Click Run.
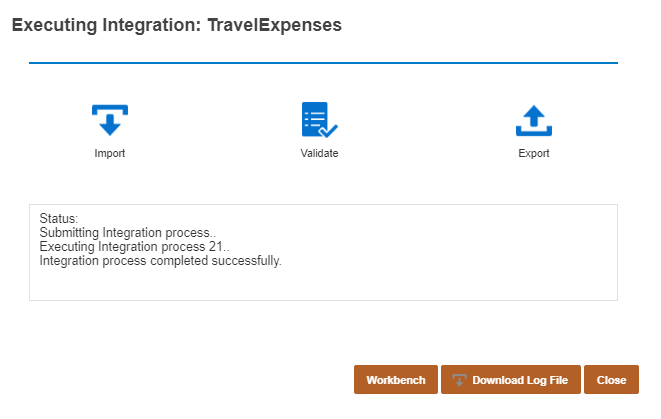
The integration execution status message is displayed.

When completed, the Import, Validate, and Export icons change in color. The Status section states that the Integration process completed successfully.
Reviewing Load Results in the Workbench
- In Executing Integration: Travel Expenses, click Workbench.
The imported data is displayed. You may need to scroll to the right to show all of the data imported.
- Click Close.
- Return to the home page. Click (Home).
Reviewing Load Results in the Form
- From the home page, open the HR Expenses form. Click Financial Plan, then Expenses.
- On the left, click the third icon, (Allocations).
- In the grid, expand YearTotal, then Q1.
The load results are displayed on the form.