 Managing Dimensions in Planning
 Before You Begin
This 35-minute tutorial introduces you to dimensions and members and shows you how to add and edit dimension and members in the Simplified Dimension Editor.
Background
Planning business processes contain dimensions that represent the categories of data in your organization. For example, you identify time periods, such as YearTotal, Q1, or Jan, in the Period dimension. You identify budgeted items, such as SG&A for expenses, in the Account dimension, and you identify departments for your organization in the Entity dimension.
After creating a Planning business process, you can start reviewing the cubes and dimensions that were added during the creation process. Then, you can start adding dimensions and members based on your organizational requirements.
What Do You Need?
- Have Service Administrator access to Planning for EPM Cloud Service.
- Have a Sample, Custom, or Module-based Planning business process created in your instance.
- Make sure that the business process uses a navigation flow that includes the Application cluster.
 Terminology Overview
In this section, you learn about dimensions, members, hierarchies, and aggregation.
Dimensions and Members
Dimensions categorize data values. Planning required dimensions are included with Sample, Custom, or Module-based business processes: Account, Entity, Scenario, Version, Period, Years, and Currency. You can create up to 13 user-defined custom dimensions.
Members are components of dimensions.
Sparse and Dense Dimensions
Dimensions are further categorized as either Sparse or Dense. Sparse dimensions lack data values for the majority of member combinations. Dense dimensions have data values for the majority of member combinations. By default, Planning designates the Account and Period dimensions as dense, and the remaining dimensions as sparse. To optimize performance for sparse dimensions, Planning searches for and calculates only occupied data values in each dimension combination, reducing calculation time and disk usage. You can modify these settings.
Dimension Hierarchies
Dimension hierarchies define relationships and consolidations between members. Relationships are represented in a graphical hierarchy diagram.
In a Planning business process hierarchy, the levels below the cube name are dimensions, and the levels below each dimension are members. Members of the same level that belong to the same dimension or member are called siblings. The members of a dimension are called children of the dimension. Members that belong to a member are called children of that member.
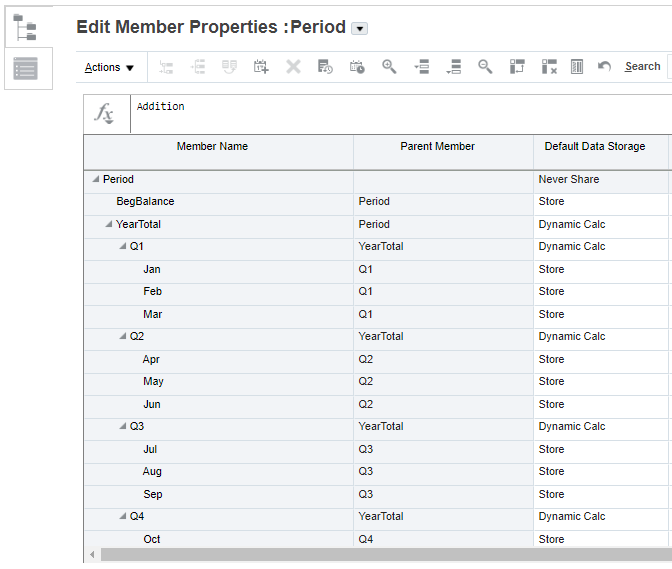
For example, the Period dimension contains the YearTotal member, which contains the Q1, Q2, Q3, and Q4 members that represent quarters. The quarters contain members for the corresponding months. Monthly data values roll up to the quarters, and quarterly data values roll up to the year total.
Hierarchy Aggregations
You can define calculations within dimension hierarchies using aggregation options. Aggregation options determine how child member values aggregate to parent members:
- + Addition
- - Subtraction
- * Multiplication
- / Division
- % Percent
- ~ Ignore
- Never (don't aggregate, regardless of hierarchy)
Dimension Storage Options
The following storage options are available to dimensions:
- Dynamic Calc and Store—calculates data values of members, and stores values.
- Store—stores data values of members.
- Dynamic Calc—calculates data values of members, and disregards the values.
- Never Share—prohibits members in the same dimension from sharing data values.
- Shared—allows members in the same dimension to share data values.
- Label Only—has no data associated with the member.
 Reviewing Dimensions
In this section, you navigate to the Dimensions tab to review cubes and dimensions in Planning.
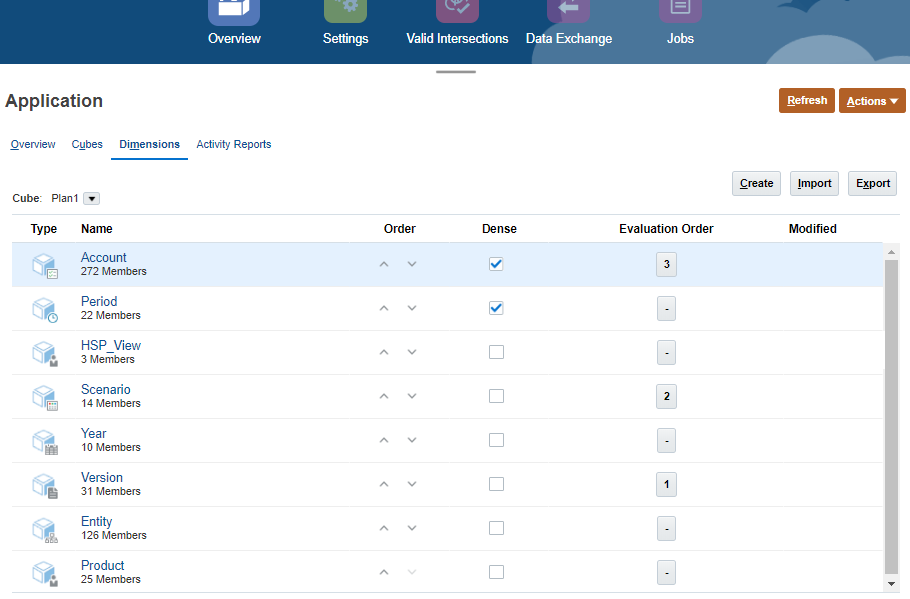
- From the Planning home page, click Application, and then Overview.
- Click the Dimensions tab.
- Create, import, or export dimensions on this tab.
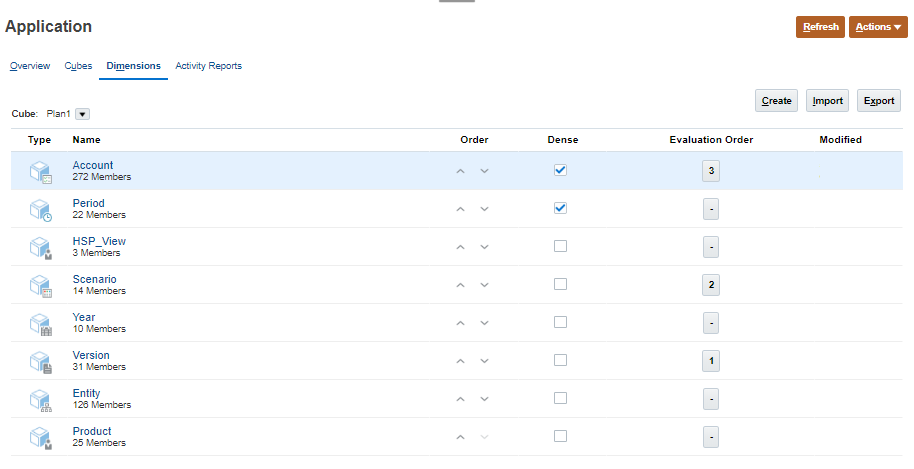
Dimensions and its number of members are displayed for each cube. You can choose dimensions displayed by selecting All or a cube name from the Cube dropdown list.
- Filter the dimension view by cube. Click the down arrow to the right of Cube to filter the list of dimensions by cube.
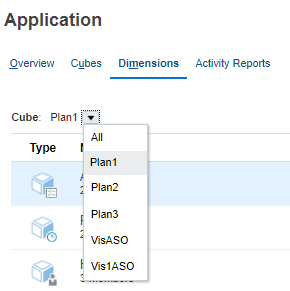
By default, Planning displays all cubes on this page. If the dimension list is filtered, this page displays only the dimensions used in the selected cube.
 Data Evaluation Order
In this section, you learn about the importance of data evaluation order for dimensions.
Dimensions are listed in order of precedence. The order of dimensions is critical for the structure and performance of a business process. The order of your dimensions determines how your data calculations will perform. You can strategically classify and order dimensions to improve performance. You set or modify the performance settings to assign dimensions as dense or sparse, or change dimension calculation order.
Evaluation Order also enables you to specify which data type prevails when a data intersection has conflicting data types. For example, if Account members are set to the Currency data type, and Product members are set to the Smart List data type, you can set whether the Currency or Smart List data type prevails at an intersection.
To set evaluation order:
- On the Dimensions tab, select a cube.
Data Evaluation Order is set per cube.
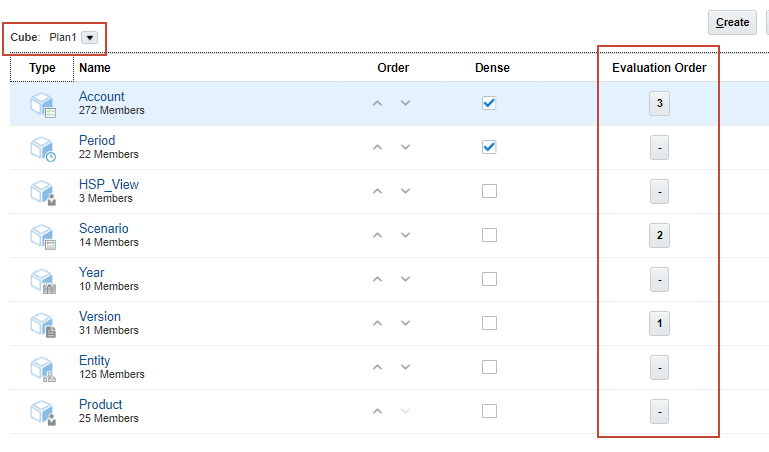
- For each dimension you want to include, click the square under the Evaluation Order column.
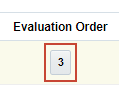
The square is updated with the dimension's position in the evaluation order.
Select dimensions whose members have specific data types (that is, their data type isn't "Unspecified"). The data type "Unspecified" doesn't conflict with another data type.
- If you want to exclude a selected dimension, click the square under the Evaluation Order column to return it to its original state.

- Perform steps 1 to 3 for each cube.
 Creating Dimensions
In this section, you create Dimensions.
- On the Dimensions tab, click Create.
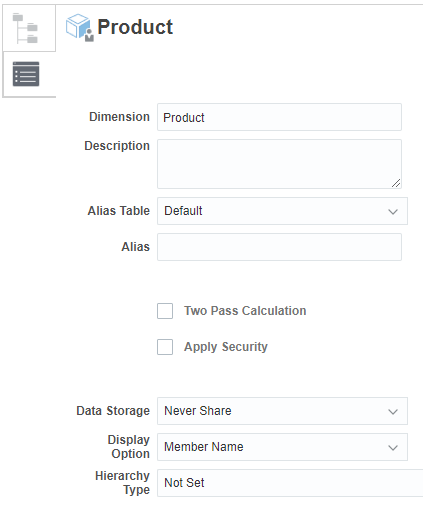
- On the Create Dimension page, enter the following information:
- Dimension—Enter a name that is unique across all dimensions.
- Description—Optional: Enter a description.
- Alias Table and Alias—Optional: Select an alias table. Enter an alternate name for the dimension.
- Two Pass Calculation—Recalculate values of members based on values of parent members or other members. This option is available for Account and Entity members with Dynamic Calc or Dynamic Calc and Store properties.
- Apply Security—Allow security to be set on the dimension members; must be selected before assigning access rights to dimension members. Otherwise, dimensions have no security and users can access members without restriction.
- Data Storage—Select a data storage option. The default is Never Share.
- Display Option—Set application default display options for the Member Selection dialog box.
- Hierarchy Type—Available for dimensions bound to an aggregate storage cube. Aggregate storage dimensions are automatically enabled to support multiple hierarchies.
Here's an example:
- Select which cubes will be using the dimension.
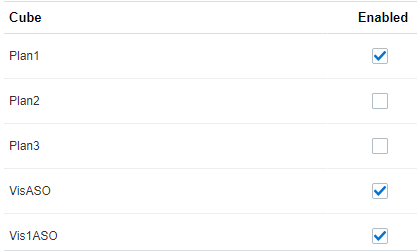
- Click Done.
 Managing Dimensions and Members
In this section, you access the Simplified Dimension Editor to manage dimensions and members.
- After selecting a cube, click the name of a dimension you want to view.
The Simplified Dimension Editor is opened with the Edit Member Properties dialog box displayed.
- Navigate between the following tabs:

Edit Member Properties—to view and edit dimension members. 
Edit Dimension Properties—to view and edit dimension details.
Editing Dimension Properties
In this section, you edit the dimension properties of a dimension.
- Click the Edit Dimension Properties tab.
Dimension properties must conform to guidelines listed in the Naming Restrictions section of the Administering Planning documentation.
- Modify the following properties:
- Dimension—Enter a unique name.
- Alias Table and Alias—Optional: Select an alias table. Enter an alternate name for the dimension.
- Select the following properties:
- Two Pass Calculation—Recalculate values of members based on values of parent members or other members. This option is available for Account and Entity members with Dynamic Calc or Dynamic Calc and Store properties.
- Apply Security—Allow security to be set on the dimension members; must be selected before assigning access rights to dimension members. Otherwise, dimensions have no security and users can access members without restriction.
- Select options for the following properties:
- Data Storage—Select a data storage option. The default is Never Share.
- Display Option—Set application default display options for the Member Selection dialog box.
- Hierarchy Type—Available for dimensions bound to an aggregate storage cube. Aggregate storage dimensions are automatically enabled to support multiple hierarchies.
- In the Cube section, select the cubes for which the dimension is enabled. Clearing this option disables all members of the dimension for the deselected cube.
- For Custom Attributes, Click to Create or Synchronize custom attributes for a dimension.

- In the Create Attribute dialog box, enter the attribute name, then select a data type, and select whether to index the attribute.
- Click Save.
- When finished setting dimension properties, click Done.
Editing Member Properties
- Click the Edit Member Properties tab.
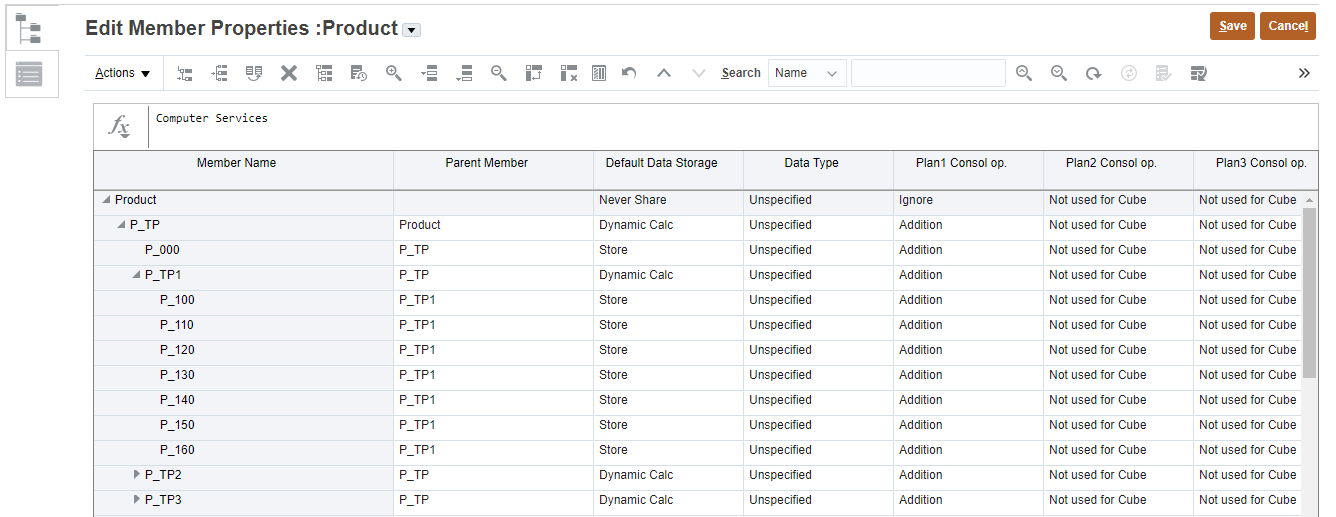
- Click within a grid cell to edit text or to view a drop-down menu from which you can choose member properties.
Each column in the Simplified dimension editor grid represents a member property. You can also drag and drop member property values over to rows and columns to fill in properties that are the same.
Adding Members
- In Edit Member Properties, perform one of the following tasks:
- To add a child member, select the parent level member, click Actions, and then click Add Child.
- To add a sibling member, select a member, click Actions, and then click Add Sibling.
- To set or change member properties, click a cell in the Edit Member Properties grid and make updates.
- Click Save.
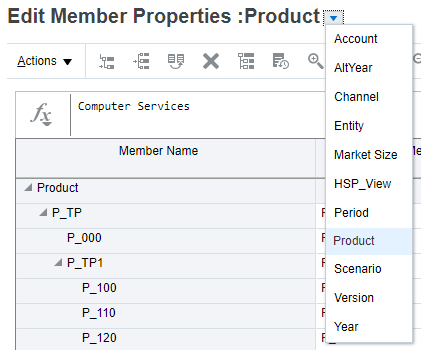
Switching Dimensions
In Edit Member Properties, click the arrow next to the dimension name and select a dimension.
Managing Years Members
- In Edit Member Properties, select the Year or Years dimension.
- Click Actions, and then click Add Years.
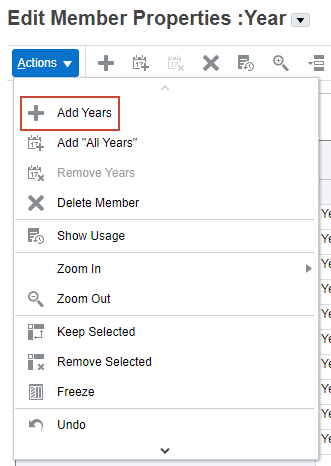
- Enter the number of years to add, click Apply, and then confirm whether to add the years to the end of the calendar.
- Click Yes to add years after the End year.
- Click No to add years before the Start year.
- To add an All Years parent member that includes all members of the Years dimension, click Actions, and then click Add "All Years".
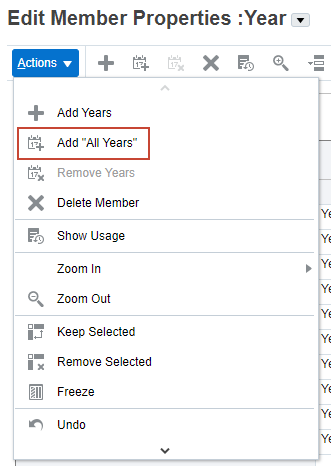
The All Years parent member enables users to view the accumulated data across multiple years, for example, a project's total cost up to its end date.
Applying Your Changes
You must refresh the database after changing the metadata structure, and modifying artifacts such as dimensions and members.
- In Edit Member Properties, to save your changes in the grid, click Save.
- To apply your changes across the business process after a save, click Refresh Database (
 ).
).
The Refresh Database dialog box is displayed.
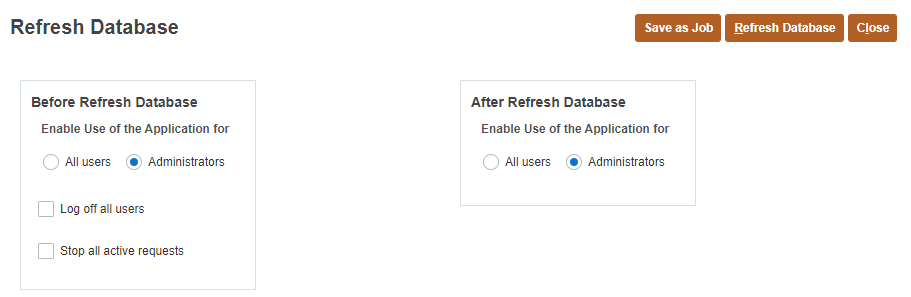
- Select applicable options and click Refresh Database.
- Click Refresh.

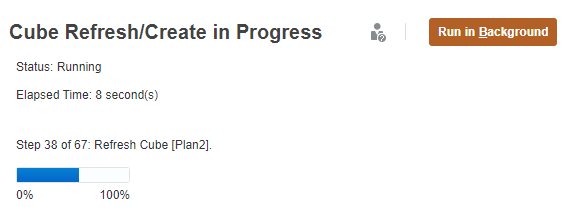
You can optionally run the process in the background.
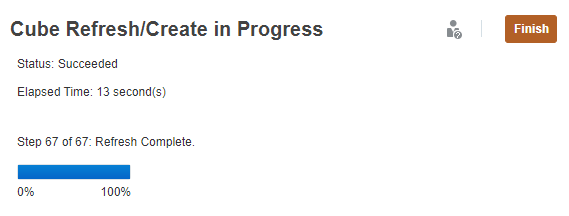
- When finished, click Finish.
- Click Close to close the Refresh Database dialog box.
Aside from managing dimensions and members properties, you can customize the column layout of the Simplified dimension editor grid, view member ancestors, show member usage in Planning, perform focused editing (zoom in, zoom out, keep selected, remove selected, and freeze), find members, move members, sort members, define or edit member formulas, undo recent changes, and copy member names from Microsoft Excel.