 Setting Up Security in Planning
 Before You Begin
This 75-minute tutorial shows you how to manage security in Access Control and set up access permissions in Planning. The Background and Planning Security Overview sections in this tutorial describes the layers of Planning security.
Background
Planning implements several security layers:
- Oracle Identity Management
- Planning Access Control
- Data and Artifact Access Permissions
- Valid Intersections
This tutorial includes an overview of each security layer, and shows you how to manage access control and access permissions in Planning.
What Do You Need?
An EPM Cloud Service instance allows you to deploy and use one of the supported business processes. To deploy another business process, you must request another EPM Cloud Service instance or remove the current business process.
- Have Service Administrator access to Planning for EPM Enterprise Cloud Service or Legacy Subscription.
- Have the sample Planning business process created in your instance.
- Set the navigation flow to Financial Flow - Admin.
 Planning Security Overview
Oracle Identity Management
Single-sign on (SSO) and role-based security are managed by Oracle Identity Management, which defines a security domain for each environment. After a successful sign-in, access to the service is determined by the role assigned to the user.
Identity Domain
An identity domain controls the accounts of users who need access to environments. It also controls the features that authorized users can access.
An Identity Domain Administrator creates and manages user accounts within an identity domain. The Account Administrator, while activating the service, identifies a user who is granted the Identity Domain Administrator role.
By default, each customer is allocated two environments of a service: test and production. The Identity Domain Administrator uses the Security Page of My Services to manage the users who need access to these environments, as well as managing users and their roles, configuring single sign-on, and setting up network restricted access. While users are shared across test and production environments, they are provisioned separately for each.
Several Enterprise Performance Management (EPM) Cloud services may belong to one identity domain.
Users
Each user who needs to access an environment must have an account in the identity domain associated with the environment.
To determine or limit what a user can do within an environment, you assign roles.
Predefined Roles
You can assign roles to a user to allow access to Oracle Cloud services (such as EPM Cloud Service) that have predefined roles defined in Oracle Identity Cloud Service.
Users must be assigned to predefined roles that grant them access to business functions and associated data.
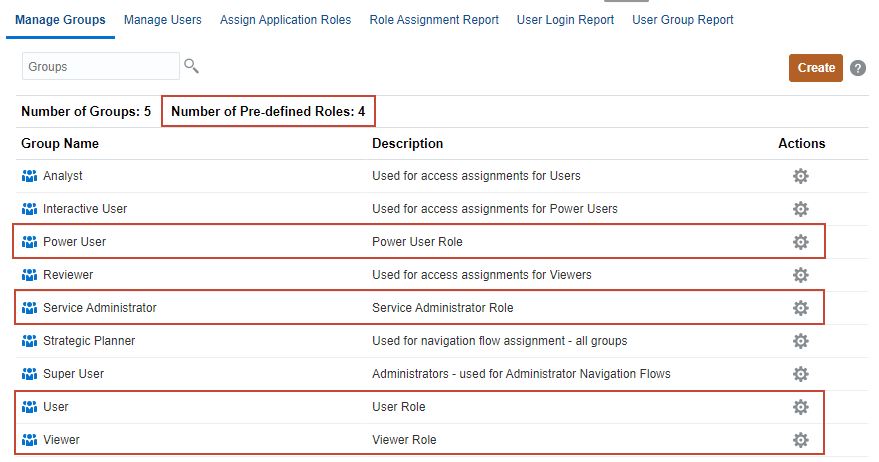
Most EPM Cloud services use a common set of four predefined functional roles to control access to service environments. The access that a predefined role grants within an environment depends on the service type. For Planning, here are descriptions of the predefined roles:
- Service Administrator—Performs all Planning or Planning Modules functional activities, including granting roles to users. This role should be granted to functional experts who need to create and administer Planning or Planning Modules and service components.
- Power User—Views and interacts with data. This role grants high-level access to several functional areas within an environment and should be granted to department heads and business unit managers, and business users in charge of a region who need to control the approval process.
A Power User can perform these activities:
- Creates and maintains forms, Oracle Smart View for Office worksheets, and Financial Reporting reports
- Manages business rules security, but cannot create rules
- Creates and manages user variables for the business process, but cannot delete them
- Views substitution variables
- Controls the approvals process, performs actions on approval units to which they have write access, and assigns owners and reviewers for the organization under her charge
- Creates reports using Reporting Web Studio, accesses the repository to create folders and save artifacts
- Loads data using forms, Data Integration, and Data Management
- User
- Enters data into forms and submits them for approval, analyzes forms using ad hoc features, controls the ability to drill through to the source system
- Accesses and modifies (rename, delete) the Reports content stored in the Repository for which the user has View, Modify, or Full Control permissions.
- Viewer—Views and analyzes data through forms and data access tools. Typically, this role should be assigned to executives who need to view business plans during the budgeting process.
Access Control in Planning
While the overall access rights are controlled by the predefined EPM Cloud Service roles, Service Administrators can grant application-specific roles and data grants to users and to groups created and managed in Planning's Access Control.
In Planning's Access Control, you can assign roles at the application-level to enhance the access rights of users. Privileges granted by a predefined role cannot be curtailed by roles assigned at the application-level.
Access Control enables you to complete these activities in an environment:
- Managing Groups
- Assigning Roles to a Group or a User
- Generating a Role Assignment Report for a User or Group
- Generating the Role Assignment Report For Your Environment
- Viewing the User Login Report
Data and Artifact Access Permissions
You can assign permissions to:
- Dimensions, including user-defined dimensions
- Launch privileges to rules
- Rule folders
- Forms and Form Folders
- Dashboards and Dashboard Folders
- Infolets and Infolet Folders
- Task lists
Types of Access Permissions
Access permissions include Read, Write, and None.
You can also set who can launch which rules: Launch and No Launch.
If a user inherits Launch permission to a rule by belonging to a group, and is also assigned No Launch permissions by belonging to another group, the more restrictive No Launch assignment takes precedence.
You can set permissions for task lists: Assigned, Manage, Manage and Assign, None.
Users and Groups: Precedence
You can specify access permissions for users and groups. When you assign a user to a group, that user acquires the group's access permissions. If an individual's access permissions conflict with those of a group the user belongs to, user access permissions take precedence.
Inheriting Permissions
Inheritance determines the user or group’s access permissions.
Instead of assigning access permissions to individual dimension members, you can use the more efficient inheritance option to assign permissions to multiple members.
Assign access to individual members only on an exception basis. For example, for the North America Sales group, you assign write access to North America and its descendants, and read access to one of its children, the North America Headquarters entity.
The following inheritance options are available:
- Member—Only to the currently selected member
- Children—To all children members in the level below the currently selected member
- Children (inclusive)—To the currently selected member and all children members in the level below it
- Descendants—To all descendant members below the currently selected member
- Descendants (inclusive)—To the currently selected member and all descendant members below it
You can specify an attribute that causes the children or descendants of that member to inherit its permissions.
Precedence and Inheritance
Assigned permissions take precedence over inherited permissions. You can include or exclude the member from the permissions setting.
When evaluating permissions, Planning gives precedence in this order:
- Role-level security
Users with the Service Administrator role have permissions to all business process elements.
- For Power User and Planner user types, permissions that are specifically assigned to users.
- Permission assignments that are acquired by belonging to a group.
If one member belongs to two groups with different permissions assigned to group members, the least restrictive permission takes precedence. For example, if one group assigns the member Read permission and another group assigns the same member Write permission, Write takes precedence. However if one of the groups assigns no permission (None) to its members, None takes precedence over Read and Write.
- Parent-level assignments (for example, to parent members or folders).
Valid Intersections
You can define rules, called valid intersection rules, that filter cell intersections for users when they enter data or select runtime prompts. For example, you can restrict product availability based on entities.
You can create valid intersection groups that contain multiple valid intersection rules.
Valid Intersections in Forms
After valid intersections are defined, cells containing invalid data are read-only. This restriction speeds the planning process and optimizes the information available to users.
If the dimensions that are set in the valid intersection are found on the Page, the user will be presented only with valid combinations in the member selector.
If the dimensions that are set with valid intersections are found on the column or row, the form designer can suppress invalid intersections completely. When the suppression option isn't selected, invalid intersections are set to read only.
 Managing Security in Access Control
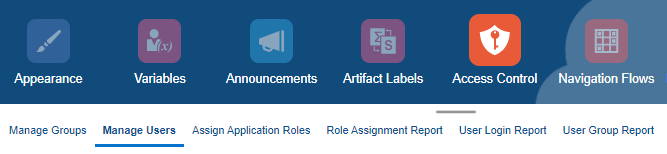
Opening Access Control
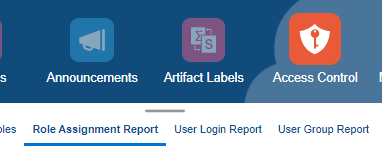
From the home page, click Tools, then Access Control.
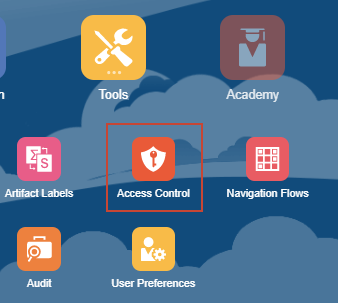
Access Control is opened with Manage Groups displayed.
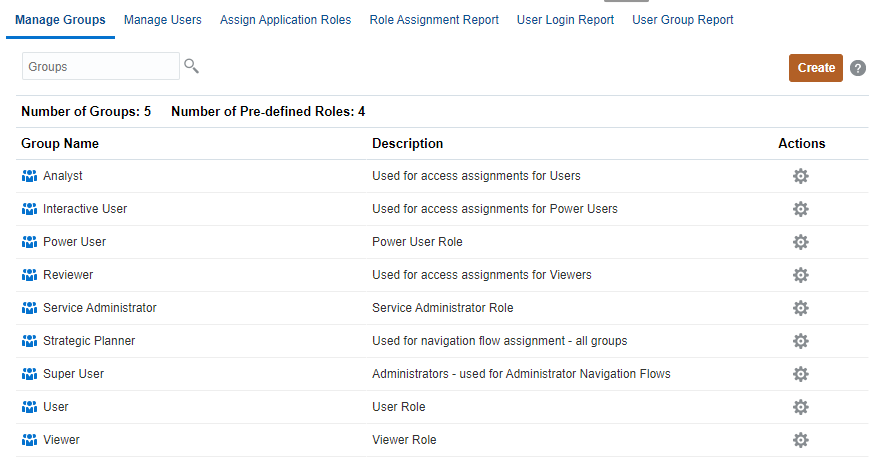
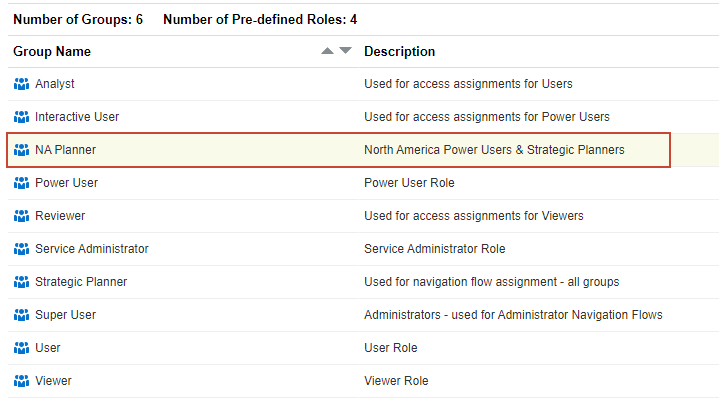
Managing Groups
Access Control lists the predefined roles as groups. Service users, who are assigned to predefined roles, are listed in Access Control so that they can be added as group members.
You use Migration or EPM Automate commands to export and import groups.
Creating Groups
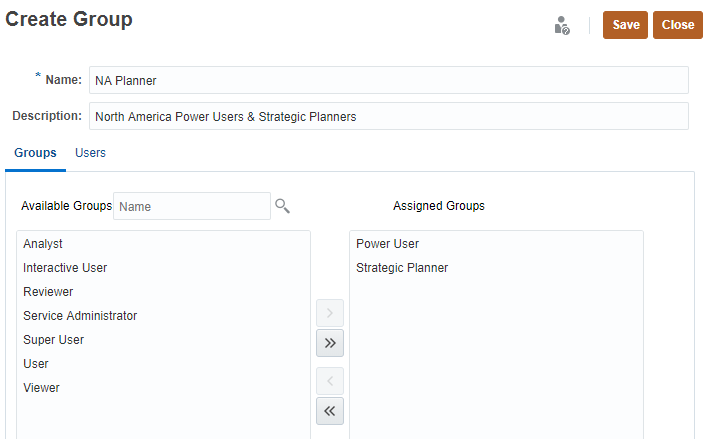
- In Manage Groups, click Create.
- In the Name textbox, enter a unique group name.
Group names may contain a maximum of 256 characters.
- Optional: Enter a description for the group.
- Optional: Add groups to create a nested group.
- Click
 (Search) to display a list of available groups or filter the list by entering a search string, and then
clicking (Search). - From Available Groups, select the members groups to add to the new group.
- Click Move.
The selected groups are listed under Assigned Groups.
Clicking Move, Move All, Remove, Remove All allows you to add or remove assignments.
- Click
- Optional: Add service users as members of the group in Users.
- Click Users.
- From Available Users, click (Search) to display a list of users or filter the list by entering a search string, and then clicking (Search).
- Click Move.
Clicking Move, Move All, Remove, Remove All allows you to add or remove users to the Assigned Users list.
- Click Save.
- In the Create Group message, click OK.
The group is listed in Manage Groups.
Modifying Groups
You cannot modify the names and description of predefined roles in Access Control.
You can modify group properties and assignments for groups that you created.
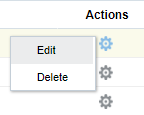
- In Manage Groups, locate the group you created and click
 (Actions).
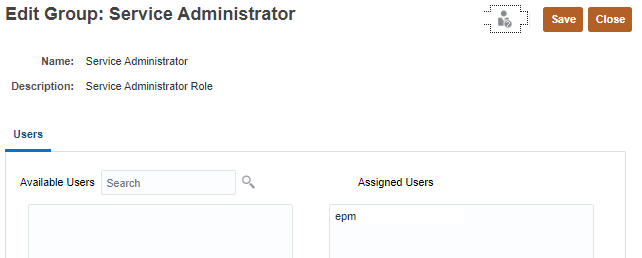
 - Select Edit.
- Modify the name, description, assigned groups, and users on the Edit Group page.
Refer to steps 2 to 4 in the Creating Groups section of this tutorial.
- Click Save.
- In the Edit Group message, click OK.
Deleting Groups
You cannot delete predefined roles in Access Control.
- In Manage Group, locate the group you want to delete and click (Actions).
- Select Delete.
- In the Delete Group prompt, click Yes.
- In the Delete Group message, click OK.
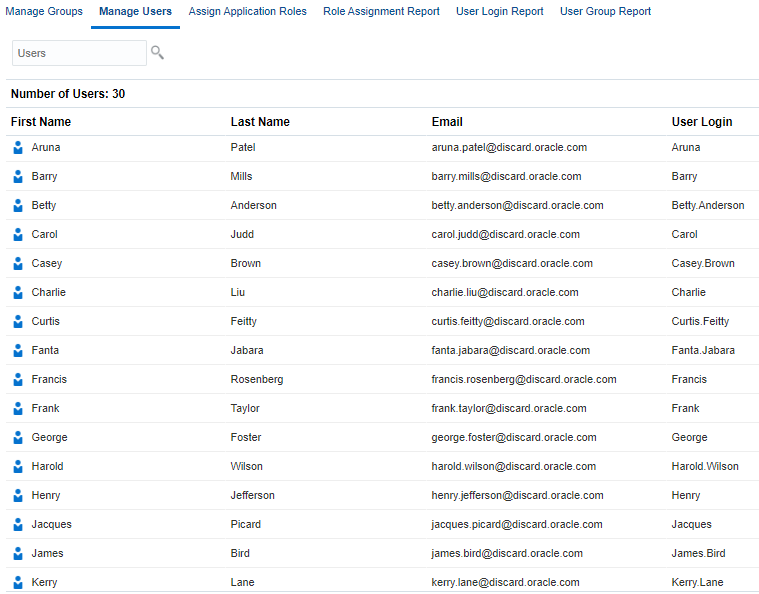
Managing Users
You can manage a user's group assignment in Manage Users.
The users displayed in this tutorial may vary from the users displayed in your Planning business process. The users listed will depend on the users you have added and provisioned in Oracle Identity Manager.
In Access Control, click Manage Users.
Manage Users lists all provisioned users in the system.
You create users, modify user properties, and delete users in Oracle Identity Management.
To modify a user's group assignment:
- In Manage Users, select a user and click (Actions).
- Select Edit.
- Assign or unassign groups to the user.
- Click (Search) to display a list of available groups or filter the list by entering a search string, and then
clicking (Search). - From Available Groups, select groups.
- Click Move.
The selected groups are listed under Assigned Groups.
Clicking Move, Move All, Remove, Remove All allows you to add or remove assignments.
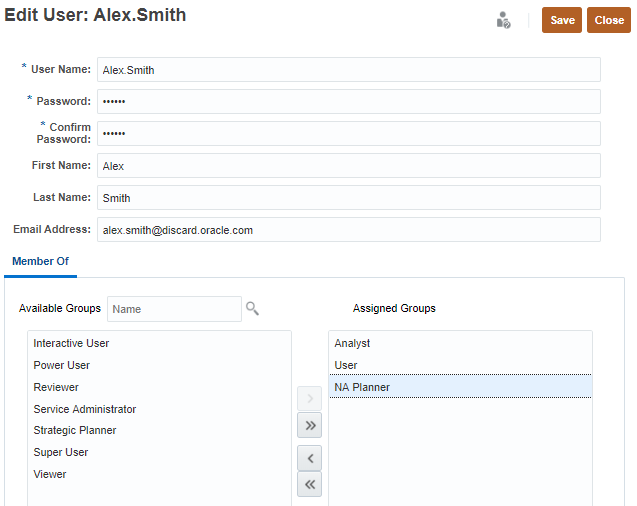
- Click
- Click Save.
- In the Edit User message, click OK.
Assigning Application Roles
Service Administrators can grant application-specific roles and data grants to users and to groups created and managed in Access Control.
In Access Control, click Assign Application Roles.
Application Roles
- Approvals Administrator—Resolves approval issues by manually taking ownership of the process.
- Approvals Ownership Assigner—Performs all tasks that users with the Planner role can complete.
- Approvals Process Designer—Performs all tasks that users with the Planner and Approvals Ownership Assigner role can complete.
- Approvals Supervisor—Performs tasks for any member of the planning unit hierarchy to which the user has write access even if the user does not own the planning unit.
- Ad Hoc Grid Creator—Creates, views, modifies, and saves ad hoc grids.
- Ad Hoc User—Views and modifies ad-hoc grids and performs ad hoc operations.
- Ad Hoc Read Only User—Performs all ad hoc functions, but cannot write back into ad hoc grids or load data using Data Management.
- Mass Allocation—Runs mass allocation rules within form grids.
- Task List Access Manager—Assigns tasks to other users.
- Create Integration—Uses Data Management and Data Integration to create mappings to integrate data between source and target systems.
- Run Integration—Executes data rules with runtime parameters and views execution logs in Data Management and Data Integration.
- Drill Through—Drills through to the source system of the data.
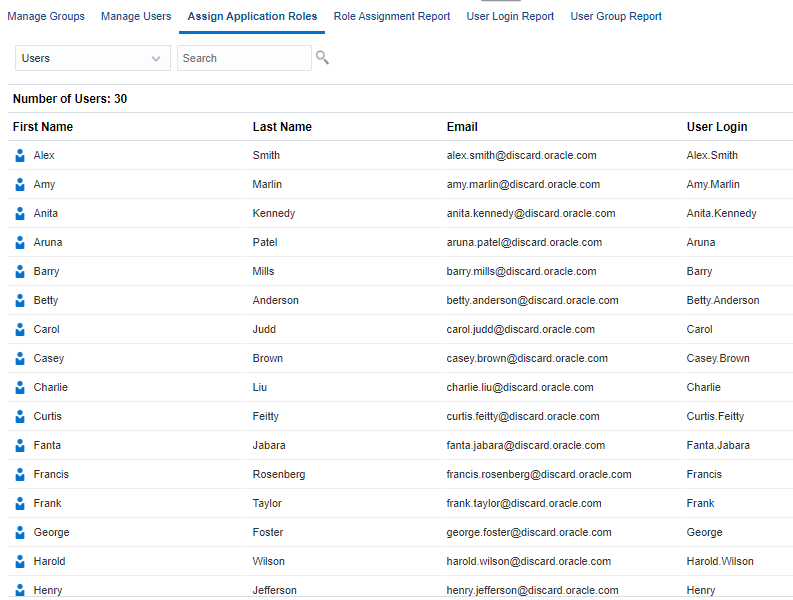
Assigning and Modifying Assigned Roles to a User
Only the users who are assigned to predefined roles can be assigned application-level roles to enhance the access they have to perform tasks within Planning.
- From the dropdown list, select Users and click (Search).
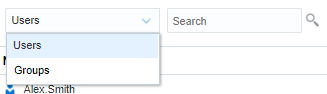
A list of service users are displayed.
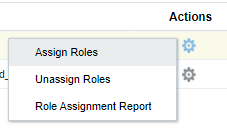
- Locate a user and click (Actions).
- Select Assign Roles.
- From the Available Application Roles, select the roles you want to assign.
- Click Move.
Clicking Move, Move All, Remove, Remove All allows you to add or remove assignments.
- Click OK.
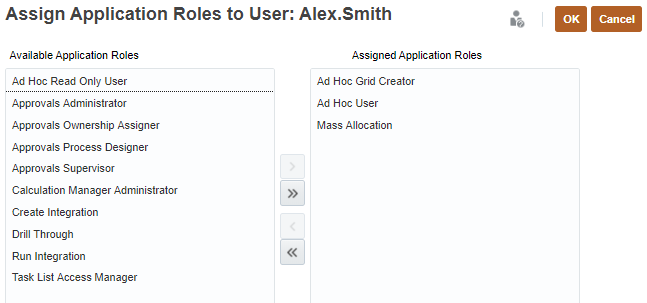
- In the Assign Application Roles to User message, click OK.
Removing Assigned Roles from Users
You can remove all the roles assigned to a user.
- In Assign Application Roles, locate a user and click (Actions).
- Select Unassign Roles.
- In the Unassign User Roles prompt, click Yes.
- In the Unassign Roles User message, click OK.
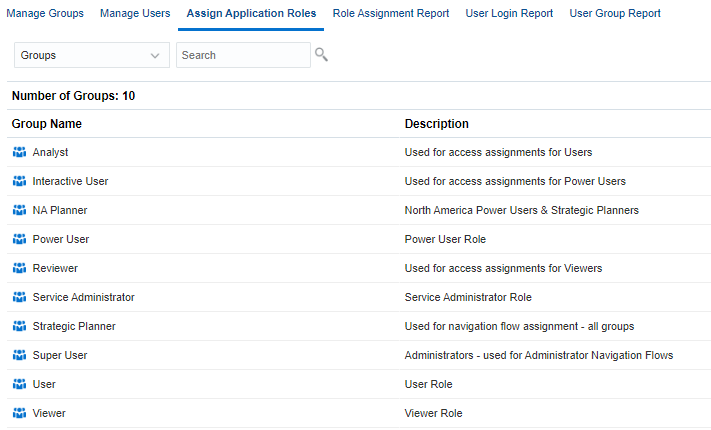
Assigning and Modifying Assigned Roles to Groups
- From the dropdown list, select Groups and click (Search).
- Locate a group and click (Actions).
- Select Assign Roles.
- From the Available Application Roles, select the roles you want to assign.
- Click Move.
Clicking Move, Move All, Remove, Remove All allows you to add or remove assignments.
- Click OK.
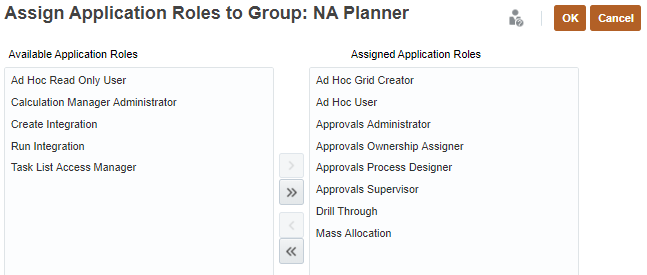
- In the Assign Application Roles to Group message, click OK.
Removing Assigned Roles from Groups
You can remove all the roles assigned to a group.
- In Assign Application Roles, locate a group and click (Actions).
- Select Unassign Roles.
- In the Unassign Group Roles prompt, click Yes.
- In the Unassign Roles Group message, click OK.
Viewing the Role Assignment Report
Service Administrators use the Role Assignment Report to review the access, assigned through predefined roles and application-level roles, assigned to all users.
To generate the Role Assignment Report in Access Control, click Role Assignment Report.
The report lists the predefined roles and Planning application roles assigned to the user.

Click Export to CSV to export the Role Assignment Report as a comma separated value file.
Viewing the User Login Report
The User Login Report contains information on the users who signed into the environment over a specified period of time.
To generate the User Login Report in Access Control, click User Login Report.
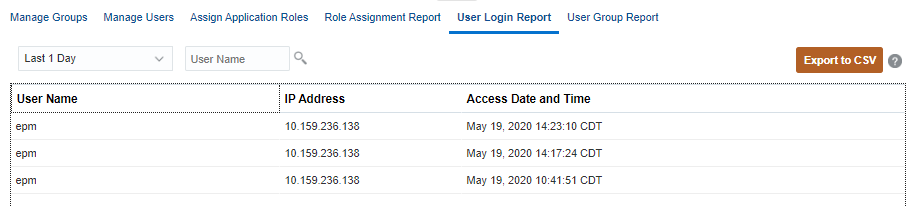
Click Export to CSV to export the User Login Report as a comma separated value file.
Viewing the User Group Report
The User Group Report lists the direct or indirect membership of users assigned to groups in Access Control.
To generate the User Group Report in Access Control, click User Group Report.
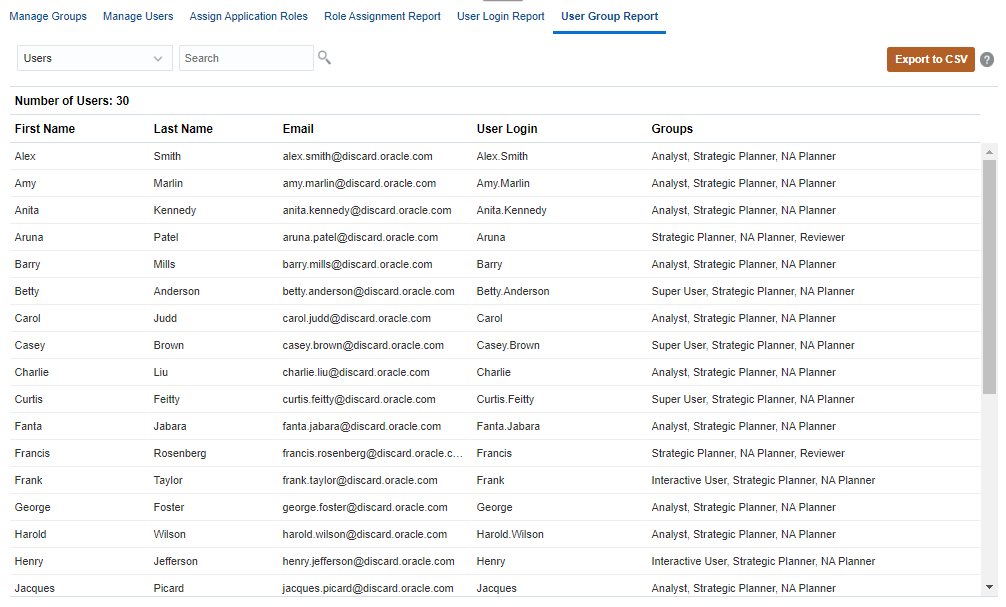
Click Export to CSV to export the User Group Report as a comma separated value file.
 Assigning Access Permissions
Dimensions and Members
You can assign permissions to members by selecting the dimension property Apply Security. See the Managing Dimensions in Planning tutorial for steps in Editing Dimension Properties.
If you omit or clear the Apply Security setting, all users can access the dimension's members. By default, the Account, Entity, Scenario, and Version dimensions are enabled for access permissions. Optionally, you can enable this option for Period, Years, and Custom dimensions.
- Return to the home page. Click
 (Home).
 - Click Application, and then Overview.
- Click Dimensions.
- Filter the dimension view by selecting a cube from the Cube dropdown list.
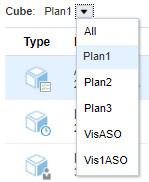
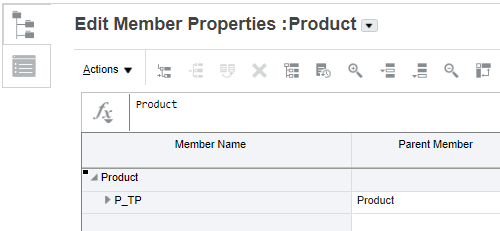
- After selecting a cube, click the name of a dimension you want to view.
In this example, the Product dimension in the Plan1 cube is opened in Edit Member Properties.
Before you can assign access permissions, you must make sure that Apply Security is enabled for the dimension you are working with.
- On the left, click
 (Edit Dimension Properties).
 - Select Apply Security.
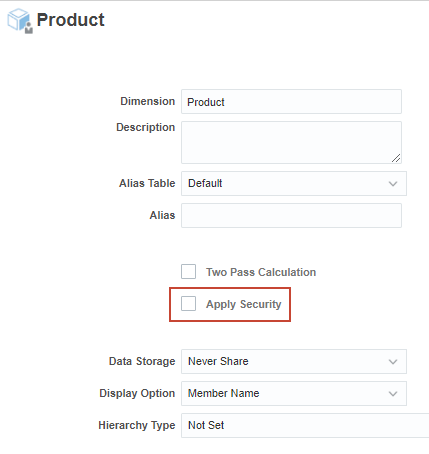
- Click Done.
- Click the name of the dimension to edit it.
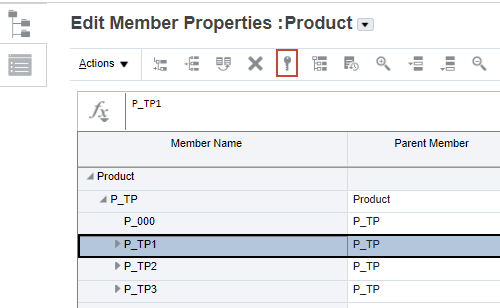
- In the grid of Edit Member Properties, select a member then click
 (Assign Permission).
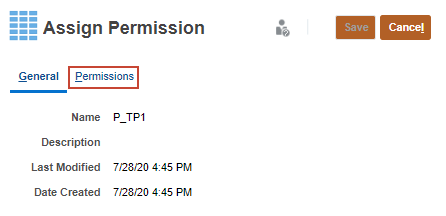
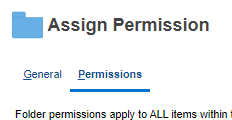
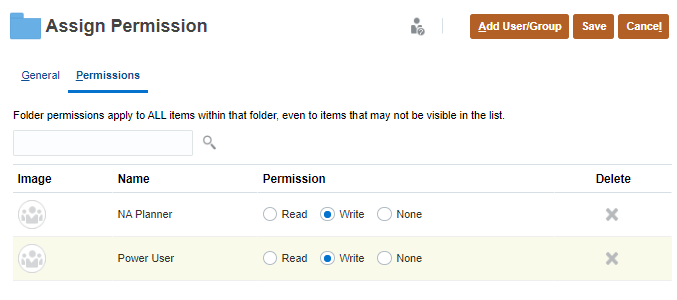
- In Assign Permission, click Permissions.
- Perform a task:
- To add permissions, click Add User/Group, then click Users or Groups, and then select from the list of
available users and groups.
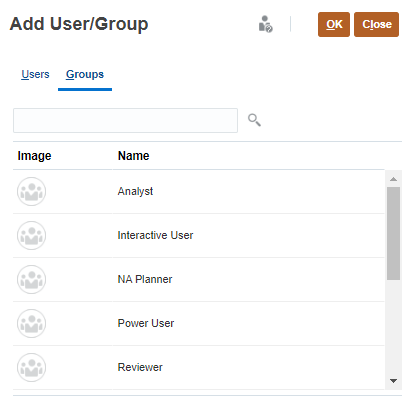
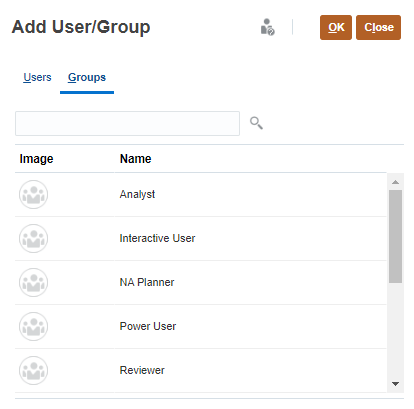
- Click OK, then click Close.
- To edit the type of permissions, select an option:
- Click Read to allow the selected users and groups to view the artifact or folder in the listing, but not allow them to create, edit, or delete the artifact or folder information.
- Click Write to allow the selected users and groups to view the artifact or folder in the listing, and to create, edit, or delete the artifact or folder information.
- Click None if you don't want the selected users or groups to view the artifact or folder in the listing.
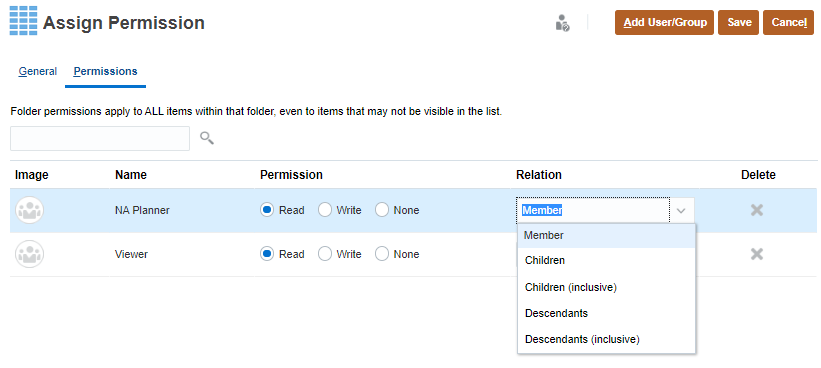
- Optional: Select a relationship.
For example, select Children to assign access to children of the selected member.
- To remove permissions, for the selected user or group, click
 (Delete).
- To add permissions, click Add User/Group, then click Users or Groups, and then select from the list of
available users and groups.
- When finished adding permissions to users and groups, click Save.
- If prompted with an information message, click OK.
- Click Cancel to close Assign Permissions.
- In Edit Member Properties, click Save.
- Click Cancel to close Edit Member Properties.
Dashboards, Forms and Form Folders
- Return to the home page. Click (Home).
- From the home page, click Dashboards, Infolets, or Data.
Each artifact or folder has an Actions menu.
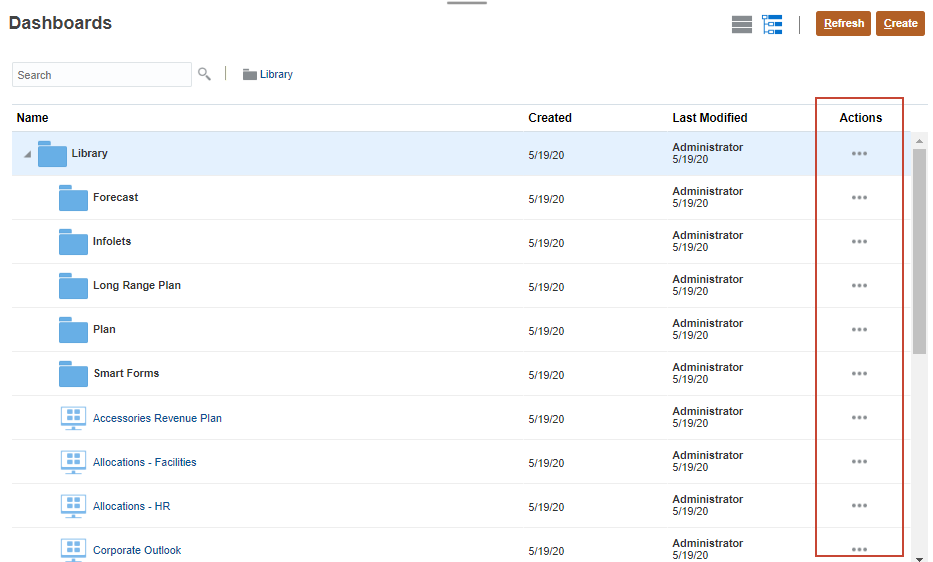
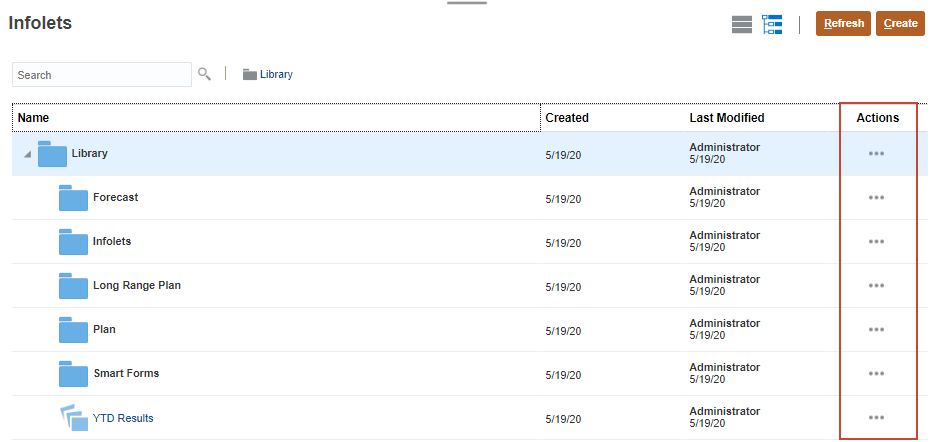
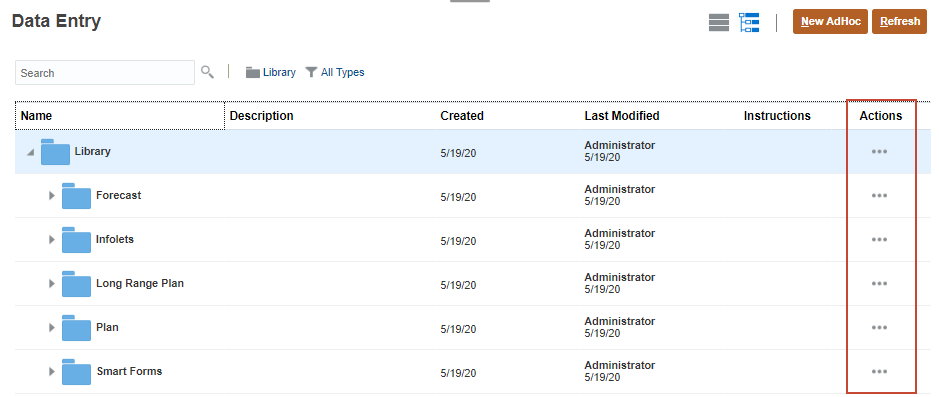
For forms, expand a folder to display more forms.
- Click
 (Actions) next to the artifact or folder and select Assign Permission.
 - In Assign Permission, click Permissions.
- Perform a task:
- To add permissions, click Add User/Group, then click Users or Groups, and then select from the list of available users and groups.
- Click OK, then click Close.
- To edit the type of permissions, select an option:
- Click Read to allow the selected users and groups to view the artifact or folder in the listing, but not allow them to create, edit, or delete the artifact or folder information.
- Click Write to allow the selected users and groups to view the artifact or folder in the listing, and to create, edit, or delete the artifact or folder information.
- Click None if you don't want the selected users or groups to view the artifact or folder in the listing.
- To remove permissions, for the selected user or group, click (Delete).
- When finished adding permissions to users and groups, click Save.
- If prompted with an information message, click OK.
- Click Cancel to close Assign Permissions.
Rules
- Return to the home page. Click (Home).
- From the home page, click Rules.
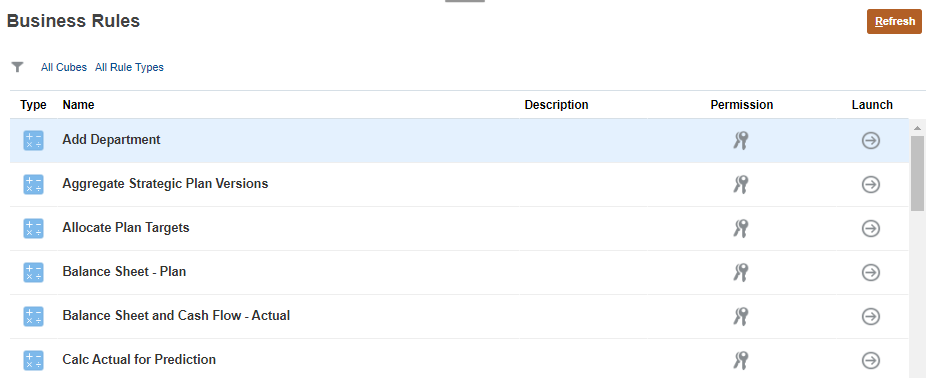
- For a rule or rule folder, click
 (Permission), and then select Assign Permission.
- In Assign Permission, click Permissions.
- Perform a task:
- To add permissions, click Add User/Group, then click Users or Groups, and then select from the list of
available users and groups.
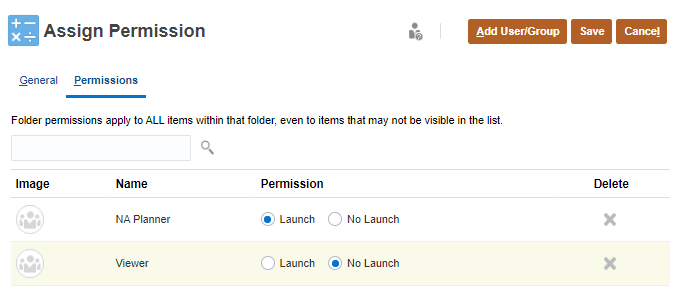
- Click OK, then click Close.
- To edit the type of permissions, select an option:
- Click Launch to allow the selected users and groups to launch the selected rules.
- Click No Launch to prevent the selected users and groups from launching the selected rules.
- To remove permissions, for the selected user or group, click (Delete).
- To add permissions, click Add User/Group, then click Users or Groups, and then select from the list of
available users and groups.
- When finished adding permissions to users and groups, click Save.
- If prompted with an information message, click OK.
- Click Cancel to close Assign Permissions.
Task Lists
- Return to the home page. Click (Home).
- From the home page, click Tasks.
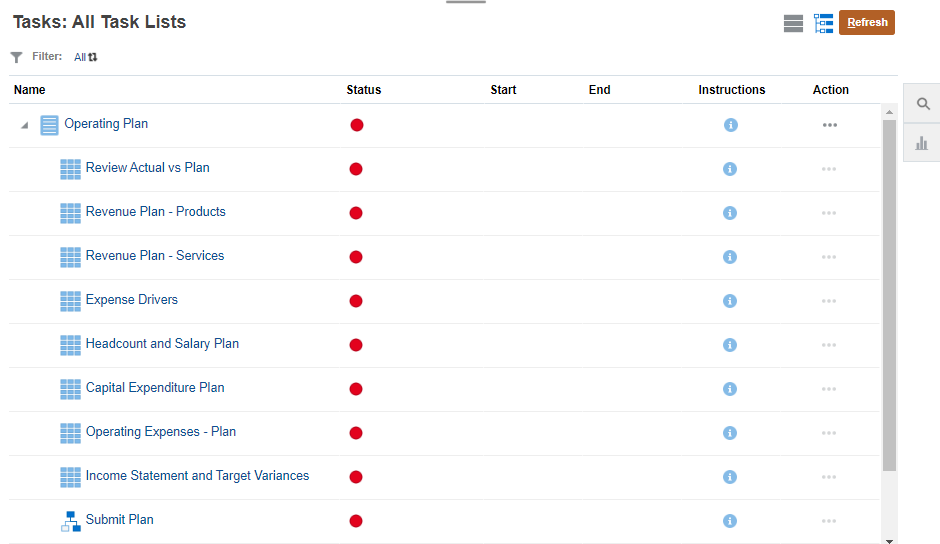
- Click (Actions) next to the task list or task list folder and select Assign Permission.
- Click Permissions.
- Perform a task:
- To add permissions, click Add User/Group, and then select from the list of
available users and groups.
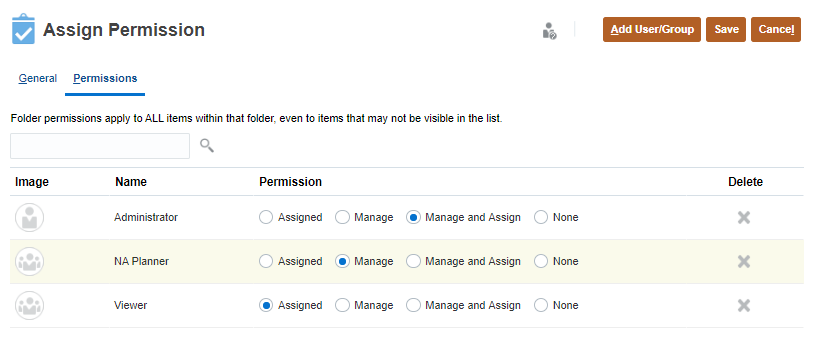
- To edit the type of permissions, select an option:
- Click Assigned to allow view and use of task lists in the folder.
- Click Manage to allow modifying task lists in the folder.
- Click Manage and Assign to allow view, use, and modifying tasks lists in the folder.
- Click None to prevent access to the task lists in the folder.
- To remove permissions, for the selected user or group, click (Delete).
- To add permissions, click Add User/Group, and then select from the list of
available users and groups.
- When finished adding permissions to users and groups, click Save.
- If prompted with an information message, click OK.
- Click Cancel to close Assign Permissions.