
 Print
PrintBefore you begin
This 65-minute hands-on tutorial shows you how to design forms in Oracle Sales Planning Cloud. The sections build on each other and should be completed sequentially.
Background
Forms empower your operational planners with flexibility, scalability, and the ownership to plan the way they want, while still offering the transparency and control required for corporate finance.
While it looks similar to a spreadsheet, forms are directly connected to your data, minimizing manual processes. You can design forms to support data entry, summary reporting, and review. Then, transform them into charts to help planners analyze results. This solution strikes an ideal balance between providing best-practice planning while maintaining the ability to be highly configured for planning processes that are unique.
Forms, when designed effectively, make planning easy. You can create simple forms to meet your needs and then you can use the simple forms and other artifacts to design dashboards to summarize the data.
What do you need?
An Oracle Sales Planning Cloud Service instance allows you to deploy and use one application. To deploy another application, you must request another Oracle Sales Planning Cloud instance or remove the current application.
- Have Service Administrator access to Oracle Sales Planning Cloud. The instance should not have an application created.
- Import the SalesPln application into your Oracle Sales Planning Cloud instance:
- If you haven't already, register for a free Oracle Cloud Customer Connect account so you can access the required files.
- From this Idea page, download and extract the SPC_apps.zip file. The compressed file contains two snapshots.
- Upload and import the SPC_BaseAdv.zip snapshot into your Oracle Sales Planning Cloud instance.
For more information on uploading and importing migration snapshots, refer to the Administering Migration for Oracle Enterprise Performance Management Cloud documentation.
Forms overview
Forms and cubes
When you create a form, you associate it with a Block Storage (BSO) or Aggregate Storage (ASO) cube, which determines the form's valid members. For example, if you assign a form to the OEP_QTP cube, you can add only accounts that are valid for the OEP_QTP cube. Entered data is saved to the selected cube's database.
Considerations:
- You can't change a form’s cube after assigning it.
- You can edit form accounts only if their source cube matches the form's cube.
- If you add an account to a form associated with a cube other than the account’s source cube, the account is read-only on that form.
Forms and access permissions
Assign permissions to a form to determine which users can modify its design and input data. Aside from form access permissions, users must also have permission to access a dimension's member. For example, if users have read-only permission to the Europe entity, the rows and columns that include the Europe entity are read-only. Users can change data only for members to which they have write permission.
See the Setting Up Sales Planning Security hands-on tutorial for steps in assigning access permissions.
Form components
You can create simple forms based on your company’s planning requirements. Simple forms are created with dimension members from a single cube.
Forms are designed to be easy and intuitive for its users. Visual indicators convey information, such as the cell’s accessibility.
Associated business rules enable the user to push and allocate target data across entities and products based on historical patterns.
There are several sections to forms:
- Point of View (POV)
 - Select point of view (POV) dimensions to define the context for pages, rows, and columns. For example, if Scenario is Budget, all data displayed and entered in pages, rows, and columns is written to the Budget scenario dimension member. Each POV dimension is set to one member, which planners can't change.
 - Page Axis
 – Use the page axis to specify member combinations that may span dimensions so that users can work with data in smaller, logical views. Each page axis item can have members selected from different dimensions. Users see only members they can access.
 - Rows
 and Columns
- Rows and columns define the grid into which planners enter data. For example, you can assign Central - Products - Div I (Territory) to the row axis and January (Period) to the column axis. When planners access forms, they can enter data into the cell where the row intersects with the column.
- Attribute Dimensions - In addition to using attribute dimensions as filters, you can define attributes as unique dimensions within Planning so that they can be placed on an axis other than their associated base dimension. This enables you to perform cross-dimensional rollups across attribute members.
To simplify a form’s POV, or better tailor it to the needs and roles of planners, you specify only relevant members or define user variables.
Select members in Member Selector by clicking the member name on the Page axis, or from a dropdown list. Click  (Edit members) to open the
  dropdown list.

You can specify multiple page dropdown lists, and select members using relationship functions or attributes. Switch between member sets by selecting them from the page axis.
You display member names or aliases on the page axis. You can specify the number of members in a page dimension that enables a search drop-down list on the data entry page, useful if dimensions contain many members.
By default, forms have one set of rows and columns. You can add rows and columns to create asymmetrical combinations of members.
Attribute dimensions are optional on form grids and are listed separately on the Layout tab of the Form Designer. To use an attribute dimension in a form, drag the attribute dimension to the point of view, page, row, or column.
Form design considerations
Consider the following tips and features when designing forms:
- Separate input-type forms from reporting forms.
- Design forms with end-users in mind. Best practice is for data entry forms to include a consumable amount of information for users such as the input form.
- Set up navigation flows to help users navigate through their planning process.
- Use dashboards to combine data entry and reporting forms to enhance user experience.
Input Form:

Reporting Form:
For more best practice information, see the Best Practices for the Design Walkthrough section under Appendix G of the Oracle Cloud Administering Planning documentation.
Getting started
About themes
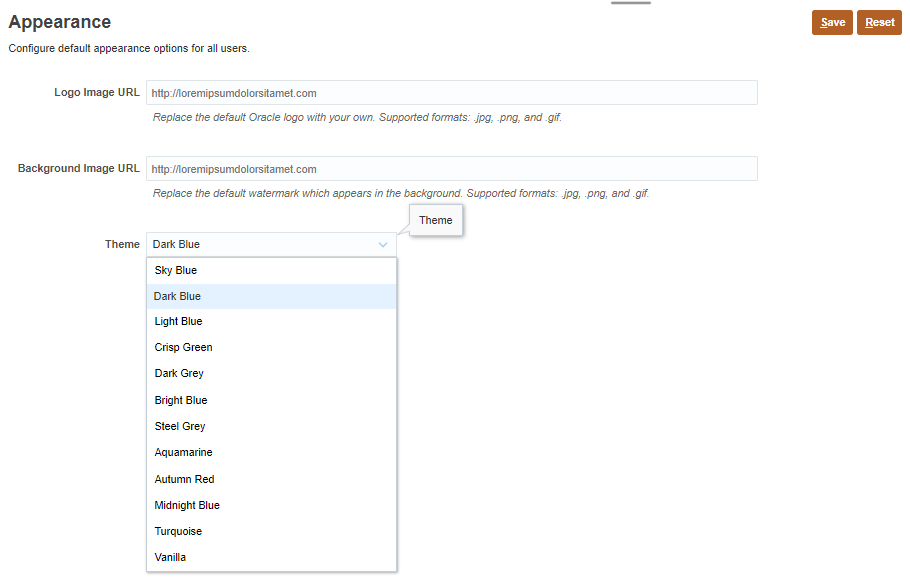
You can change the theme of your display or add your company logo or a background image to the home page.
This tutorial was developed using the Dark Blue theme. You can select a theme by clicking ![]() (Navigator), then under Tools, click Appearance. For Theme, select a color option.
(Navigator), then under Tools, click Appearance. For Theme, select a color option.
Setting values to user variables
Set values for user variables so you can design forms that use user variables as members on a form.
- From the home page, click Tools, then User Preferences.
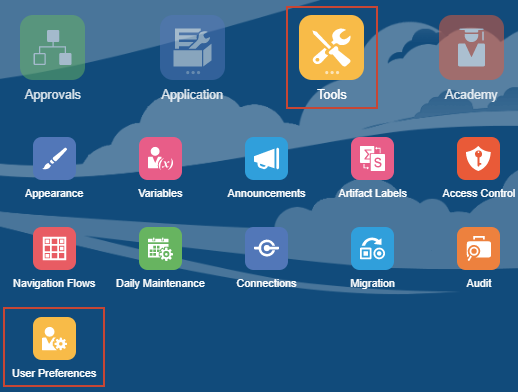
- On the left, under Preferences, click User Variables.
- For each variable, click its
 (Select Member) to select a member as the variable's value:
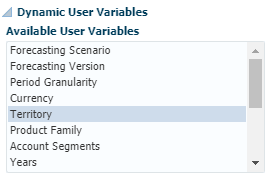
Dimension User Variable Member Currency Currency USD Period Period Granularity YearTotal Currency Reporting Currency USD Scenario Scenario OEP_Plan Years Years FY19 Accounts Account Segments OEP_All Accounts Scenario Forecasting Scenario OEP_Forecast Version Forecasating Version OEP_Working Bottom Up Measures Drivers OGS_Product Measures Product Product Family OEP_All Product Territory Territory OEP_Total Territory Territory Overlay Territory OEP_All Overlay Territory Territory Sales Rep Territory 1012 (Central - Products - Div I -Peter Branch) Territory Territory 1011 (NA Products - Central - Alex Smith) Accounts Accounts OEP_All Accounts Product Product OEP_All Product If you selected to show aliases in Member Selector, the value listed in the Member column may vary. For example, for some dimensions, the prefix (OEP_ and OGS_) are not shown. For some territory members, instead of the numeric member name, the full alias name is displayed. The full alias name for numeric territories are noted in parenthesis in the table above.

- On the upper-right, click
 (Save).
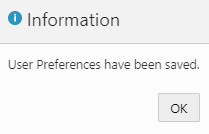
- In the Information message, click OK.
- Return to the home page. Click
 (Home).
Managing forms and form folders
Use folders to organize forms in your application. You can group forms in folders by process or user type, or simply to help users readily find forms. You can move forms into folders, and you can create a folder hierarchy. Creating folders also simplifies assigning access because all forms in the folder will inherit the access permissions assigned.
Creating form folders
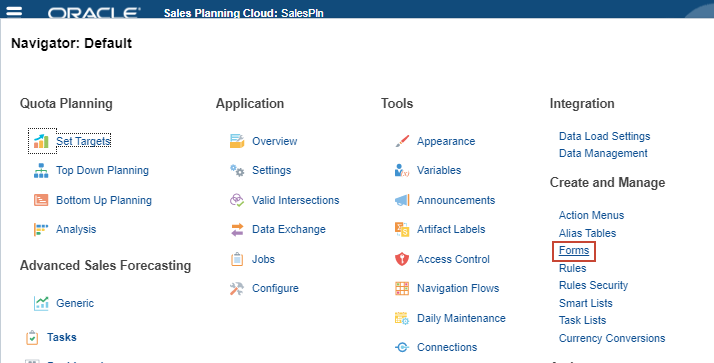
- Click
 (Navigator), then under Create and Manage, click Forms.
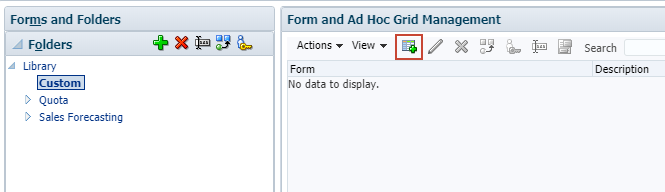
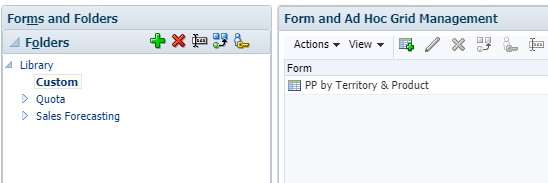
Form and Ad Hoc Grid Management is displayed.
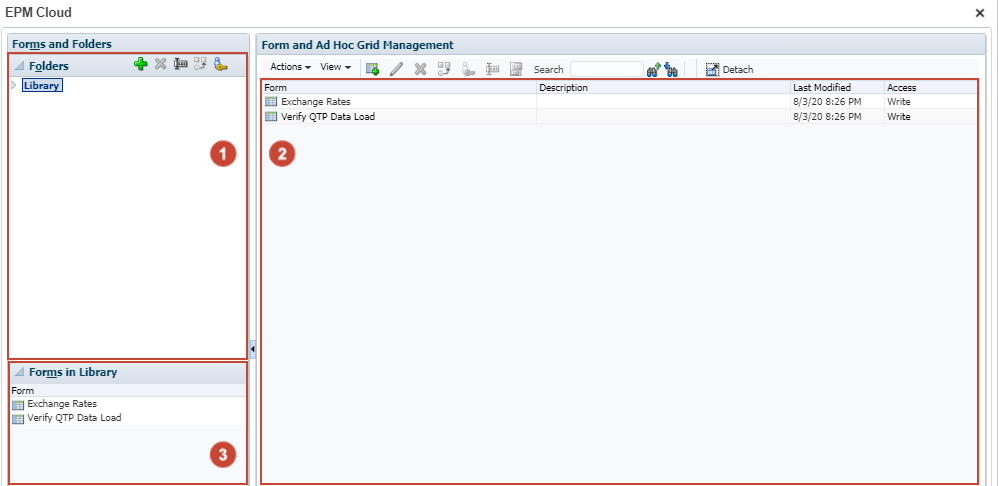
Form folders
 are in the left pane. Forms are listed in the
  content area and
  bottom left pane.
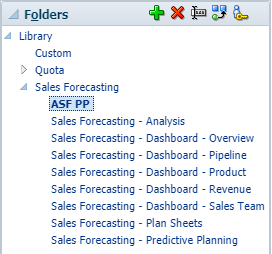
 - View predefined form folders. In Folders, click
 (Expand) next to Library.
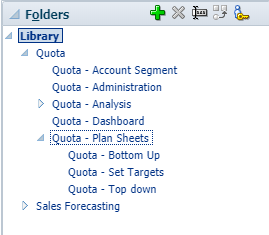
- Click (Expand) next to Quota.
- Click (Expand) next to Quota - Plan Sheets.
Folders and subfolders for Quota Planning are displayed.
- Under Quota-Plan Sheet, click Quota - Set Targets.
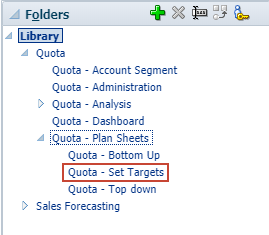
A list of forms in the Quota - Set Targets folder is displayed in the content pane and bottom left pane.

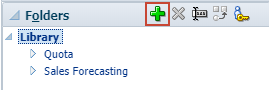
- In Folders, collapse folders. Click
 (Collapse) next to Quota - Plan Sheets, then Quota.
 - Click Library.
- Click
 (Create).
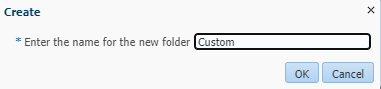
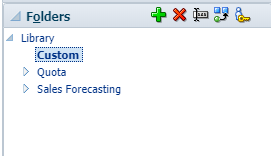
- In Create, enter Custom as the name for the new folder, and click OK.
The Custom form folder is listed in the Folders pane.
- Create a folder under Custom. With Custom selected, click (Create).
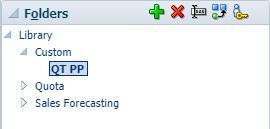
- In Create, enter QT PP as the name for the new folder, and click OK.
The QT PP form folder is listed under the Custom folder.
Moving form folders
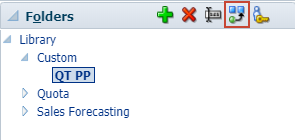
- With QT PP selected in the Folders pane, click
 (Move).
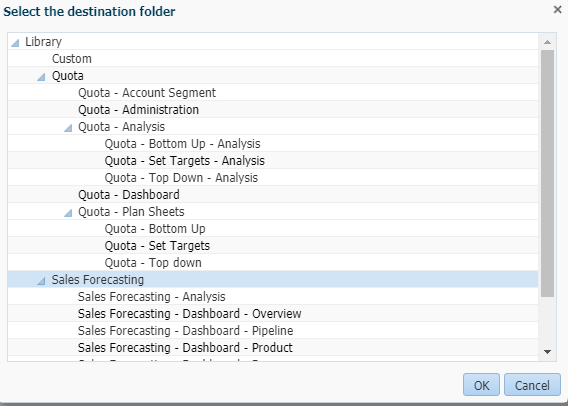
- In Select the destination folder, select Sales Forecasting and click OK.
- In Folders, click (Expand) next to Sales Forecasting.
The QT PP folder was moved under Sales Forecasting.
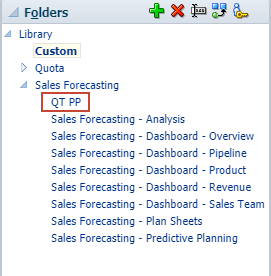
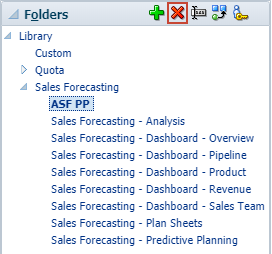
- Click QT PP.
Renaming form folders
- With QT PP selected, click
 (Rename).
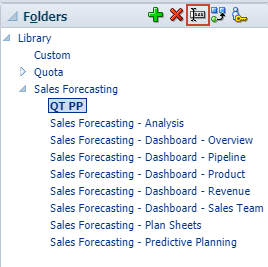
- In Rename, change the folder name to ASF PP, and click OK.
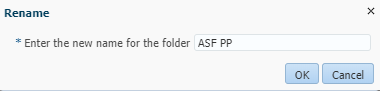
QT PP was renamed to ASF PP.
Deleting form folders
- With ASF PP selected, click
 (Delete).
- In the Delete message, click OK.

The ASF PP folder was permanently removed.

- Click (Collapse) next to Sales Forecasting.
- In Folders, select Custom.
Creating forms
- Make sure that the Custom folder is selected.
- In the content area, click
 (Create).
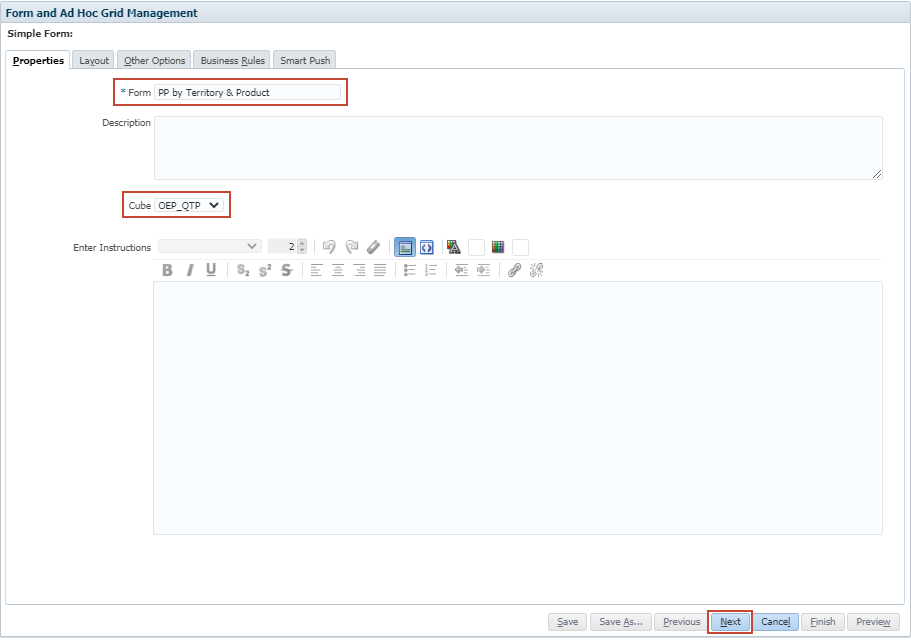
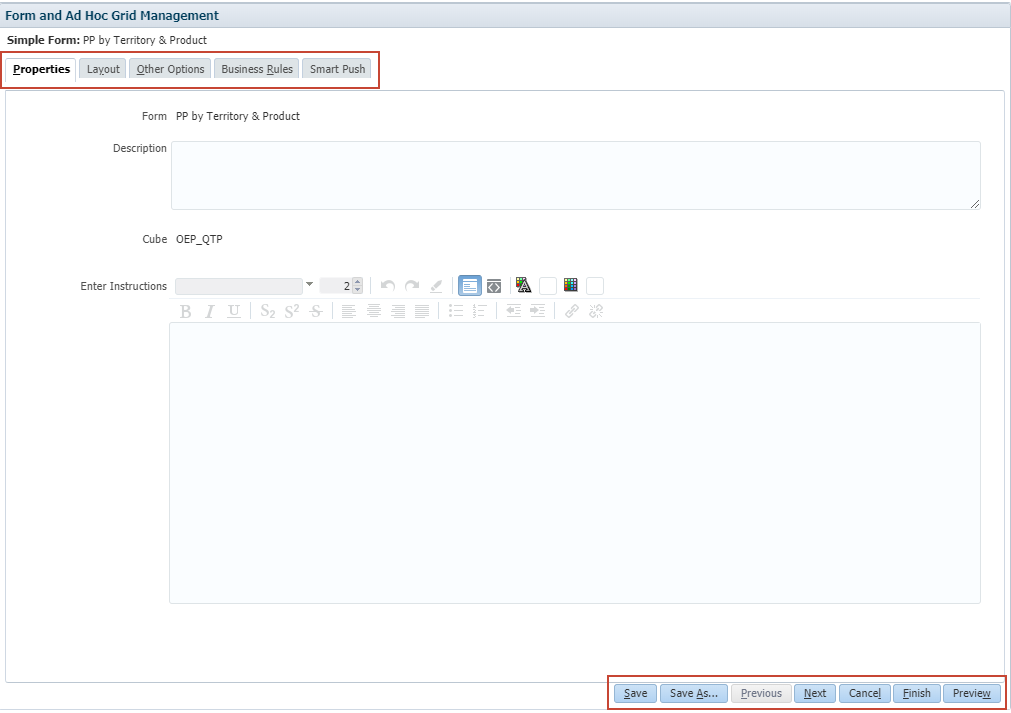
- On Properties, enter PP by Territory & Product.
You can enter a name of up to 80 characters. Descriptions of up to 255 characters are optional.
- For Cube, select OEP_QTP.
- Review your selections and click Next.
- Before you can save the form, you must move dimensions to the row and column sections of the layout:
- Click
 next to Territory, then drag and drop it to the Rows.
 - Click next to Years, then drag and drop it to the Columns.
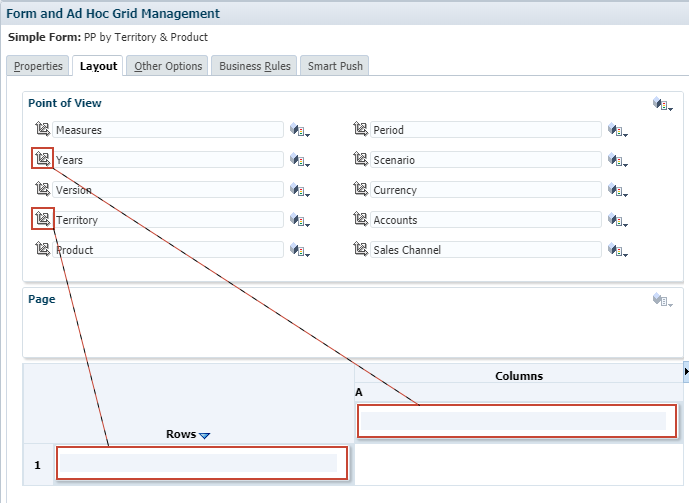
- Click
- After moving dimensions to the rows and columns, click Finish.
The PP by Territory & Product form is now listed under the Custom folder.
Editing forms
You can move, rename, or delete forms using the Actions menu or the icons on the top of the content area.
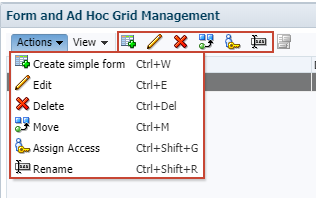
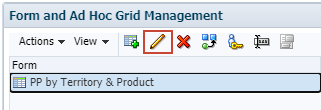
Select PP by Territory & Product, and click ![]() (Edit).
(Edit).
You navigate by clicking the tabs at the top of the page or the buttons at the bottom of the page.
You can also:
- Click
 (Save) to save the form and continue editing.
 - Click
 (Save As) to save a duplicate copy of the form under a new name.
 - Click
 (Cancel) to ignore your changes and close the form.
 - Click
 (Finish) to save your changes and close the form.
 - Click
 (Preview) to preview your form design.
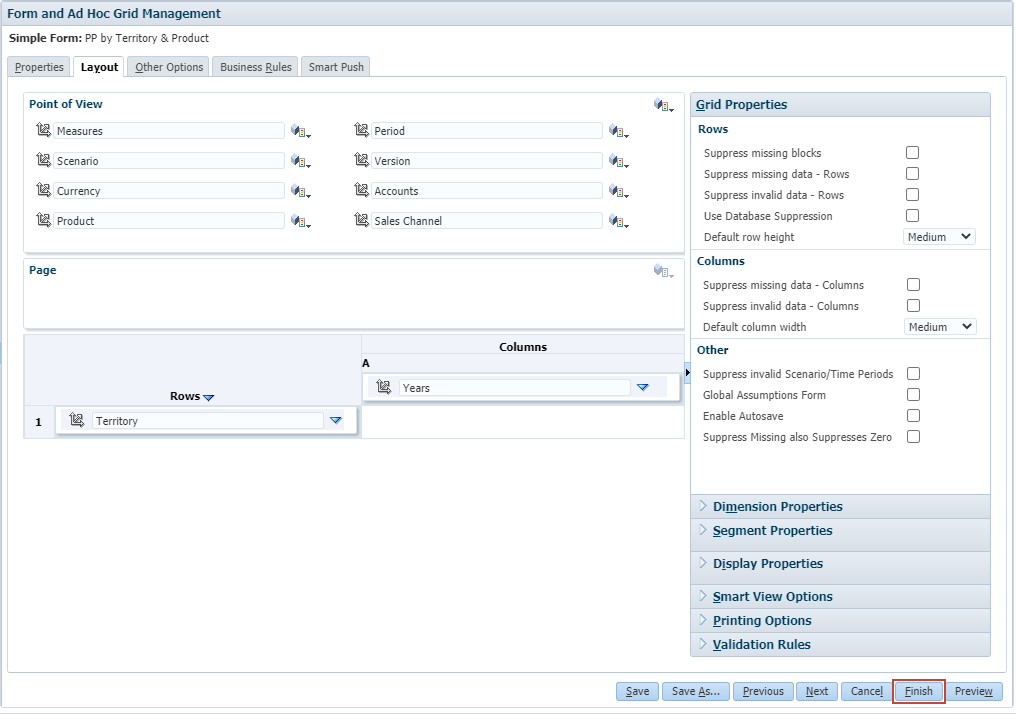
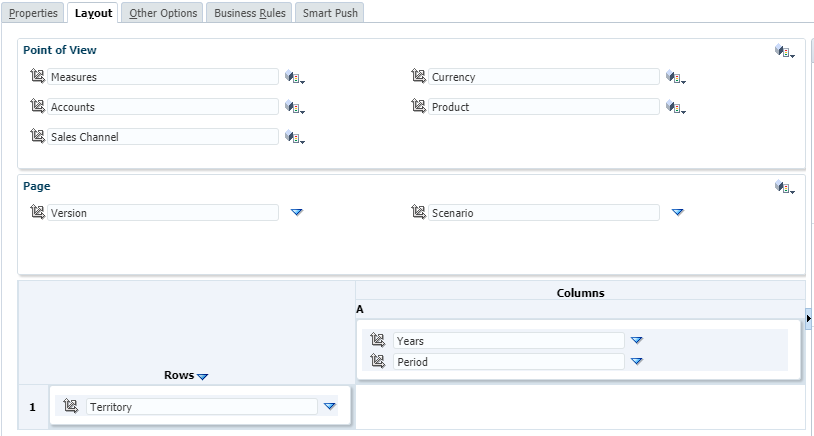
Defining the form layout
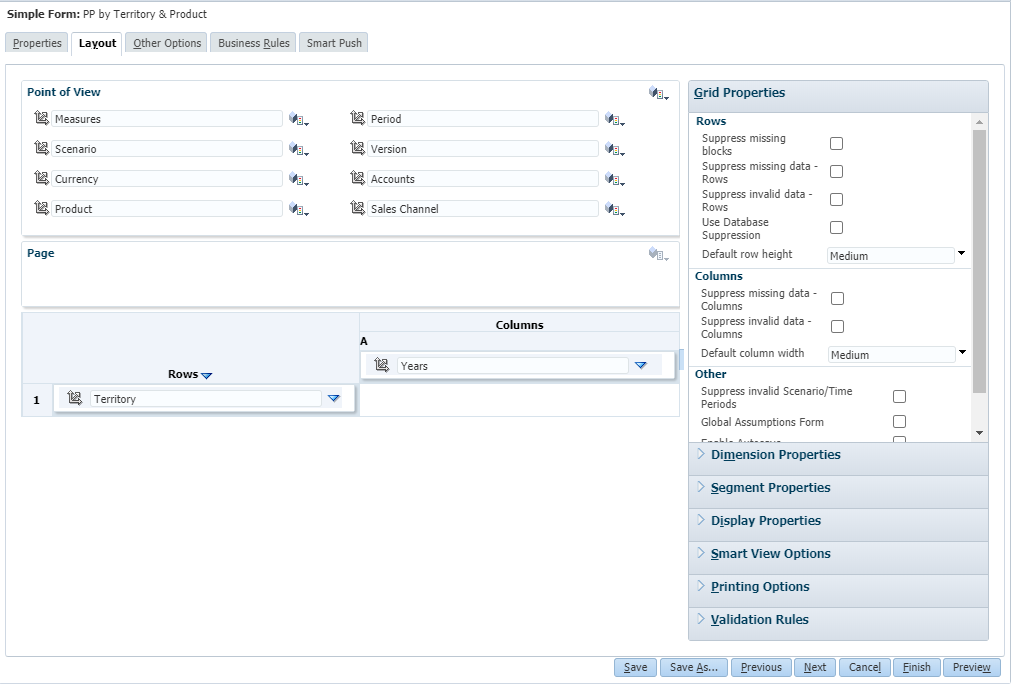
With the PP by Territory & Product form open, click  (Next) to go to the Layout tab.
You can select dimensions and members for the page axis and point of view (POV). POV dimensions and members must be valid for the form cube, and not assigned to a page, column, or row axis.
You can adjust the pane size vertically by clicking and dragging the section dividers. You can hide and restore panes by clicking ![]()
![]() (Collapse Pane and Restore Pane).
(Collapse Pane and Restore Pane).
Moving dimensions within the layout
You initially moved the Territory and Years dimensions to the rows and columns of the form layout. In this section, you move the rest of the dimensions based on this example:
- Click, drag, and drop dimensions to sections in the form layout:
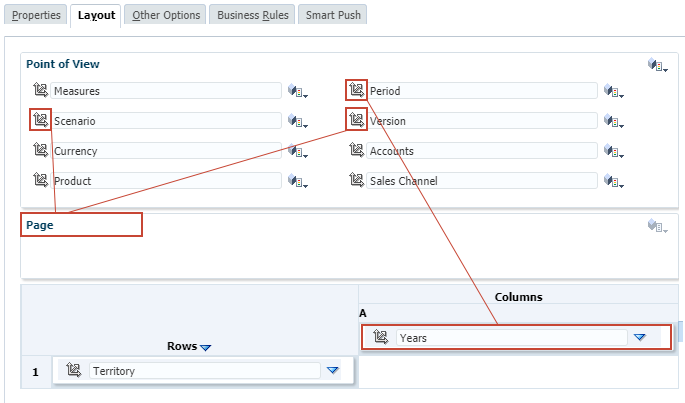
- Click next to Period, then drag and drop it to the Columns.
- Click next to Version, then drag and drop it to the Page.
- Click next to Scenario, then drag and drop it to the Page.
- Click
- Verify your selections and click (Save).
Selecting members for each section
- Open Member Selector. In the top right of Point of View, click
(Select Member).

Alternatively, you can click
 (Select Member) for each dimension.
 - In Member Selection, click the Dimensions dropdown list.
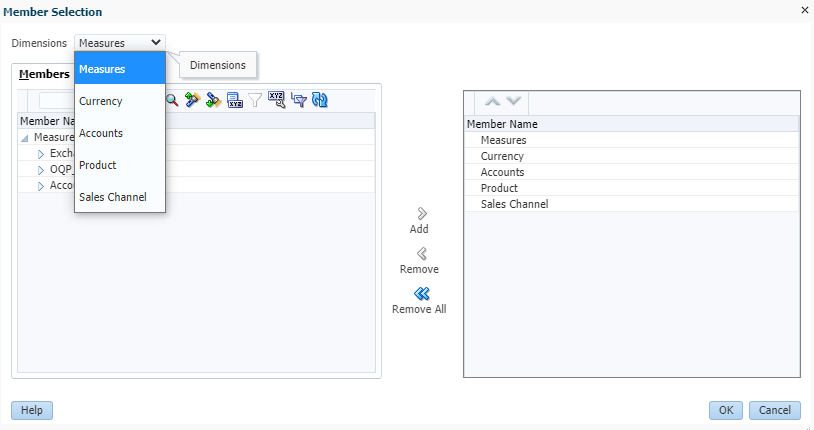
Dimensions in the Point of View are listed in the Dimensions dropdown list.
- Accept the initial selection, Measures.
- In the Search box, type Unit of Measures and press Enter.
The Member Name listing locates and selects Unit of Measures.
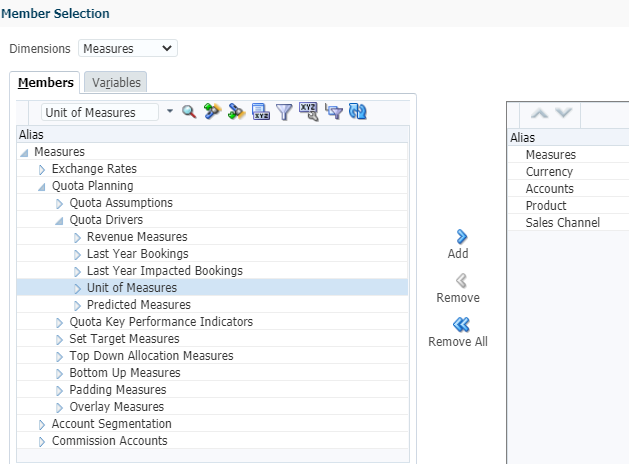
To display aliases in Member Selector, click
 (Display Properties) and select Alias.
 - With Unit of Measures selected, click
 (Add).
The member is added to the right, where selected members are listed.
- Clear the contents of the Search box.
- From the Dimensions dropdown list, select Currency.
- Click Variables.
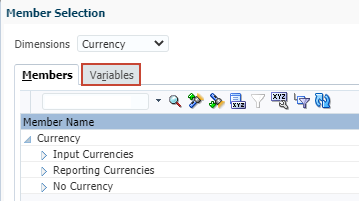
- In Variables, under User Variables, select OEP_Currency and click (Add).
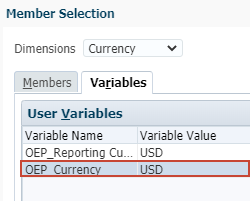
The user variable OEP_Currency is added to the selected members list.
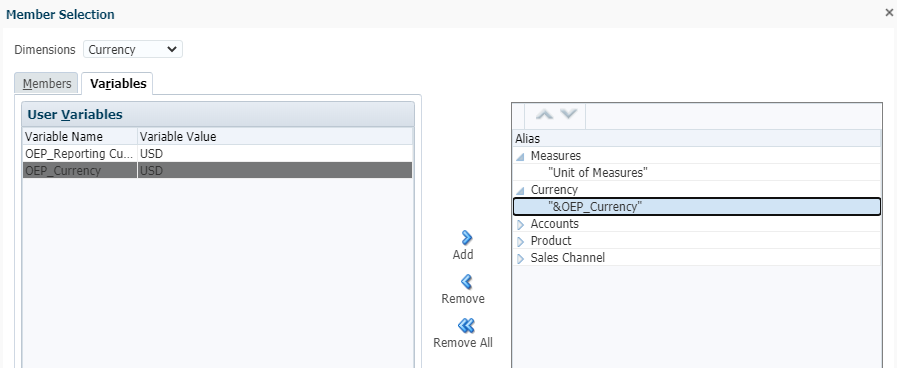
Click
(Expand) next to the member name to display member selections. - From the Dimensions dropdown list, select Accounts.
- Click Members.
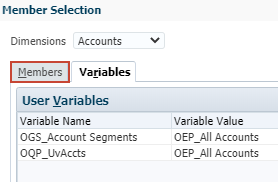
- In Member Name, under Accounts, select Total Accounts and click (Add).
- From the Dimensions dropdown list, select Product.
- In Member Name, under Accounts, select Total Product and click (Add).
- From the Dimensions dropdown list, select Sales Channel.
- In Member Name, under Accounts, select Total Sales Channel and click (Add).
- Click OK.
Members were selected for the dimensions in the Point of View.

- Click (Save).
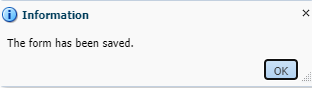
- In the Information message, click OK.
- Next, for the Page section, use (Select Member) to select members for Version and Scenario based on this example, then click OK.
Both dimensions use a variable. Select the OEP_Version substitution variable for Version, and OEP_Scenario user variable for Scenario.

- Click (Save).
- In the Information message, click OK.
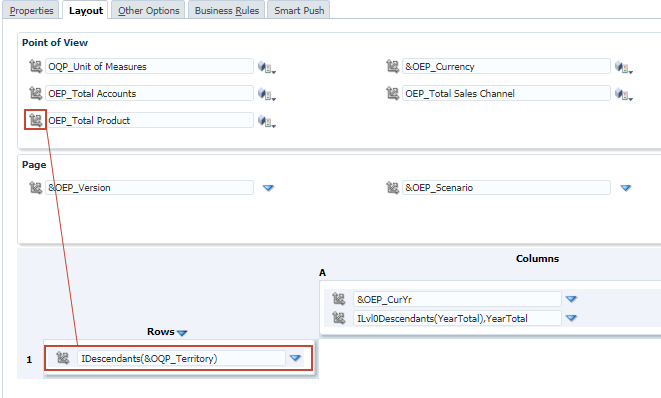
- In Rows, for Territory, click
 (Edit) and then select Edit.

- In Member Selection, click Variables.
- In Variables, under User Variables, select OQP_Territory then click
 (Function Selector).
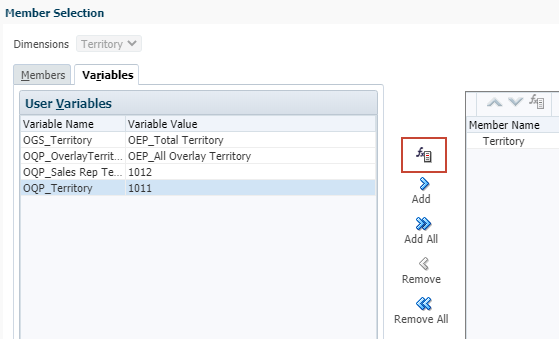
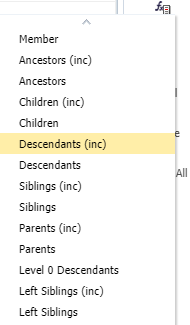
- Select Descendants (inc).
If Territory is not expanded in the selected members list, click
(Expand).IDescendants("&OQP_Territory") is added to the selected members list.
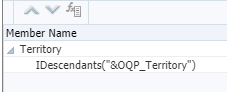
- Click OK.
- In Columns, for Years, click (Edit) and then select Edit.
- In Member Selection, click Variables.
- In Variables, under Substitution Variables, select OEP_CurYr, and then click (Add).
- Click OK.
- In Columns, for Period, click (Edit) and then select Edit.
- In Member Name, select YearTotal.
- Click (Function Selector) and select Level 0 Descendants.
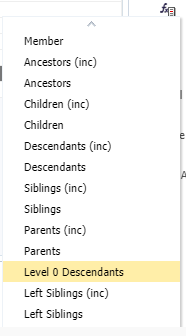
- Add YearTotal. Make sure YearTotal is selected and click (Add).
- Click OK.
- Modify the members selected for Measures to include its children. For Measure, modify the member name in the textbox to: Children("OQP_Unit of Measures").

- Click (Save).
- In the Information message, click OK.
- At the bottom of the page, click (Preview).
The form preview displays how the dimensions are displayed on the form.
If you selected to show aliases in the Display Properties when selecting members, your preview may display aliases instead of member names as well.
- Click
 to close the preview.
Setting segment properties
Segment properties apply to rows and columns.
- Display segment properties for rows. Click the row number.
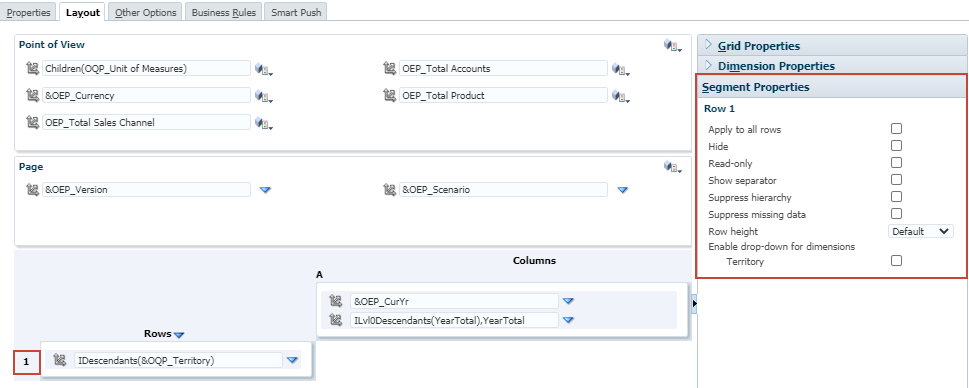
- Review the segment properties. Do not make any changes.
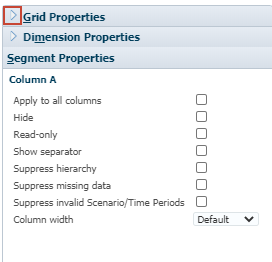
- Display segment properties for columns. Click the column letter.
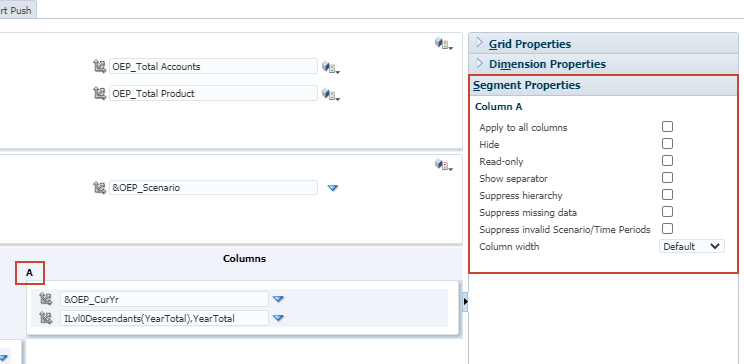
- Review the segment properties. Do not make any changes.
Setting form grid properties
- Click (Expand) next to Grid Properties.
- Review the grid properties.
Form grid properties define how rows and columns display.

Setting dimension properties
- In Point of View, click Measures.
Dimension properties for Measures are displayed.
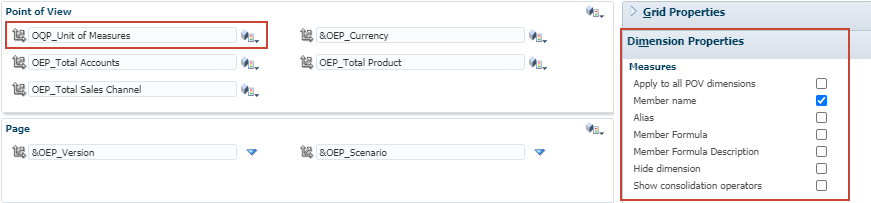
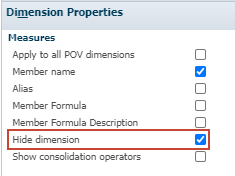
- In Dimension Properties for Measures, select Hide dimension.
You can hide dimensions with values that are constant and do not need to change within the form.
- Repeat steps 1 and 2 and select Hide dimension for the following dimensions:
- Accounts
- Sales Channel
- Version
- Scenario
- Click (Save).
- In the Information message, click OK.
- In Point of View, click Currency.
Dimension properties for Currency are displayed.
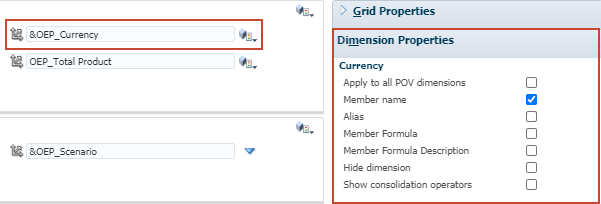
- In Dimension Properties for Currency, clear Member name. and select Alias.
- Repeat step 7 to clear Member name and select Alias for the following dimensions:
- Product
- Territory

- In Dimension Properties, for the following dimensions, verify that Start expanded is selected:
- Territory
- Years
- Period

- Click (Save).
- In the Information message, click OK.
- At the bottom of the page, click (Preview).
The form preview is updated with the changes to the form layout. The dimensions you selected to hide are no longer displayed on the form. Notice that Product and Territory display aliases instead of their member name.
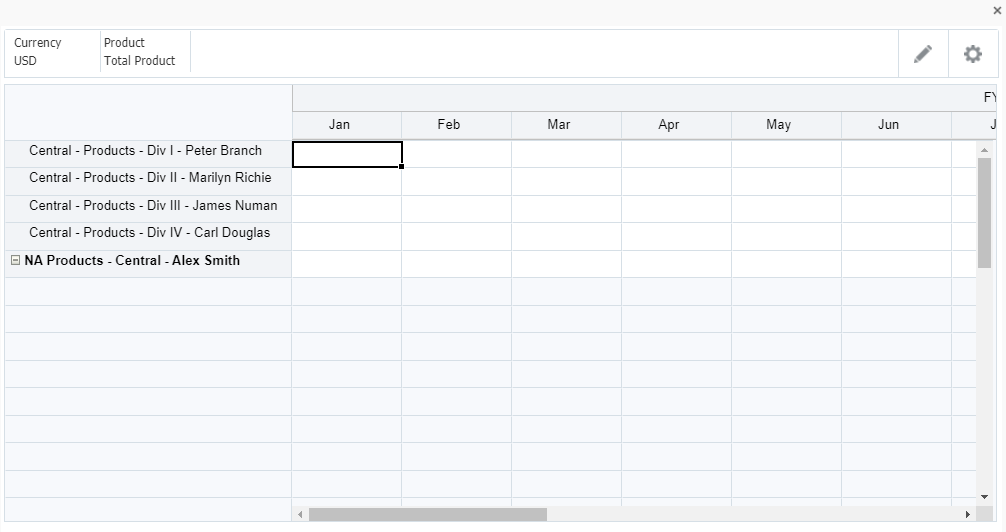
- Click to close the preview.
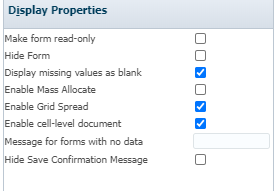
Setting display properties
- Click (Expand) next to Display Properties.
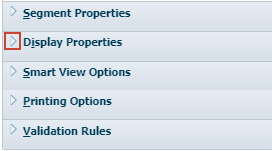
- Review and accept the form's default display properties.
Setting Smart View form options
- Click (Expand) next to Smart View Options.
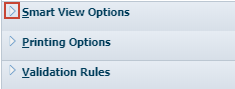
- Review the options available for form display in Oracle Smart View for Office.
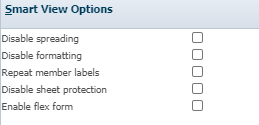
- Select Enable flex form.

Learn more about setting up and working with flex forms by viewing the Planning with Flex Forms in EPM Cloud Planning video tutorial.
- Click (Save).
- In the Information message, click OK.
Setting printing options
- Click (Expand) next to Printing Options.
- Review the printing options available for form, and accept the default selections.

- Click (Next).
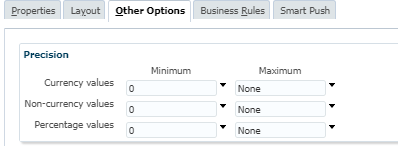
Setting other form options
Setting precision, assigning menus, and enabling dynamic user variables
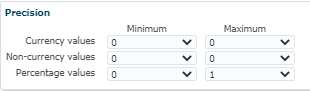
- In Other Options, review the default precision options.
You can control data precision by applying minimum and maximum values for different account types. For example, you can truncate and round the decimal portion of longer numbers. Precision settings affect just value display, not their stored values.
- Set the maximum precision settings based on the following example:
- Review the menus in the application.
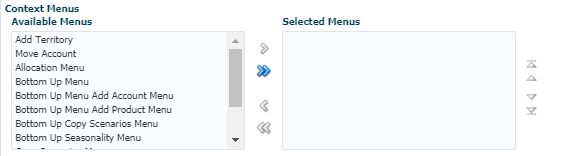
When you associate menus with forms, the menu is added to the form's right-click menu. The context of the right-click is relayed to the next action: the POV and the Page, the member you clicked on, the members to the left (for rows), or above (for columns).
- Click (Expand) next to Dynamic User Variables.

- From the Available User Variables list, select Territory and click
 (Move).
If your administrator set up a form with at least one user variable and enabled dynamic user variables, then you can select and change user variable values directly in the form.
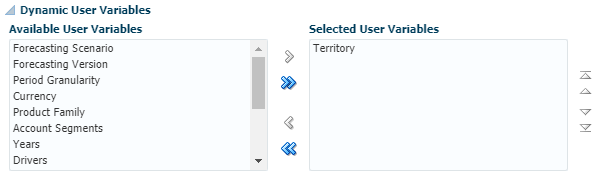
- Select Enable dynamic user variables.

- At the bottom of the page, click (Preview).
The form preview is updated with the changes to the form layout. Territory was added to the POV after enabling dynamic user variables.
- Click to close the preview.
- Click (Save).
- In the Information message, click OK.
- Click (Next).
Reviewing business rule options
- Review the business rules you can associate with the form.
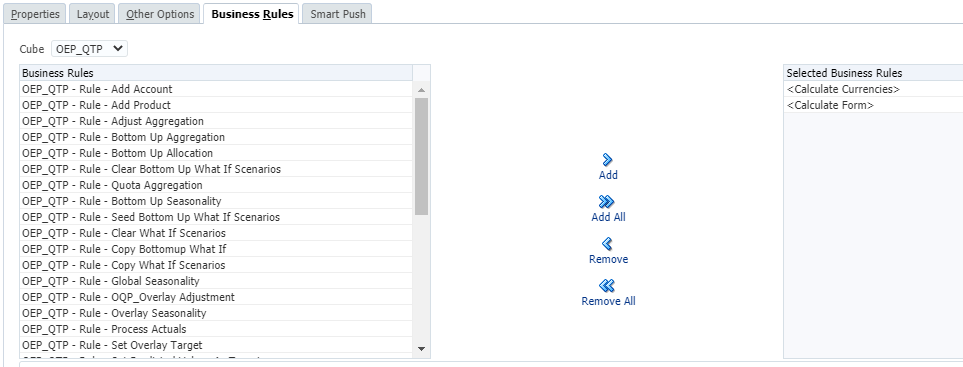
- Click
 (Remove All).
 - Click (Next).
Reviewing Smart Push options
- Review the Smart Push options for forms.
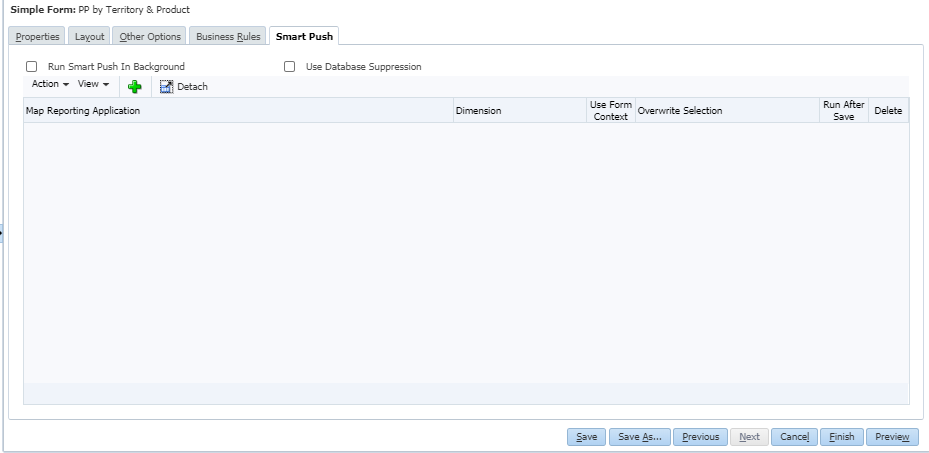
With Smart Push, you can move data between source cubes and reporting cubes using a UI-driven data mapping process and data-transfer functionality that does not require scripting.
For video tutorials on Smart Push and creating data maps, visit docs.oracle.com.
- Save your changes. Click (Finish).
- Close Form and Ad Hoc Grid Management. Click (Close.)
Reviewing your form design
Opening your form
You open forms from the Data card in the Default navigation flow. You can create a navigation flow that opens forms and dashboards. Dashboards allow you to display information graphically or to display several forms simultaneously.
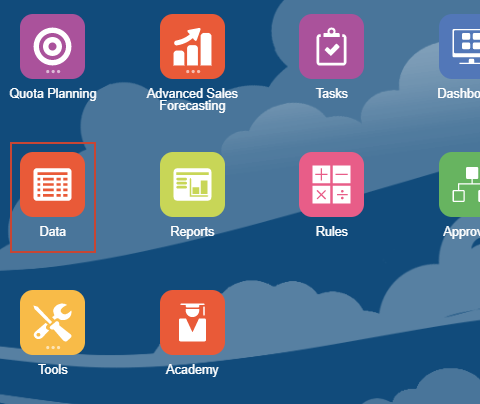
- If not already on the home page, click (Home).
- Click Data.
- In Data Entry, expand Custom.
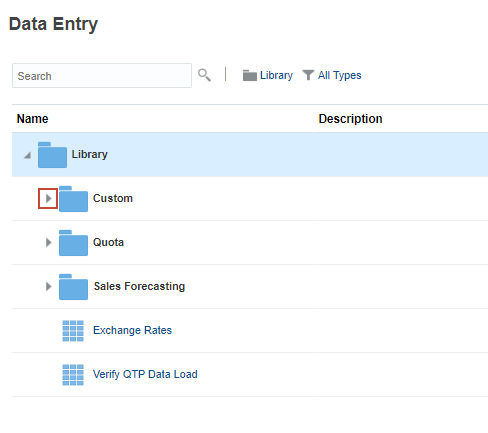
The form you created is listed under Custom.

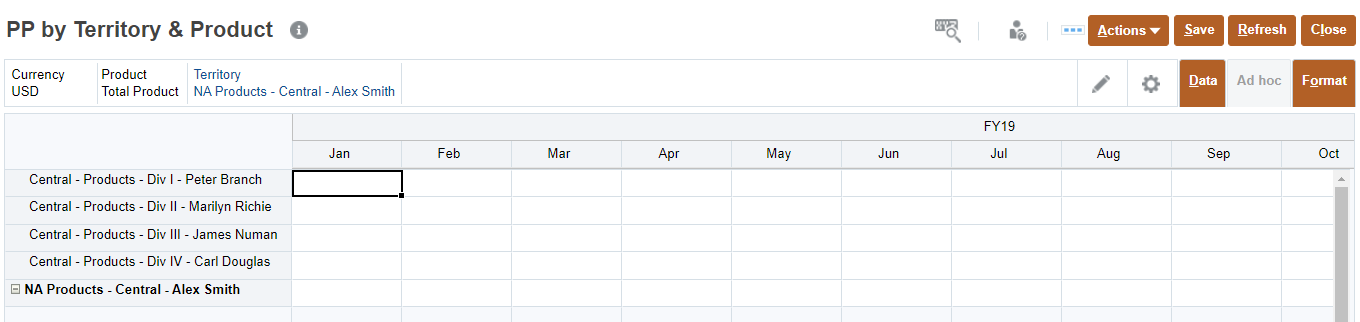
- Click PP by Territory & Product to open the form.
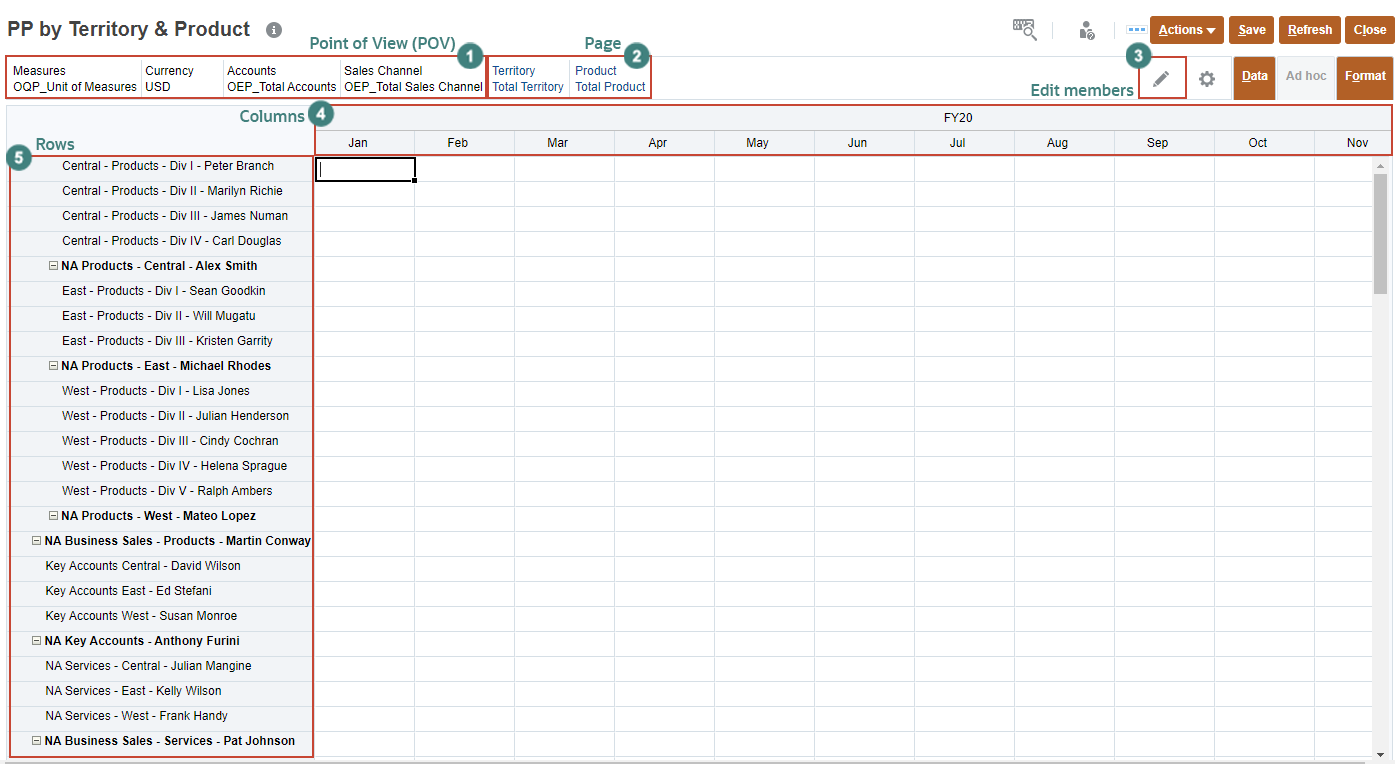
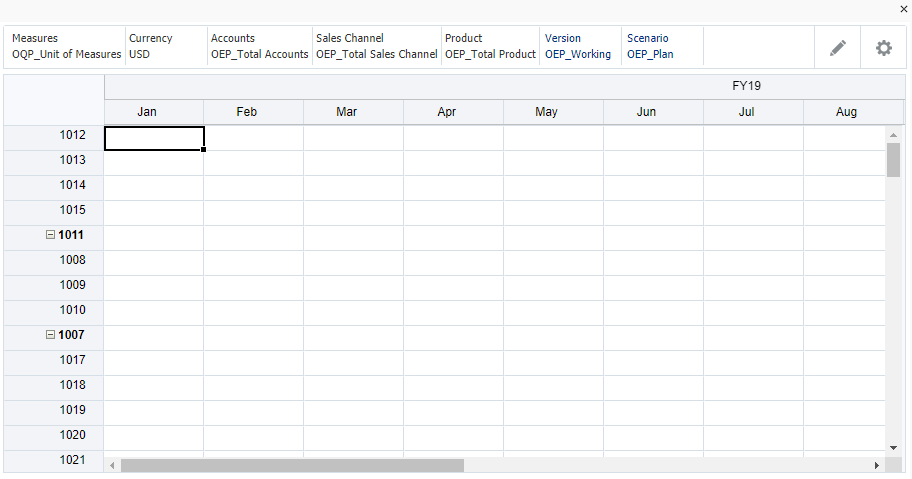
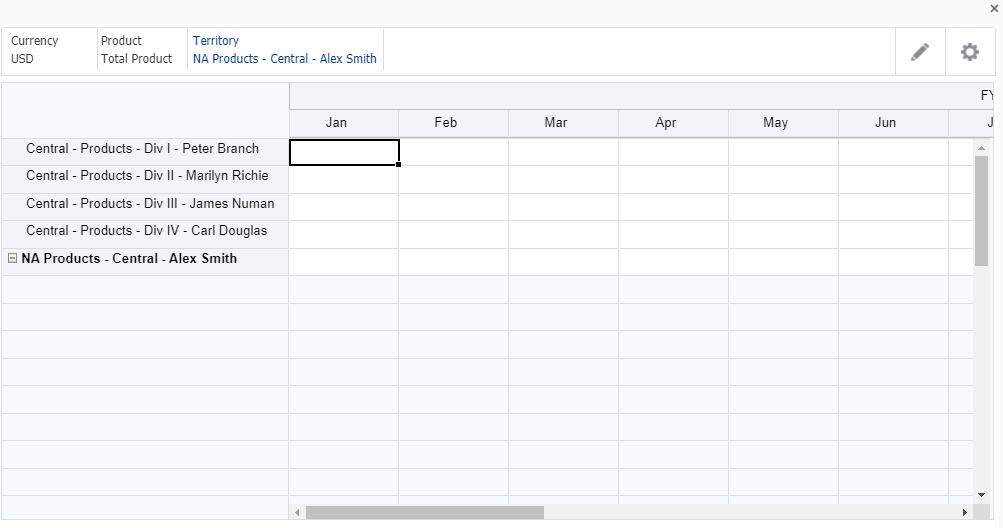
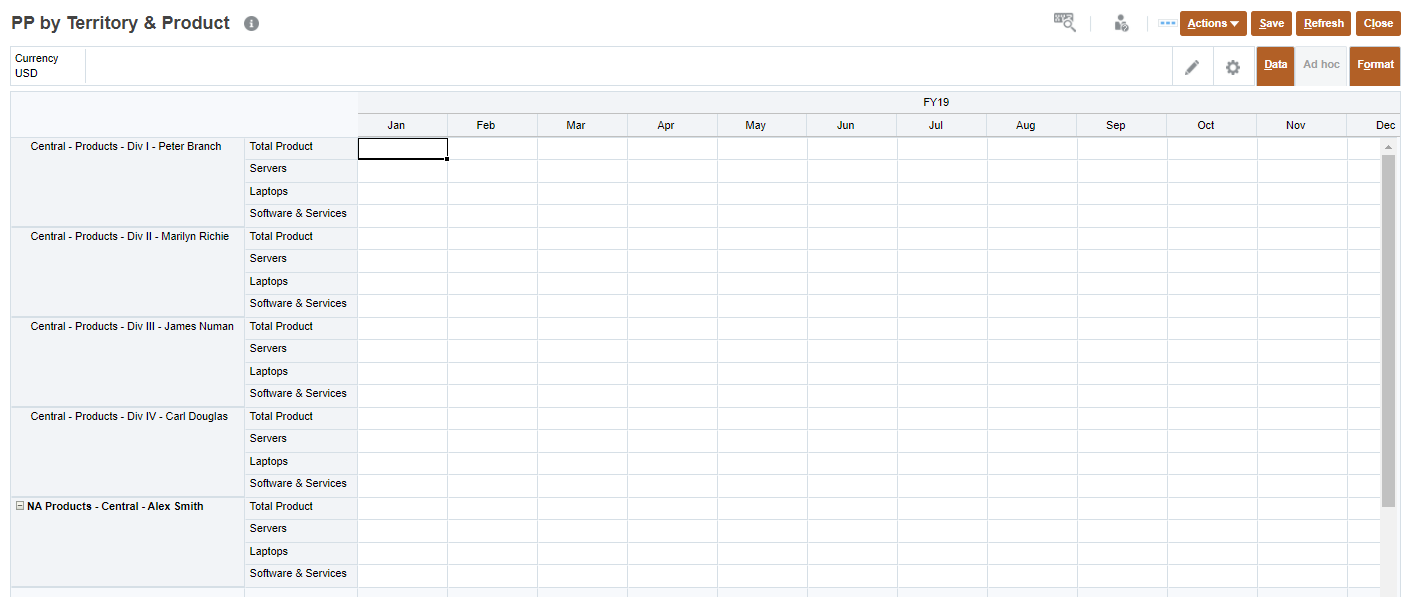
In the PP by Territory & Product form, notice the following:
- Point of View: You cannot change member selections for Currency and Product.
- Column: Year and Period are displayed and expanded in the grid.
- Row: Territory is displayed in the grid.
- Page: You can select members for Territory because you enabled it as a dynamic user variable in the form.
In order to plan by Territory and Product, we need to make additional changes to the form.
- Click
 (Close).
Modifying your form
- Click (Navigator), then under Create and Manage, click Forms.
- In Folders, click (Expand) next to Library.
- Click Custom.
- In the content area, select PP by Territory & Product, and click
 (Edit).
 - With the PP by Territory & Product form open, click (Next) to go to the Layout tab.
- Click next to Product, then drag and drop it to the Rows.
- In Rows, for Product, click (Edit) and then select Edit.
- Under Product, expand Total Product.
To display aliases in Member Selector, click
(Display Properties) and select Alias. - Select All Product.
- Click (Function Selector), and select Children.
Product selected members now include Total Product and Children("All Product"). If you are not showing aliases in Member Selector, both members will include the OEP prefix in their member name.
- Click OK to close Member Selection.
- Click (Save).
- Click (Next) to go to Other Options.
- Clear Enable dynamic user variables.

- Click (Finish).
- Click (Close) to close Form and Ad Hoc Grid Management.
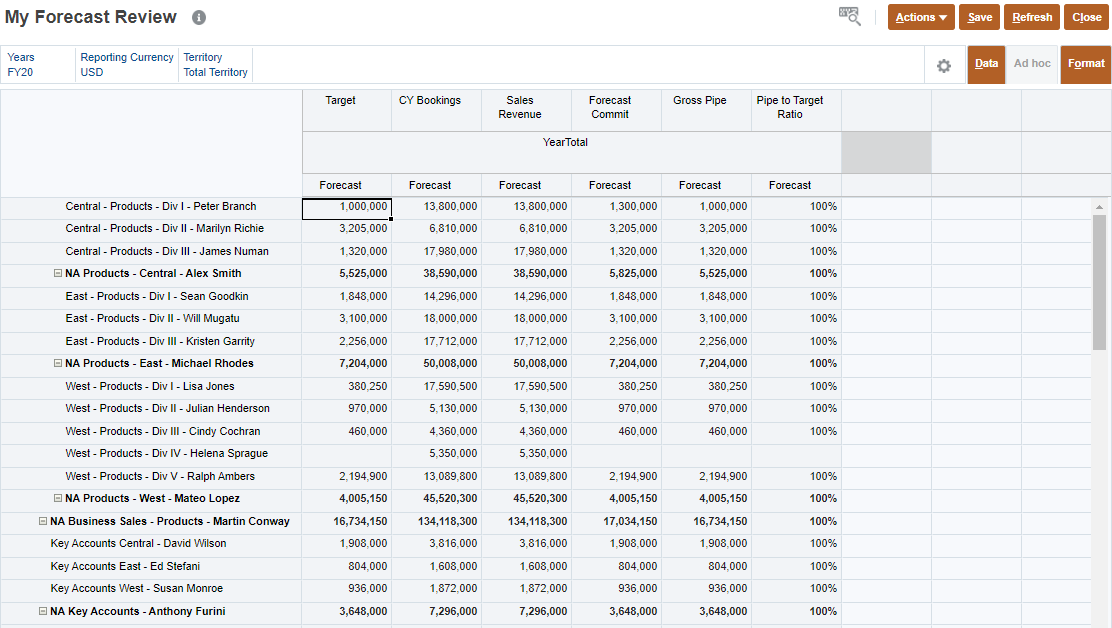
Verifying your updated form design
- In Data Entry, make sure that Custom under Library is expanded.
- Click PP by Territory & Product to open the form.
- Review the updated form.
- Point of View: You cannot change member selection, USD, for Currency.
- Column: Year and Period are displayed and expanded in the grid.
- Row: Territory and Product are displayed in the grid.
- Page: There are no dimensions displayed in the Page section of the form.