
 Print
PrintBefore you begin
This 30 minute hands-on tutorial shows you how to view, update and add tasks in Task Manager. The sections build on each other and should be completed sequentially.
Background
Task Manager helps you define, execute, and report on the interdependent activities of a business process. It provides centralized monitoring of all tasks and provides a visible, automated, repeatable system of record for running a business process.
You can:
- Define the tasks and schedule to ensure the most efficient task flow.
- Automate the business process, track status, and provide notifications and alerts.
- Notify users by e-mail for delinquencies, due dates, status changes.
- Monitor business process status from a dashboard.
- Analyze the effectiveness of the business process.
What do you need?
An EPM Cloud Service instance allows you to deploy and use one of the supported business processes. To deploy another business process, you must request another EPM Enterprise Cloud Service instance or remove the current business process.
- Have Service Administrator access to EPM Enterprise Cloud Service. The instance should not have a business process created.
- Upload and import this snapshot into your Financial Consolidation and Close instance.
For more information on uploading and importing migration snapshots, refer to the Administering Migration for Oracle Enterprise Performance Management Cloud documentation.
Viewing task lists
- On the Home page, select 2020, Apr. A summary of tasks status for the selected period is displayed.

- In the tasks status summary, click Open to open the Worklist.
- The Worklist displays task with Open status for all users. Click the My Tasks icon to filter the list to task assigned to you.

- You have no current open tasks, so the list is empty. Click the Schedule Tasks vertical tab. The Schedule Tasks list provides advanced filtering options. To change the the filter for Schedule, click Schedule in the Filter area. In the Selected list, click 2020 03 March Monthly Close to remove it, then click 2020 04 April Monthly Close to add it to the Selected list.

- Click anywhere off of the Schedule filter list to return to the Schedule Tasks page. In the task list, expand the 01 Consolidation Process Kick Off parent task.
Parent tasks group a set of related tasks. The start date data of the parent task is the earliest start date of its child tasks, and the end date for the parent task is the latest end date of its child tasks.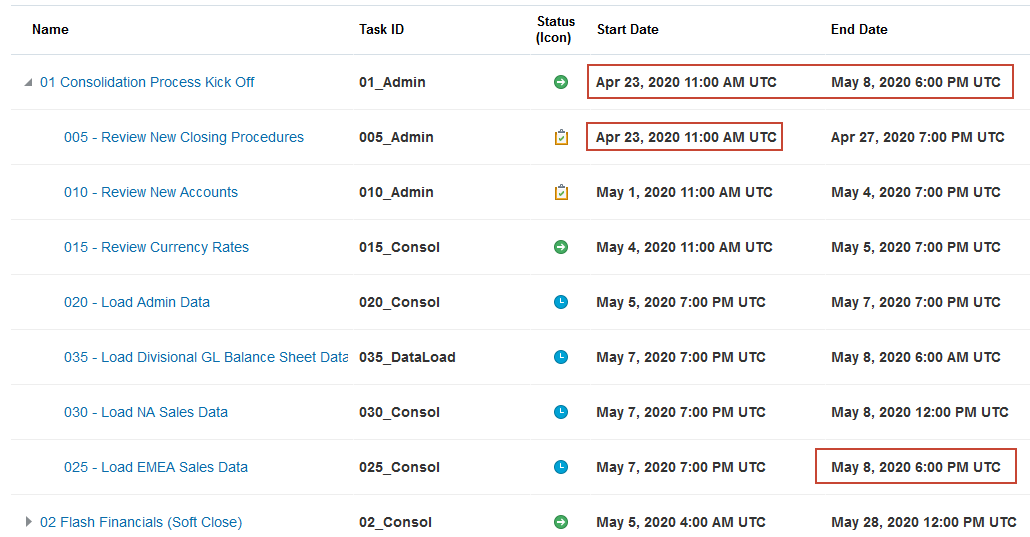
- To view predecessor and successor relationships between tasks, click the View icon to the right of the list, and then select Gantt Chart.

- In Gantt view, tasks with Closed status display in blue, Open tasks in green, and Pending tasks in orange. Pending tasks cannot open until their predecessor task closes, even if their start date is reached. In the example, Review Currency Rates is a predecessor task for Load Admin Data, and Load Admin Data in turn is a predecessor for the tasks for loading balance sheet and sales data.

- To return to the list view, click the View icon to the right of the Gantt chart, and then select List View.

Updating tasks
- In the task list, under the 01 Consolidation Process Kick Off parent task, click 015 - Review Currency Rates.

- The tasks dialog box for the Review Currency Rates tasks is opened. It is an integration task, so the data form needed to perform the task is embedded in the dialog box. Click the Properties tab to open the Properties drawer.
The Properties drawer displays basic task information, such as the start and end data assigned to the task.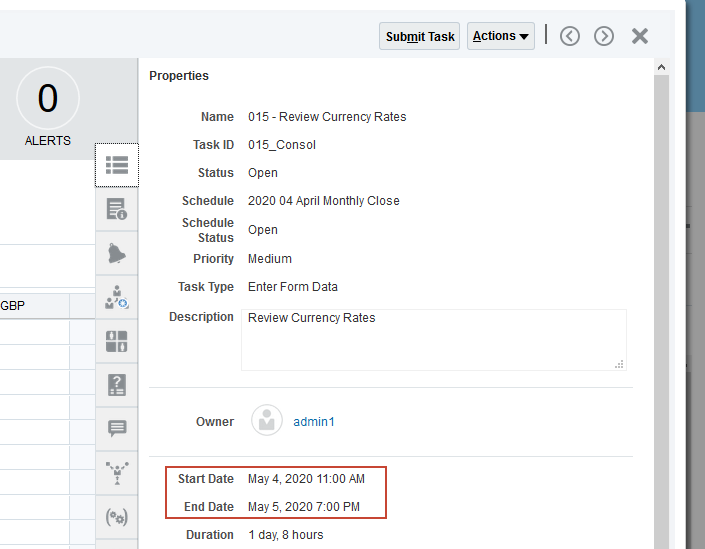
- Click the Workflow tab to display the user workflow assignments. User1 is the task assignee. There is no approver assigned to the task, so the task status will change to Closed when it is submitted.

- Select the Comments tab. Enter the text 'All rates are current' in the Comments text box and click Post.

- Click the Comments tab again to close the Comments drawer.
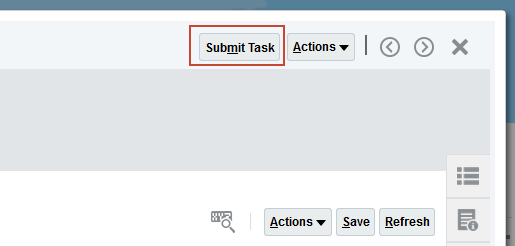
- In the toolbar in the upper right of the dialog box, click Submit Task. Administrators can intervene in the close process whenever needed to submit and approve tasks.
- At the confirmation prompt, click Yes.

- Click the History tab. To provide audit capability, a history is kept of all actions performed on the task.

- In the toolbar in the upper right of the dialog box, click X to close the task and return to the task list.
The task status has changed to Closed, and the status for its successor task, 020 -Load Admin Data, has changed from Pending to Open.
- Click
 (Home) to go to the home page.
Viewing dashboards
- On the Home page, click Dashboards, then click Task Overview.

- You can click in the charts to drill to detail. Click the green Complete bar in the Schedule Tasks chart to view the completed tasks.

- Notice that the Review Currency Rates tasks you submitted is listed. You can open tasks from the list. Click 015 - Review Currency Rates to open the task.

- Click X in the upper right corner to close the task, then click OK to close the Tasks list.
- You can use the POV settings to change the Year and Period. Select Mar for Period. The information for March is displayed.

- Click the Task Manager Overview vertical tab.
The default view for the Task Manager Overview dashboard is the number of tasks for each priority level.
- You can use the View By list to change the view. In the View By list, select Task Type.
The number of tasks for each integration task type is displayed.
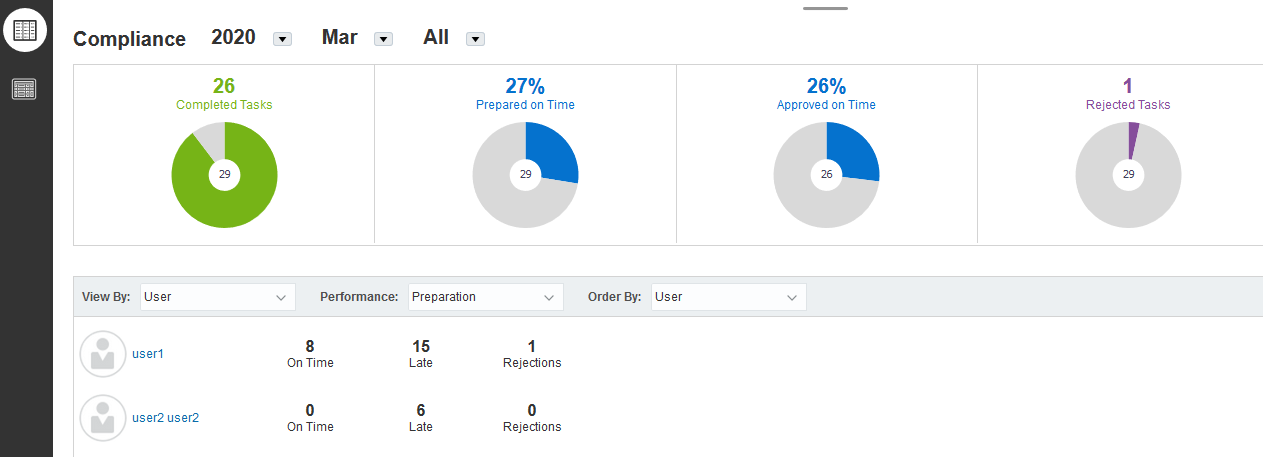
- Click Compliance Overview.

- The Compliance dashboard gives an overview of close process efficiency.
- Click (Home) to go to the home page.
Viewing task manager reports
- On the Home page, click Reports.

- Click Task Manager Reports.

- In the report list, select Early Tasks in the Name column, and HTML in the Output Format column.

- Click Generate.
- In the Schedule list select 2020 03 March Monthly Close, and in the Period list select Mar.

- Click Generate.
- When prompted, save the compressed file to a location, navigate to the location and uncompress the file. Click Early Tasks.html to view the report in your browser. Close the report when you finish reviewing it.

- In Financial Consolidation and Close, click Close to close the Generate Report dialog box.
- Click (Home) to go to the home page.
Adding tasks to schedules
In this section, you add a task for reviewing changes to entities to the close schedule for April 2020, and then add it as a child task to the 01 Consolidation Kick Off parent. You must have the Service Administrator or Power User role to add tasks.
- On the Home page, click Tasks.

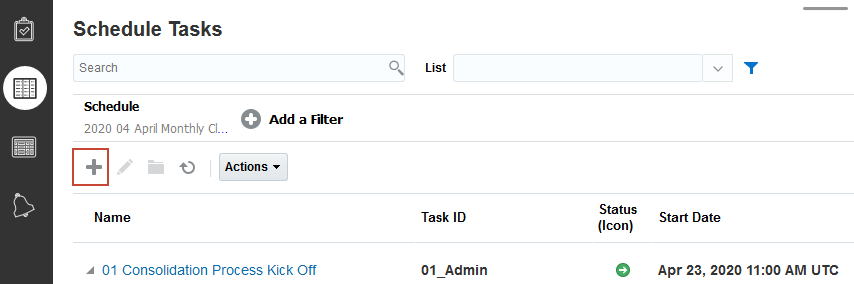
- Click the Schedule Tasks vertical tab and verify that the current schedule is 2020 04 April Monthly Close. Click
 (New).
- Enter 011 - Review New Entities for Task Name and 011_Admin for Task ID.

- Make the following additional selection on the Properties tab:
- Organizational Unit: North America
- Task Type: Basic Task
- Priority: High

- Click the Instructions tab and enter the following instructions: Verify that no new business units have been added and that no restructuring has taken place.

- Click the Workflow tab. Leave yourself as the assignee. Clich the Calendar icon for Starts and set the start date to one day prior to today's date, Set Ends to one day after today's date.

- Select the Questions tab and click to add a question.

- Make the following entries in the New Question dialog box:
- Question: Did the review of the organization structure include all regions?
- Type: Yes/No
- Role: Assignee
- Required: Yes

- Click OK. The question is added to the Questions tab.

- Click the Predecessors tab, and click + (New).

- In the list of tasks, select 0005 - Review New Closing Procedures, then click OK.

- Click Save and Close to return to the Schedule Tasks List.

- Click the ellipsis in the row for the 01 Consolidation Process Kickoff parent, and select Edit.

- In the Edit Task dialog box select the Children tab. In the Available Tasks list, select 011-Review New Entities, and click Add to move it to the Selected Tasks list.

- Click Save and Close.
- 011- Review New Entities is added as a child of 01 Consolidation Process Kickoff, with Open status. Click 011-Review New Entities to open the task.

- The Tasks dialog box is displayed, with the instructions you entered. Try to submit the task by clicking Submit Task.

- An error message is displayed. You made the question you added to the task required, so it must be answered before the task can be submitted. Click Close, and the click the Questions tab in the right side panel.

- In the Questions tab, select Yes in the answer list.

- Click Submit Task. Click Yes at the confirmation prompt. Click X in the upper right to close the Task dialog box and return to the Schedule Tasks list.
The task status is changed to Closed.