 Design a Data Model for an Oracle APEX App on Exadata Express Cloud
 Before You Begin
This is the first tutorial in the Building an Oracle Application Express App on Oracle Database Exadata Express Cloud Service series. Perform each of these tutorials sequentially as there is a dependency to complete one before starting the next one.
- Design a Data Model for an Oracle APEX App on Oracle Exadata Express Cloud
- Develop an Oracle APEX App on Oracle Exadata Express Cloud
- Deploy an Oracle APEX App on Oracle Exadata Express Cloud
In this first tutorial, you will design a data model. It takes approximately 15 minutes to complete.
Background
Oracle Application Express is a low code, rapid web application development tool. It enables you to efficiently develop and maintain beautiful, responsive and database-driven applications using only your web browser.
What Do You Need?
- A desktop or laptop computer running Microsoft Windows 7, Apple MacOS 10.9 or later, or Oracle Linux and a web browser. Oracle Application Express supports the current and prior major release of Google Chrome, Mozilla Firefox, Apple Safari, Microsoft Internet Explorer and Microsoft Edge.
- An Oracle Exadata Express Cloud Service account with two service instances. You will develop an app on one instance and deploy it on the second instance of the service.
 Install
Quick SQL
Install
Quick SQL
You will use Quick SQL to design a data model. Quick SQL is a packaged app available with Oracle Application Express. To install Quick SQL, access your Exadata Express Cloud Service instance.
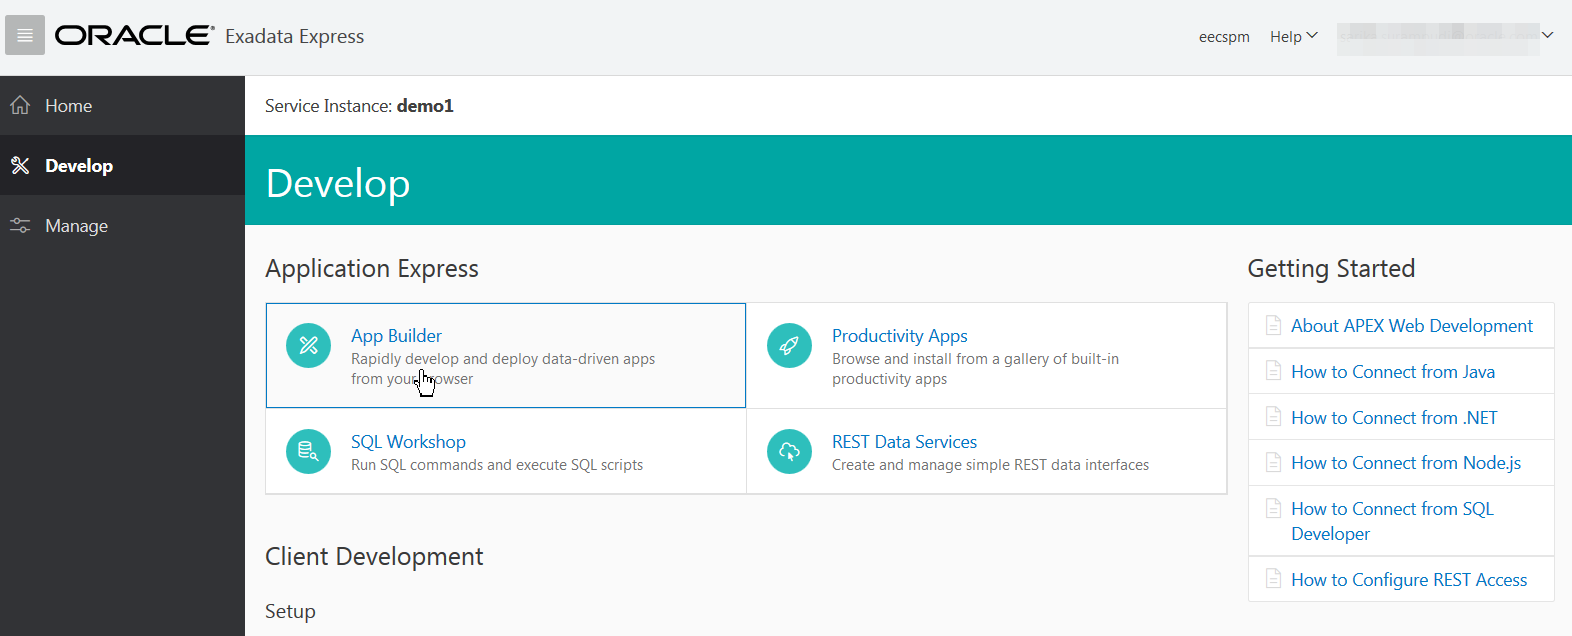
- On the Oracle Exadata Express Cloud Service instance landing
page, click Develop in the left navigation
pane.

Description of the illustration low_code_data_model_step 1_1.png - On the Develop page, click the App Builder
icon. This takes you to the App Builder page that has a number
of tools and utilities.
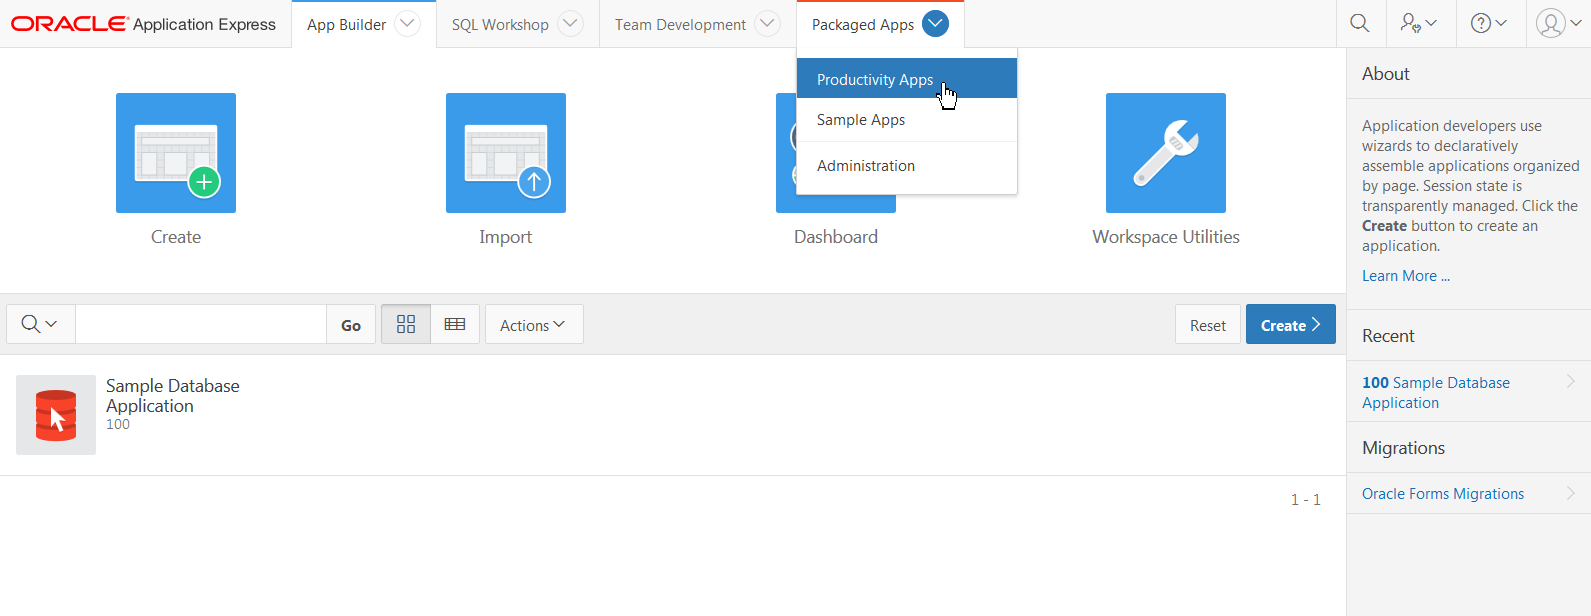
Description of the illustration low_code_data_model_step 2_1.png - To see a list of packaged apps, click the Packaged
Apps drop-down menu and select Productivity
Apps.
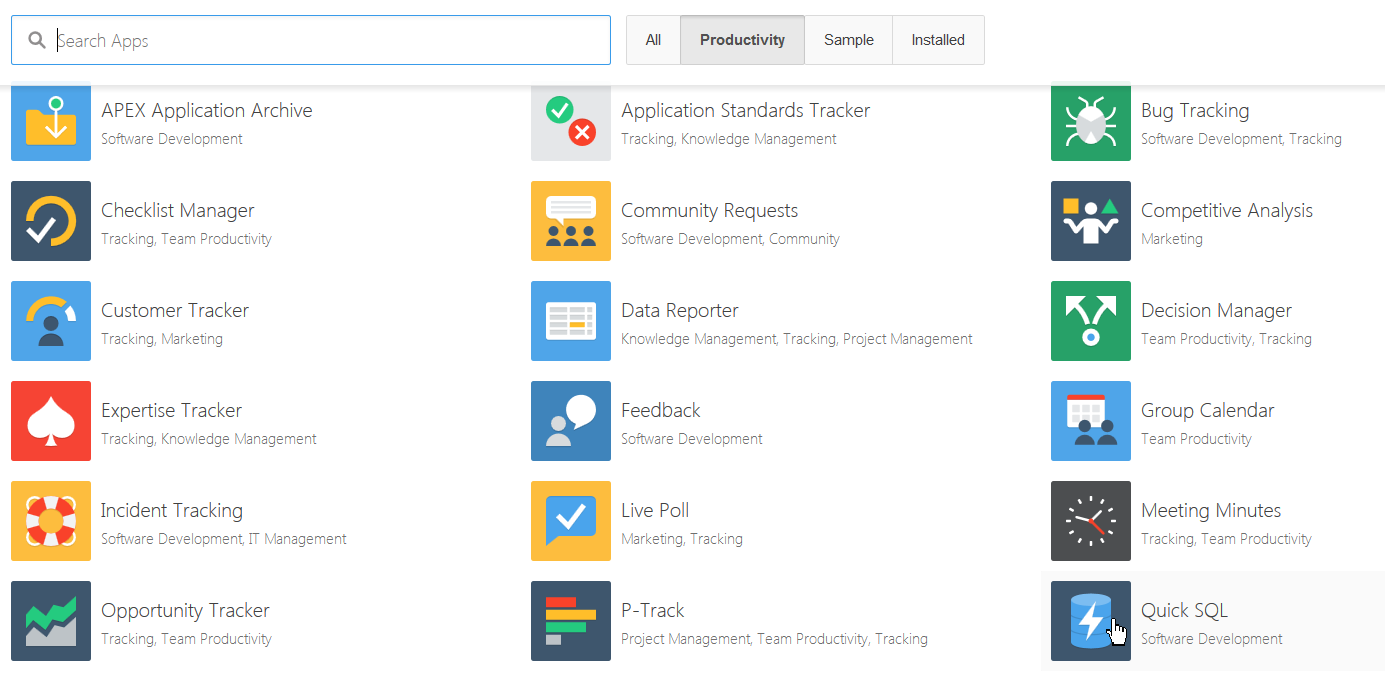
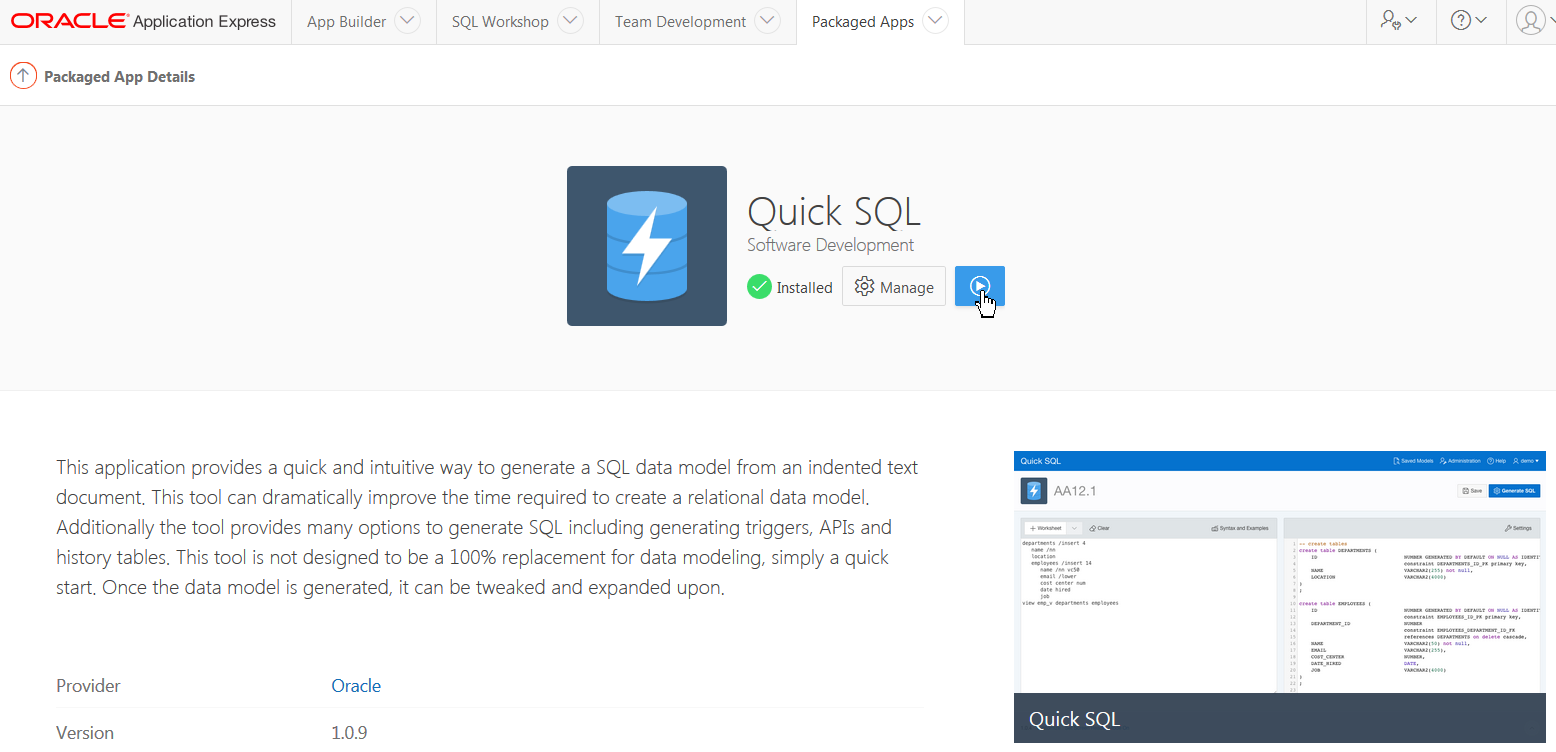
Description of the illustration low_code_data_model_step 3_1a.png - Click the Quick SQL icon.
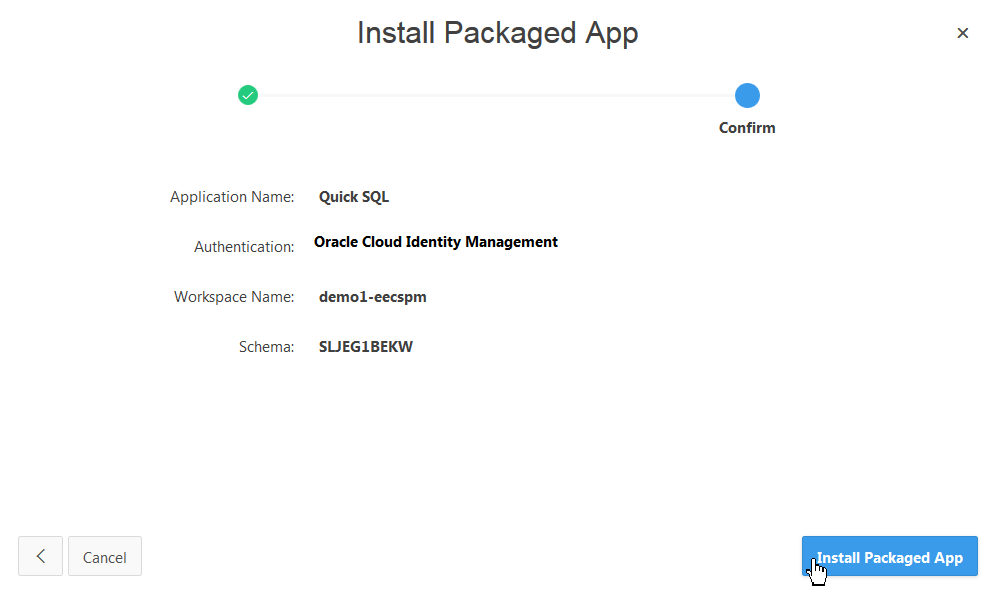
Description of the illustration low_code_data_model_step 4_1.png - In the Install Packaged App dialog, click Next
and then click the Install Packaged App
button.
Description of the illustration low_code_data_model_step 5_1a.png
 Design
a Data Model
Design
a Data Model
- Access the Quick SQL app you installed in the previous step.
On the App Builder page, click the Quick SQL
icon.

Description of the illustration low_code_data_model_step 1_2.png - Click the Run button.
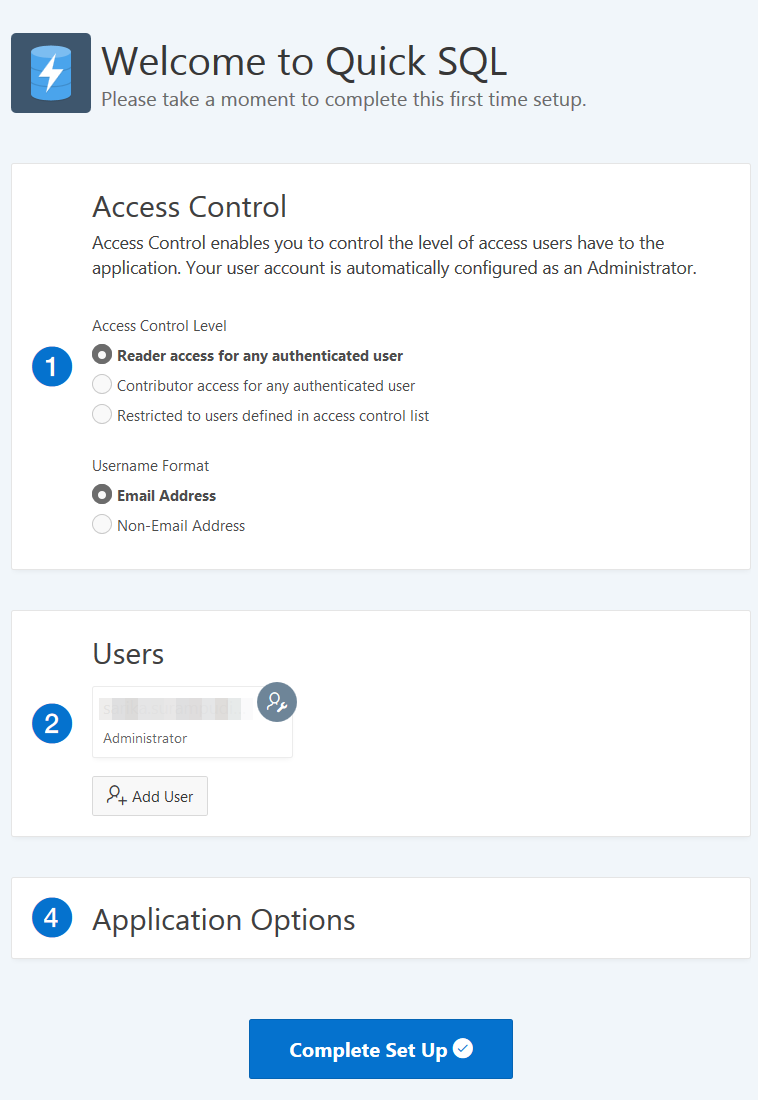
Description of the illustration low_code_data_model_step 2_2.png - Choose the default set up for Quick SQL. Click the Complete
Set Up button.
Description of the illustration low_code_data_model_step 3_2.png - In the left pane of the Quick SQL app, start typing
shorthand SQL to create the data model. Create the EMPLOYEES
table and add a SKILLS table.

Description of the illustration LowCode_apex_02_01.png - Enter the shorthand SQL displayed below:
- Create a view. Enter the shorthand SQL statement displayed below after the shorthand SQL statements for creating tables.
- To configure your data model settings, click the Settings
button.

Description of the illustration LowCode_apex_02_02.png - In the Settings dialog box, in the Table Settings section,
enter OC in the Object Prefix field.

Description of the illustration LowCode_apex_02_02_1.png - In the Additional Columns section, click to select the Audit
Columns check box.

Description of the illustration LowCode_apex_02_02_2.png - In the Generation section, select Yes for Include Drops and Apex Enabled options. Click Save Changes. Next, from the right pane of the Quick SQL app, copy the automatically generated SQL statements to the clipboard.
- Access your Oracle Application Express workspace.
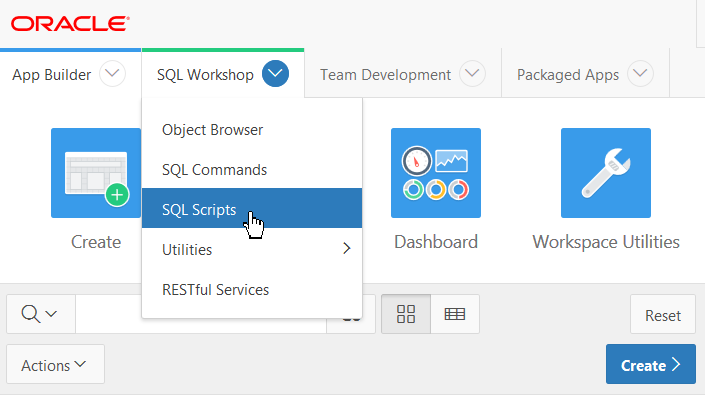
- To create a script from the generated SQL in Quick SQL, open
the Script Editor. Click SQL Workshop and
select SQL Scripts.
Description of the illustration LowCode_apex_02_03.png - Click Create.
- Paste the automatically generated SQL statements copied from
Quick SQL in a preceding step into Script Editor. Enter a name
for the script and click Run.

Description of the illustration LowCode_apex_02_04.png - Click Run Now.

Description of the illustration LowCode_apex_02_05.png - Verify created objects. Click View Results.

Description of the illustration LowCode_apex_02_06.png - Review the results displayed.

Description of the illustration LowCode_apex_02_07.png - Verify the EMPLOYEES table. Click SQL Workshop,
click Object Browser and then select OC_EMPLOYEES
from the left pane.

Description of the illustration LowCode_apex_02_08.png - Verify the SKILLS table. Select OC_SKILLS
from the left pane.

Description of the illustration LowCode_apex_02_09.png
 employees /insert 50
      name /nn
      email /lower
      city
      country /values US, US, MX, CA
      skills /insert 150
          skill /nn /upper /values Java, Java, Java, JS, JS, SQL, PHP, Perl, ABCS, APEX, Python
         proficiency num /nn /check 1, 2, 3, 4
view employee_skills employees skills

 Next
Tutorial
Next
Tutorial
Develop an Oracle APEX App on Oracle Exadata Express Cloud