 Develop an Oracle APEX App on Oracle Exadata Express Cloud
 Before You Begin
This is the second tutorial in the Building an Oracle Application Express App on Oracle Database Exadata Express Cloud Service series. Perform each of these tutorials sequentially as there is a dependency to complete one before starting the next one.
- Design a Data Model for an Oracle APEX App on Oracle Exadata Express Cloud
- Develop an Oracle APEX App on Oracle Exadata Express Cloud
- Deploy an Oracle APEX App on Oracle Exadata Express Cloud
In this tutorial, you will develop an application using App Builder on an Oracle Exadata Express Cloud Service instance. It takes approximately 15 minutes to complete.
Background
Oracle Application Express is a low code, rapid web application development tool. It enables you to efficiently develop and maintain beautiful, responsive and database-driven applications using only your web browser.
What Do You Need?
- A desktop or laptop computer running Microsoft Windows 7, Apple MacOS 10.9 or later, or Oracle Linux and a web browser. Oracle Application Express supports the current and prior major release of Google Chrome, Mozilla Firefox, Apple Safari, Microsoft Internet Explorer and Microsoft Edge.
- An Oracle Exadata Express Cloud Service account with two service instances. You will develop an app on one instance and deploy it on the second instance of the service.
 Create
a Chart Page
Create
a Chart Page
You will create a simple app incorporating a chart and a report. To develop the app, you will use Application Express bundled with an Exadata Express Cloud Service instance. Sign in to your Exadata Express Cloud Service instance.
- On the Oracle Exadata Express Cloud Service instance landing
page, click Develop in the left navigation
pane.

Description of the illustration low_code_data_model_step 1_1.png - On the Develop page, click the App Builder
icon. This opens the Application Express workspace that has a
number of tools and utilities. You will develop your app in
this workspace.

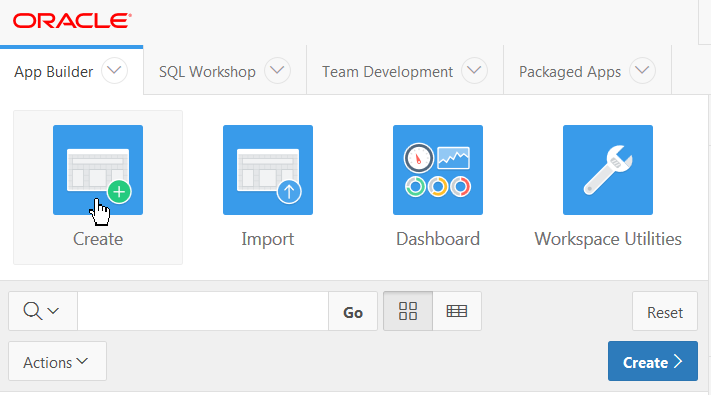
Description of the illustration low_code_data_model_step 2_1.png - Click the Create icon.
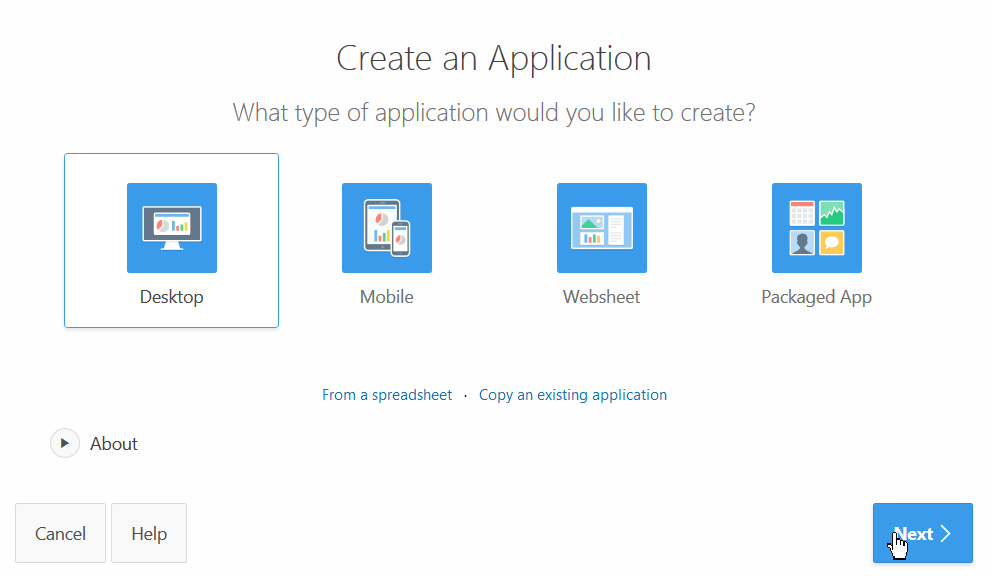
Description of the illustration low_code_dev_app_step 3_1.png - The Desktop option is selected by default. Click Next
icon.
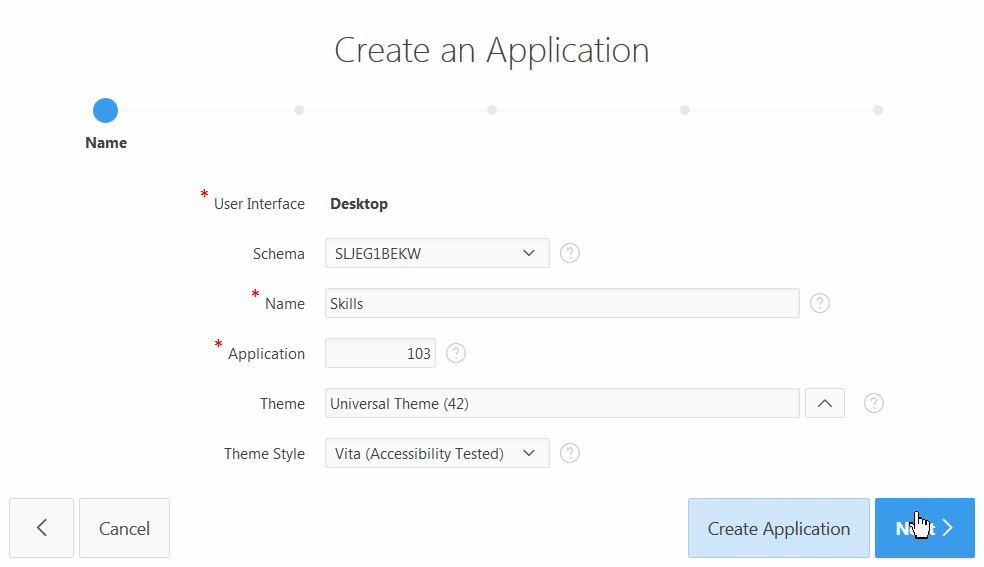
Description of the illustration low_code_dev_app_step 4_1.png - In the Create an Application wizard, enter Skills
for application name and click Next.
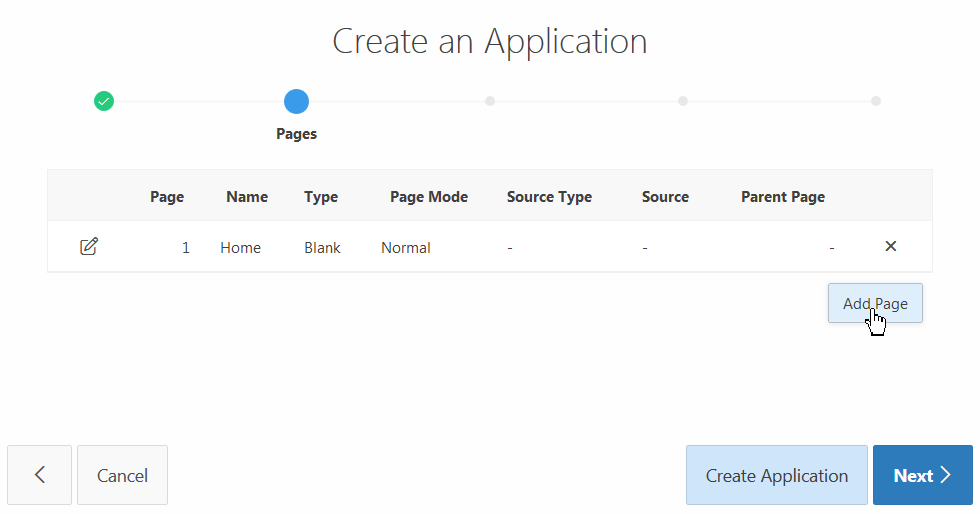
Description of the illustration low_code_dev_app_step 5_1.png - A home page is added automatically. To add another
page,click Add Page.
Description of the illustration low_code_dev_app_step 6_1.png - Click the Chart option.
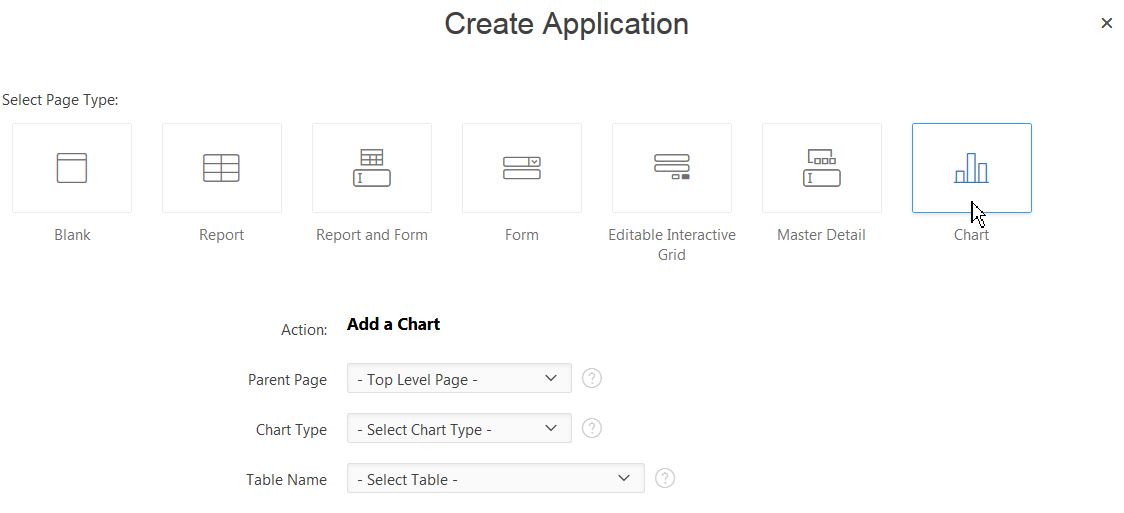
Description of the illustration low_code_dev_app_step 7_1.png - Select Home for Parent Page
and Pie for Chart Type.
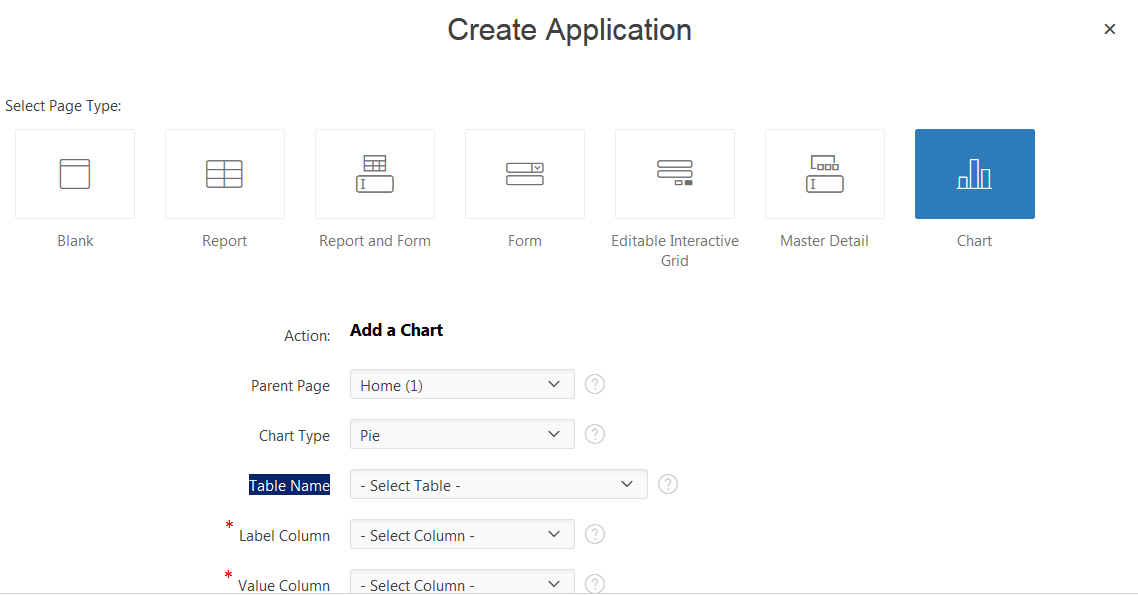
Description of the illustration low_code_dev_app_step 8_1.png - Select OC_SKILLS as the source table name,
SKILL for the Label Column,
Proficiency for the Value Column.
Click Add Page.

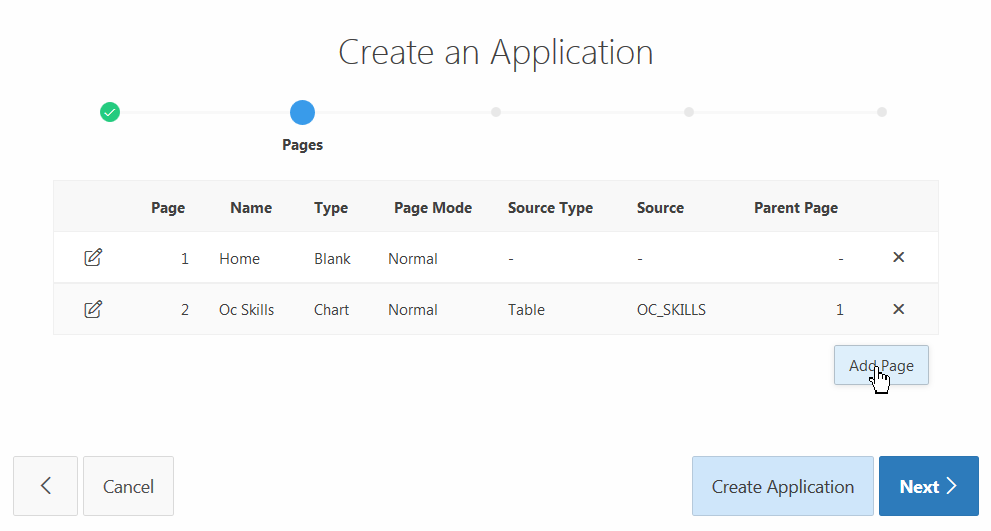
Description of the illustration low_code_dev_app_step 9_1.png - A chart page has been created.
Description of the illustration low_code_dev_app_step 10_1.png
 Create
a Report Page
Create
a Report Page
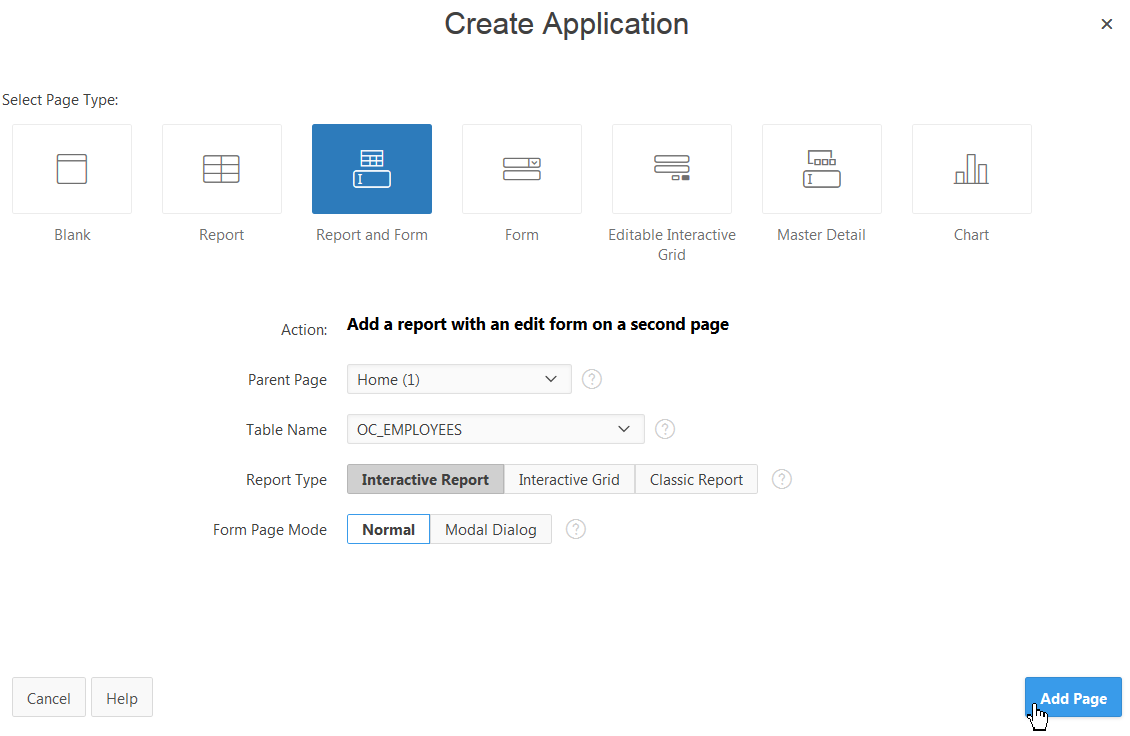
- To add another page, click Add Page.
Description of the illustration low_code_dev_app_step 10_1.png - Click Report and Form.
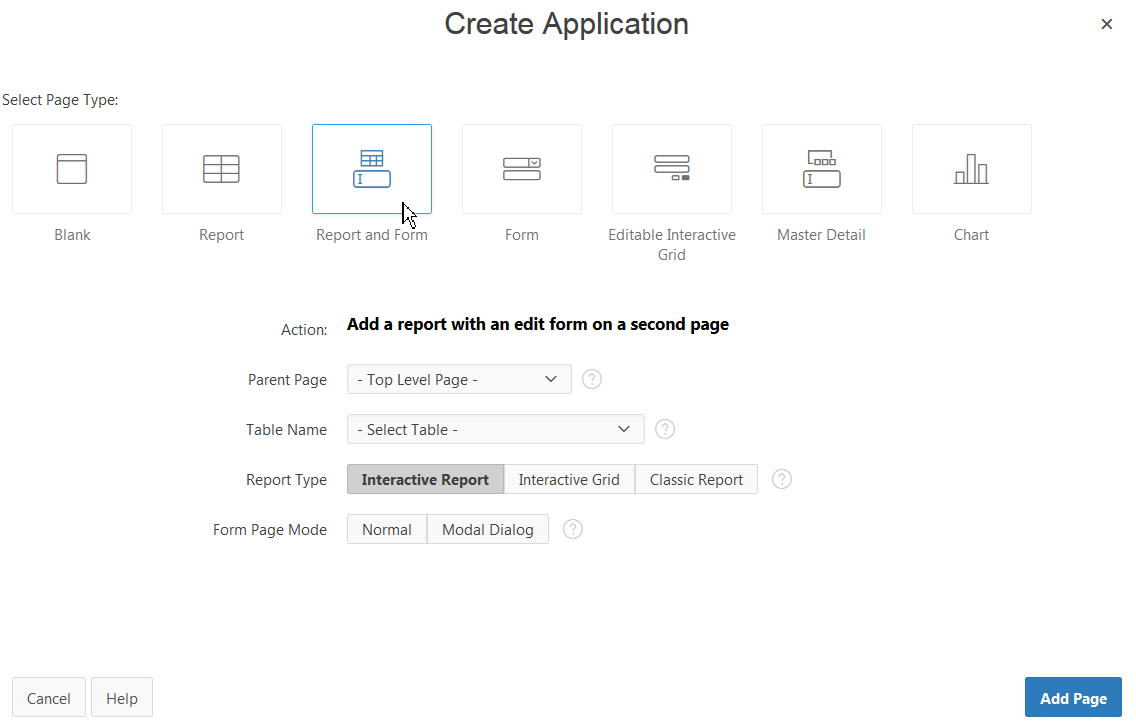
Description of the illustration low_code_dev_app_step 11_1.png - Select Home for Parent Page,
OC_EMPLOYEES for Table Name,
Interactive Report for Report Type
and Normal for Form Page Mode.
Click Add Page.
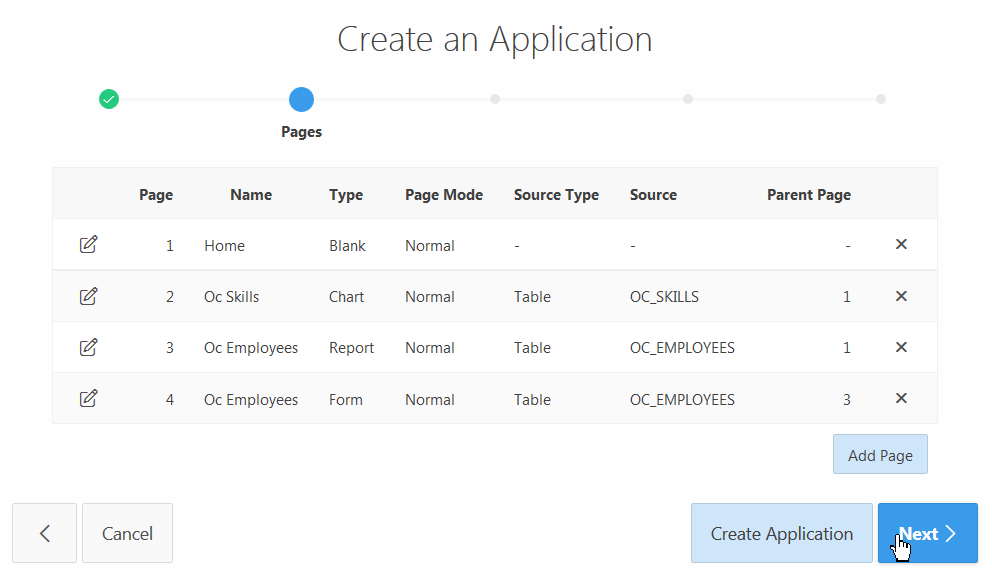
Description of the illustration low_code_dev_app_step 12_1.png - Click Next.
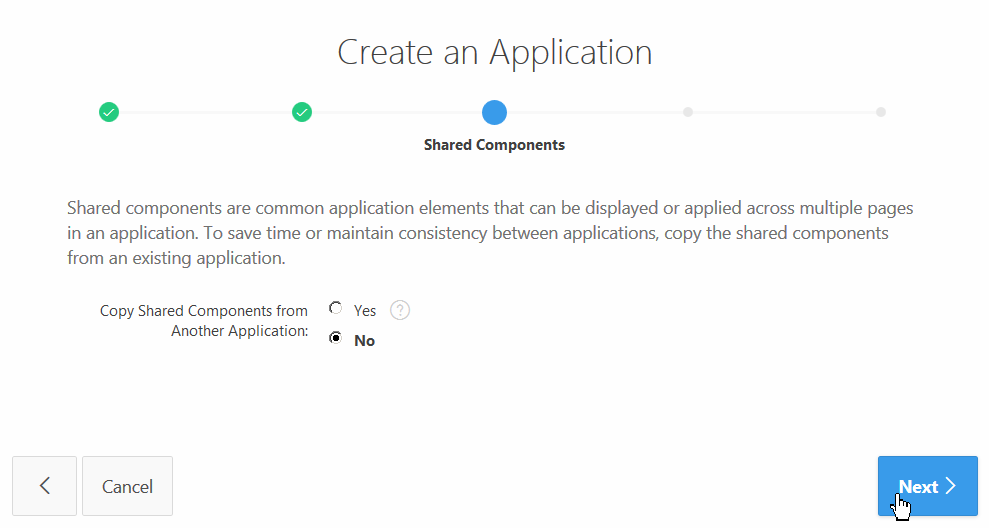
Description of the illustration low_code_dev_app_step 13_1.png - Click Next.
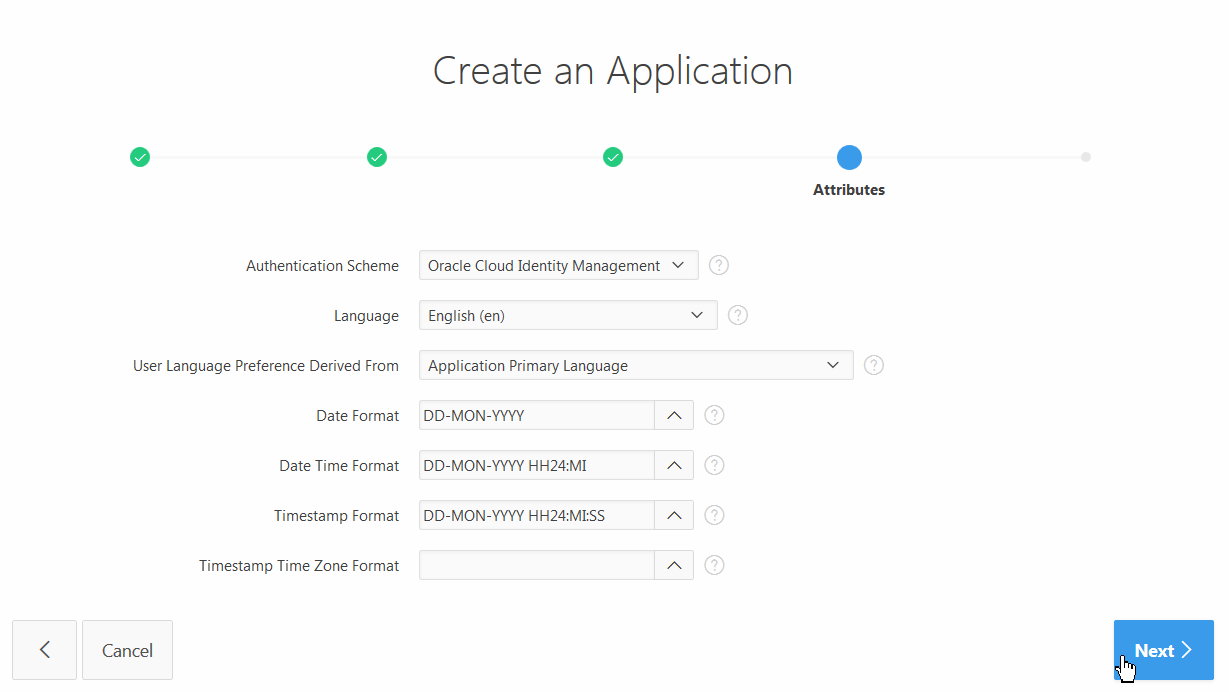
Description of the illustration low_code_dev_app_step 14_1.png - Select the date and time formats and click Next.
Description of the illustration low_code_dev_app_step 15_1.png - Click Create Application.
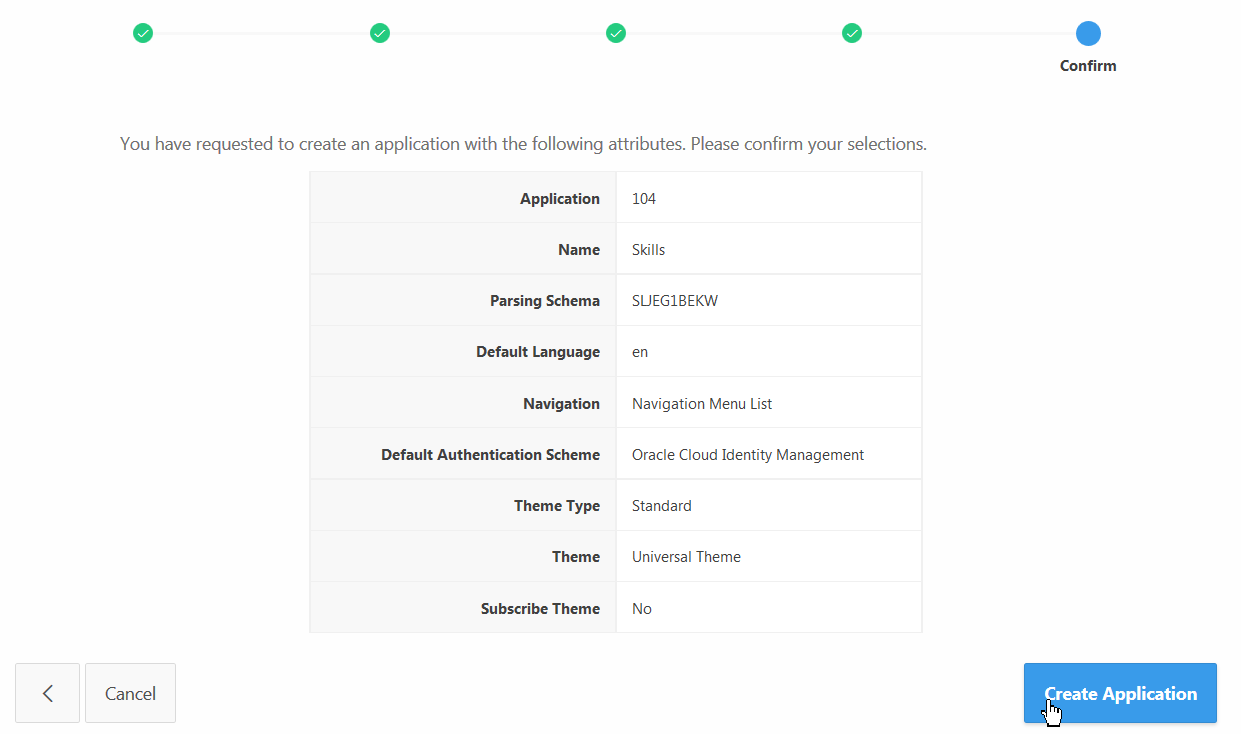
Description of the illustration low_code_dev_app_step 16_1.png - The Skills app has been created in your Application Express
workspace.
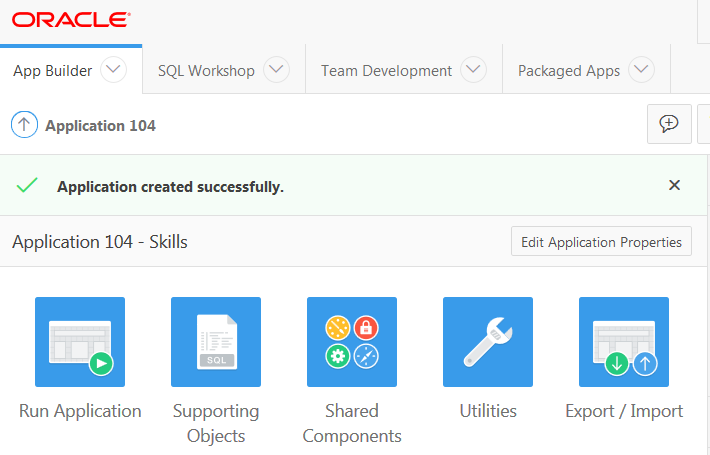
Description of the illustration low_code_dev_app_step 17_1.png
 Next
Tutorial
Next
Tutorial
Deploy an Oracle APEX App on Oracle Exadata Express Cloud