Before You Begin
Purpose
Create and start a service for integrating and replicating data in the cloud.
Time to Complete
Approximately 30 minutes, not including wait time for service activations and provisioning.
Background
GoldenGate Cloud Service (GGCS) is a real-time cloud service for migrating, integrating or replicating data between cloud and cloud or cloud and non-cloud databases. These databases include Oracle Database Cloud Service (DBCS) instances, Oracle Databases 11g and 12c, MySQL 5.6 and any database supported by Oracle GoldenGate. With Oracle GoldenGate Cloud Service, one of your databases, either the source or the target must be an Oracle Database Cloud Service (DBCS). You associate this DBCS to your GGCS, when you create your service instances.
By using the Oracle GoldenGate Cloud Service wizard, you create a GoldenGate environment in the cloud. When you complete the wizard, your environment is provisioned and fully integrated with an Oracle Cloud Service. The GoldenGate Cloud Service is started automatically, and you can begin to prepare your data for Database replication from an on-premises or cloud database to the cloud.
This tutorial doesn't instruct you on how to work with your on-premises GoldenGate installation or how to prepare your data for replication.
What Do You Need?
Before starting this tutorial:
| You Should Have: | How and Which Ones? |
|
Subscriptions to:
|
Refer to Get Your Oracle Cloud Services (Review and Confirm) section for a Description of required services and A Summary of Steps to get your services. |
| Your Oracle Cloud user name, password, and identity domain | Locate your account details in the post-activation email that you received from Oracle Cloud when your user account was set up. If you don't have your New Account Information email, click the Users tab in My Services Dashboard and find the role associated to your user name. |
| Service Administrator role for your Oracle Cloud services | If you aren't sure whether your Oracle Cloud user account has the Service Administrator role, contact your account administrator. | Supported Browsers | Supported browsers include:
|
Get Your Oracle Cloud Services (Review and Confirm)
Here is a summary of steps you perform to get your Oracle Cloud Services. If you have access to the services mentioned in step two of this section, from your Oracle Cloud account's My Services page, then skip Create an Oracle Database Cloud Service (DBCS) Instance.
- Get an Oracle Account on http://www.oracle.com.
- From your account, sign up for the following services on http://cloud.oracle.com:
- Oracle Storage Cloud Service- This service provides backup and recovery of the replicated data and transactions residing in the target database.
- Oracle Database Cloud Service (DBCS) - This service provides a database to host the replicated data
- Oracle GoldenGate Cloud Service - This service performs the replication of data and transactions.
- After some time, you receive your first email that asks you to activate your service. Activate the service by clicking a button from within the email or by signing into My Account. This requires you to enter your Oracle.com account/password.
- When the service is activated, you get a second email that contains information about accessing your service, your user name, temporary password, link to My Services. Note that the My Services URL includes your data center and identity domain. If you access My Services by clicking this URL from within the email, then you'll be taken directly to your My Services URL.
You should enter your identity domain, user name, and temporary password. Because you’re signing in to My Services for the first time, you’re presented with a password reset screen. You'll change your password and set challenge questions.
Alternatively, if you access My Services from http://cloud.oracle.com/sign_in, then you'll need to select a data center. You don’t need to “set” this data center. In fact, you can't set it. The data center is set by Oracle. This data center name/prefix is included in the second email notification. You note it down and select that data center. That’s it. Again, you don’t need to do all of this, if you click the My Services URL from your second email directly.
- Confirm that all your services appear in your Oracle Cloud account's My Services page.
Create an Oracle Database Cloud Service (DBCS) Instance
In this section, you create an Oracle Database Cloud Service (DBCS) instance (necessary to host the replicated data in the cloud) by using the Create Database Cloud Service Instance wizard.
If you already have an Oracle Database Cloud Service instance in the same identity domain as your GoldenGate Cloud Service, skip to Create a GoldenGate Cloud Service (GGCS) Instance.
Invoke the Create Database Cloud Service Instance Wizard
-
Go to Oracle Cloud My Services by either clicking the link in your Welcome email or by going to http://cloud.oracle.com, clicking Sign In, selecting your Data Center and then clicking MyServices in the Cloud Account section.
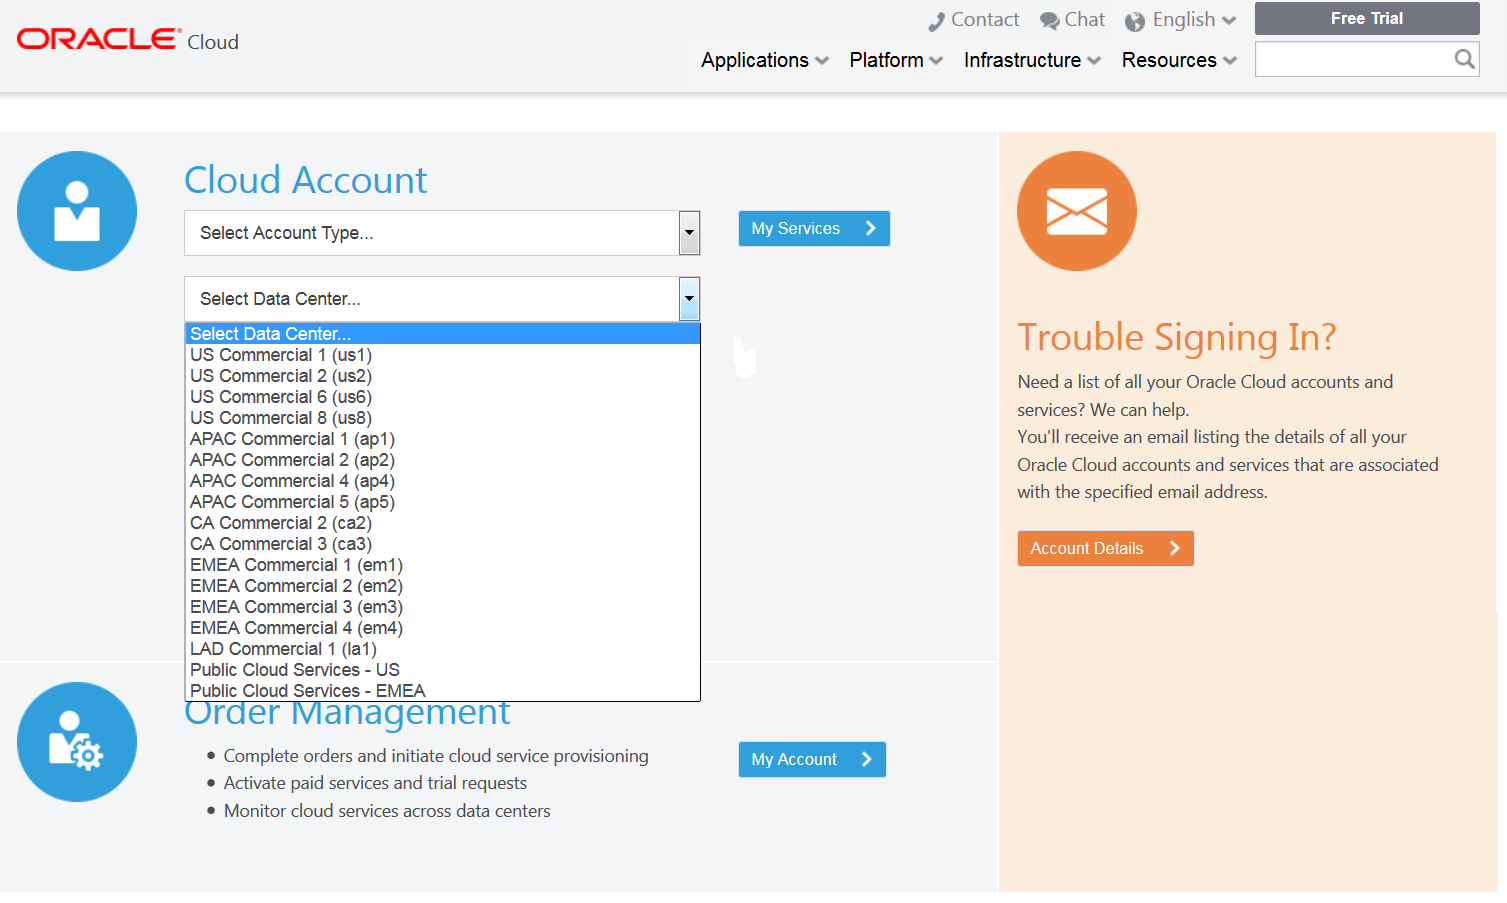
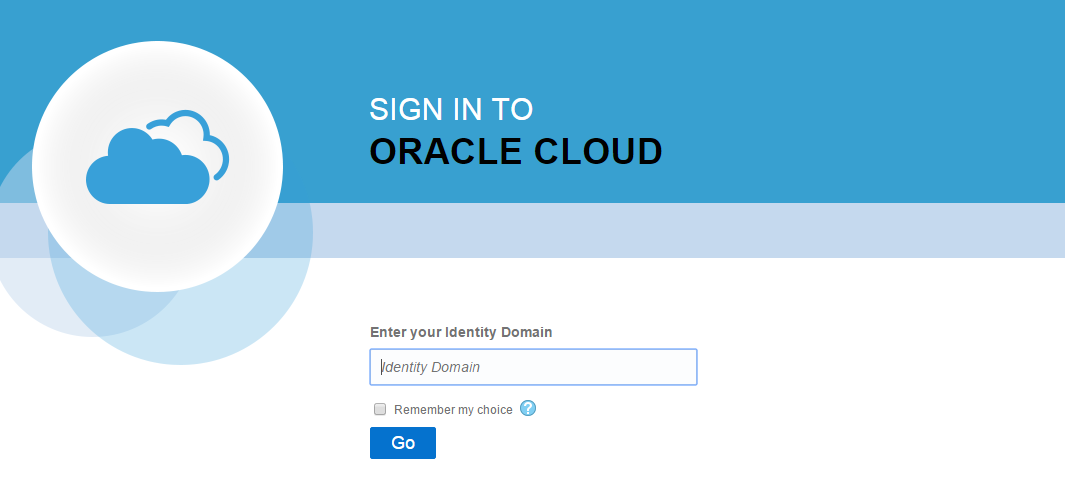
Description of this image -
Provide your Identity Domain and click Go.
Note: If you don't go to Oracle Cloud directly and use the link in your Welcome email instead, you don't need to provide your identity domain.
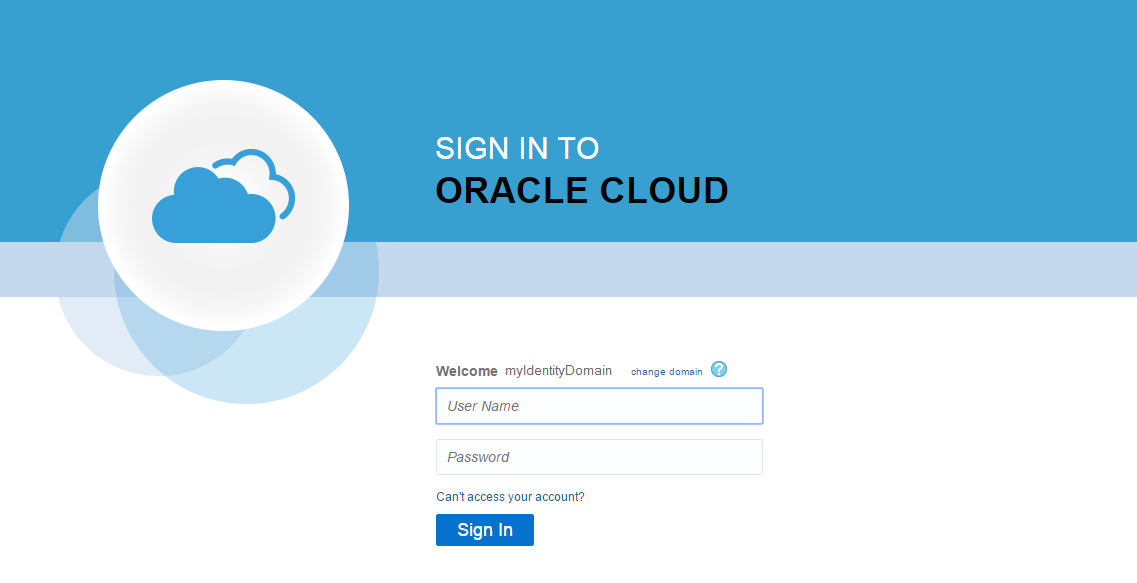
Description of this image - Enter your username and password and click Sign In.
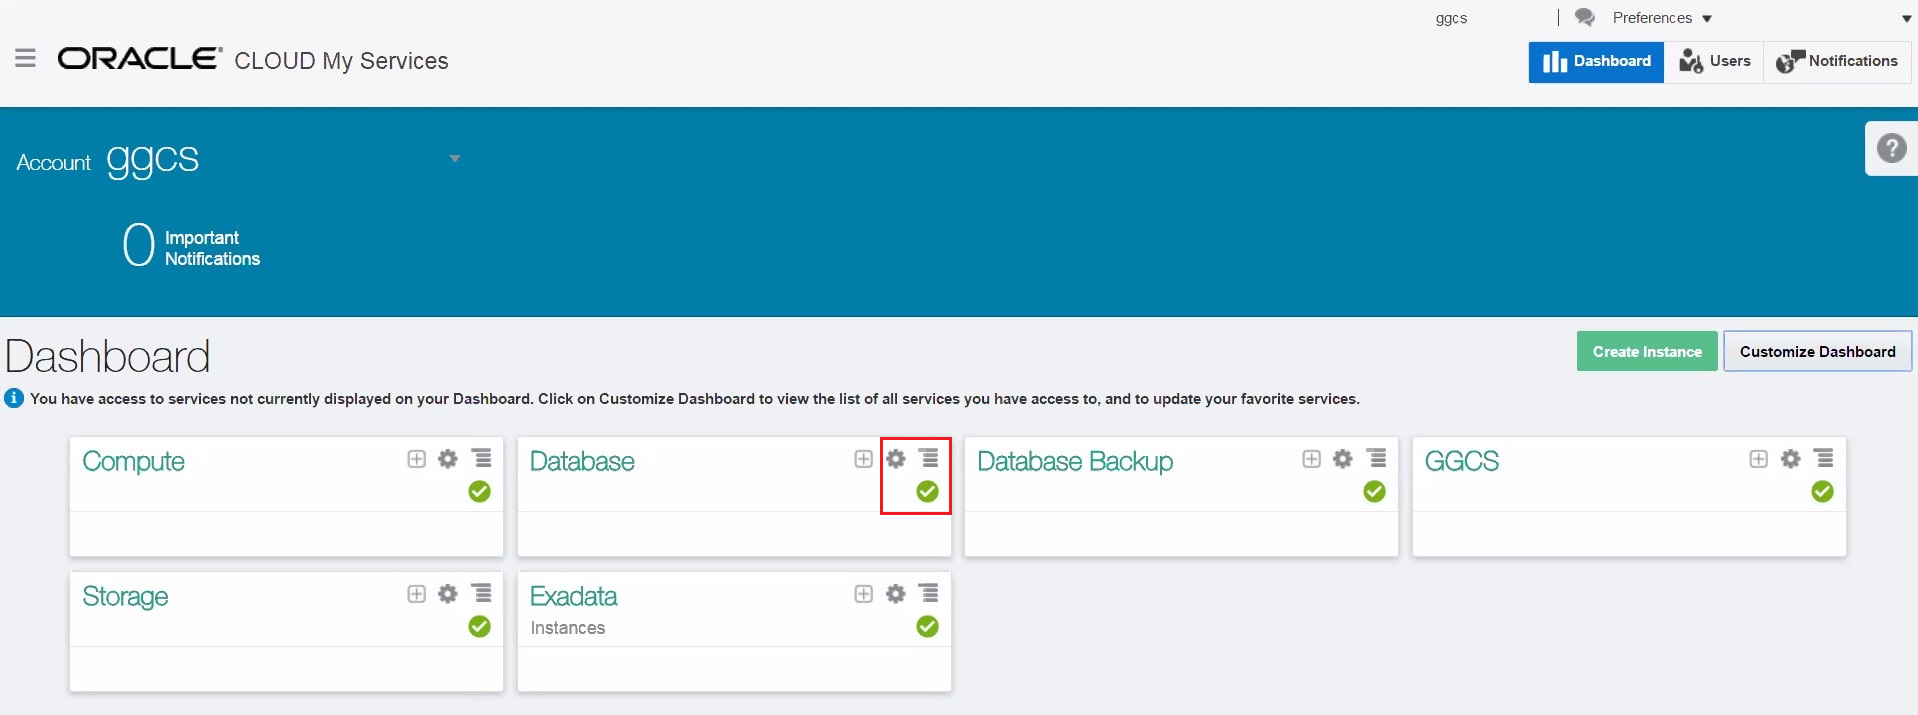
Description of this image In My Services Dashboard, click the Database menu and then click Open Service Console.
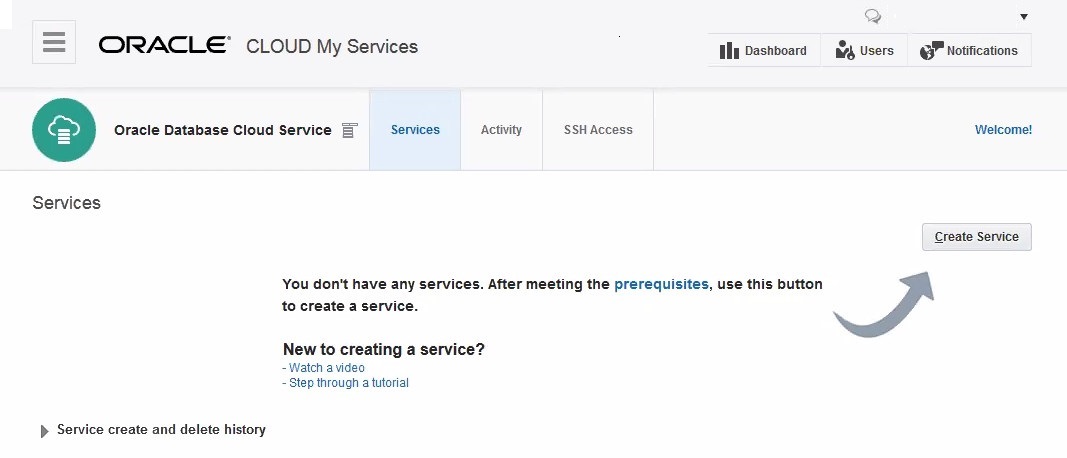
Description of this image - If you have no instances, then you get a Welcome page instead of the Services page. In such a case, either click the Services or the Go to Console link. Otherwise, skip this step.

Description of this image - In the Services page, click the Create Service button.
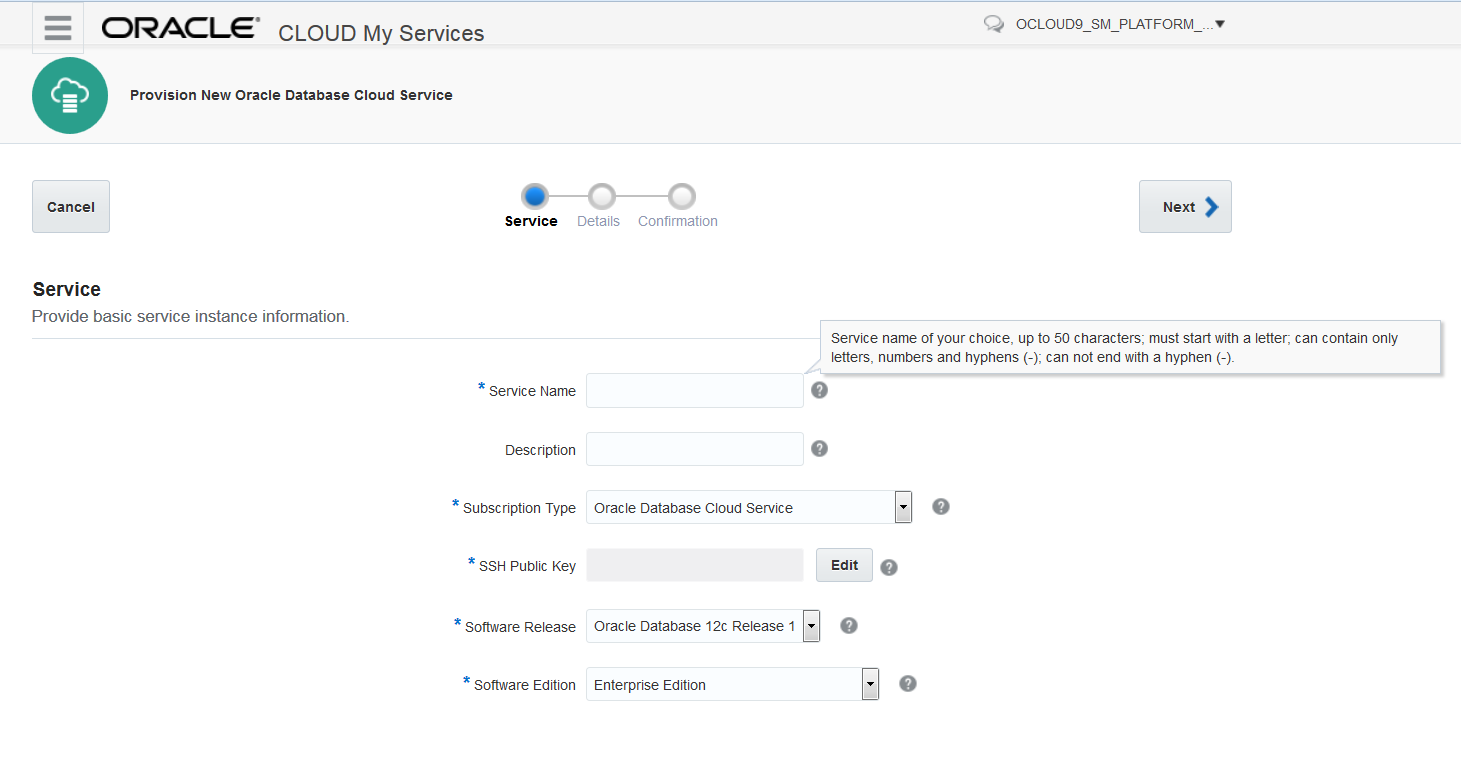
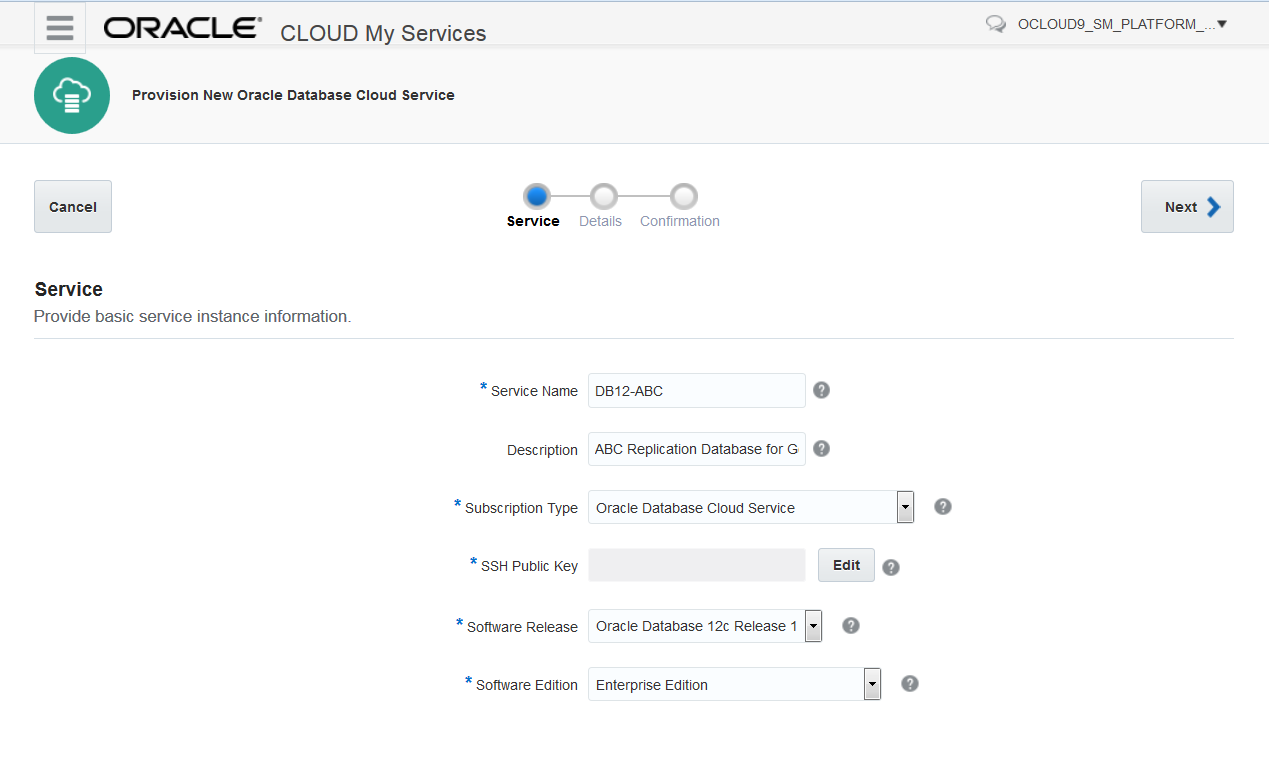
Description of this image - The wizard opens the Service level.
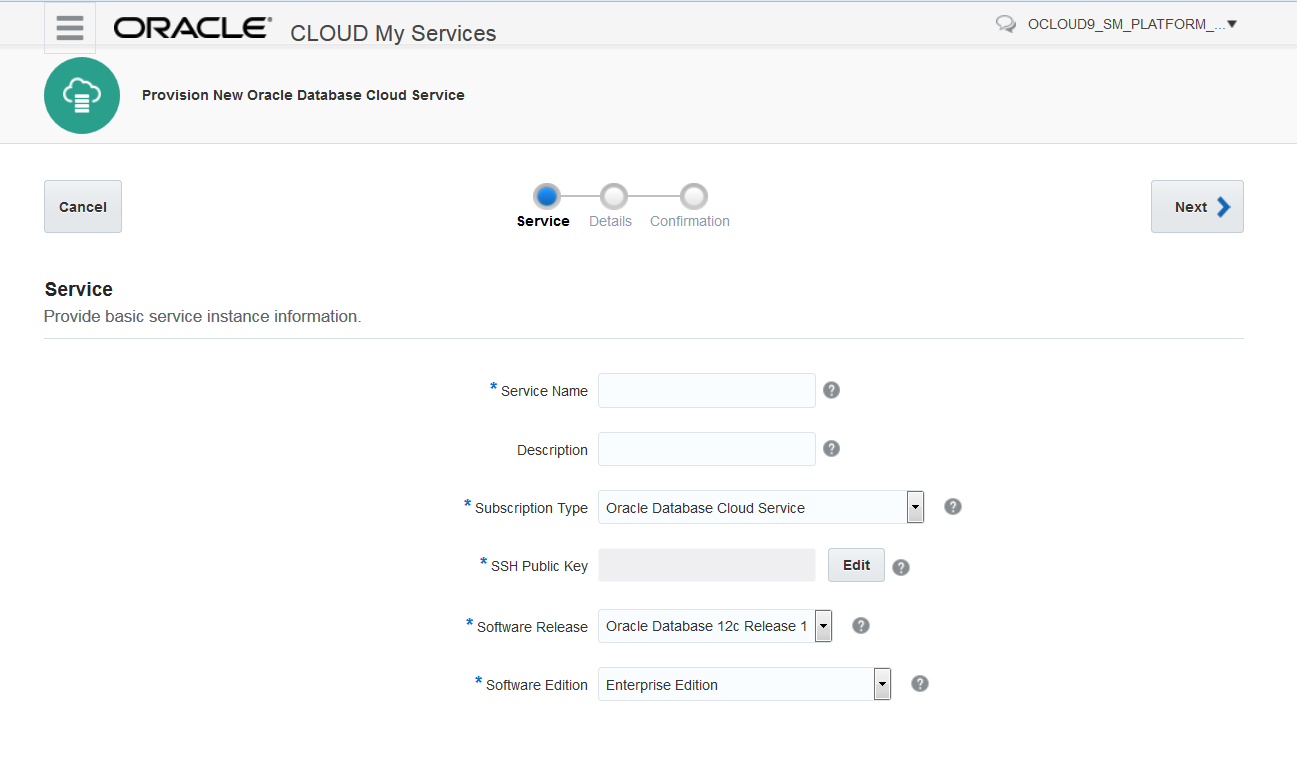
If you're not sure about how to complete a field, click the tooltip icon next to that field for assistance.
- At the Service Level, enter a display name for the service instance in the Service Name field.
For this tutorial, set this value to
DB12-ABC.Note: In Oracle terminology, the name of a particular database on the server is known as the service name. The service name here is the database cloud service name and not the service name associated in
tnsnames.oraThis Name you define here, is not used for the SID; you define this value later. - For the Description field enter
ABC Replication Database for GoldenGate Cloud Service.Note: Description is optional. However, it is a great place to provide more information for this database, so future administrators can easily identify this database’s functionality.
- For the Subscription Type select Oracle Database Cloud Service.

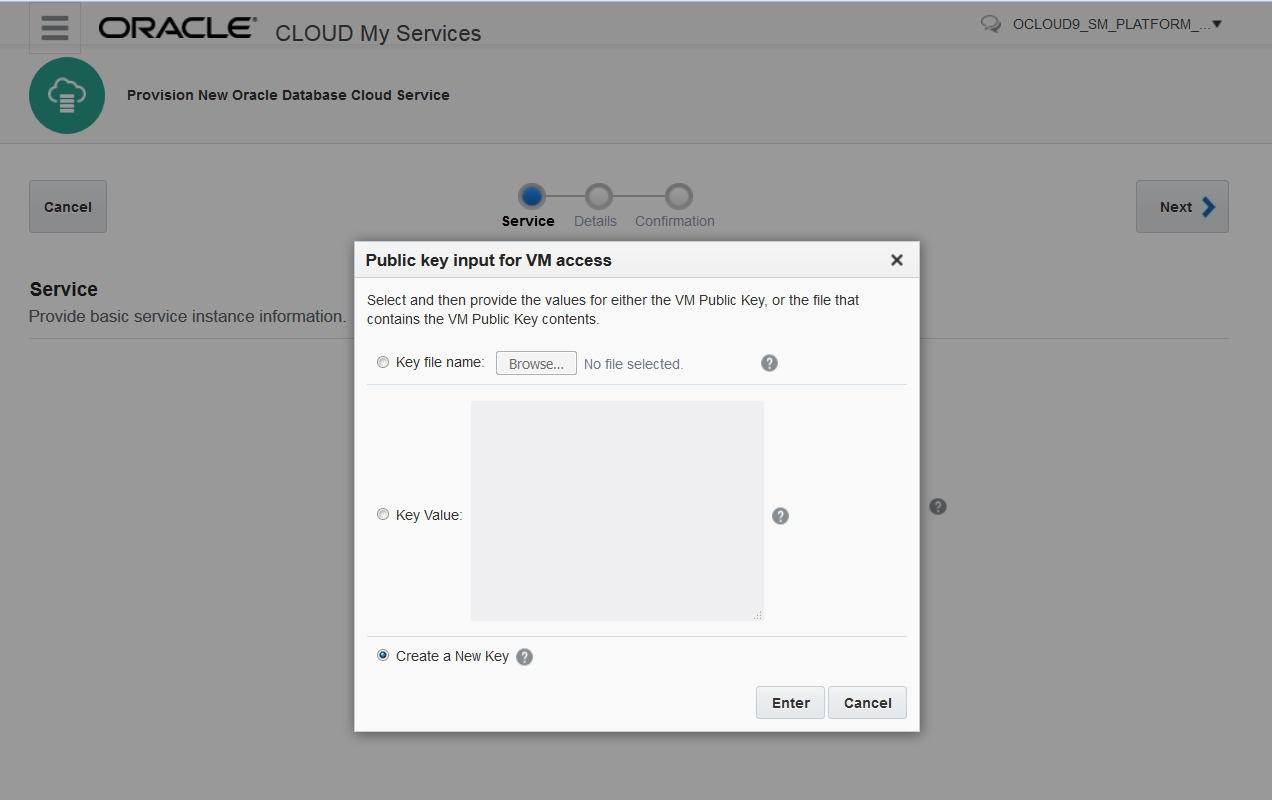
- You provide a public key when provisioning a service instance and the paired private key when you log into its associated VM using an SSH utility. To associate your public key with this database service instance, click the Edit button for the SSH Public Key field. You have three options to associate a public key to an instance:
- Key file name: Browse and select a file containing your SSH public key.
- Key Value: Copy and paste your SSH public key value into the provided field.
- Create a New Key: Have the wizard create a public/private key pair for you.
- Select Create a New Key, then click Enter.
- Click Download in the Download Keys dialog box.
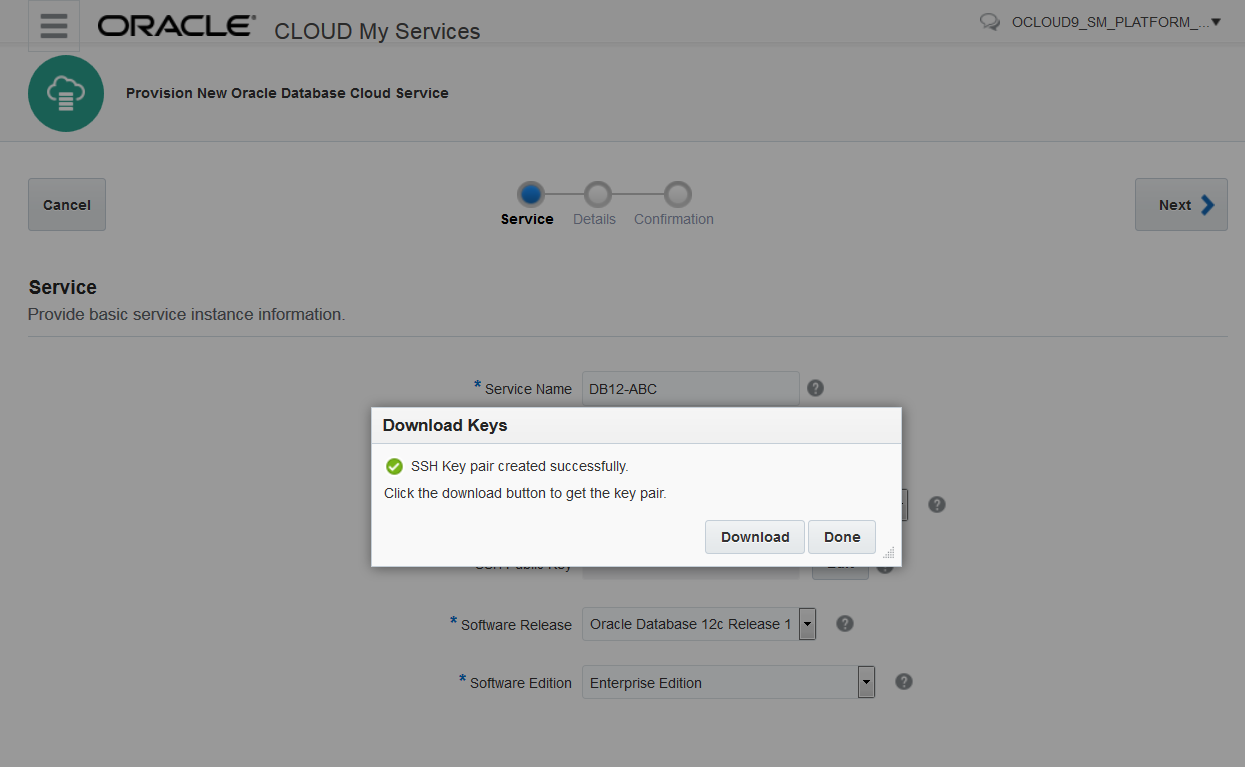
- Save the provided sshkeybundle.zip file on your computer.
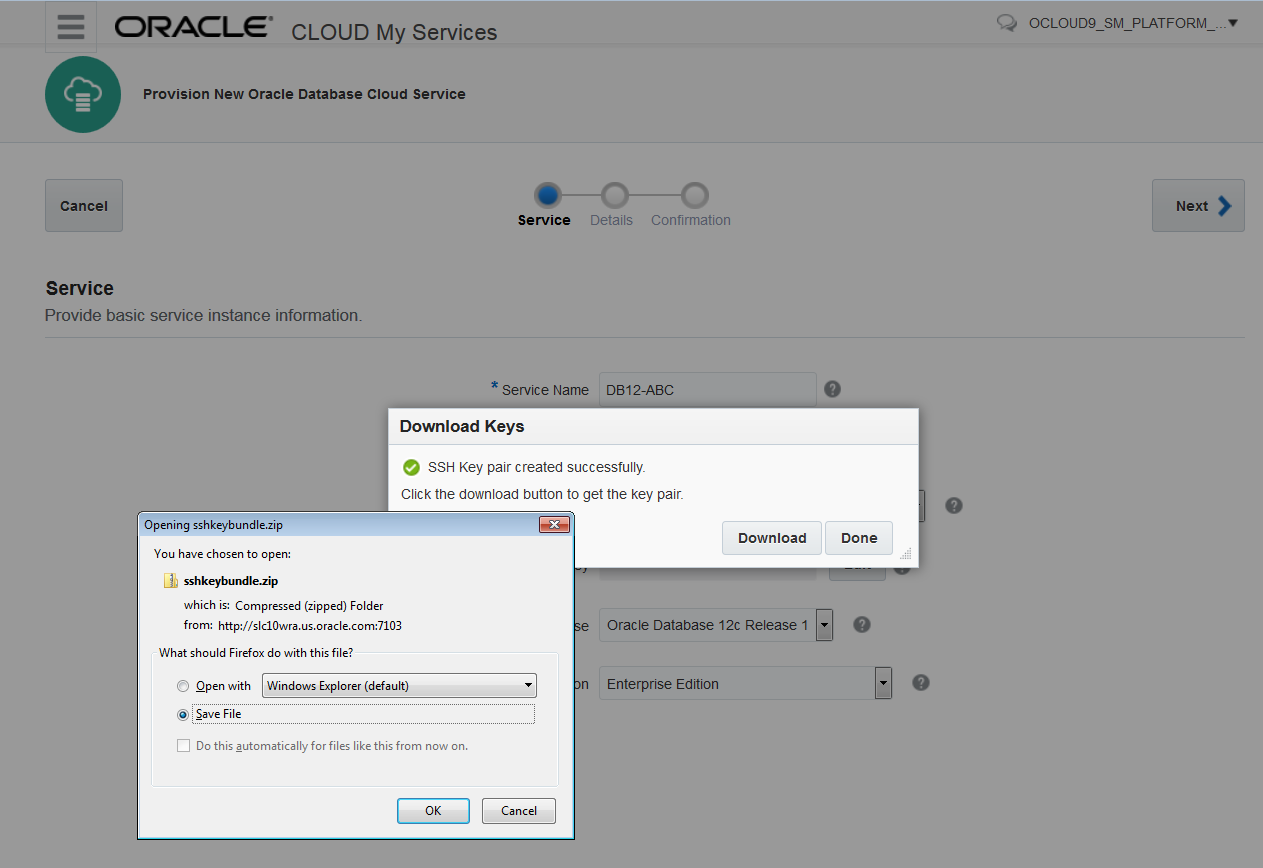
- Confirm that the SSH Public Key field now containes a public key value.
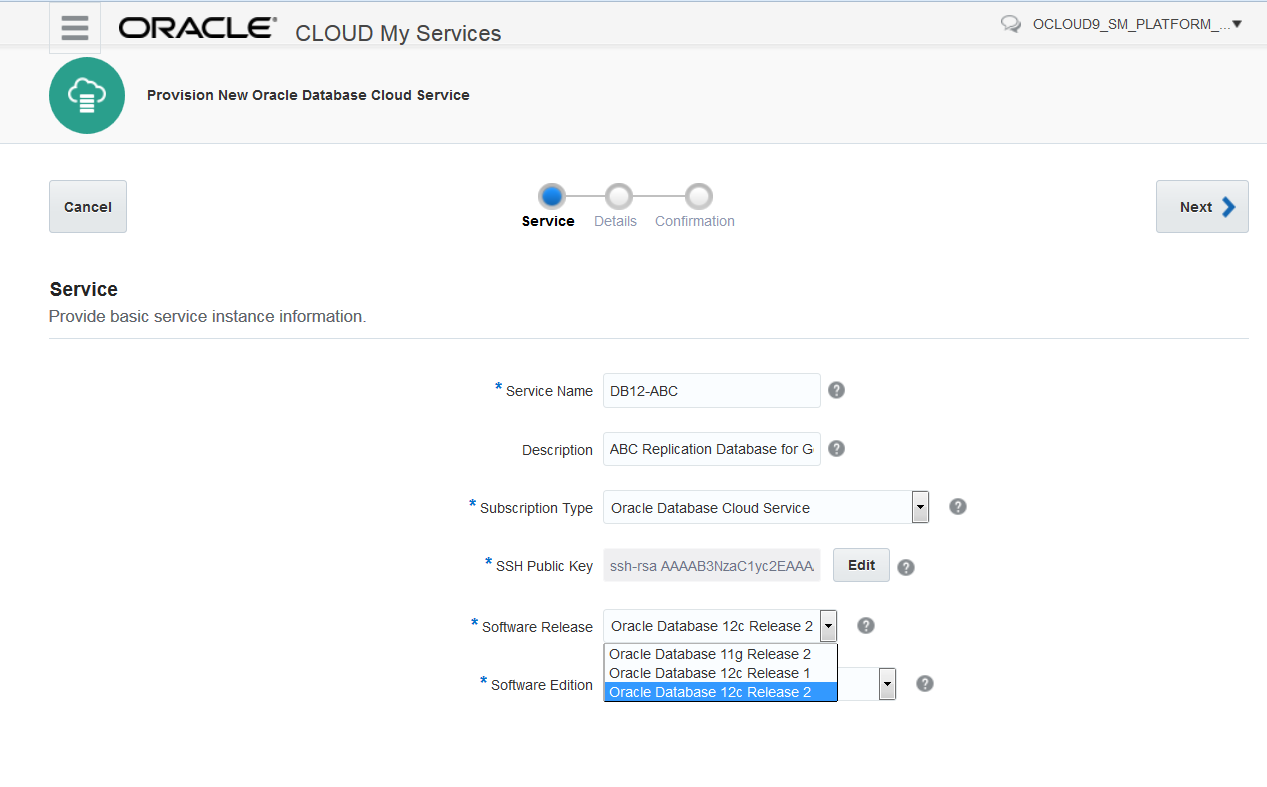
- Select the Software Release that you want to be installed on your instance. Oracle GoldenGate Cloud Sevice supports both 11g and 12c options to be used for the replication database.
Oracle Database 12c has a multitenant architecture for managing Pluggable Databases in the cloud. Oracle Database 11g has a non container database (CDB) architecture. For more information, see Introduction to Multitenant Architecture.
For this tutorial, select Oracle Database 12c Release 2. Then click Next.
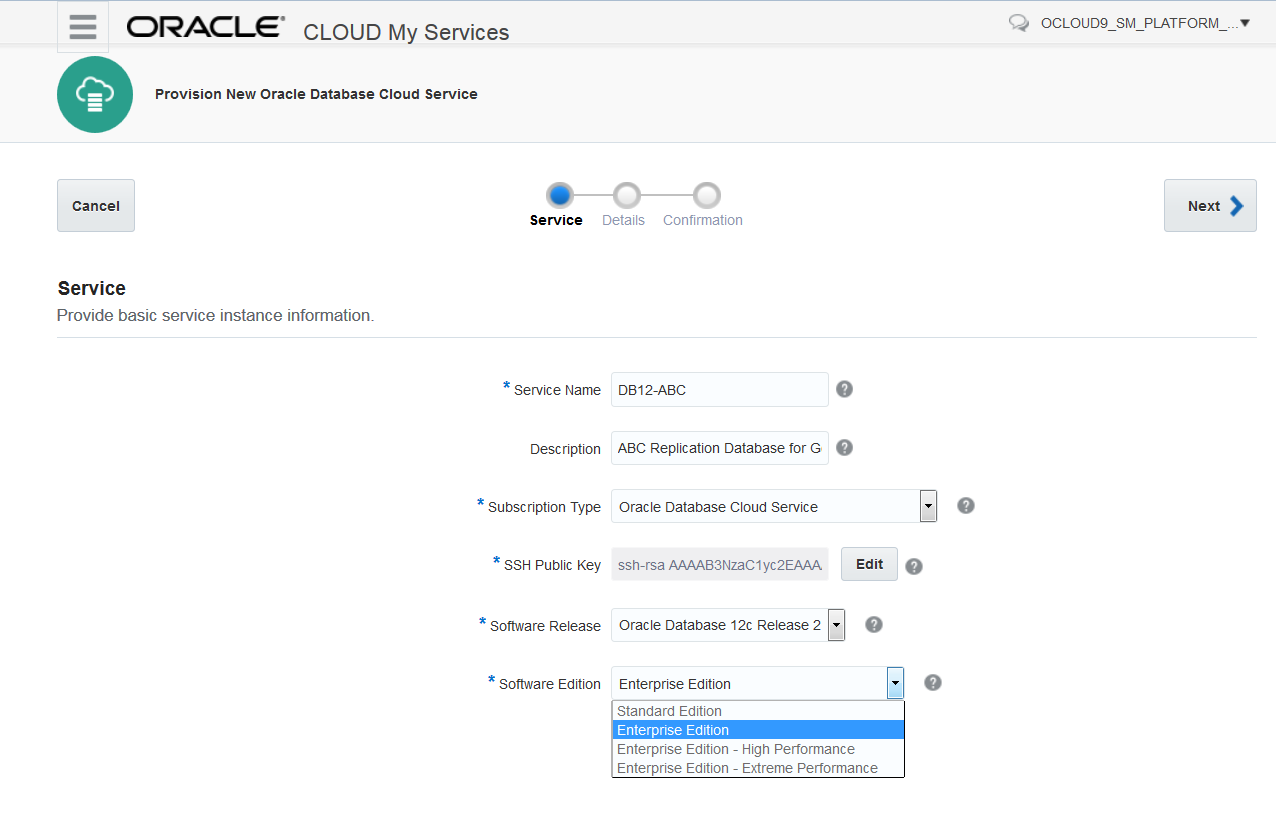
- Select the Software Edition
Both Oracle Database Cloud releases 11g and 12c, offer the following software editions:
- Standard Edition (includes all the facilities necessary to build business-critical applications for use for workgroup, department-level, and Web applications, but no Database Options are included)
- Enterprise Edition (provides the performance, availability, scalability, and security required for mission-critical applications such as high-volume online transaction processing (OLTP) applications, query-intensive data warehouses, and demanding Internet applications. Oracle Database Enterprise Edition contains all of the components of Oracle Database, but no Database Options are included)
- Enterprise Edition High Performance (includes all Database Options and Enterprise Management Packs such as Multitenant, Partitioning, Real Application Testing, Advanced Compression, Advanced Security, Label Security, Database Vault, OLAP, Advanced Analytics, Spatial and Graph, Diagnostics Pack, Tuning Pack, Database Lifecycle Management Pack, Data Masking and Subsetting Pack and Cloud Management Pack for Oracle Database. It does not include Real Application Clusters (Oracle RAC), Oracle RAC One Node, In Memory Database and Active Data Guard)
- Enterprise Edition Extreme Performance (includes all Database Options such as In-Memory Database, Active Data Guard, Multitenant, Partitioning, Real Application Testing, Advanced Compression, Advanced Security, Label Security, Database Vault, OLAP, Advanced Analytics, Spatial and Graph, Diagnostics Pack, Tuning Pack, Database Lifecycle Management Pack, Data Masking and Subsetting Pack, Cloud Management Pack for Oracle Database and Oracle RAC. It does not include Oracle RAC One Node.)
Note: All software editions are supported. For this tutorial, select Enterprise Edition. Then click Next.
Configure the Service Instance
In this section, you provide information for four areas:
- Service Configuration
- Database Configuration
- Standby Database Configuration
- Backup and Recovery Configuration
In the Service Configuration section:
-
Select a compute shape from the compute shape drop-down list.
This compute shape specifies the number of Oracle Compute Units (OCPUs) and amount of memory (RAM) for the virtual machine (VM) hosting the replication service.
Note: All available database shapes are supported to work with Oracle GoldenGate Cloud Service. Select OC3, because it is the smallest shape available, and good enough for this tutorial.
-
Select your time zone.

Configure the Database
In the Database Configuration section:
- Enter the amount of storage you want for your actual database data in GB in the Usable Database Storage field. The minimum value that you can enter is 15GB.
For this tutorial, leave this field to its default value of
25.Based on your entry, the Total Data File Storage (GB) field is updated to reflect the amount of storage in GBs that will be allocated to your instance, including space for operating system and product binaries, supporting files, database data and configuration files, and so on.
Note: After you create the service instance, you can add more data storage as needed.
- Enter and reenter a password for administrative access to the database and other components of your service instance in the Administration Password and Confirm Password fields.
Use the password field tooltip for guidance on acceptable passwords. For this tutorial, use the password
Welcome_123#. - Enter a name for the Oracle System ID (SID) so this database can uniquely be identified on the server.
For this tutorial, leave the default value,
ORCL. - For Oracle Database 12c, you must define a Pluggable Database (PDB) name. A PDB is a portable collection of schemas, schema objects and nonschema objects that can be used with the multitenant architecture of Oracle Database 12c. For this tutorial, leave the default value,
PDB1.
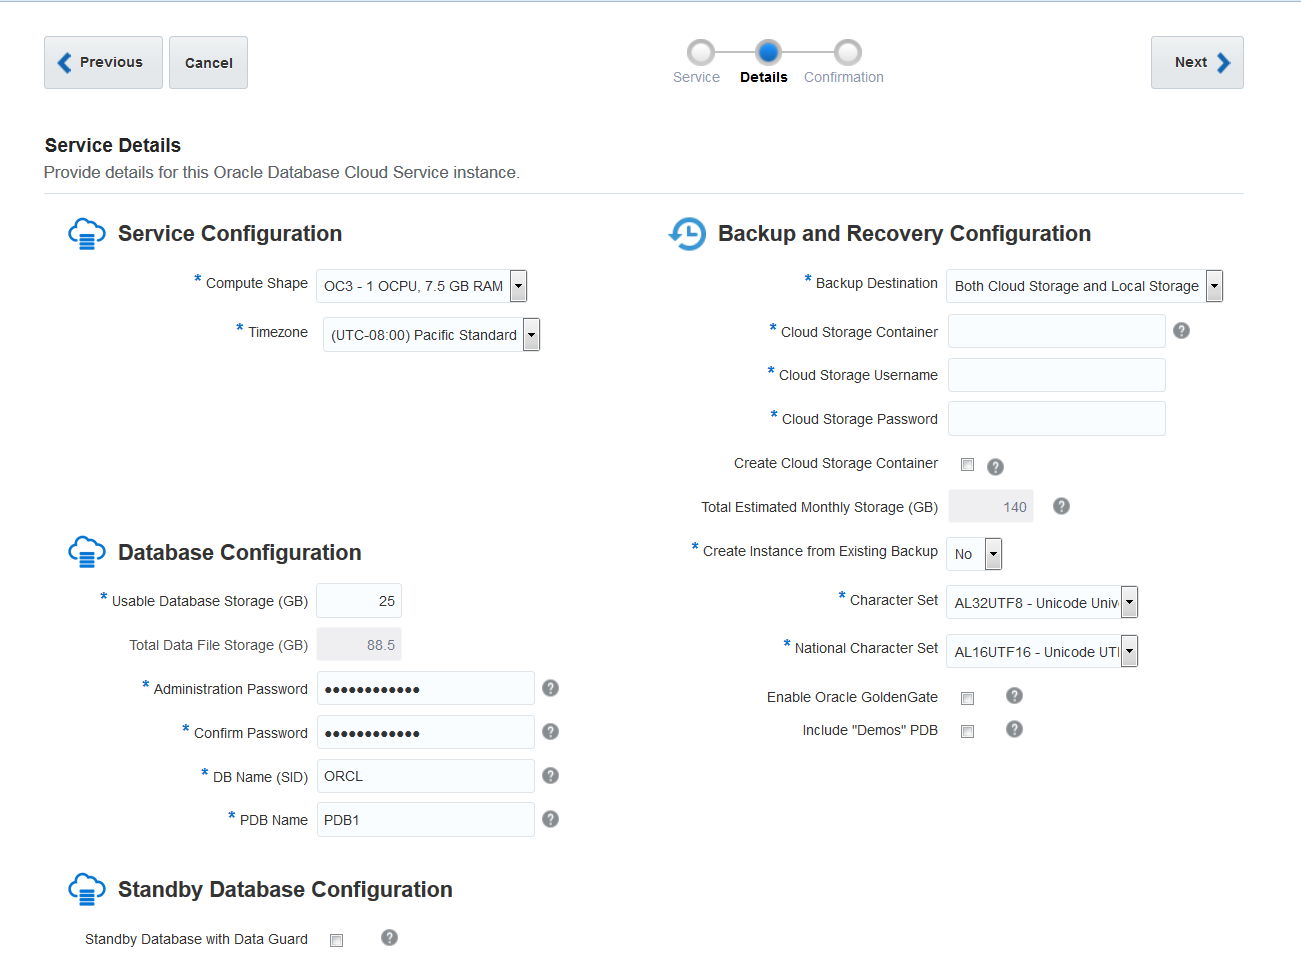
Configure Backup and Recovery
In the Backup and Recovery Configuration section:
- Select Both Cloud Storage and Local Storage from the Backup Destination drop-down list.
Note: It's always recommended to have backup, but this option is optional. With this option, backups are configured to be created automatically and stored both on block storage and on an Oracle Storage Cloud Service container.
When you select this choice, then User Name and Password fields are displayed.
- If you haven't already created a Storage Container, then select the Create Cloud Storage Container checkbox, to have the wizard create a container for you.
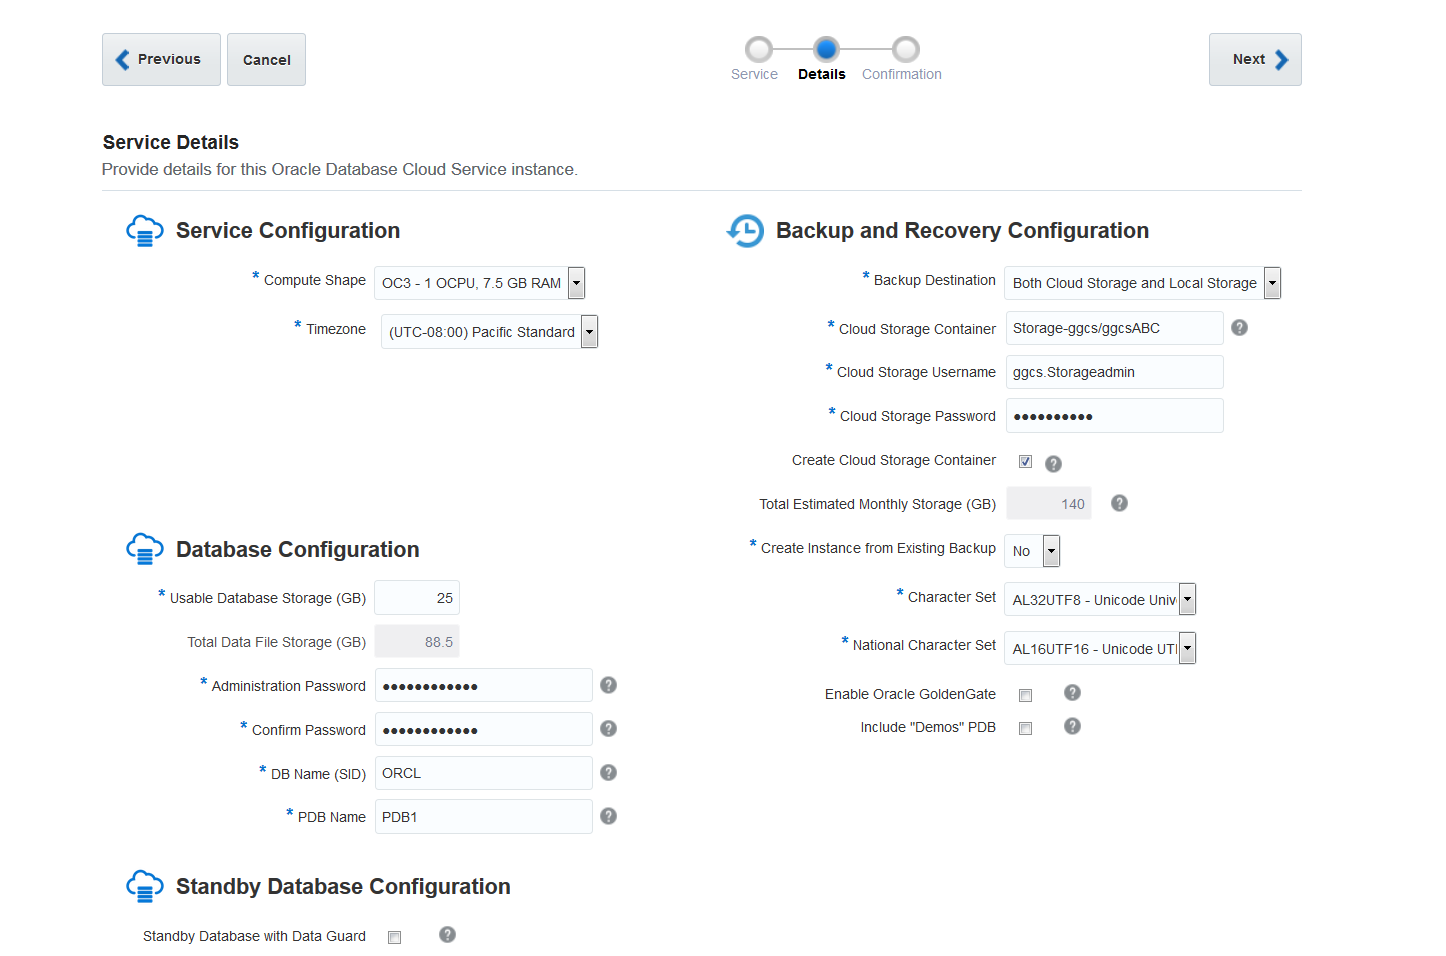
- Use the following format for the Cloud Storage Container field:
Storage-<identity domain name>/<container name>where
<container name>is:- The name of the container you wish the wizard create for you, if you have selected the Create Cloud Stroage Container checkbox.
- The name of the container you already have, if you haven't selected the Create Cloud Stroage Container checkbox.
For this tutorial the value is:
Storage-ggcs/ggcsContainerwhereggcsis the identity domain andggcsContaineris the name of the container that the wizard will create. - Enter the username and password you used to activate the Oracle Cloud Storage Service in the Cloud Storage User Name and Cloud Storage Password fields, respectively. If you have updated the administrator password after the activation, then enter your latest password. Your username and password are in the email you received after you requested this service.
The Total Estimated Monthly Storage (GB) field is updated to reflect the amount of storage in GBs that is estimated for your instance as configured, including data files and backup storage.
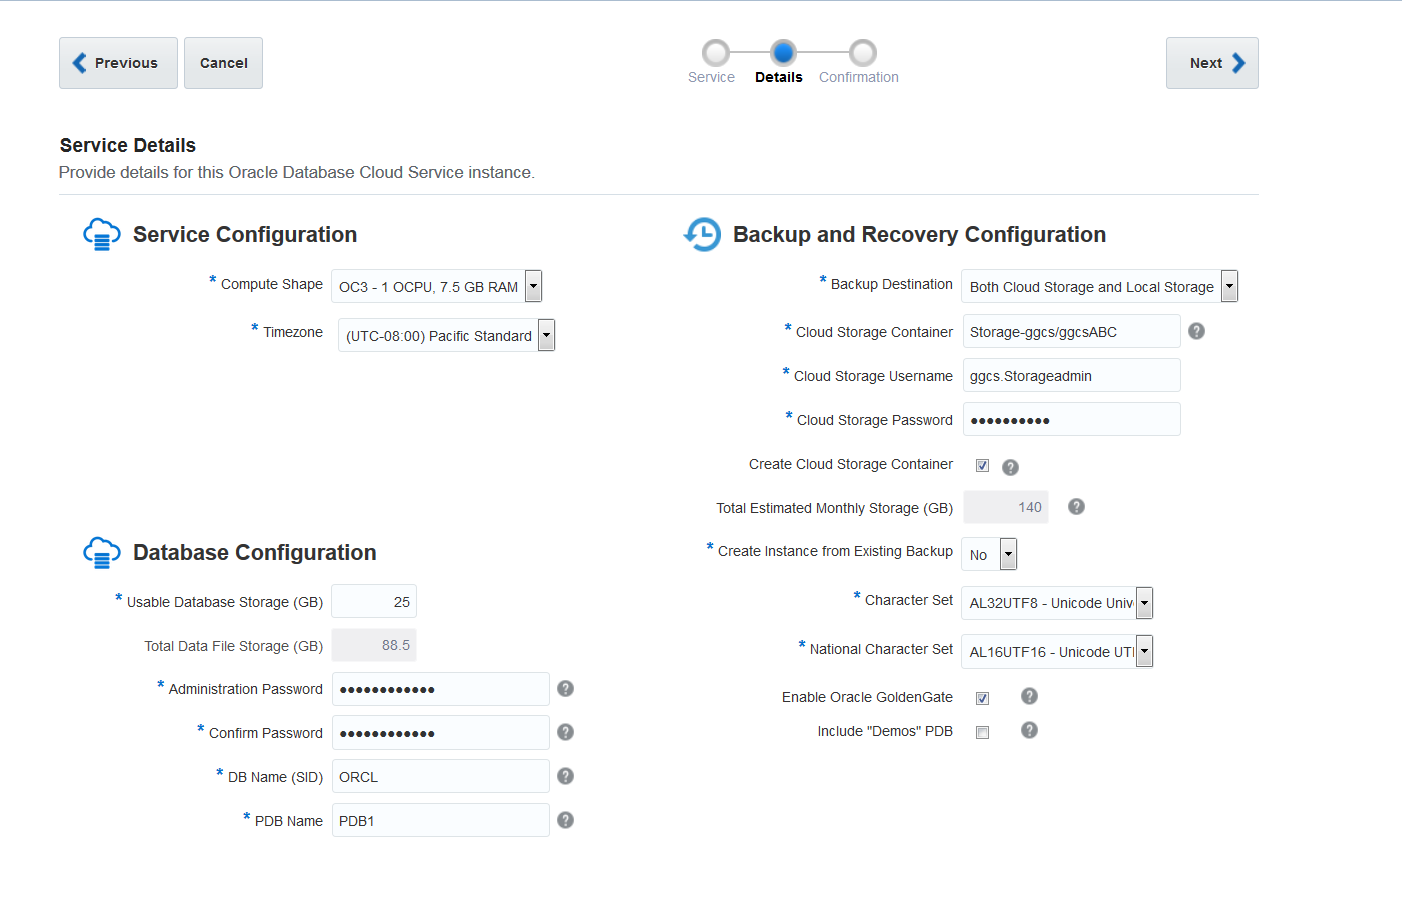
Enable Oracle GoldenGate Replication
- Select the checkbox for Enable Oracle GoldenGate. This option configures the database for use as the replication database of an Oracle GoldenGate Cloud Service instance
- For this tutorial, deselect Include "Demos" PDB to save some database space. Selecting this option configures several PDB demos in the database with the service instance creation. These demos are for 12c new features, such as in-memory and multi-tenancy. Ir you'd like to learn from the demos, then select this checkbox.
- Click Next.
Note: When you select the Enable Oracle GoldenGate checkbox, the Standby Database with Data Guard checkbox disappears because GoldenGate Cloud Service isn't supported on Data Guard configurations.
Confirm Your Oracle Database Cloud Service Instance Definition
The Confirmation page, has a summary of all your previous selections. Review them and if you agree with them, then click Create. Otherwise, use the navigation train or the Previous button to change your information

Your new database will be listed in the the Database Cloud Service, Services page with a status of "In Progress" until the service instance creation is completed. Service instance creation can take more than 30 minutes. After the service instance is up and running, no status will be shown for the service instance.
Don't start the next section until your database instance is up and running.
Create a GoldenGate Cloud Service (GGCS) Instance
In this section, you create an Oracle GoldenGate Cloud Service instance.
You should already have:Invoke the Create Oracle GoldenGate Cloud Service Instance Wizard
-
Go to Oracle Cloud My Services by either clicking the link in your Welcome email or by going to http://cloud.oracle.com, clicking Sign In, selecting your Data Center and then clicking MyServices in the Cloud Account section.
Description of this image -
Provide your Identity Domain and click Go.
Note: If you don't go to Oracle Cloud directly and use the link in your Welcome email instead, you don't need to provide your identity domain.
Description of this image -
Enter your username and password and click Sign In.
Description of this image -
In My Services Dashboard, click the GGCS menu and then click Open Service Console.
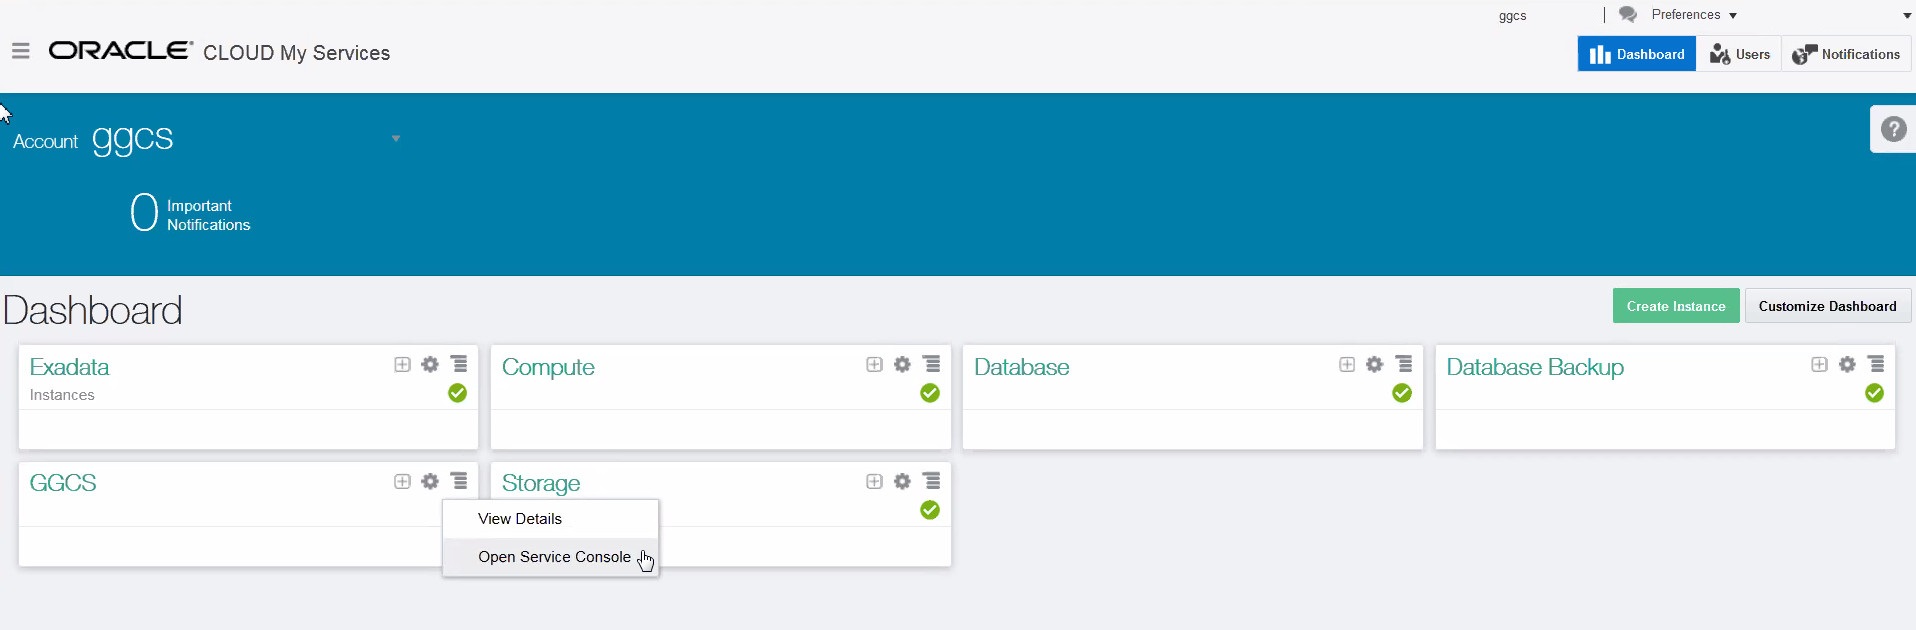
Description of this image
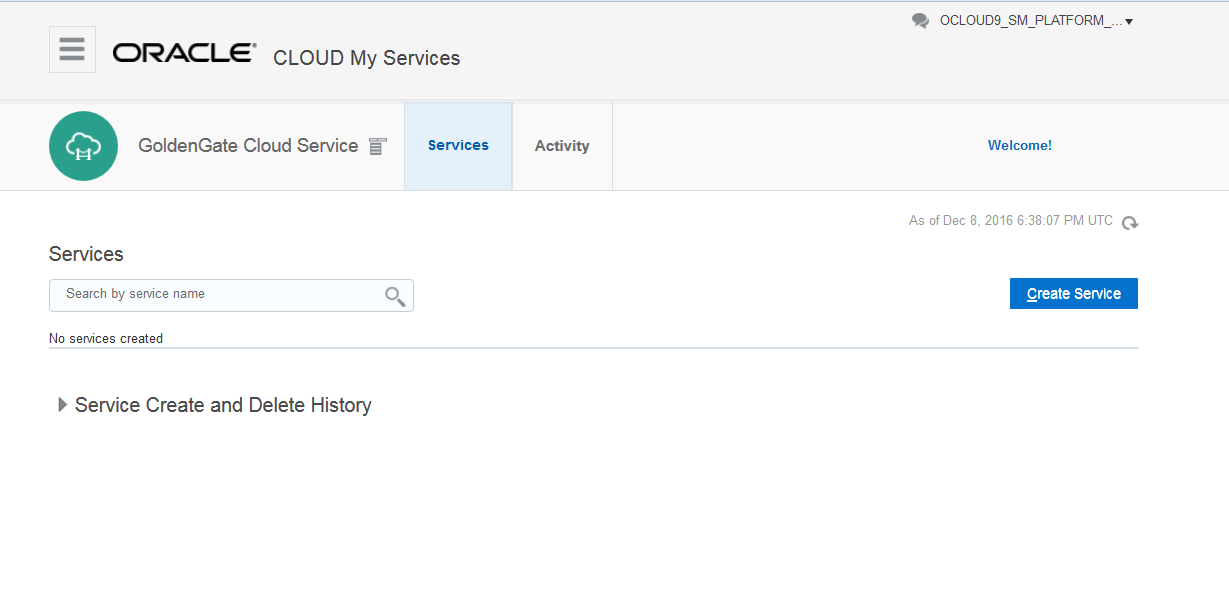
- In the GoldenGate Cloud Service console, click the Create Service button.
Note: If you don't have any instances, you get a welcome banner and links to get you started. In that case, click the Services page and then click Create Service.
Define Your Service Instance
Note: If you want information about any of the fields on this page, click the tooltip icon adjacent to it.
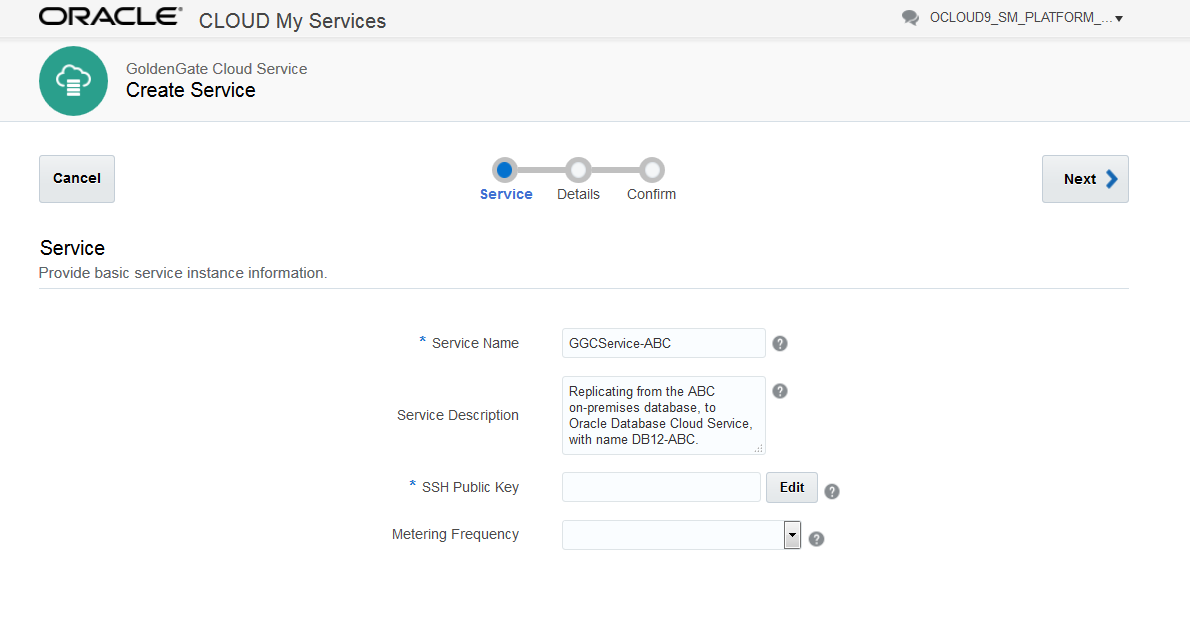
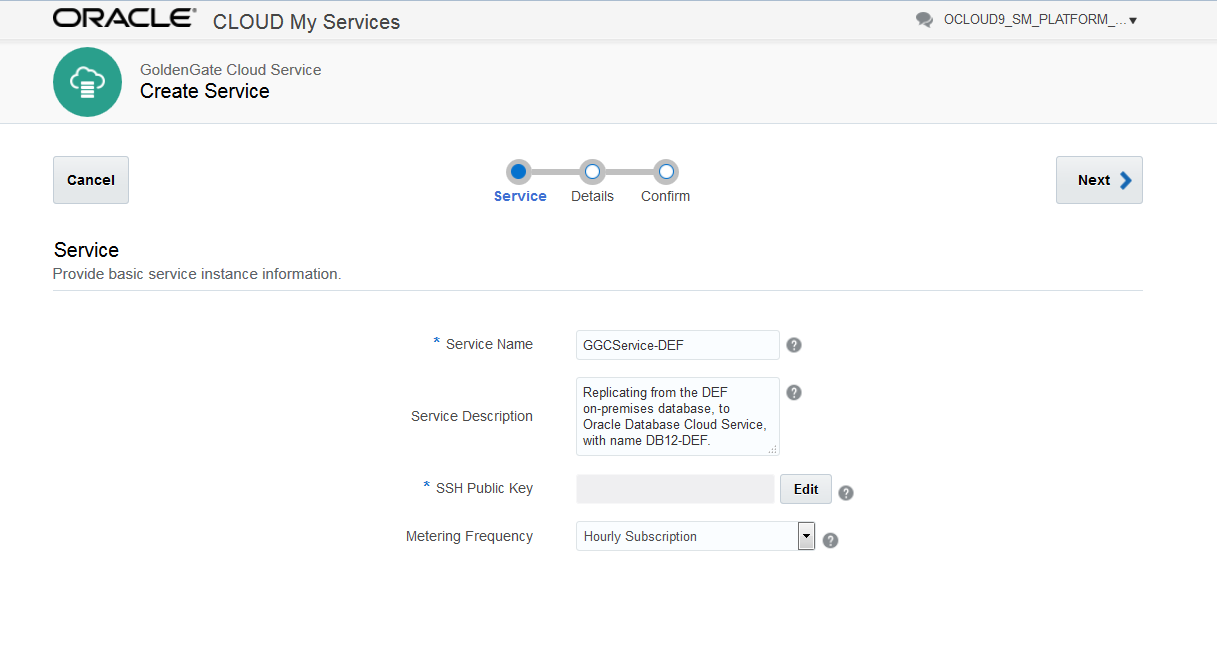
-
Provide a display name for the service instance in the Service Name field. For this tutorial, set this value to
GGCService-ABC. -
Provide a description for the service instance in the Service Description field. For example,
Replicating from the ABC on-premises database, to Oracle Database Cloud Service, with name DB12-ABC.Note: Use the Service Description field to provide a business reason for creating this instance, so future administrators can easily identify this instance's functionality. For example, Replication service for QA testing, or Replication service for transferring the System X output data from our on-premises data center to our database service in the cloud.
Provide a Public Key for Access to this Service Instance
In this step, you enter a public key to be installed on the virtual machine (VM) for this service instance. Associating a public key to this VM will allow Secure Shell (SSH) access to this virtual machine from the 'opc' administrative user account.
- Click Edit for the SSH Public Key Text field.
-
You have three options to provide a public key:
- Key File Name: Browse to the location of a file containing a public key.
- Key Value: Enter the value of an existing SSH public key.
- Create a New Key - This option creates a public and a private key file, zipped and ready for you to save both files on your computer. This option saves the public key information for the service instance.
For this tutorial, instead of creating a new key, use the same pair of keys you generated for the database cloud service in the Configure the Database section. To do that, unzip the sshkeybundle.zip file created by the Create Servcie wizard of the database cloud service and select publicKey from the unzipped folder.
Select Key File Name option, click Browse and locate the public key file,
publicKeyon your computer, and click Enter.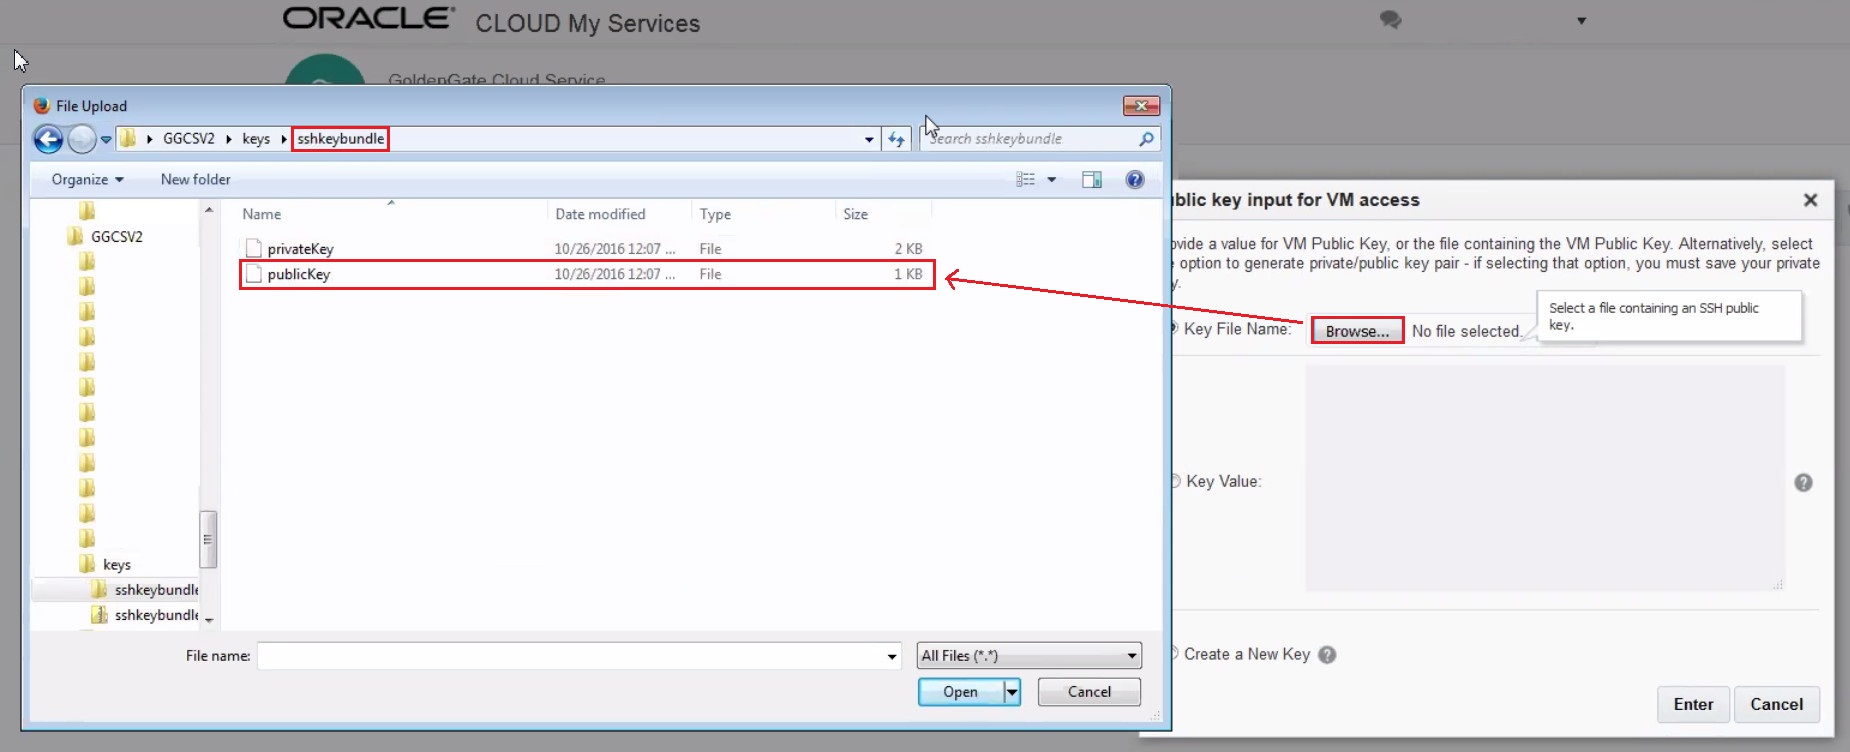
Description of this image
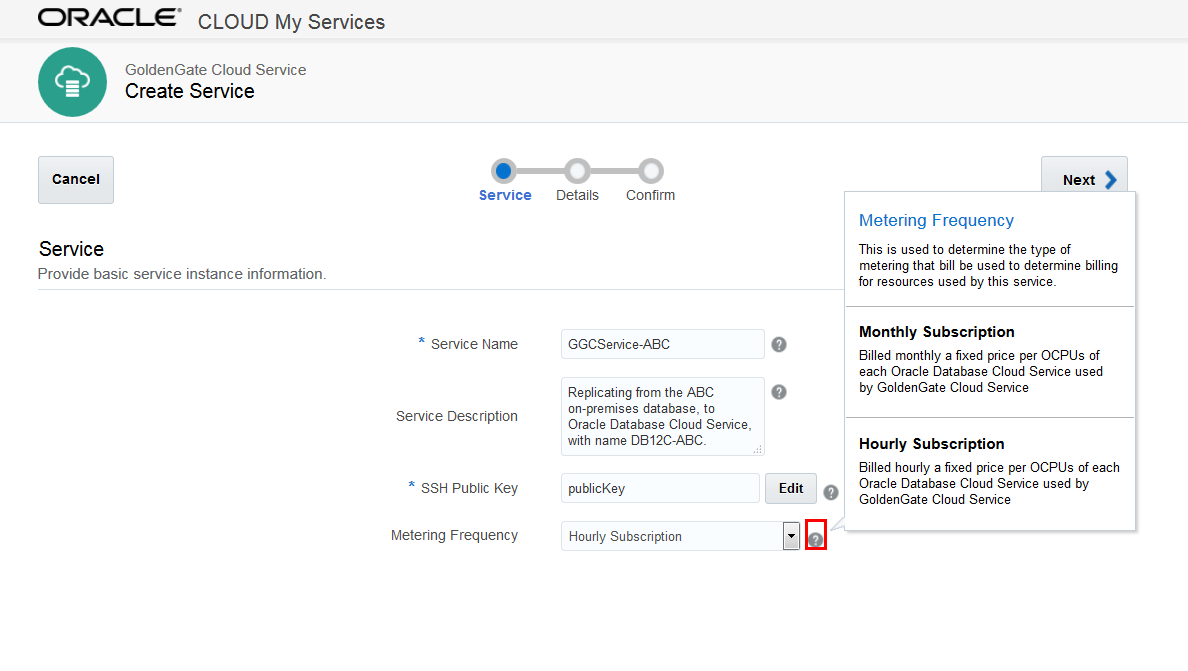
Choose Billing Frequency
Depending on your subscription, you may or may not get a Metering Frequency option in this step. For example, if you have a trial account, you can choose an hourly or monthly billing option, but if you have a subscription based (SB) account, you won't have a Metering Frequncy field. If you get this option, then read the tooltip for this field, and then select the billing option that works best for you.

Click Next.
Get the Software Release
In the Details Page, click Selection Summary to get the version of GoldenGate that's installed for this GoldenGate Cloud Service instance.

The software release is GoldenGate Cloud Service with GoldenGate 12.2.0.1.2 for DB12c/11g on Oracle Linux 6.6.
Configure Backup and Recovery
In the Backup and Recovery Configuration section:
In The Backup Destination dropdown menu, either choose Both Remote and Disk Storage or None. If you choose None, then skip the rest of this section. However, Oracle recommends that you select backup to recover your GoldenGate Cloud Service instances.
-
In The Backup Destination dropdown menu, either choose Both Remote and Disk Storage or None. If you choose None, then skip the rest of this section. However, Oracle recommends that you select backup to recover your GoldenGate Cloud Service instances.
Storage-<identity domain name>/<container name>Where
<container name>is the name of a new or existing Cloud Stroage Container. If you want the wizard to create you a new container, then you must also select the checkbox for Create Cloud Storage Container. Either way, the format is always the same. For this tutorial this container was created through the database cloud service wizard so the value for this field is:Storage-ggcs/ggcsContainerwhereggcsis the identity domain andggcsContaineris the name of the existing container. - Enter the user name and password you used to activate the Oracle Cloud Storage Service in the Cloud Storage User Name and Cloud Storage Password fields, respectively. If you have updated the administrator password after the activation, then enter your latest password. Your username and password are in the email you received after you requested this service.

Provide Target Database Details
In the Database Service Details section, you provide information for the database instance that you want to associate with this GoldenGate Cloud Service, to use either for the source or the target of the replicated data. This tutorial doesn't go over setting up your source or target, but you must always associate one Oracle Database Cloud Service with your GGCS instance.
Note: Only Oracle Database Cloud Service (DBCS) instances that are RUNNING are available in the drop down list. For example, if the status of an instance is in progress, it won't appear in the list. You can find the status of a database cloud service in the Services page of Oracle Database Cloud Service. If the instance doesn't show a status, such as In Progress or Stopped, then it means that it's running.
If you don't have any Database Cloud Service instances in the same identity domain as your GoldenGate Cloud Service, then the wizard won't allow you to create any GoldenGate Service instances. You should first create the database instance by following the steps in Create an Oracle Database Cloud Service Instance.
Note: For GoldenGate Cloud Service, all Oracle Database Cloud Service, instances, versions 11g and 12c are supported. If you have a 12c instance, then you either provide a valid PDB name or use the default PDB. You can leave the PDB field blank to use the default PDB that was created when the database instance was provisioned.
Note: In addition to the default PDB, you can enter the name of any of the custom PDBs created for this selected database instance. Only one PDB name is accepted for each GoldenGate Cloud Service instance.
For this tutorial select or enter the following information:
-
Database Service:
DB12-ABC -
PDB Name:
PDB1 -
Administrator User Name:
<SYS or other user with SYSDBA privileges> -
Password:
<The database administrator password which is Welcome_123# for this tutorial.>
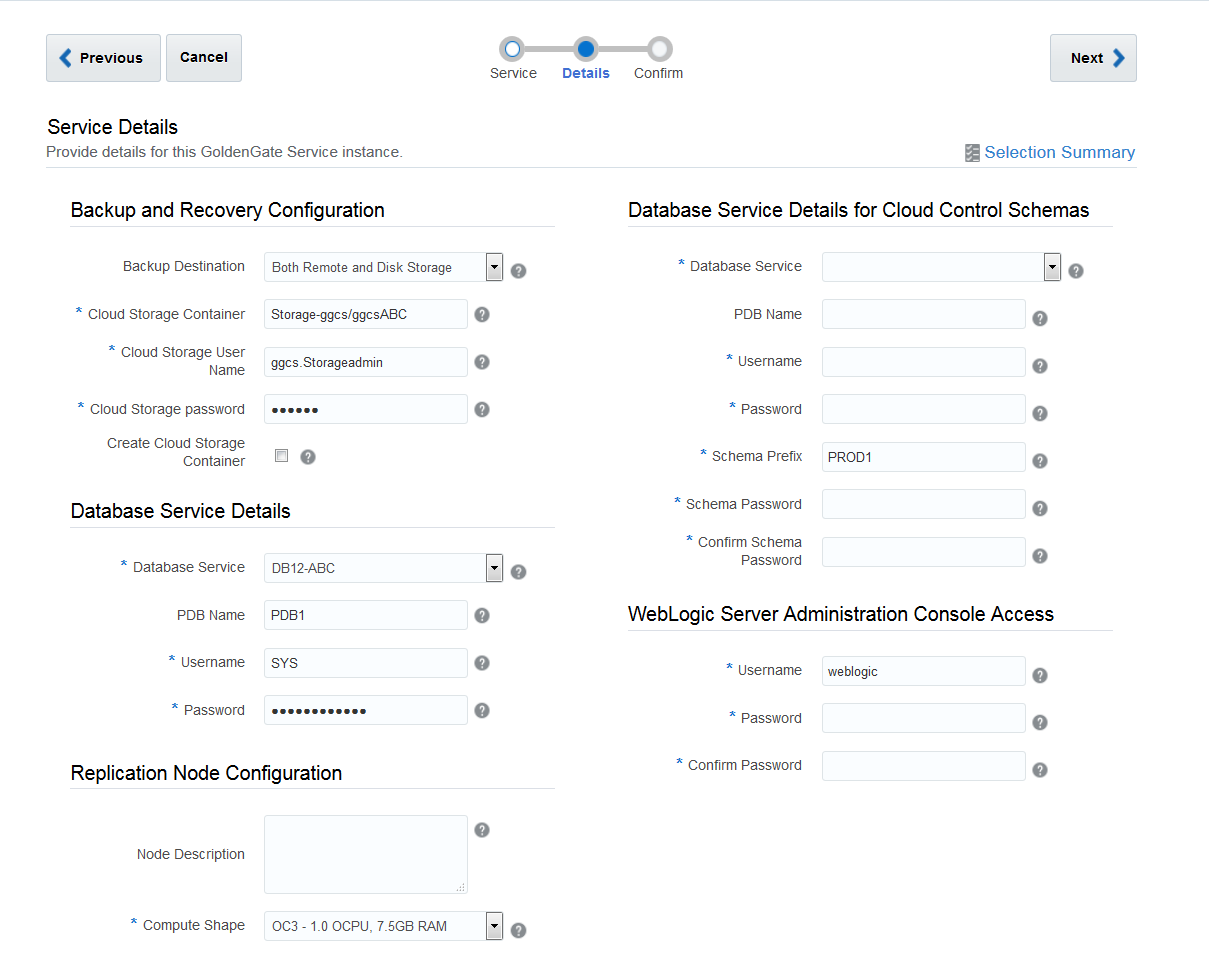
Click Next.
Configure the Replication Service
A replication process runs on a database and is responsible for applying data changes to that database.
In GoldenGate Cloud Service, each replication node provides a replication service for a source database to be replicated on an Oracle cloud target database instance that you have specify in this step.
In the Replication Node Configuration section:
-
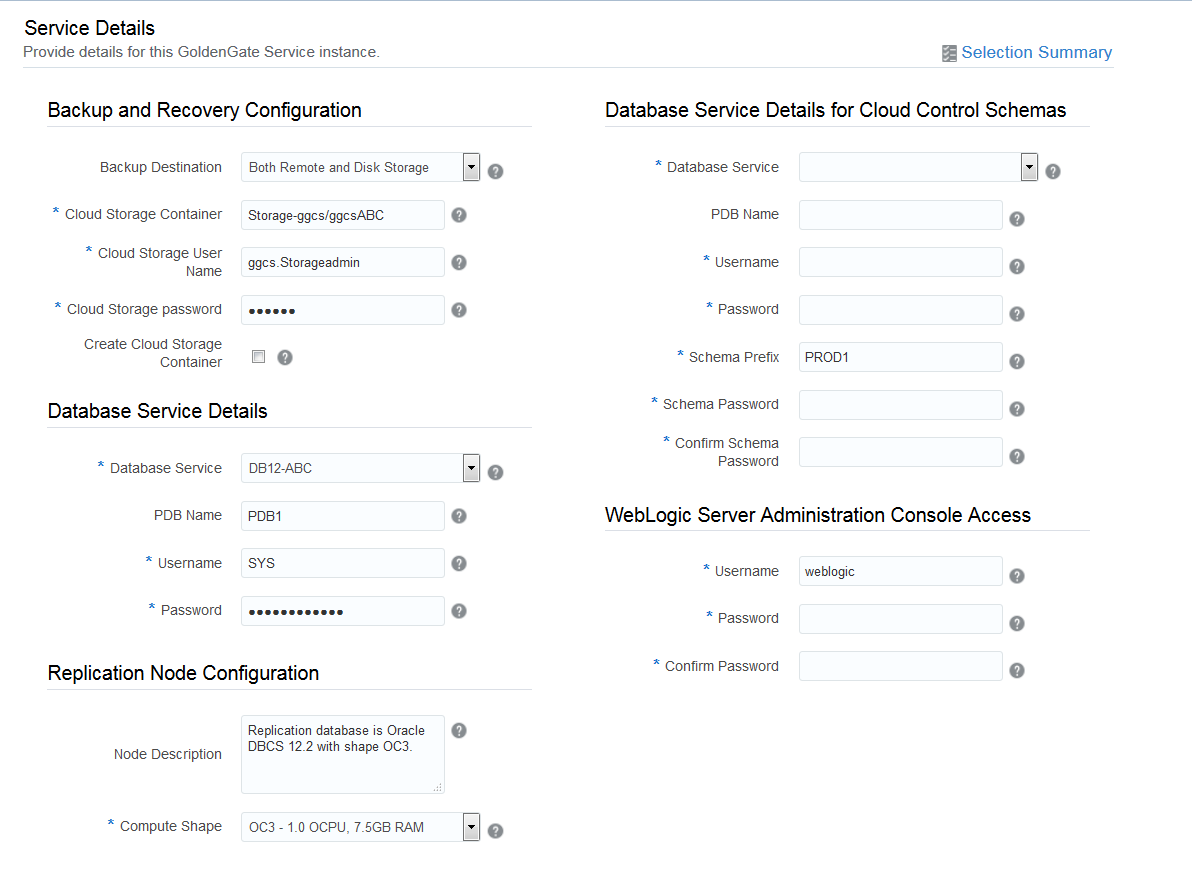
Enter a description of the service instance in the Node Description field.
For this tutorial enter,
Replication database is Oracle Database Cloud, DBCS 12c with shape OC3 - 1OCPU and 7.5 GB RAM. Oracle Cloud Storage Container provides backup and recovery:
Storage-ggcs/ggcsContainer
. -
For the GoldenGate Cloud Shape , select OC5 - 4 OCPU, 30GB RAM.
This compute shape specifies the number of Oracle Compute Units (OCPUs) and amount of memory (RAM) for the virtual machine (VM) hosting the replication service. Both OC3 and OC5 are supported for GoldenGate Cloud Service. However, selecting OC5 gives you a faster virtual machine with more RAM than OC3. OC3 is offered for trial versions of GGCS.
Note: The replication node compute shape does not include the OCPU and RAM allocated for the target replication database instance that you specify here, in the Service Details page of the Oracle Database Cloud Service wizard. You specified the database instance shape, when you provisioned it in the Create an Oracle Database Cloud Service Instance section.
Configure the Cloud Control Server
GoldenGate Cloud Control provides a dashboard for monitoring, analyzing and managing your GoldenGate Cloud Service instances.
In the Database Service Details for Cloud Control Schemas section, select an Oracle Database Cloud Service instance to be used for Cloud Control schemas. Choose from databases with a running status within the same identity domain as this GoldenGate Cloud Service instance.
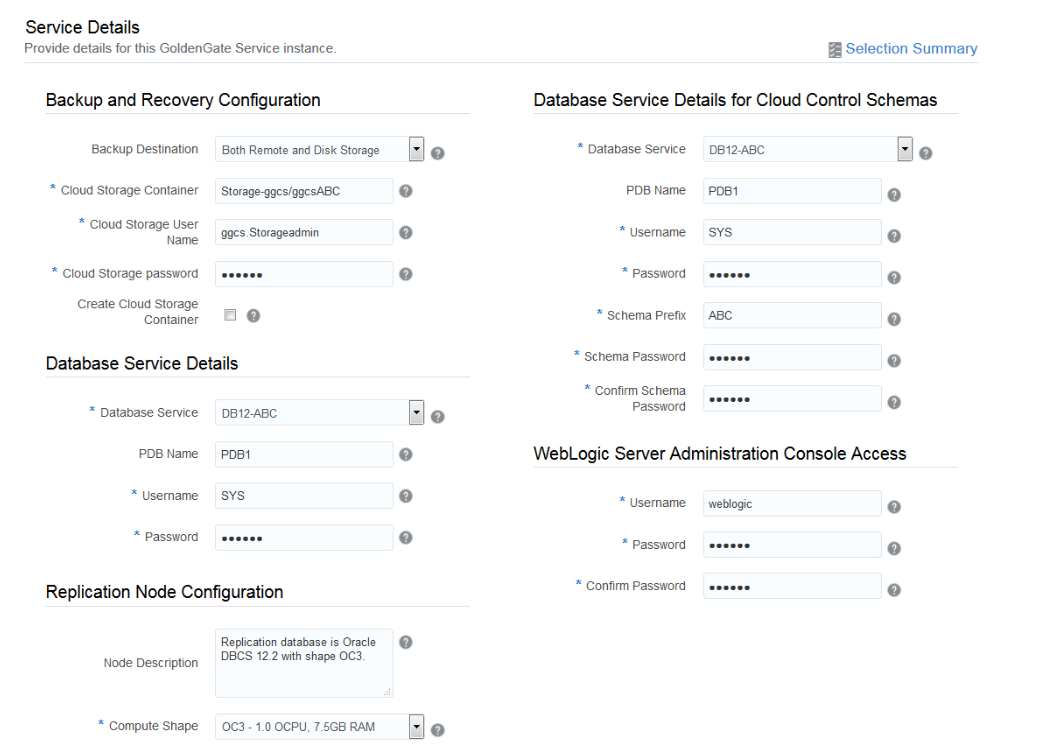
For this tutorial, enter or select the following information:
- Database Service: DB12C-ABC
Note: This database should be different from the database you select in the Database Service Details section to be used for your replication database. Otherwise, you may run into some issues. For simplicity in this tutorial, it is the same as the replication database, which is DB12-ABC.
- PDB Name: PDB1
- Administrator User Name: <SYS or other user with SYSDBA privileges>
- Password: <The database administrator password which is Welcome_123# for this tutorial>.
- Schema Prefix: ABC
Note: This prefix that you provide is prepended to each schema name in the form of prefix_schemaname. Instance creation will fail if you use the same prefix as an existing instance. To ensure that each prefix is unique, check the instance detail page of other instances to find their prefixes and avoid re-using their prefixes.
- Schema Password: (Your choice of password such as Welcome_123#).
In the WebLogic Administration Console Access section you choose your credentials for logging into WebLogic Server Admin console and GoldenGate Cloud Control dashboard. Note that both are setup to use the same username and password. You use the WebLogic Administration console to manage the Cloud Control managed server and users and roles associated to this service. Save this username and password to later access WebLogic Administration Console as well as your Cloud Control dashboard. For this tutorial enter:
- User Name: ABC
- Password: (Your choice of password such as Welcome_123#).
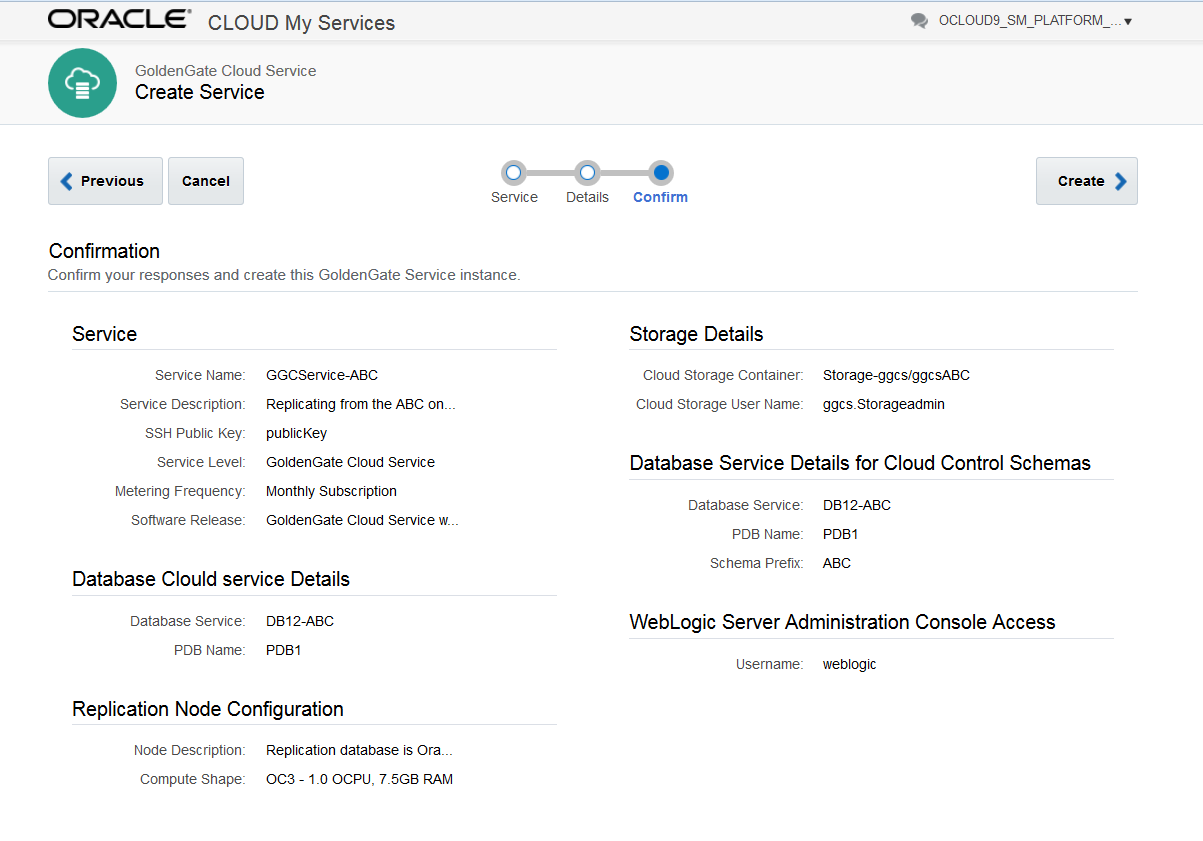
Confirm and Create your GoldenGate Cloud Service Instance
On the Confirmation page:
- Review your settings.
- If you want to change any information, click the Previous button, make your changes and then return to the Confirmation page. (optional step)
- If any fields display a partial value, such as the Software Release, click or hover the mouse on the partial value for a window popup to display the complete value of that field.
- Click Create.
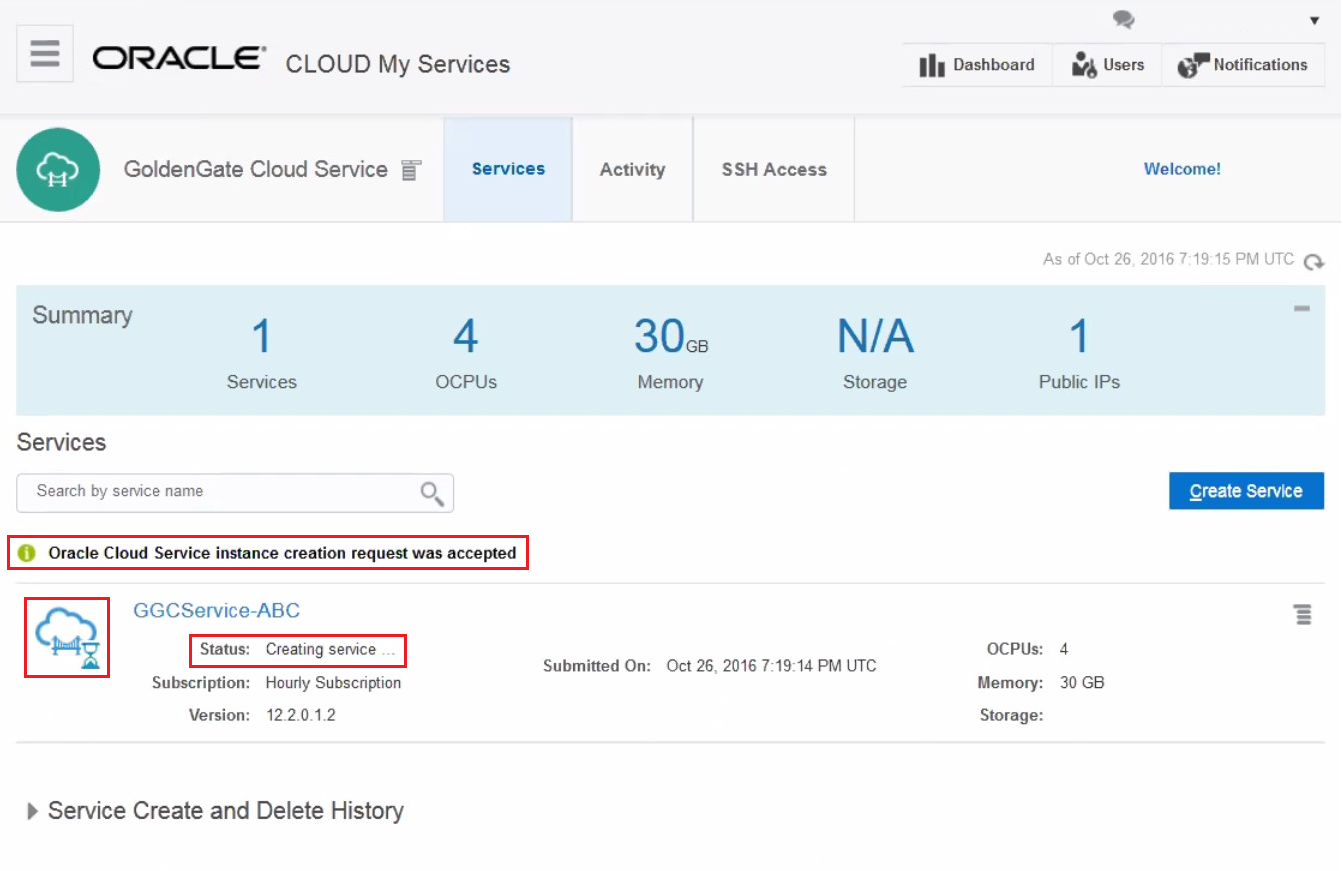
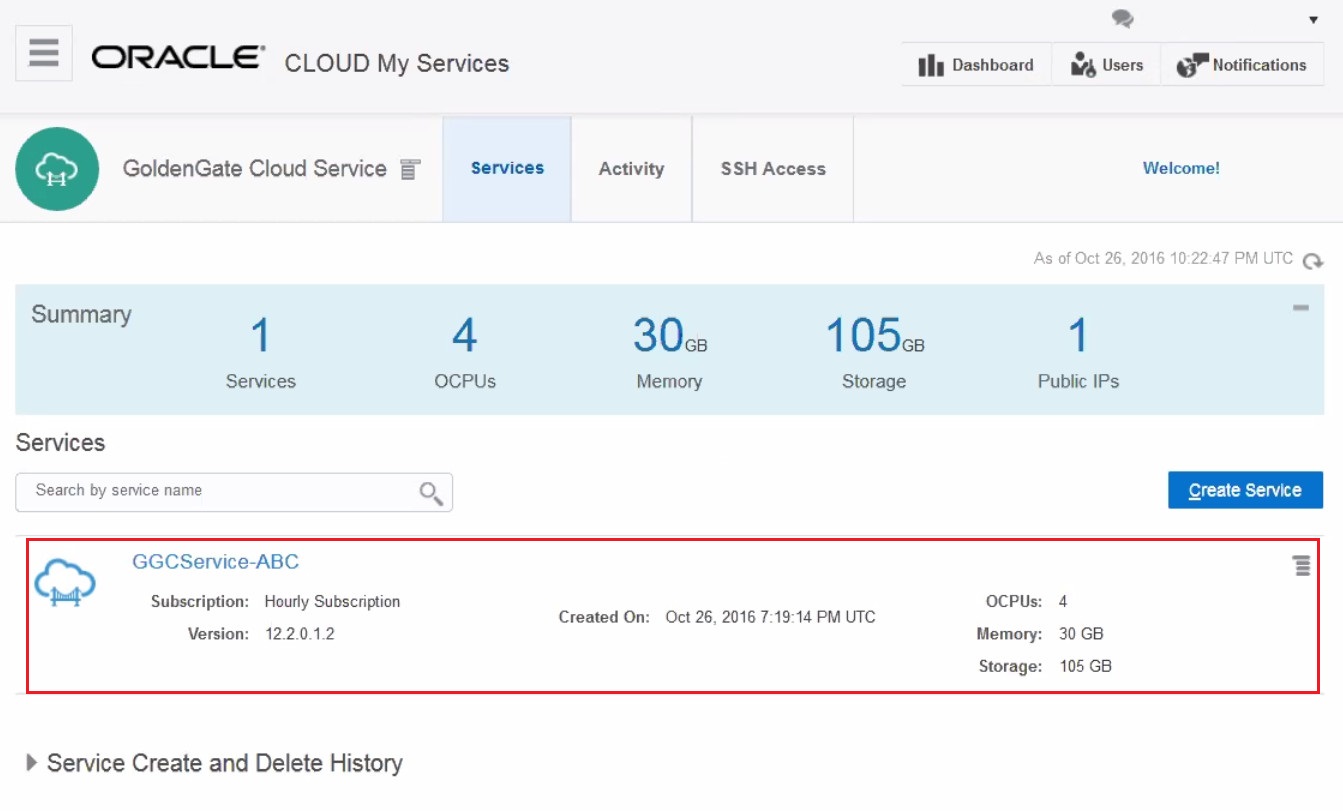
- Refresh the page several times, until the status of your instance isn't Creating service ... any more and GoldenGate Cloud Service icon for the service is not displayed with an hour-glass. Then you can click the instance name and see its details.