Before You Begin
Purpose
This tutorial helps you set up a SOCKS5 proxy with Secure Shell (SSH) tunneling, so you can transfer data to or from an Oracle Public Cloud service without the need to open additional ports.
Time to Complete
Approximately 30 minutes
Background
Oracle Cloud services offer virtual machines that can receive data from and send data to cloud or noncloud machines, even if they have firewalls. By using SSH tunnels, you have an encrypted, secure pathway to transfer your data from an SSH server to an SSH client, with the identity of the client hidden from the public.
You set up SOCKS5 proxy on the SSH server with a proper authentication method, either a password to the noncloud machine, or a private key to the cloud machine. Then, you assign a local port to be open on the client to receive all the data. This way, the client won't need to ask for authentication, every time it receives data from another the client and you also don't need to open any additional ports.
Oracle Cloud services are SSH and SOCKS5 enabled to protect your data delivery.
What Do You Need?
- PuTTY, if connecting to cloud from Windows
- SSH client on non-cloud machine
- IP address of cloud or non-cloud machine
- Private key to cloud virtual machine or password to non-cloud machine
Copy Private Key into .SSH Directory of Client
In this tutorial, you're sending data from the machine with the SSH client to the one with the SSH server.
If you're sending data to a noncloud VM or a machine that doesn't need a private key to accept data, then skip this section.
On the client machine, to determine if SSH is running, enter the following command:
$ pgrep sshd
If SSH is running, then the response to this command is one or more process ID numbers.
In the home directory of the clent user, gguser in this example, use the command ls -la to ensure that the .ssh directory is owned and writable only by that user.
$ cd ~
$ ls -la
(confirm that .ssh folder is here)
If you don't have one, then create the .ssh directory in the user's home directory, and set permissions on it to ensure that only that user, for example, gguser, has read and write permissions:
$ mkdir ~/.ssh
$ chmod 700 ~/.ssh
Copy the private key to connect to the cloud server, to the client's .ssh folder.
$ cp  (location of your private key)/privateKey  ~/.ssh
$ cd .ssh
$ ls
privateKey
In the .ssh folder, change the permission of the privateKey file, so it's not accessible by others.
$ chmod 600 privateKey
$ ls -l
-rw------- 1  .......  privateKey
Note: If your private key file is in a ppk format such as privateKey.ppk, then the ssh command will ask for a passphrase. If you didn't set a passphrase for the privateKey.ppk file, then, you won't be able to use the SOCKS5 proxy. Instead, you can use the privateKey name file that the Oracle Cloud service wizard created with the matching public key and you won't be asked for a passphrase. This tutorial uses privateKey.
However, if you didn’t have the wizard create a key for you and you used PuTTY to generate your public / private key pair, then use the PuTTygen program and perform the following steps to convert your private key file from PPK version to an OpenSSH format:
- Run the puTTygen program.
- Click Load.
- Select your private key that ends in .ppk and then click Open.
- Click the Conversions menu option.
- Click Export OpenSSH key.
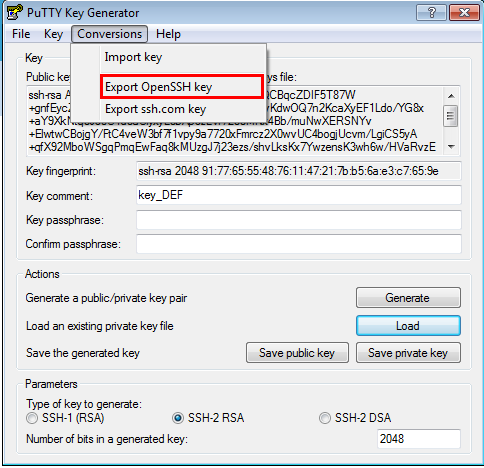
- If you want a passphrase, enter it in the Key passphrase field and confirm it. Ensure that you know this passphrase later, because it's not retrievable.
- If you didn’t choose a passphrase, confirm that you don’t want one.
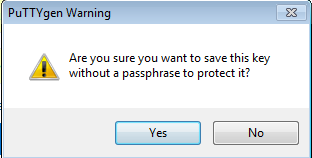
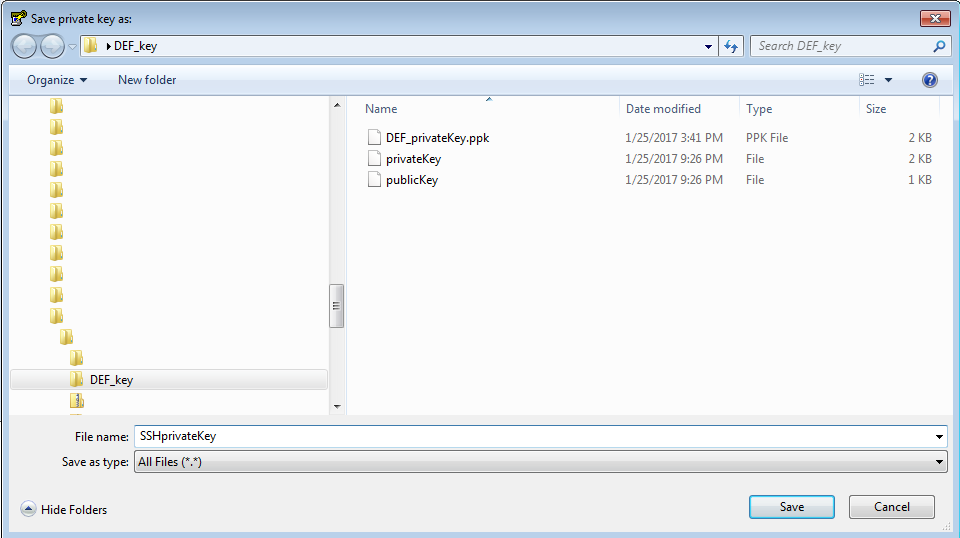
- Give your private key a new name. For example SSHprivateKey and then click Save.
- Close the puTTygen program.
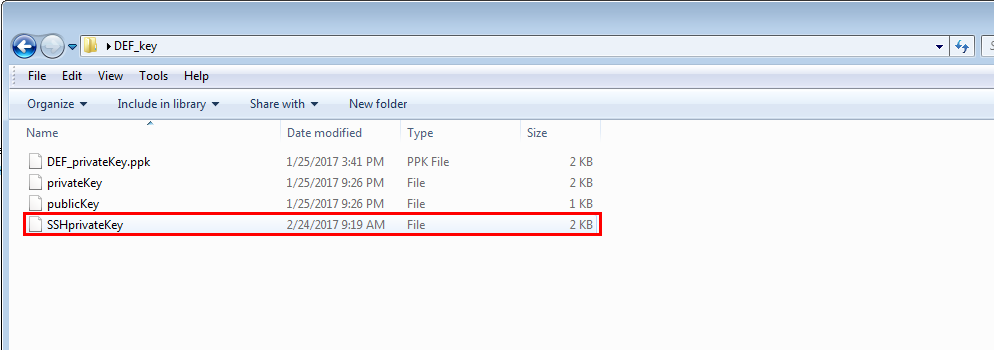
- Confirm that your new private key has been saved in the location that you specified.
Connect to Oracle Public Cloud Service with PuTTY
If you're using the Oracle Public Cloud service as a client and want to send data from its VM to another machine, then you should connect to the Oracle Cloud Service VM first. If you are on Windows, use PuTTY to connect to it. If the Oracle Public Service is receiving data and not sending data, then skip this step.
1. Find the IP address of the cloud instance. Go tp Find the IP address of an Oracle Cloud Service VM tutorial for instructions.
2. Use the IP address. user name, which is either opc or orcle, and private Key to theVM to connect to it with PuTTY. If you need help, then go to Set up a PuTTY connection tutorial.
After you establish a connection with PuTTy, go to the next section.
Set up SOCKS5 Proxy on the Client
The client is the machine sending out the data.
- Find the IP address of the server. If the server, who will be listening for data is cloud, then go to Find the IP address on an Oracle Cloud Service VM tutorial for instructions. Otherwise, for a Linux machine, enter the following command to find its IP address.
- In a terminal window, set up the SOCKS5 proxy with port 9000, using the following
sshcommand:
$ / sbin/ifconfig
...inet addr: 111.111.1.11
ssh -i <private_key file> -v -N -f -D <listening IP address>:<listening IP port> <server login username>@<server IP address>
-i: Private key file
-v: Verbose mode
-N: No execution command on remote system
-f: Run the proxy process in the background
-D: Dynamic port forwarding
<listening IP port>: Port to connect to on the remote host.
The following is an example of SOCKS5 proxy setup that shows the SSH tunnel connecting to a cloud service with the IP address of 11.111.111.111 . The username for an Oracle Public Cloud (OPC) service is usually opc or oracle.
$ ssh -i ~/.ssh/privateKey -v -N -D 127.0.0.1:9000 opc@11.111.111.111 >& ./dirrpt/ggcs_socksproxy.log
In a typical implementation of on-premises to cloud replication, SSH is used for the connectivity, which the on-premises server communicates directly to the GGCS server through the use of SOCKS5 proxy. However, in cases where the security policy dictates or the client doesn’t want to use SSH, Corente Services Gateway for VPN connectivity between on-premises and the GGCS VM can be used. For more information, go to How to configure on-premise to GoldenGate Cloud Services replication with Corente
If you're sending data to a noncloud machine, you don't need a private key and you'll be prompted to provide a password to the noncloud machine for the user you specify in the command. Therefore, eliminate the -i <private_key file> from the ssh command.
The following is an example of SOCKS5 proxy setup that shows the SSH tunnel connecting to a noncloud service with the IP address of 111.111.1.11 with the username gguser.
ssh -v -N -D 0.0.0.0:9000 gguser@111.111.1.11
After you enter the ssh command, you provide the password to the non-cloud machine.
Review if the SOCKS5 Proxy is Running on the Client
For more ssh options use the man command:
$ man ssh
If you don't add -f to run the proxy process in the background and then close the terminal running the ssh command, then your SSH tunnel with the SOCKS5 proxy will be lost. But before you run the ssh command in the background with the -f option, run the ssh command without it and confirm that the SOCKS5 proxy is running successfully. Search for outputs confirming an established connection, either with the private key or the password you provided.
For example, in the output, you'll have:
debug1: Connection established.
debug1: Found key in /scratch/gguser/.ssh/known_hosts:2
debug1: SSH2_MSG_SERVICE_ACCEPT received
...
Troubleshooting:
If you get the error message: Cannot assign requested address, then that means that the port that you assigned, 9000 in this example, is already taken. Instead, assign another port for the SOCKS5 proxy. To verify if a port is taken, enter the following command to see what process is using this port. For port 9000 enter:
$ netstat -na | grep 9000
If you get the Permission denied error when starting the SOCKS5 proxy with SSH, then you're missing the user name and host name needed to connect.
Additional Steps on the Client
Depending on the product that's sending data on the client side, you may need to perform additional steps that are specific to your product. For example, in Oracle GoldenGate, you add the following line to the pump parameter file when it is pumping data to a target with SOCKS5 proxy:
RMTHOST xx.xxx.xxx.xxx, MGRPORT 7744, socksproxy 0.0.0.1:9000
Review your product documentation for more information.
Find Received Data on the Server
If the Oracle Public Cloud service is the ssh server and is listening to accept data from the ssh client, then based on the cloud service you have, you may need additional information about the received data.
- Find the IP address of the cloud instance. Go to Find the IP address of an Oracle Cloud Service VM tutorial for instructions.
- Use the IP address. user name, which is either opc or orcle, and private Key to theVM to connect to it with PuTTY. If you need help, then go to Set up a PuTTY connection tutorial.
- After you establish a connection with PuTTy, browse to the corresponding folder or query the data that's received.
Review your Oracle Cloud Service's documentation for more information on the received data.
For example, for Oracle GoldenGate Cloud Service, the data is received in the Database Cloud Service associated to it and you can use SQL to query the data.