 Provision Your First Oracle Integration Instance
 Before You Begin
This tutorial shows you how to provision your first Oracle Integration Cloud instance. The configuration steps in this tutorial take approximately 15 minutes to complete.
What Do You Need?
- Obtain an Oracle Integration Cloud subscription.
- Subscribe to and create an Oracle Database Cloud Service instance.
- Subscribe to and create an Oracle Storage Cloud Service storage account. You do not need to create an instance. The provisioning wizard described in this tutorial creates the instance for you after you complete the configuration steps.
 Create
an Instance
Create
an Instance
Complete the configuration steps to provision an Oracle Integration Cloud instance.
- Sign in to the My Services Console.
- Click Go
to Console.
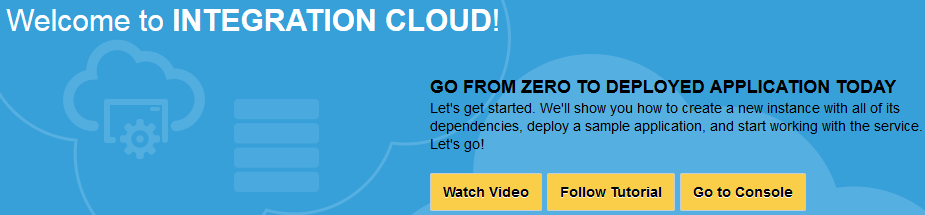
Description of the illustration welcome - Click Create
Service.

Description of the illustration provision-main-page - On the Service page, provide basic information about your
new Oracle Integration Cloud instance, then
click Next.
Field Description Service Name Specify a name to identify the new service instance. The name must be unique within the tenant domain. You cannot have two instances with the same name at the same time; one instance must be deleted. The service name must meet the following conditions: - Must start with a letter.
- Cannot be longer than 50 characters.
- Can only specify a hyphen as a special character.
Description Optionally add a description to help identify the purpose of this new service. The description is only used during service list display. Notification Email Enter an email address at which to be notified of instance provisioning progress (for example, when provisioning completes). SSH Public Key Select an option for accessing service host access. This key is used for authentication when connecting to the instance using a secure shell (SSH) client. The same public key is used for all VMs configured for this service instance.
- Browse for the file containing the VM public key file.
- Provide a value for an existing VM public key.
- Create a new private/public key pair. A new key is generated for you. When prompted, save the key as a file on your hard drive.
Initial Number of Nodes Select the number of nodes to include in the cluster. Select 1, 2 (the default value), 4, or 8 virtual machines (nodes). If you use the REST API to provision an instance, you can specify any number of nodes. After provisioning completes, you can scale in (remove nodes) or scale out (add nodes) from the My Services Console. Metering Frequency Displays HOURLY. This is the only value available and cannot be deselected. - On the Details page, specify the Oracle Integration
Cloud feature set, Oracle Database Cloud Service details,
and Oracle Storage Cloud Service container details, then
click Next.
Field Description Backup and Recovery Configuration Specify the Oracle Storage Cloud Service container in which to store backups. You can specify an existing storage container service or automatically create a new storage container service during this Oracle Integration Cloud provisioning session. The storage container account must already exist even if the storage container has not yet been created. - Cloud Storage Container:
Specify the container name using the following
format:
For example:Sstorage-identity_domain/container_name
where:Sstorage-jsmith/JaasBackupStorage-identity_domain: Storage container account name. You must first create this account by subscribing to the Oracle Storage Cloud Service.container_name: Storage container name of an existing storage container service or the name to use to create a new storage container.
- Cloud Storage User Name: Specify the username.
- Cloud Storage User Password: Specify the password.
- Create Cloud Storage Container: Select this check box to automatically create a storage container during Oracle Integration Cloud provisioning.
Database Configuration Specify Oracle Database Cloud Service details.
Note: You must provision Oracle Database Cloud Service before you can use this wizard. Otherwise, no databases are available for selection from the Service Name list and you cannot proceed with Oracle Integration Cloud provisioning.- Service Name: Select the service name of the database you want to use. Only the service name is displayed. The type of database is not displayed (for example, RAC or data guard). For specific details about the database, go to the Oracle Database Cloud Service My Services Console and look for the service name.
- Pluggable Database Service name: Optionally specify the service name of the pluggable database (PDB). This field is only for version 12c databases. A PDB is a multitenant container database (CDB) consisting of a portable collection of schemas, schema objects, and nonschema objects that appear to an Oracle Net client as a non-multitenant container database (CDB). A non-CDB is a traditional Oracle database that cannot contain PDBs.
- Database Administrator User Name: Specify the user name. This value must be set to a database user with SYSDBA system privileges. You can use the default user SYS or any user that has been granted the SYSDBA privilege.
- Database Administrator User Password: Specify the password for the administration user. The administrator password was specified when the Oracle Database Cloud Service instance was created.
Instance Responsibility Click to acknowledge that you are responsible for provisioning and administering your own instance, including: - Patching
- Starting stopping instances and individual VMs
- Starting/stopping Oracle WebLogic Server
- Scaling in/scaling out
- Backups
- Database management
- Operating system management, including ensuring that you have enough swap space
- Cloud Storage Container:
Specify the container name using the following
format:
- Review the service details and make a copy or a screen capture. If you need to change the service details, use the navigation bar or Previous button at the top of the wizard to step back through the pages in the wizard. Click Cancel to cancel out of the wizard without creating a new service instance. If you are satisfied with your choices on the Confirmation page, click Create. Instance creation takes some time.