Before You Begin
This tutorial familiarizes you with Oracle
Integration Cloud Service and shows you how to
create an integration. Some of the sections include
demonstration videos that you can watch before you
attempt that section of the tutorial.
Time to Complete
This tutorial should take about 1 hour to complete.
Introduction
When integrating services with Oracle’s Integration Could Service, there are two main steps you need to complete. First, you create connections, then you integrate those connections. For each connection you add a contact, configure the connectivity by specifying a WSDL URL, and then secure the connection by adding credentials. To create the integration, you configure the trigger and the invoke, then you map the business objects to each other.
Scenario
In this tutorial, you create an Organization
business object in Oracle RightNow, which causes a
corresponding AccountServoce business
service to be created and populated in Oracle Sales
Cloud. The tutorial includes the following six major
steps:
- Create an Oracle RightNow connection.
- Create an Oracle Sales Cloud connection.
- Create a new integration that links the two connections.
- Configure the connections and map the data so
that when
Organizationdata in the Oracle RightNow application is created or updated, it is pushed to theAccountServiceservice in the Oracle Sales Cloud application.
- Activate the new integration.
- Verify that the integration works correctly.
The following figure illustrates the scenario.

Prerequisites
Before starting this tutorial, you must have the following:
- An Oracle Integration Cloud Service subscription or trial subscription.
- An Oracle RightNow Cloud Service subscription or trial subscription. Note: In some documentation and user interfaces, the Oracle RightNow Cloud Service is referred to as Oracle Service Cloud.
- An Oracle Sales Cloud subscription or trial subscription.
- Running instances of the Oracle RightNow and Sales Cloud applications. You must know the WSDL URLs and the login credentials (username/password) required to connect to them.
For links to some of these resources, see the "Want to Learn More?" section at the end of this tutorial.
Create Connections
Connections allow Integration Cloud Service to interact with an application instance. A connection is required for every application instance that participates in an integration. In this tutorial you create two connections – one for an Oracle RightNow application instance and one for an Oracle Sales Cloud application instance.
Watch "Creating Connections in Integration Cloud Service" to see it before you do it.
Create the Oracle RightNow Connection
- Start Oracle Integration Cloud Service.
- On the Home page, click Create
Connections.
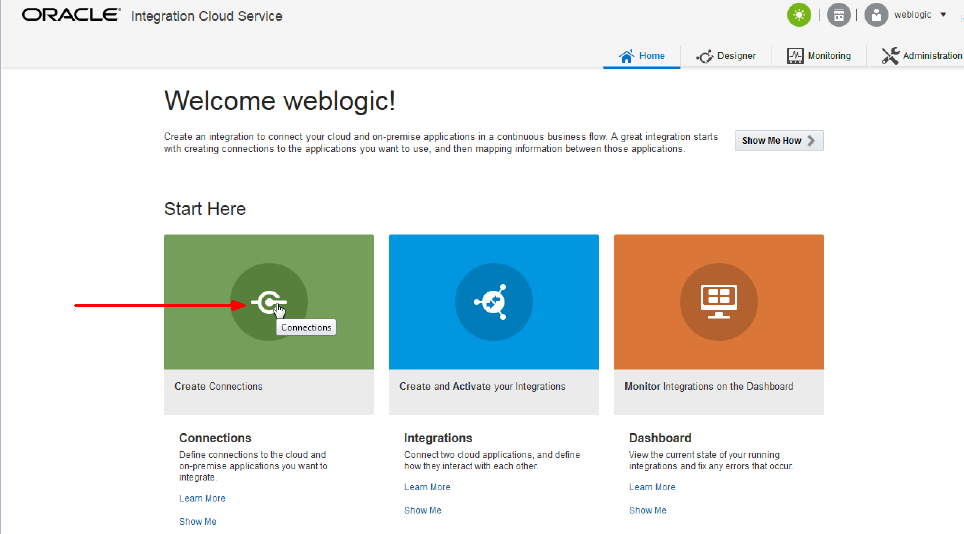
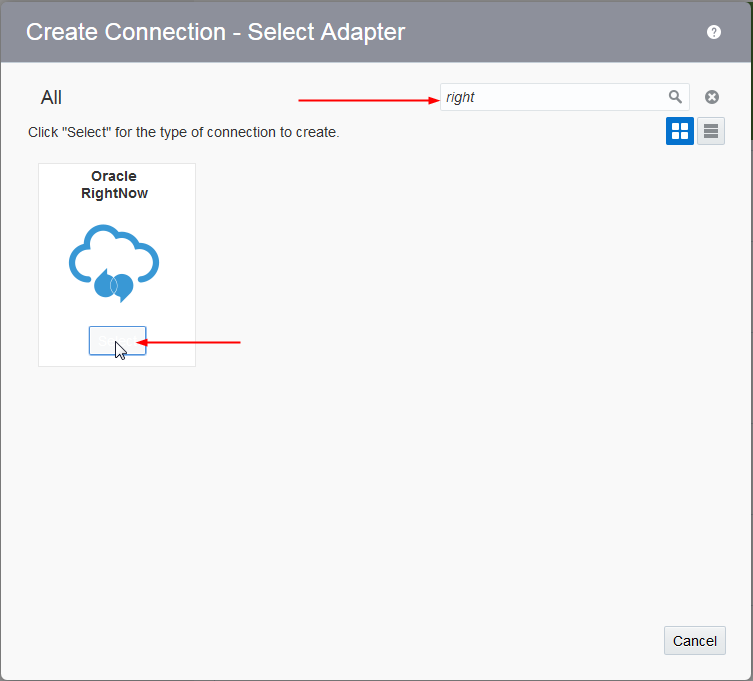
- Click New Connection.

- Type "right" in the Select Adapter Search
field and then select the Oracle RightNow
adapter.
- Enter the following connection information in the New Connection - Information dialog.
| Field | Enter |
| Name | Oracle RightNow My Instance |
| Identifier | ORACLE_RIGHTNOW_MY_INSTANCE (Note: The default value is entered for you automatically.) |
| Role | Trigger |
| Description | Connect to my Oracle RightNow instance. |
- Click Create.
- In the Email Address field of the Connection Administrator section, enter your email address.
- Click Configure Connectivity to configure the WSDL URL. Enter the URL to your Oracle RightNow WSDL file.
- Click Configure Security. Enter the username and password required to access your Oracle RightNow application. Note that the Username Password Token option is automatically selected in the Security Policy list. This is the only selection available.
- Click Save.
- Click Test to verity the
connection.

If the test is successful, you see the following message at the top of the window.
If the test is not successful, verify that the WSDL URL and credentials that you entered are correct.
- Click Exit Connection.
The new connection is added to the top of the connections list.
Create the Oracle Sales Cloud Connection
Creating an Oracle Sales Cloud connection is very similar to creating the Oracle RightNow connection.
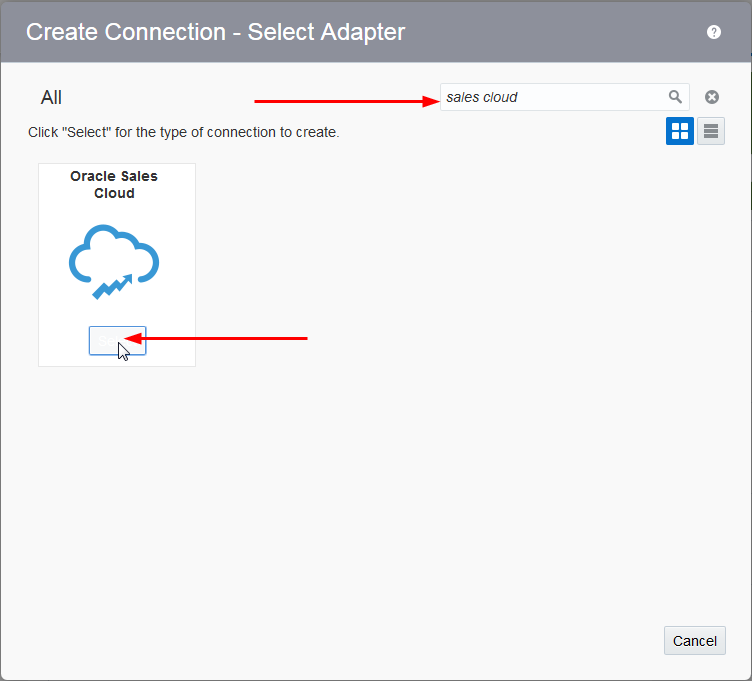
- Click New Connection.
- Type "sales cloud" in the Select Adapter Search
field and then select the Oracle Sales Cloud
adapter.
- Enter the following connection information in the New Connection - Information dialog:
| Field | Enter |
| Name | Oracle Sales Cloud My Instance |
| Identifier | ORACLE_SALES_CLOUD_MY_INSTANCE (Note: The default value is entered for you automatically.) |
| Role | Invoke |
| Description | Connect to my Oracle Sales Cloud instance. |
- Click Create.
- In the Email Address field of the Connection Administrator section, enter your email address.
- Click Configure Connectivity to configure the WSDL URL. Enter the URL to your Oracle Sales Cloud WSDL file in the OSC Services Catalog WSDL URL field.
- Click Configure Security. Enter the username and password required to access the Oracle Sales Cloud application. Note that the Username Password Token option is automatically selected in the Security Policy list. This is the only selection available.
- Save the connection.
- Click Test to verity the
connection.
- If the test is successful, you see the
following message at the top of the
window.
If the test is not successful, verify that the WSDL URL and credentials that you entered are correct.
- Click Exit Connection.
The new connection is added to the top of the connections list.
Create a New Integration
Now that you've created connections, you need to integrate the connections so that data can flow from one (the trigger) to the other (the invoke). In this tutorial the Oracle RightNow application is the trigger and the Oracle Sales Cloud application is the invoke.
Watch "Creating Integrations in Integration Cloud Service" to see it before you do it.
Create the Integration
To create a new integration, perform the following steps:
-
Click Designer at the top right corner of the Integration Cloud Service Home page.
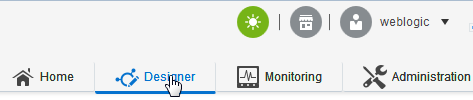
- Click the Integrations icon.

-
Click New Integration.

- In the Create an Integration - Select a Style/Pattern dialog, select Basic Map Data.
- Enter the following integration information in the Create New Integration dialog:
| Field | Enter |
| What do you want to call your integration? | MyIntegration |
| Identifier | MYINTEGRATION (Note: The default value is entered for you automatically.) |
| Version | Nothing to enter. Use the default value of 01.00.0000. |
| What does this integration do? | Syncs RightNow Organization objects with OSC AccountService. |
| Which package does this integration belong to? | MyPackage (Note: Packages enable you to group integrations into a single structure that makes them easy to import and export.) |
- Click Create.
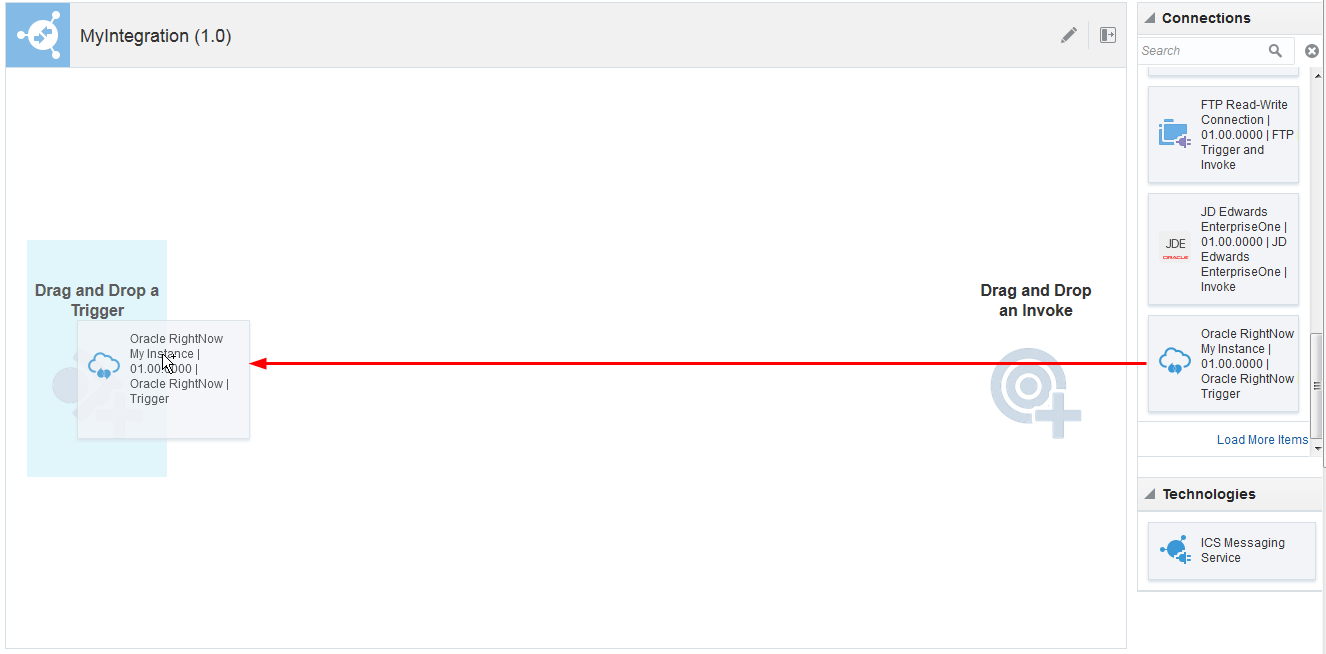
Configure the RightNow Connection (Trigger)
- Drag your Oracle RightNow connection to the
Trigger area. This invokes the configuration
wizard.
- Fill in the wizard Basic Info page with the
following information:
| Field | Enter |
| What do you want to call your endpoint? | SyncOrganization |
| What does this endpoint do? | Receives request from RightNow to create Account in Oracle Sales Cloud |
- Click Next to advance to the Request page.
- Scroll down the list of business objects and select Organization from the list.
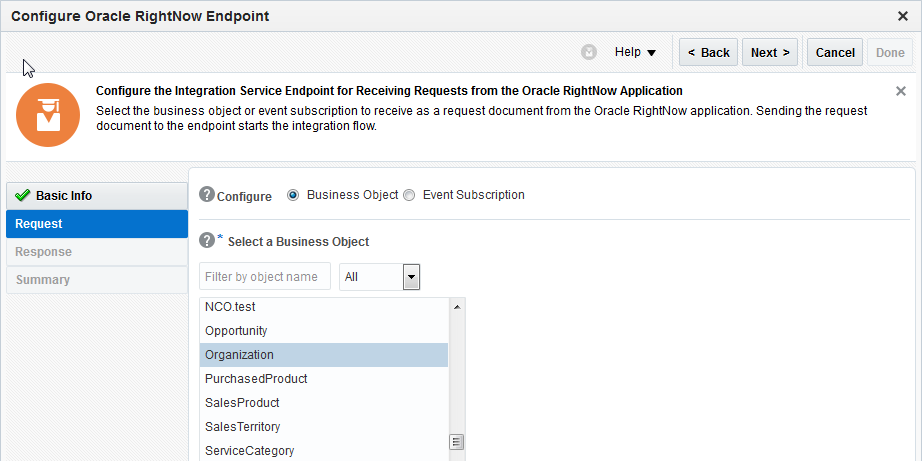
- Click Next to advance to the Response page.
- Because this is a one-way process, there is
no response. Select the None
response type.
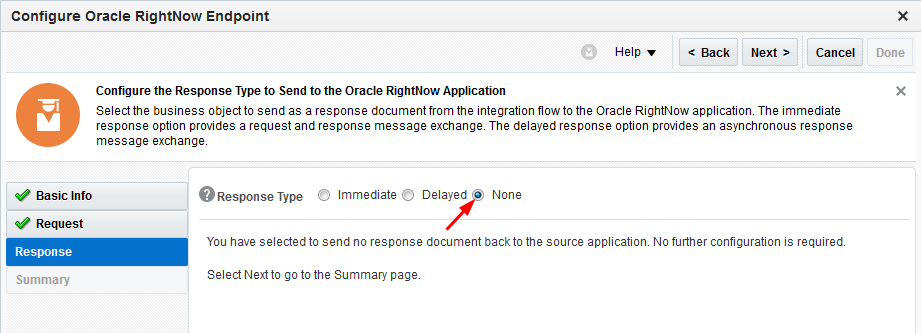
- Click Next.
- Click Done.
- Click Save on the main
canvas to save your work.

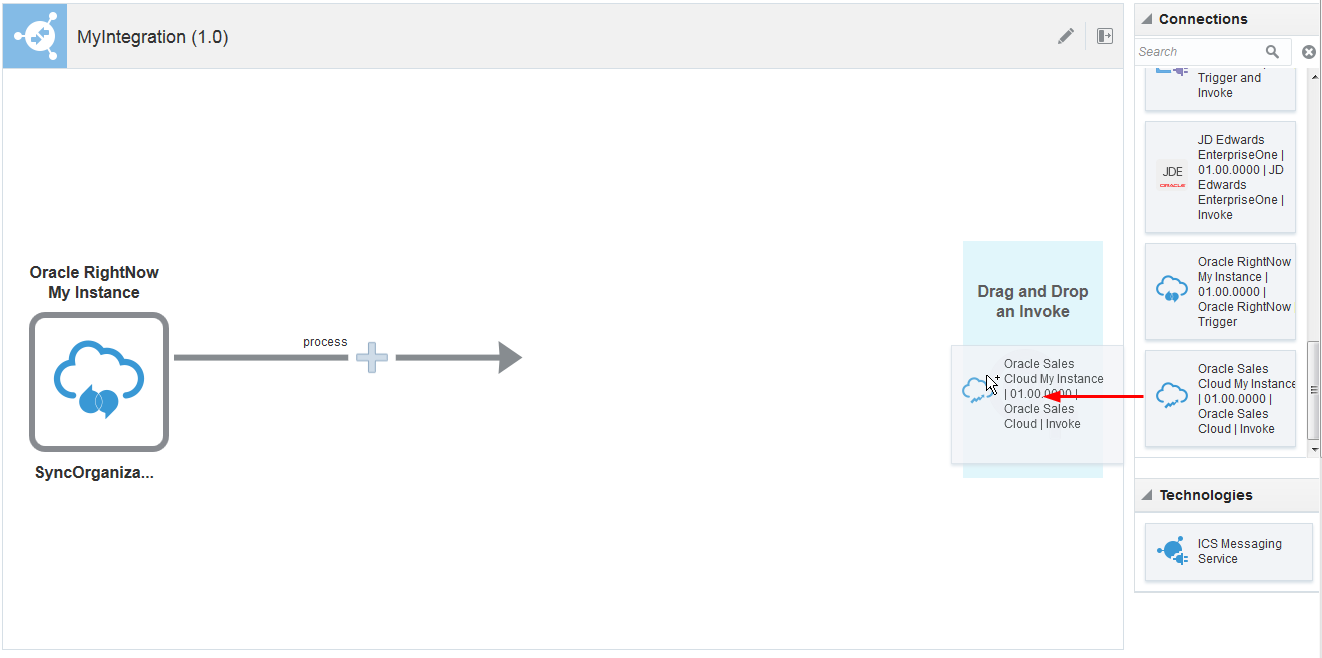
Configure Oracle Sales Cloud Connection (Invoke)
- Drag your Oracle Sales Cloud connection to
the Invoke area. This invokes the
configuration wizard.
- Fill in the wizard Basic Info page with the following information:
| Field | Enter |
| What do you want to call your endpoint? | CreateAccount |
| What does this endpoint do? | Create Account in Oracle Sales Cloud |
- Click Next to advance to the Operations page.
- Select Services from the Browse by dropdown menu.
- Select AccountService from the scrolling list of business services.
- Select createAccount from
the dropdown menu beneath the scrolling
list.
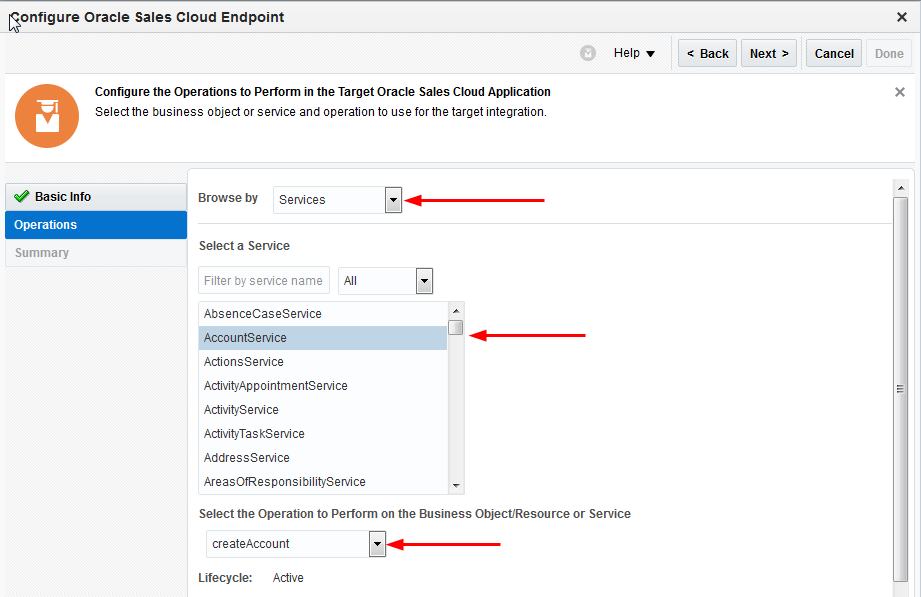
- Click Next.
- Click Done.
- Click Save on the main
canvas to save your work.
Map the Data
One of the key tasks in creating an integration
is defining how data is transferred, or mapped,
between two applications. In this tutorial, you
map the fields of the Oracle RightNow Organization
object (trigger) to the fields of the Oracle
Sales Cloud AccountService
(invoke). The Oracle Integration Cloud Service
visual mapper enables you to map fields between
applications by dragging trigger fields onto
invoke fields. When you open the mapper for a
request or response message in an integration,
the data structures are automatically populated
with the information pulled from the trigger and
invoke connections.
To map data for this integration, perform the following steps:
- Click the mapping icon between the trigger
and the invoke icons.
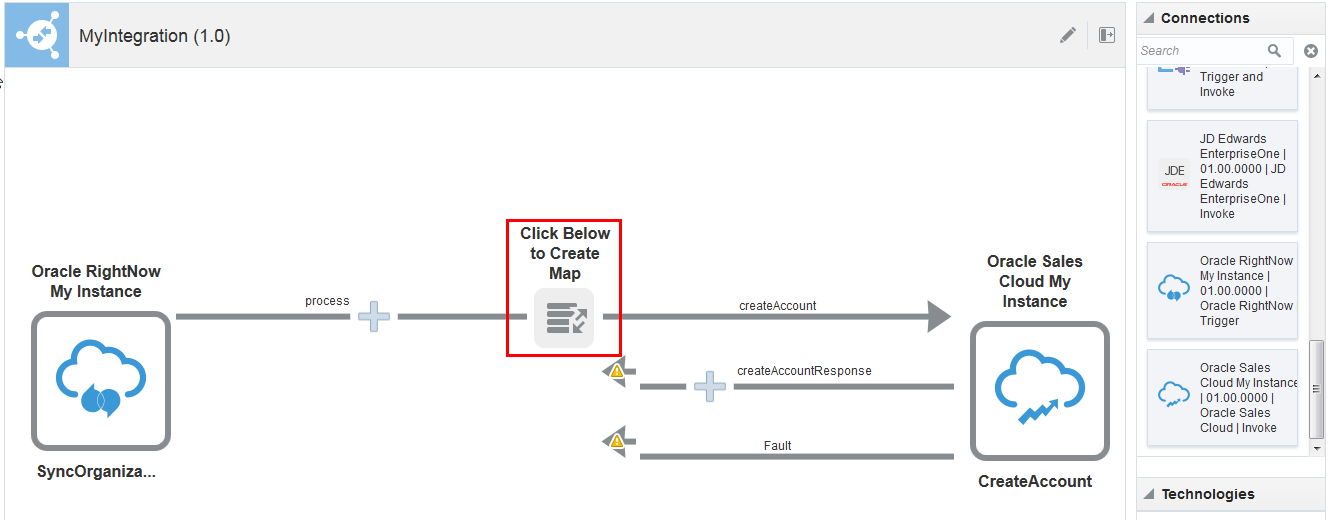
- Click the Create
icon when prompted.
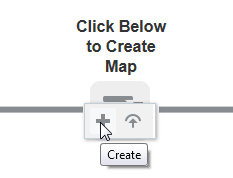
This opens the mapper.
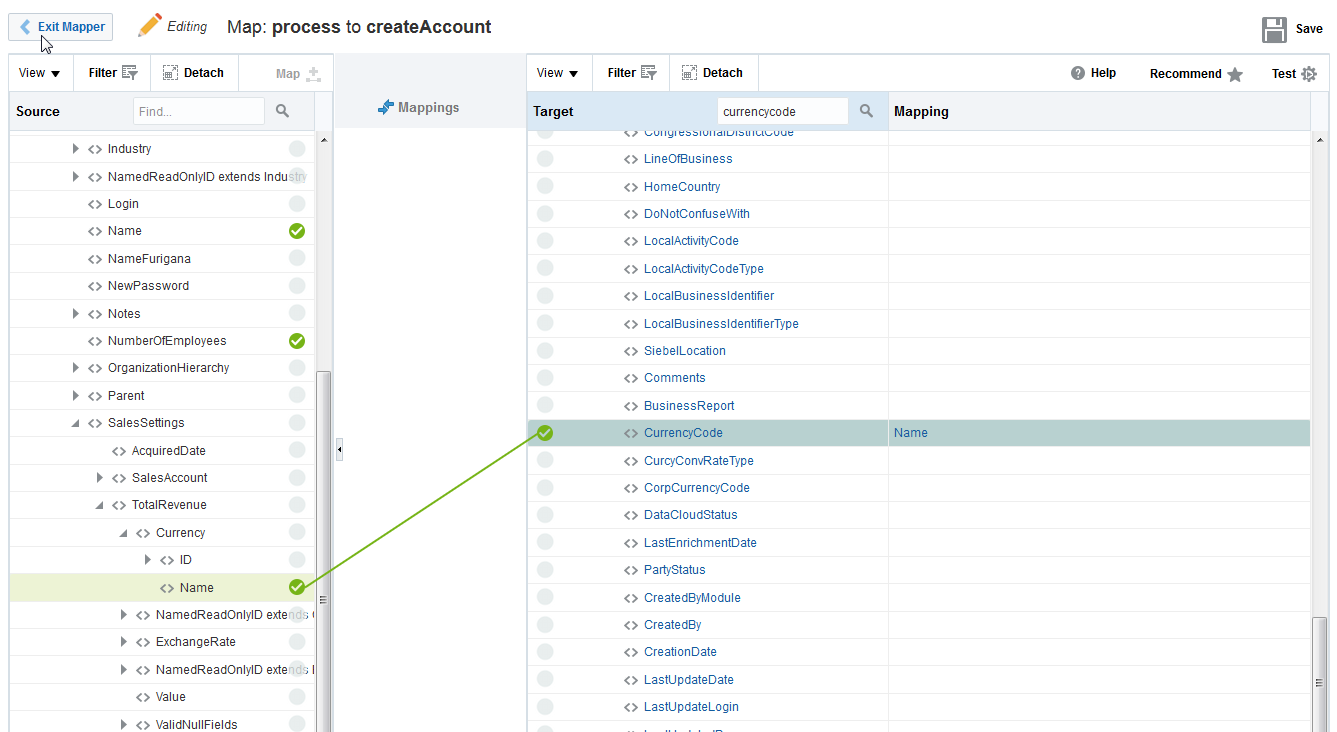
- Drag the source to the target, as listed in
the table. Drop the source in the empty field
next to the target. As shown in the image
above, the green checkmark icon and the line
connecting them indicate that these fields
have been mapped.
- After you have mapped the three items in the
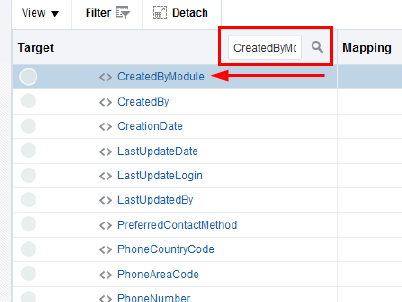
table, on the target side, search for the CreatedByModule
field and then click it to invoke
the Build Mappings page.
- In the Drag and Drop or Type
here text box, type
MyIntegration.
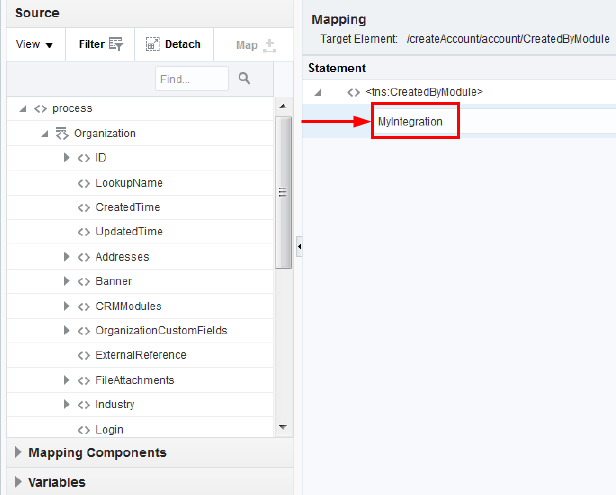
- Click Save, then click Close.
- Click Save, then click Exit Mapper.
- Save the Integration.
- Click Exit Integration.
The source data structure is on the left of the mapper and the target data structure is on the right. Collapse the top-level nodes to make it easier to see the fields with which you want to work.
| Source | Target |
| process / Organization / Name | createAccount / account / OrganizationName |
| process / Organization / NumberOfEmployees | createAccount / account / EmployeesTotal |
| process / Organization / SalesSettings / TotalRevenue / Currency / Name | createAccount / account / CurrencyCode |


Track Fields
Perform the following steps to enable the
tracking of payload fields.
- Click MyIntegration
in the Integrations list..

- Click Tracking above the integration.
- Drag the
LookupNamefield from the Source section into the Tracking Field column. This lets you track the status of that payload field during runtime.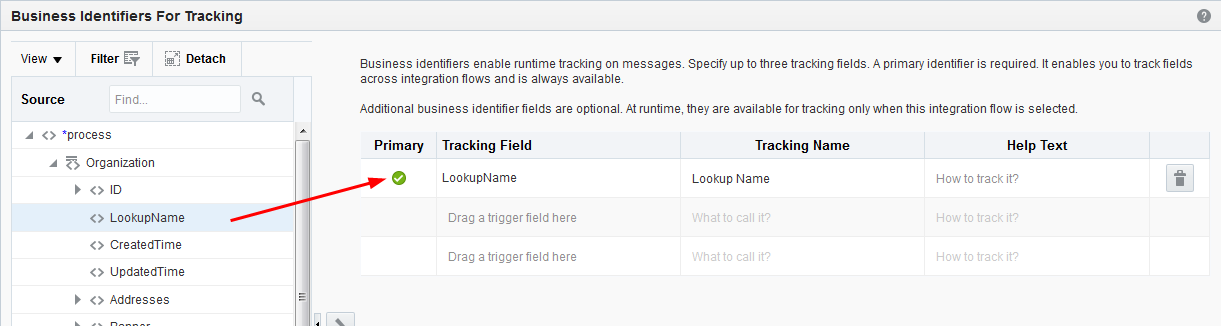
- Click Done.
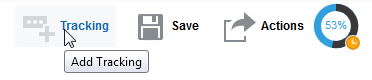
- Note that Flow Progress Indicator
shows that the integration is 100% complete.

- Click Save.
- Click Exit Integration.
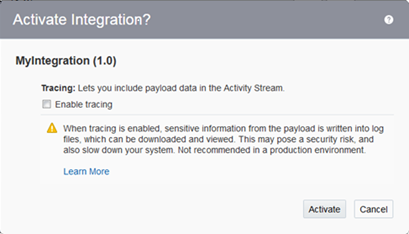
Activate the Integration
To activate your integration, perform the following steps:
- Find MyIntegration in the Integrations list and click the Activate slider.
- Click Activate when prompted to confirm. Note: Do not select Enable tracing.
- Verify that the integration is Active.

 .
.
Verify That Your Integration Works
The final step to determine if your integration is
working properly is to pass data through your
integration from Oracle RightNow to Oracle Sales
Cloud. The verification process requires you to
create a PHP script that runs in the Oracle RightNow
console and initiates contact with Oracle
Integration Cloud Service and facilitates the
transfer of business objects to the Oracle Sales
Cloud connection.
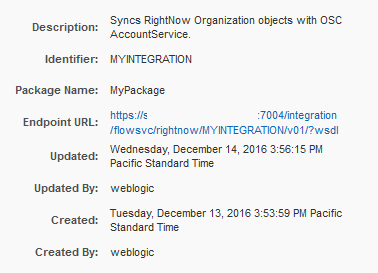
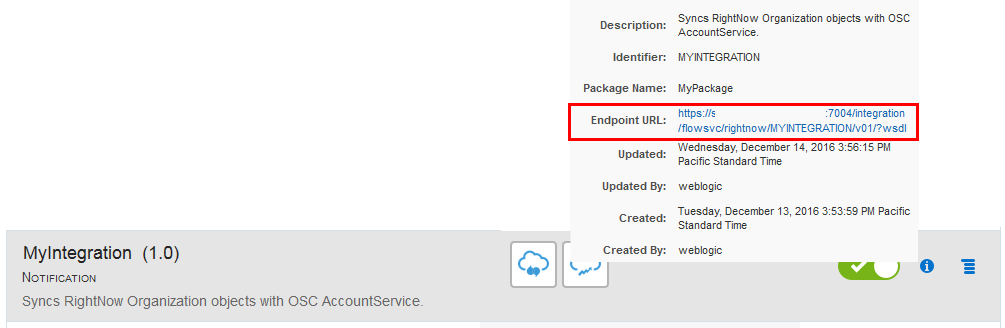
Note: Use the integration's
endpoint URL to connect to Integration Cloud Service
from your PHP script. To get the integration
endpoint URL, find MyIntegration in
the integration list, and click the integration's
information icon.
Run Your Script to Test the Integration
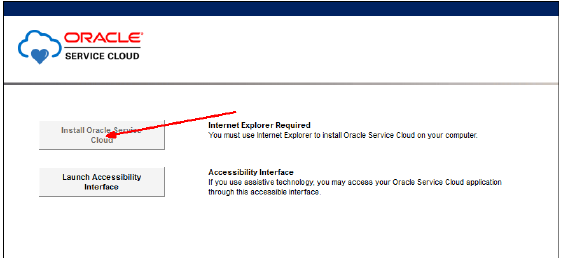
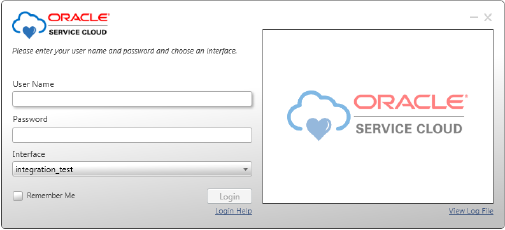
- Launch the Oracle RightNow console. Note: The RightNow console only runs in the Internet Explorer web browser.
- Click the Install Oracle Service
Cloud button.
- Log in to the console using the credentials
you specified when you created the Oracle
RightNow connection.
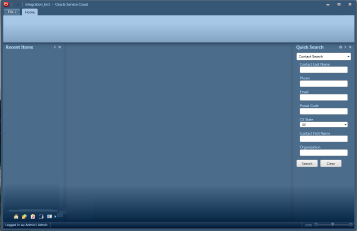
- The console user interface appears.
- Click the arrow at the bottom left of the
console window.

- Select Configuration and
then expand the Site Configuration item.
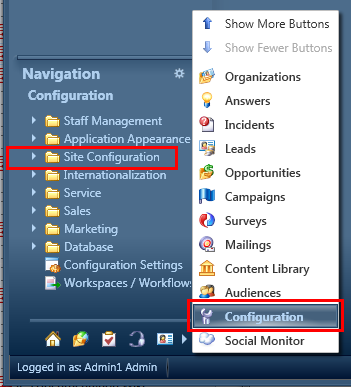
- Double-click Process Designer.
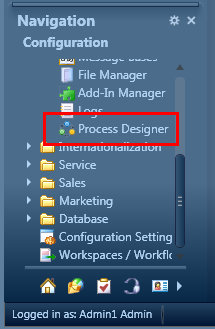
- After the process designer opens, select New.
The new object event handler window appears.
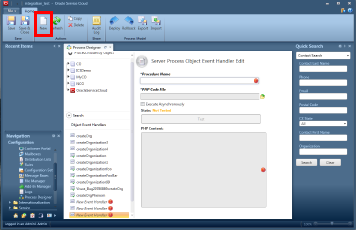
- Click the Browse icon and
select the file that contains your PHP script.

- Select Execute Asynchronously.
- Click Save.
- Click Test.

The Good URL dialog confirms that the connection is made. If the connection fails, check the URLs in your PHP script.
Deploy the Event Handler
- Select Deploy.
- Add the email address used when you set up your connection in Integration Cloud Service.
- Select Organization in
the tree.
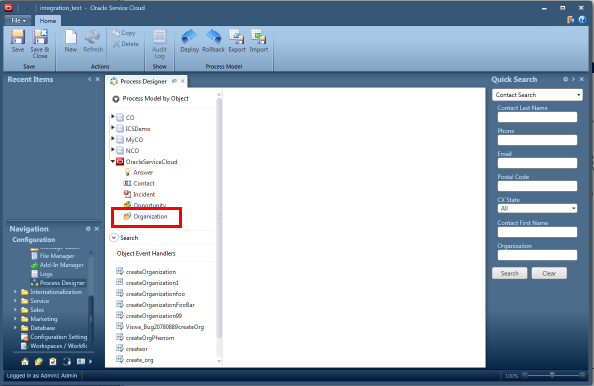
- Select createOrganization.
- Select Can Suppress.
- Click Save.
- Click Deploy.
- Click OK.
Verify the New Account in Oracle Sales Cloud
- Launch Oracle Sales Cloud.
- Click the Accounts icon.
- Verify your account appears in the list.
Summary
In this tutorial, you learned to:
- Create Oracle RightNow and Oracle Sales Cloud connections
- Create a new integration using the connections
- Configure the connections
- Activate your integration
- Verify that your integration works correctly
Credits
Want to Learn More?
Prerequisites
Use the following links to find more information about the prerequisites mentioned in the "Prerequisites" section of this tutorial:
- Get an Oracle Integration Cloud Service subscription or trial subscription.
- Get an Oracle RightNow Cloud Service subscription or trial subscription. Note: In some documentation and user interfaces, the Oracle RightNow Cloud Service is referred to as Oracle Service Cloud.
- Get an Oracle Sales Cloud subscription or trial subscription.
Resources
The following resources complement this tutorial: