Before You Begin
Purpose
In this tutorial, you learn to integrate Oracle Identity Cloud Service with WebLogic Server using SAML 2.0, so cloud users can access applications hosted on WebLogic Server without having to log in again (Federated Single Sign-On).
This tutorial is based on this article posted by Paulo Albuquerque.
Time to Complete
90 minutes
Background & Scope
In this tutorial, you implement Federated SSO between Oracle Identity Cloud Service and Employee Dashboard, a web application hosted Weblogic Server. The integration is based on SAML 2.0, an XML-based Federated SSO protocol popularly adopted by enterprise solutions such as WebLogic Server.
The integration is described as follows:
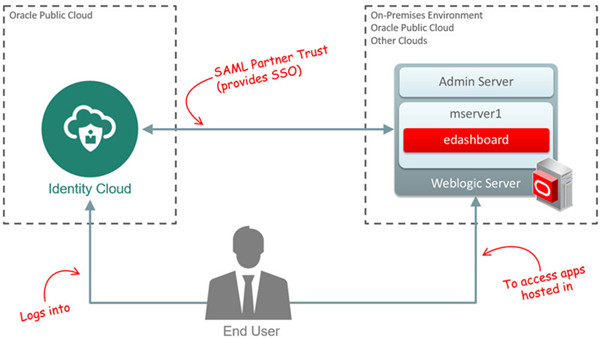
In this integration:
- End-users can access applications hosted on a WebLogic using their Identity Cloud credentials.
- Oracle Identity Cloud Service acts as SAML Identity Provider (IdP), providing federated SSO for applications hosted on Weblogic.
- WebLogic Server acts as SAML Service Provider (SP), and trusts the authentication provided by Identity Cloud Service.
- WebLogic Server enforces the authorization using the group information provided by Identity Cloud Service as part of the federation.
Tip: Oracle Identity Cloud Service also supports Federated SSO and Authorization via OpenID Connect and OAuth 2.0 standards. These standards are typically used by modern cloud applications. To explore this integration, try the Integrating a Custom Client Application tutorial.
What Do You Need?
- Experience with Java development and WebLogic Administration.
- Netbeans IDE 8.1 (bundle All or Java EE). Tip: To learn more about how to install Netbeans 8.1, visit the official documentation.
- Access to Oracle Identity Cloud Service with authorization to manage applications. (Identity Domain Administrator, Security Administrator, or Application Administrator).
- A WebLogic Server domain with SSL enabled and a public URL. Note: for this tutorial, we are using WebLogic Server 12cR2 (12.2.1.2) with its default configuration (key store, security realm, and embedded LDAP).
-
Clone or Download the idm-samples repository on GitHub:
View idm-samples on GitHubImportant: The Employee Dashboard (edashboard) is provided “AS IS” with no express or implied warranty for accuracy or accessibility. The sample code is used solely for educational purposes and does not represent, by any means, the recommended approach nor is it intended to be used in development or productions environments.
 View idm-samples on GitHub
Deploying Employee Dashboard
In this task, you deploy the Employee Dashboard (sample code), a Java web application (JAAS/JAZN) that will be used to demonstrate the Federated SSO integration.
Important Notes:
-
Make sure cloned or downloaded the idm-samples repository before starting this section:
View idm-samples on GitHubImportant: The Employee Dashboard (edashboard) is provided “AS IS” with no express or implied warranty for accuracy or accessibility. The sample code is used solely for educational purposes and does not represent, by any means, the recommended approach nor is it intended to be used in development or productions environments.
Build edashboard
- Access Netbeans and click File > Open Project.
- Navigate to the folder where you cloned/downloaded the idm-samples repository. Select the edashboard folder, and then click Open Project.
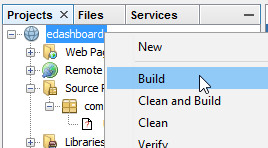
- Right-click edashboard, and then click Build.
- In the Output window, confirm that the message BUILD SUCCESSFUL is displayed.
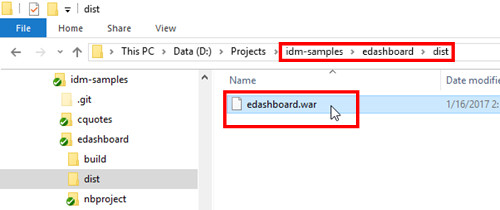
- Navigate to the folder where you cloned the idm-samples repository, and then go to edashboard > dist, and confirm that the file edashboard.war exists.
Deploy edashboard
In this task, you deploy the Employee Dashboard in WebLogic.
Tips: For this tutorial, we are deploying the application in the managed server mserver1, which has SSL enabled and is exposed in the URLhttps://admin1.example.com:7502/. Please change the managed server and its URL according to your environment.
- Launch the WebLogic Administration console and log in as administrator (for example,
weblogic). - Click Lock & Edit.
- Under Domain Structure, click Deployments.
- Click Install.
- Click Upload your file(s).
- Click Choose File next to Deployment Archive.
- Open the edashboard.war file.
- Click Next.
- Confirm that edashboard.war is selected and then click Next.
- Click Next.
- Select the cluster or managed server where edashboard will run (for example, mserver1), and then click Next.
- Click Finish.
- Click Activate Changes.
- Under Domain Structure, click Deployments. In Summary of Deployments, click Control.
- Select edashboard and then click Start > Servicing all requests.
- Click Yes.
- Launch a new browser window and launch the edashboard application URL (For example,
https://admin1.example.com:7502/edashboard). - In the login prompt, enter the weblogic administrator credentials (for example,
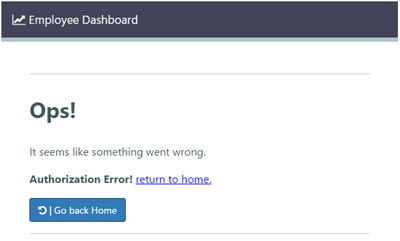
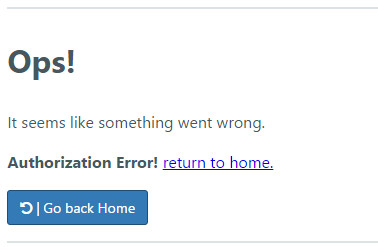
weblogic). - After a successful login, edashboard will return the message "Authorization Error!".
- The edashboard app is configured to display pages only for users that are assigned to the employee, manager, or the security groups. Because your WebLogic domain does not have any of these groups in its identity store, none of your users will be able to get a successful authorization.
- In the next steps, you integrate your WebLogic Domain with Identity Cloud Service. The configuration includes creating the groups expected by edashboard in Identity Cloud Service.
- During runtime, Oracle Identity Cloud Service will pass the user membership information to WebLogic as part of the federated SSO. This information will be used by edashboard to apply the authorization constraints.
- If you want to test how edashboard operates without the Identity Cloud Service integration, you can manually create the employee, manager, and security groups, as well as users associated with those groups in your WebLogic security realm.
Weblogic will display the message "The deployment has been successfully installed".
WebLogic displays a confirmation message. If the message indicates that a server needs to be restarted, restart the WebLogic Server Domain.
You are ready to integrate Oracle Identity Cloud Service with WebLogic.
Enabling SAML in Weblogic
In this section, you enable the support to SAML in your WebLogic Server Domain.
Configure the WebLogic security realm
- Access the WebLogic Server Console as administrator (for example,
weblogic). - Click Lock & Edit.
- Click Security Realm.
- Click myrealm.
- Click Providers, and then click New.
- Enter
SAML2IdentityAsserteras Name, selectSAML2IdentityAsserteras Type, and then click OK.
The SAML2IdentityAsserter is displayed under the Authentication Providers table.
- On the Providers page, click New.
- Enter
SAMLAuthenticatoras Name, selectSAMLAuthenticatoras Type, and then click OK.
The SAMLAuthenticator is displayed under the Authentication Providers table.
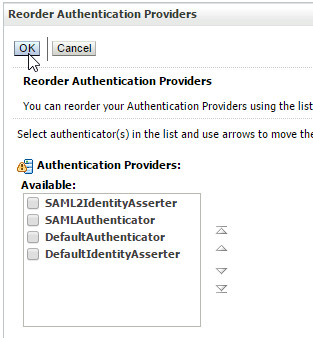
- Click Reorder.
- Select and reorder the providers in the following order.
- SAML2IdentityAsserter
- SAMLAuthenticator
- DefaultAuthenticator
- DefaultIdentityAsserter
- Click OK.
- Click SAMLAuthenticator.
- Select
OPTIONALas Control Flag and then click Save. - Return to the Providers page.
- Click DefaultAuthenticator.
- Select
SUFFICIENTas Control Flag and then click Save. - Click Activate Changes.
- Restart the domain.
Configure the SAML Service Provider Settings
- Access the WebLogic Server Console as administrator.
- Click Lock & Edit.
- Click Environment > Servers.
- Click the manager server that's hosting edashboard (for example, mserver1).
- Click Federation Services > SAML 2.0 General.
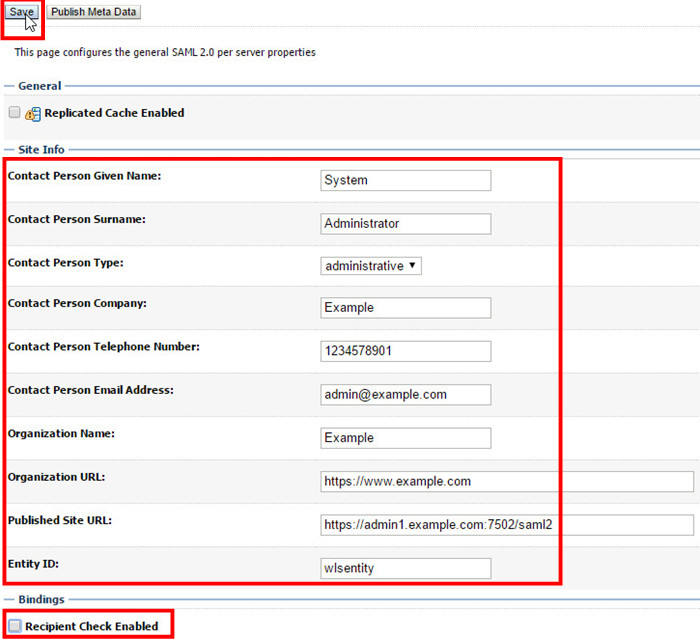
- Modify the General settings as follows, replacing the information according to your company and server.
- Click Save.
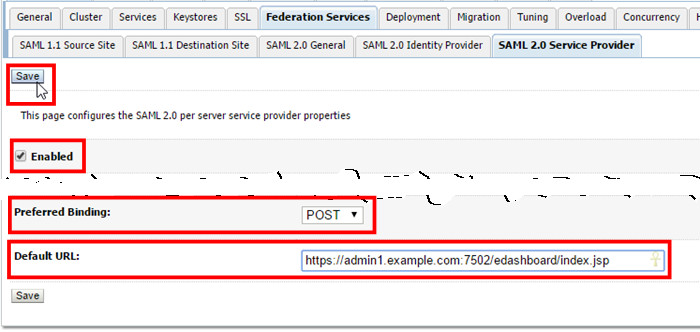
- Click SAML 2.0 Service Provider.
- Select Enabled, select
POSTas Preferred Binding, enterhttps://admin1.example.com:7502/edashboard/index.jspas Default URL, and then click Save. - Click Activate Changes.
Tip: You can use this page to define the Site Information and additional settings for the SAML assertion, plus generate the service provider metadata file.

| Attribute | Sample Value |
| Contact Person Given Name | System |
| Contact Person Surname | Administrator |
| Contact Person Type | administrative |
| Contact Person Company | Example |
| Contact Person Telephone Number | 12345678901 |
| Contact Person Email Address | admin@example.com |
| Organization Name | Example |
| Organization URL | https://www.example.com |
| Published Site URL | https://admin1.example.com:7502/saml2 |
| Entity ID | wlsentityTip: You can enter any identification value, as long it's unique in Identity Cloud Service and in your Weblogic Domain. |
| Recipient Check Enabled | Deselected |
Creating users and groups for tests
In this section, you create users and groups to Employee Dashboard as SAML application in Oracle Identity Cloud Service.
Note: The Employee Dashboard application leverages the following groups for authorizing the access inside the application:| Identity Cloud Service Group | Employee Dashboard JAZN Role | Authorized Pages |
| Employee | appemployee | Index, My Profile, and Employee Perks |
| Manager | appmanager | Index, My Profile, Employee Perks, and Management Watch |
| Security | appsecurity | Index, My Profile, Employee Perks, and Security Report |
web.xml and weblogic.xml files.
Create groups
- Access the Identity Cloud Service console and log in as administrator.
- In the Identity Cloud Service console, expand the Navigation Drawer
 , click Applications, and then click Add.
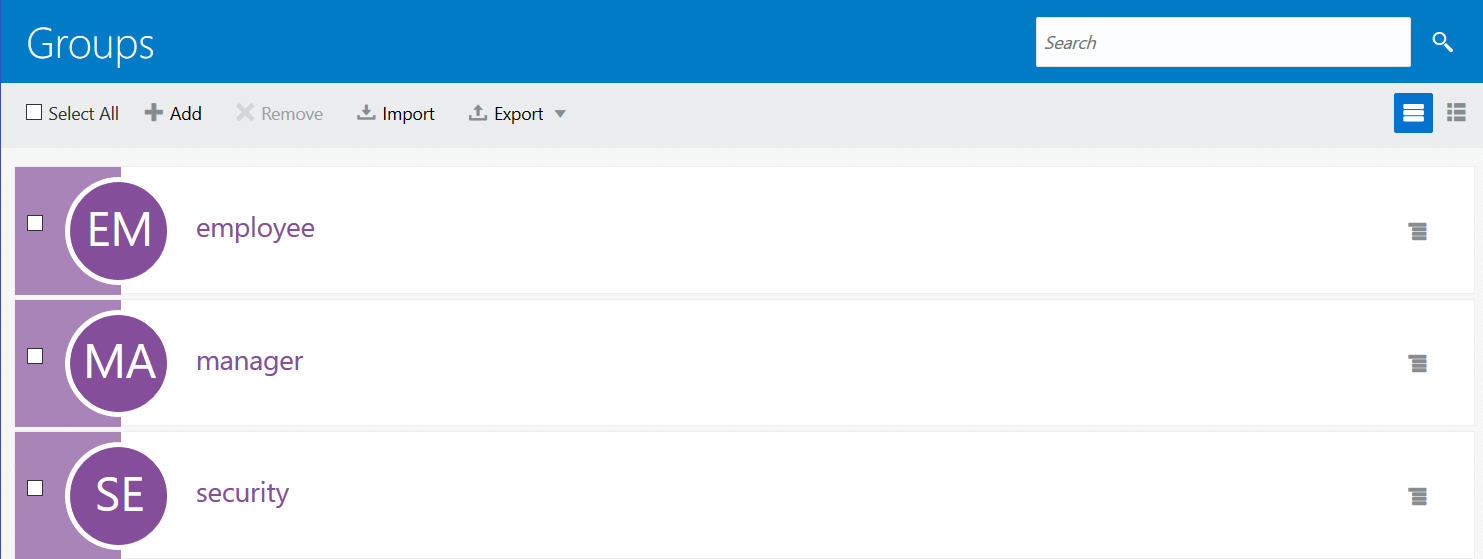
 - Enter
employeeas Name and click Finish.
A confirmation message for the group creation is displayed.
- Repeat the previous steps to create the
managerand thesecuritygroups.
Assign users to groups
In this section, you assign Identity Cloud Service users to the groups previously created. These users will be used for testing the federated SSO. For this tutorial, we making the following assignments:
| User | Groups |
| csaladna@example.com | employee. |
| fredmilson@example.com | employee and manager. |
| xhanel@example.com | employee, manager, and security. |
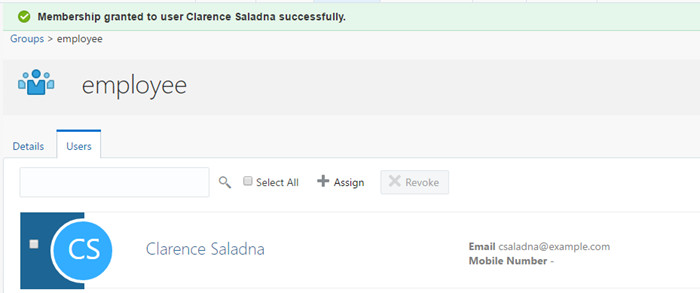
- In the group page, click employee.
- Click Users > Assign.
- Search and selected the user for assignment (in this example,
csaladna@example.com), and then click OK.
A confirmation message is displayed.
- Repeat the previous steps to associate users with the
managerand thesecuritygroups.
Registering the Employee Dashboard Application in Identity Cloud Service
In this section, you register Employee Dashboard as SAML application in Oracle Identity Cloud Service.
- Access the Identity Cloud Service console and log in as administrator.
- Expand the Navigation Drawer
 , click Applications, and then click Add.
 - Click SAML Application.
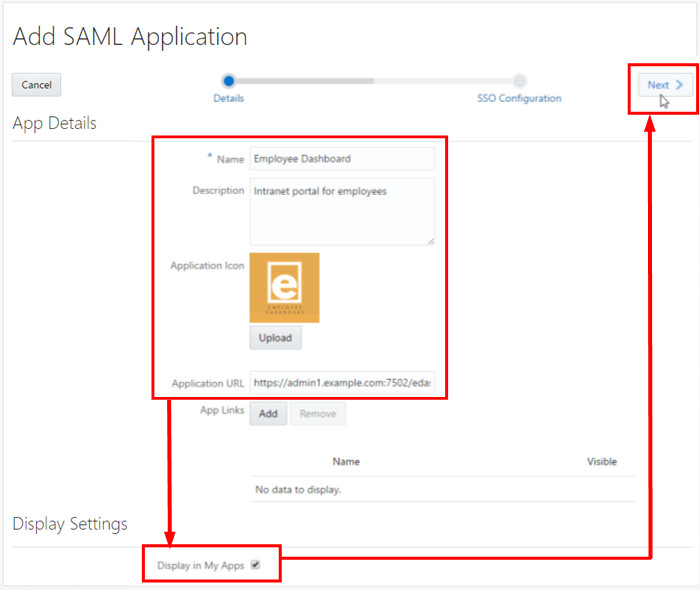
- Provide the information as follows and then click Next.
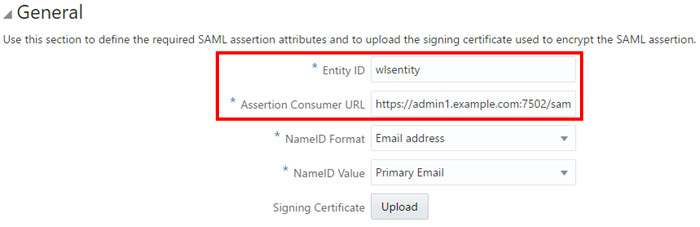
- In SSO Configuration, modify the General section as follows:
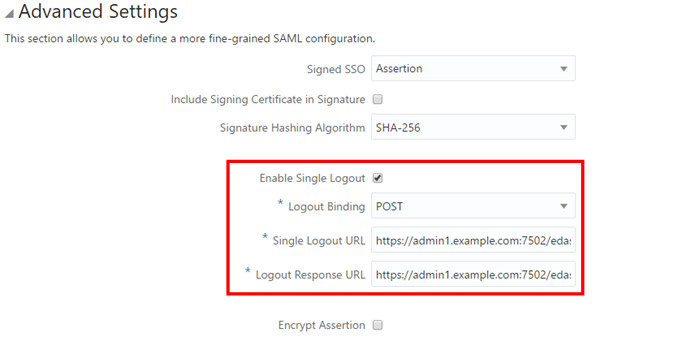
- Expand and modify the Advanced section as follows:
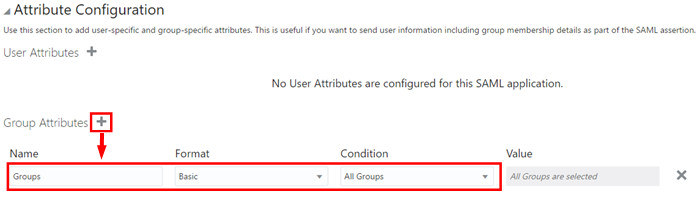
- Expand the Attribute Configuration section and click the plus button (+) next to Group Attributes.
- Fulfill the Group attributes as follows:
- Click Finish.
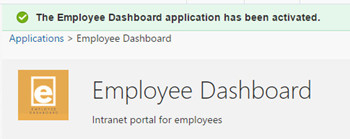
- Click Activate, and then click Activate Application. A confirmation message appears.
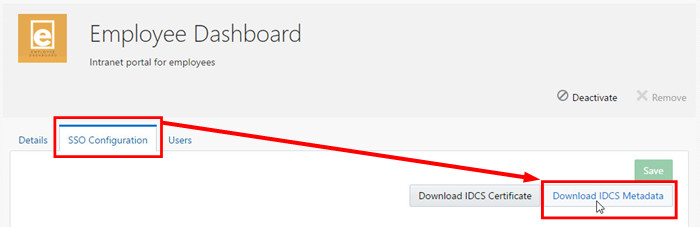
- Click SSO Configuration.
- Click Download IDCS Metadata and save the
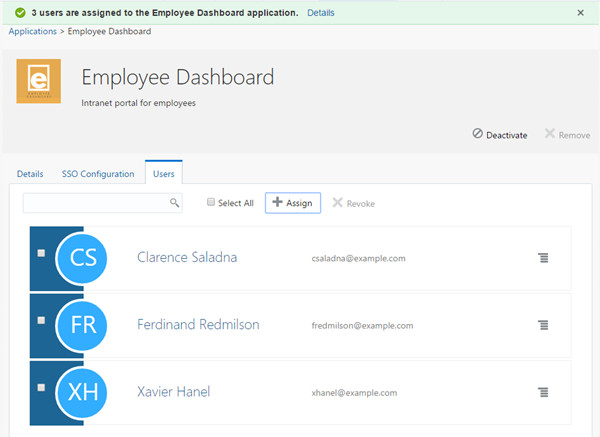
IDCSMetadata.xmlfile. - Click Users and then click Assign.
- Search and select users (for example,
csaladna@example.com,fredmilson@example.com, andxhanel@example.com) and then click OK.
A confirmation message is displayed.
| Attribute | Value(s) |
| Name | Employee Dashboard |
| Description | Intranet portal for employees |
| Application Icon optional |
Select the icon provided with the edashboard sample code at idm-samples/edashboard/edashboard_logo.gif. |
| Application URL | https://admin1.example.com:7502/edashboard |
| Display in My Apps | selected |
| Attribute | Value(s) |
| Entity ID | wlsentity |
| Assertion Consumer URL | https://admin1.example.com:7502/saml2/sp/acs/post |
| Include Signing Certificate in Signature | selected |
| Logout Binding | POST |
| Single Logout URL | https://admin1.example.com:7502/edashboard/logout |
| Logout Response URL | https://admin1.example.com:7502/edashboard |
| Name | Groups |
| Format | Basic |
| Condition | All Groups |
Registering Identity Cloud Service as Identity Provider in WebLogic
In this section, you register Oracle Identity Cloud Service as a SAML Identity Provider in WebLogic.
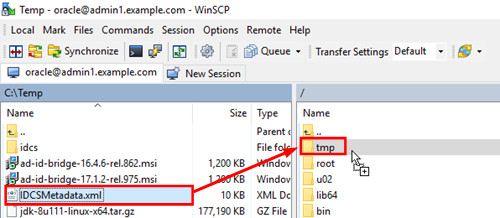
- Upload the
IDCSMetadata.xmlobtained in the previous steps to the server hosting WebLogic (for example, under/tmp/IDCSMetadata.xml). - Access the WebLogic Administration Server Console as administrator (
weblogic). - Click Security Realm.
- Click myrealm.
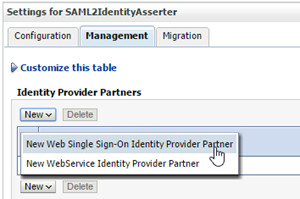
- Click Providers, and then click SAML2IdentityAsserter.
- Click Management, and then click New > New Web Single Sign-On Identity Provider Partner.
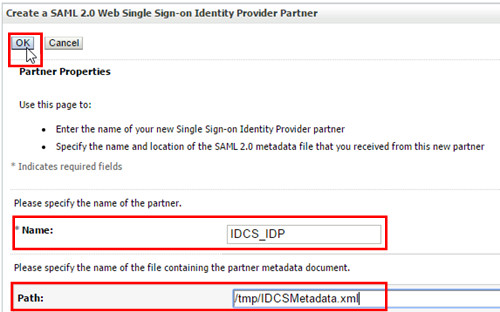
- Enter
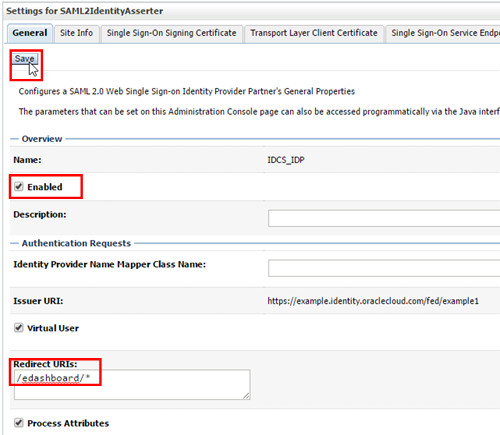
IDCS_IDPas Name, and/tmp/IDCSMetadata.xmlas Path, and then click OK. - Click IDCS_IDP.
- Select Enabled, enter
/edashboard/*as Redirect URIs, and then click Save. - Sign-out of WebLogic Server and close your browser.
WebLogic displays the IDCS_IDP entry under the Identity Provider Partners table.
Testing the Integration
In this section, you test the federated Single Sign-On.
Test the single sign-on initiated from WebLogic
- Sign-out of Oracle Identity Cloud Service console and WebLogic Server.
- Access
https://admin1.example.com:7502/edashboard/. - Authenticate with a user assigned only to the employees group (for example,
csaladna@example.com).
You will be authenticated against Identity Cloud Service and redirected back to the Employee Dashboard:
- Explore the options available in Employee Dashboard. The application must return an error page when accessing the Management Watch and Security Report options.
- Close your browser.
- Optionally, repeat the test with other users (for example,
fredmilson@example.com, andxhanel@example.com) to confirm that the authorization is working properly for other groups.
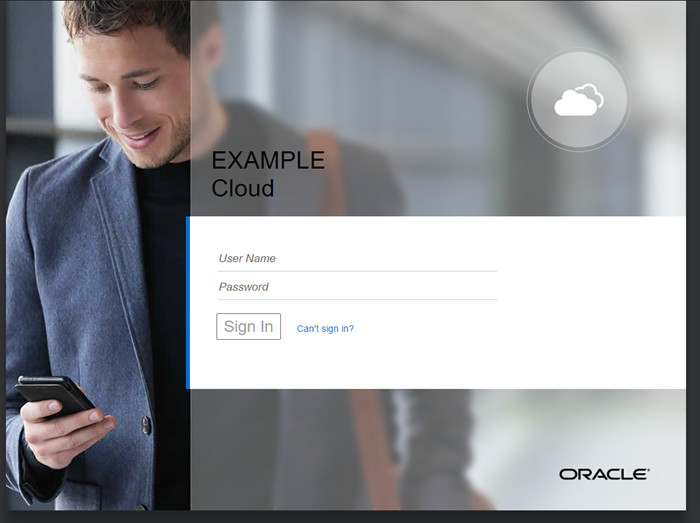
The Oracle Identity Cloud Service login URL is displayed:

Test the single sign-on initiated from Identity Cloud Service
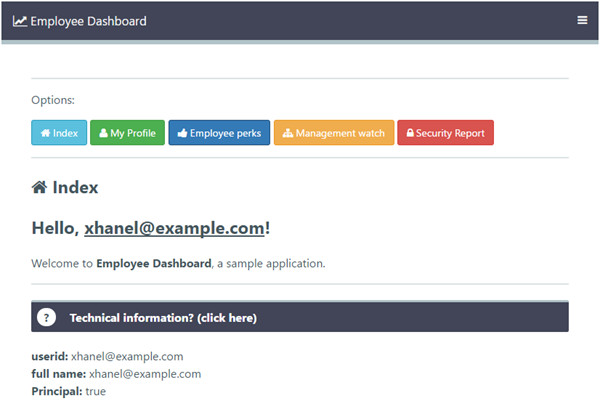
- Access Oracle Identity Cloud Service and log in with a user (for example,
xhanel@example.com). - Click Employee Dashboard. The employee dashboard is displayed for xhanel@example.com:
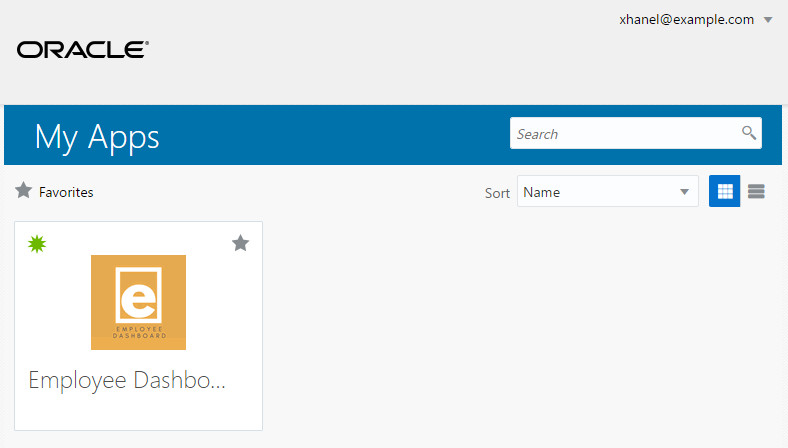
The Oracle Identity Cloud Service My Apps page is displayed with the Employee Dashboard application available:
Optional: Implementing App Links
In this optional section, you implement app links for the Employee Dashboard application.
Note: App links are a useful feature when you want to expose several links from the same application.
- Access Oracle Identity Cloud Service as administrator.
- Expand the Navigation Drawer , click Applications, and then select Employee Dashboard.
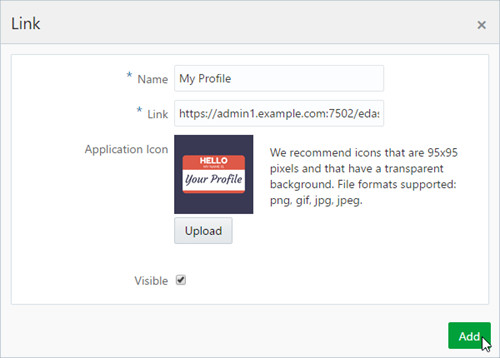
- Click Add next to App Links.
- Provide the information as follows and click Save.
- Repeat the previous steps to add the remaining app links.
- Click Save and then log out.
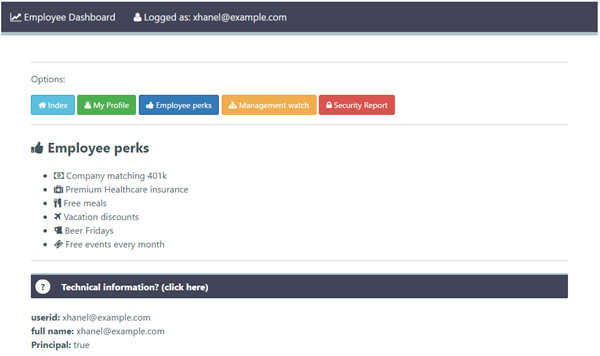
- Access Oracle Identity Cloud Service and log in with a user with access to Employee Dashboard (for example,
xhanel@example.com). - Click Employee Perks. The employee perks should be displayed for xhanel@example.com:
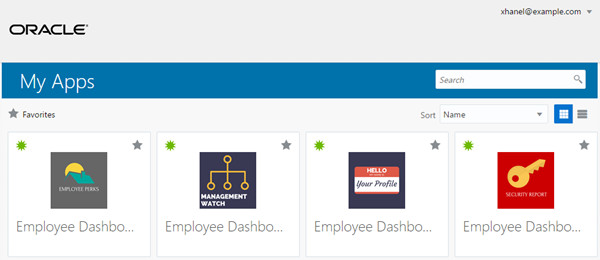
- Optionally, return to My Apps and launch the remaining app links.
| Name | Link | Application Icon |
|---|---|---|
My Profile |
https://admin1.example.com:7502/edashboard/myprofile.jsp |
Select the icon provided with the edashboard sample (idm-samples/edashboard/):edash_myprofile_icon.gif |
| Name | Link | Application Icon |
|---|---|---|
Employee Perks |
https://admin1.example.com:7502/edashboard/employee.jsp |
edash_empperks_icon.gif |
Management Watch |
https://admin1.example.com:7502/edashboard/manager.jsp |
edash_mgmtwatch_icon.gif |
Security Reports |
https://admin1.example.com:7502/edashboard/securityReport.jsp |
edash_secreport_icon.gif |
The Oracle Identity Cloud Service My Apps page now displays each of the App links under Employee Dashboard:
Want to Learn More?
To learn more about this SAML integration, including architectural information and tips, visit Paulo Albuquerque's article.
To learn more about integrating applications with Oracle Identity Cloud Service using OpenID Connect and OAuth 2.0 for REST-Based Federated Single Sign-On and authorization, try the following tutorials:
Credits
- Subject Matter Expert(s): Kiran Thakkar, Paulo Albuquerque, Christopher Johnson, and Olaf Heimburger.
- Developer(s): Frederico Hakamine.