Before You Begin
Purpose
This tutorial covers how to migrate the MedRec application from an on-premise environment to Oracle Java Cloud Service. The MedRec application is installed in your WebLogic Server 12.1.2 environment when you choose to perform a complete installation.
Time to Complete
Approximately 1 hour
Background
The MedRec application serves as an example of an application in your local environment that you would want to modify (as needed) and deploy in Oracle Java Cloud Service.
What Do You Need?
A web browser is required for working with Oracle Cloud Services. These are the minimum requirements:
-
Microsoft Internet Explorer 9 or 10 with Browser Mode and Document Mode set to IE9 or IE10
-
Mozilla Firefox 24 and later
-
Google Chrome 29 and later
-
Apple Safari 6 and later
Before starting this tutorial, you should:
-
(Optional) Install Oracle WebLogic Server 12.1.2. High-level instructions are given in Installing Oracle WebLogic Server with Sample Applications below in case you have not yet installed this software.
-
Install PuTTY and an SCP client on your local machine. WinSCP is used in this tutorial.
-
Download the
Medrec.sqlfile. Click thisMedrec.ziplink and save the file asMedrec.sqlon your local machine. Then, use a utility such as 7-zip to unzip the file. -
Obtain an Oracle Java Cloud Service instance and an Oracle Database Cloud - Database as a Service instance. You have two options:
-
You can create the service instances yourself. See the Creating and Managing an Oracle Java Cloud Service - Coherence Instance tutorial for more information. In order to do this, you must first generate a public/private key pair by using the PuTTYgen utility on your local system. Remember the passphrase for your private keys. See the Creating SSH Keys for Use with Oracle Cloud Services tutorial for more information. You specify the public key when you create the service instances. You specify the private key later when you log in to the VMs. You are not required to use the same key pair for the Oracle Database Cloud - Database as a Service instance and the Oracle Java Cloud Service instance. If you want to use different keys, you must generate two key pairs.
-
You can use existing service instances. You must obtain the private keys and passphrases to the instances from the person who created the service instances.
-
-
Get the following information from the Oracle Java Cloud Service and Oracle Database Cloud - Database as a Service instances:
-
The public IP address of the Oracle Java Cloud Service Administration Server, the service instance's load balancer, and the Oracle Database Cloud - Database as a Service instance. To find the IP addresses, open the service consoles and click the name of the service instance to reveal more details. For more information, see Exploring the Oracle Java Cloud Service Instance Overview Page in Using Oracle Java Cloud Service.
-
The usernames and passwords you specified when you created the Oracle Java Cloud Service instance and the Oracle Database Cloud - Database as a Service instance. If you did not create the service instances, obtain the usernames and passwords from the person who created them. Note that the username and password for the Oracle Java Cloud Service instance and the Oracle Database Cloud - Database as a Service instance might not be the same.
-
The database name and host name of the Oracle Database Cloud - Database as a Service instance, which you obtain from the connect descriptor for the database. Find the connect descriptor the same way you would find the IP address. The connect descriptor is of the format
DBHostName:port/DBName.
-
Installing Oracle WebLogic Server with Sample Applications
To install Oracle WebLogic Server with sample applications, see Installing Oracle WebLogic Server 12.1.2 in JD Edwards EnterpriseOne HTML Server on WebLogic Reference Guide for Microsoft Windows.
During the installation process, provide the following information that is specific to this tutorial:
-
Set your JAVA_HOME and PATH variables appropriately for your installation.
-
Set the Oracle home <WLS_HOME> to
D:\<MW_HOME>\WLS. -
On the Installation Type page, choose Complete installation.
-
Choose to automatically start the quickstart configuration wizard.
-
Enter
welcome1as the password.
After you have installed and configured WebLogic Server with sample applications, notice the following three directories:
-
<WLS_HOME>\user_projects\domainsContains the medrec, medrec-spring, and wl-server domains.
-
<WLS_HOME>\user_projects\domains\medrecIs the domain location for the MedRec application.
-
<WLS_HOME>\user_projects\applications\medrecContains the source code and compiled code for the
MedRec application.
To verify that the MedRec application is up and running:
-
Navigate to
<WLS_HOME>\user_projects\domains\medrec\bin -
Run
startWeblogic.cmd.Note: On Linux machines, navigate to
<WLS_HOME>/user_projects/domains/medrec/binand execute thestartWebLogic.sh. -
Navigate to
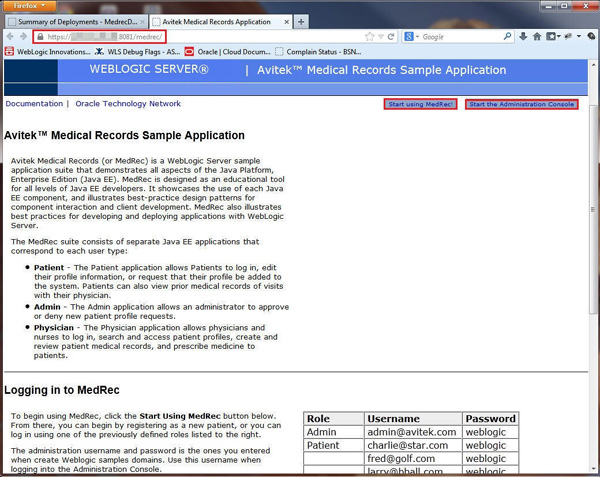
http://<desktop_machine>:<medrec_port>/medrec, for example,http://localhost:7011/medrec.
The MedRec application opens in your browser. It uses the Derby database that comes bundled with WebLogic Server.
You have now started the Administration Server of
the medrec domain and accessed the
application.
Note: This tutorial shows migration of the MedRec environment. When you migrate your own application, use the Administration Console on your local machine to familiarize yourself with your environment. Make a note of the names of you data source, JMS modules, JMS queues, work manager, messaging resources, and mail session.
Migrating the Database
Migrating the MedRec application includes the following steps: database migration, environment configuration, and application migration. We will start with database migration.
In this task, you create the required users and
tables in the database and push the sample data to
it. In the original application (the application on
your local WebLogic server), the data is already
present in the Derby database. Now, you use the Medrec.sql
file you downloaded to push the data into your
database (the database on the cloud). This data is
exactly the same as that of the original
application. If you have not yet downloaded the
file, click this Medrec.zip
link. Use any SCP client to copy the Medrec.sql
file into a folder (for example, /tmp)
of your Oracle Database Cloud - Database as a
Service instance.
Note: This is a sample application. In your production environment, you might need to use the the Database Export utility or datapump utility to prepare and migrate the data to the Oracle Database Cloud - Database as a Service environment. For more information, see Exporting an On-Premises PDB and Importing into the DBaaS Database tutorial.
Note: You should already have the details of the Oracle Database Cloud - Database as a Service instance assigned to you. Refer to the What Do You Need section in Before You Begin.
Copying Files to Your Oracle Database Cloud - Database as a Service Instance
To copy files to your Oracle Database Cloud - Database as a Service instance:
-
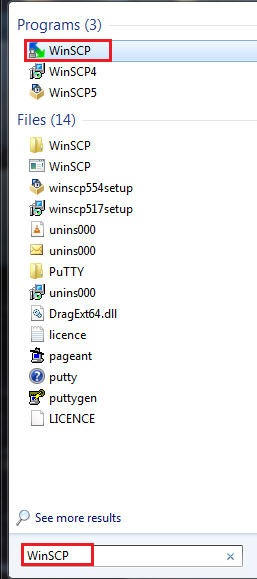
Click the Start button, search for WinSCP, then click it.
-
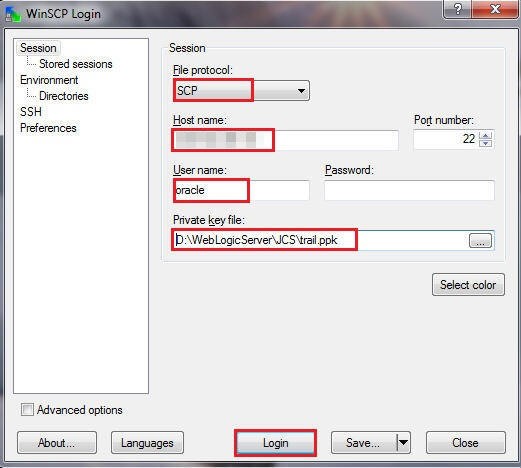
On the WinSCP Login page, click Session and enter the following details:
-
File protocol:
SCP -
Host name: 111.111.111.111 (Public IP address of your Oracle Database Cloud - Database as a Service instance)
-
Username:
oracle -
Password: Leave blank
-
Private key file: Use the private key (
ppk) file that you created using PuTTYgen. The corresponding public key was used when the Oracle Database Cloud - Database as a Service instance was created.
-
-
Click Login.
-
A dialog box is displayed. Click Continue.
-
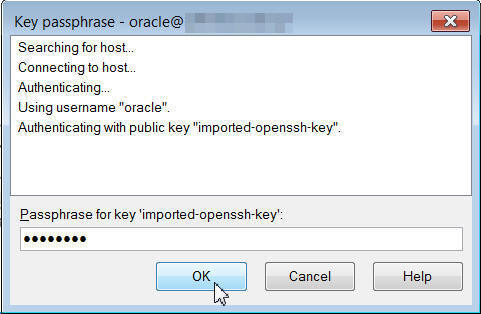
Enter the passphrase that you provided while generating the
ppkfile and click OK. -
After logging in, drag and drop the
Medrec.sqlfile from your local machine to the/tmpdirectory of your Oracle Database Cloud - Database as a Service instance. -
Close WinSCP after the file transfer is complete.
Using PuTTY to Connect to the Machine
To connect to the machine:
-
Open PuTTY and navigate to SSH > Auth.
-
Click Browse and specify the location of the
ppkfile you created using the private key with PuTTYgen. -
Navigate to Session.
-
Enter the Public IP of y/our Oracle Database Cloud - Database as a Service instance and click Open.
-
Enter
oracleas the user name and click Enter.
You are now logged in to the machine.
Creating the Table in the Database in the Oracle Database Cloud - Database as a Service Instance
In this step, you will create a user in the Oracle PDB database and run SQL queries to create the table in the database.
Enter commands such as the ones given below, with information you can find in the instance shown.
Note: You obtain the DBConnectString from the
Connect Descriptor as shown in the image. For
example: Medrec:1111/PDB1.environment.oraclecloud.
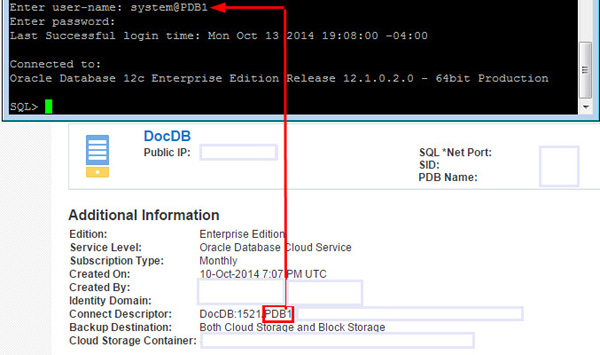
cd /tmp
sqlplus DBuser/DBPassword@DBConnectString
create user medrec identified by medrec;
grant DBA to medrec;
connect medrec/medrec@DBConnectString
@Medrec.sql
exit;
Close PuTTY.
Now, you have populated the database with the required data. This completes the database migration.
Configuring the Oracle Java Cloud Service Environment
In this section, you replicate the environment from your local WebLogic server to the remote WebLogic server in the cloud. You can verify the environment in your local machine at any time.
Launching the Administration Console
Your WebLogic Server is running on your local machine.
-
Launch the WebLogic Server Administration Console on your local machine by entering the following URL in your browser:
http://localhost:7001/consoleWhen prompted, enter your username and your password, and click Login.
In the Administration Console, you can view the environment for the application.
-
Close the Administration Console on your local machine.
You will replicate the environment onto a Java Cloud Service instance.
-
Navigate to the Oracle Java Cloud Service Console and make a note of the data highlighted below.
-
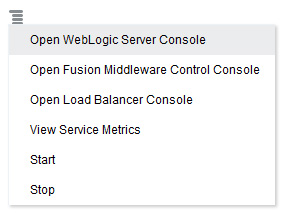
From the
 menu, click Open WebLogic Server
Console.
menu, click Open WebLogic Server
Console. -
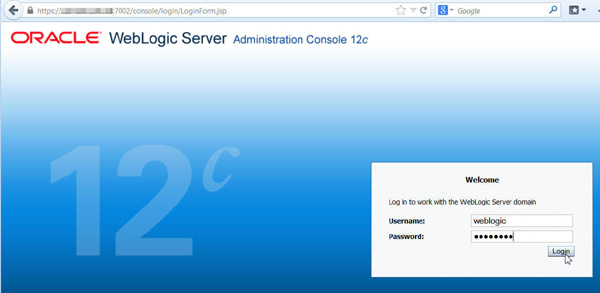
You will receive a message about an untrusted site. Allow the exception.
-
When the WebLogic Server Administration Console Welcome screen is displayed, enter your username and password, and click Login

Note: This is an example only. The name of the service instance here is "Medrec," but unless you named your service instance "Medrec," your service instance name will be different. The information you need to note will be the same.
Creating a Data Source
Now that the Administration Console is displayed, you create a data source in your Oracle Java Cloud Service instance.
-
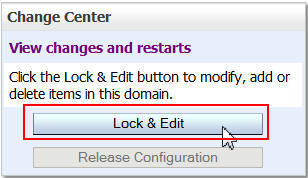
In the Change Center of the Administration Console, click Lock & Edit.
Note: You must click Activate Changes after each modification.
-
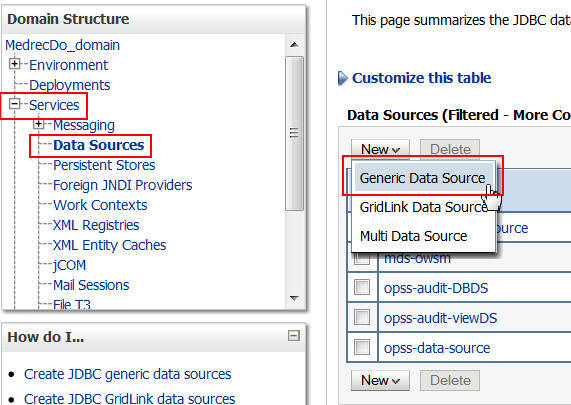
Click Services > Data Sources. Then, click New > Generic Data Source.
-
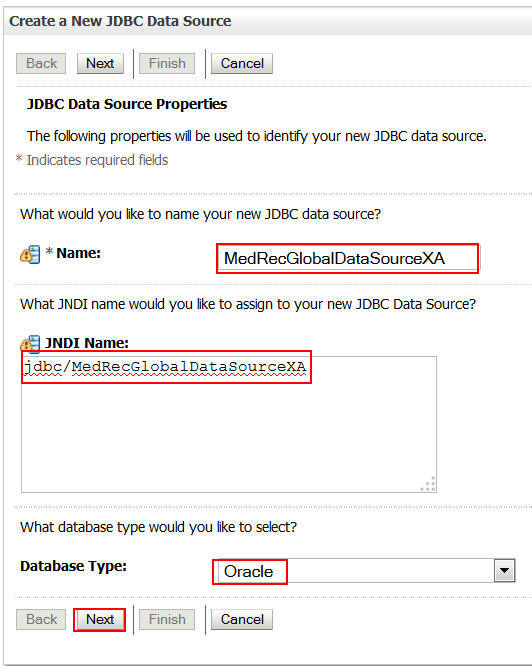
Enter the following information and click Next:
Name:
MedRecGlobalDataSourceXAJNDI Name:
jdbc/MedRecGlobalDataSourceXADatabase Type:
Oracle -
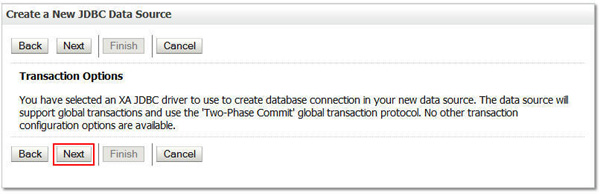
Select Oracle's Driver (Thin XA) for Service connections; Versions: Any from the Database Driver drop down menu and click Next.
-
Leave the default values as-is and click Next.
-
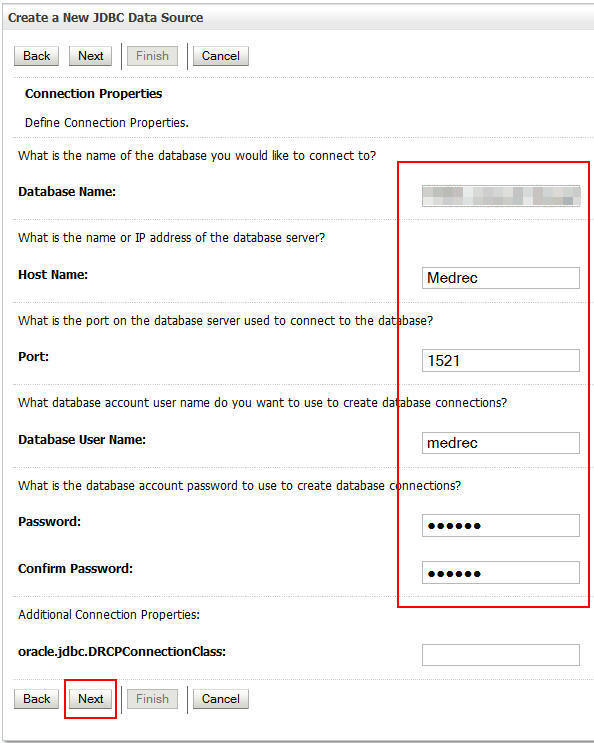
Enter the following details and click Next.
Database Name: Name of your database.
Host Name: Name of your Oracle Database Cloud - Database as a Service instance, in this example,
Medrec)Database User Name:
medrecPort:
1521Password:
medrecNote: See the Prerequisites section of this document if you need help finding the database and host name for the database.
-
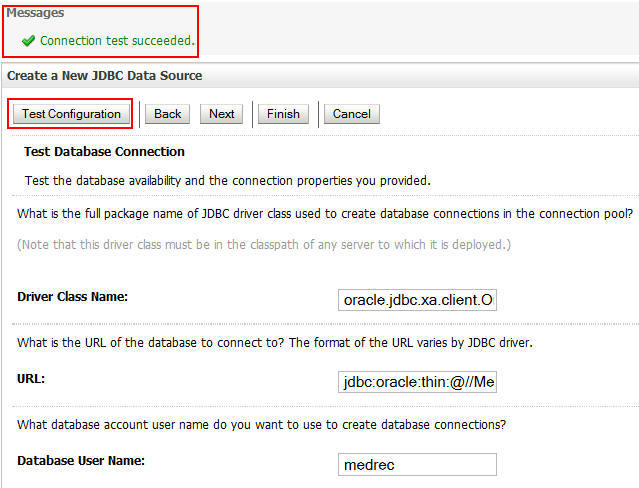
Click Test Configuration. If you see the message, Connection test succeeded, click Next.
-
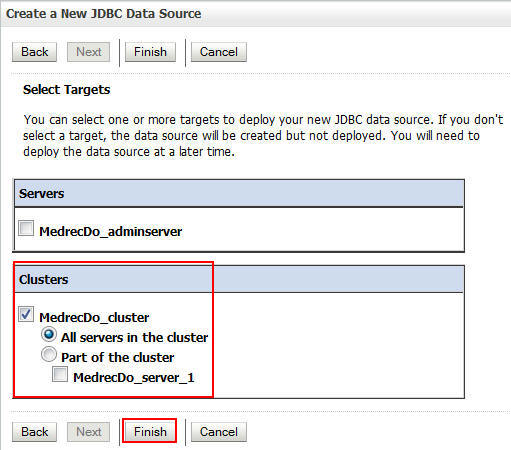
Select the cluster as the data source target and click Finish.
-
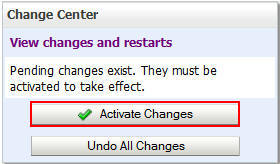
Click Activate Changes.
-
Click Lock & Edit.

Creating a Work Manager
In this section, you create a work manager in the cloud.
-
In the Domain Structure, click Environment > Work Managers and click New.
-
Select Work Manager and click Next.
-
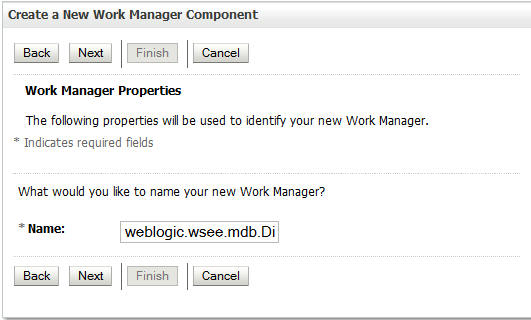
In the Name field, enter
weblogic.wsee.mdb.DispatchPolicyand click Next. -
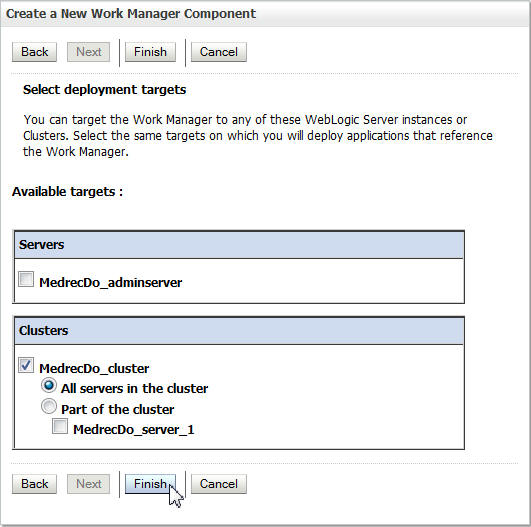
Select the cluster as the deployment target and click Finish.


You have created a work manager.
Creating Messaging Resources
In this section you create messaging resources in the cloud.
-
Click Lock and Edit.
-
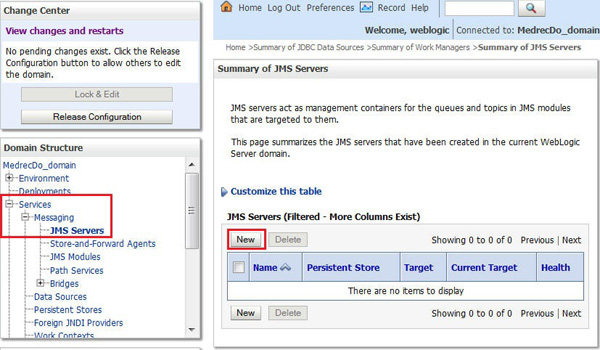
Under Domain Structure, click Services > Messaging < JMS Servers and click New.
-
In the Name field, enter
MedRecJMSServerand click Next. -
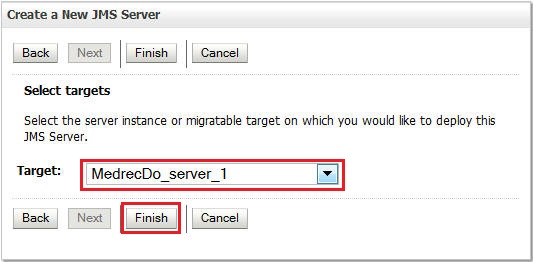
Select the managed server as the target and click Finish.
-
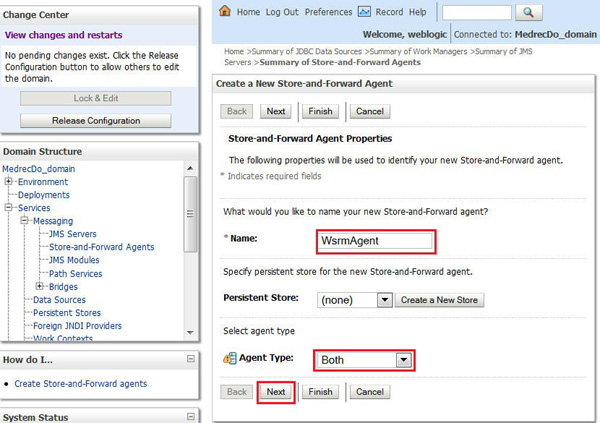
Click Services > Messaging > Store-and-Forward Agents and click New.
-
Enter the following details and click Next.
Name:
WsrmAgentAgent Type:
Both -
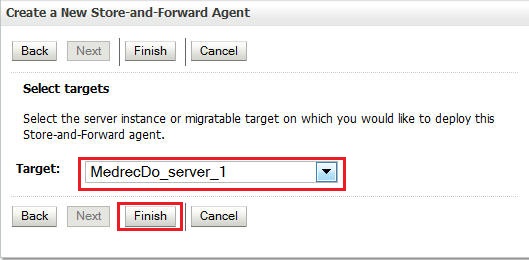
Select the managed server as the target and click Finish.
-
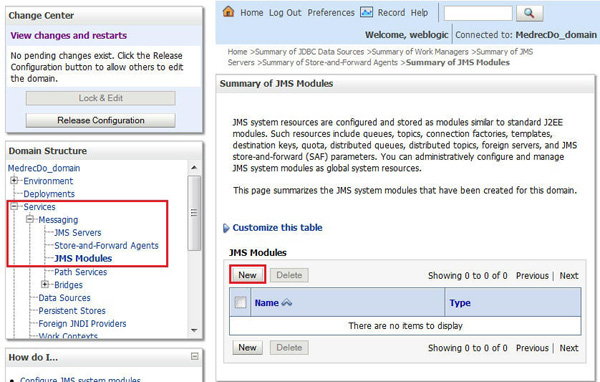
Click Services > Messaging > JMS Modules and click New.
-
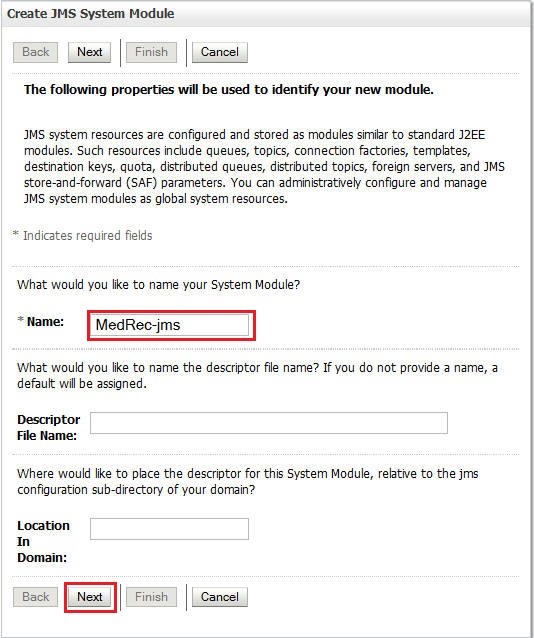
In the Name field, enter
MedRec-jms, leave the values for the remaining fields as-is, and click Next. -
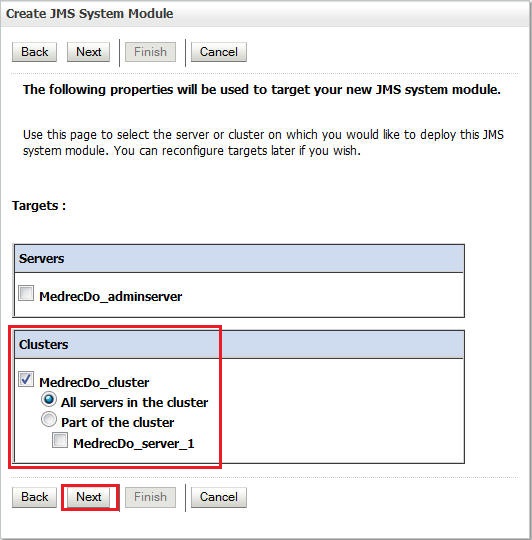
Select the cluster as the Target and click Next.
-
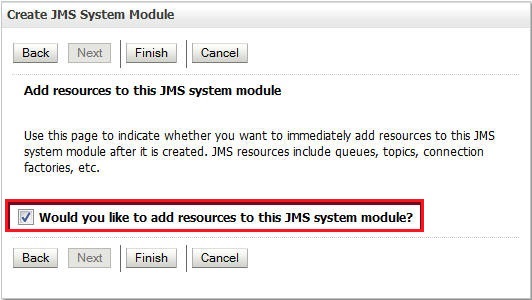
Select the Would you like to add resources to this JMS module? option and click Finish.
-
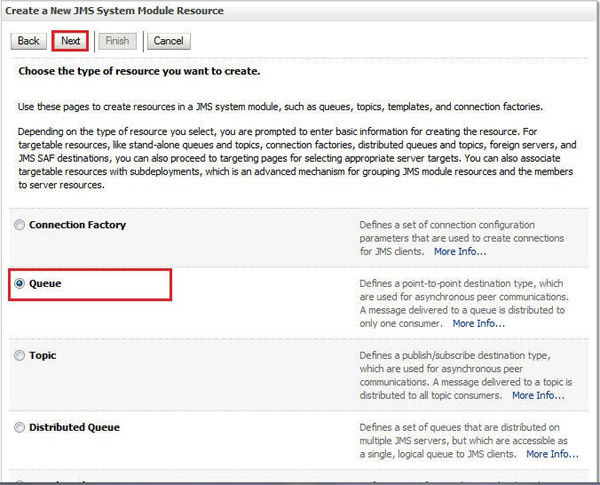
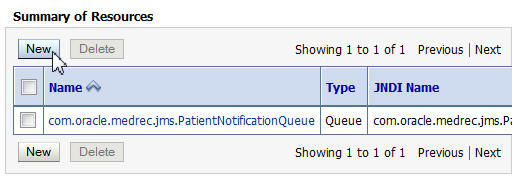
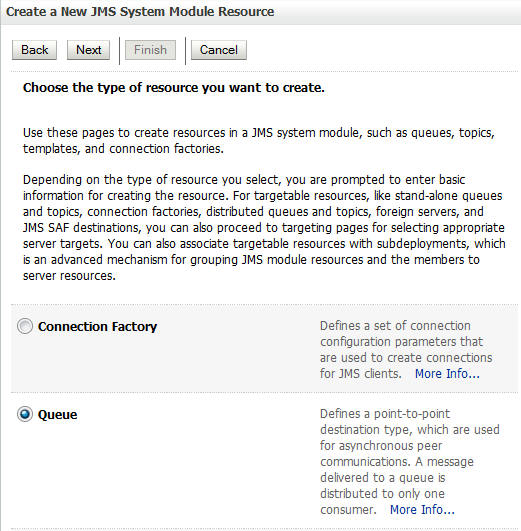
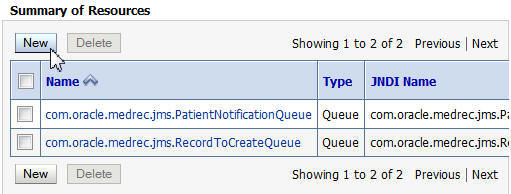
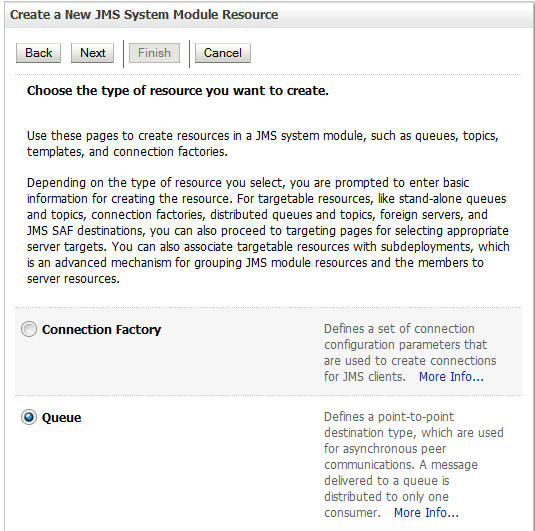
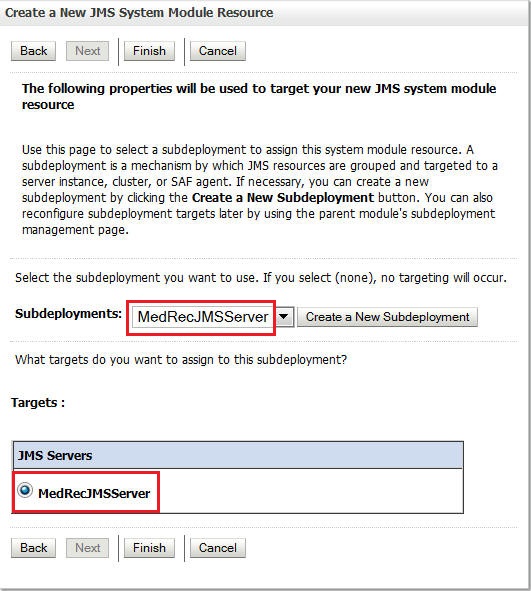
In the Summary of Resources section, click New. On the Create a New JMS System Module Resource page, select Queue and click Next.
-
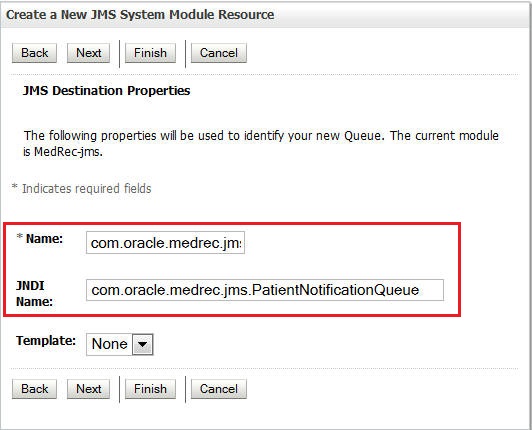
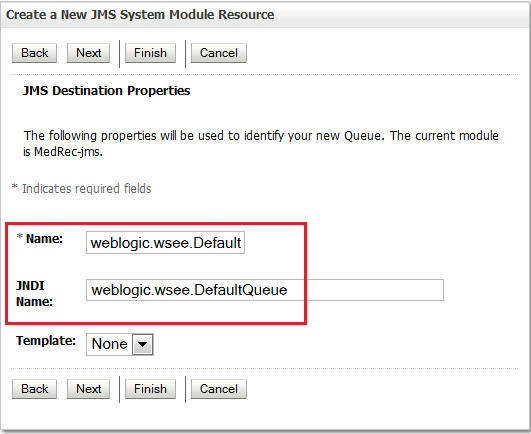
Enter the following details and click Next.
Name:
com.oracle.medrec.jms.PatientNotificationQueueJNDI Name:
com.oracle.medrec.jms.PatientNotificationQueue -
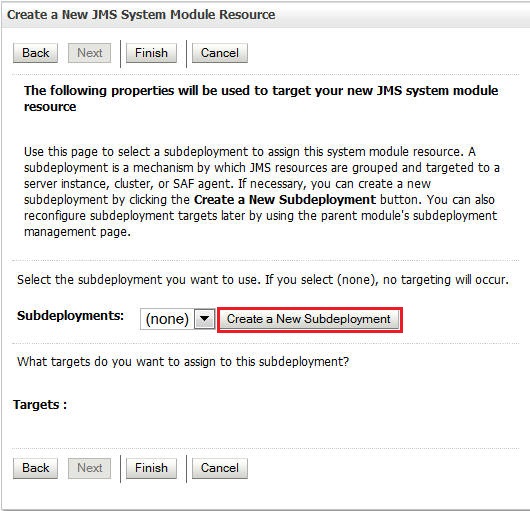
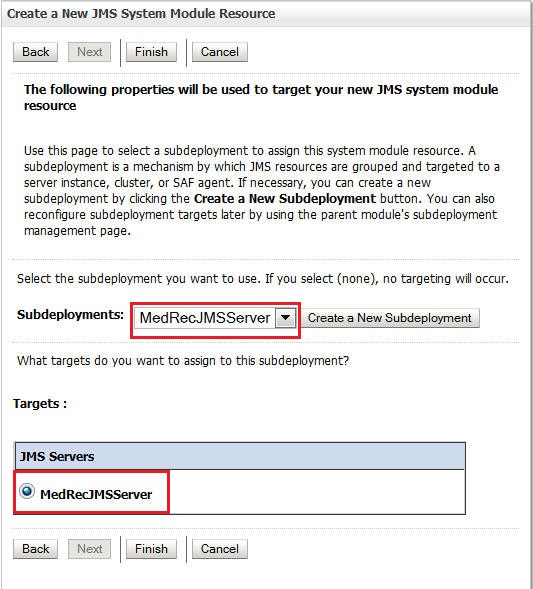
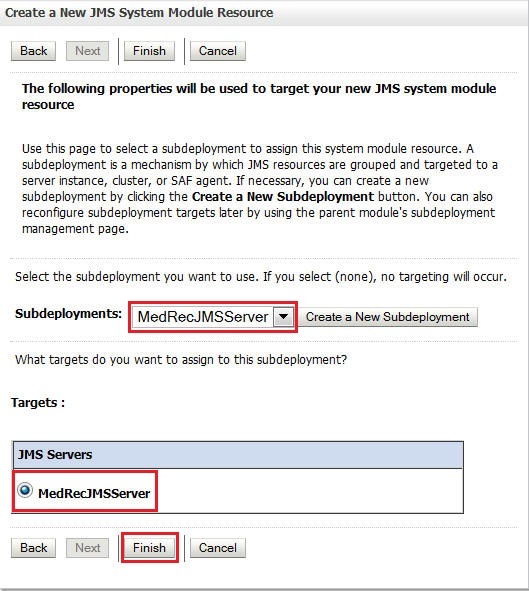
Click Create a New Subdeployment.
You will use the subdeployment for the next two queues you will create.
-
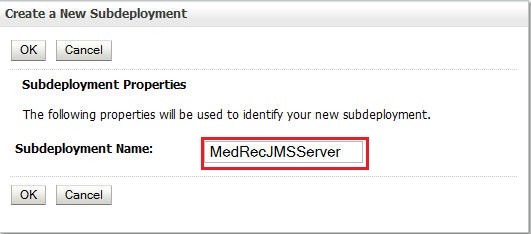
Enter
MedRecJMSServeras the Subdeployment Name and click OK. -
Select MedRecJMSServer as the Subdeployment and as the target JMS target server and click Finish.
-
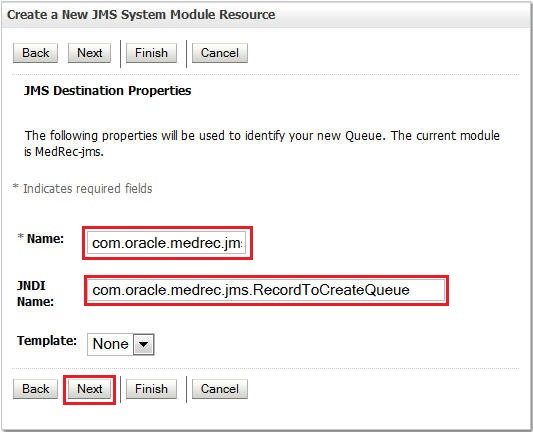
Use the same procedure for the following two queues:
com.oracle.medrec.jms.RecordToCreateQueueandweblogic.wsee.DefaultQueue. Their JNDI names are same as their names. Use the following illustrations as a reference: -
Click Activate Changes.


You have created messaging resources.
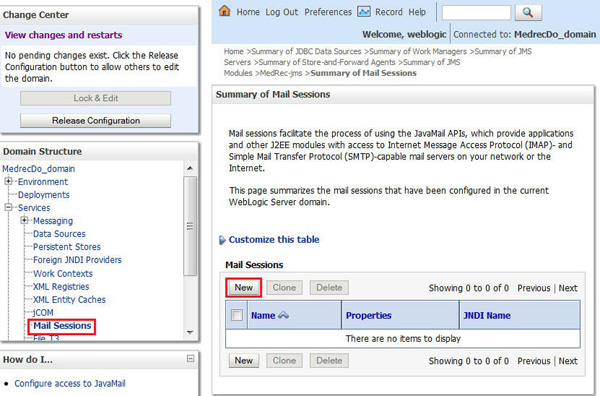
Creating a Mail Session
-
Click Lock and Edit.
-
Click Services > Mail Session and click New.
-
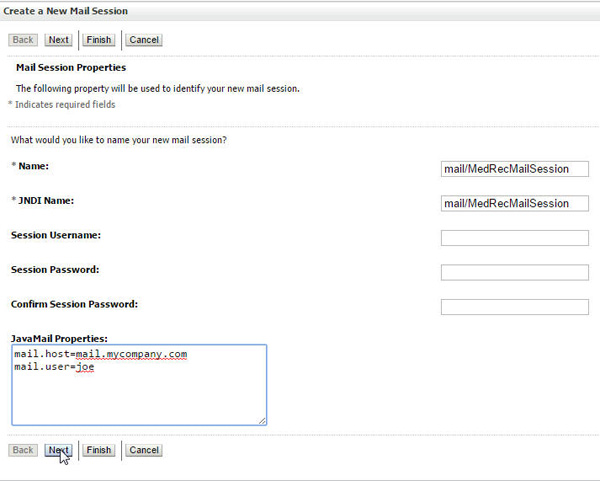
Enter the following details and click Next.
Name:
mail/MedRecMailSessionJNDI Name:
mail/MedRecMailSessionJava Mail Properties:
mail.host=mail.mycompany.commail.user=joe -
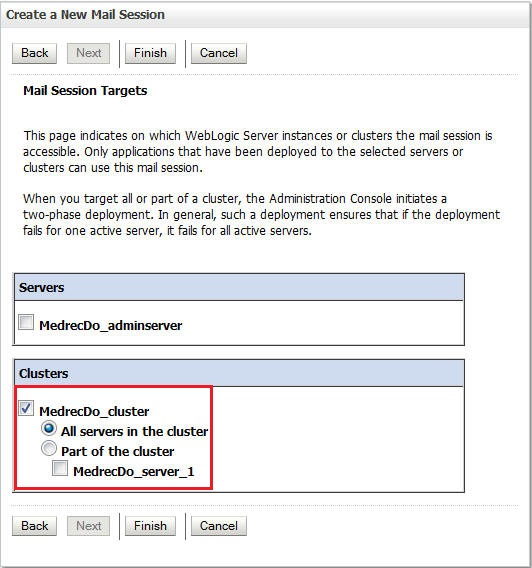
Select the cluster as the Target and click Finish.
-
Click Activate Changes.
You have created a mail session.
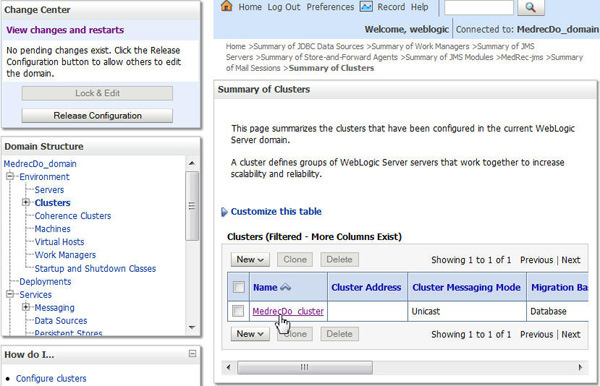
Configuring the Cluster
-
Click Lock & Edit.
-
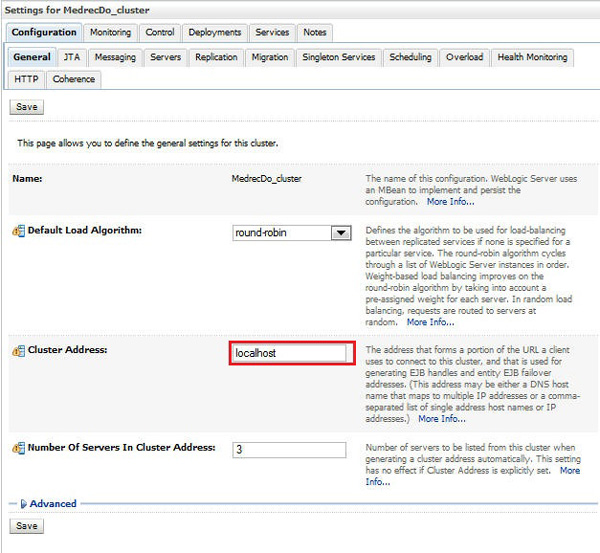
Navigate to Environment > Clusters and click the cluster name, MedrecDo_cluster.
-
Enter
localhostas the cluster address and click Save. -
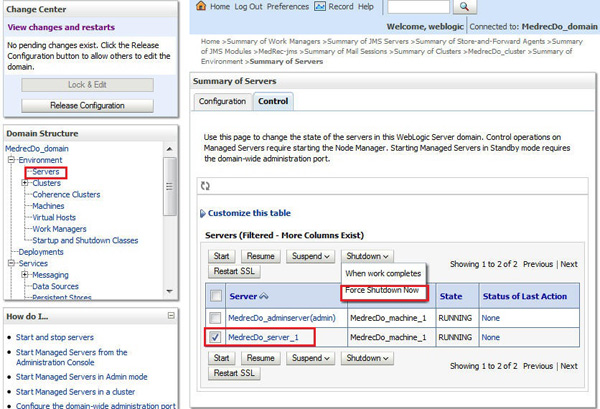
To shut down the server:
-
Navigate to Environment > Servers. On the Summary page, click the Control tab. Select the check box for the managed server MedrecDo_server_1. Select Force Shutdown Now from the Shutdown drop-down menu.
-
Click Yes on the Server Life Cycle Assistant page.
-
After the managed server shuts down, restart it. For instructions, see Configuring the Cluster.
-
On the Servers list, select the managed server.
-
On the Server Life Cycle Assistant dialog, click Yes.
-
Click Activate Changes.
-
Important: Restart the Managed Server. For instructions, see Configuring the Cluster.
Note: The cluster address has changed, so you must restart the managed server.


You have successfully configured the environment.
Migrating the Application
If you have war or ear
file that runs successfully on your on local
WebLogic Server, then you can easily deploy the same
file to WebLogic Server in the Oracle Java Cloud
Service instance. If you complete the following
migration steps, your application will run
successfully as well. You have sample code for
MedRec application (which was installed when you
installed WebLogic Server), so you will use the same
code for deployment. On your local system, the
application runs in simple domain. So, you are going
to make some small changes to the weblogic-application.xml
file and deploy the same ear file to
the cloud.
Copying the MedRec Source Code
The MedRec source code is located at <WLS_HOME>\user_projects\applications\medrec,
where WLS_HOME is the WebLogic
Server home directory you specified when you
installed WebLogic Server.
You only need to copy the .ear
directories:
-
<WLS_HOME>\user_projects\applications\medrec\modules\medrec\assembly\target\medrec.ear -
<WLS_HOME>\user_projects\applications\medrec\modules\physician\assembly\target\physician.ear
-
Copy the
.eardirectories to a different location, for example,D:\.Example used here:
D:\medrec\modules\medrec\assembly\target\medrec.earD:\medrec\modules\medrec\assembly\target\physician.earNote: You can choose any location for your working directory. The
D:directory is an example in this tutorial.
Converting the Application to an Exploded Format
-
Navigate to
D:\medrec\modules\medrec\assembly\target. -
Rename
medrec.eartomedrec1.ear. -
Use 7zip (or equivalent software) to extract
medrec1.eartoD:\medrec.ear. -
Navigate to
D:\medrec\modules\physician\assembly\target. -
Rename
physician.eartophysician1.ear. -
Use 7zip (or equivalent software) to extract
physician1.eartoD:\physician.ear.
You have now converted the application to an exploded format.
Modifying the xml File
In this section, you modify the weblogic-application.xml
file to use the filtering classloader.
Note: Use any XML editor or Notepad. Do not use WordPad.
Replace the content in the following two files:
-
D:\medrec\modules\medrec\assembly\target\medrec.ear\META-INF\weblogic-application.xml -
D:\medrec\modules\physician\assembly\target\physician.ear\META-INF\weblogic-application.xml
...with the modified weblogic-application.xml
content.
Original weblogic-application.xml:
 <wls:weblogic-application xmlns:xsi="http://www.w3.org/2001/XMLSchema-instance"
      xmlns:wls="http://www.bea.com/ns/weblogic/weblogic-application"
      xsi:schemaLocation="http://www.bea.com/ns/weblogic/weblogic-application
      http://www.bea.com/ns/weblogic/weblogic-application.xsd
      http://java.sun.com/xml/ns/j2ee
      http://java.sun.com/xml/ns/j2ee/j2ee_1_4.xsd">
  <wls:application-param>
    <wls:param-name>webapp.encoding.default</wls:param-name>
    <wls:param-value>UTF-8</wls:param-value>
  <wls:application-param>
</wls:weblogic-application>
Modified weblogic-application.xml
file:
<?xml version="1.0" encoding="UTF-8"?>
<wls:weblogic-application xmlns:wls="http://xmlns.oracle.com/weblogic/weblogic-application"
     xmlns:xsi="http://www.w3.org/2001/XMLSchema-instance"
     xsi:schemaLocation="http://java.sun.com/xml/ns/javaee
     http://java.sun.com/xml/ns/javaee/javaee_5.xsd
     http://xmlns.oracle.com/weblogic/weblogic-application
     http://xmlns.oracle.com/weblogic/weblogic-application/1.5/weblogic-application.xsd">
  <wls:application-param>
    <wls:param-name>webapp.encoding.default</wls:param-name>
    <wls:param-value>UTF-8</wls:param-value>
  </wls:application-param>
  <prefer-application-packages>
    <package-name>org.apache.commons.*</package-name>
  </prefer-application-packages>
</wls:weblogic-application>
The schema location now uses the filtering classloader.
Using WinSCP to Copy the Application Files
In this section, you use WinSCP to copy the medrec.ear
and physician.ear directories from
the current location to the /tmp
folder in the Oracle Java Cloud Service
instance.
To connect to the Oracle Java Cloud Service instance:
-
On the WinSCP Login page, click Session and enter the following details:
File protocol:
SCPHost name: Enter the Public IP of your Oracle Java Cloud Service instance
Username:
opcPassword: Leave blank
Private key: Use the ppk file that you created using PuTTYgen
-
Click
Login. -
Copy the two
.earfiles to the/tmpfolder of the Oracle Java Cloud Service instance. -
After the file transfer is complete, close WinSCP.
You have now copied the application files from your local installation to the Oracle Java Cloud Service.
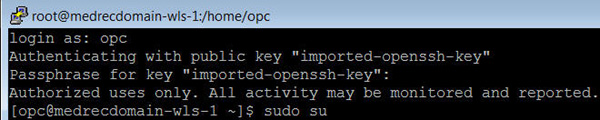
Using PuTTY to Change File Permissions
Use PuTTY to change permissions to 777 for the
.ear files.
-
Log in as
opcand specify your passphrase when prompted. -
Execute the following commands:
sudo su
chmod -Rf 777 /tmp/medrec.ear
chmod -Rf 777 /tmp/physician.ear

You have now changed file permissions.
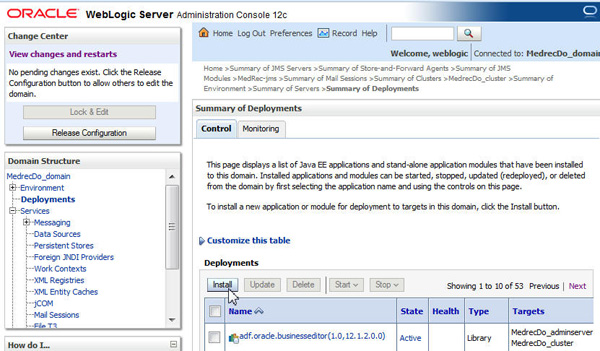
Deploying the Application
-
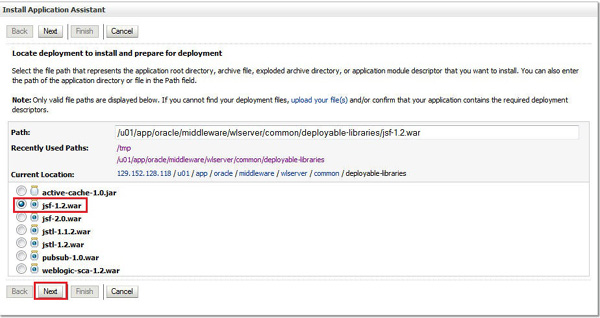
Install the
jsf-1.2.warfile as a shared library.-
Click Lock & Edit.
-
Select Deployments and click Install.
-
Specify the path as
/u01/app/oracle/middleware/wlserver/common/deployable-libraries/jsf-1.2.warand click Next. -
Select Install the deployment as a library and click Next.
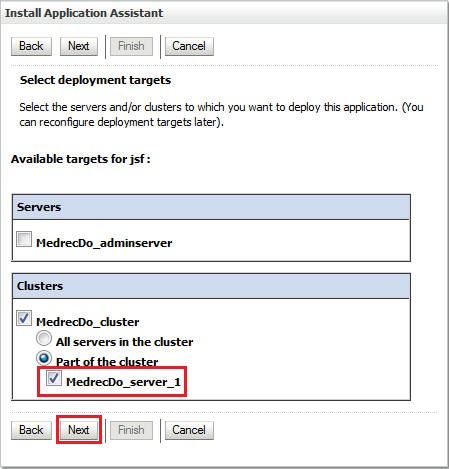
-
Select the managed server as the target.
-
Click Finish.
-
Click Activate Changes.
A message is displayed, directing you to restart the server.
-
Restart the Managed Server. See the instructions in Configuring the Cluster.
-
-
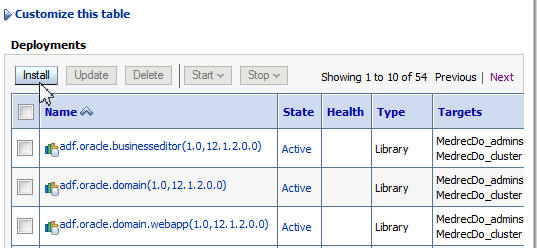
Deploy the
medrec.earfile as an application.-
Click Lock & Edit.
-
On the Deployments table, click Install.
-
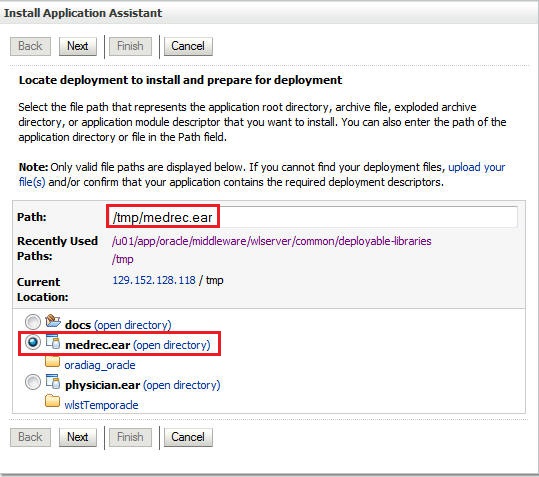
Specify the path as
/tmp/medrec.ear. -
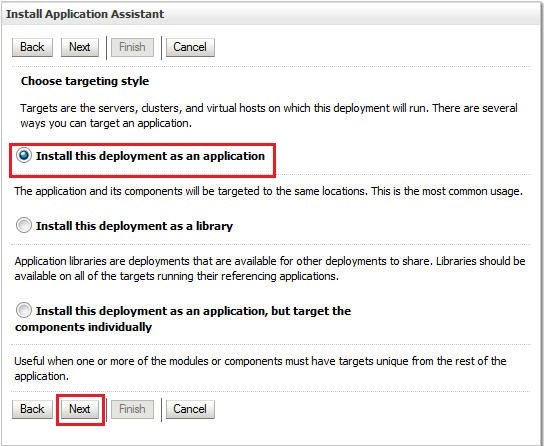
Select Install this deployment as an application.
-
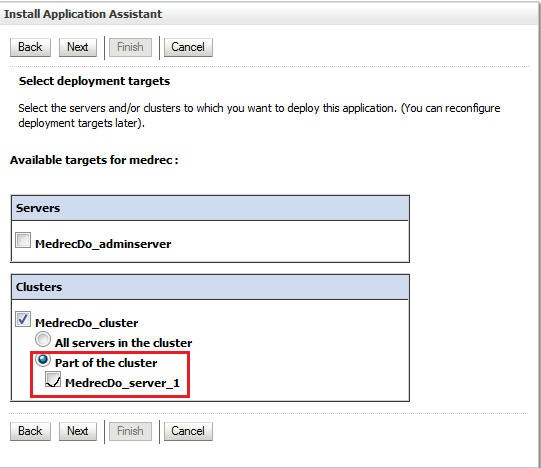
Select the managed server as the target.
-
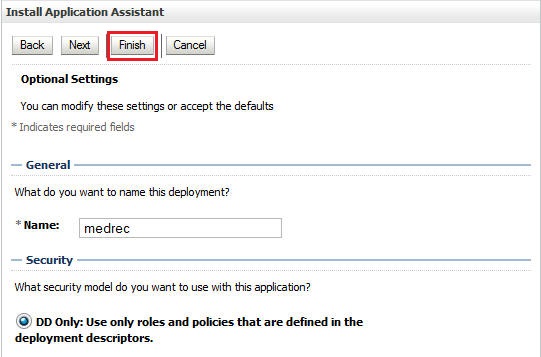
Click Finish.
-
Click Activate Changes.
A message stating the servers need to restarted is displayed.
-
Restart the Managed Server. For instructions, see Configuring the Cluster.
-
-
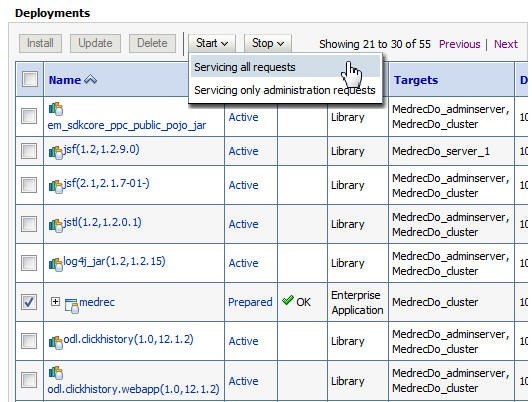
Click the Next button on the Deployments table until the MedRec application is displayed. Select the check box for the
medrecapplication and click Start > Servicing all requests. -
Click Yes on the Start Application Assistant page.
-
Repeat the preceding steps to deploy the
physician.earapplication.


You have now deployed the MedRec application.
Accessing the Application
-
Navigate to
https://IP_of_the_Load_Balancer_Instance:443/medrecand click Start using MedRec. -
Accept the security exception.
-
Test the application to validate that the migration was successful.
Note: You can find the credentials on the home page.
-
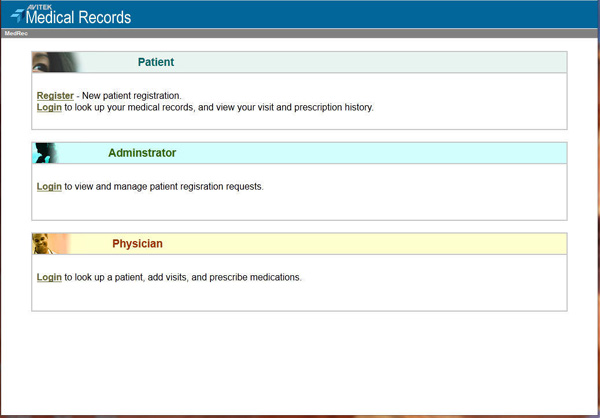
Click Start.
-
Click Register to register a patient.
-
Click Login to log in as Administrator and approve the patient registration.
-
Log in as the patient and edit the profile information.
-
Log in as the physician, search for the patient, and prescribe medication.
-
You have now accessed and tested the MedRec application.
Want to Learn More?
- Using Oracle Java Cloud Service
- Creating SSH Keys for Use with Oracle Cloud Services
- Oracle Cloud Documentation
- cloud.oracle.com
Credits
- Lead Curriculum Developer: Kathryn Abelson
- Contributors: Ankit Pandey, Vijaya Karothi, Shankar Raman, Veerabhadra Rao Putrevu