 Managing Oracle Event Hub Cloud Service - Topic using a Swagger-Generated Java Client
 Before You Begin
This tutorial shows you how to generate Java client using REST API and to manage Oracle Event Hub Cloud Service - Topics using this generated Java client. This tutorial takes approximately 15 minutes to complete.
Background
Oracle Event Hub Cloud Service provides a highly available and scalable messaging platform for loading and analyzing data. Oracle Event Hub Cloud Service - Topic instances help users to produce to and consume from streams of data like a messaging system. It also helps store streams of data in a distributed and scalable cluster. Users can access these instances also using REST API. This OBE describes managing instances using REST API.
What Do You Need?
- Swagger specification for the Oracle Event Hub Cloud Service - Topic. Download from REST API for Oracle Event Hub Cloud Service in Oracle Help Center page.
- A working Oracle Event Hub Cloud Service - Platform cluster.
- Oracle Event Hub Cloud Service account login credentials.
- Java 8 or above installed.
- Maven 3 or above installed.
- Eclipse Integrated Development Environment (IDE) that supports Maven installed.
- Access to editor2.swagger.io web page.
Note: Swagger editor version 2.X is recommended. Refer github.com/swagger-api/swagger-editor for additional information.
 Generate Java Client for the REST API
Perform the following steps to generate Java Client from the editor2.swagger.io web site.
- Go to editor.swagger.io website.
- From the File menu, select Import File.
-
In the Upload File dialog box, click Browse, select the required swagger file and then select Open File.
Note: You would see the swagger code on the left hand side pane and the User Interface on the right hand side pane.
-
Select Generate Client menu and then select Java. The java client file will be downloaded to the local directory.
Note: You could generate client program in any of the programming languages that are listed in the menu. We have chosen Java for the purpose of this demo.
- Extract the downloaded zip file.
 Set up the Project in Eclipse IDE
-
Open Eclipse IDE. From the File menu, select Import.
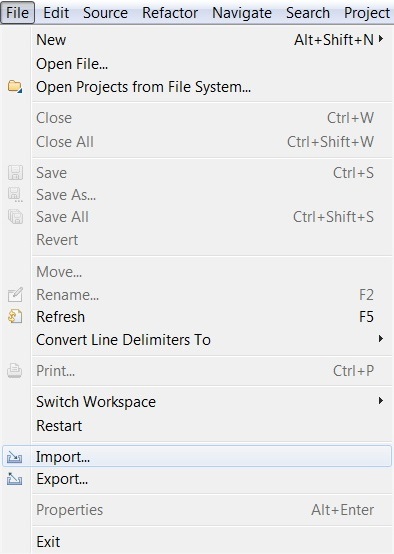
Description of the illustration b01.jpg -
The Import wizard appears. Expand General, select Projects from Folder or Archive option and click Next.
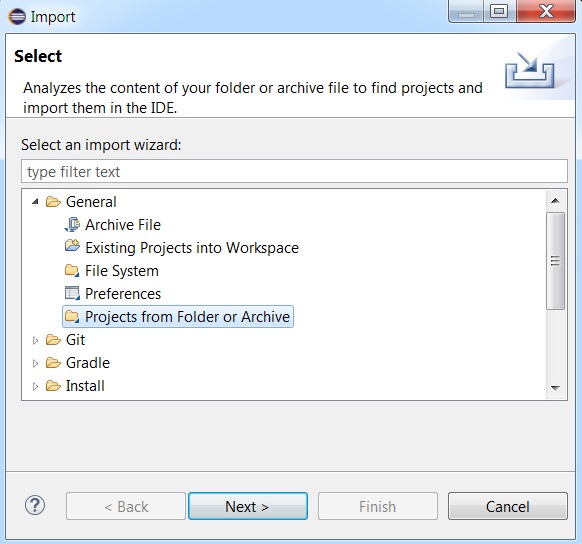
Description of the illustration b02.jpg -
The Import Projects from File System or Archive window appears. In the Import Source, input the path of the extracted zip file. After you give a valid path, you could see the
java-clientproject is selected. Click Finish.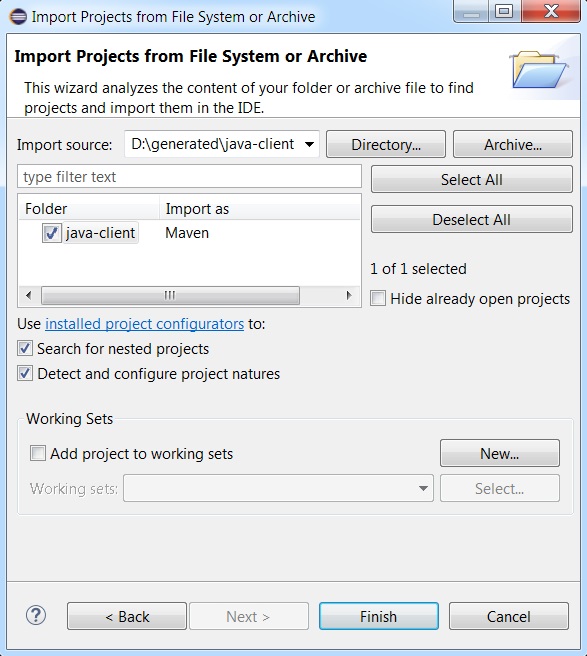
Description of the illustration b03.jpg -
The
java-clientproject opens up in the Package Explorer. Observe the structure of the project. -
Open
ApiClient.javafile present inio.swagger.clientpackage. Go to theisJsonMime(String mime)method and update the return statement with the below code.return mime != null && mime.matches("(?i)application\\/(.*)json(;.*)?");
Description of the illustration b04.jpg
 Create an Oracle Event Hub Cloud Service - Topic instance
Perform the following steps to create a Java program that would create an Oracle Event Hub Cloud Service - Topic instance.
-
Right Click on the
java-clientproject. Expand New and then select Class option.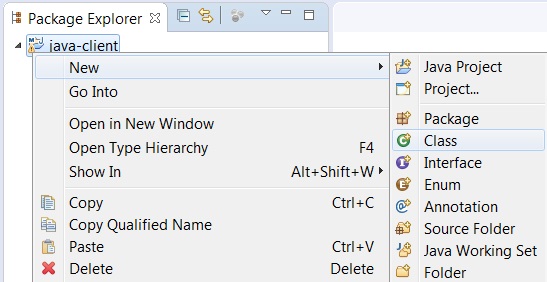
Description of the illustration z01.jpg -
The Java Class creation wizard appears. Enter the Package as
mydemoand then enter the Name asCreateInstanceDemo. Click Finish.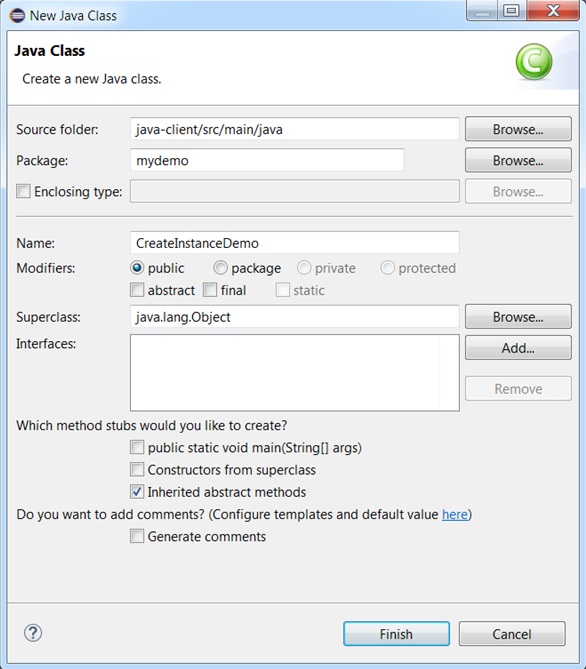
Description of the illustration c01.jpg -
The
CreateInstanceDemo.javafile is created and then opens up. Observe the contents. -
Copy this snippet of code to the
CreateInstanceDemoclass.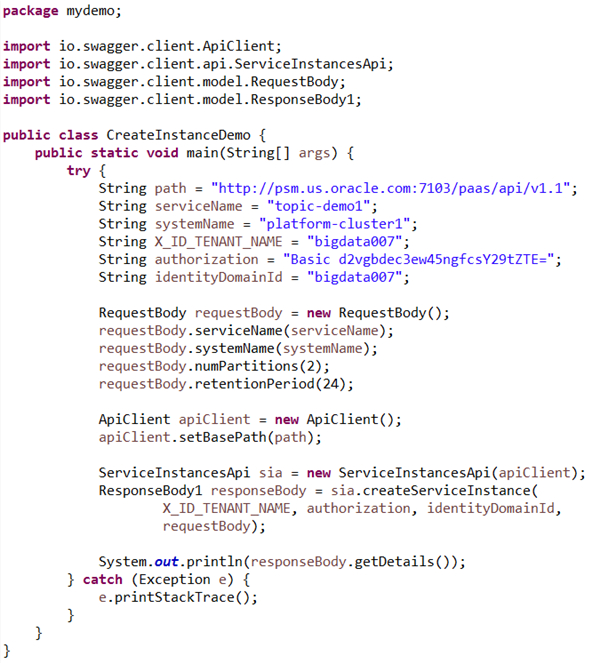
Description of the illustration c02.jpg -
Update the following variables in the
CreateInstanceDemoprogram with actual values from your Oracle Event Hub Cloud Service instance.- path: path Base path of the service URL (e.g. http://localhost/paas/api/v1.1)
- serviceName: Name of the Topic that you want to create
- systemName: Name of the Platform cluster in which you want to create the topic
- X_ID_TENANT_NAME: Identity domain Id for Oracle Event Hub Cloud Service account.
- authorization: Base64 encoding of the user name and password of the user making the request.
- identityDomainId: Identity domain Id for Oracle Event Hub Cloud Service account.
- Right click on the program. Expand Run As and then select Java Application.
-
Observe the output in the Console. On successful execution, a
jobIdwill be displayed. You can use thisjobIdto track the status of this job.Class Details { message: Submitted job to create service [topic-demo1] in domain [bigdata007]. jobId: 5293 }
 View the job status of create operation
-
Right Click on the
java-clientproject. Expand New and then select Class option.
Description of the illustration z01.jpg -
The Java Class creation wizard appears. Enter the Package as
mydemoand then enter the Name asViewJobDemo. Click Finish.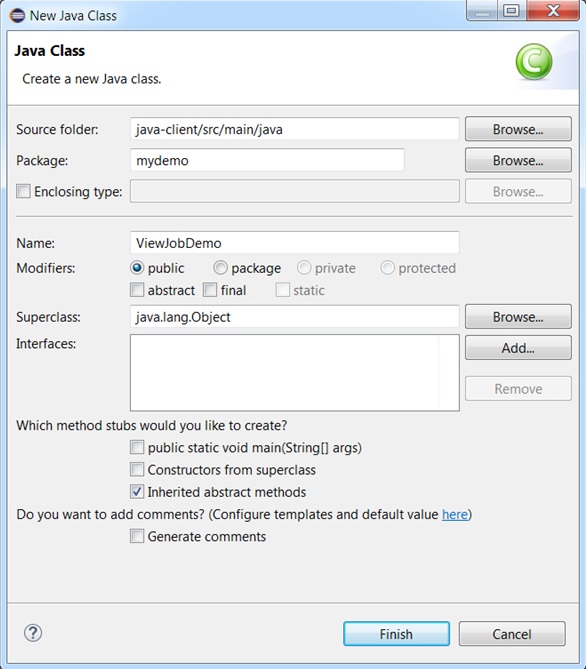
Description of the illustration d01.jpg -
The
ViewJobDemo.javafile gets created and then opens up. Observe the contents. -
Copy this snippet of code to the
ViewJobDemoclass.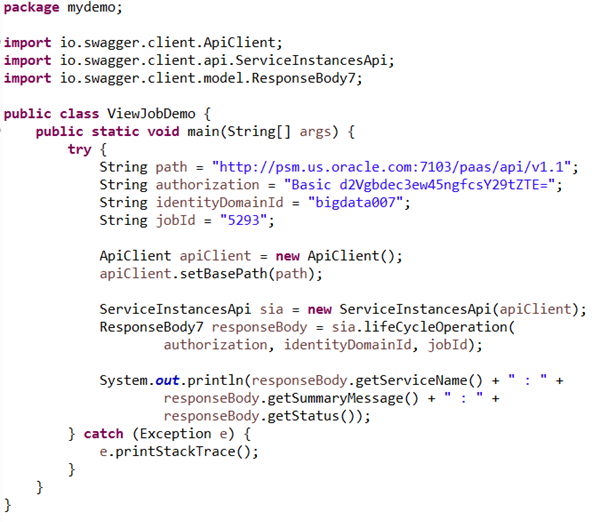
Description of the illustration d02.jpg -
Update the following variables in the program with actual values from your Oracle Event Hub Cloud Service instance.
- path: path Base path of the service URL (e.g. http://localhost/paas/api/v1.1)
- authorization: Base64 encoding of the user name and password of the user making the request.
- identityDomainId: Identity domain Id for Oracle Event Hub Cloud Service account.
- jobId: Job Id of an operation.
- Right click on the program. Expand Run As and then select Java Application.
-
Observe the output in the Console. The status details of the
jobIdis displayed.topic-demo1 : CREATE_SERVICE : SUCCEED
 View all the service instances
-
Right Click on the
java-clientproject. Expand New and then select Class option.
Description of the illustration z01.jpg -
The Java Class creation wizard appears. Enter the Package as
mydemoand then enter the Name asViewAllServicesDemo. Click Finish.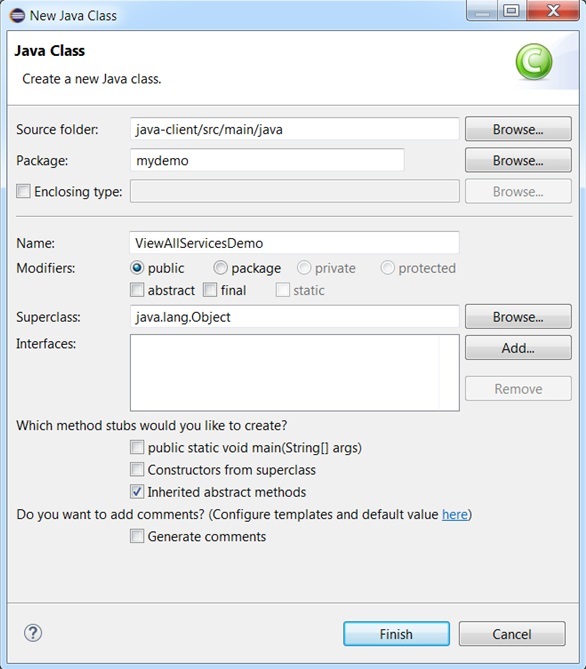
Description of the illustration e01.jpg - The ViewAllServicesDemo.java file gets created and then opens up. Observe the contents.
-
Copy this snippet of code to the
ViewAllServicesDemoclass.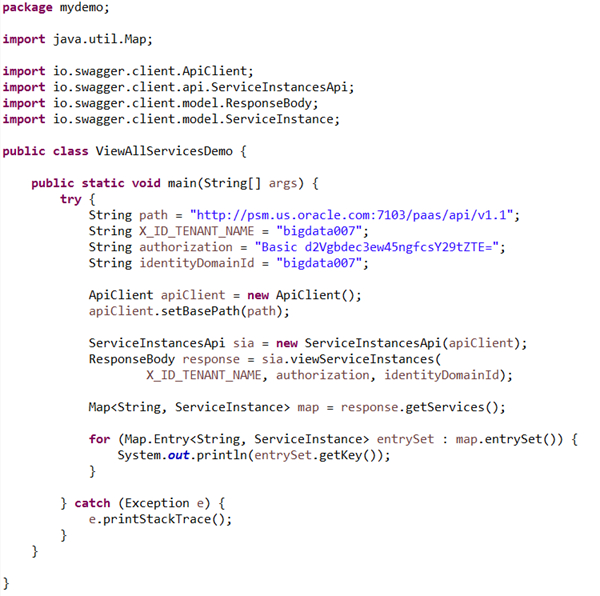
Description of the illustration e02.jpg -
Update the following variables in the program with actual values from your Oracle Event Hub Cloud Service instance.
- path: path Base path of the service URL (e.g. http://localhost/paas/api/v1.1)
- X_ID_TENANT_NAME: Identity domain Id for Oracle Event Hub Cloud Service account.
- authorization: Base64 encoding of the user name and password of the user making the request.
- identityDomainId: Identity domain Id for Oracle Event Hub Cloud Service account.
- Right click on the program. Expand Run As and then select Java Application.
-
Observe the output in the Console. All the services instances in the domain is displayed.
mydemo
topic-demo1
 Want to Learn More?
- You’ve completed the module. Go to the learning path overview to see what’s next.
- Oracle Help Center Page for Oracle Event Hub Cloud Service
- Using Guide for Oracle Event Hub Cloud Service