Managing an Initial Load Plan in OTBI Enterprise
Overview
Purpose
In this tutorial, you define, generate, and execute an initial load plan to load source data into the Oracle Transactional Business Intelligence Enterprise (OTBI Enterprise) data warehouse. Once data is loaded, it is available for OTBI Enterprise reports and dashboards.
Time to Complete
Approximately 1 hour (depending on time to execute the load plan)
Introduction
You use Configuration Manager to define, generate, and execute a “Source Extract and Load (SDE, SIL, and PLP)” load plan for OTBI Enterprise. A “Source Extract and Load (SDE, SIL, and PLP)” load plan includes all tasks required to extract data from the source and load it into the OTBI Enterprise data warehouse. You must define, generate, and execute a domain-only load plan before completing the steps in this tutorial. For more information, please refer to the companion tutorial in this series: Normalizing Data in OTBI Enterprise.
Scenario
The goal of the tutorials in this series is to enable users with an implementer role to configure and deploy OTBI Enterprise. An implementer is responsible for performing the initial setup and configuration of OTBI Enterprise. The implementer role may be performed by the customer or by an implementation partner. During the loading data stage, implementers load transactional data into the OTBI Enterprise data warehouse for analysis by BI end users.
Prerequisites
Before starting this tutorial, complete the steps in the companion OBEs in this series:
- Performing the Initial Configuration of OTBI Enterprise
- Normalizing Data in OTBI Enterprise
- Performing Functional Setup of OTBI Enterprise
About Load Plans
A load plan runs a sequence of steps required to load data from a source system into the OTBI Enterprise data warehouse. Once you have defined the settings for a load plan, you indicate to the system that it is ready to be generated. Generating a load plan performs a set of activities in the background to prepare the load plan for execution. Next, you schedule your load plan to execute one time, or on recurring basis. Finally, you monitor the progress of the load plan execution.
A load plan life cycle comprises the following phases:

For more information about monitoring a load plan, refer to the tutorial in this series: Monitoring and Troubleshooting a Load Plan in OTBI Enterprise.
Setting the Initial Extract Date
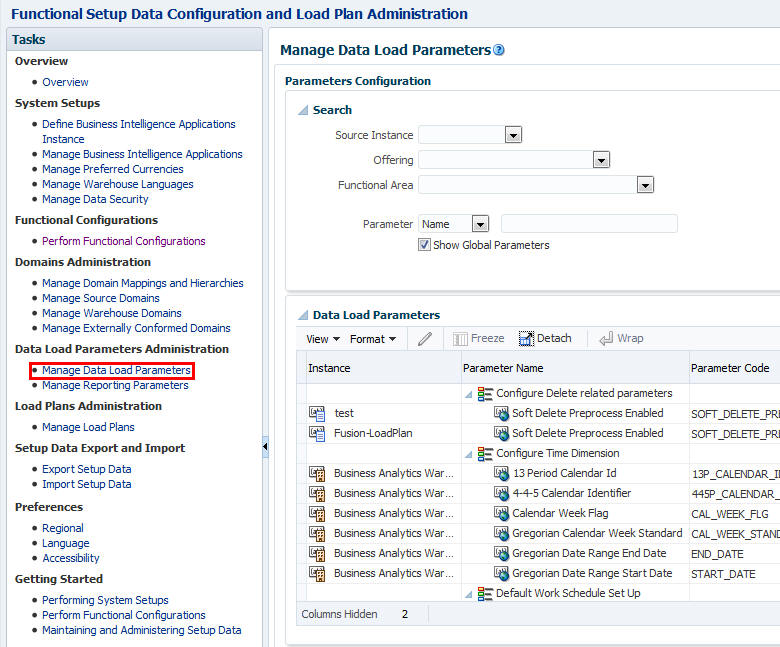
This is an optional step. If you haven't done so already, you should verify or set the initial extract date before running the initial load plan. The initial extract date is required when you extract data for a full load. You can use it to reduce the volume of data in the initial load. The specified initial extract date is used as a filter on the creation date of source data in the selected full extract mapping. It indicates how far back you want to extract data from the source for an implementation. For example, you may choose to extract data only from last 3 years. There are different methods for accessing the initial extract date parameter in Configuration Manager. You can access the Initial Extract Date for ETL parameter via the implementation project task list, or via the Manage Data Load Parameters link. This set of steps illustrates the method using the Manage Data Load Parameters link.
-
Sign in to Configuration Manager.
-
In the Tasks list, select Manage Data Load Parameters to open the Manage Data Load Parameters page in the right pane.
-
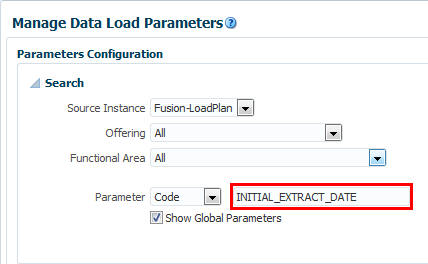
Select the Source Instance. Please note that the source instance name in the screenshots in this example, Fusion-LoadPlan, is an arbitrary name assigned to the source instance configured during source registration. It does not refer to a load plan.

-
Select Code in the Parameter list.

-
Enter INITIAL_EXTRACT_DATE in the Search field.
-
Click Search. The Initial Extract Date for ETL global parameter is visible in the Data Load Parameters section.

-
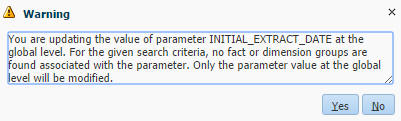
To edit the parameter, click the value or select the parameter in the Data Load Parameters list and click the Edit icon to open the Edit Dialog box.

-
When you receive the Warning message, click Yes to continue.
-
In the Edit dialog box, enter the desired date in the Parameter Value field.

-
Click Save and Close.
-
In the Data Load Parameters list, confirm that the Initial Extract Data for ETL parameter is updated.

-
Click Done.
Defining an Initial Load Plan
If you are deploying Fusion Applications, then you will have performed a Cloud Extract during Initial Configuration to load data into your Cloud Storage Service. For more information, refer to the tutorial Performing Initial Configuration of OTBI Enterprise. Also, you must define, generate, and execute a domain-only load plan before completing the remaining steps in this tutorial. For more information, please refer to the companion tutorial in this series: Normalizing Data in OTBI Enterprise.
-
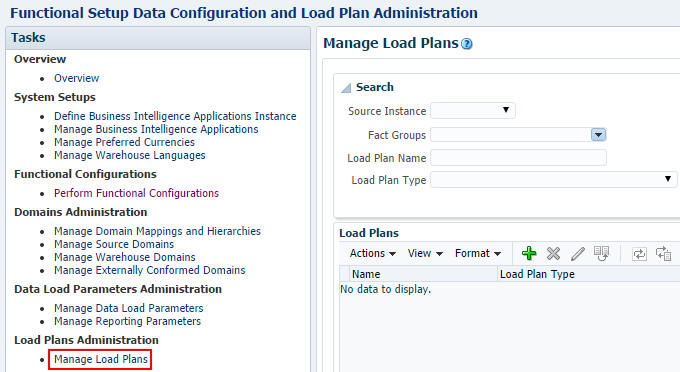
In the Tasks pane of Configuration Manager, under Load Plans Administration, select Manage Load Plans. The Manage Load Plans page is displayed.
-
On the Load Plans toolbar, click the Add icon.

-
The Define Load Plan page is displayed.
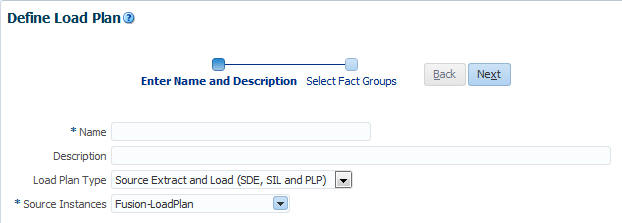
-
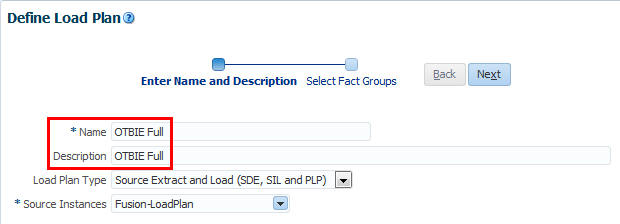
On the first page of the Define Load Plan series, specify the load plan name and description. Enter a unique name for the load plan to identify the data being loaded. This name is used in Configuration Manager, and in Health Check email notifications. A description is optional.
-
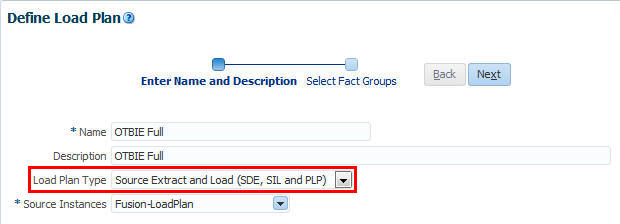
For Load Plan Type, select Source Extract and Load (SDE, SIL and PLP). A Source Extract and Load (SDE, SIL, and PLP) load plan includes all tasks to extract from the source and load the data warehouse tables.
-
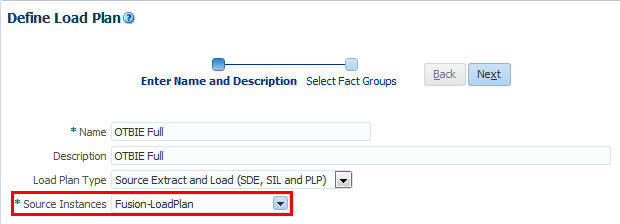
Select the source instance from which the fact groups will be selected. This list displays the data sources that you specified when you registered your source systems. For more information, refer to the tutorial Performing Initial Configuration of OTBI Enterprise.
-
Click Next to display the second page of the Define Load Plan series.
-
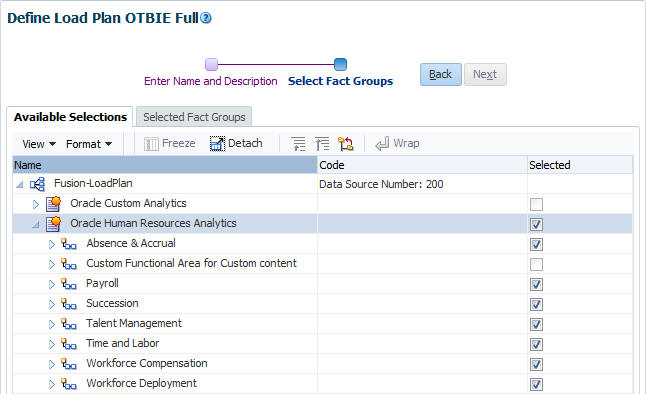
In the Available Selections tab, select the offerings and fact groups to include it in the domains load plan definition. Note that fact groups may belong to a hierarchy of fact groups. You can select only the top-level parent fact group and not a child fact group. A load plan must contain at least one fact group.
-
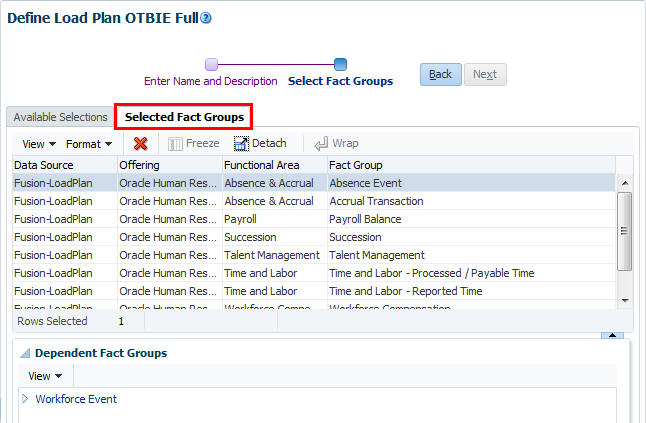
Click the Selected Fact Groups tab and verify that the selected fact groups are visible in the Fact Group field.
-
Save the load plan. After a load plan is saved, it is displayed in the Load Plans master list.

Exploring the Initial Load Plan Settings
-
Select the load plan you just created in the Load Plans master list.

-
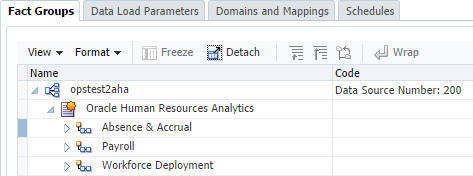
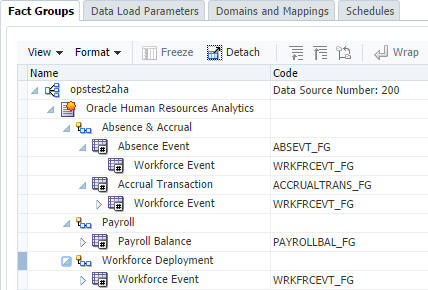
Click the Fact Groups sub-tab.
-
Expand the source name and confirm that the selected fact groups are associated with the load plan, and the data source number is set as expected. You use this tab to view the fact groups associated with a load plan selected in the Load Plans list. The fact groups displayed may belong to a hierarchy of fact groups. You can expand the fact group node to view the hierarchy.
-
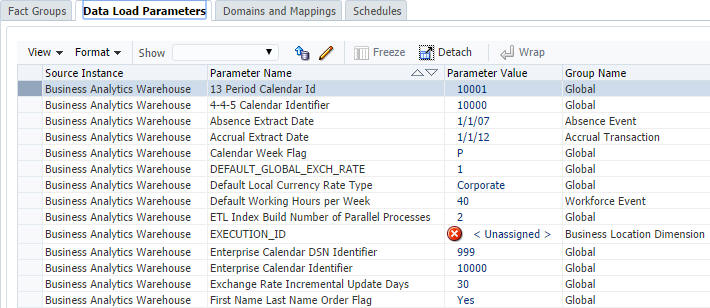
Click the Data Load Parameters tab. You use this tab to view and edit the data load parameters associated with a load plan selected in the Load Plans list. The Data Load Parameters list includes both application-specific and global parameters. Application-specific parameters are associated with one or more fact groups included in the load plan definition. Global parameters apply to all applications and can also be associated with specific fact groups.
-
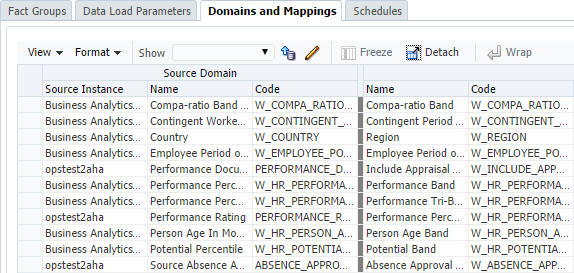
Click the Domains and Mappings tab. You use the “Domains and Mappings” tab to view and edit domains and mappings related to a load plan selected in the Load Plan list. The domains and mappings are associated with the fact group included in the load plan definition.
-
Click the Schedules tab. You use the Schedule tab to view, create, edit, and delete schedules for the execution of a load plan.

Generating an Initial Load Plan
A load plan must be generated successfully before it can be executed. Load plans must be generated serially or the process will fail. Do not launch a second load plan generation if one is already underway. You must wait until the first generation process completes before you launch the next generation process.
-
In the Load Plans master list, select the Source Extract and Load (SDE, SIL and PLP) load plan that you defined in the previous set of steps.

-
Click the Generate icon
 on the Load Plans toolbar to begin the generation process.
-
Use the Generation Status column to monitor the progress of the generation process. The process must complete and display the Succeeded icon
 before you can move on to the next step. Click the Refresh icon
  on the toolbar to refresh the display.
Executing an Initial Load Plan
You can only execute (run) a load plan if it was successfully generated.
-
Select the Source Extract and Load (SDE, SIL and PLP) load plan by clicking inside the field. Do not drill down on the load plan name.

-
Execute the load plan by clicking the Execute icon
 on the toolbar.
-
Enter the following in the Execute Load Plan dialog box:
Context: Global
Logical Agent: OracleDIAgent
Oracle Data Integrator Work Repository: BIAPPS_WORKREP
Log Level: <Accept Default>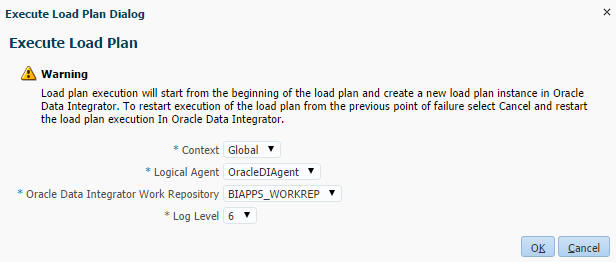
-
Click OK. Allow a moment for the Execute Load Plan Dialog to close and the execution process to begin
-
Use the Execution Status column to monitor the progress of the execution process. Click the Refresh icon
 on the Load Plans toolbar to refresh the display. Initially, the Running icon
  will display in the Execution Status column. Eventually the status icon should turn to Succeeded
  to indicate that the load plan execution completed successfully. If you receive an error, please refer to the tutorial Monitoring and Troubleshooting a Load Plan in OTBI Enterprise.
Summary
In this tutorial, you learned to define, generate, and execute an initial load plan to load source data into OTBI Enterprise Service. You learned how to:
- Set the initial extract date
- Define a load plan
- Explore load plan settings
- Generate a load plan
- Execute a load plan
Resources
To learn more about implementing OTBI Enterprise, refer to additional documentation in the OTBI Enterprise Help Center.
Credits
Lead Curriculum Developer: Jim Sarokin
To navigate this Oracle by Example tutorial, note the following:
- Topic List:
- Click a topic to navigate to that section.
- Expand All Topics:
- Click the button to show or hide the details for the sections. By default, all topics are collapsed.
- Hide All Images:
- Click the button to show or hide the screenshots. By default, all images are displayed.
- Print:
- Click the button to print the content. The content that is currently displayed or hidden is printed.
To navigate to a particular section in this tutorial, select the topic from the list.