Setting Up Data Security in OTBI Enterprise
Overview
Purpose
In this tutorial you learn how to set up data security in Oracle Transactional Business Intelligence Enterprise (OTBI Enterprise).
Time to Complete
Approximately 10 minutes
Introduction
During implementation of OTBI Enterprise, you can use Configuration Manager to set up data security by provisioning users with access to specific objects in the OTBI Enterprise data warehouse. You can set up data security by provisioning users manually, or by importing user data in a bulk load. In this tutorial you learn both methods. Setting up data security should be performed after a full load plan has been run and data has been loaded into the OTBIE data warehouse.
Prerequisites
Before starting this tutorial, you should complete the following tutorials in this series:
- Performing the Initial Configuration of OTBI Enterprise
- Loading Source-Specific Reference Data into OTBI Enterprise
- Performing Functional Setup of OTBI Enterprise
- Managing an Initial Load Plan in OTBI Enterprise
Setting Up Data Security By Provisioning User Accounts Manually
-
Sign in to Configuration Manager. You use Configuration Manager to set up data security by assigning functional areas to users.
-
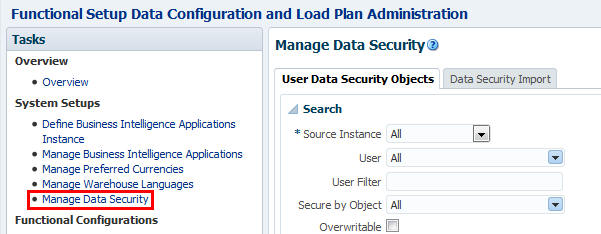
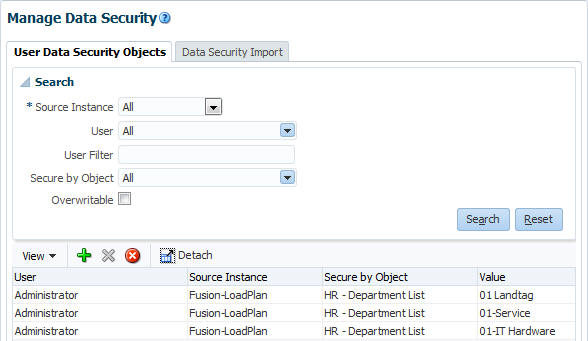
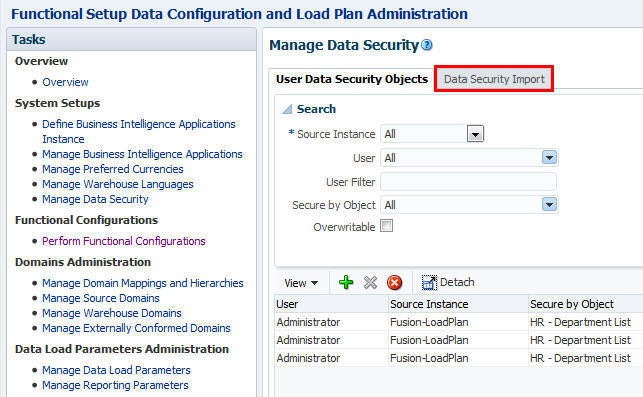
In the Tasks pane, under System Settings, select Manage Data Security to open the Manage Data Security pane on the right.
-
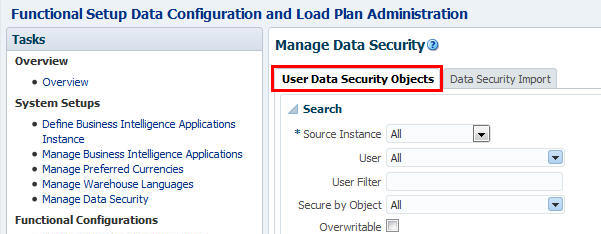
Select the User Data Security Objects tab.
-
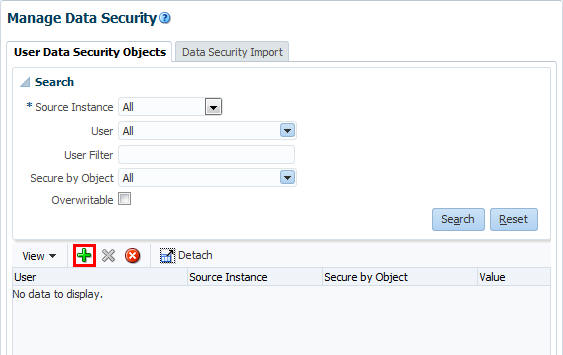
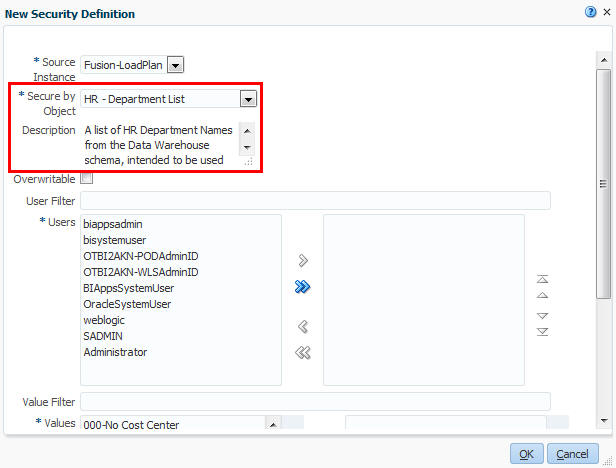
Click the Add button to open the New Security Definition dialog.
-
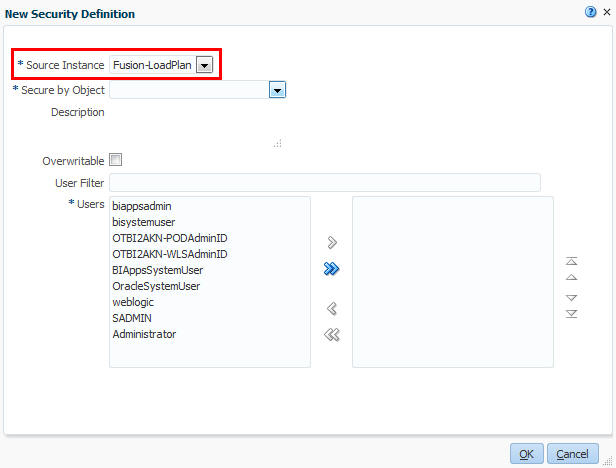
In the Source Instance field, select the data source that you are deploying.
-
In the Secure By Object field field, select the data warehouse object that you want the users to access. For example, HR - Department List. Notice that a description for the selected object is displayed.
-
Notice also that the functional data areas are now displayed in the Values list.
-
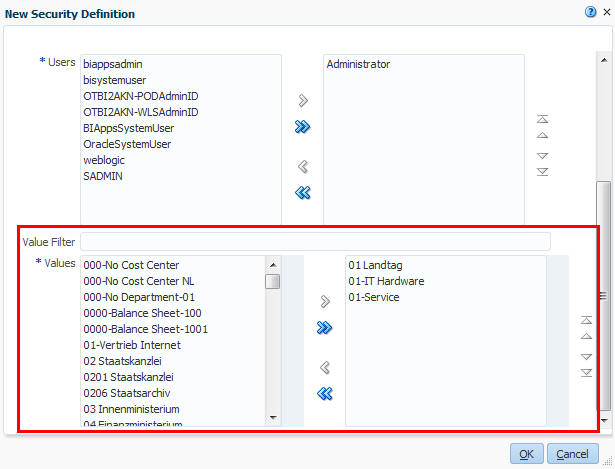
In the Users section, move the user or users that you want to provision from the left hand list to the right hand list. To filter the Users list, you can enter the first characters of the user name that you want to provision into the User Filter field.

-
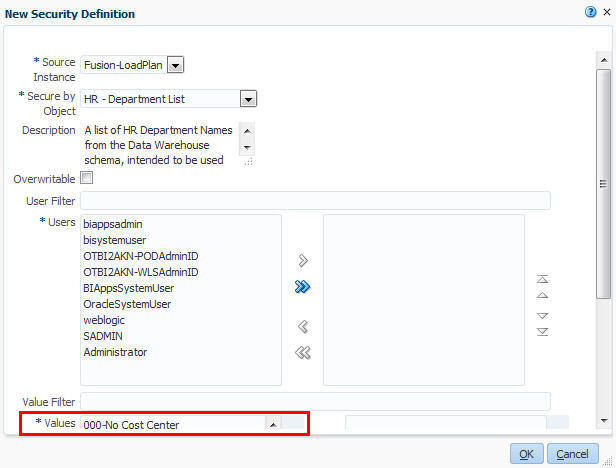
In the Values area, move the data areas that you want users to access from the left hand list to the right hand list. To filter the Values list, enter the first characters of the value into the Value Filter field.
-
Click OK to save the details and close the New Security Definition dialog and return to the Manage Data Security pane.
-
The user data security information is displayed in the list.
-
Repeat the above steps for every user that you want to provision.
Setting Up Data Security By Importing User Data In A Bulk Load
You can optionally provision users by importing in bulk load a set of "user to data mappings" in a comma separated value (CSV) file.
Before you start, you prepare a CSV containing the user to data mappings, in the following format:
The first line of the CSV file should be a header row, followed by one or more data rows. The header can be in any order, but data row values must be placed adjacent to the headers. Header names are read case-insensitive, that is, ACTION, Action or action are interpreted as Action header.
For more information about the required columns in the CSV file, refer to the table in Oracle Transactional Business Intelligence Enterprise Implementing Your Deployment.
-
Create a data security CSV file with the following information: action, data source, user, data security type, data security value. The example shows only one user and one data mapping, but typically you would include multiple users and mappings. Save the file to a local directory.

-
Sign in to Configuration Manager.
-
In the Tasks pane, under System Settings, select Manage Data Security to open the Manage Data Security pane on the right.

-
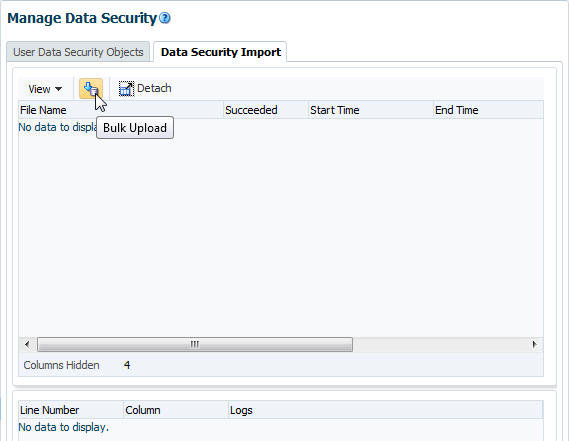
Select the Data Security Import tab.
-
Click the Bulk Upload button to open the Bulk Upload dialog.
-
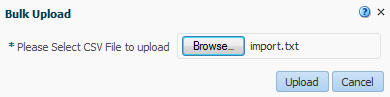
In the Bulk Upload dialog, browse to locate the CSV file that contains the user to data mappings.
-
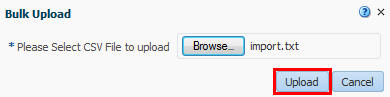
Click Upload to load the file and close the Bulk Upload dialog.
-
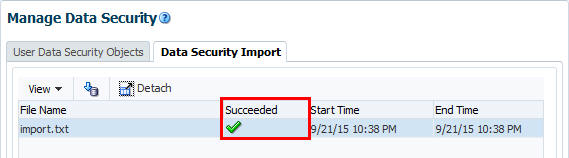
On the Data Security Import tab, verify that the import succeeded.
-
Display the User Data Security Objects tab, and review the user to data mappings that were imported.

-
If the user to data mappings are correct, then you can test the user accounts in BI Answers to verify that each user has access to the correct data areas.
Summary
In this tutorial you learned how to set up data security in Oracle Transactional Business Intelligence Enterprise (OTBI Enterprise).
Resources
To learn more about implementing OTBI Enterprise, refer to additional documentation in the OTBI Enterprise Help Center.
Credits
Lead Curriculum Developer: Jim Sarokin
To navigate this Oracle by Example tutorial, note the following:
- Topic List:
- Click a topic to navigate to that section.
- Expand All Topics:
- Click the button to show or hide the details for the sections. By default, all topics are collapsed.
- Hide All Images:
- Click the button to show or hide the screenshots. By default, all images are displayed.
- Print:
- Click the button to print the content. The content that is currently displayed or hidden is printed.
To navigate to a particular section in this tutorial, select the topic from the list.