Before You Begin
Purpose
This tutorial covers how to access server and domain logs for a Oracle Java Cloud Service (JCS) instance in two ways:
- Using the WebLogic Server Administration Console
- Using a Command Prompt
Time to Complete
Approximately 30 minutes.
Introduction
Oracle Java Cloud Service is built on top of Oracle WebLogic Server. When you create a JCS instance, an Oracle WebLogic Domain is provisioned across all machines that are part of that JCS instance.
For troubleshooting purposes, you can always access all the different log files that the underlying WebLogic infrastructure create. This tutorial shows how to get access to those log files.
Software Requirements
Any SSH utility
In order to view the log files from a Command Prompt, you will have to get access to the target VMs hosting the log files of interest.
For that you will need any SSH utility with a command line interface, such as OpenSSH (UNIX), Cygwin (Windows) or PuTTy (Windows).
Prerequisites
Before starting this tutorial, you should have:
- A JCS instance already available.
- Any SSH utility installed on your computer.
- A valid pair of SSH keys, for accessing the JCS instance VMs.
- A basic knowledge of Linux, for working at the command line.
Accessing the WebLogic Server Administration Console
Open the Oracle Java Cloud Service Console:
-
Sign in to the My Services application at https://cloud.oracle.com/sign_in. The My Services Dashboard appears.
-
In the Oracle Java Cloud Service section, click Open Service Console. The Oracle Java Cloud Service Console page is displayed.
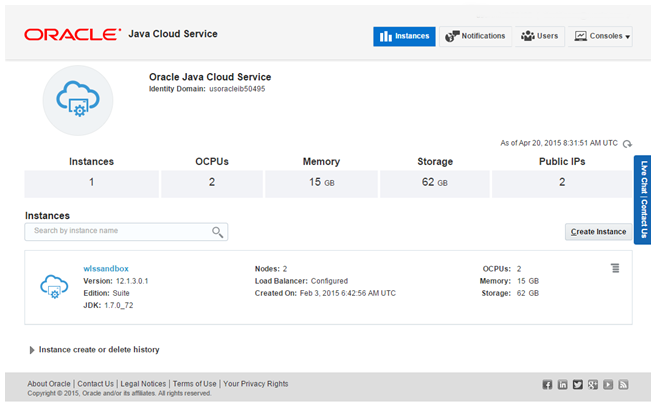
Description of this image
Login to the WebLogic Server Administrative Console
-
In your Oracle Java Cloud Service Console, click the
 icon for the service instance that you want to manage and click Open WebLogic Server Console
Description of this image -
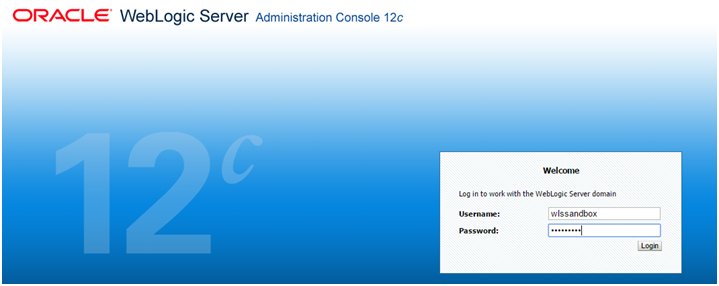
In the WebLogic Server Administration Console login page, use a valid WebLogic Server administrative user name and password to log into the console. You may want to use the WebLogic Administrator username and password that you provided when creating the service instance (for example wlssandbox/Welcome#1).
Description of this image The WebLogic Server Administration Console home page now appears.

Description of this image
Locating Domain and Server logs
Locate the domain log
-
Log into the WebLogic Console following instructions in the section "Accessing the WebLogic Server Administration Console", above. The WebLogic Server Administration Console home page is displayed.
-
In the navigation tree click on the domain name link.
The name of domain is the first eight letters of the JCS instance name plus the suffix_domain.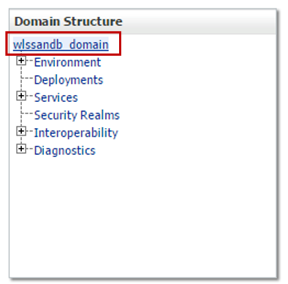
Description of this image -
Click on the Logging tab of the workspace area
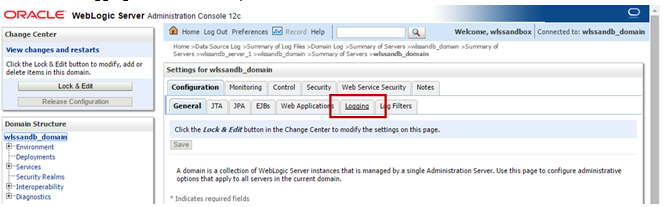
Description of this image The details about the domain log file, including location and rotation properties are presented.
Log location is relative to the admin server home directory.
Take note of the file location, as it will be used in subsequent steps.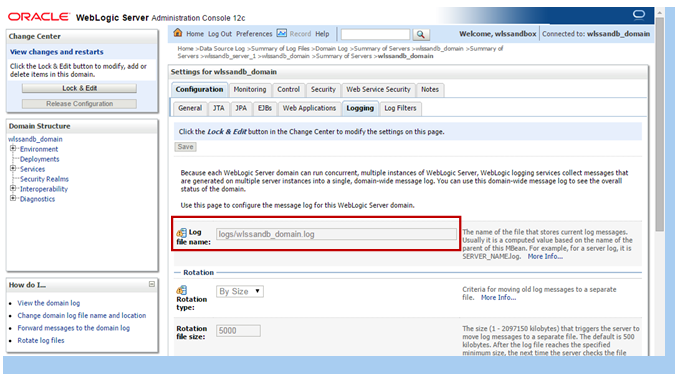
Description of this image
Locate a server log
-
Log into the WebLogic Console following instructions in the section "Accessing the WebLogic Server Administration Console", above. The WebLogic Server Administration Console home page is displayed.
-
Under the domain name in the navigation tree click to expand the Environment node and click Servers.

Description of this image -
The workspace area presents the list of servers that are part of the domain. Click on the server for which you want to locate the log file.
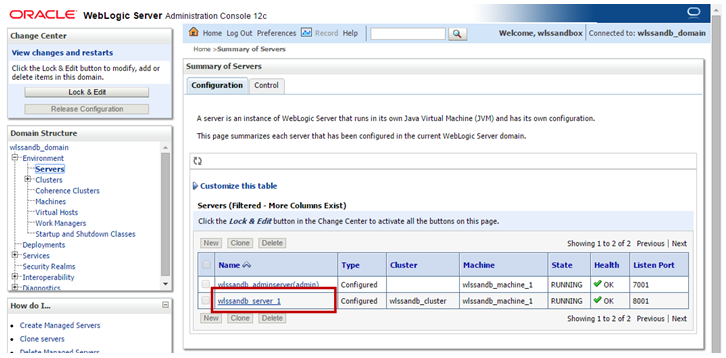
Description of this image -
Click on the Logging tab.
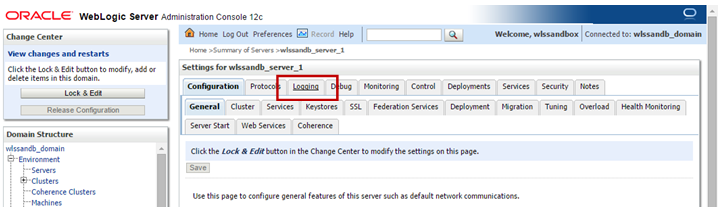
Description of this image The details about the server log file, including location and rotation properties are presented. Log location is relative to the server home directory.
Take note of the file location, as it will be used in subsequent steps.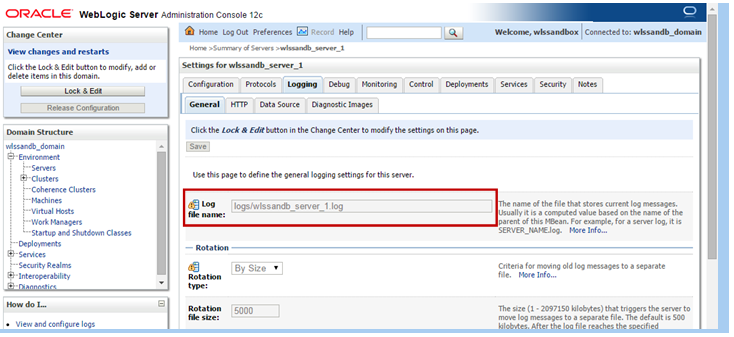
Description of this image
Accessing Logs from the WebLogic Administration Console
Log into the WebLogic Console
-
Following instructions in the section "Accessing the WebLogic Server Administration Console", above. The WebLogic Server Administration Console home page is displayed
-
In the navigation tree, under the domain name, expand the Diagnostics node and click Log Files.
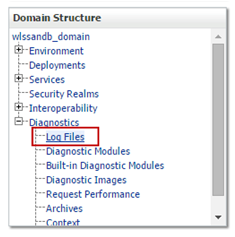
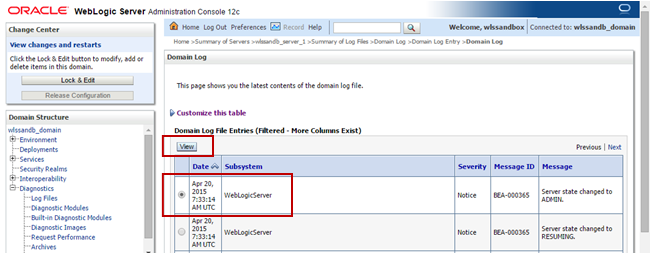
Description of this image - The workspace area presents a list with the log files. Use the Customize this table link to specify filters, columns displayed and the number of rows per page.
Locate the log file you want to visualize. For example, the one named DomainLog that represents the domain log. Select it by clicking the radio button and click View.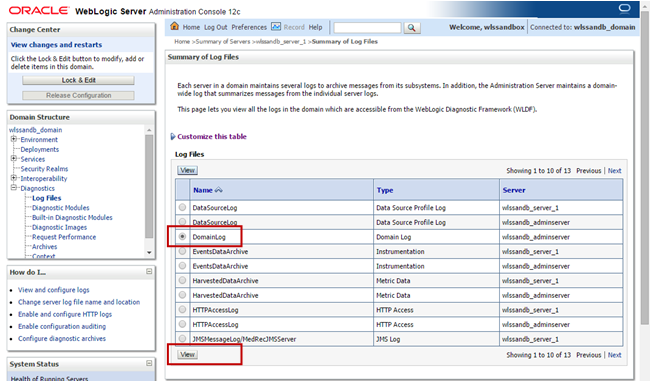
Description of this image -
The workspace area presents a list with log entries.
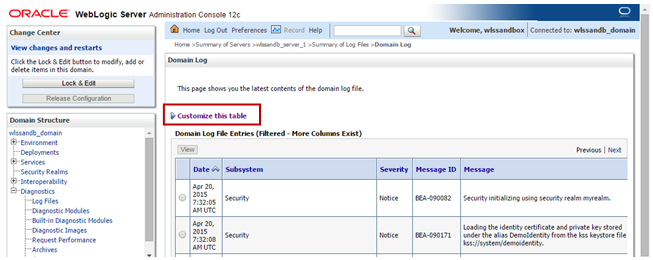
Description of this image Use the Customize this table link to define the time interval, columns displayed and log entries per page.
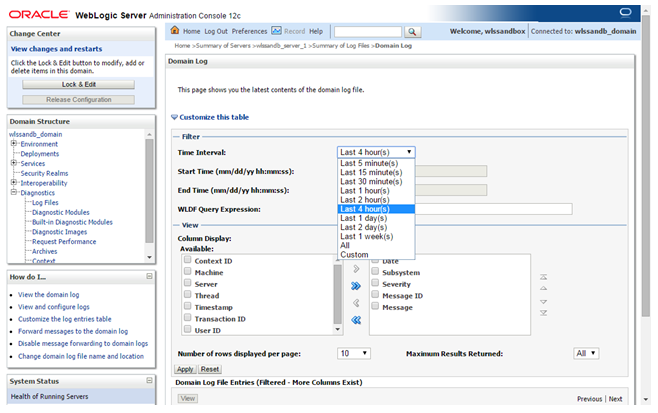
Description of this image -
To see the details of a given log entry, select it by clicking on its associated radio button and click View.
Description of this image The log entry is displayed
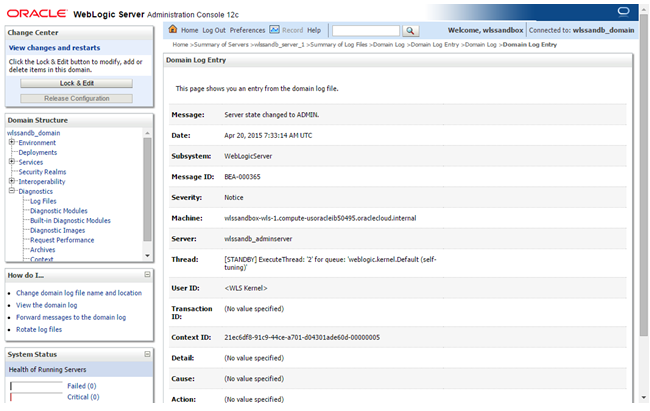
Description of this image
Accessing Logs from the command prompt
Find the public IP address of the target machine
-
Sign in to the My Services application at https://cloud.oracle.com/sign_in. The My Services Dashboard appears.
-
In the Oracle Java Cloud Service section, click Open Service Console.
-
On your Oracle Java Cloud Service Console, click the link that represents the service instance you want to manage.

Description of this image The details of the selected service instance show up, including a list with all the machines belonging to the service. For each machine the public IP address is presented as depicted below:
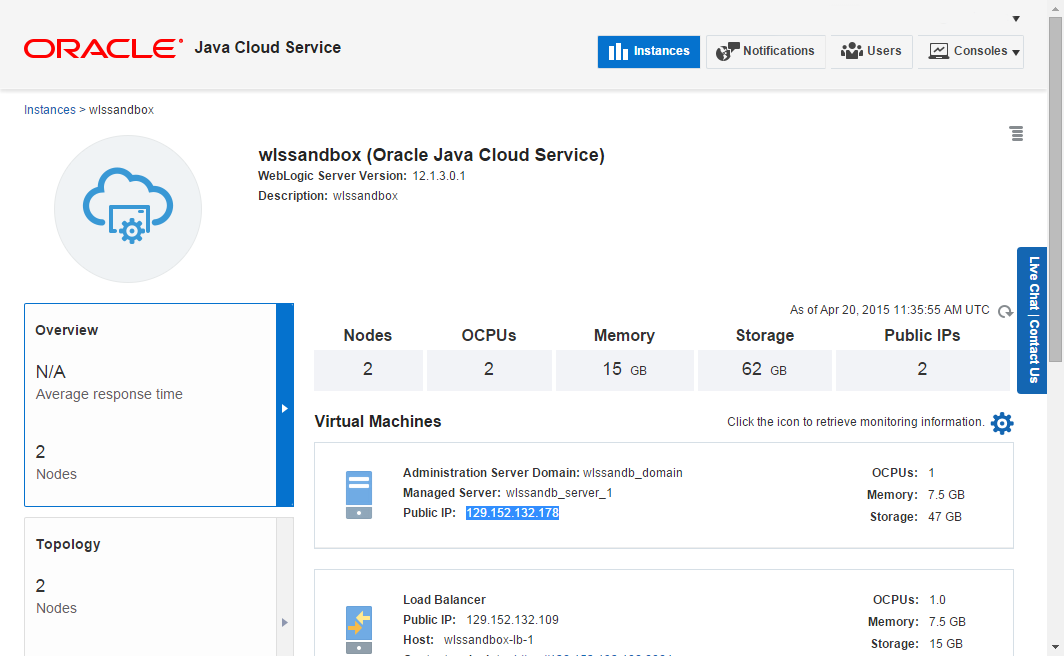
Description of this image
Set up SSH tunnel to the target machine
-
Use the SSH client of your choice to access the target machine. Use the public IP address you found out in the step #1 and opc as the username with no password.
You will also have to provide your SSH client with the SSH private key you created for use with Oracle Cloud Services.
To get more information about SSH keys see Creating SSH Keys for Use with Oracle Cloud Services.
Description of this image If you created you SSH private key with a passphrase you will be prompted for it.

Description of this image -
After you log in, change to the user oracle issuing the command
sudo su – oracle(oracleis the owner of the WebLogic domain directory).
Description of this image
View the target log file
-
Issue a
(Alternately for these steps, you can change to: $DOMAIN_HOME/servers/<jcs-server> )df -kcommand to see the list of filesystems./u01/data/domainsis the filesystem where the domain data reside.
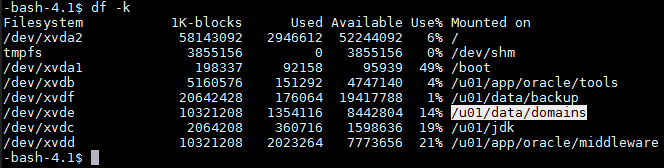
Description of this image -
Change to:
/u01/data/domains/<jcs-domain>/servers/<jcs-server><jcs-server>where:- <jcs-domain> matches your domain name, formed with the first eight letters of the JCS instance name plus the suffix _domain
- <jcs-server> is the name of the server that owns the log file you want to see. Remember that the Domain log is owned by the admin server.

Description of this image -
Use the log file location determined inin the step "Locating Domain and Server logs" above, to view the target file, using the command of your choice:
tail, less, more…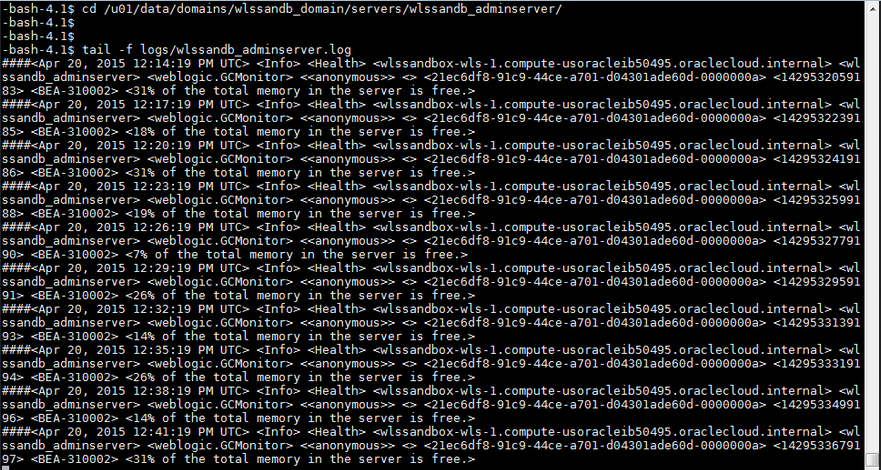
Description of this image