Before You Begin
Purpose
This Oracle by Example (OBE) tutorial shows you how to deploy an Oracle Service Bus application to Oracle SOA Suite Cloud Service.
Time to Complete
30 minutes
Background
A service-oriented architecture (SOA) is an enterprise architecture that helps you build connected enterprise applications that can solve your business problems.
Oracle SOA Suite Cloud Service provides a complete set of service infrastructure components for designing, managing, and deploying composite and service bus applications to the cloud.
You can save time, money, and work more efficiently by using the wide variety of features in Oracle SOA Suite Cloud Service to:
- Design SOA composite and service bus applications.
- Create test environments for all your applications.
- Monitor and manage your application environment.
Using this tutorial, you learn how to deploy your Oracle Service Bus applications to Oracle SOA Suite Cloud Service. Because this cloud service uses the same Oracle SOA Suite software that you use for your on-premises applications, you can use the same tools in the cloud.
Context
This is the fifth OBE of a series that shows you how to install Oracle SOA Suite 12c, develop and test SOA composite applications and Oracle Service Bus applications from the start, and deploy the same applications to Oracle SOA Suite Cloud Service.
What Do You Need?
- An Oracle Java Cloud Service instance for which you have log in credentials. For information about creating a service instance in Oracle Java Cloud Service, go to Creating and Managing an Oracle Java Cloud Service—Coherence Instance
- A subscription or trial subscription to Oracle SOA Suite Cloud Service
- Oracle SOA Suite Quick Start for Developers
- Basic knowledge of Oracle JDeveloper
- The HelloWorld composite application deployed in Oracle SOA Suite Cloud Service
Downloading an Oracle Service Bus Sample Application
-
Create a directory in the file system named mywork.
-
Download the helloWorldSB.zip file into the mywork directory. This file contains the Oracle Service Bus sample application.
Importing an Oracle Service Bus Project into Oracle JDeveloper
-
Go to the mywork directory and extract the application inside of this directory.
-
Open Oracle JDeveloper 12c, click the Applications tab, and select Open Application.
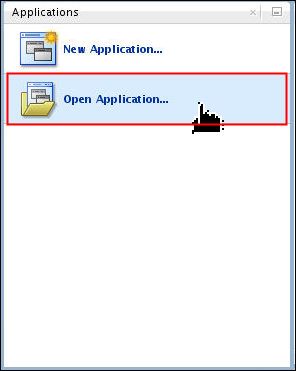
Description of this image Note: If you already have applications open, then from the main menu, click File, and then click Open.
The Open dialog box appears.
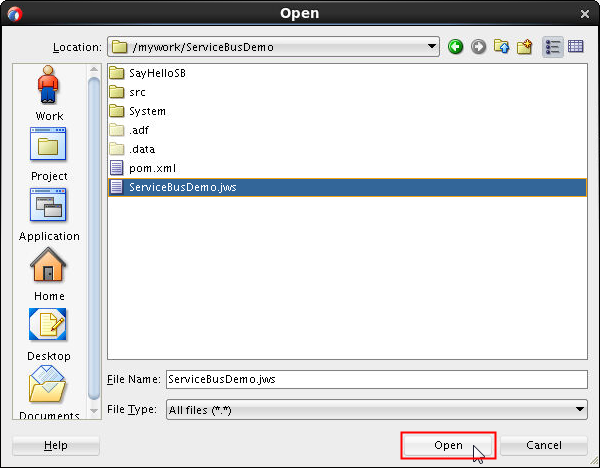
-
On the Open dialog box, go to mywork/ServiceBusDemo, select ServiceBusDemo.jws, and click Open.
Description of this image The ServiceBusDemo application opens with the SayHelloSB project.
Exporting an Oracle Service Bus Application
After you open the Oracle Service Bus application and project, you export the entire Oracle Service Bus project:
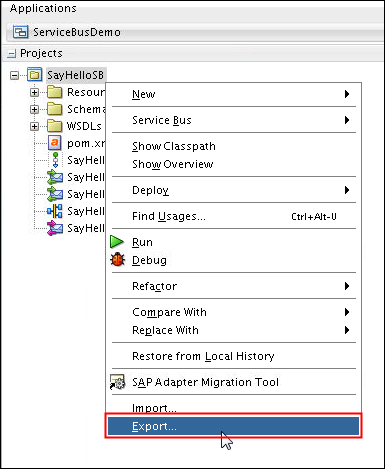
-
On the Applications tab, right-click SayHelloSB and select Export.
Description of this image -
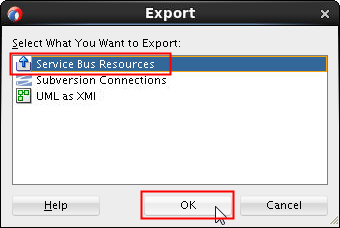
On the Export page, select Service Bus Resources and click OK.
Description of this image -
On the Export Service Bus Resources - Step 1 of 2 page, accept the default value and click Next.
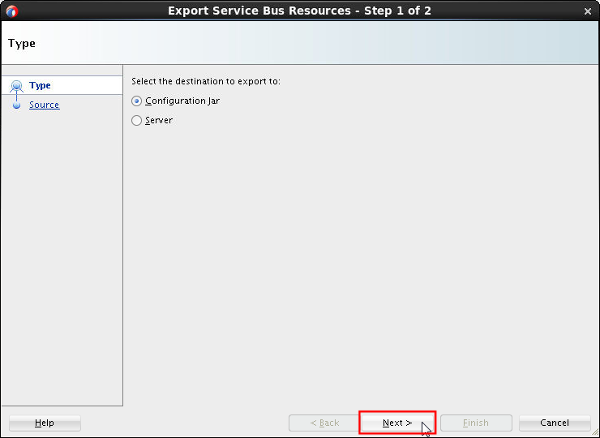
Description of this image -
On the Export Service Bus Resources - Step 2 of 2 page, in the Jar File field, enter the location and name of the JAR file where you want to export the resources and click Finish.
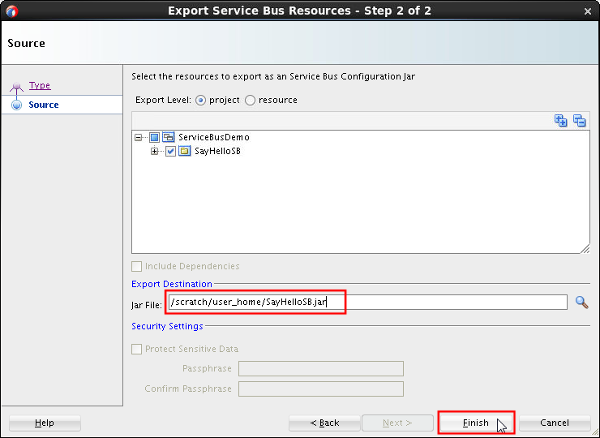
Description of this image Note: The JAR file shouldn't exist, otherwise you will overwrite the file. This file is created along with the resources that you selected.
Deploying an Oracle Service Bus Application to Oracle SOA Suite Cloud Service
After you export the resource configuration of the Oracle Service Bus project, you import the project configuration into Oracle SOA Suite Cloud Service:
-
Open Oracle SOA Suite Cloud Service Console and click Menu
 to select the service instance that you want to
manage. Then, click Open Service Bus
Console.
to select the service instance that you want to
manage. Then, click Open Service Bus
Console. 
Description of this image -
In the Login page, enter your user ID and password and click Login.
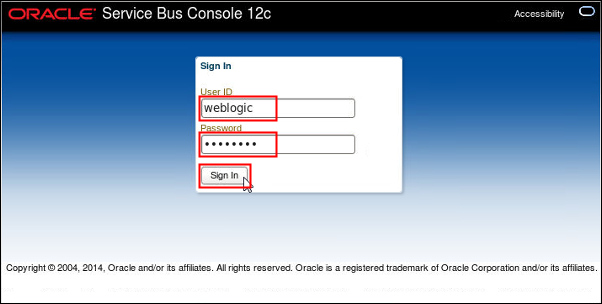
Description of this image -
On the Service Bus Console page, create a session by clicking Create.
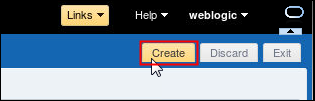
Description of this image -
On the Resources tab, click the Import Config Jar icon.
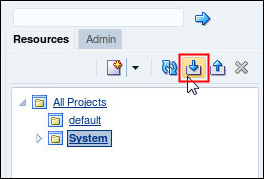
Description of this image The Import Config Jar page appears.
-
On the Import Config Jar page, click Browse.
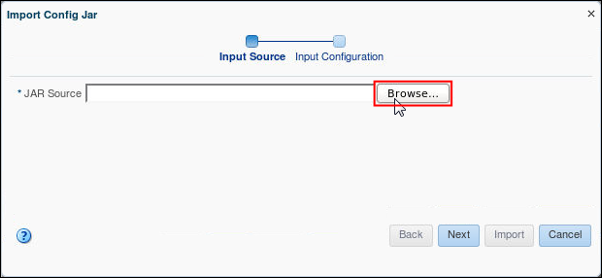
Description of this image The File Upload dialog box appears.
-
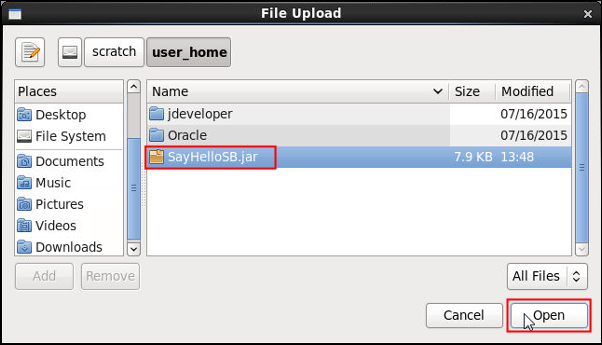
On the File Upload dialog box, go to the location where you saved the SayHelloSB.jar file and click Open.
Description of this image -
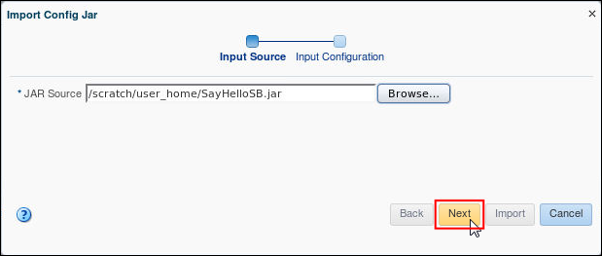
On the Import Config Jar page, verify the location of the JAR source file and click Next.
Description of this image -
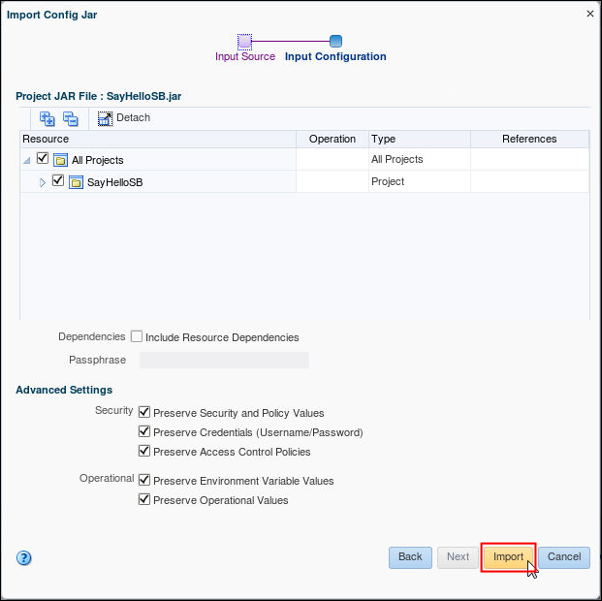
On the Import Config Jar page, accept the default values and click Import.
Description of this image -
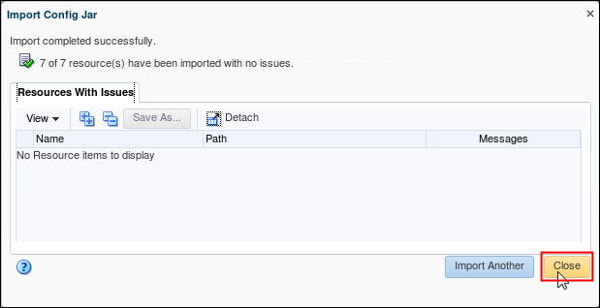
On the Import Config Jar page, verify that the import completed successfully and click Close.
Description of this image -
On the Resources tab, expand the SayHelloSB project and click SayHelloService.
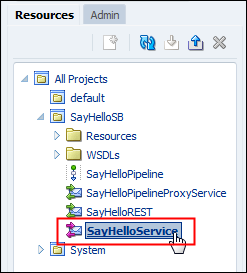
Description of this image The SayHelloService page appears on the Service Bus Overview Editor.
-
On the SayHelloService page, click the Transport tab and edit the endpoint URI. Replace
localhost:7101with the hostname and port number of the Oracle SOA Suite Cloud Service instance.Note: Use the Oracle Traffic Director (OTD) host name, rather than the public IP address, if its metadata points to a service deployed on Oracle Weblogic Server in the same Oracle SOA Suite Cloud Service environment.

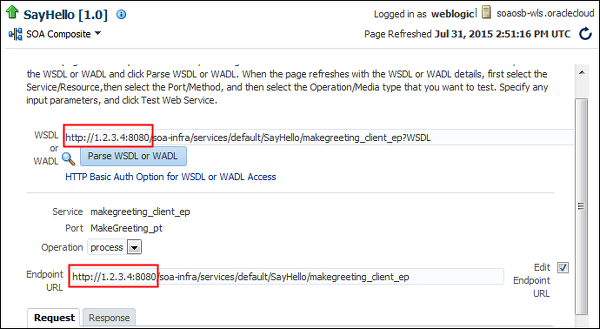
Description of this image Note: On the SayHello[1.0] test page from the Oracle Enterprise Manager application at the Oracle SOA Suite Cloud Service instance, you can verify the public IP address or hostname of your cloud instance along with the port number.
Description of this image -
On the Service Bus Console page, save the changes by clicking the Save Changes in All Tabs icon.
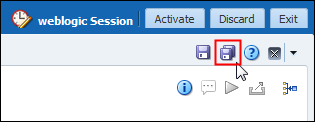
Description of this image -
On the Service Bus Console page, click Activate.
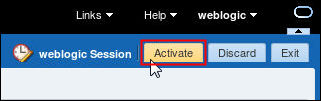
Description of this image The Confirm Session Activation page appears.
-
On the Confirm Session Activation page, enter a description and click Activate.

Description of this image
Testing an Oracle Service Bus Application in Oracle SOA Suite Cloud Service
After you import the project configuration into Oracle SOA Suite Cloud Service and change the endpoint URL of the SayHelloService to the SOA composite application deployed on the Oracle SOA Suite Cloud Service instance, you test the Oracle Service Bus application:
Test a Proxy Service
-
On the Resources tab, expand the SayHelloSB project and click SayHelloServicePipelineProxyService.

Description of this image The SayHelloPipelineProxyService page appears on the Service Bus Overview Editor.
-
On the SayHelloPipelineProxyService page, click the Launch Test Console icon.

Description of this image The Test Console page appears.
-
On the Test Console page, in the Form tab, update the Payload XML request, replace the string with your name, and click Execute.

Description of this image -
On the Test Console page, scroll down to the Response Document panel, and verify that the result contains your name.
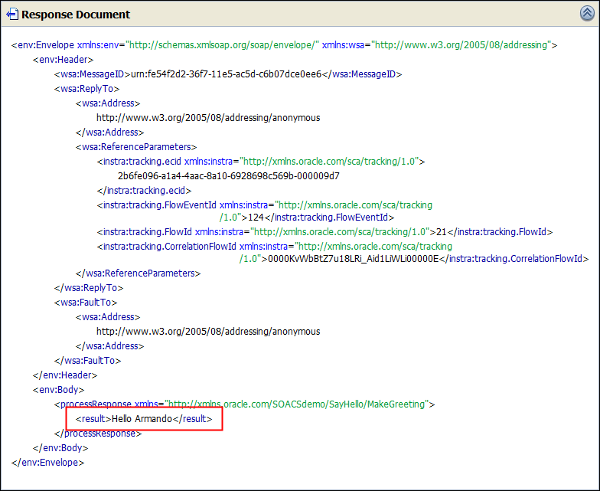
Description of this image
Test a REST Service
-
On the Resources tab, expand the SayHelloSB project and click SayHelloREST.

Description of this image The SayHelloREST page appears on the Service Bus Overview Editor.
-
On the SayHelloREST page, click the Launch Test Console icon.

Description of this image The Test Console page appears.
-
On the Test Console page, in the Request Document, enter your name and click Execute.

Description of this image -
On the Test Console page, scroll down to the Response Document panel, and verify that the result contains your name.
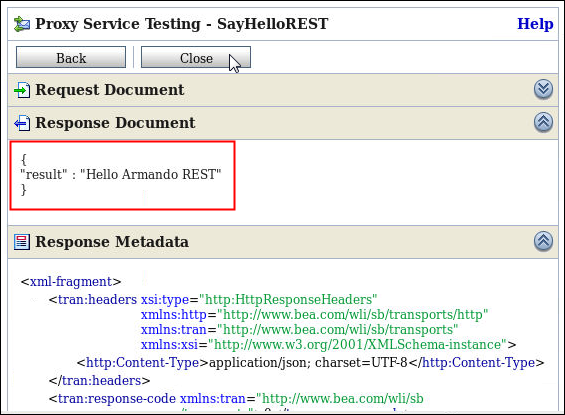
Description of this image
Want to Learn More?
- Performing a Quick Start Installation of Oracle SOA Suite 12c
- Creating an Oracle Service Bus Application with Oracle JDeveloper 12c
-
In the Oracle Help Center: Deploying Oracle Service Bus Services
-
In the Oracle Help Center: Using the Test Console
-
In the Oracle Help Center: How to Configure a Business Service Transport
Credits
-
Lead Curriculum Developer: Armando Hernandez