Redaction Management in Oracle SQL Developer
Overview
- Creating a redaction policy
- Altering a redaction policy
- Adding a Column to a redaction policy
- Modifying an Expression in a redaction policy
- Disabling a redaction policy
- Dropping a redaction policy
- Understand Oracle Database concepts. More information is available on the Oracle Technology Network.
- Have a previously created Oracle database with a table containing a field suitable for redaction (for example, an Employees table).
Purpose
This tutorial shows you how to manage redaction policies in SQL Developer 4.0.
Time to Complete
Approximately 1 hour
Introduction
In this tutorial, you learn how to manage redaction in Oracle Database 12c or 11g Release 2 Patchset 3 (11.2.0.4) using SQL Developer. Topics include:
Prerequisites
Before starting this tutorial, you should:
Creating a Redaction Policy
To create a redaction policy, perform the following steps:
Open Oracle SQL Developer by clicking the SQL Developer desktop icon.

The Oracle SQL Developer window is displayed.

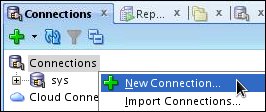
On the Connections tab, right-click Connections and select New Connection.

The New / Select Database Connection dialog box is displayed.
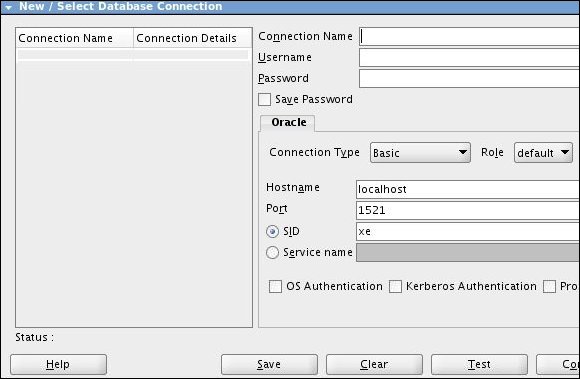
Enter parameters for the new connection. In this example, the entries are:
Name: sys
Username: sys
Password: Enter the password for your system.
Save Password: Select this check box
Connection Type: Basic
Role: SYSDBA
Hostname: localhost
Port: 1521
SID: Enter SID or Service Name
Click Test and confirm a status of "Success."

Click Save and then close the New / Select Database Connection dialog box.
Right-click connection sys and select Open SQL Worksheet.
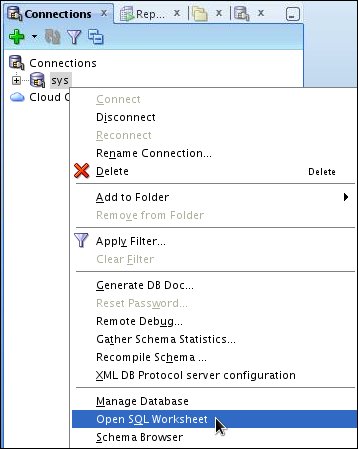
The sys worksheet is opened.
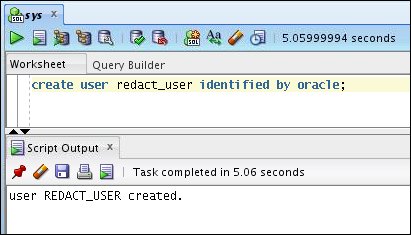
To create the redaction user, enter and execute the following statement in the worksheet:
create user redact_user identified by oracle;
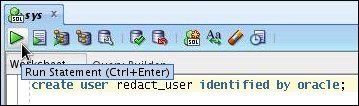
User REDACT_USER is created.
Grant appropriate privilege to redact_user by entering and executing the following statements:
grant
                          connect, resource, unlimited tablespace to redact_user;

                          grant select on Sys.redaction_policies to redact_user;

                          grant select on Sys.redaction_columns to redact_user;

                          grant execute on dbms_redact to redact_user;

Create a connection for redact_user.
Provide the following connection entries:
Name: redact_user
Username: redact_user
Password: Enter the password for your system.
Save Password: Select this check box
Connection Type: Basic
Role: default
Hostname: localhost
Port: 1521
SID: Enter SID or Service Name
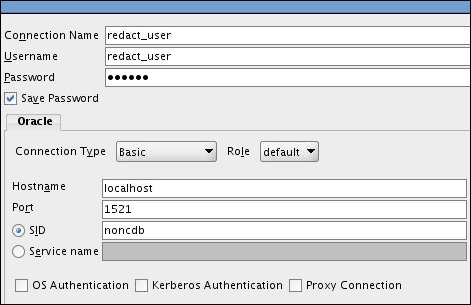
Test and Save the connection. Then close the New/Select Database Connection dialog box.


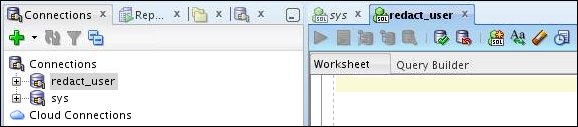
Right-click connection redact_user and select Open SQL Worksheet.
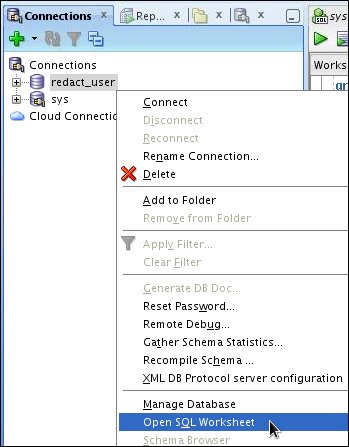
The redact_user worksheet is opened.
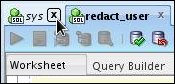
Close the sys worksheet without saving changes.
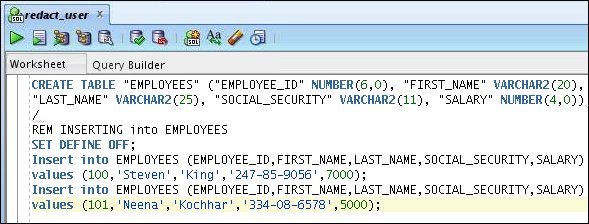
Create the EMPLOYEES table and populate it with sample data by entering the following statements into the redact_user SQL worksheet:
CREATE TABLE "EMPLOYEES" ("EMPLOYEE_ID"
                        NUMBER(6,0), "FIRST_NAME" VARCHAR2(20), "LAST_NAME" VARCHAR2(25),
                        "SOCIAL_SECURITY" VARCHAR2(11), "SALARY" NUMBER(4,0))
/
REM INSERTING into EMPLOYEES
SET DEFINE OFF;
 Insert into EMPLOYEES
                        (EMPLOYEE_ID,FIRST_NAME,LAST_NAME,SOCIAL_SECURITY,SALARY) values
                        (100,'Steven','King','247-85-9056',7000);
 Insert into EMPLOYEES
                        (EMPLOYEE_ID,FIRST_NAME,LAST_NAME,SOCIAL_SECURITY,SALARY) values
                        (101,'Neena','Kochhar','334-08-6578',5000);
In the SQL worksheet menu, click Run script.
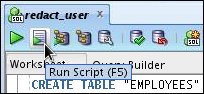
Table EMPLOYEES is created.

Close the redact_user SQL worksheet without saving changes.
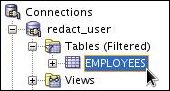
In the Connections panel, expand node redact_user and then expand Tables.
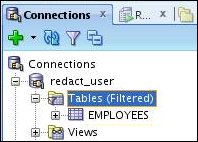
Double-click the EMPLOYEES node.
SQL worksheet EMPLOYEES is displayed.

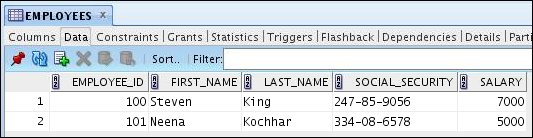
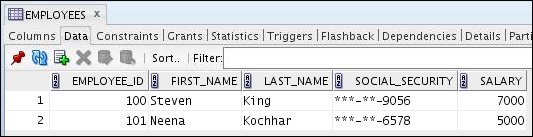
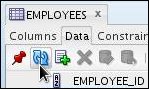
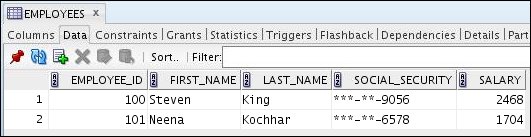
In the EMPLOYEES SQL worksheet, click the Data tab.

The Data tab is displayed. Since the Social Security Number (SSN) is sensitive data, you can apply a redaction policy to mask the data.
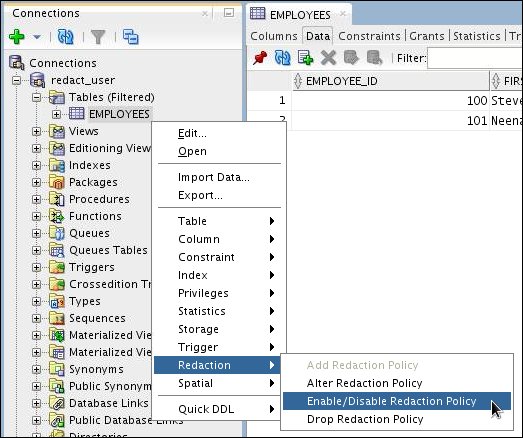
In the navigation tree, right-click table EMPLOYEES and select Redaction > Add Redaction Policy.
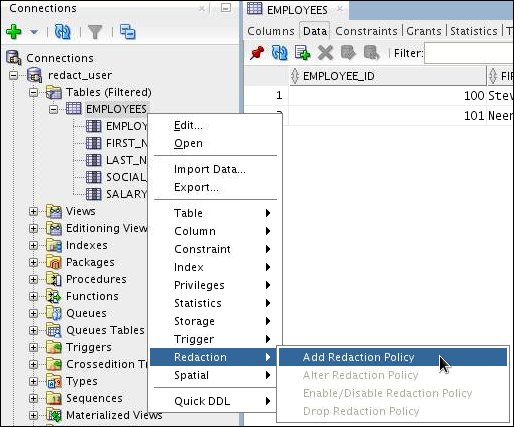
The Create Redaction dialog box is displayed.
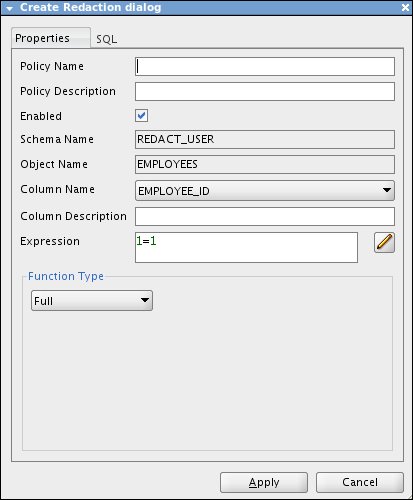
Enter (or select) the following parameters for the new redaction and then click Apply:
Policy Name: Redaction
Policy Description: SSN redaction (optional)
Column Name: SOCIAL_SECURITY (select)
Function Type: Full
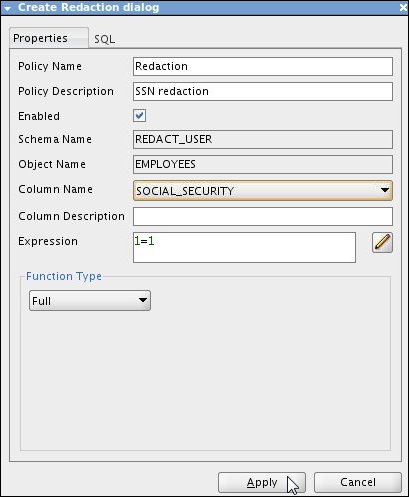
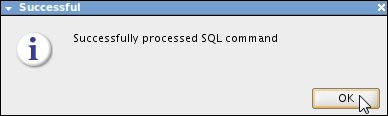
When the success message is displayed, click OK.
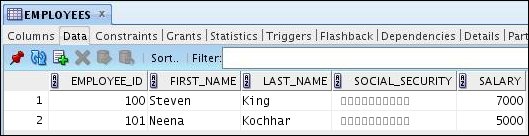
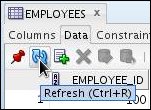
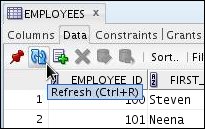
On the Data tab, click Refresh.
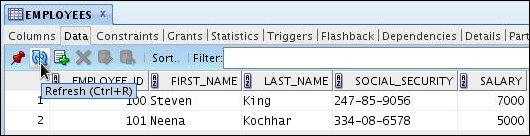
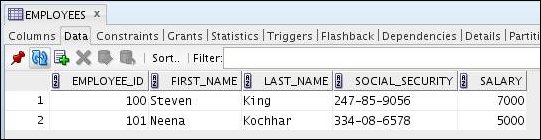
The entire SSN is masked in the worksheet.
Optional:. In the connections navigator, collapse the EMPLOYEES table.
Altering a Redaction Policy
You can alter the redaction policy to apply a partial redaction to the SOCIAL_SECURITY column. Perform the following steps to replace the first five numbers with an asterisk (*) while preserving the hyphens (-) between the numbers:
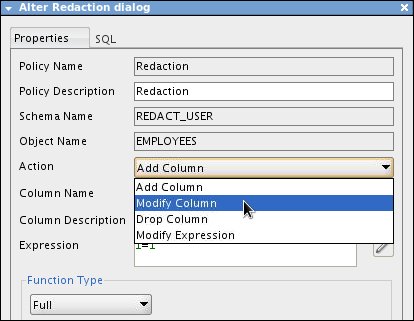
In the Connections tree, right-click EMPLOYEES and select Redaction > Alter Redaction Policy.
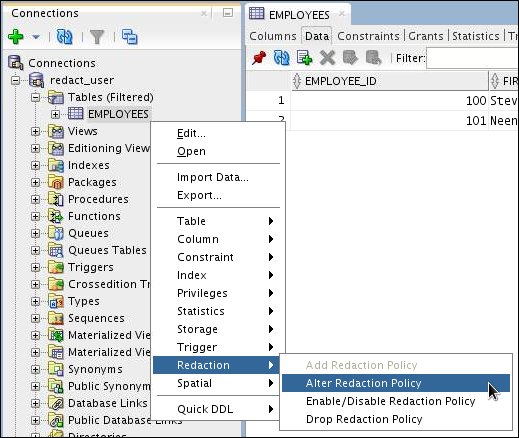
The Alter Redaction dialog box is displayed.
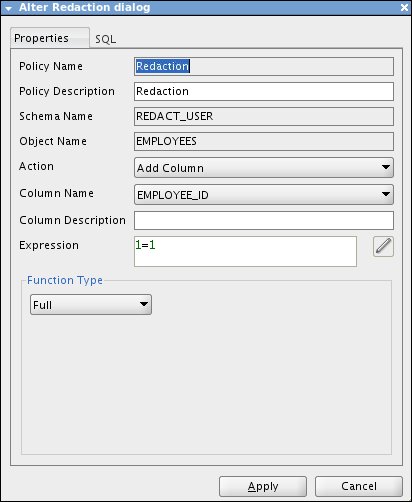
In the Action list, select Modify Column.
For Function Type, select Partial.
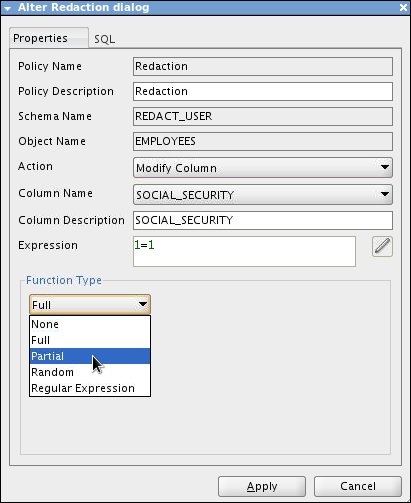
Confirm that Column Name is SOCIAL_SECURITY.
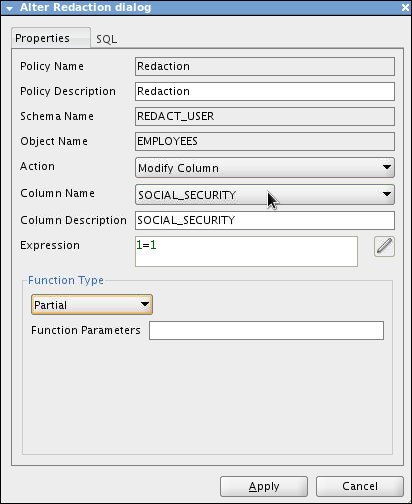
In the Function Parameters text box, make the following entry to format for a character data type and then click Apply:
VVVFVVFVVVV,VVV-VV-VVVV,*,1,5
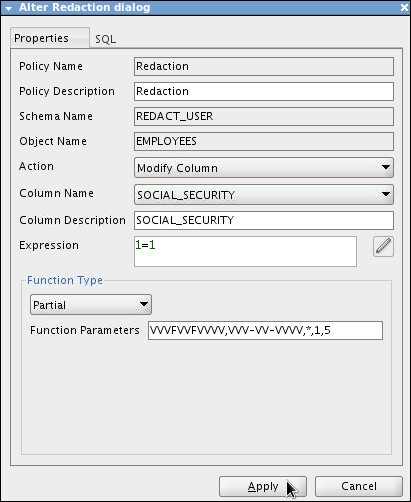
When the success message is displayed, click OK.

On the Data tab, click Refresh.
In the SOCIAL_SECURITY column, the first five numbers of the SSNs are replaced with asterisks (*) and the hyphenation is preserved.
Note: If SOCIAL_SECURITY is a NUMBER data type, use numeric function parameters. For example, function parameters 5,1,5 modify SSN 788910026 to display as 555550026.
Adding a Column to a Redaction Policy
You can apply different masking types to different columns. For example, to display random numbers in the SALARY column, first add the SALARY column to the redaction policy.
Right-click EMPLOYEES and select Redaction > Alter Redaction Policy.
In the Alter Redaction dialog box, select Add Column from the Action list.

In the Column Name drop-down list, select SALARY.
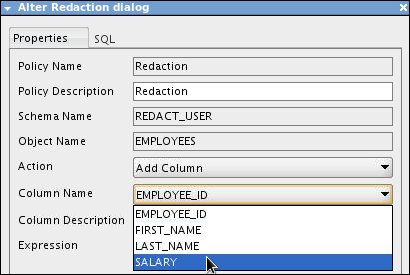
In the Function Type list, select Random.
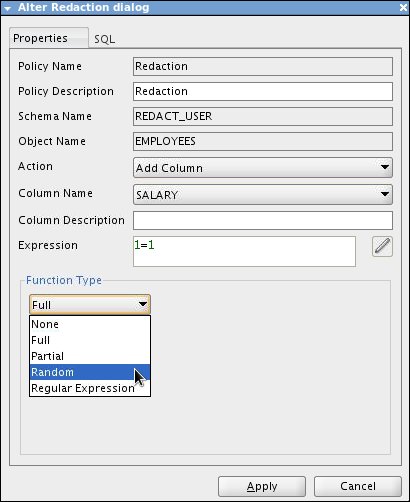
Click Apply. When the success message is displayed, click OK.
In the Data tab, click Refresh.
The SALARY column is now redacted as a random number.
Modifying an Expression in a Redaction Policy
You can control who is exempt from the redaction policy. To set the Human Resources (HR) session user as exempt, perform the following tasks:
Right-click EMPLOYEES and select Redaction > Alter Redaction Policy.
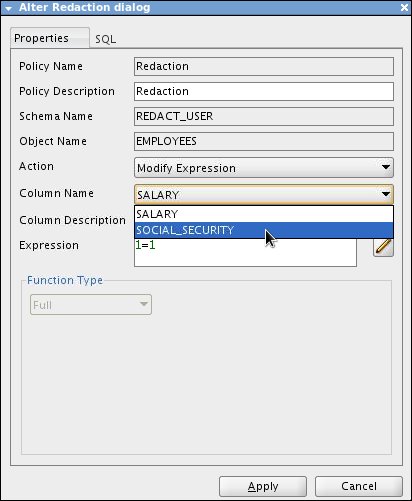
In the Alter Redaction dialog box, select Modify Expression from the Action list.
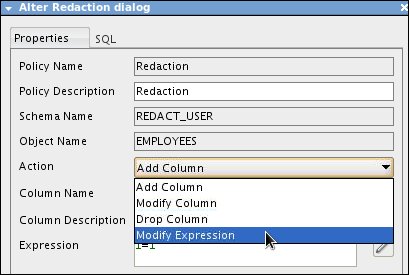
In the Column Name list, select SOCIAL_SECURITY.
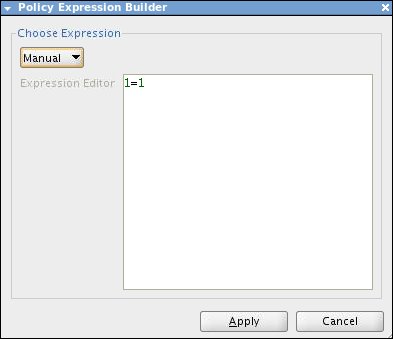
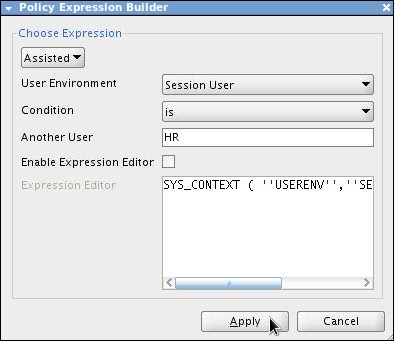
Click the pencil icon to build an expression.

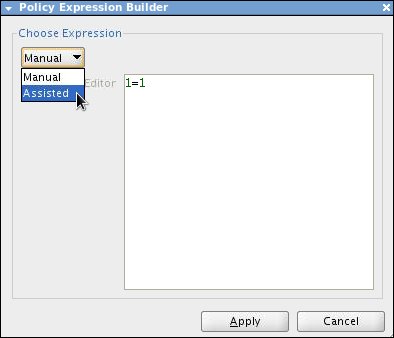
The Policy Expression Builder dialog box is displayed.
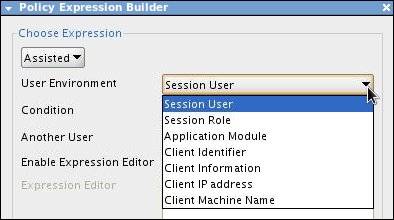
Select Assisted for the expression.
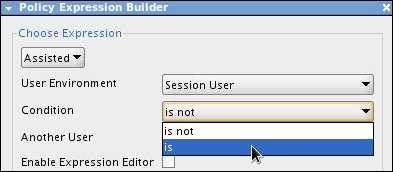
Additional selections are displayed. In the User Environment list, select Session User.
In the Condition list, select is.
In the Another User text box enter HR and click Apply.
In the Alter Redaction dialog box, click Apply.

When the success message is displayed, click OK.
An HR user who views the EMPLOYEES table will be able to see the Social Security Number.
Keep the EMPLOYEES Data tab open for the next section.
Disabling a Redaction Policy
To disable a redaction policy, perform the following tasks:
Right-click EMPLOYEES and select Redaction > Enable/Disable Redaction Policy.
The Enable/Disable Redaction dialog box is displayed.
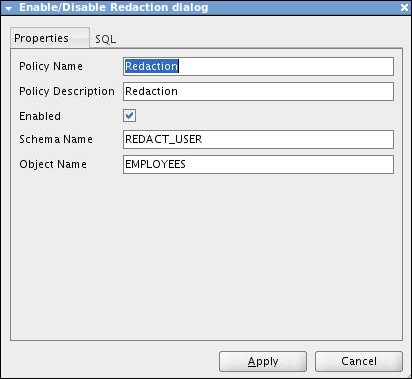
Deselect Enabled and then click Apply.
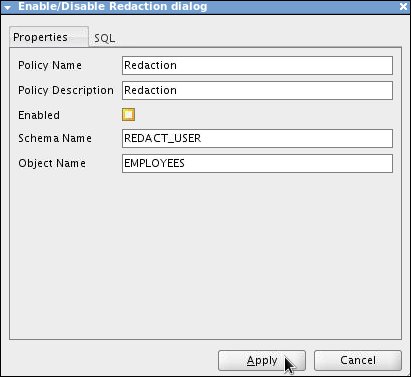
When the success message is displayed, click OK.
On the Data tab, click Refresh.
The Redaction policy is disabled, and the data is now unmasked.
Dropping a Redaction Policy
To drop a redaction policy, perform the following tasks:
Right-click EMPLOYEES and select Redaction > Drop Redaction Policy.
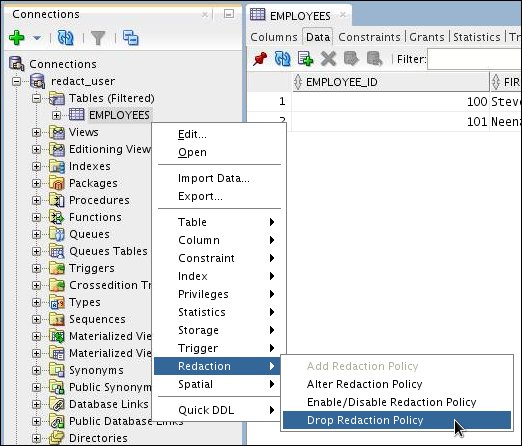
The Drop Redaction dialog box is displayed.
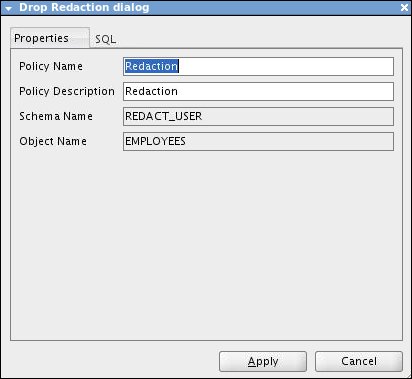
Confirm the redaction properties and then click Apply. You can drop both enabled and disabled redaction policies.
When the success message is displayed, click OK.
Summary
- Create a redaction policy
- Alter a redaction policy
- Add a column to a redaction policy
- Modify an expression in a redaction policy
- Disable a redaction policy
- Drop a redaction policy
- To learn more about Oracle database technologies, visit www.oracle.com.
- To view Oracle Database 11g and 12c documentation, see Oracle Database Documentation on the Oracle Technology Network.
- To look for more OBEs related to Oracle Database, visit the Oracle Learning Library.
- Lead Curriculum Developer: Pete DeHaan
- Other Contributors: Ashley Chen
In this tutorial, you learned how to:
Resources
Additional information about Oracle and Oracle technologies is available at the following sites:
Credits
To navigate this Oracle by Example tutorial, note the following:
- Hide Header Buttons:
- Click the title to hide the buttons in the header. To show the buttons again, click the title again.
- Topic List:
- Click a topic to navigate to that section.
- Expand All Topics:
- Click the button to show or hide the details for the sections. By default, all topics are collapsed.
- Hide All Images:
- Click the button to show or hide the screenshots. By default, all images are displayed.
- Print:
- Click the button to print the content. The content that is currently displayed or hidden is printed.
To navigate to a particular section in this tutorial, select the topic from the list.