Developing and Deploying a .NET Stored Procedure
Purpose
This tutorial describes how to deploy a .NET stored function using Oracle Developer Tools for Visual Studio.
Time to Complete
Approximately 20 minutes.
Overview
With Oracle Database 10g Release 2 on Windows, Oracle now offers Oracle Database Extensions for .NET. This database option makes it possible to deploy stored procedures and functions written in a .NET managed language into the Oracle database on Windows.
Prerequisites
Before starting this tutorial, you should:
|
. |
Install Microsoft Visual Studio 2010 |
|---|---|
|
. |
Install Oracle Database 10.2 or later with "Oracle Database Extensions for .NET" database option installed and configured. |
|
. |
Install Oracle 11g Oracle Data Access Components (ODAC) with Oracle Developer Tools for Visual Studio version 11.2.0.1.2 or later from OTN |
|
. |
Extract this file into your working directory. |
Creating an Oracle Connection
Before you begin creating your application, you open Visual Studio and examine the interface. Perform the following steps:
| . |
Open Visual Studio.
|
|---|---|
|
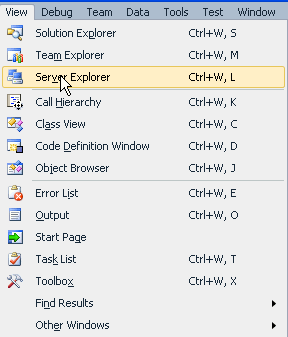
. |
Select View > Server Explorer.
|
|
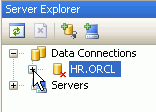
. |
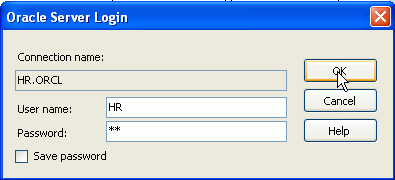
In Server Explorer, if you already have an HR.ORCL connection, you can expand it to connect to the database.
Then enter HR for the password and click OK.
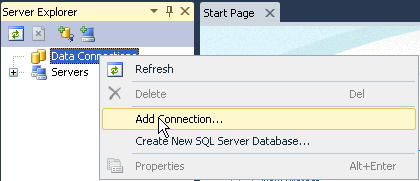
Otherwise, right-click Data Connections and select Add Connection....
|
|
. |
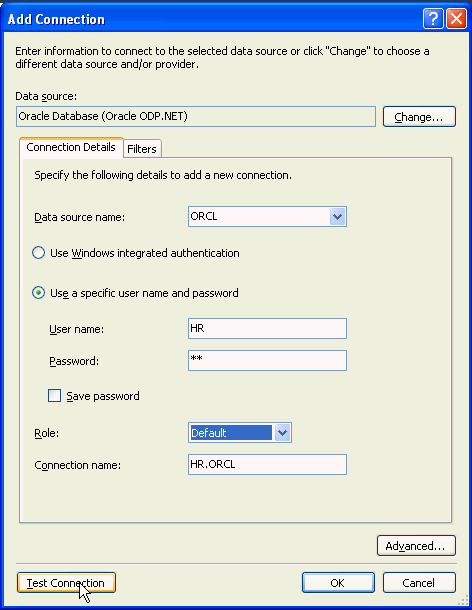
Enter your Data source name. Enter hr for the User name and Password. Click Save password, select Default as the Role, and click Test Connection.
|
|
. |
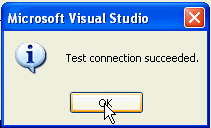
Test connection succeeded. Click OK.
|
|
. |
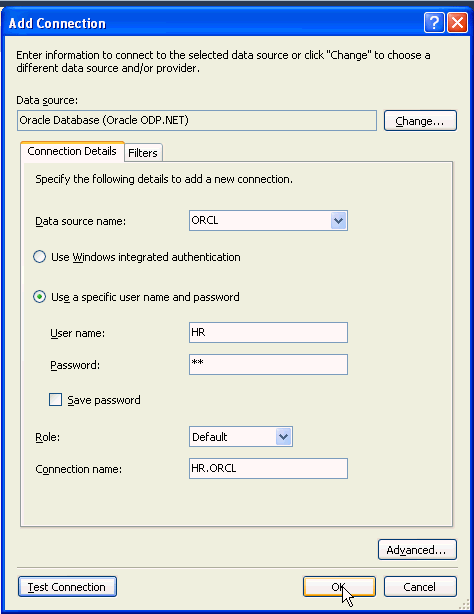
Click OK.
|
|
. |
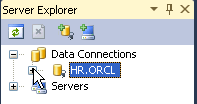
Your connection has been created. Expand HR.ORCL. Now you can create your Stored Function.
|
Creating a .NET Stored Function
In this topic, you create an Oracle project to store the function in the database. Perform the following steps:
| . |
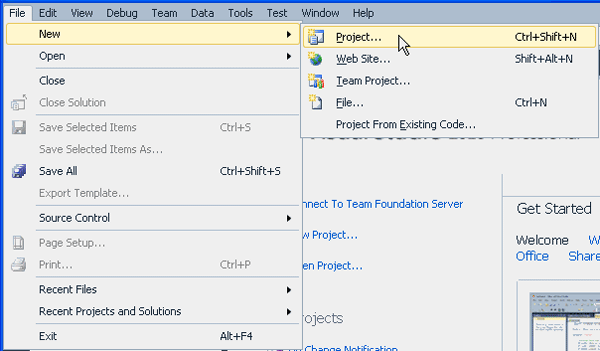
From the File menu, select New > Project.
|
|---|---|
|
. |
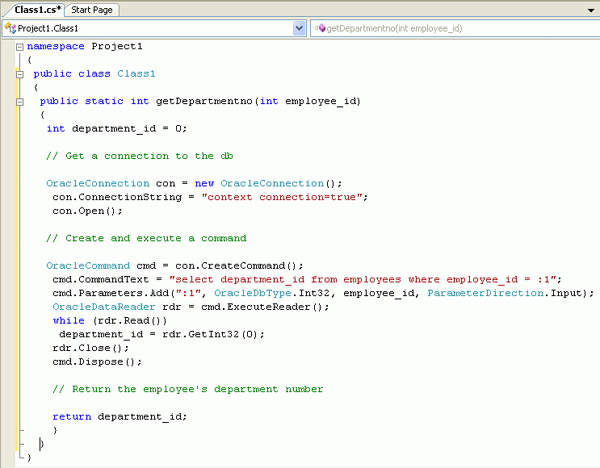
Expand the Database Project type, click Oracle and select the Visual C# Oracle CLR Project template. Enter Project2 in the Name field and select the directory where you want the files stored (Note: if the directory does not exist, it is created). Then click OK.
The Project1 class object is shown.
|
|
. |
Delete public static void StoredProcedure1() and it's curly braces ( {} ) from the code and copy and paste the text in getdepartmentno.txt from the file you downloaded in the working directory. public static int getDepartmentno(int
employee_id) // Get a connection to the db OracleConnection con =
new OracleConnection(); // Create and execute a command OracleCommand cmd = con.CreateCommand(); // Return the employee's department number return department_id; }
|
|
. |
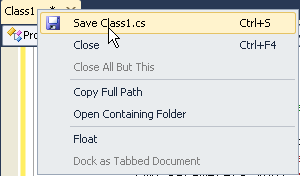
Right-click the Class1.cs tab and select Save Class1.cs.
|

Deploying a .NET Stored Function
In this topic, you deploy a .NET Stored Function into the Database. Perform the following steps:
|
. |
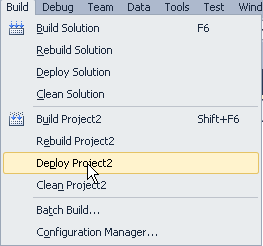
Select Build > Deploy Project1. This task compiles the code and then launches the .NET deployment wizard
|
|---|---|
|
. |
The Oracle Deployment Wizard for .NET appears. Click Next.
|
|
. |
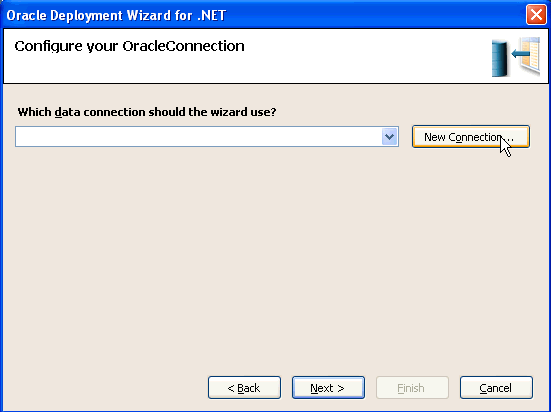
You need to establish a connection with SYSDBA credentials. Click New Connection. Note: If you already have a connection to the SYS user, select that connection from the list.
|
|
. |
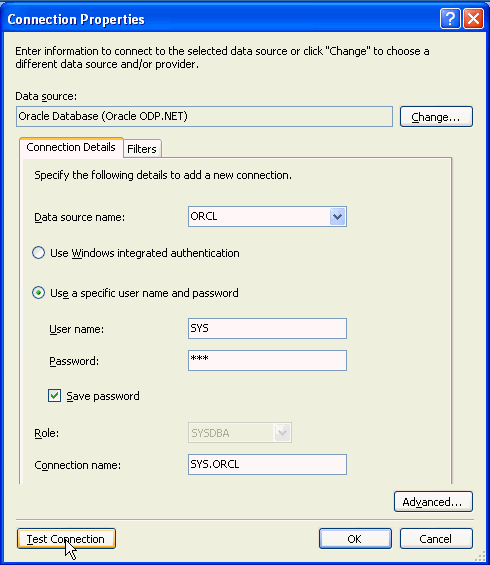
Select ORCL as the Data source name, enter sys for the User name and <syspassword> for the Password. Select Save password and click Test Connection.
|
|
. |
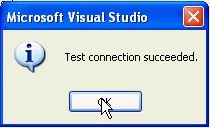
Test connection succeeded. Click OK.
|
|
. |
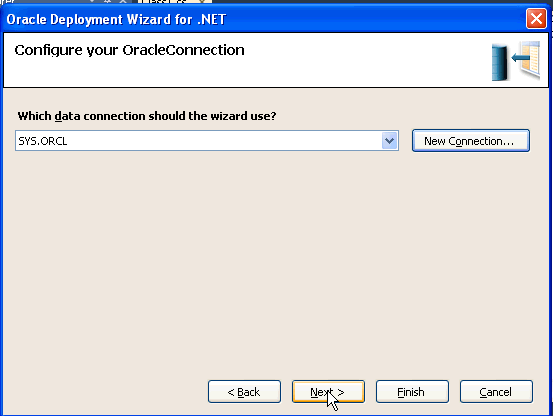
Click OK to save your connection.
|
|
. |
Click Next.
|
|
. |
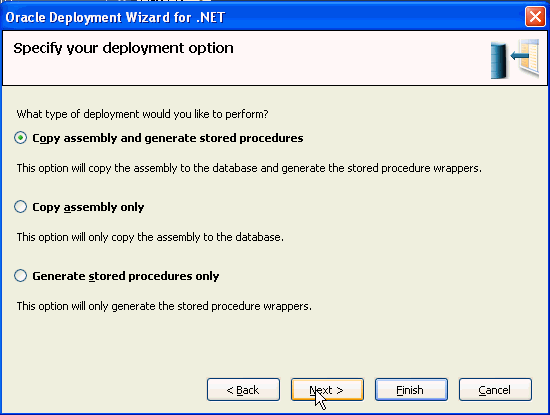
Make sure Copy assembly and generate stored procedures is selected and click Next.
|
|
. |
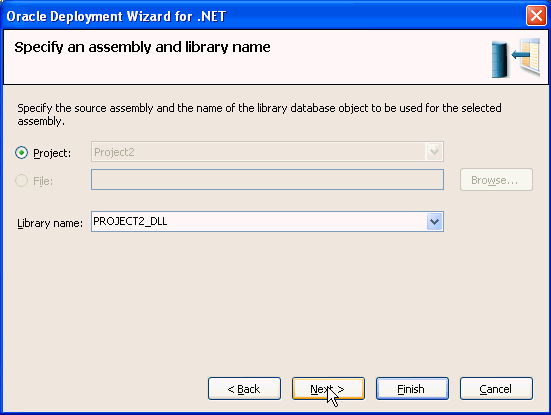
Accept the defaults and click Next.
|
|
. |
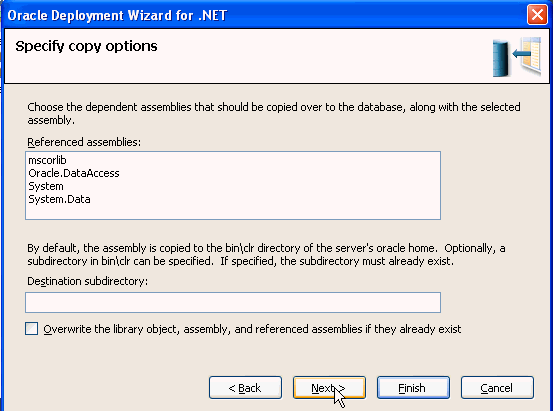
Accept the defaults and click Next.
|
|
. |
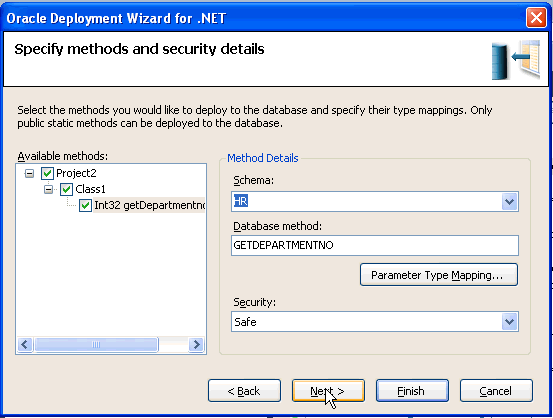
Expand Project2 > Class1 and select the
check box next to Int32 getDepartmentno. Then select the down arrow
next to schema.
|
|
. |
Select HR from the list of Schemas and click Next.
|
|
. |
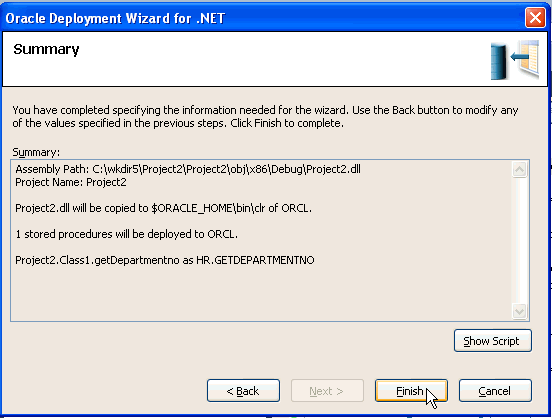
At the Summary window, click Finish.
|
|
. |
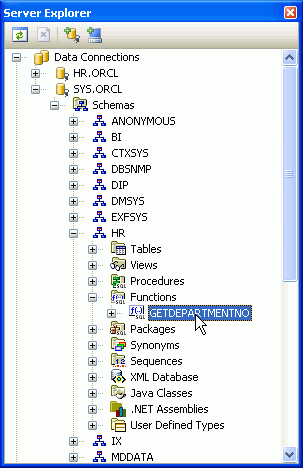
Your .NET Stored Function has been deployed successfully.
|


Running the .NET Stored Function
In this topic, you execute the .NET Stored Function you just deployed. In this case, the function retrieves the department number for the employee id given. Perform the following steps:
|
. |
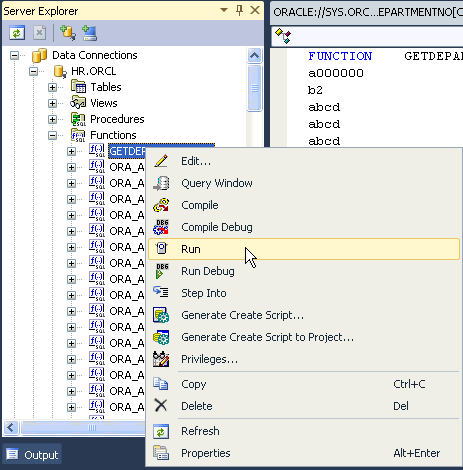
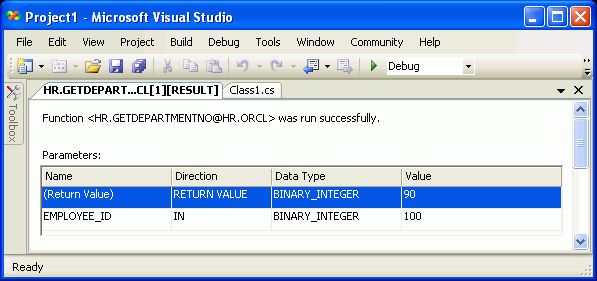
Expand HR.ORCL > Functions. Right-click GETDEPARTMENTNO and select Run. If you do not see GETDEPARTMENTNO, right-click Functions and click Refresh.
|
|---|---|
|
. |
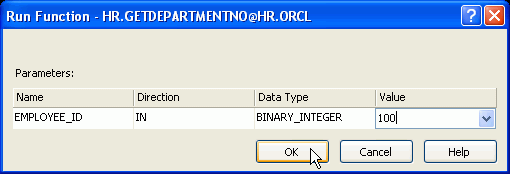
Enter a value of 100 (or any other valid Employee ID) and click OK.
Note: If you receive an error, stop and start the OracleOraDb10g_home1ClrAgent. Then try again.
|
|
. |
The Department id 90 of the Employee 100 was selected.
|
Summary
In this tutorial, you learned how to:
- Create an Oracle connection.
- Create a .Net Stored Function.
- Deploy a .Net Stored Function.
- Run a .Net Stored Function.
- Lead Curriculum Developer: Anupama Mandya, Pallavi Rajan
- Other Contributors: Marcie Young, Christian Shay
![]()

|
About
Oracle |Oracle and Sun | |