Using DBMS_Scheduler
Purpose
This tutorial shows you how to use the DBMS Scheduler feature in Oracle SQL Developer 3.0
Time to Complete
Approximately 80 minutes.
Overview
DBMS Scheduler is a feature that enables database administrators and application developers to control when and where various tasks execute in the database environment. The Scheduler can help in simplifying certain management tasks by offering a set of functionality for complex scheduling needs in an organisation. The basic capability of a Scheduler is the ability to schedule a job to run at a particular date and time or when a particular event occurs.
In this tutorial, the Scheduler performs a simple data load which is a typical data warehouse activity. The Scheduler Job loads the customer sales data from the US and UK into tables and then merges them into a composite set. This repeats every minute.
Software and Hardware Requirements
The following is a list of software requirements:
- Oracle Database 11g with the sample schema installed
- Oracle SQL Developer 3.0
Prerequisites
Before starting this tutorial, you should:
|
. |
Install Oracle SQL Developer 3.0 from OTN. Follow the readme instructions here. |
|---|---|
|
. |
Install Oracle Database 11g with the Sample schema. |
|
. |
Extract these files into your working directory. |
Creating a Database Connection
The first step to managing database objects using Oracle SQL Developer 3.0 is to create a database connection.
Perform the following steps to create a database connection:
Note: If you have already created a database connection, you do not need to perform the following steps. You can move to the Create a User and Grant required Privileges topic.
|
. |
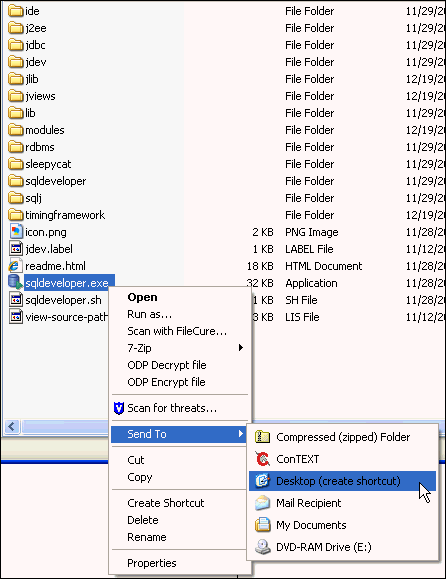
If you have installed the SQL Developer icon on your desktop, click the icon to start your SQL Developer and move to Step 4. If you do not have the icon located on your desktop, perform the following steps to create a shortcut to launch SQL Developer 3.0 from your desktop. Open the directory where the SQL Developer 3.0 is located, right-click sqldeveloper.exe (on Windows) or sqldeveloper.sh (on Linux) and select Send to > Desktop (create shortcut).
|
|---|---|
|
. |
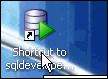
On the desktop, you will find an icon named Shortcut to sqldeveloper.exe. Double-click the icon to open SQL Developer 3.0. Note: To rename it, select the icon and then press F2 and enter a new name.
|
|
. |
Your Oracle SQL Developer opens up.
|
|
. |
In the Connections navigator, right-click Connections and select New Connection
|
|
. |
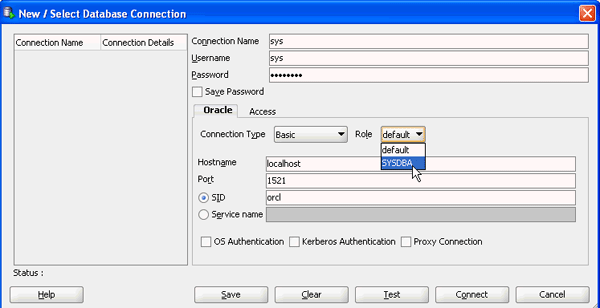
The New / Select Database Connection dialog opens. Enter the connection details as follows and click Test. Connection Name: sys
|
|
. |
Check for the status of the connection on the left-bottom side (above the Help button). It should read Success. Click Save then click Connect.
|
|
. |
The connection is saved and you see the newly created connection in the Connections list.
|


Create a User and Grant Required Privileges
The procedure for creating a new user and granting the required privileges scripts has been completed for you. The files are available in the files.zip file provided in the prerequisites section.
To run the scripts in Oracle SQL Developer, perform the following steps:
. |
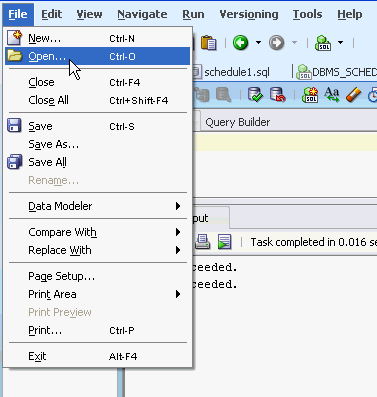
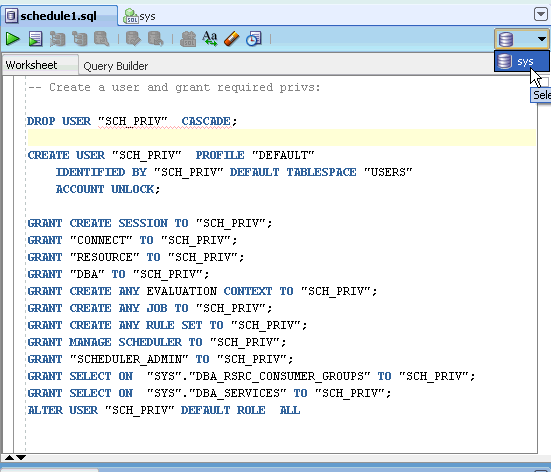
Select File > Open.
|
|---|---|
. |
Locate the schedule1.sql file that you downloaded onto your working directory. Select the schedule1.sql script and click Open.
|
. |
The schedule1.sql file opens in SQL Developer.
|
. |
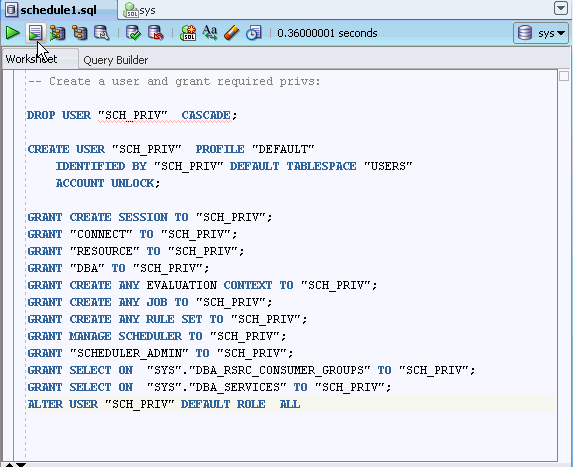
Select sys database connection from the right side menu drop-down list.
|
. |
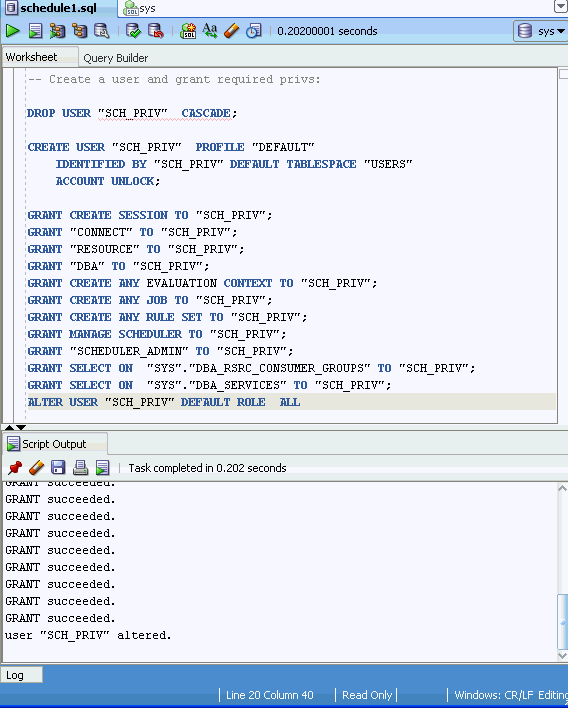
Click Run Script
|
. |
The output appears.
|


Create a Connection for the User
To create a connection for the sch_priv user, perform the following steps:
. |
In the Connections navigator, right-click Connections and select New Connection.
|
|---|---|
|
. |
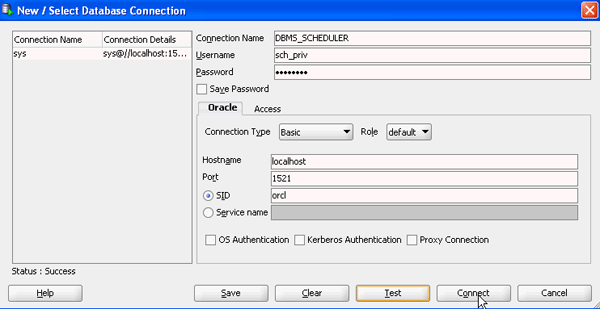
The New / Select Database Connection dialog opens. Enter the connection details as follows and click Test. Connection Name: DBMS_SCHEDULER (or any other name that identifies your connection)
|
|
. |
Click Test to check the status of the connection on the left-bottom side (above the Help button). It should read Success. Click Save then click Connect.
|
|
. |
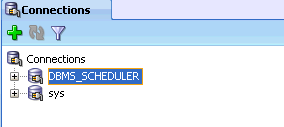
The connection is saved and you see the newly created connection in the Connections list.
|


Run Scripts for the Newly Created Connection
The script for creating tables, procedures and jobs has been completed for you. The files are available in the files.zip file provided in the prerequisites section.
To run the scripts in Oracle SQL Developer, perform the following steps:
|
. |
Select File > Open.
|
|---|---|
|
. |
Locate the schedule2.sql file that you downloaded onto your working directory. Select the schedule2.sql script and click Open.
|
|
. |
The schedule2.sql file opens in SQL Developer.
|
|
. |
Select DBMS_SCHEDULER database connection from the right side menu drop-down list.
|
|
. |
Click Run Script
|
|
. |
The output appears.
|


Viewing Objects in the Newly Created Connection
The DBMS_SCHEDULER connection is created with appropriate scheduling privileges to manage all scheduling tasks. To look at the different objects that are created, perform the following steps:
|
. |
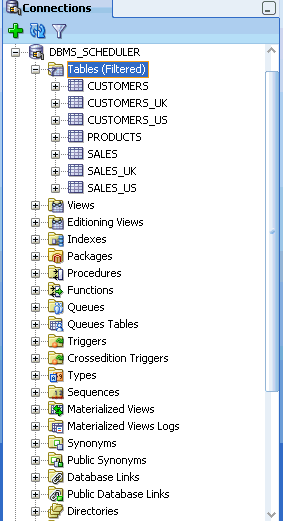
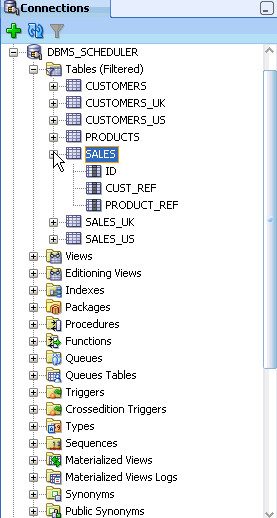
In the Connections tab, expand DBMS_SCHEDULER. Expand Tables.
Initially, these tables have no data. The job scheduler is set up to run procedures that populate the UK and US tables. Afterwards, the data is merged into the SALES and CUSTOMERS tables.
|
|---|---|
|
. |
Select the SALES table.
|
|
. |
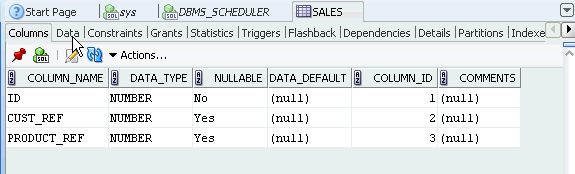
Click Data tab.
|
|
. |
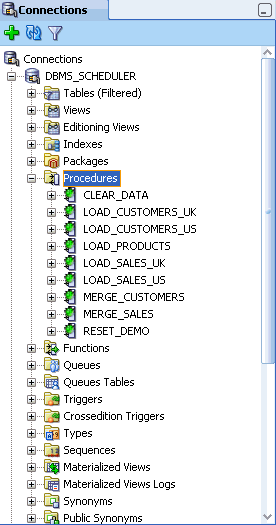
In the DBMS_SCHEDULER navigator, expand Procedures. Here are the set of PL/SQL procedures that are referenced by the Scheduler to load and merge the data.
|
|
. |
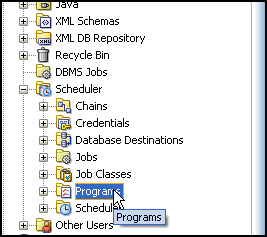
In the DBMS_SCHEDULER navigator, expand Scheduler. The various objects within the Scheduler are as follows: Credentials - are tasks that require authentication. Database Destinations - specifies a remote database instance that can be specified as a location for running a remote database job. Jobs - are a combination of schedules and programs, along with any additional arguments required by the programs. Job Classes - are resources for Jobs. Programs - contain metadata about the command that the Scheduler will run. These include external programs, stored procedures or PL/SQL blocks. Schedules - contain details about when and how often operations are executed.
|


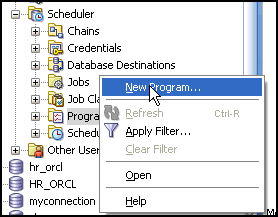
Creating a New Scheduler Program
|
. |
Right click the Programs option present in the Scheduler node. Select New Program...
|
||||||||||||
|---|---|---|---|---|---|---|---|---|---|---|---|---|---|
|
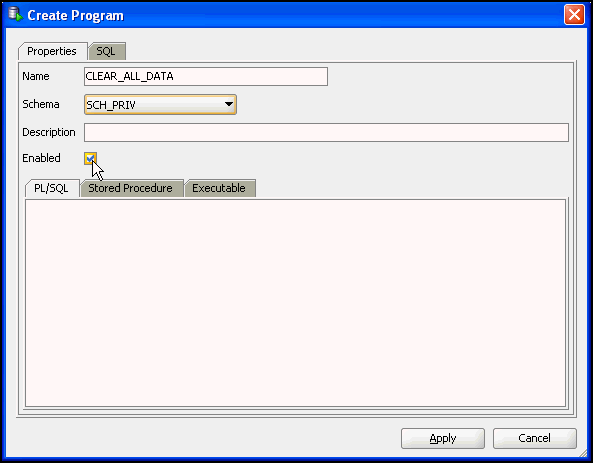
. |
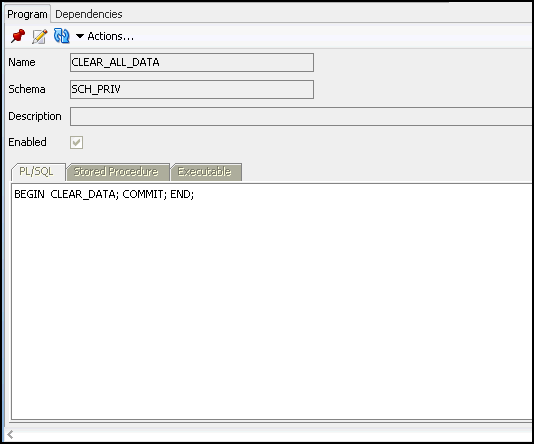
The Create Program dialog opens. Input the details as given below. Program Name: CLEAR_ALL_DATA
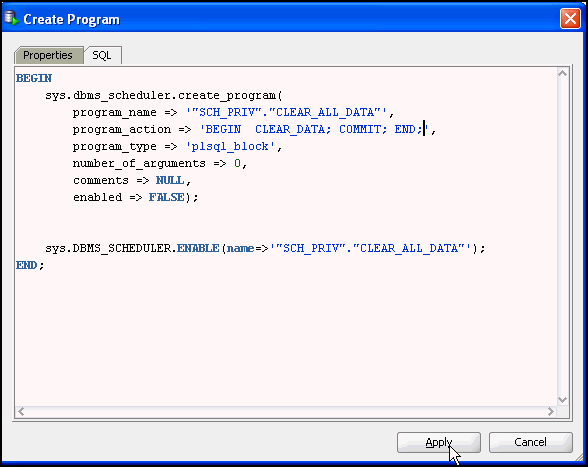
You can also switch to the SQL tab, view the auto-generated PL/SQL Code and edit the same. Since this program is created to clear the existing data present in the table, type the action as 'BEGIN CLEAR_DATA; COMMIT; END;'. Click Apply.
The Success message box appears. Click OK.
|
||||||||||||
|
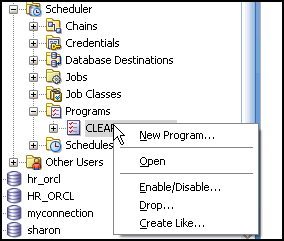
. |
The Program is successfully created and you can see the newly created program by expanding the Programs Node.
|
||||||||||||
|
. |
Create the following programs by repeating the steps mentioned above.
|

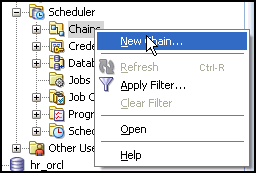
Creating a New Chain
|
. |
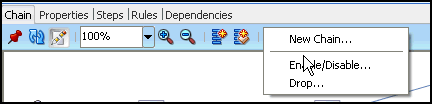
Right click the Chains option present in the Scheduler node. Select New Chain...
|
|---|---|
|
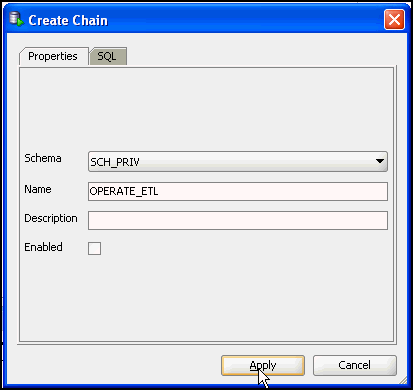
. |
The Create Chain dialog opens. Type the Chain name as 'OPERATE_ETL' and click Apply.
The Success message box appears. Click OK.
|
|
. |
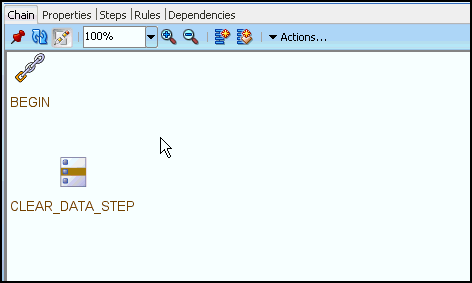
The Chain is successfully created and you can see the newly created Chain by expanding the Chains Node.
When you click on OPERATE_ETL, the Chain details are displayed in a new tab.
|


Creating Steps and Rules for a Chain
To create the steps and rules for running the Scheduler Job, perform the steps given below.
|
. |
Click the Chain option present in the Chain tab. Click
the Create Step
|
||||||||||||||||||||||||||||||||||||||||||||||||||||||
|---|---|---|---|---|---|---|---|---|---|---|---|---|---|---|---|---|---|---|---|---|---|---|---|---|---|---|---|---|---|---|---|---|---|---|---|---|---|---|---|---|---|---|---|---|---|---|---|---|---|---|---|---|---|---|---|
|
. |
The Create Step dialog opens. Input the Step Name as
CLEAR_DATA_STEP, and the Program as CLEAR_ALL_DATA. Click Apply.
The Success message box appears. Click OK.
|
||||||||||||||||||||||||||||||||||||||||||||||||||||||
|
. |
You see the graphical view of the first step of the Chain OPERATE_ETL.
|
||||||||||||||||||||||||||||||||||||||||||||||||||||||
|
. |
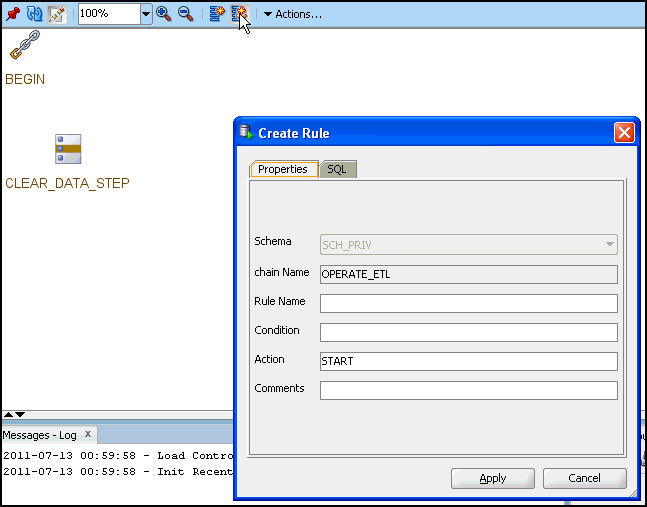
Select the Chain option present in the Chain tab. Click
the Create Rule
|
||||||||||||||||||||||||||||||||||||||||||||||||||||||
|
. |
The Create Rule dialog opens. Input the details as given below and click Apply. Rule Name: START_ETL Condition: true Action: START_CLEAR_DATA_STEP.
The Success message box appears. Click OK.
|
||||||||||||||||||||||||||||||||||||||||||||||||||||||
|
. |
Create the following Steps and Rules by repeating the steps mentioned above.
Note: Make sure that you create the steps and rules one after the other following the order of creation mentioned in the tables.
|
||||||||||||||||||||||||||||||||||||||||||||||||||||||
|
. |
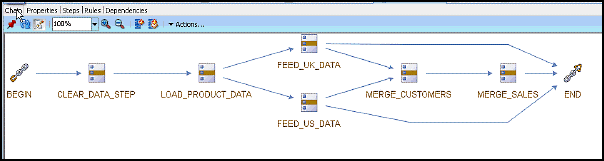
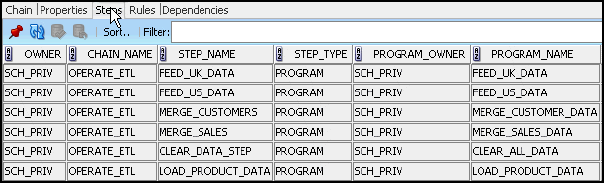
Once you complete creating all the steps and the rules as mentioned, you can see a completed Chain of jobs created. This is the order of execution that happens when you run a Scheduler Job.
|
||||||||||||||||||||||||||||||||||||||||||||||||||||||
|
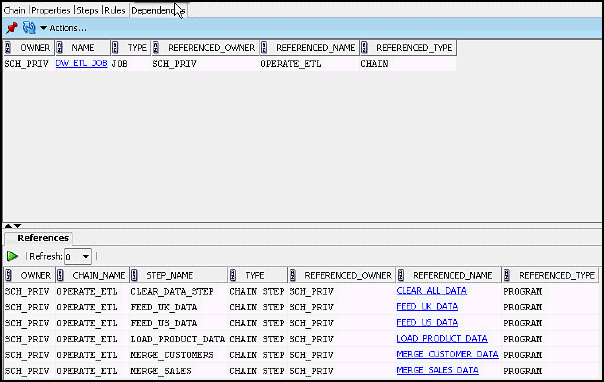
Note: You can view the dependencies on the related programs by selecting the Dependencies tab.
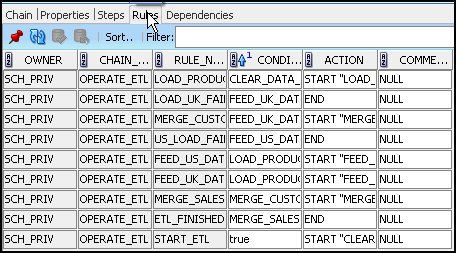
You can view all the rules present for a job by selecting the Rules tab.
Also, You can view the steps using the Steps tab.
|


Creating a New Schedule
After creating the program, Chain, the set of steps and rules, perform the following steps to create the schedule for running the job.
|
. |
Right click Schedule option present in the Scheduler node. Click New Schedule...
|
|---|---|
|
. |
The Create Schedule dialog opens. Input the details as given below. Schedule Name: DW_ETL
Note: Repeat Interval means the time frequency of the job to be executed automatically. For Repeat Interval, click on the edit button. The Repeat Interval Window opens. Select the Frequency tab and choose the Frequency as MINUTELY. Click OK.
The Success message box appears. Click OK.
The schedule is now created. After creating the job, the schedule can be enabled. |
|
In the Chain Tab, Click Edit. Choose 'Enable/Disable option.
Note: Make sure that the 'Enabled' option is set to true.
The schedule is now enabled and ready to be run. |


Creating a New Scheduler Job
|
. |
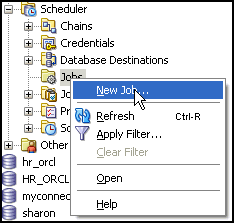
Right click Jobs option present in the Scheduler node. Click New Job...
|
|---|---|
|
. |
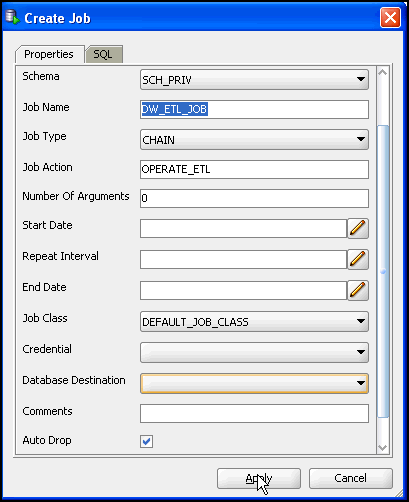
The Create Job dialog opens. Input the details as given below, and click OK. Job Name: DW_ETL_JOB Job Action: OPERATE_ETL Schema Name: SCH_PRIV AutoDrop: True
The Success message box appears. Click OK.
|
Graphical Representation of the Scheduler Objects
To view the Scheduler Objects in a grahical representation, perform the following steps:
. |
Right-click Scheduler. Select Scheduler Design Editor
|
|---|---|
. |
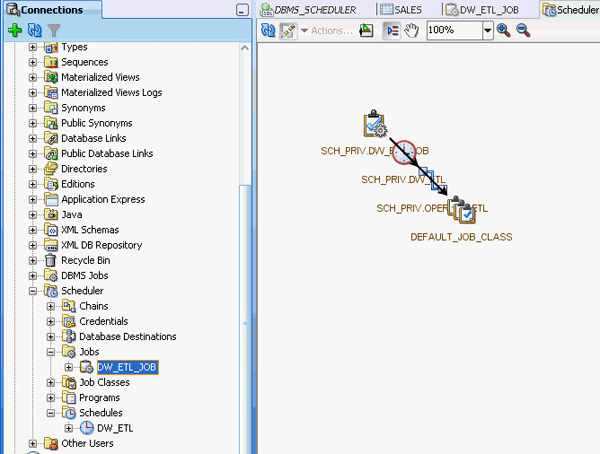
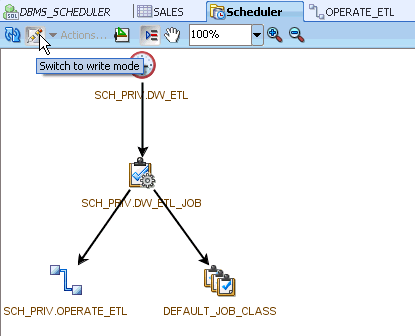
You can drag the objects to the editor. Click Jobs. Select DW_ETL_JOB and drag it to the Scheduler Design Editor.
|
. |
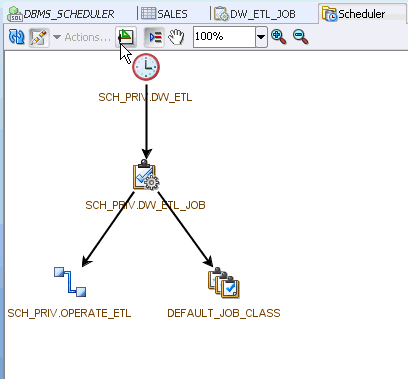
Click Layout
Note that apart from the Job object, all the related objects to run this Job are also displayed.
|
. |
To invoke the object editor, double-click the object SCH_PRIV.OPERATE_ETL.
|
. |
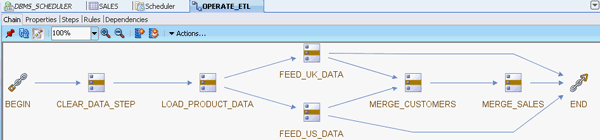
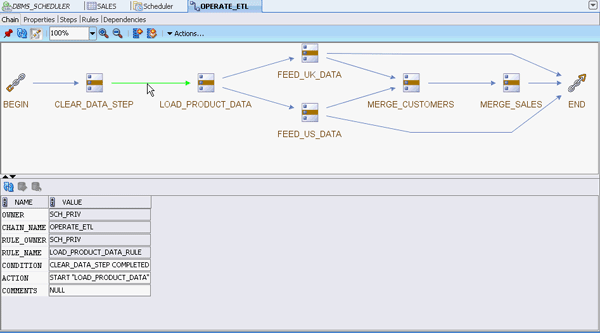
The flow of the Chain steps appear in the Chain object editor. Each step is a program and linking each step is a Chain rule.
|
. |
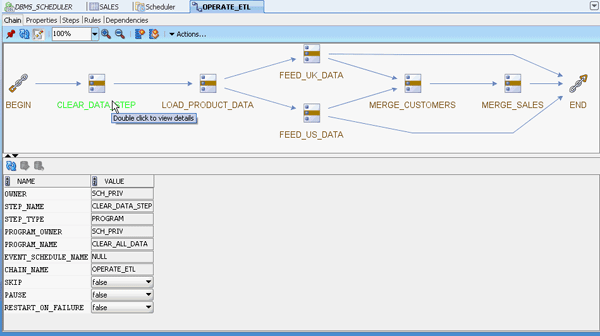
The sequence of steps flow from left to right. Double-click the first step CLEAR_DATA_STEP to view details.
The CLEAR_DATA_STEP step references the CLEAR_ALL_DATA program that calls the PL/SQL procedure to clear all data from the tables.
|
. |
Double-click the Chain rule.
Chain Rules are transitions between steps with conditions and actions. Here, this rule states that the CLEAR_DATA_STEP condition needs to be met before the action LOAD_PRODUCT_DATA is initiated.
|


Enabling the Job to Load Data into the Tables
Since the property of the Job is initially set to disable, you will have to enable the Job. To run the Job, perform the following steps:
|
. |
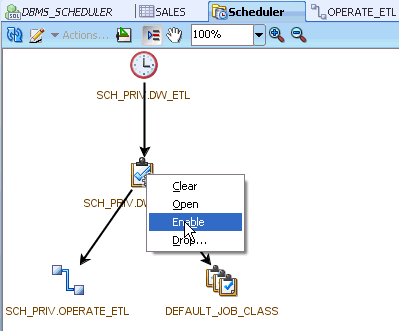
In the Scheduler tab, click Switch to write mode
|
|---|---|
|
. |
Right-click SCH_PRIV.DW_ETL_JOB Job. Select Enable to activate the Job.
When the Job is enabled, it will start a Chain of programs that load the SALES and CUSTOMERS tables at every one minute interval. You can view the data loaded into the tables by clicking on each table.
|
|
. |
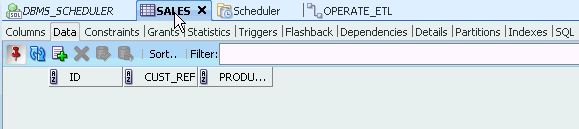
To view if the Job has loaded data into the SALES table, select the SALES tab.
To refresh the SALES table, click Refresh
|
|
. |
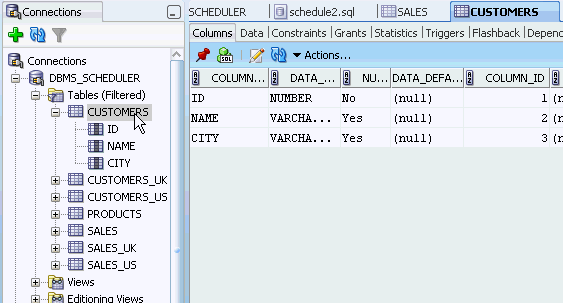
Select CUSTOMERS table.
Click Data tab to view if the data has been loaded into the table.
The Job has completed its first data load and continues to make updates
every minute until the Job is disabled. |
 .
. 

Summary
In this tutorial, you have learned how to:
- Create a Database Connection
- Create a User and Grant Required Privileges
- Run Scripts for the Newly Created Connection
- View Objects in the Newly Created Connection
- Create Programs, Jobs, Chains and Schedules using the dialogs
- Graphically Represent the Scheduler Objects
- Enable the Job to Load Data into the Tables
![]()
|
|
Copyright © 2011, Oracle and/or its affiliates. All rights reserved |