Working with Tuning Utilities in SQL Developer
Overview
- Use SQL Developer to
- Generate and display the Explain plan of a SQL query
- Execute Autotrace Plan
- Examine the effects of changing column order in a composite index
- Use SQL Plan Baseline to associate a hinted execution plan with a hard coded SQL statement
- Oracle Database 11g Enterprise Edition with access to the Tuning and Diagnostic management packs and with the sample schema installed.
- Oracle SQL Developer 4.0.
- Download Oracle SQL Developer 4.0 here.
Purpose
This tutorial shows you how to work with the tuning utilities in SQL Developer.
Time to Complete
Approximately 40 minutes
Introduction
In this tutorial you will :
Hardware and Software Requirements (Optional)
The following is a list of hardware and software requirements:
Prerequisites
Note: For best results, use Firefox or Chrome browsers to view this tutorial.
Creating a Database Connection
The first step to using the optimizer access path is to create
a database connection.
Perform the following steps to create a database connection:
Click the SQL Developer 4.0 icon on your Desktop to
start SQL Developer . Your Oracle SQL Developer 4.0
opens up.
In the Connections navigator, right-click Connections and select New Connection.
The New / Select Database Connection dialog opens. Enter the
connection details as follows and select Save Password and
then click Test.
Connection Name: hr_conn
Username: hr
Password: <your_password >(Select Save
Password)
Hostname: localhost
SID: <your_own_SID>
Check for the status of the connection on the left-bottom side (above the Help button). It should read Success. Click Connect.
Using SQL Developer to Generate and Display the Explain
Plan of a SQL Query
To review the execution steps of a SQL statement section, perform the following steps:
A new SQL worksheet opens.
Create a table emp by executing the statement shown below:
emp_id varchar2(5) CONSTRAINT emp_id_pk PRIMARY KEY,
emp_fn varchar2(20),
emp_ln varchar2(20),
dept_id varchar2(5),
hire_date DATE CONSTRAINT "EMP_HIREDATE_NN" NOT NULL ENABLE,
salary NUMBER(8,2)
);
Note: If the emp table already exists, drop it and create it again.

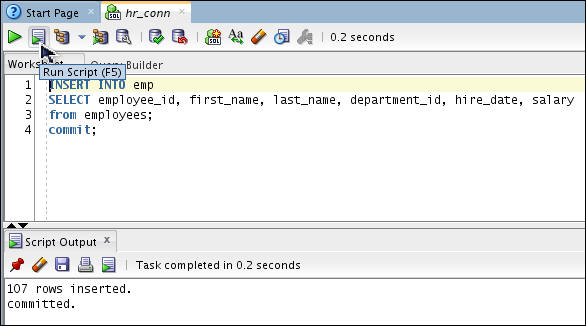
Insert records into the emp
table:
INSERT INTO
emp
SELECT employee_id, first_name, last_name,
department_id, hire_date, salary from employees;
commit;
Gather the emp table statistics by executing the statement given below:
exec DBMS_STATS.GATHER_TABLE_STATS ('HR','EMP', METHOD_OPT => 'for all indexed columns', CASCADE => TRUE);
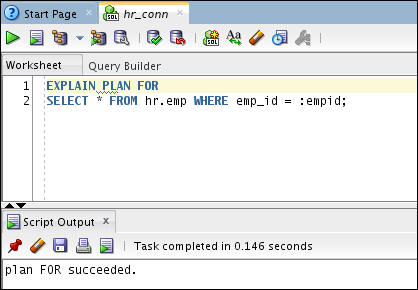
Analyze the execution plan using the EXPLAIN PLAN
command.
Execute the code given below to analyze the execution plan of the SQL query.
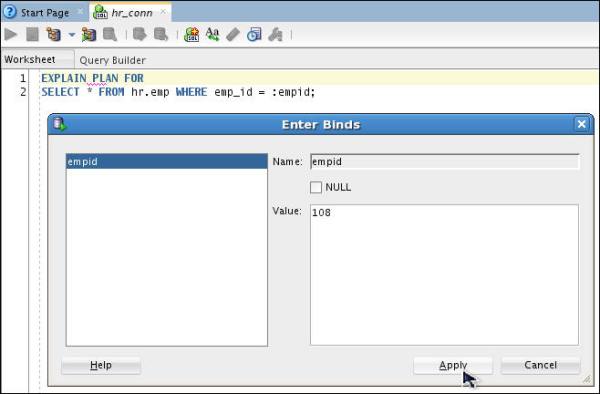
EXPLAIN PLAN FOR
SELECT
* FROM hr.emp WHERE emp_id = :empid;
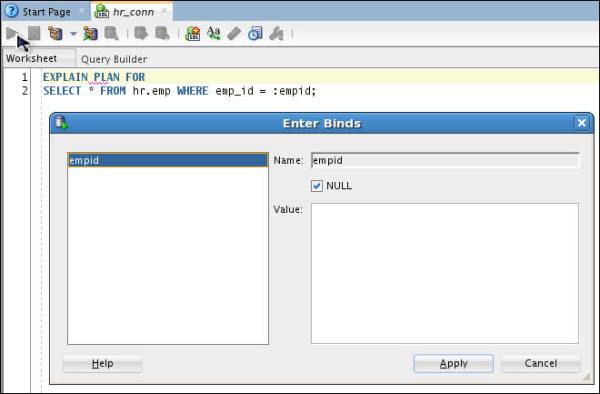
Enter a Value of 108 and click Apply.
Execute the following query:
SELECT * FROM TABLE (dbms_xplan.display);
You will notice that the emp_id_pk index is used here.
Use the Autotrace option to access the performance characteristics of the following SQL query :
SELECT * FROM hr.emp WHERE
emp_id = :empid;
Examining the Effects of Changing Column Order in a
Composite Index
- Which index was used?
- What is the total cost?
- Which index was used?
- What is the total cost?
In this section you will execute several SQL statements and examine the effects of changing the column order in a composite index.
Create the following indexes:
CREATE INDEX
emp_fname_sal_idx
ON emp (emp_fn,salary)
NOLOGGING
COMPUTE STATISTICS;
CREATE INDEX emp_sal_fname_lname_idx
ON emp (salary,emp_fn,emp_ln)
NOLOGGING
COMPUTE STATISTICS;

Execute the following code and gather the execution plan of
the SQL statement using the EXPLAIN PLAN command.
EXPLAIN PLAN FOR SELECT
emp_fn, salary, hire_date
FROM emp
WHERE emp_fn like 'S%'
AND salary > 1000
/
SELECT * FROM TABLE (dbms_xplan.display);
Looking at the execution plan can you find out
Now, execute the following code and gather the execution
plan of the SQL statement using the EXPLAIN PLAN command.
EXPLAIN PLAN FOR SELECT
emp_fn, emp_ln, salary
FROM emp
WHERE emp_ln like 'S%'
AND salary > 1000
/
SELECT * FROM TABLE (dbms_xplan.display);
Looking at the execution plan can you find out
Using SQL Plan Baseline to Associate a Hinted Execution Plan with a Hard Coded SQL Statement
In this section, you will use SQL Plan Baseline to associate a hinted execution plan with a hard-coded SQL statement.
In the Connections navigator, right-click Connections and
select New Connection.
The New / Select Database Connection dialog opens. Enter the
connection details as follows and click Test.
Connection Name: sh_conn
Username: sh
Password: <your_password >(Select Save
Password)
Hostname: localhost
SID: <your_own_SID>

Check for the status of the connection on the left-bottom side (above the Help button). It should read Success. Click Save and then click Connect.
A new SQL worksheet opens.
Drop all the indexes on the customers table except the primary key and unique key indexes ( *_PK, *_UK) below.
DROP INDEX customers_gender_bix ;

                          DROP INDEX customers_yob_bix;

                          DROP INDEX cust_cust_credit_limit_idx;
CREATE BITMAP INDEX cust_yob_bix
ON CUSTOMERS(cust_year_of_birth)
NOLOGGING
COMPUTE STATISTICS;
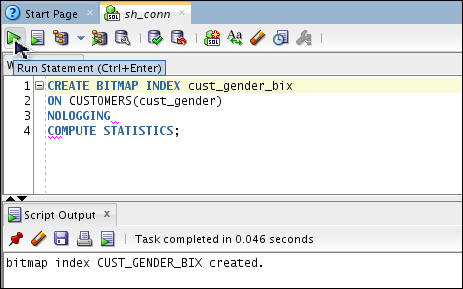
CREATE BITMAP INDEX cust_gender_bix
ON CUSTOMERS(cust_gender)
NOLOGGING
COMPUTE STATISTICS;

exec DBMS_STATS.GATHER_TABLE_STATS ('SH','CUSTOMERS');
SELECT /*+ INDEX_COMBINE (customers cust_gender_bix, cust_yob_bix) */ *
FROM customers
WHERE cust_year_of_birth < 70
AND cust_gender = 'M';
The query does not return any value on purpose. It is only to see which plan can be used. And the original query will use the hinted execution plan, not the original plan.
sql_id and plan_hash_value
using v$sqlarea.
select sql_id, plan_hash_value, sql_text
from v$sqlarea
where sql_text like '%SELECT /*+ INDEX_COMBINE (customers cust_gender_bix, cust_yob_bix)%';
Note: Copy the
sql_id for the following
text: SELECT /*+
INDEX_COMBINE (customers cust_gender_bix, cust_yob_bix) */
* FROM customers where cust_year_of_birth < 70 AND
cust_gender = 'M';SELECT * FROM table (dbms_xplan.display_cursor ('Please Enter the SQL_ID value'));
Note: The BITMAP MERGE operation is used. Total Cost is 4.
Use the SYSTEM user to grant SH user the privilege to access the DBMS_SPM package.
Create a connection to the SYSTEM user.
Click SQL Worksheet icon and select system_conn user.
In the SYSTEM worksheet, execute the following SQL:
GRANT ADMINISTER SQL MANAGEMENT OBJECT TO sh;

var res number;

                        exec :res := dbms_spm.load_plans_from_cursor_cache
                        (sql_id => 'Please enter the original SQL_ID value',
                        plan_hash_value => 'Please enter the
                        &original_plan_hash_value');
Note: Enter the
sql_id and plan_hash_value
obtained in Step 9.
select sql_handle, plan_name, sql_text, enabled, accepted
from dba_sql_plan_baselines
where sql_text like '%SELECT /*+ INDEX_COMBINE (customers cust_gender_bix, cust_yob_bix)%';
sql_id and plan_hash_value.SELECT /*+ INDEX (customers cust_yob_bix)*/ *
FROM customers
WHERE cust_year_of_birth < 70
AND cust_gender = 'M';
select sql_id, plan_hash_value, sql_text
from v$sqlarea
where sql_text like 'SELECT /*+ INDEX (customers cust_yob_bix)%';
Here you are associating a better execution plan with the SQL Baseline.
Note: Copy the
sql_id for the following
text: SELECT /*+ INDEX
(customers cust_yob_bix) */ * FROM customers where
cust_year_of_birth < 70 AND cust_gender = 'M';SELECT * FROM table (dbms_xplan.display_cursor ('Please Enter the SQL_ID value'));
Note: The BITMAP MERGE operation is used. Total Cost is 2.
Summary
- Use SQL Developer to
- Generate and display the Explain plan of a SQL query and
- Use Auto trace option
- Examine the effects of changing column order in a composite index
- Use SQL Plan Baseline to associate a hinted execution plan with a hard coded SQL statement.
- Lead Curriculum Developers: Dimpi Sarmah, Sharon Sophia
Stephen
- Other Contributors: Ashley Chen, Swarnapriya Shridhar, Nancy Greenberg
In this tutorial, you have learned how to:
Credits
To help navigate this Oracle by Example, note the following:
- Hiding Header Buttons:
- Click the Title to hide the buttons in the header. To show the buttons again, simply click the Title again.
- Topic List Button:
- A list of all the topics. Click one of the topics to navigate to that section.
- Expand/Collapse All Topics:
- To show/hide all the detail for all the sections. By default, all topics are collapsed
- Show/Hide All Images:
- To show/hide all the screenshots. By default, all images are displayed.
- Print:
- To print the content. The content currently displayed or hidden will be printed.
To navigate to a particular section in this tutorial, select the topic from the list.