Developing PL/SQL Applications with Oracle In-Memory Database Cache
Purpose
In-Memory Database Cache (IMDB Cache) is a database option that allows you to use TimesTen as an in-memory database cache for the Oracle Database. IMDB Cache improves application transaction response time by caching a performance critical subset of tables from an Oracle database to the application tier. Now you can selectively take your PL/SQL code to the TimesTen database, with minimal application changes.
This tutorial shows you how to use PL/SQL with Oracle TimesTen In-Memory Database and Oracle In-Memory Database Cache. The PL/SQL engine from the Oracle Database was efficiently ported to run inside the TimesTen database in the application-tier, using the same PL/SQL language and syntax. This tutorial demonstrates how you can leverage TimesTen to enhance the performance of PL/SQL code.
Time to Complete
Approximately 50 minutes
Software Used in this Lab
In this tutorial, the following software have been pre-installed and configured:
1. Oracle In-Memory Database Cache 11.2.1.8.0
2. Oracle Database 11.2.0.2
3. SQL Developer 3.0
Overview
In-Memory Database Cache (IMDB Cache) improves application transaction response time, by caching a subset of tables from an Oracle database to the TimesTen in-memory database. PL/SQL, the Oracle procedural extension of SQL, is a portable, high-performance transaction processing language. By moving your performance sensitive PL/SQL subprograms to TimesTen, the application can get access to the data faster, resulting in shorter SQL processing time and better overall application response time.
The focus of this tutorial is to illustrate that PL/SQL operates essentially the same way inside TimesTen as in the Oracle database. The tutorial exercise will also show how to use the TimesTen direct-linked in-process connections to dramatically reduce the SQL query response time and achieves higher transaction throughput.
Scenario
In this tutorial, you will learn the basics of creating cache tables and PL/SQL support in TimesTen by working through step by step examples. The tutorial exercises makes use of Oracle SQL Developer to create and run PL/SQL anonymous blocks, procedures, functions, and packages with collections and ref cursors.
Using an existing PL/SQL package from the Oracle Database, you will create an identical PL/SQL package in TimesTen, run and measure the time it takes to run the PL/SQL code in TimesTen.
NOTE: TimesTen also offers a command line interactive SQL utility called ttIsql. The last topic of the Lab demonstrates the use of ttIsql.
Creating Connections to the Oracle and the TimesTen Database
In this tutorial, an Oracle database and a TimesTen ( plsqldb) database have been pre-created for your convenience. The database user pls owns all the tables and the PL/SQL subprograms.
In this topic, you will create connections to both the Oracle database and the TimesTen database in SQL Developer.
Create a connection to the TimesTen database using SQL Developer
1. |
Double click on the desktop icon "SQL Developer" to launch SQL Developer.
|
2. |
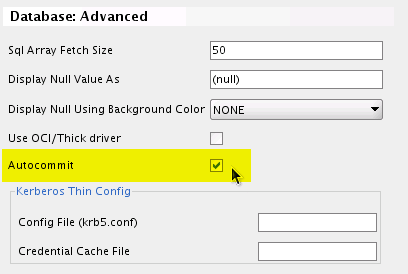
TimesTen connections work best in SQL Developer if the AutoCommit flag is checked.
|
3. |
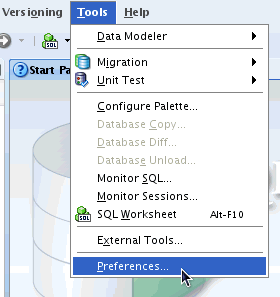
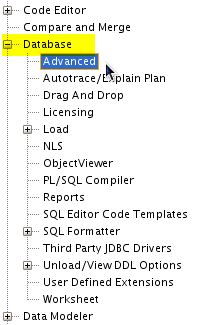
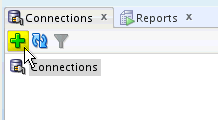
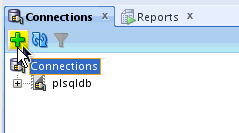
Click on + sign next to Database to expand the preferences.
|
4. |
Check the Autocommit checkbox, if not already checked.
|
5. |
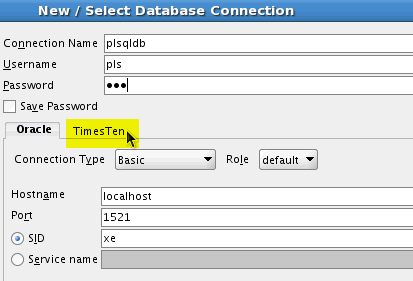
To create a connection to the TimesTen plsqldb in SQL Developer.
|
6. |
Enter plsqldb in the Connection Name field.
|
7. |
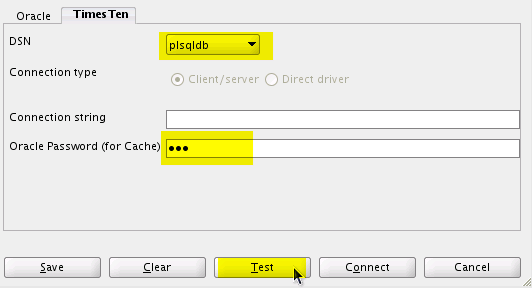
Select plsqldb from the DSN drop down list.
|
8. |
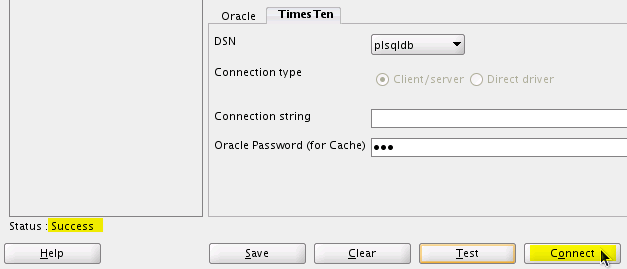
Check the status of the connection on the status line (above the Help button). It should read Success.
|
9. |
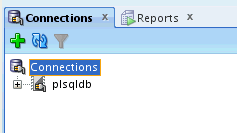
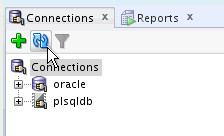
The connection plsqldb has been created. It should appear in the Connections navigator. If not, expand out the connections by clicking on the + sign next to Connections.
|
Create a connection to the Oracle database using SQL Developer
1. |
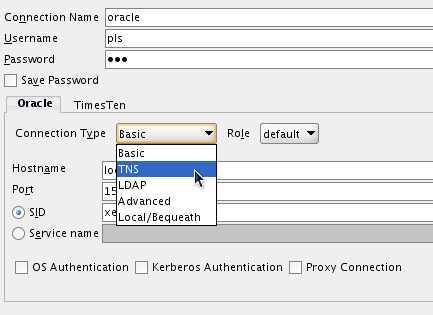
Create a connection to the Oracle database in SQL Developer.
|
2. |
Enter oracle in the Connection Name field.
|
3. |
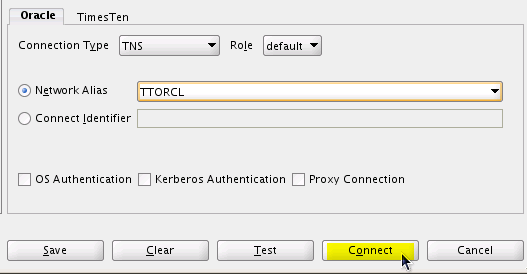
Select TTORCL from the Network Alias drop down list.
|
4. |
The connection oracle has been created. It should appear in the Connections navigator. If not click the Refresh icon.
|
5. |
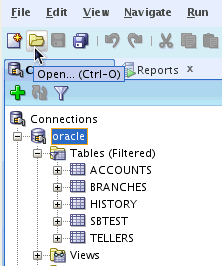
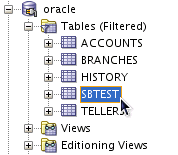
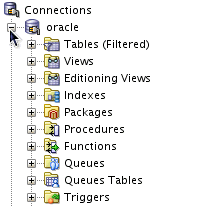
Click on the + sign next to the connection oracle and then expand Tables (Filtered) to see the tables in the Oracle database.
|

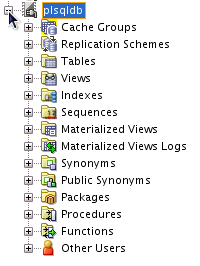
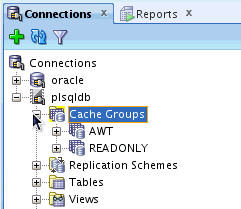
Creating Cache Groups
In this topic you will learn how to create cache groups to cache Oracle tables into the in-memory database, plsqldb. You will create cache groups using the Create Cache Group dialog in SQL Developer. The cache agent process is responsible for managing the interaction and data synchronization between the Oracle database and the cache database.
Run a SQL script to define a Cache Grid
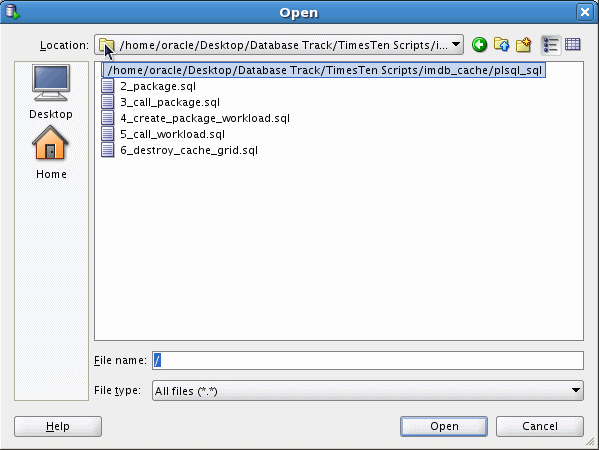
To reduce typing time, a number of scripts have been pre-created. They are located in the directory /home/oracle/Desktop/Database Track/TimesTen Script/imdb_cache/plsql_sql . They will be used throughout the Lab for your convenience.
1. |
Click on Open to bring up the Open File dialog box.
|
2. |
Navigate to the SQL script directory. If there is a plsql_sql icon on the left panel, click on the icon to go directly to the SQL script directory. Otherwise, use Location: to navigate to the script directory:
|
3. |
Select the file 1_create cache_grid.sql and click Open.
|
4. |
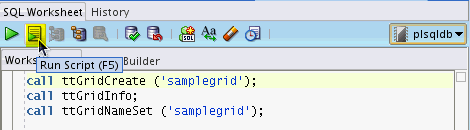
The content of this file appears in a SQL Worksheet tab. Review the code.
|
5. |
Click Run Script to execute this script on plsqldb.
|
6. |
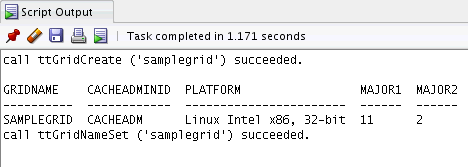
The result from running the script is displayed in the Script Output Pane.
|
7. |
Close the file 1_create_cache_grid.sql by clicking on the button X, located on the right of the tab.
|

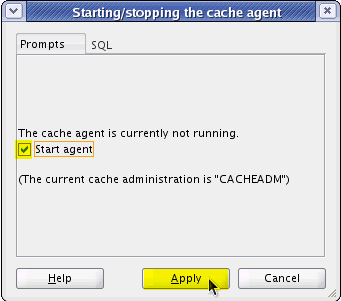
Start the Cache Agent
1. |
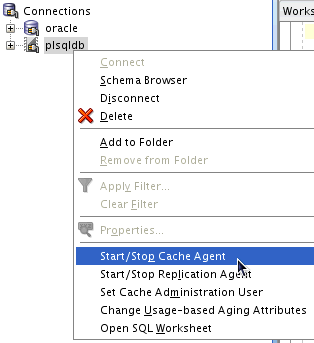
Before cache groups can be created, the cache agent must be running.
|
2. |
Check the Start agent check box and click Apply. This starts up the cache agent for plsqldb.
|
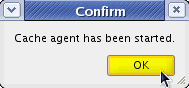
3. |
Click OK to close the confirmation dialog box.
|
Create a Read-only cache group
Read-only cache group specifies the tables cached from the Oracle database are for read operations, updates are done in the Oracle database and refreshed to the cache.
To create a read-only cache group based on the pls.tellers table using the Create cache group dialog in SQL Developer, perform the following steps:
1. |
Click on the + sign next to the connection plsqldb to expand out the connection, if not already expanded.
|
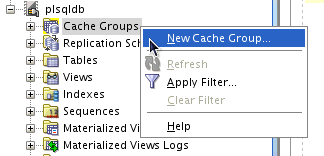
2. |
Right click on Cache Groups and select New Cache Group. This brings up the Create cache group dialog box.
|
3. |
Enter readonly into the Name field. Change the Refresh interval from 5 minutes to 5 seconds.
|
4. |
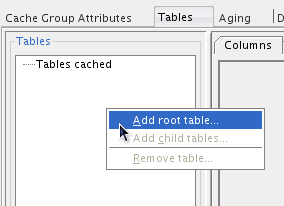
A cache group is a collection of cache tables related to each other by foreign key constraints. The screen defines the tables to be cached.
|
5. |
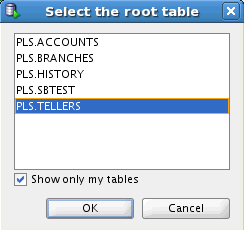
Select PLS.TELLERS and click OK.
|
6. |
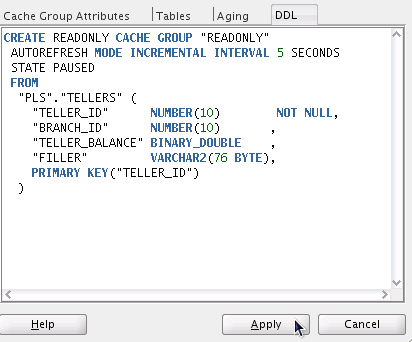
Click on the DDL tab to view the corresponding CREATE CACHE GROUP statement for the current cache group.
|
7. |
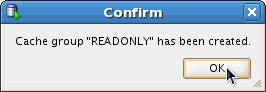
Click OK to close the confirmation dialog box.
|


Create an Asynchronous Writethrough (AWT) Cache Group
Asynchronous Write-through cache group specifies the tables cached from the Oracle database are for read/write transactions in the cache, committed transactions are asynchronously propagated to the Oracle database
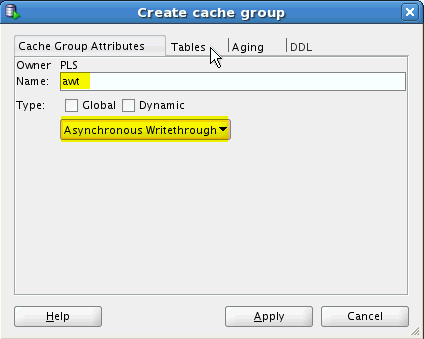
To create an AWT cache group based on the PLS.SBTEST table using the Create cache group dialog in SQL Developer, perform the following steps:
1. |
Go back to the connections navigator. Click on the + sign next to the connection plsqldb to expand out the connection, if not already expanded.
|
2. |
Right click on Cache Groups and select New Cache Group. This brings up the Create cache group dialog box.
|
3. |
Enter awt into the Name field.
|
4. |
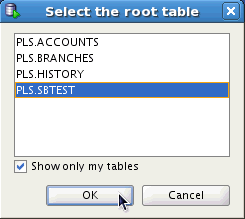
The screen defines the tables to be cached. Right click in "Tables cached" and select Add root table. This brings up a dialog box with a listing of the tables belonging to the user PLS.
|
5. |
Select PLS.SBTEST and click OK.
|
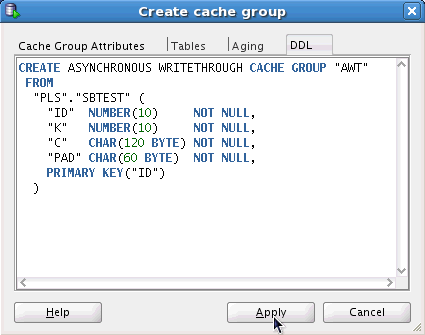
6. |
Click on the DDL tab to view the corresponding CREATE CACHE GROUP statement for the cache group.
|
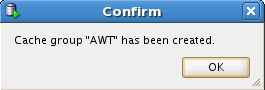
7. |
Click OK to close the confirmation dialog box.
|
8. |
Expand Cache Groups to verify the two cache groups have been created. If necessary, click on the icon Refresh to refresh the connections navigator.
|
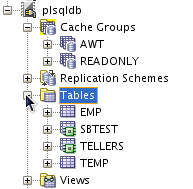
9. |
Expand Tables to view the tables in the in-memory database.
|
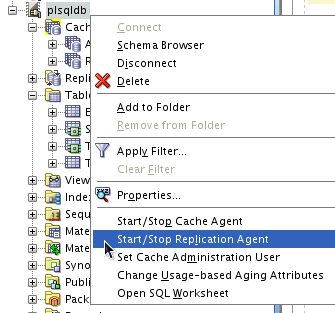
Start the Replication Agent
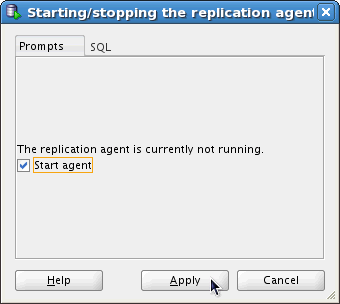
1. |
To enable the propagation of AWT data between the cache tables and the Oracle database, the replication agent must be running. Right-click on the connection plsqldb in the connections navigator, and select Start / Stop Replication Agent.
|
2. |
Check the Start agent checkbox and click Apply. This starts up the replication agent for plsqldb.
|
Loading Data into Cache Groups
Data from the Oracle database can be preloaded into a cache group. Depending on the cache group type, an optional WHERE condition can also be specified to restrict or partition the data to be cached. In this topic, you will use SQL Developer to preload the cache groups.
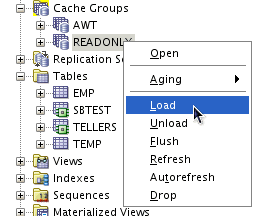
Preload Data into a Read-only Cache Group
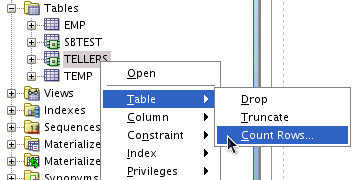
1. |
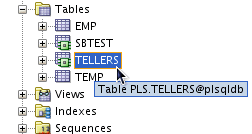
Let's check the content in the TELLERS cache table.
|
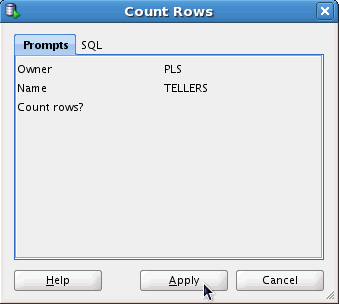
2. |
Click Apply to execute the Count Rows operation.
The TELLERS cache table has been created, but the table is empty. Click OK to close the dialog.
|
3. |
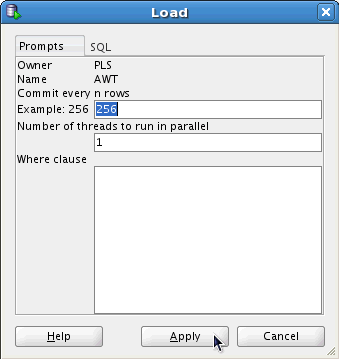
To load data into PLS.TELLERS, perform the following steps.
|
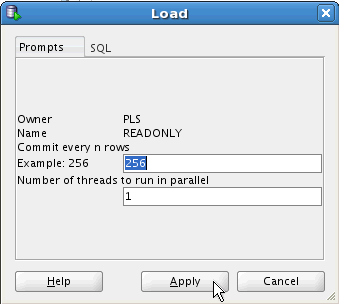
4. |
Click Apply to load all the tellers records from PLS.TELLERS into plsqldb.
|
5. |
Repeat the Count Rows operation. Right click on table TELLERS and select Table -> Count Rows , then click Apply.
|
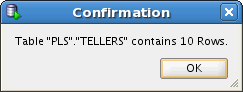
6. |
This time, it should return 10 rows. Click OK to continue.
|

Preload data into an Asynchronous Writethrough Cache Group
1. |
To load data into SBTEST, perform the following steps.
|
2. |
Click Apply to load all the records from the Oracle table PLS.SBTEST into plsqldb.
|
Showing Cache Data Synchronization with the Oracle Database
In this topic, you will verify the synchronization of data between the cache tables and their counterparts in the Oracle database.
Demonstrate Automatic Refresh of data in a Read-only cache group
1. |
Go to the connections navigator and expand the connection plsqldb, if not already expanded.
|
2. |
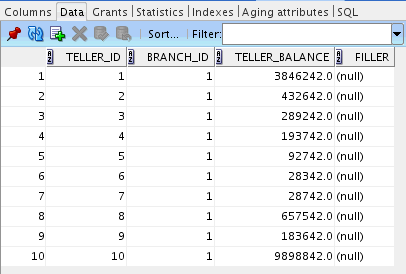
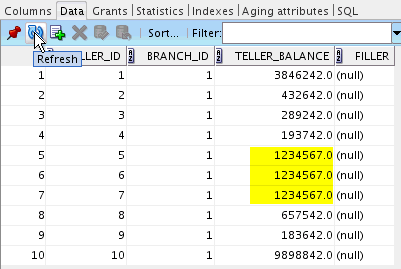
Click on the Data tab and view records cached in the TELLERS table.
|
3. |
We will now make updates to the TELLERS table in Oracle, and check for changes to be refreshed to plsqldb.
|
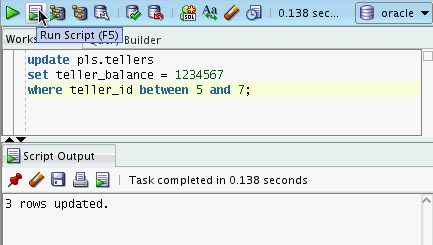
4. |
Enter the following SQL statement into SQL Worksheet, and click Run Script (F5) to execute it.
The Script Output pane confirms 3 records have been updated.
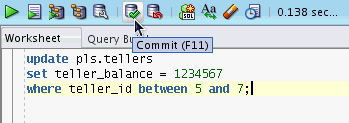
|
5. |
Click on Commit (F11) to commit the updates.
|
6. |
Go back to the data tab showing the TELLERS table in plsqldb, click Refresh to see the changes automatically updated in the cache table.
|
7. |
Close the TELLERS tab by clicking on the button X.
|
Demonstrate data propagation from cache database to Oracle database in an AWT cache group
1. |
PLS.SBTEST table has been configured as a write-through cache table in plsqldb, all updates are asynchronously write-through to the Oracle database after the transactions are committed in the cache database.
|
2. |
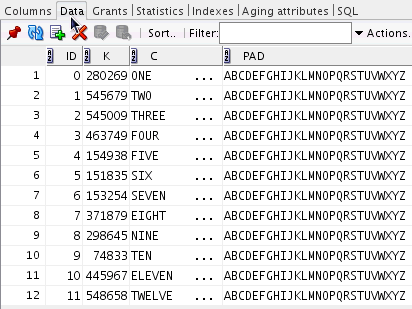
Click on the Data tab and view records cached in SBTEST.
|
3. |
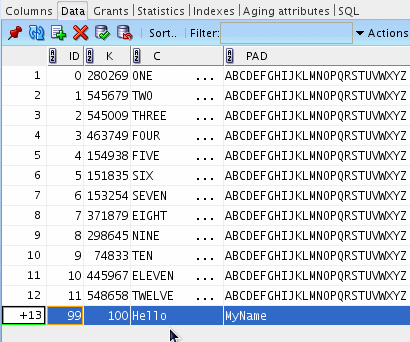
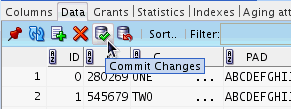
Click on the icon Insert Row under the Data tab. This will create a new row in the data editor.
|
4. |
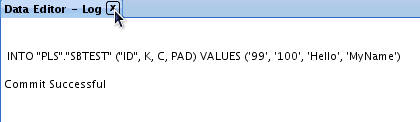
Double click into the ID field, and enter the following data into the data editor. ID = 99
|
5. |
Click the icon Commit Changes to commit the row to the database. The Data Editor - Log displays the outcome of the commit operation. Mouse over the Data Editor - Log tab, click on the X button to close the tab.
|
6. |
Let's go back to the Oracle database and verify the insert has been committed to Oracle.
|
7. |
Click on the Data tab and look for the newly inserted record. (Note that the newly inserted record is not necessarily shown as the 13th record.) As expected, the update from the TimesTen cache table has propagated to the Oracle database. This is the result of the SBTEST table being cached in TimesTen as an updatable cache table via asynchronous writethrough cache. Any updates that occur in the TimesTen cache table are automatically propagated to the Oracle database.
|
8. |
Close the SBTEST tab by clicking on the button X.
|


Running a PL/SQL Package with Cursors and Collections Support
Commonly used PL/SQL features such as parameterized cursors, ref cursors, PL/SQL types (records and tables), dynamic and static SQL and the returning into clause are all supported in TimesTen.
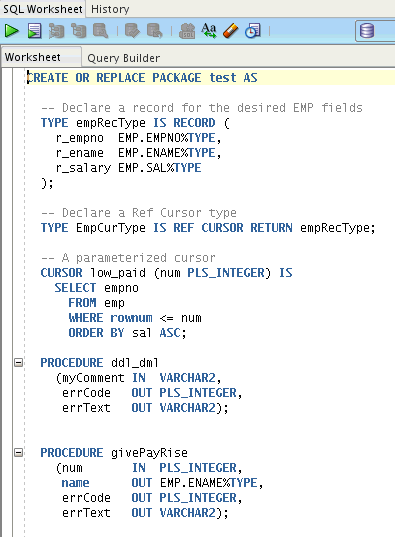
In this topic you will create, and run a stored package TEST which contains the following procedures.
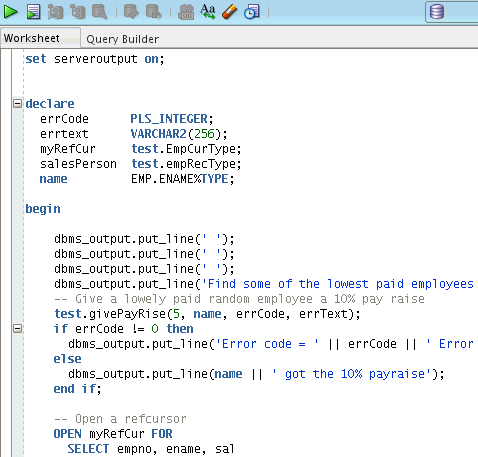
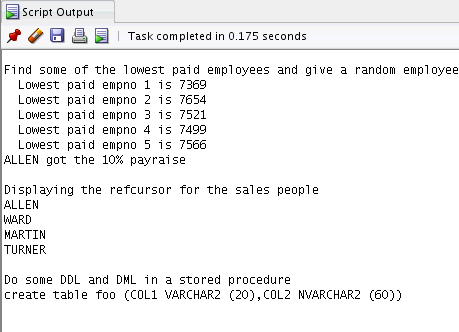
- Procedure test.givePayRise finds a variable number of the lowest paid employees in the EMP table, and randomly selects one of them to get 10% pay raise. The procedure uses a parameterized CURSOR, a PLSQL array (table of numbers), the DBMS_RANDOM function, LOOPs and an UPDATE statement with RETURNING INTO logic.
- Procedure test.ddl_dml shows the use of dynamic SQL to create a table, a sub block, custom exception handlers and static SQL (insert + commit).
- Procedure test.getCommEmps uses a ref cursor to show the sales people in the EMP table. The opened ref cursor is passed as an input parameter to the getCommEmps procedure. The procedure displays the result of the ref cursor and then closes the ref cursor.
Create and compile a stored package using SQL Worksheet
1. |
Click on Open to bring up the Open File dialog box. Select the script 2_package.sql from the plsql_sql folder and click Open. We will use the script to create the package in SQL Developer.
|
2. |
The file contains the CREATE PACKAGE statement for the package test.
|
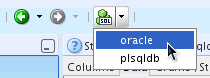
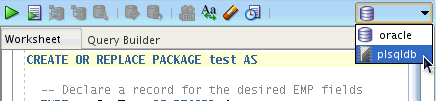
3. |
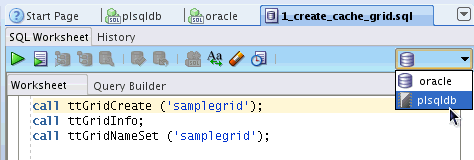
Go to the Worksheet connection drop down list on the right, and select plsqldb as the database connection.
|
4. |
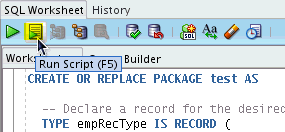
Click Run Script to create the test package in the plsqldb database.
|
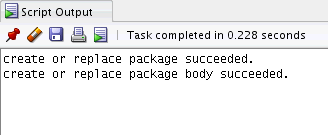
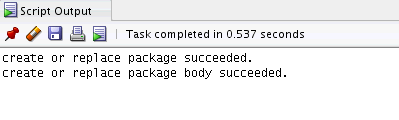
5. |
The result from CREATE PACKAGE is displayed in the Script Output Pane.
|
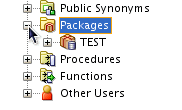
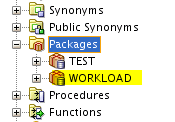
6. |
Go back to the connections navigator, click on the + sign next to Packages on plsqldb to confirm TEST has been created.
|
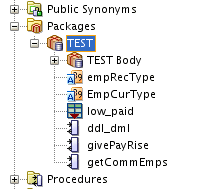
7. |
Click on the + sign next to TEST to view the objects belonging to this package.
|

Run a PL/SQL program which calls the stored package TEST
1. |
Click on Open to bring up the Open File dialog box. Select the script 3_call_package.sql from the plsql_sql folder and click Open. This is a script that we invoke the code in the TEST package.
|
2. |
Review the code in SQL Worksheet.
|
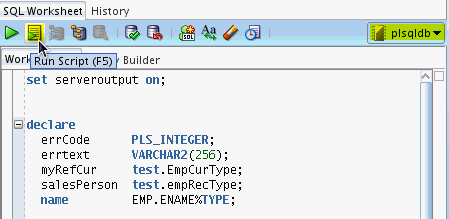
3. |
Change the SQL Worksheet connection to plsqldb and click Run Script.
|
4. |
The result from running 3_call_package.sql is displayed in the Script Output pane.
|
5. |
Mouse over the redundant tabs in SQL Developer and click on the X button to close them. |
Creating and Running a PL/SQL Package against cache tables in TimesTen
This topic shows the benefits of running PL/SQL with In-Memory Database Cache as a cache in front of the Oracle Database.
In the Oracle database, we have an OLTP read / write intensive application, which is driven by a PL/SQL package called workload. The package performs the following read / write operations
- Read - “range query”, “sum query”, “ordered range query” and “range distinct query”.
- Write - “update by PK”, “updates by non index column”, “delete” and “insert”.
Since the workload is SQL processing intensive and we are running the code in-process with the application, the resulting response time improvement should be noticeable. However, that said, the lab environment here is not set up for performance comparison because we are running both the Oracle Database and the TimesTen database in the same virtual machine. Thus, the results you see are for demonstration purpose only.
You will use SQL Developer to browse the PL/SQL package workload and the tables in the Oracle database. Then, create the identical PL/SQL package inside the TimesTen database and run the workload in TimesTen.
Show tables and PL/SQL subprograms in the Oracle database
1. |
Go back to the connection navigator. Click on the + sign next to the connection oracle to expand all the database objects, if not already expanded.
|
2. |
Expand Tables and view the tables in the Oracle database.
|
3. |
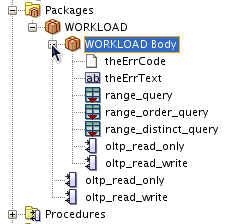
Expand Packages to view the PL/SQL package WORKLOAD.
|
4. |
Close any opened WORKLOAD tabs on the right. |
Create package and run OLTP workload in the cache database
1. |
Note: We have already created SBTEST as a cache table in a previous topic "Create Cache Groups". We will now create the same package in plsqldb, and then run the same workload transactions in the cache database.
|
2. |
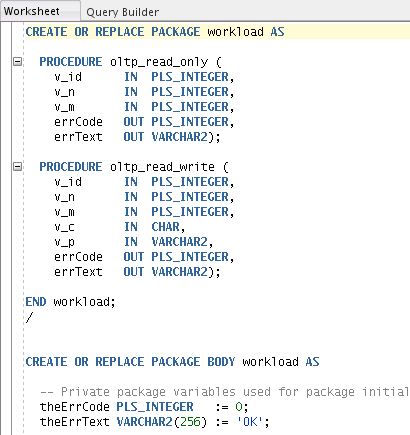
Review the package code; it is the same package as the one in the Oracle database.
|
3. |
Go to the Worksheet connection drop down list on the right, and select plsqldb as the database connection.
|
4. |
The result from running the script is displayed in the Script Output Pane.
|
5. |
Go back to the connections navigator, click on the + sign next to Packages on plsqldb to confirm WORKLOAD has been created. If needed, click on Refresh to see the new package.
|
6. |
Click on Open to bring up the Open File dialog box.
|
7. |
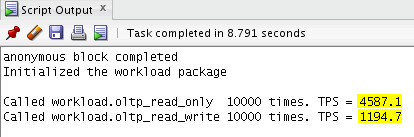
Review the PL/SQL code in the Worksheet.
The PL/SQL code calls the oltp_read_only and oltp_read_write procedures 10,000 times and measures the elapsed time for performing the operations.
|
8. |
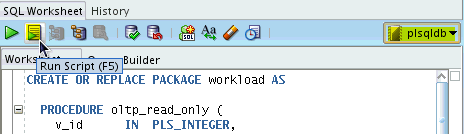
Change the SQL Worksheet connection to plsqldb and click Run Script to run this program against the cache database.
|
9. |
The results from running 5_call_workload.sql are displayed in the Script Output pane.
To run the same program against the Oracle database, just change the SQL Worksheet connection to oracle and click Run Script. The following screenshots show an example of running the same program against Oracle database.
|
10. |
Mouse over the redundant tabs in SQL Developer and click on the X button to close them. |


Using ttIsql for PL/SQL Development
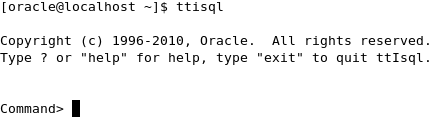
ttIsql is an interactive SQL command line utility that allows developers to execute SQL statements to create, view, compile and run PL/SQL subprograms. Similar to SQL*Plus, ttIsql can also be used by database administrators for manage their databases. In this topic, you will use ttIsql to browse the PL/SQL subprograms that were created in the previous sections, and run a PL/SQL program to execute the workload package in TimesTen.
1. |
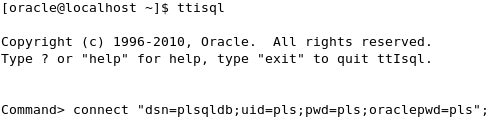
Double click on the Terminal desktop icon and enter ttIsql at the OS command prompt to start ttIsql.
|
2. |
Enter connect "dsn=plsqldb; uid=pls; pwd=pls; oraclepwd=pls"; at the ttIsql command prompt.
This will establish a connection to the plsqldb database as user pls.
|
3. |
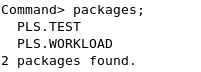
Use the ttIsql commands packages to list all the packages owned by the user pls.
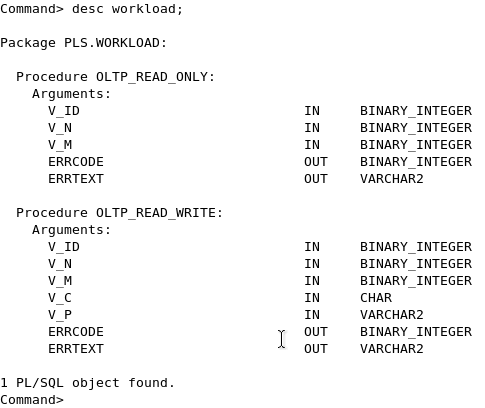
Use the desc command to see the procedures and their parameters defined in the package workload.
|
4. |
Run the PL/SQL program 5_call_workload.sql in ttIsql to execute the workload package
created in the previous section.
|
5. |
The output shows the number of transactions per second (TPS) achieved by running the PL/SQL workload against the in-memory cache database.
|
6. |
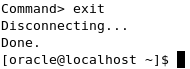
Exit out of ttIsql by entering exit on the ttIsql command line.
|


Removing Cache Groups (optional)
In this topic you will learn how to remove the cache groups that were created in this tutorial.
Note that this section is to clean up the environment you have just created. You may skip this optional section.
Stop the Replication Agent
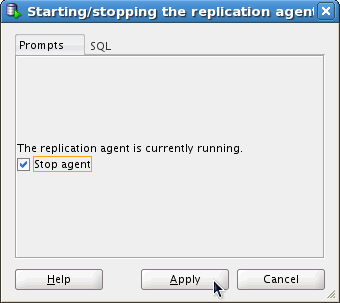
1. |
To disable the propagation of AWT data from the cache tables to the Oracle database, the replication agent must be stopped. Right-click on the connection plsqldb in the connections navigator, and select Start / Stop Replication Agent.
|
2. |
Check the Stop agent checkbox and click Apply.
|
Drop Cache Groups
Perform the following steps to remove the 2 cache groups that were created earlier:
1. |
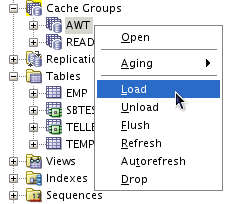
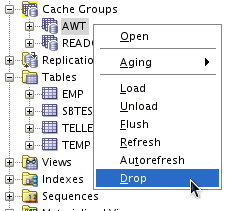
Click on the + sign next to Cache Groups to expand out the cache groups in plsqldb, if not already expanded.
|
2. |
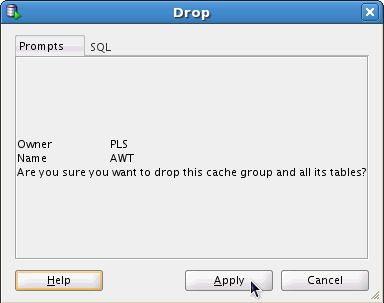
Right click on the cache group AWT and select Drop. This brings up the Drop cache group dialog box.
|
3. |
Click Apply to drop the cache group. Click OK to close the confirmation dialog box.
|
4. |
Repeat step 2 and step 3 on cache group READONLY , to remove the remaining cache group from plsqldb.
|
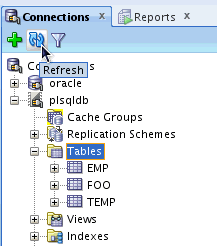
5. |
Expand Tables to verify the cache tables TELLERS and SBTEST have been removed. If necessary, click on the icon Refresh to refresh the connections navigator.
|
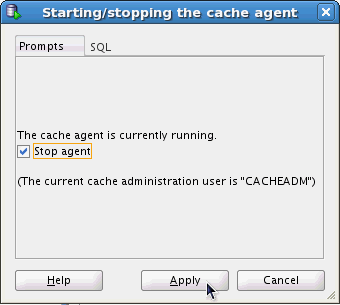
Stop the Cache Agent
1. |
Right-click on the connection plsqldb in the connections navigator, and select Start / Stop Cache Agent.
|
2. |
Check the Stop agent check box and click Apply. This stops the cache agent on plsqldb.
|
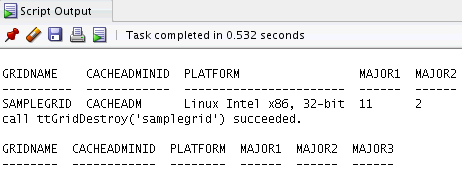
Run a SQL script to remove the Cache Grid
1. |
Click on Open to bring up the Open File dialog box.
|
2. |
The content of this file appears in a SQL Worksheet tab. Review the code.
|
3. |
The result from running the script is displayed in the Script Output Pane. The cache grid samplegrid has been removed.
|
4. |
Select File -> Exit to close SQL Developer.
|

Summary
In this lesson, you learned how to:
| Create a SQL Developer connection to a TimesTen In-Memory databases | ||
| Define cache groups to cache Oracle tables using SQL Developer | ||
| Load data from Oracle tables into Cache Groups | ||
| Create and view PL/SQL subprograms inside a TimesTen in-memory database using SQL Developer | ||
| Compile and run PL/SQL subprograms using SQL Developer | ||
| Browse, compile and run PL/SQL subprograms using SQL Developer | ||
| Browse and run PL/SQL subprograms using ttIsql | ||
Related Information
To learn more about In-Memory Database Cache and PL/SQL you can refer to:
| Oracle In-Memory Database Product Center on OTN - http://www.oracle.com/technology/products/timesten/imdb_cache | ||