Before You Begin
Purpose
This document walks through the installation process used for creating the Oracle GoldenGate (OGG) Veridata and Monitor Fusion Middleware (FMW)12.1.3 demo VM. First, we start with some public resources that includes where to download what. Then we show the four commands used to install everything for this release (not including the pre-installed OS and the databases.) Next we show the screen shots of all of the Oracle Universal Installer (OUI) steps. Finally, in the last section, there is a more detailed view of which files need to be edited, what settings to use, and how to start everything.
Time to Complete
Approximately 1 hour
Background
Scenario
For proof-of-concept, you will install everything on one host. In real life, it would likely be three or four separate hosts: source database, target database, and the repository database with WebLogic Server installed.
Context
After completing this OBE, you might want to take more GoldenGate training and/or more WebLogic training.
What Do You Need?
Install and Configure the Back End
It is just four things (plus JDK 1.7 and preferably an Oracle Database). After this you move to a few small steps in configuring the agents and optionally a couple of things for Monitor Server.
-
WebLogic Server + Infrastructure file needed for OGG. Yes, this includes WebLogic Server 12.1.3. Or you can use it to install just the infrastructure (formerly known as JRF) files on top of an existing 12.1.3 WLS install. Invoke this by using the command:
java -jar fmw_12.1.3.0.0_infrastructure.jar -
OGG Veridata Server + Veridata Agent + Monitor Server + Monitor Agent. It is one big jar file, and works on all supported platforms except NonStop. Choose any combination you want. For this tutorial, the choice was "complete" to get everything installed in one pass. Invoke this by using the command:
java -jar fmw_12.1.3.0.0_ogg.jar -
Run the Repository Creation Utility (RCU). It gets installed as part of the WLS+JRF install above. You can run it once for all products (WLS, Veridata, and Monitor.) The location in this demo (and the sample VM) is:
/u01/app/oracle/product/wls/oracle_common/bin/rcu -
Configure WLS, Veridata, and Monitor domains. You can run this once for all products. Invoke this by using the command:
/u01/app/oracle/product/wls/oracle_common/common/bin/config.sh -
When everything is all completed and all servers have been started, you should see this:
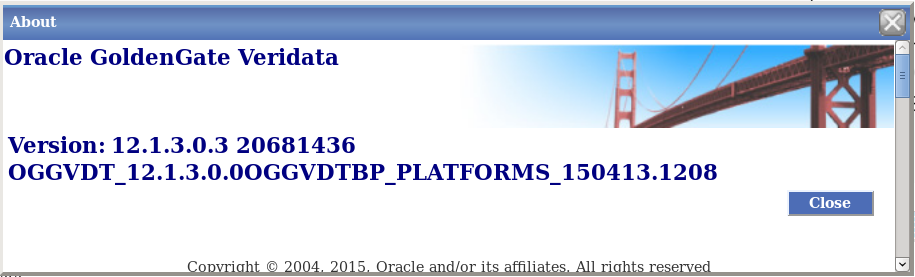
Description of this image There may be a later patch version by the time you run this tutorial.
Installing FMW Infrastructure
Notice that this installs both WebLogic Server (WLS) and the Oracle Fusion Middleware (FMW) Infrastructure.
-
Open a terminal session. Invoke the installer by entering:
java –jar fmw_12.1.3.0.0_infrastructure.jar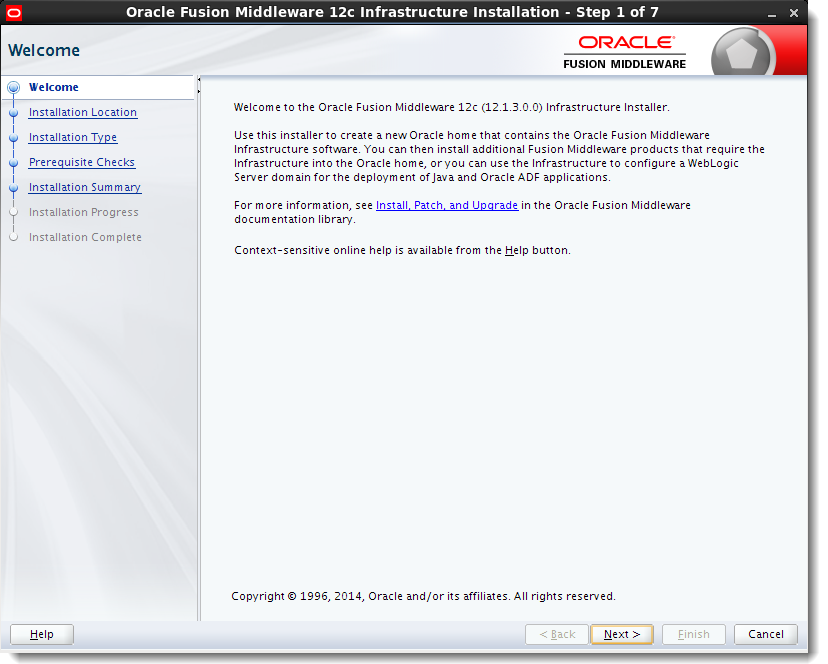
Description of this image Click to continue.
-
Enter a location for Oracle Home to store the binary files.

Description of this image Click to continue.
-
Select either installation type, with or without examples. Notice at the bottom that WLS is going to be installed.

Description of this image Click to continue.
-
Wait for the progress bar to reach 100%. The minimum Java version that it is looking for is greater than 1.7.
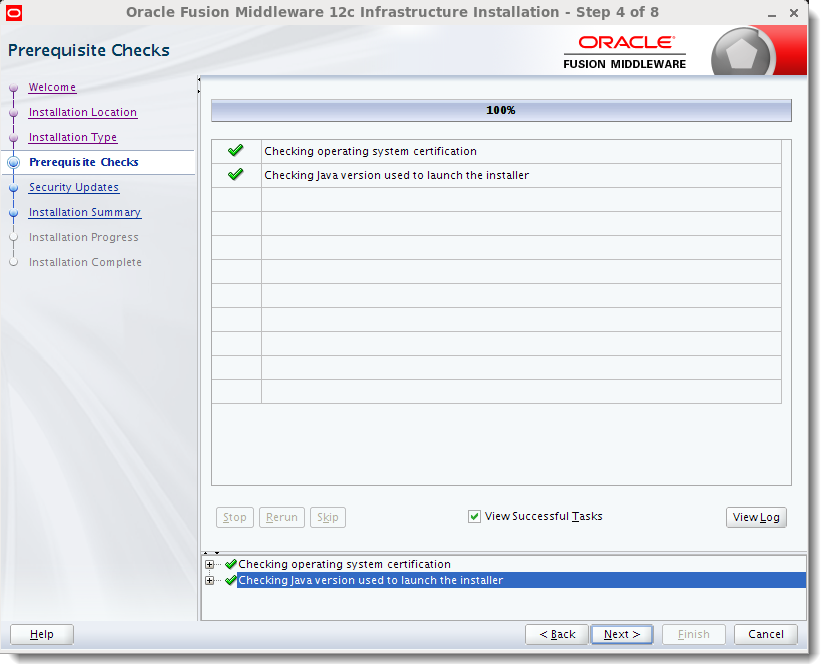
Description of this image Click to continue.
-
If you want to enter your email, you may. Otherwise, accept the warning that it is blank.

Description of this image Click to close the warning. Click to continue.
-
There is nothing to do on this panel, just accept the defaults.

Description of this image Click to continue.
-
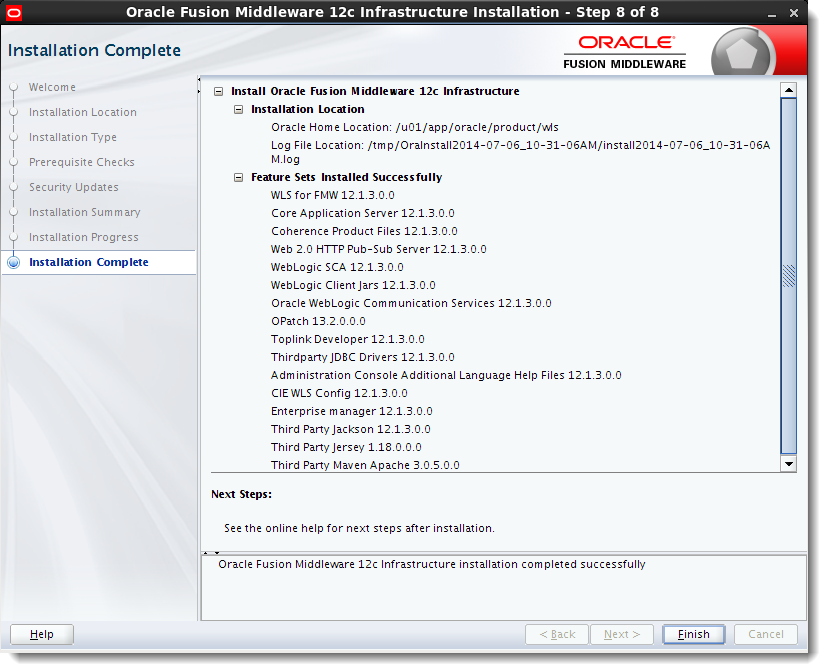
Wait for the progress bar to reach 100%. You can optionally view the logs.

Description of this image Click to continue.
-
There is nothing to do on this panel, just accept the defaults.
Description of this image Click to continue.
Installing Veridata and Monitor
Notice that this Installer has the option to install either Oracle GoldenGate Veridata and/or the Oracle GoldenGate Monitor. This tutorial will choose to install both.
-
Open a terminal session. Invoke the installer by entering:
java -jar fmw_12.1.3.0.0_ogg.jar
Description of this image The splash screen will go away by itself when the progress bar reaches 100%.
-
There is a patch available for at least version 12.1.3.0.3. See My Oracle Support for information on how to download and install the patch after installing this base code.

Description of this image Click to continue.
-
Enter the same Oracle Home you entered in the previous section, step 2.
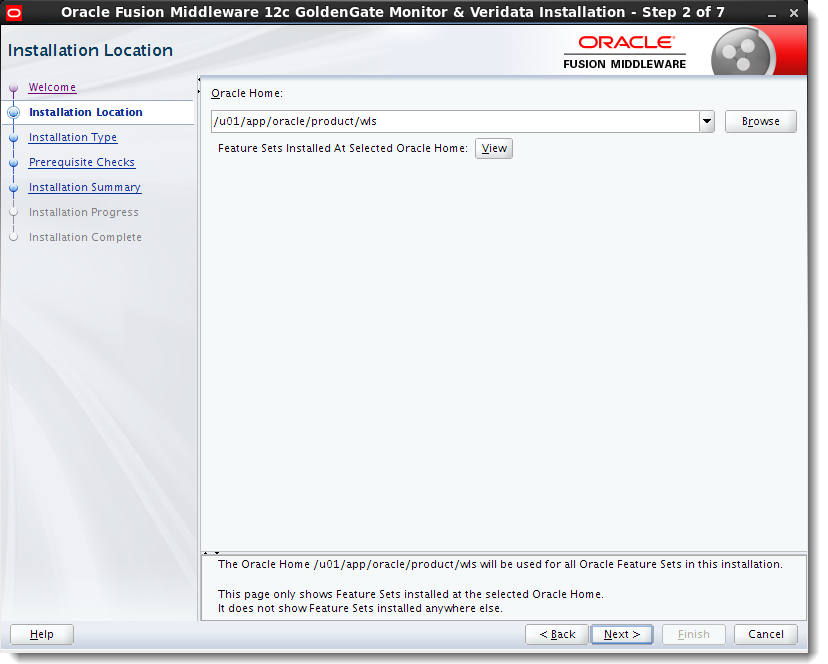
Description of this image Click to continue.
-
Select which pieces of Oracle GoldenGate you would like to install, or select Complete install to get them all.

Description of this image Click to continue.
-
Wait for the progress bar to reach 100%. The minimum Java version that it is looking for is greater than 1.7.

Description of this image Click to continue.
-
There is nothing to do on this panel, just accept the defaults.
Description of this image Click to continue.
-
Wait for the progress bar to reach 100%. You can optionally view the logs.

Description of this image Click to continue.
-
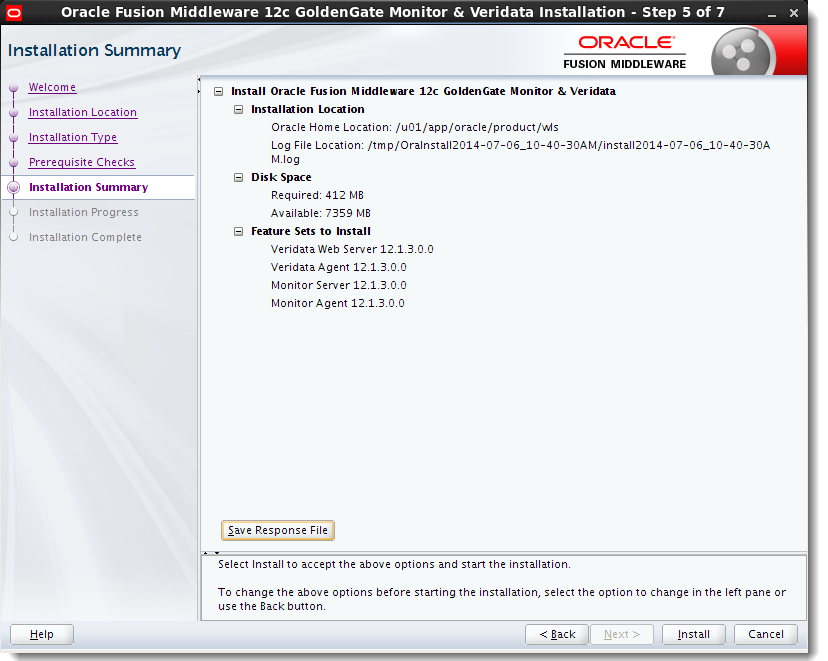
There is nothing to do on this panel, just accept the defaults.

Description of this image Notice it tells you that the next steps are to run RCU and then to run Configuration Wizard. Click to continue.
Configuring RCU
The Repository Creation Utility (RCU) presumes that you have already installed a compatible database to house the repository. This example will assume that it is an Oracle 12c Database.
-
Open a terminal session. Invoke the RCU by entering:
/u01/app/oracle/product/wls/oracle_common/bin/rcu
Description of this image Click to continue.
-
The default is Create Repository with System Load and Product Load.

Description of this image Click to continue.
-
Enter the appropriate information to log in to your database with full privileges.

Description of this image Click to dismiss Checking Prerequisites. Click to continue.
-
If this is the first time you have run RCU, then the only option is to create a new prefix. If you have run RCU in the past, then it will increment the new prefix to be one more than the last existing one, for example,
DEV2orDEV3. You can override the suggestion.Select Oracle GoldenGate, Veridata Repository.
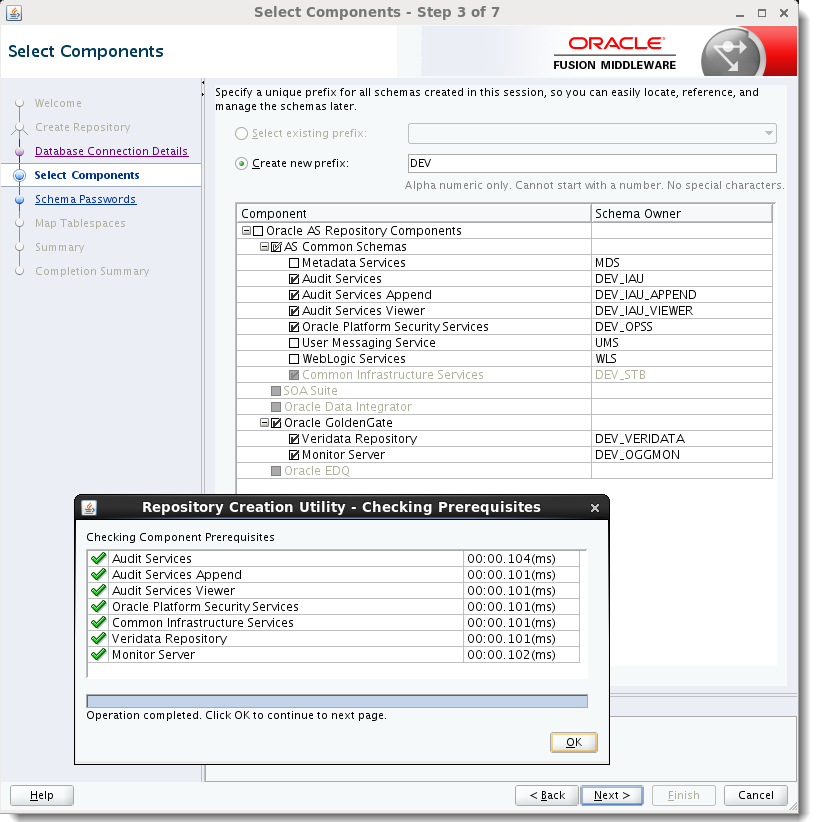
Description of this image Click to dismiss Checking Prerequisites. Click to continue.
-
Enter the same password twice. Many of the sample VM databases use oracle (all lower case) as the default password for all schemas.

Description of this image Click to continue.
-
Accept the default tablespace allocations.

Description of this image Click on the Confirmation.
-
(same screen)

Description of this image Click to dismiss Creating Tablespaces. Click to continue.
-
There is nothing to do on this panel, just accept the defaults.

Description of this image Click to continue.
-
There is nothing to do on this panel, just accept the defaults. You can optionally view the logs.

Description of this image Click to continue.
Creating the Domain
The Configuration Wizard can either create a new domain or extend an existing domain. This example will assume you are creating a new domain.
-
Open a terminal session. Invoke the Configuration wizard by entering
/u01/app/oracle/product/wls/oracle_common/common/bin/config.sh
Description of this image Stay on this screen. Notice that Basic WebLogic Server Domain is pre-selected.
-
Select Veridata Standard Server Domain and optionally OGG Monitor Server. This will cause additional options to be selected automatically. If Oracle JRF is not auto-selected, then you did not install the Infrastructure correctly.

Description of this image Notice the title bar "page x of 8" has changed to "page x of 11." It may change again! Click to continue.
-
Enter the same password twice. Complexity rules require a number or special character in the password. The sample VM uses weblogic1. Note the difference between the lowercase L in the middle and the numeral one at the end.

Description of this image Click to continue.
-
If you plan to use
localhost/127.0.0.1as the host name/address, you must select Development. In production you would not uselocalhost, but would use the real host name/address.
Description of this image Click to continue.
-
Fill in the Service, Host Name, Port, Schema, and Password. Click to continue.

Description of this image Click to continue.
-
Verify that the host names and passwords are all filled in.

Description of this image Click to continue.
-
The "Test Select Connection" happens automatically. Looking in the result log, make sure all six are successful.

Description of this image Click to continue.
-
This is only for OGG Monitor, not Veridata. Only passwords matter here. These are the passwords stored in the Monitor Server Oracle Wallet. Do not use
pw_server.shto reset. Use thewlstutility instead. These user names will be overridden in themonitor.propertiesfile.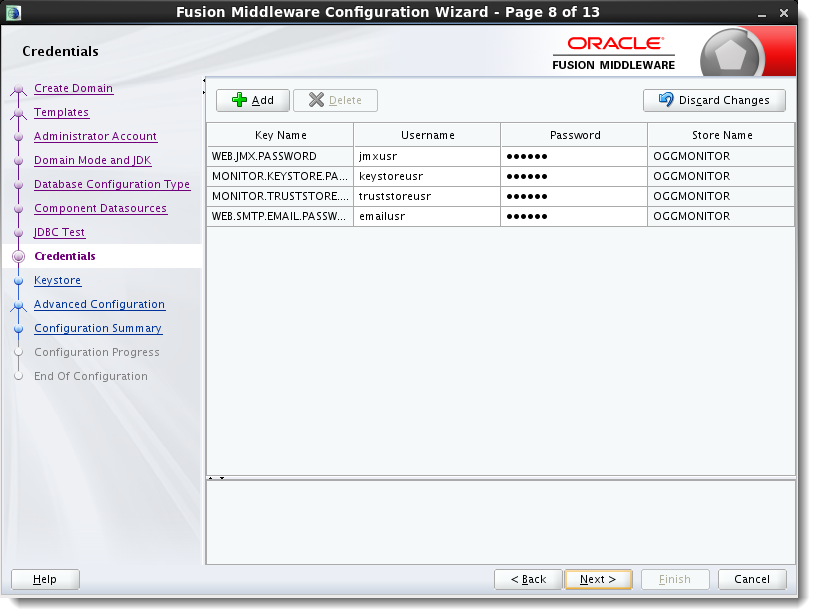
Description of this image Click to continue.
-
Enter the password.

Description of this image Click to continue.
-
Do not select any of the advanced options. (This is where you might configure clusters of servers if you needed to guarantee high availability using multiple hosts.)

Description of this image Click to continue.
-
There is nothing to do on this page. (It may be of interest to see where the Veridata server application is deployed. If you used clusters, you would deploy the application to the cluster, not to any one server.)

Description of this image Click to continue.
-
When the progress bar reaches 100%, it should say, "Domain Created Successfully!"

Description of this image Click to continue.
-
Note the URLs to use from a web browser to reach the WebLogic Administration Console. Often there are two: an http URL which is insecure, and an https URL which uses SSL for increased security.

Description of this image Click to continue.
Deploy Agents
It is presumed that the database is already installed and configured. It is presumed that the software distribution files have been downloaded and unzipped.
-
This is the script used to Install the FMW software.
########################################################## # Install ########################################################## # WebLog Server + Infrastructure files needed for OGG. java -jar fmw_12.1.3.0.0_infrastructure.jar # OGG Veridata + agent + Monitor + agent. java -jar fmw_12.1.3.0.0_ogg.jar # Repository Creation Utility; can run once for all products. /u01/app/oracle/product/wls/oracle_common/bin/rcu -
This is the script used to configure the FMW software.
########################################################## # Configure ########################################################## ########## # All ########## # Configure WLS, Veridata, and Monitor; can run once for all products. /u01/app/oracle/product/wls/oracle_common/common/bin/config.sh ########## # Veridata ########## # Veridata agents. Can run from anywhere, give destination as argument. /u01/app/oracle/product/wls/veridata/agent/agent_config.sh /u01/ogg/agents/veridata/agent1 # Should return, "Successfully deployed the agent." -
These are the changes made to the
agent.propertiesfile.cd /u01/ogg/agents/veridata/agent1 cp agent.proerties.sample agent.properties gedit agent.properties server.port=7850 database.url=jdbc:oracle:thin:@//localhost:1521:orcl server.driversLocation=/u01/app/oracle/product/12.1.0/dbhome_1/jdbc/lib server.jdbcDriver=odbc7.jarNo changes are needed to the
veridata.cfgfile. -
These are the changes needed for deploying Monitor, one for each OGG installation.
cd /u01/app/oracle.product/wls/oggmon/ogg_agent ./create_ogg_agent_instance.sh Please enter absolute path of Oracle GoldenGate home directory: /u01/ogg/replication/oggcore1 Please enter absolute path of OGG Agent instance: /u01/ogg/agents/oggmon/agent1 Successfully created OGG Agent instance. ./create_ogg_agent_instance.sh Please enter absolute path of Oracle GoldenGate home directory: /u01/ogg/replication/oggcore2 Please enter absolute path of OGG Agent instance: /u01/ogg/agents/oggmon/agent2 Successfully created OGG Agent instance. -
These are the changes to the
Config.propertiesfile for Monitor.gedit /u01/ogg/agents/oggmon/agent1/cfg/Config.properties gedit /u01/ogg/agents/oggmon/agent2/cfg/Config.properties diff /u01/ogg/agents/oggmon/agent1/cfg/Config.properties /u01/ogg/agents/oggmon/agent2/cfg/Config.properties < jagent.host=localhost > jagent.host=127.0.0.1 < jagent.jmx.port=5555 > jagent.jmx.port=5655 < jagent.rmi.port=5559 > jagent.rmi.port=5560 -
Setup Oracle Wallet for Monitor Agents.
/u01/ogg/agents/oggmon/agent1/bin/pw_agent_util.sh -create /u01/ogg/agents/oggmon/agent2/bin/pw_agent_util.sh -create Please create a password for java Agent: oracle Please confirm password for java Agent: oracle Please enter Monitor Server JMX password: oracle Please confirm Monitor Server JMX password: oracle Wallet created successfully. -
These are the changes to the
monitor.propertiesfile for Monitor.diff /u01/app/oracle/product/wls/ogg_domain/config/monitorserver/cfg/monitor.properties /u01/app/oracle/product/wls/ogg_domain/config/monitorserver/cfg/monitor.properties.orig < monitor.smtp.from=Oracle GoldenGate Monitor <oracle@localhost> > monitor.smtp.from=Oracle GoldenGate Monitor <> < monitor.smtp.host=localhost > monitor.smtp.host= < monitor.smtp.alerts.enabled=true > monitor.smtp.alerts.enabled=false < monitor.snmp.alerts.enabled=true > monitor.snmp.alerts.enabled=false < monitor.cli.alerts.enabled=true > monitor.cli.alerts.enabled=false -
All scripts are cerate in the
Desktop/directory purely for convenience.# Start WLS /u01/app/oracle/product/wls/ogg_domain/startWebLogic.sh# Start Veridata Server + Agent # Server only /u01/app/oracle/product/wls/ogg_domain/veridata/bin/veridataServer.sh start # Agent only /u01/ogg/agents/veridata/agent1/agent.sh start# Start Monitor Server /u01/app/oracle/product/wls/ogg_domain/startManagedWebLogic.sh MONITORSERVER_server1 http://localhost:7001# Start Monitor Agents ggsci> start jagent echo "start jagent" | $OGG_HOME/ggsci echo "start jagent" | $OGG_HOME2/ggsci
Want to Learn More?
-
Platform Support Matrix to see which platforms are supported (spreadsheet).
-
Video presentation for both Veridata and Monitor 12.1.3.
-
Courses offered by Oracle University.
Credits
-
Lead Curriculum Developer: Joe deBuzna
-
Other Contributors: Steve Friedberg