Before You Begin
Purpose
In this tutorial, you learn how to install and configure Oracle Mobile Security Suite (OMSS) with IDM LCM tool.
Time to Complete
Approximately 1.5 hours
Introduction
You can install and configure OAM and OMSS using Identity Management Provisioning tool or LCM (LifeCycle Management) tool sometimes also referred to as Oracle Identity and Access Management Deployment Repository. The advantage of this tool is that it automates all the steps of installing and configuring various products and performing transparent integration based on the topology selected. Oracle packages all the software required to automatically deploy, patch, and upgrade Oracle Identity and Access Management in a single software distribution known as the Oracle Identity and Access Management Deployment Repository. You need to configure Oracle Database separately, even though the database software is part of the Oracle Identity and Access management. deployment repository software binaries, it is not installed/configured using the tool.
When you download and unpack the archives for
Deployment Repository distribution, you end up with
a directory structure that contains a software
repository. Within this repository are all the
software installers required to install and
configure Oracle
Identity Management, as well as the installer for
Oracle Identity and Access Management Life Cycle
Management Tools.
The Oracle Identity and Access Management LCM tool automates all aspects of installing and configuring the software.
Following are high level steps of OMSS installation using IDMLCM:
- Download repository archive and unzip into REPOS_HOME. The repository contains installers for database, RCU, IAM suite, MSAS, OUD, jdk, Appdev, IDMLCM, SOA, WebGate, WebLogic, and webtier & Patches.
- Install IDMLCM using IDMLCM installer available under REPOS_HOME. You install this into IDMLCM_HOME.
- Use IDMLCM tool installed in the above step to install WebLogic, IDM products, OHS, Webgate and configure these products.
- This step creates IDMTOP/products in which all binaries are installed.
- Also creates IDMTOP/config in which domain, OUD, and OHS instances are created.
- OMSS+OAM and OMSS+OAM+OIM topologies are supported by IDMLCM.
Here is a diagram of the OAM-OMSS topology:
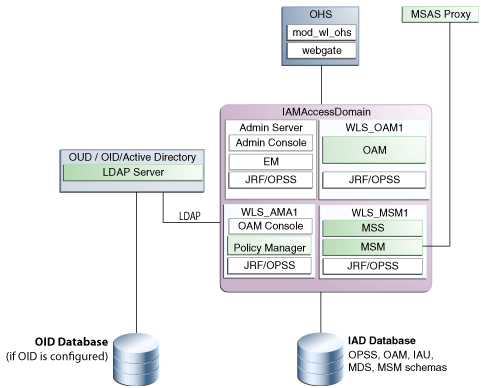
Make sure the Oracle Database is pre-created. We will be working on Oracle Linux 6 OS with at least 16 GB free memory (it is preferred to have more if possible).
Downloading Deployment Repository Software and Install IDM LCM Tool
Download Oracle Identity and Access Management Deployment Repository
-
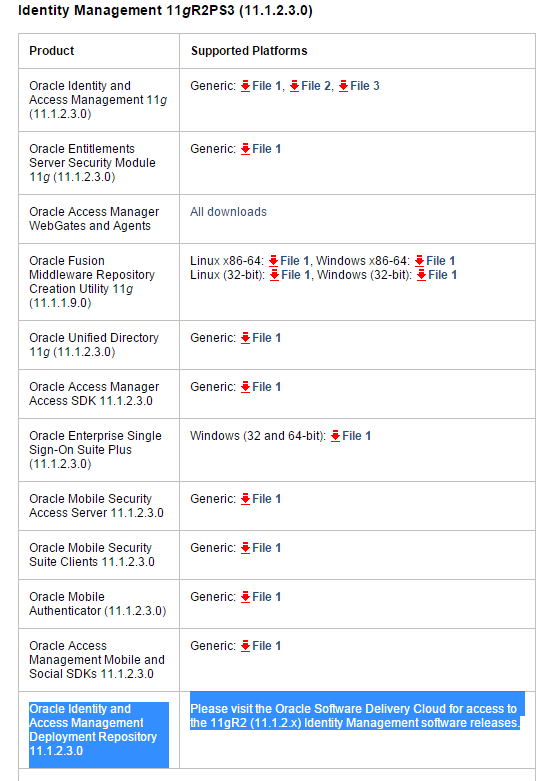
Navigate to OTN - otn.oracle.com or directly go to http://www.oracle.com/technetwork/middleware/id-mgmt/downloads/index.html, click on download link under 11g R2 Release (11.1.2.x). Accept the terms and click next to the link for Oracle Identity and Access Management Repository 11.1.2.3. It should redirect you to edelivery.oracle.com. Sign In and download the software.
-
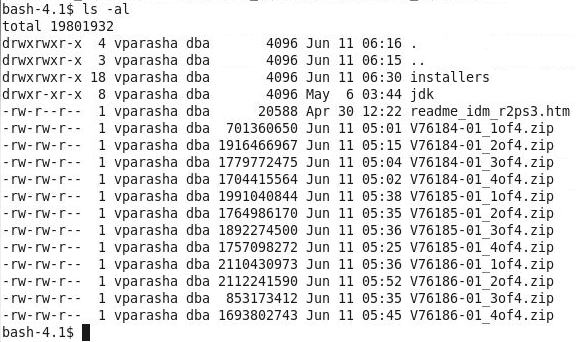
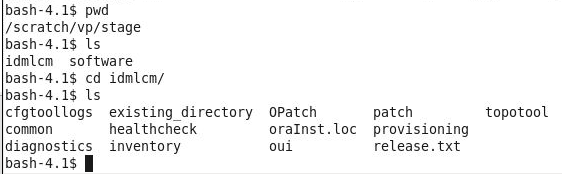
After downloading all the files, you should have following 12 zip files staged. Unzip the files and you will have one read me file along with two directories - installers and jdk. In our environment the software is staged under /scratch/vp/stage/software
-
On the terminal window set two environment variables:
export REPOS_HOME=/scratch/vp/stage/software
export JAVA_HOME=$REPOS_HOME/jdk
Install Oracle Identity and Access Management Lifecycle Tool
-
Install the LCM tools by running an installer, which is located in the Oracle Identity and Access Management deployment repository (REPOS_HOME). Before you begin, make sure two environment variables - REPOS_HOME and JAVA_HOME - are set on the terminal window.
To begin installing the tools, change to $REPOS_HOME/installers/idmlcm/Disk1 directory and start the installer and click Next on the Welcome screen:
cd $REPOS_HOME/installers/idmlcm/Disk1
./runInstaller -jreLoc $JAVA_HOME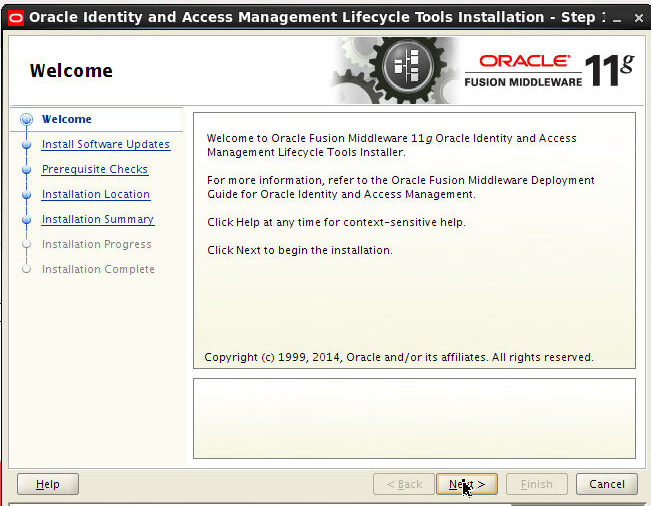
-
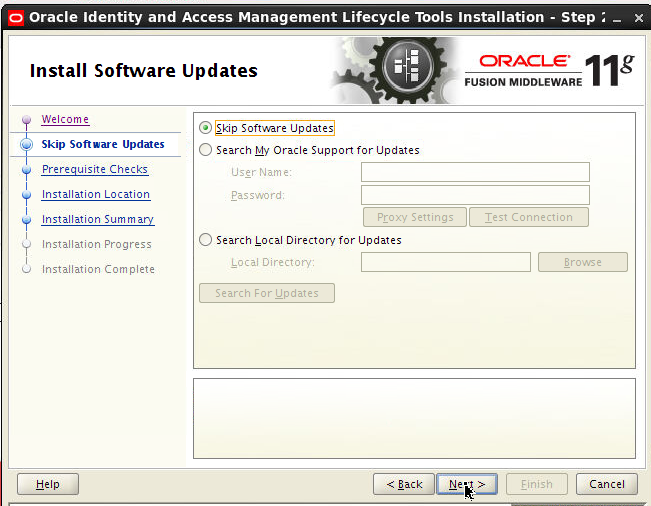
Skip Software Updates and Click Next.
-
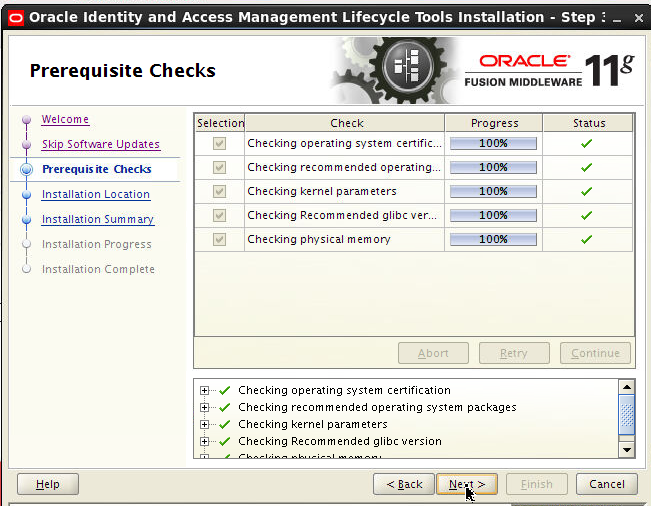
On Prerequisite screen, click Next.
-
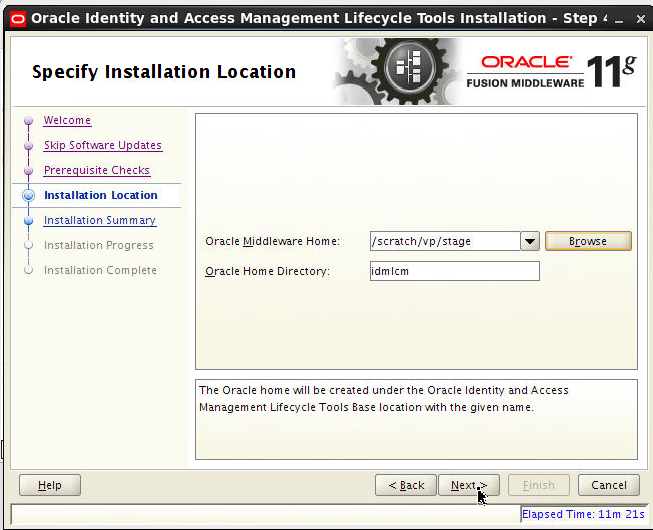
On the Installation Location screen, specify where you want to install IDM LCM tool.
-
On the Installation Summary screen, click Install.

-
On the Installation Progress screen, click Next :

-
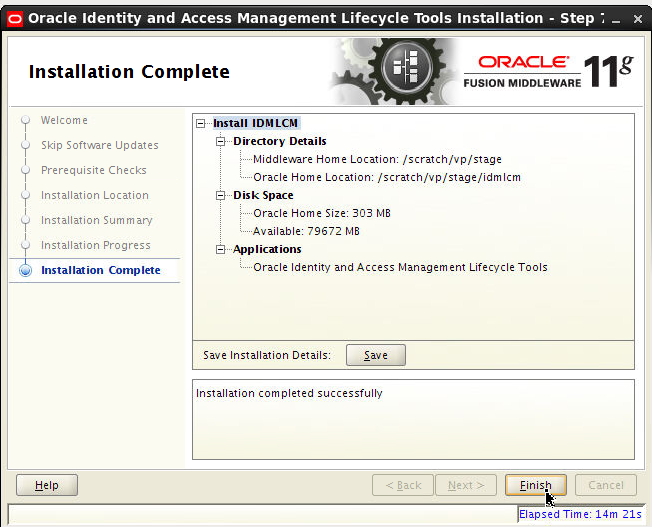
On the Installation Complete screen, Click Finish.
-
You can view the directory structure of IDM LCM tools directory.
-
Set a new environment variable on the same terminal window:
 export
                                      IDMLCM_HOME=/scratch/vp/stage/idmlcm
Running IDM LCM tool
Pre-requisite steps
Before you run the deployment wizard, change the following OAM database, system parameters:
-
Verify the following kernel parameters:
- shmmax = 2147483648
- soft nproc 4096
- hard nproc 4096
If using RHEL6 and above change it in
/etc/security/limits.d/90-nproc.conf
else change it in/etc/security/limits.conf
Reboot the machine. -
Set and verify the following database parameters:
- open_cursors 1600
- session_cached_cursors 500
- session_max_open_files 50
- sga_target 536879120 (min should be 4294967296 )
- pga_aggregate_target 104857600 (OPTIONAL)
- sga_max_size 4294967296
- memory_target=0 (OPTIONAL)
You can change the above database values using: - Processes = 500
- open_cursors = 1600
- session_cached_cursors = 500
- aq_tm_processes = 1
- dml_locks = 3396
- job_queue_processes = 1000
- session_max_open_files = 50
- sessions = 772
- sga_target = 536879120
- pga_aggregate_target = 104857600
- sga_max_size = 4294967296
sqlplus / as sysdba SELECT value FROM
v$parameter WHERE name =
‘<parameter_name>'; For example:
 SELECT value FROM v$parameter
                                  WHERE name = ‘open_cursors';
If the value of the parameter is less than the values mentioned above, modify the values using:
alter system set
                                  <parameter_name> = <value>
                                  scope=spfile
For example:
 alter system set
                                  open_cursors = 1600 scope=spfile
Verify the following database parameters:
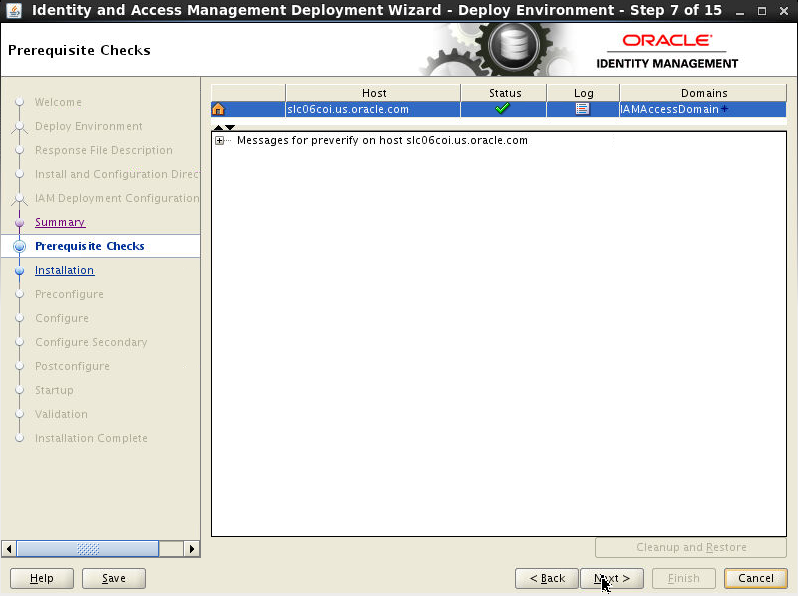
There are a number of pre-requisite checks during the preverify phase of the deployment wizard that are done and have to be successful before the wizard goes to the next phase - install. This is an illustration only (varies from environment to environment):
Whenever the tool run the
/scratch/vp/stage/idmlcm/healthcheck/bin/idmhc.sh
command, it generates XML and HTML reports
and a log file and checks for the following
settings in your environment.-
Checks OS and release: checks against certification matrix on OTN. In our case, Oracle Linux 6.5 64 bit.
-
Checks if the following ports are free - the ports mentioned in the provisioning.rsp file for example:
- 8989,
- 6703 OPMN Local port,
- 14150 OAM Policy mgr port,
- 6704 OPMN Remote port,
- 14151 OAM policy mgr SSL port,
- 7001 Admin Server port,
- 14180 OMSM port,
- 14181 OMSM SSL port,
- 5556 Node mgr port,
- 7777 OHS HTTP port,
- 14100 OAM port,
- 7779,
- 1389 OUD non-SSL port,
- 4443 OHS SSL port,
- 4444 OUD Admin listener port,
- 5575 OAM OAP port,
- 9002 OMSAS SSL port,
- 9001 OMSAS port,
- 9999 OHS admin SSL port
-
Checks the following free disk space:
- $SHARED_CONFIG_DIR - 3GB
- $IDM_TOP - 20GB
- $LCM_HOME/provisioning - 0.2 GB
- Temp space - 500 MB
- Swap memory - 512 MB
- Checks for free memory: 6GB minimum but 22 GB is recommended.
- Checks the host is reachable by pinging host
-
Checks for the supported JDK vendor and version.
- Confirms the following OS packages are
installed:
- binutils-2.20.51.0.2-5.36.el6.x86_64
- compat-libcap1-1.10-1.x86_64
- gcc-4.4.7-4.el6.x86_64
- gcc-c++-4.4.7-4.el6.x86_64
- libaio-0.3.107-10.el6.x86_64
- libaio-devel-0.3.107-10.el6.x86_64
- libgcc-4.4.7-4.el6.i686
- libstdc++-devel-4.4.7-4.el6.x86_64
- sysstat-9.0.4-22.el6.x86_64
- compat-libstdc++-33-3.2.3-69.el6.x86_64
- glibc-2.12-1.132.el6.x86_64
- libstdc++-4.4.7-4.el6.x86_64
- libXext-1.3.1-2.el6.i686
- libXtst-1.2.1-2.el6.i686
- xorg-x11-utils-7.5-6.el6.x86_64
- xorg-x11-apps-7.6-6.el6.x86_64
- xorg-x11-xinit-1.0.9-14.el6.x86_64
- xorg-x11-server-Xorg-1.13.0-23.el6.x86_64
- xterm-253-1.el6.x86_64
- openmotif-2.3.3-6.1.el6_4.i686
- openmotif22-2.2.3-19.el6.x86_64
- redhat-lsb-core-4.0-7.0.1.el6.x86_64
- Checks if the following paths have RWX
permissions:
- /scratch/vp/stage/lcmstoreloc
- $REPOS_HOME
- /scratch/vp/idmtop/config
- Run checks XClock.
Creating a Deployment Response File for OAM-OMSS Topology
- Make sure Oracle Database is up and running.
-
To start the Oracle Identity and Access Management Deployment Wizard, go to
$IDMLCM_HOME/provisioning/bindirectory. -
Make sure you are on the same terminal window where all the 3 previous environment variables have been set.
-
Run the following cmd:
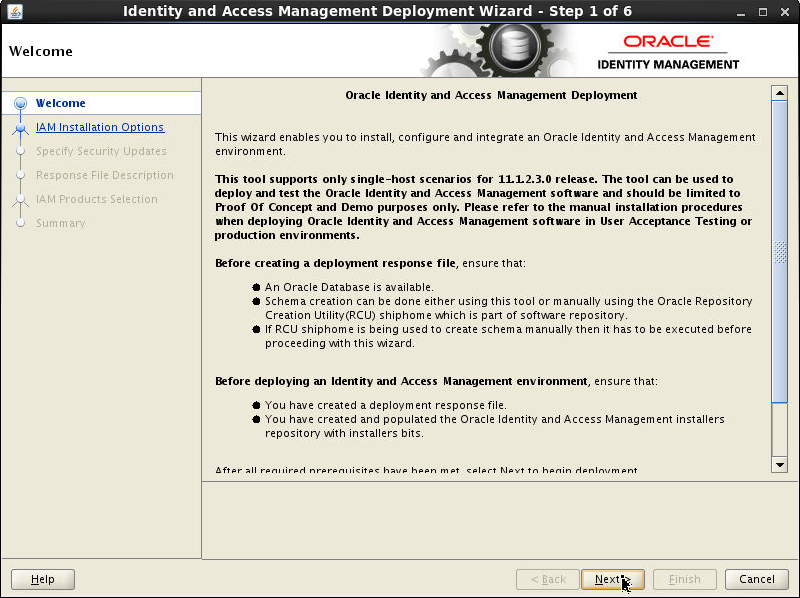
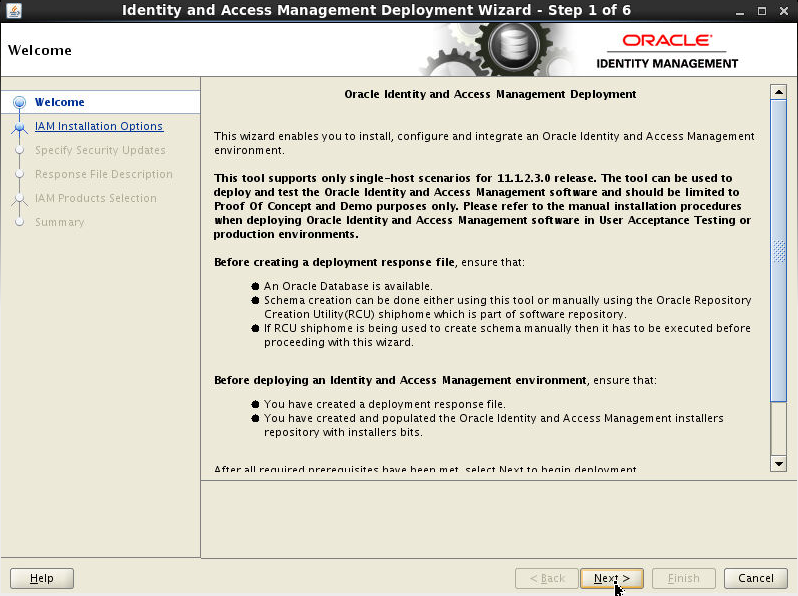
./iamDeplymentWizard.sh - On the Welcome screen, click Next.
-
On Choose IAM Installation Option screen, select Create a New Identity and Access Management Deployment Response File. Click Next.

-
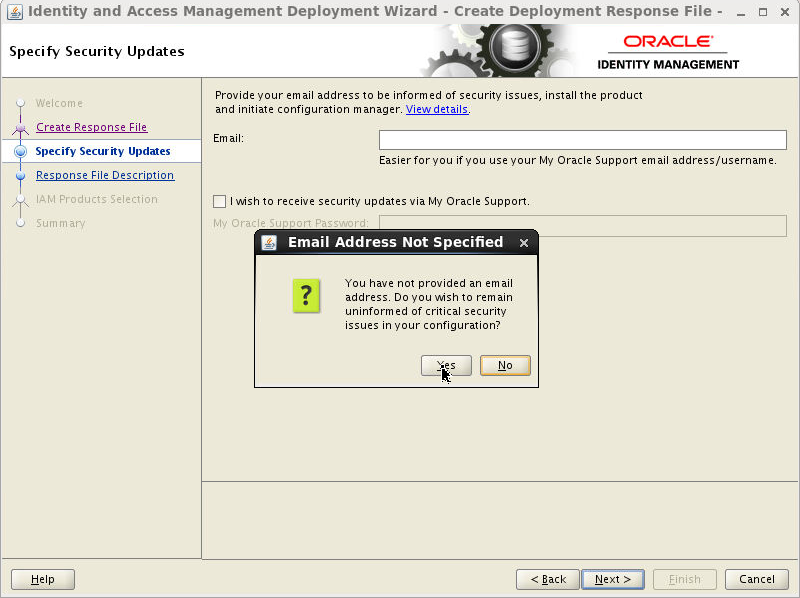
Use the Specify Security Updates screen to set up a notification preference for security-related updates and installation-related information from My Oracle Support. This information is optional. Here you can deselect I wish to receive security updates via My Oracle Support. Click Next.

-
On the Email Address Not Specified popup screen, click Yes.
-
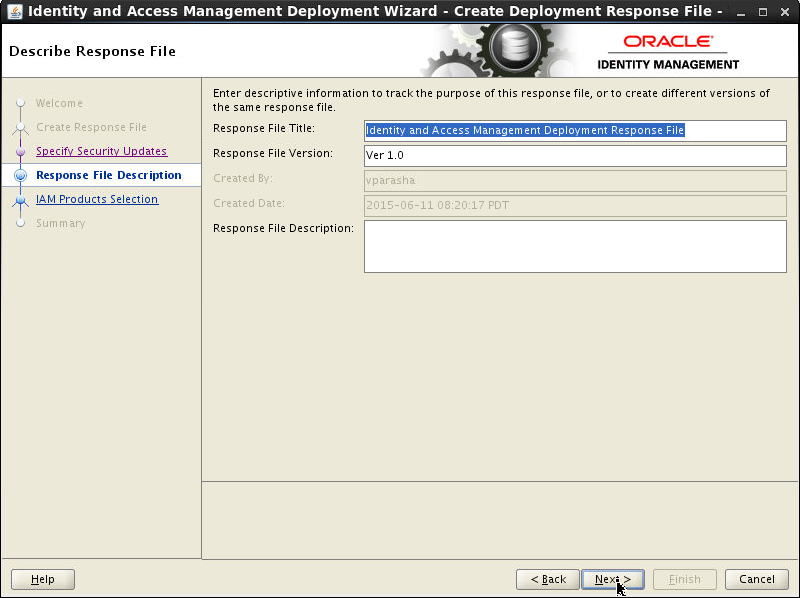
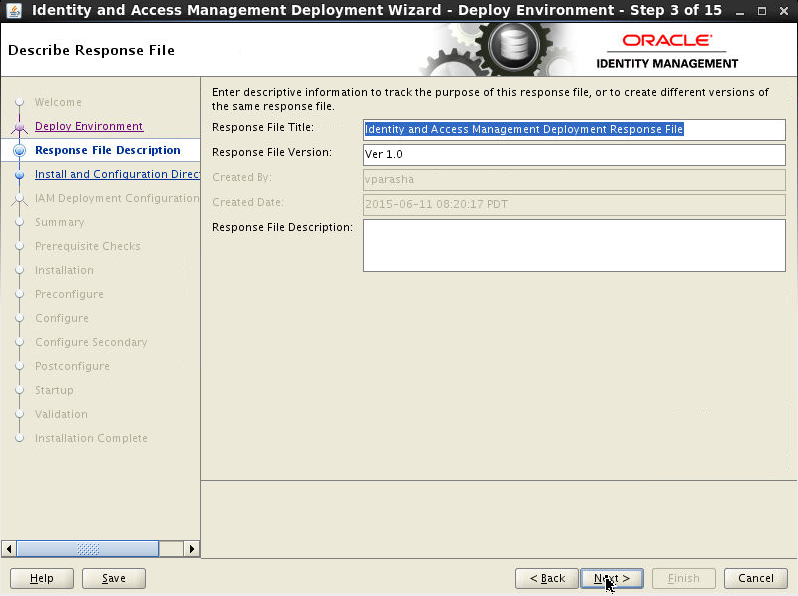
On the Describe Response File screen, specify descriptive information to identify the response file. This information can be used to uniquely identify a response file if multiple response files are created.
- Response File Title: The Oracle Identity and Access Management Deployment Wizard provides the default title Identity and Access Management Deployment Response File. You can change this.
- Response File Version: The Oracle Identity and Access Management Deployment Wizard provides a default value, which you can change. You can use this to keep track of different file versions.
- Created By: Defaults to the operating system user who invoked the Deployment Wizard. Set when the response file is initially created and cannot be modified for the current response file.
- Created Date: Defaults to the date that the response file was initially created. Set when the response file was initially created and cannot be modified for the current response file.
- Response File Description: Provide a description of this response file. This is an optional field.
Click Next.
-
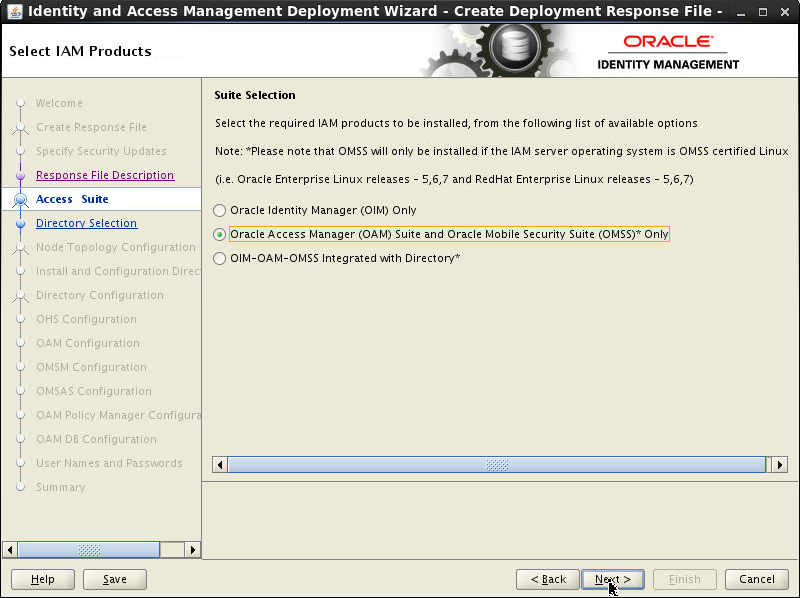
On the Select IAM Products screen, select Oracle Access Manager(OAM) Suite and Oracle Mobile Security Suite (OMSS)* Only. Click Next.
-
On Configure Oracle Unified Directory screen, select Configure New Directory option. Choose the Directory Types as Oracle Unified Directory. Click Next.

-
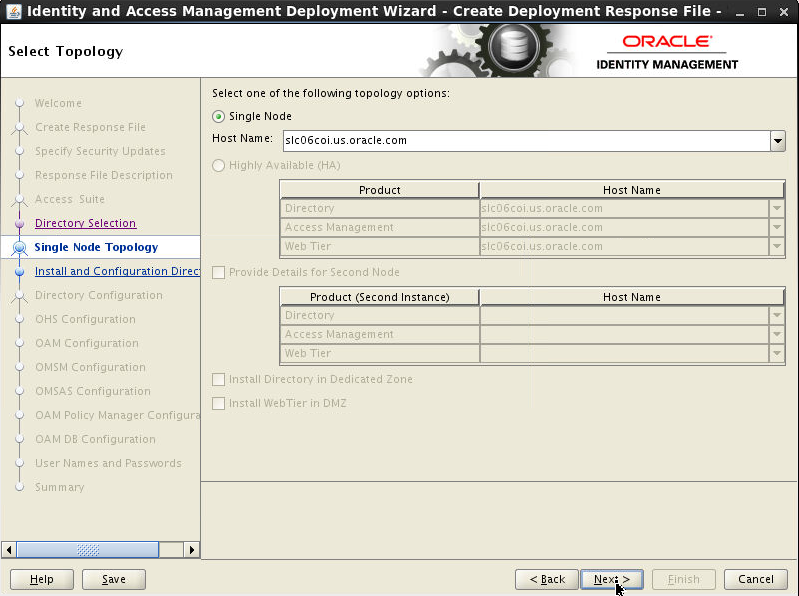
On Select Topology screen, select Single Node. In the Host Name field, specify the host where you want to deploy Identity and Access Management, as a fully-qualified host name. Click Next.
-
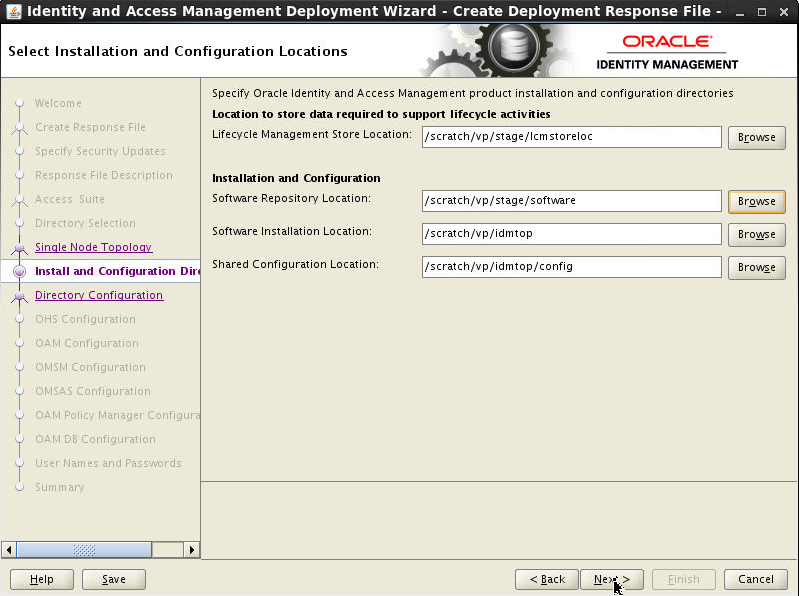
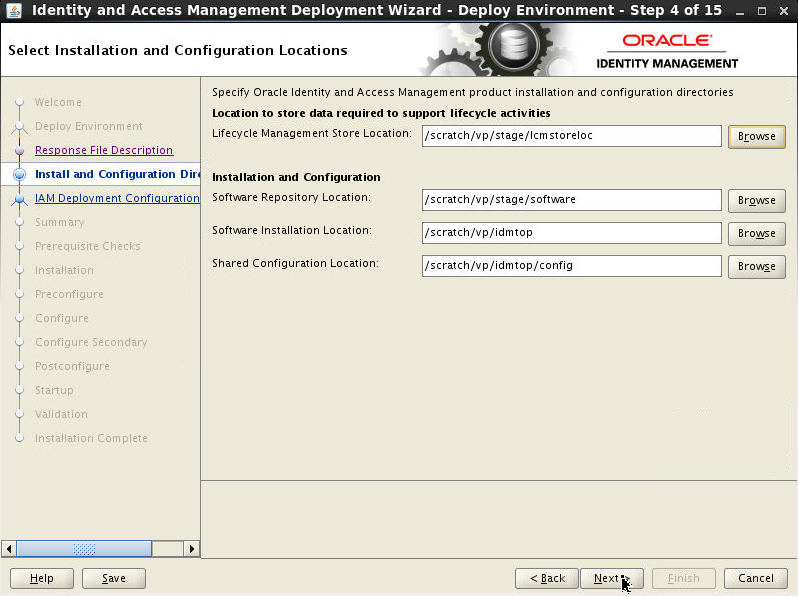
On Select Installation and Configuration Locations screen, give the location of the directories required for installation and configuration actions. Click Next.
-
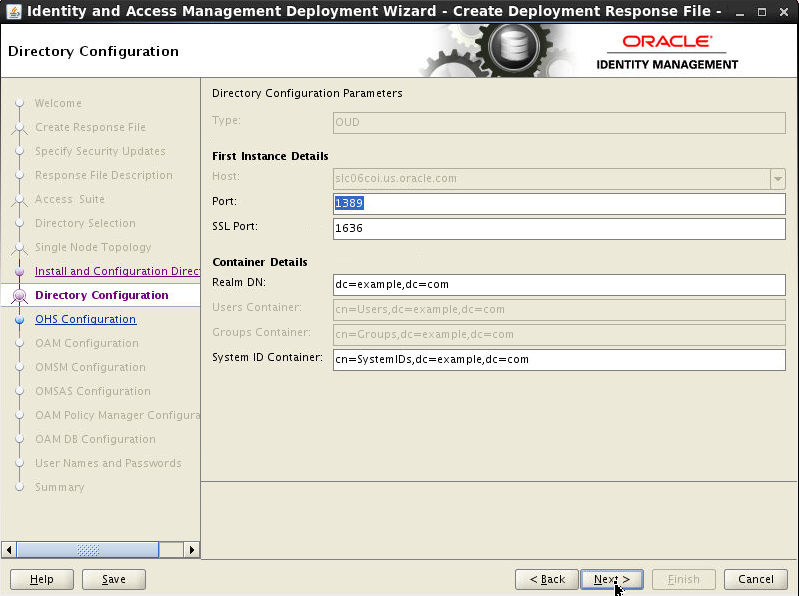
On Directory Configure screen,enter the following values for the ports. Click Next.
- Port = 1389
- SSL Port = 1636
-
On Configure Oracle HTTP Server screen, enter the following values for the ports.
- HTTP Port = 7777
- SSL Port = 4443
- OHS Admin SSL Port = 9999
- OPMN Local Port = 6703
- OPMN Remote Port = 6704

-
On Configure Oracle Access Manager screen, enter the following values for the ports.
- AdminServer Port = 7001
- OAM Port = 14100
- Nodemanager Port = 5556
Click Next.

-
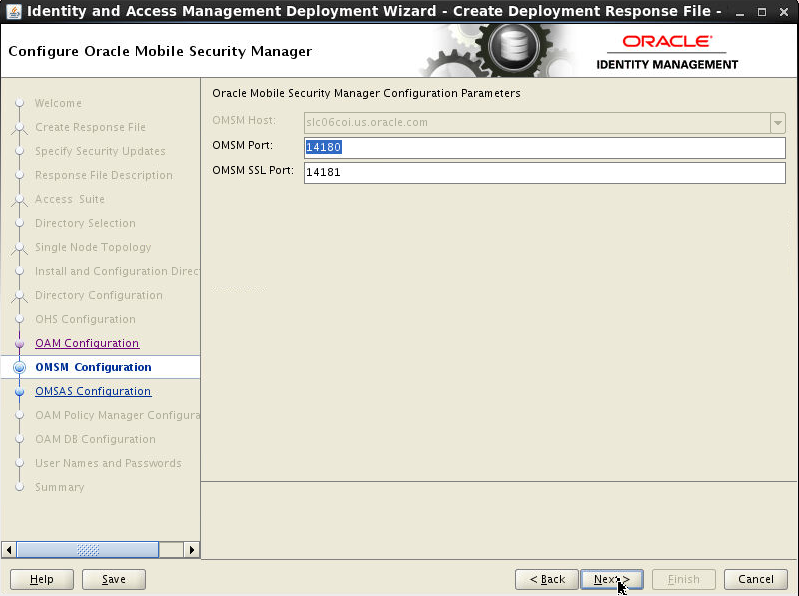
On Configure Oracle Mobile Security Manager screen, enter the following values for the ports.
- OMSM Port = 14180
- OMSM SSL Port = 14181
Click Next.
-
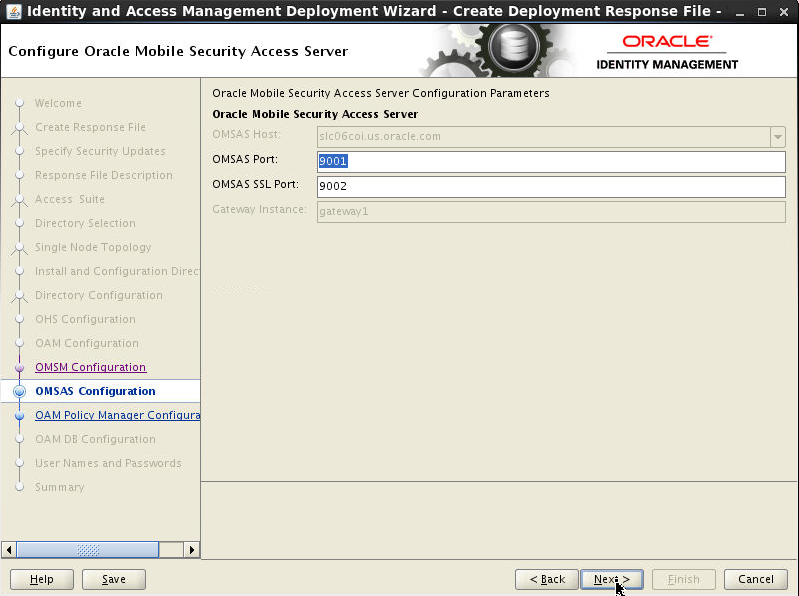
On Configure Oracle Mobile Security Access Server screen, enter the following values for the ports.
- OMSAS Port = 9001
- OMSAS SSL Port = 9002
Click Next.
-
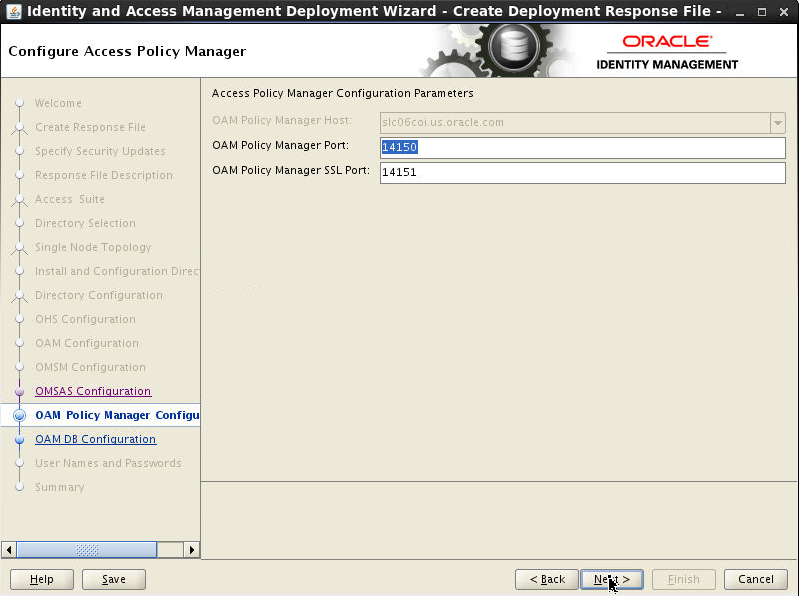
On Configure Access Policy Manager screen, enter the following values for the ports.
- OAM Policy Manager Port = 14150
- OAM Policy Manager SSL Port = 14151
Click Next.
-
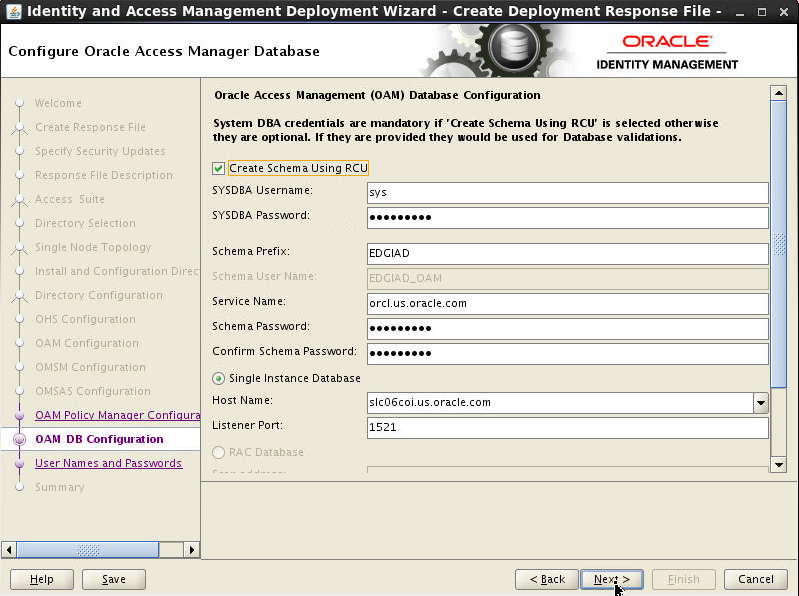
On Configure Oracle Access Manager Database screen, check Create Schema Using RCU and enter the following
- SYSDBA Username: SYS
- SYSDBA Password: <sysdba
password> For Example: Oracle123
- Schema Prefix: EDGIAD
- Service Name: <service name> For example: orcl.us.oracle.com
- Schema Password: <Provide schema password> For Example: Oracle123
- Host
Name: <hostname>
- Listen Port: 1521
Click Next.
-
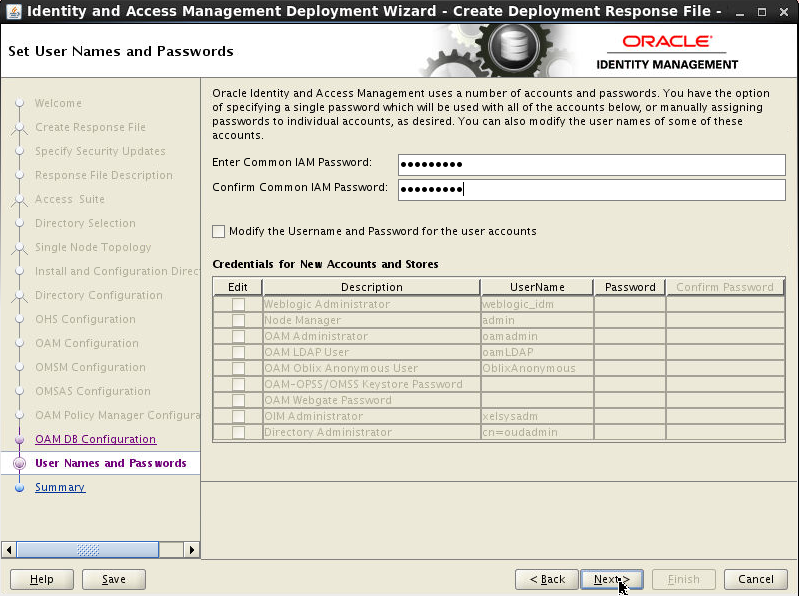
On Set User Names and Passwords screen, enter the common IAM password.Click Next.
-
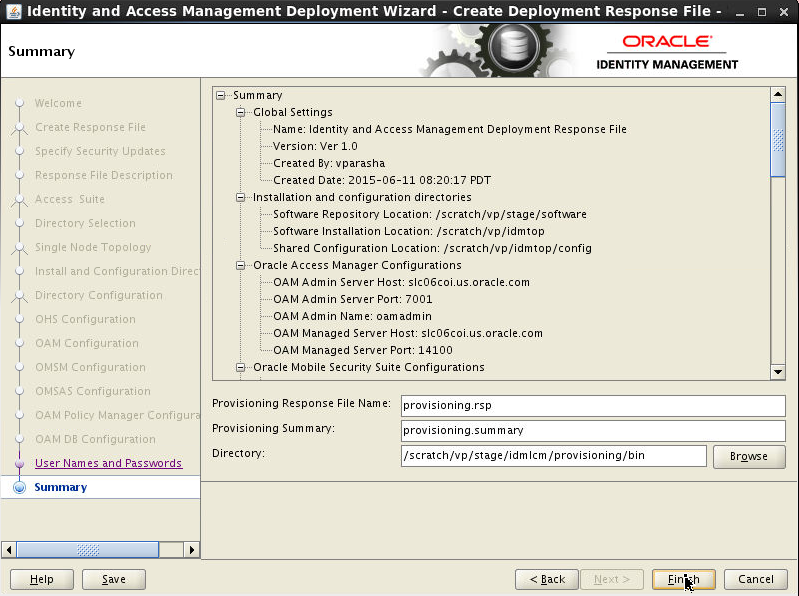
The Summary screen is displayed.
-
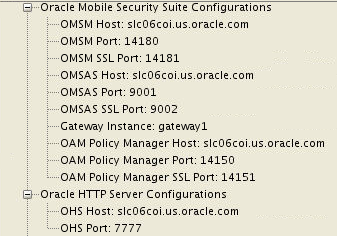
On the Summary screen verify the Oracle Mobile Security Suite Configuration details.
-
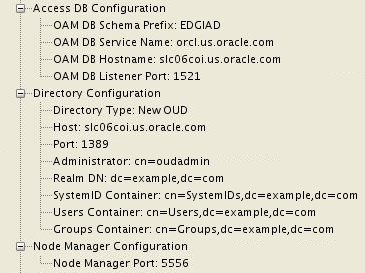
On the Summary screen verify the Configuration details.
-
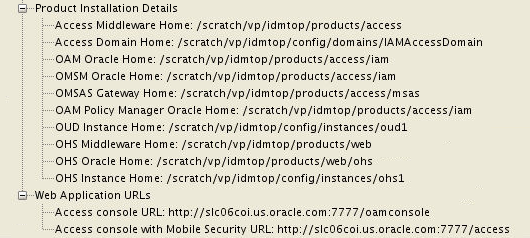
On the Summary screen verify the Product Installation details.
Click Finish.
Use the Existing Deployment Response File for Installing and Configuring OAM-OMSS Topology Using IDM LCM Tool
After creating the deployment response file, use it to deploy the Oracle Identity and Access Management environment. When you use the LCM tools to deploy an Oracle Identity and Access Management environment, you run the deployment in stages. At the end of each stage, you can verify that the stage has completed successfully before advancing to the next stage.
Following are the phases : Prerequisite checks,
Install, Preconfigure, Configure, Configure
Secondary, Postconfigure, Startup and Validate.
After you have created a response file, you can
deploy the Oracle Identity and Access Management
software using the deployment tool command line
or the Oracle Identity and Access Management
Deployment Wizard.
If you want to install and configure all the 8
steps of the IDM LCM deployment wizard for
silent install and scripting, you could use the
command line deployment tool. You must run the runIAMDeployment.sh
script a number of times, specifying the
deployment stage with the -target
option. You MUST complete each command, in
order, and successfully, before running the next
command.
The command syntax for the deployment tool on
UNIX is: runIAMDeployment.sh
-responseFile RESPONSE_FILE
-target STAGE
In this example, note the following:
RESPONSE_FILE
is the complete path to the location of the
deployment response file. You specified the file
name and directory on the Summary screen when
you ran the wizard to create the deployment
response file.
On Unix, the default value is: IDMLCM_HOME/provisioning/bin/provisioning.rsp
Review the following example, which shows each
of the commands:
runIAMDeployment.sh -responseFile
                                    IDMLCM_HOME/provisioning/bin/provisioning.rsp
                                    -target preverify
(Approximate time to complete this step 2 min)runIAMDeployment.sh -responseFile IDMLCM_HOME/provisioning/bin/provisioning.rsp -target install
(Approximate time to complete this step 30 min)runIAMDeployment.sh -responseFile IDMLCM_HOME/provisioning/bin/provisioning.rsp -target preconfigure
(Approximate time to complete this step 35 min)runIAMDeployment.sh -responseFile IDMLCM_HOME/provisioning/bin/provisioning.rsp -target configure
(Approximate time to complete this step 35 min)runIAMDeployment.sh -responseFile IDMLCM_HOME/provisioning/bin/provisioning.rsp -target configure-secondary
(Approximate time to complete this step 9 min)runIAMDeployment.sh -responseFile IDMLCM_HOME/provisioning/bin/provisioning.rsp -target postconfigure
(Approximate time to complete this step 13 min)runIAMDeployment.sh -responseFile IDMLCM_HOME/provisioning/bin/provisioning.rsp -target startup
(Approximate time to complete this step 20 min)runIAMDeployment.sh -responseFile IDMLCM_HOME/provisioning/bin/provisioning.rsp -target validate
(Approximate time to complete this step 3 min)
In this OBE however, we will be using the Deployment Wizard instead of the command line.
On the same terminal window where we have set the environment variables - JAVA_HOME, REPOS_HOME, IDMLCM_HOME, run the following command:
cd IDMLCM_HOME/provisioning/bin./iamDeploymentWizard.sh-
On the Welcome screen, click Next.
-
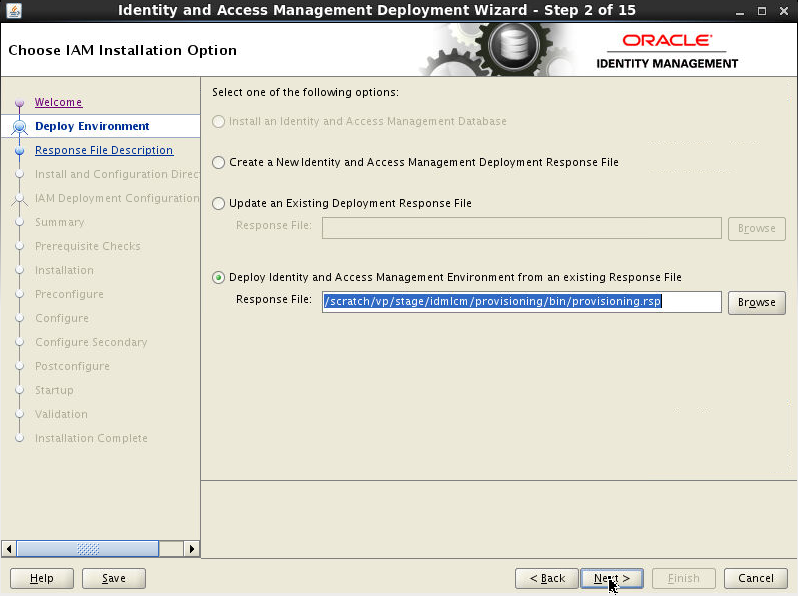
On Choose IAM Installation Options screen, Select Deploy an Identity and Access Management Environment from an existing Response File. In the Response File field, specify the path name of the file you want to use, either by typing it in the field or by clicking the Browse button, navigating to the desired file, and selecting it. Click Next.
-
On Describe Response File screen, enter the information about the response file, that you had provided when creating the Deployment Profile. Click Next.
-
On Select Installation and Configuration Locations screen enter the information about the Oracle Identity and Access Management installation and configuration directories, that you had provided when creating the Deployment Profile. Click Next.
-
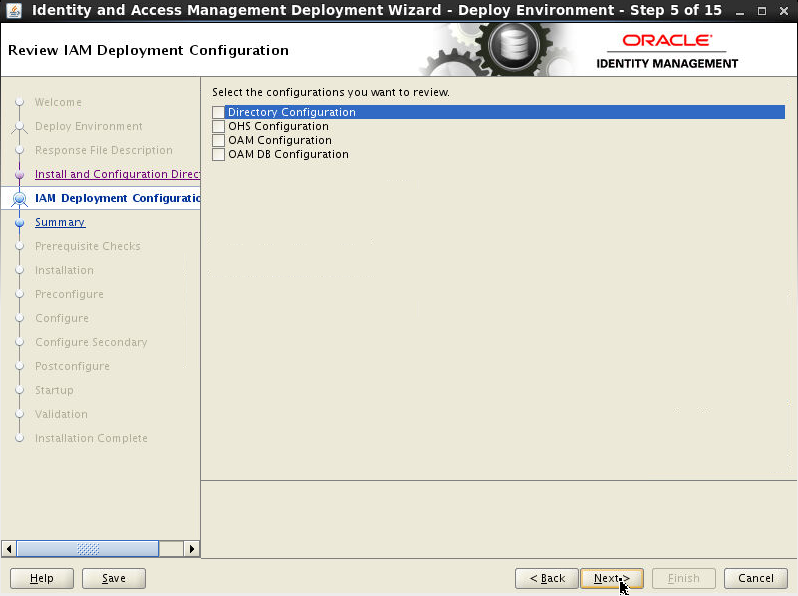
The Review Deployment Configuration screen enables you to select configurations you want to review. This is optional. Click Next.
-
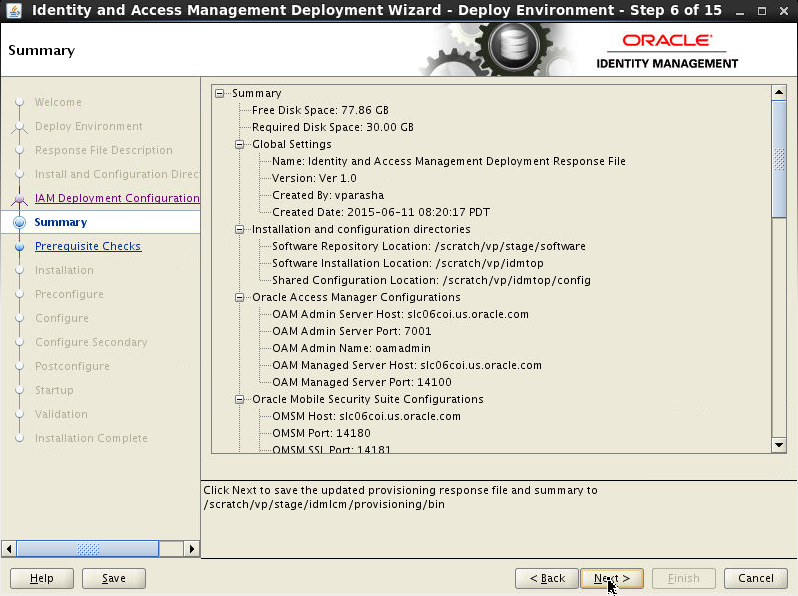
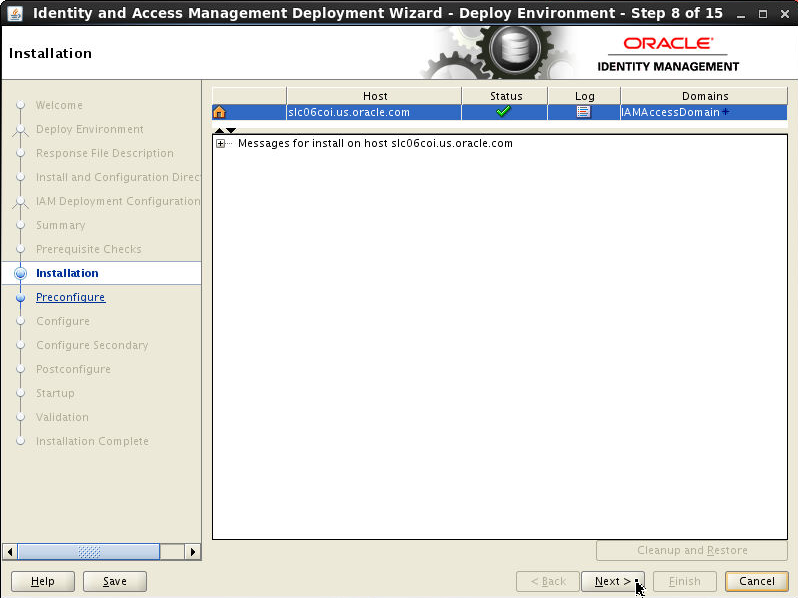
Review the information displayed on the Summary screen to ensure that the installation details are what you intend. Click Next.
-
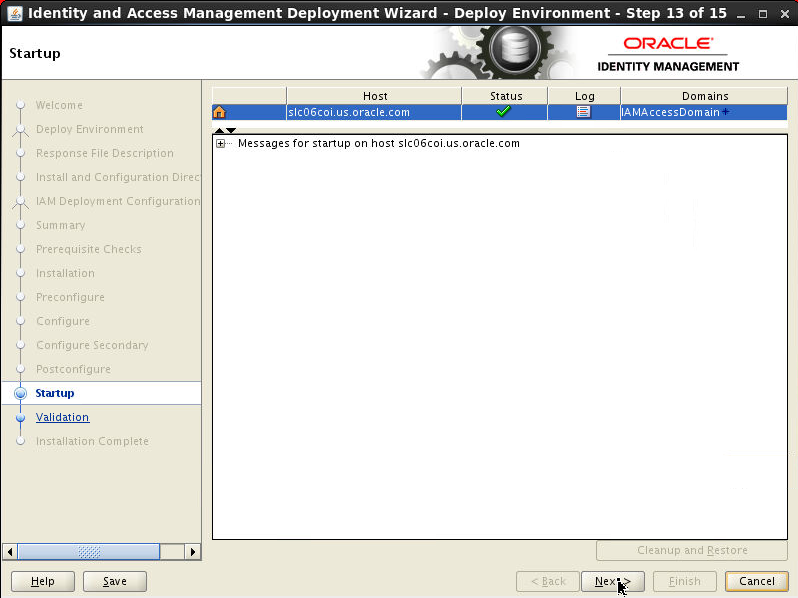
Click Next to continue.
-
Click Next to proceed.
-
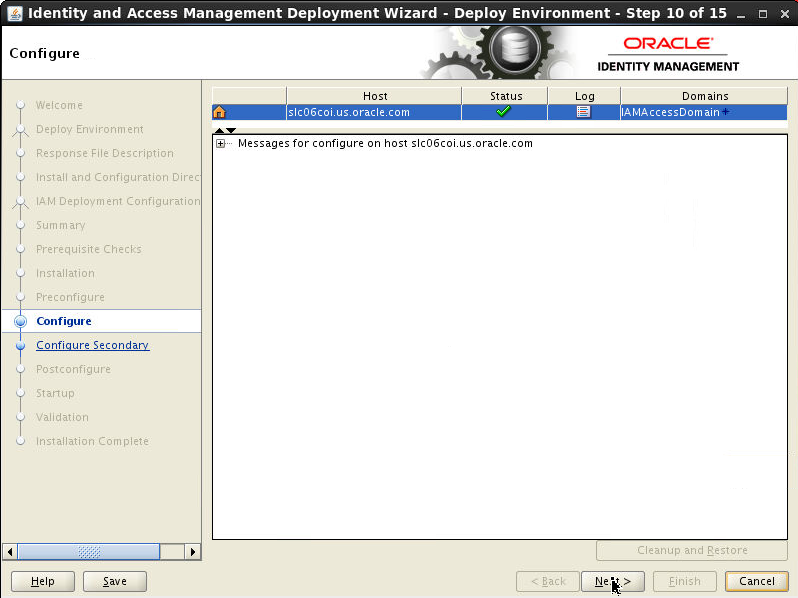
Click Next. The Oracle Identity and Access Management Deployment Wizard starts the configure phase and displays the Configure screen.

-
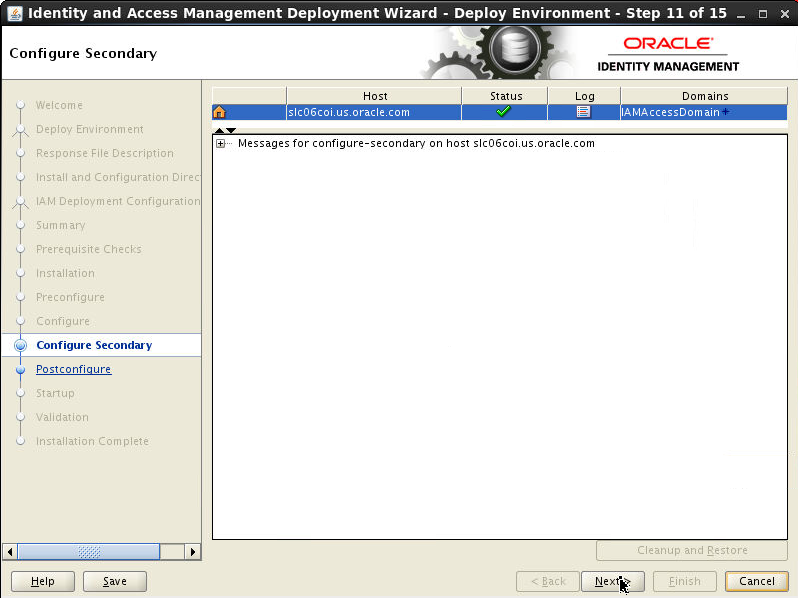
Click Next to continue.
-
Click Next to continue.
-
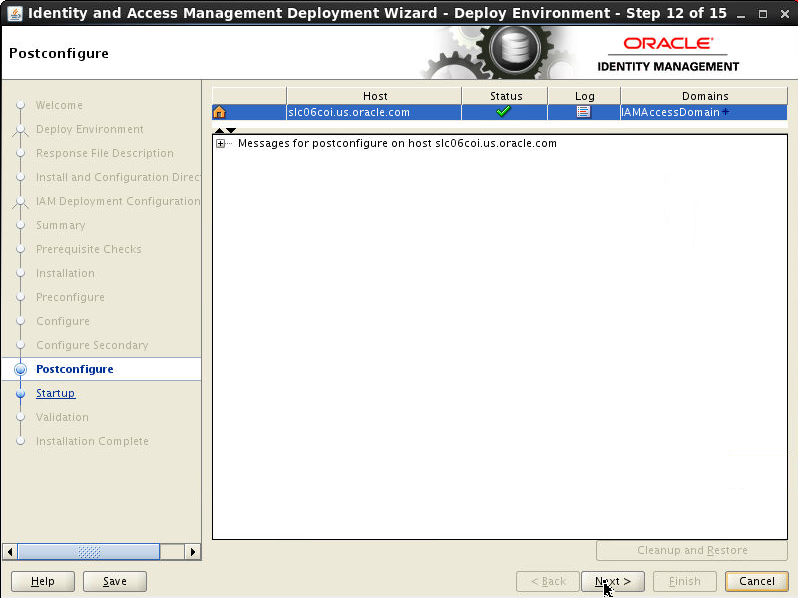
Click Next to continue.
-
Click Next to continue.
-
Click Next to continue.

-
The Install Complete screen appears after deployment has completed successfully. It shows a summary of the products that have been installed.
Click Finish.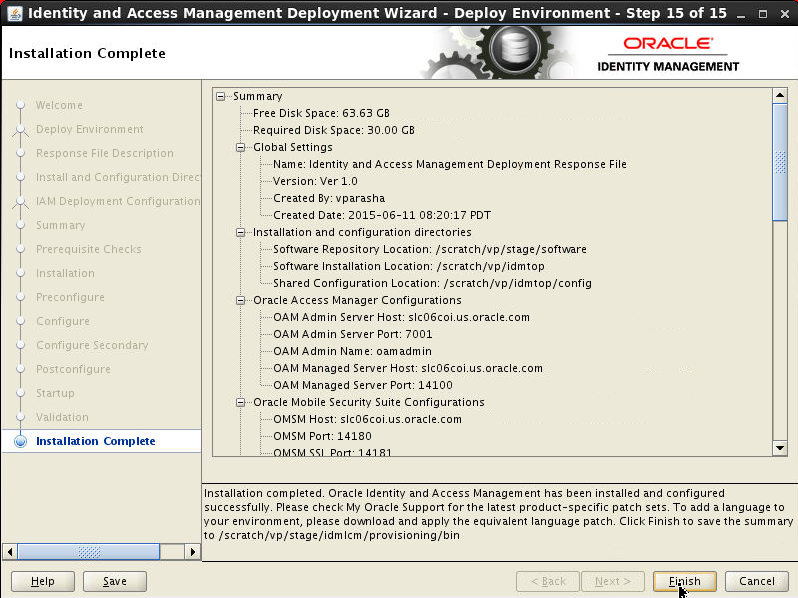
Health Check Utility
The Oracle Identity and Access Environment Health Check Utility is used to check the technical aspects of your identity and access management setup and provide an overall measurement of various settings and configurations of your environment.Oracle Identity and Access Management Life Cycle Management tools runs the health-check utility automatically as part of the pre-installation and post-configuration steps.
Further, after installing and configuring Oracle Identity and Access Management Life Cycle Management tools, the product specific plugins can be executed at any time to verify the health of the deployment.
The Oracle Identity and Access Environment Health Check Utility uses specific directories for executing plugins and for storing log files.
The healthcheck dir location is $IDMLCM_HOME/healthcheck
- bin - Contains the execution script
idmhc.sh, idmhc.propertiesfile andidmhc.batfile. - config - Contains the xml files that must be
provided as input when running the
idmhc.shcommand. - lib - Contains relevant jar files
The Oracle Identity and Access Environment
Health Check Utility is run, either via
command-line or by the automated LCM tools, by
executing the idmhc.sh command.The
xml file that is passed to the idmhc.sh command
contains the plugins that need to be executed.
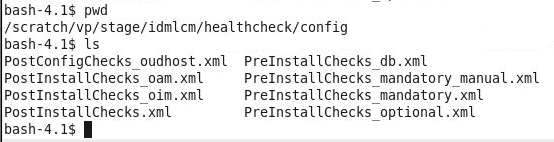
All relevant xml files reside in the $IDMLCM_HOME/healthcheck/config
directory.
There are xml files for generic tests, such as
PreInstallChecks_mandatory.xml,
                                  PreInstallChecks_mandatory_manual.xml,
                                  PreInstallChecks_optional.xml
and PostInstallChecks.xml,
and xml files that are product-specific such as
PostInstallChecks_oim.xml,
                                  PostConfigChecks_oudhost.x
, and PostInstallChecks_oam.xml.
Open the
PreInstallChecks_*.xml files
to view the plugins which are invoked in the
Preverify phase of the deployment wizard. Plugins are:
FreeMemoryCheck, KernelParamCheck,
                                  OSCheck, FreePortsCheck, DiskSpaceCheck,
                                  HostsCheck, DBParameterCheck, DBSchemaCheck,
                                  JDKCheck, PackageInstalledCheck,
                                  PermissionsCheck, XClockCheck, ProcessorCheck,
                                  HostsCheck.
The Oracle Identity and Access Environment
Health Check Utility uses the idmhc.properties
file located in $IDMLCM_HOME/healthcheck/bin
directory, to run the plugins listed
in the xml files of the utility. The idmhc.properties
file contains parameters that define
the connectivity of IDStore, schemas for various
components of the Oracle Identity and Access
Management suite, WebLogic server schemas, OUD
checks, and so on.
In the preverify stage, Oracle Identity and
Access Management Health Check Utility (idmhc.sh)
performs validation checks against your Oracle
Identity and Access Management setup. The
utility gathers data from your environment, and
runs a set of health-check plugins in an XML
file to generate a report that compares your
environment configuration settings with various
Oracle recommended configuration settings.
The execution script idmhc.sh
that is required to run the Health Check utility
can be located in the $IDMLCM_HOME/healthcheck/bin
folder. The plugins in PreInstallChecks_mandatory.xmlare
tested and results in errors if one of the
plugins fails(/scratch/vp/stage/lcmstoreloc/provisioning/logs/<hostname>/healthchecker-preverify-error-check.log)and
plugins in PreInstallChecks_optional.xml
are tested and result in warnings if one of the
plugins fails($LCM_HOME/provisioning/provisioning/logs/myhost.mycompany.com/healthchecker-preverify-warning-check.log)
Open the two log files:
healthchecker-preverify-error-check.loghealthchecker-preverify-warning-check.log
idmhc.sh
command.
The log files of the idmhc.sh run
(based on mandatory or optional plugins in the PreInstallChecks_mandatory.xml
or PreInstallChecks_optional.xml
files) are located in /scratch/vp/stage/lcmstoreloc/provisioning/logs/<hostname>/healthcheck-error
or healthcheck-warning directories.
IDM deployment wizard automatically starts all
components. if you want to do it manually, go to
/scratch/vp/idmtop/config/scripts/startall.sh
(you will also find stopall.sh
here).
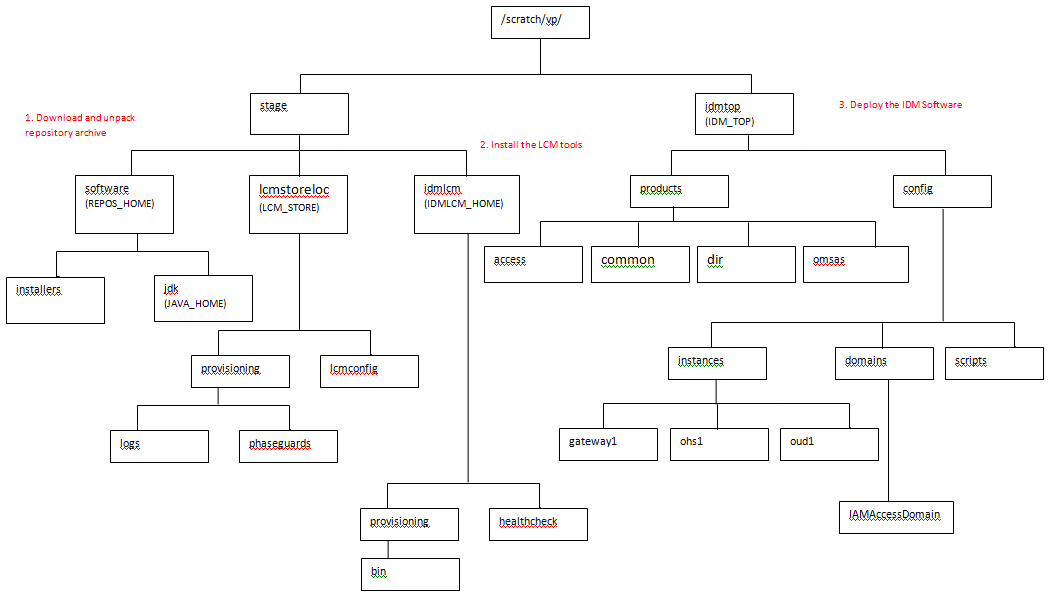
The final directory structure looks as follows.
In this picture we are highlighting only key
directories.
Post Installation Validation Steps
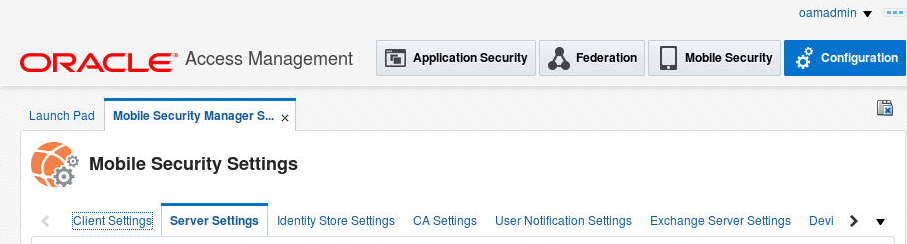
Login to Access Console (http://slc06coi.us.oracle.com:7777/access)
as oamadmin/Oracle123.
- Make sure you can see 4 top level tabs - App Security, Federation, Mobile Security and Configuration.
- Click on Configuration tab > Available Services.
- Make sure following services are available:
- Access Mgr., Mobile and Social and Mobile Security Service.
- Click on Mobile Security tab. Make sure you can see the following 4 sections:
- Mobile and Social Services.
- Mobile OAuth services.
- Mobile Security Manager.
- Mobile Security Access Server.
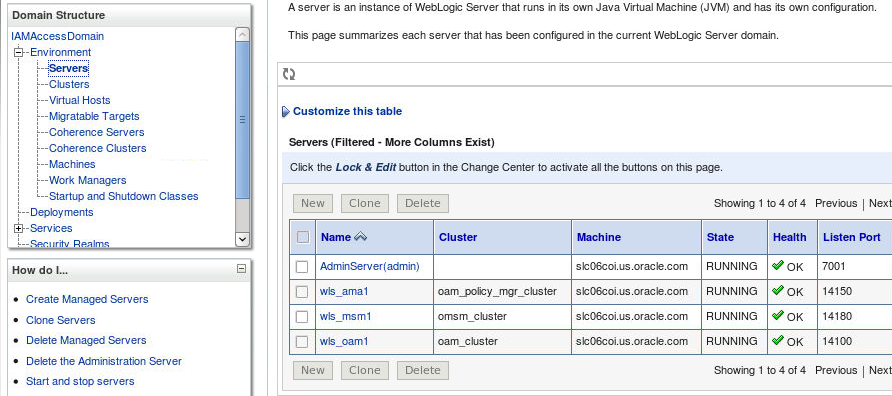
Login to WebLogic Console (http://slc06coi.us.oracle.com:7777/console)
as oamadmin and Go to
IAMAccessDomain > Environment > Servers
and check the status of the admin and managed
servers.
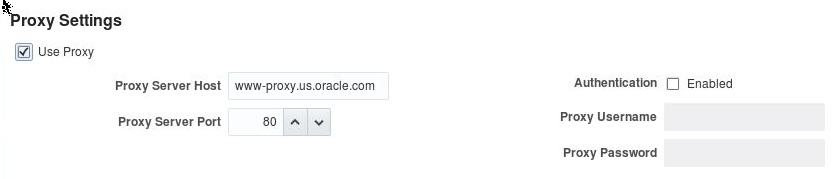
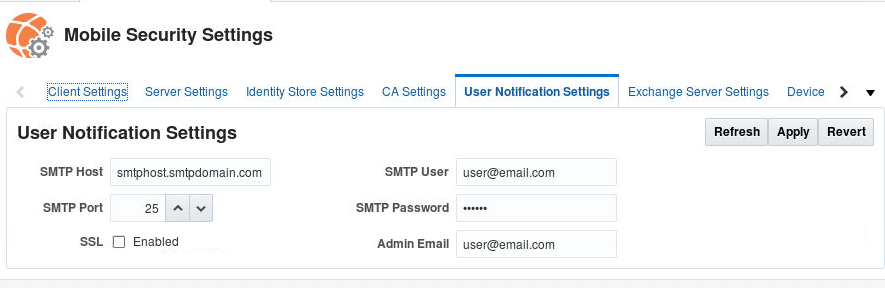
IDM LCM based installation doesn't set Proxy settings, APNS or GCM settings and SMTP email server settings if you need Push notification (for MDM) for either iOS or Android or if you want to send invite emails for workspace provisioning on the mobile devices , you should configure those options manually.
Navigate to Access Console. Click on Configuration > Settings > Mobile Security Manager Settings
Proxy Settings
You will have to provision APN certificate from apple.
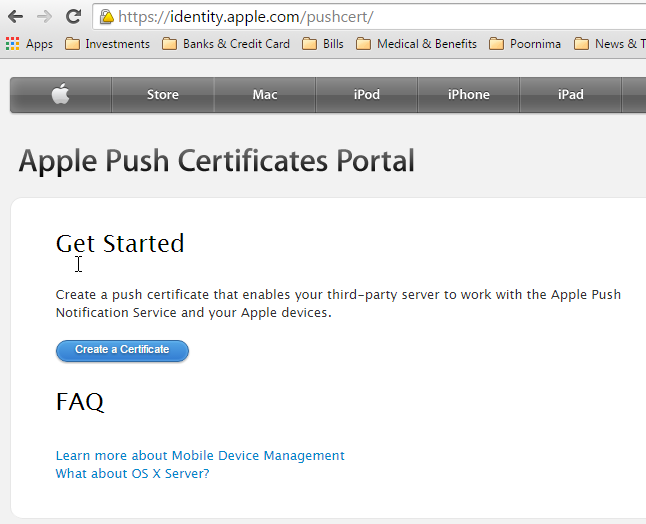
Once you have the certificate you can specify it in the APNS settings:

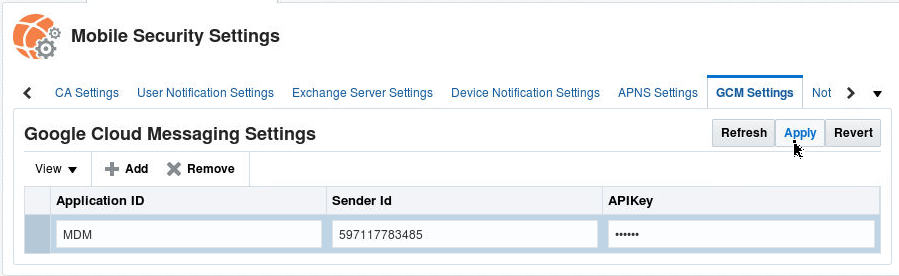
Similarly if you want push notification to work on Android device, you need to specify GCM settings. You would need Sender ID and API Key (which you get when creating a project in Google Developers Console - https://cloud.google.com/console)
Google Cloud Messaging (GCM) for Android is a service that allows you to send data from your server to your users' Android-powered device, and also to receive messages from devices on the same connection. The GCM service handles all aspects of queuing of messages and delivery to the target Android application running on the target device, and it is completely free.
Creating a Google API project
- Open the Google Developers Console -
https://cloud.google.com/console (Login using your
Google a/c)
If you haven't created an API project yet, click Create Project.
Supply a project name and click Create.
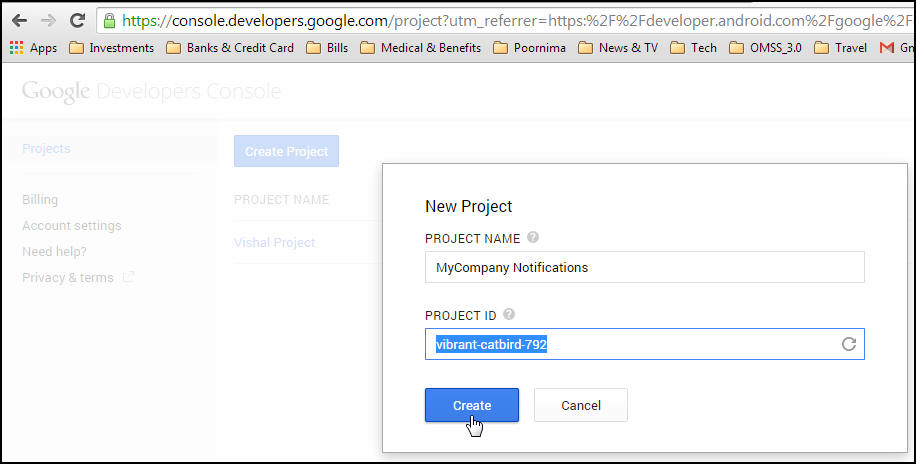
- Once the project has been created, a page
appears that displays your project ID and project
number. For example, Project Number: 37609765914.
Copy down your project number. You will use it
later on as the GCM sender ID.


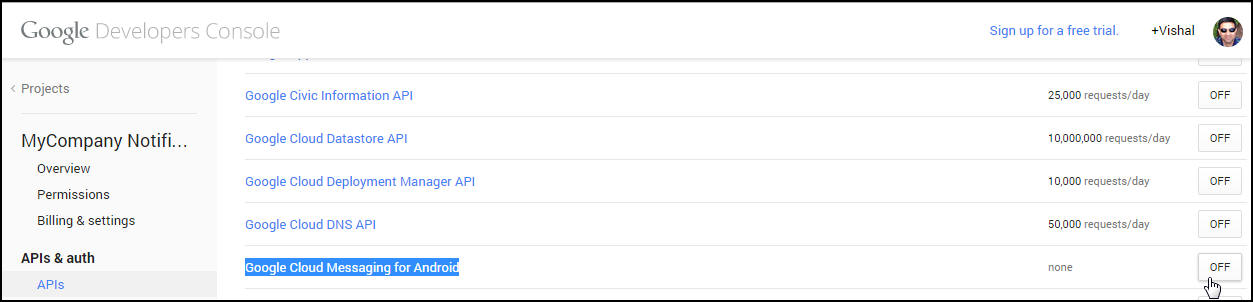
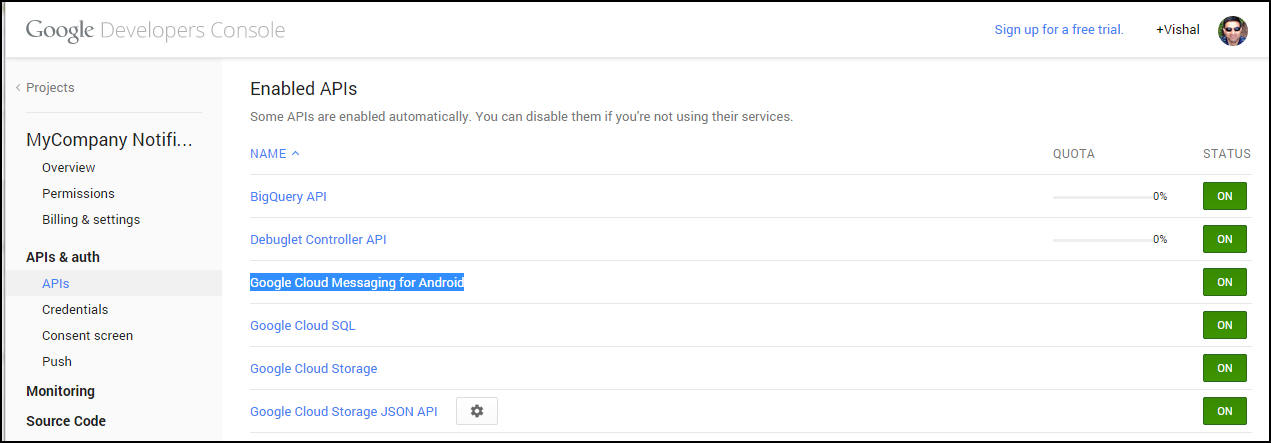
- Enabling the GCM Service
In the sidebar on the left, select APIs & auth > APIs.
In the displayed list of APIs, turn the Google Cloud Messaging for Android toggle to ON.

- Obtaining an API Key
In the sidebar on the left, select APIs & auth > Credentials.
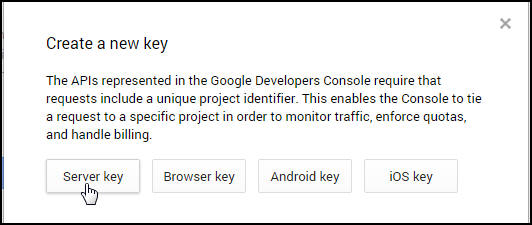
Under Public API access, click Create new Key.
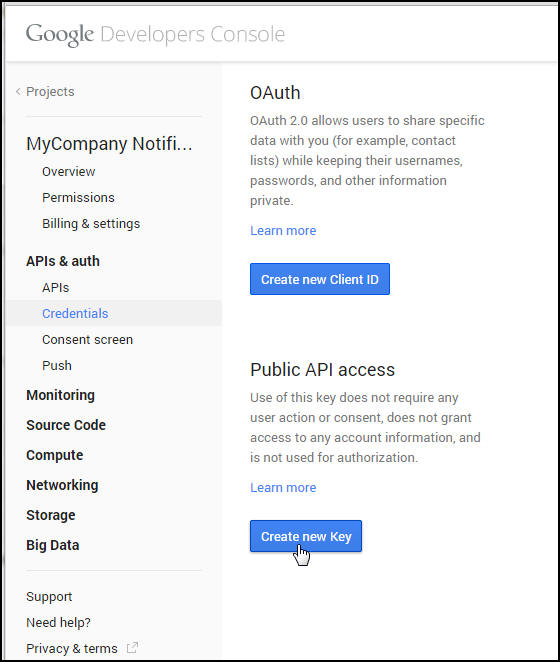
In the Create a new key dialog, click Server key.
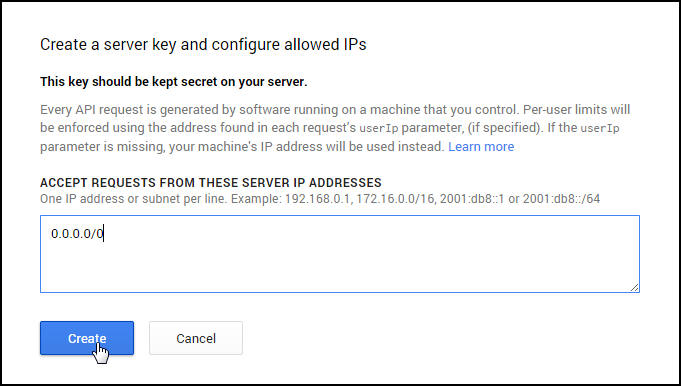
- In the resulting configuration dialog, supply
your server's IP address i.e, IP of the MSNS
machine which would typically not be accessible
from the outside hence you may need to specify the
IP of the forwarding proxy in DMZ which forwards
the request to/from the MSNS server to GCM server.
In our example, we would use 0.0.0.0/0 which means accept request from all routes and all subnet masks.
Click Create.
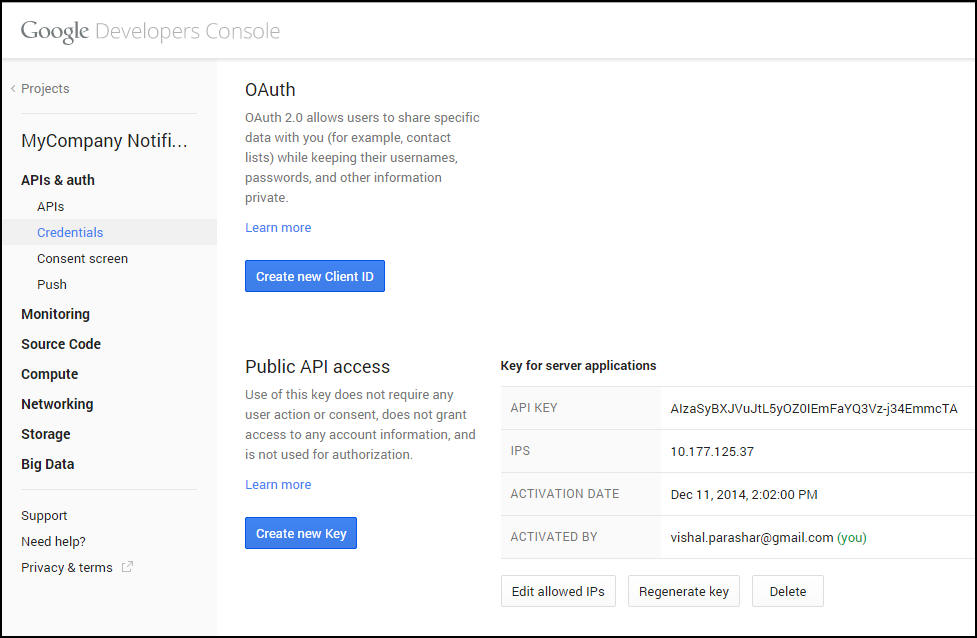
- In the refreshed page, copy the API key. You
will need the API key later on to perform
authentication in your application server. For
example. API KEY
AIzaSyBXJVuJtL5yOZ0IEmFaYQ3Vz-j34EmmcTA
Note: If you need to rotate the key, click Regenerate key. A new key will be created. If you think the key has been compromised and you want to delete it immediately, click Delete.
Troubleshooting IDM LCM Installation
Following are log locations for troubleshooting:
OMSM installer logs:
                                <IDMTOP>/products/access/oraInventory/logs
OMSM Middleware Home: <IDMTOP>/products/accessOMSM Oracle Home: <IDMTOP>/products/access/iamOMSAS installer logs location: <IDMTOP>/products/omsas/oraInventory/logsOMSAS Install Location: <IDMTOP>/products/omsasidmConfigTool will be executed from: <IDMTOP>/products/access/iam/idmtools/binidmConfigTool logs located at: <LCM_STORE>/provisioning/logs/<host_name>WLS server logs can be found in following locationsIAMAccessDomain/servers/<name_of_server>/logs/<name_of_server>.logIAMAccessDomain/servers/<name_of_server>/logs/<name_of_server>-diagnostic.logWLS server output logs: IAMAccessDomain/servers/<name_of_server>/*.out
If the deployment fails, note the name of the phase
where the failure occurred, and then check the logs
to determine a cause. When you are ready to cleanup
and attempt another deployment, do one of the
following:
- If the deployment failed in the Preconfigure or Install phases, then use Cleanup and Restore to cleanup the environment so you can start the deployment again from the beginning.
- If deployment fails between the Preconfigure stage and the Validate stage, then use the Cleanup and Restore feature to clean up the environment and restore it back to the post-install stage. For example, if the deployment fails during the postconfigure stage, you can use Cleanup and Restore to clean up any changes made since you successfully completed the install stage.
The command syntax for performing a cleanup and restore is as follows:
-
<Oracle_IDMLCM>/runIAMDeployment.sh
                                -responseFile response_file_name -target
                                cleanup-failed_phase_name
<Oralce_IDMLCM>/runIAMDeployment.sh -responseFile response_file_name -target restore-failed-phase_name
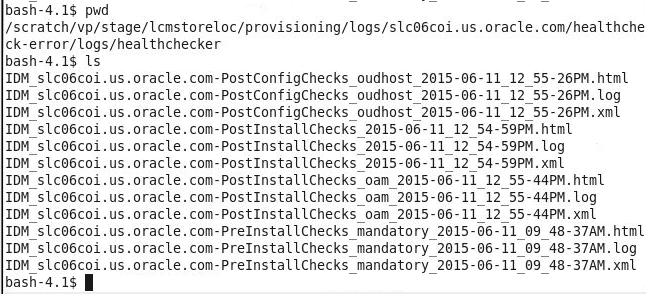
If you get errors during the pre-requisite checks
phase, navigate to /scratch/vp/stage/lcmstoreloc/provisioning/logs/<hostname>/healthcheck-error/logs/healthchecker
and view IDM_<hostname>-PreInstallChecks_mandatory_<timestamp>.logs
or you can open the corresponding html file to view
the test results and errors.
Various Phase logs:
- You can view the different phase logs
under
/scratch/vp/stage/lcmstoreloc/provisioning/logs/<hostname>/runIAMDeployment-<phase_name>.log. You can click on the log icon on the wizard to view the logs inline. This file should point you to the above healthchecker log file.
Want to Learn More?