Before You Begin
Purpose
In this tutorial, you learn how to obtain signing certificate and generate the provisioning profile from an Apple.
Time to Complete
Approximately 1 hours
Overview of Oracle Mobile Security Suite
Oracle Mobile Security Suite (OMSS) securely extends identity services and policies to mobile devices through authentication, policyenforcement, and single sign-on between applications. It delivers a secure container for application security and control in order to
separate, protect, and wipe corporate applications and data. OMSS provides a trusted and independent mobile workspace for
enterprise applications, email, and data.
Hardware and Software Requirements
The following is a list of software and hardware requirements:
- Mac Machine
Prerequisites
Before starting this tutorial, it is required that
the organization or developer be a member of the
Apple iOS Developer Program(https://developer.apple.com)
and have an understanding of the Apple iOS
development process.
Obtaining the Signing Certificate
Generate the Enterprise Certificate
A certificate from Apple is used to sign an
application developed through XCode. Now you
will sign the workspace app, with the Enterprise
Distribution Certificate from Apple. There are
two types of Enterprise Certificates.
Development and Production. This OBE
demonstrates
creating a Development Certificate. However in
real life scenarios (in typical organizations),
iOS developers may have their own development
certificate when they develop the application.
Before archiving, the application is given to
the Enterprise Security team who replace the
development certificate with an Enterprise
Distribution certificate. There is only one
Enterprise Distribution certificate per
organization.
A sample of a Production certificate is shown
below.

Follow the steps below to generate a Development Certificate.
-
Open a browser in an iMac or a Macbook Pro laptop. Login to https://developer.apple.com. Click
 Certificates, Identifiers and
                                      Profiles
.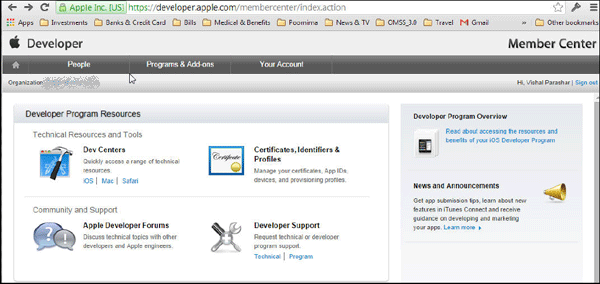
-
Click
Certificates.
- Click
Add("+")to generate a new iOS Certificate for the Enterprise. This will be used to sign the workspace container. -
Select
iOS App Development. ClickWorldwide Developer Relations Certificate Authorityto download
the intermediate certificate.
-
Click
Add. The certificateAppleWWDRCA.ceris added to the Keychain.
-
The next screen contains instructions to create a CSR using Keychain Access. Click
Continue.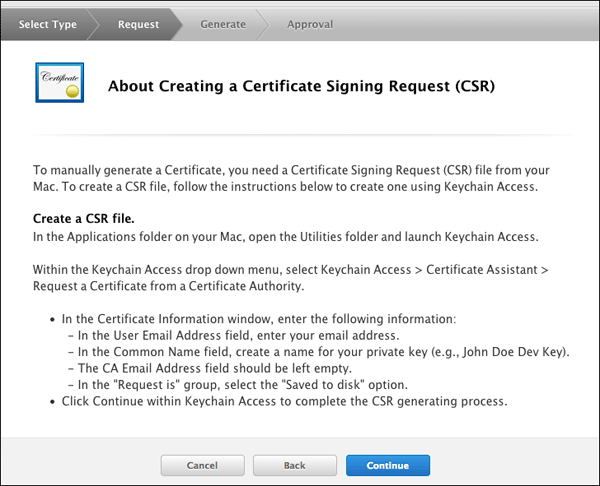
-
On your Mac desktop, Navigate to
Applications > Utilities.OpenKeychain Access.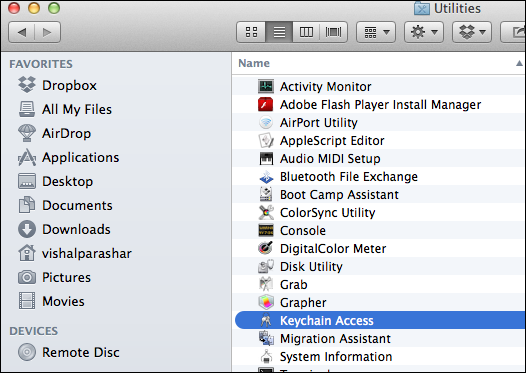
-
Select
Keychain Access > Certificate Assistant > Request a Certificate from a CA.
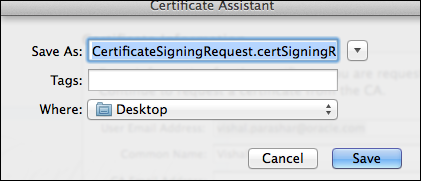
In theCertificate Assistantwindow, enter the following information.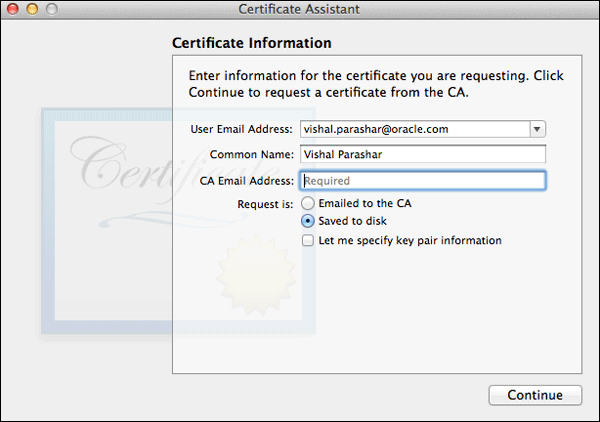
-
Save the certificate request to the desktop.
-
On
Generate your certificate, clickChoose Fileand select the CSR (Certificate Signing Request) that you saved
above to the Desktop. ClickGenerateto generate the certificate.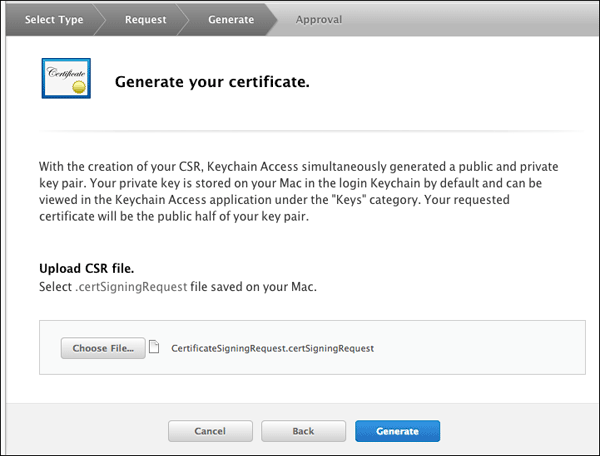
-
The status of the certificate shows
Pending
                                      Approval
. It needs to be approved by the team administrator.
-
The new certificate has a status of
Pending
                                      Approval
.
-
Once approved by the team administrator, it is ready for download. Click
Download.
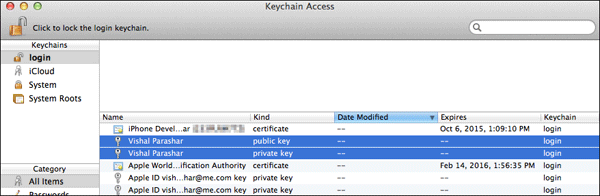
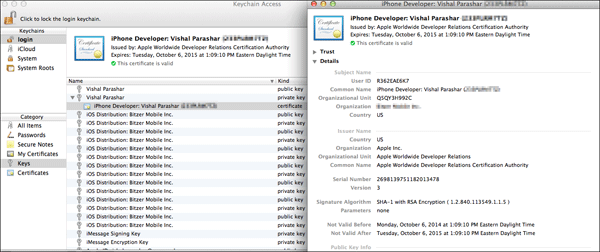
-
Add the certificate
ios_development.certo the keychain.
-
You can see the public, private keys, and the certificate in the KeyChain Access.
Register an Application ID
Bundle ID is the identifier of an application
(i.e.,Bundle ID is a string used to precisely
identify a single application). App ID is the
connection between the application and
provisioning profile. App ID’s primary use is,
as part of a provisioning profile, it specifies
which applications are authorized by the profile
to be signed and launched. App ID has 2 parts:
"bundle seed ID" and
"bundle ID search string".
Bundle seed ID makes applications share
keychain data, that is, it's the key chain entry
of the applications which have the
same bundle seed ID. Bundle ID search string
defines how many applications are covered by
this App ID.
If you use a Wildcard App ID, that means many
applications will be authorized by the
provisioning profile associated with
this App ID. Provisioning profile ties the
certificates, App id and Device id together.
For more details on Bundle Identifier, Application ID and Provisioning Profile, Please refer to Apple Documentation.
-
Login to https://developer.apple.com. Click
Certificates, Identifiers and
                                      Profiles
.
-
Under
Identifiers, clickApp IDs. ClickAdd(+)to register an App ID.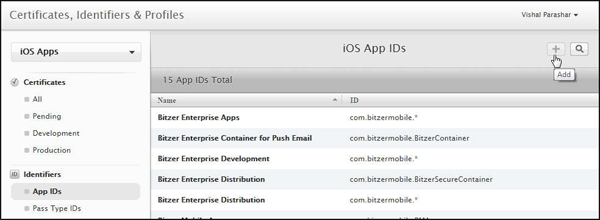
-
Enter a name or description for the App ID in the
Namefield.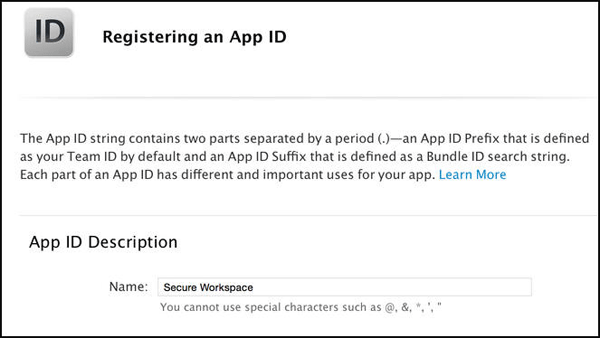
-
Select the corresponding checkboxes to enable the app services you want to use.
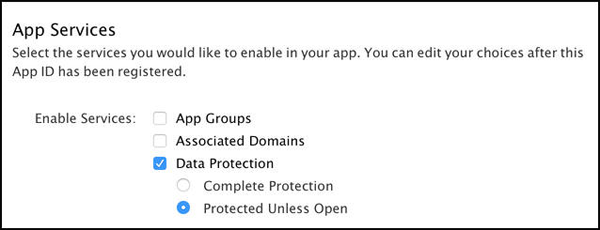
Note: A checkbox is disabled if the technology requires an explicit App ID and you are creating a
wildcard App ID, or the technology is enabled by default. -
To create an Explicit App ID, Select
Explicit
                                      App ID
and enter the app’s bundle ID in theBundle ID
field. An Explicit App ID exactly matches the bundle ID of an app you’re building, for example,
com.bitzermobile.BitzerSecureContainer.
An explicit App ID can’t contain an asterisk (*). To create a wildcard App ID, select Wildcard App ID and
enter a bundle ID suffix in the Bundle ID field.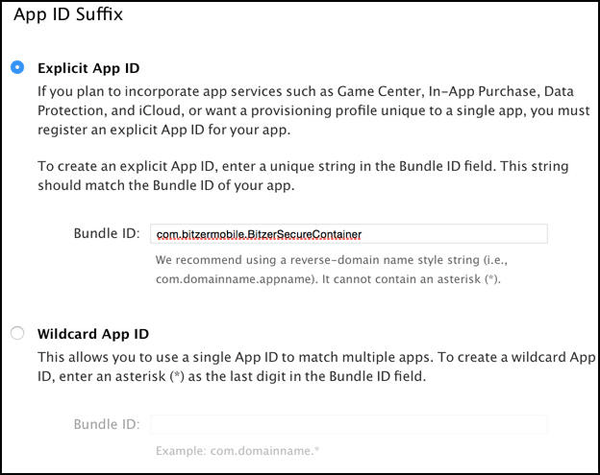
-
Click
Continue. Review the registration information, and clickSubmit. ClickDone.
Register a device
You must add the device to your account for
testing before you can download the provisioning
profile. This is required
only while creating a Development provisioning
profile. This step is not required while
creating an Enterprise Distribution
provisioning Profile.
-
The UDID of the device to be registered has to be determined first. In your Mac, connect to iTunes and under
MyDevice look for Summary page. The UDID of the device can be obtained as shown below.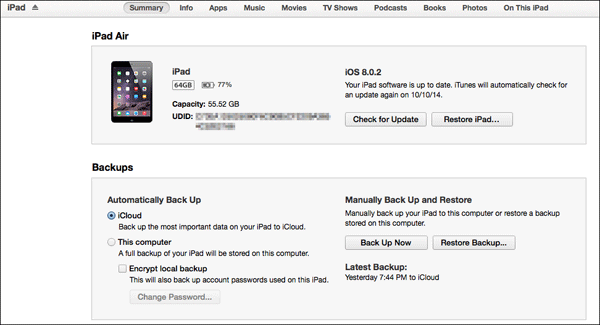
-
Login to https://developer.apple.com. Click
Certificates, Identifiers and
                                      Profiles
.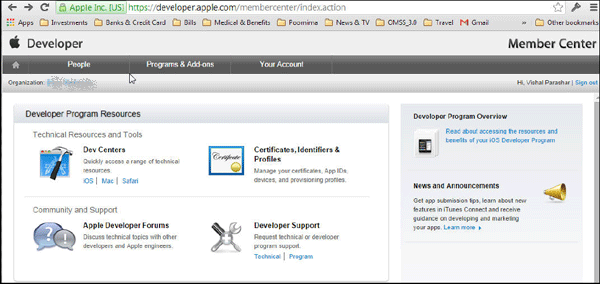
-
Under
Devices, clickAll. ClickAdd(+)to register a new device. Use the UDID of the device (obtained above)
to register the device.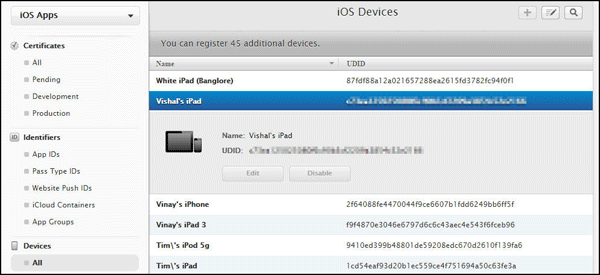
Note: For Enterprise Distribution profile this is not required. You need this device id when working with Enterprise
Development provisioning profile only.
You have now completed creating the artifacts required for creating a provisioning profile.
Obtaining the Provisioning Profile
Create a Provisioning Profile
A provisioning profile is a collection of
digital entities that uniquely ties developers
and devices to an authorized iPhone Development
Team and enables a device to be used for
testing.
There are two types of provisioning profiles.
Development and Distribution. For this OBE, you
will create a Development provisioning profile.
But in a real life scenario (In Organizations)
only a Distribution provisioning profile will be
created. A sample of a Distribution provisioning
profile is shown below.

Note: One provisioning profile can be used with
one application or a generic provisioning
profile can be created (commonly referred
to as star (*) profiles) that can be used with
many applications. If you are building the
application in XCode, the bundle identifier must
have the app id of the provisioning profile as
the prefix, otherwise it will not compile.
-
Login to https://developer.apple.com. Click
Certificates, Identifiers and
                                      Profiles
.
-
Under
Provisioning Profiles, ClickAll. ClickAdd(+)to register a new provisioning profile. -
Select
iOS App Developmentand clickContinue.
-
In the next few steps you will associate the provisioning profile with artifacts generated in the previous step.
Select the app id generated.
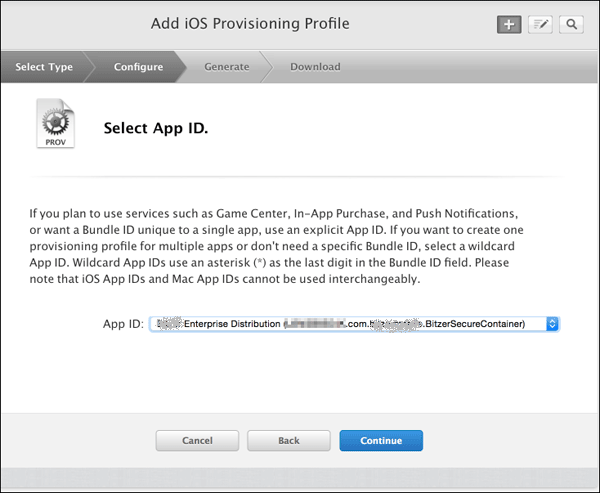
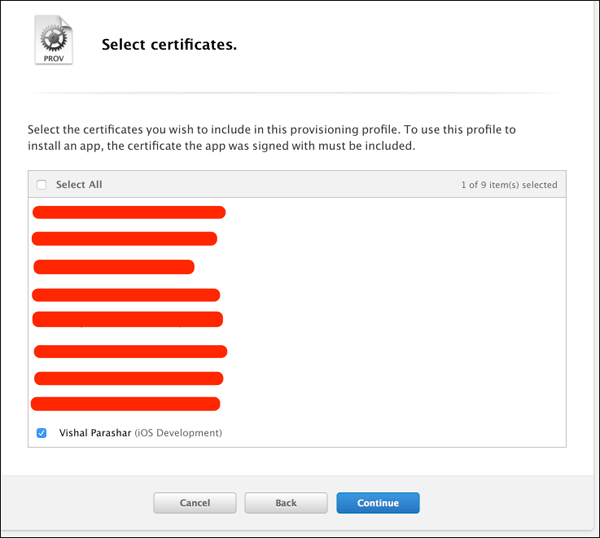
Select the certificates that you wish to be included in the provisioning profile.
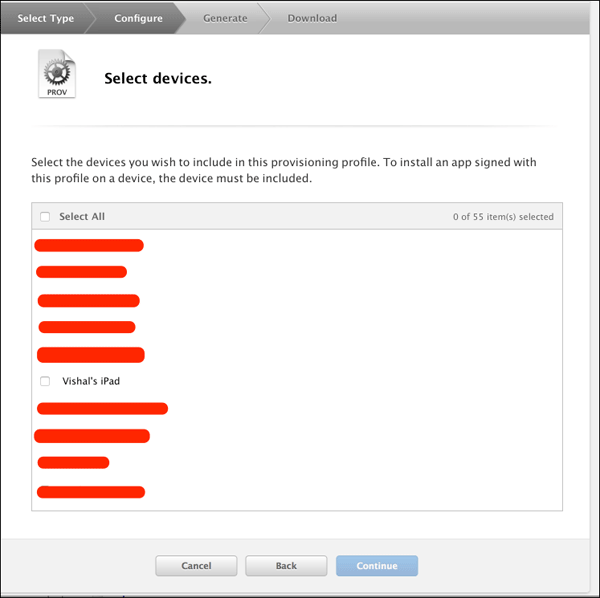
Select the devices that you wish to be included in the provisioning profile.
-
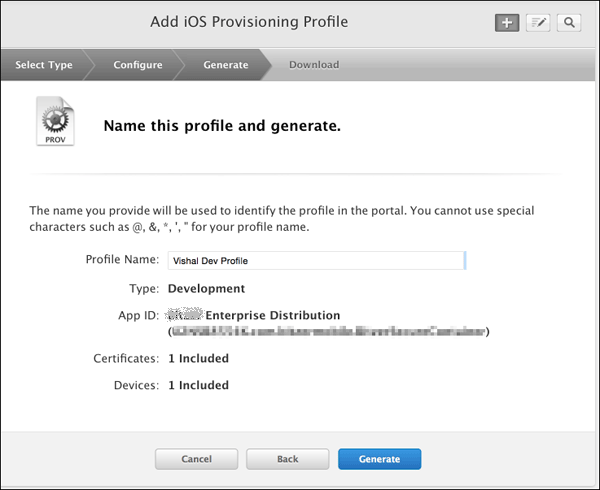
Provide a name for the provisioning profile and associate it with its Certificate, Device id and App id.
-
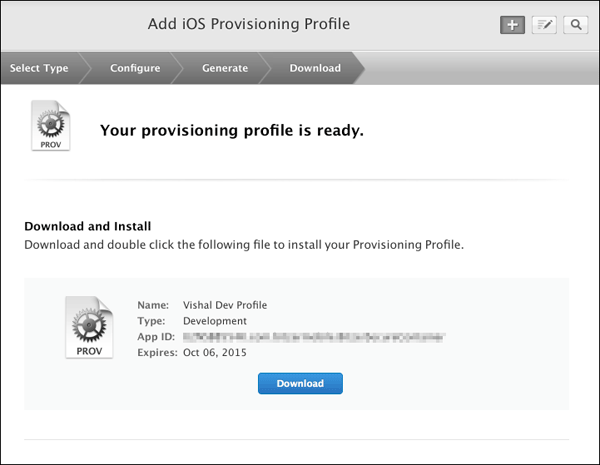
Once the provisioning profile is generated, click
Download.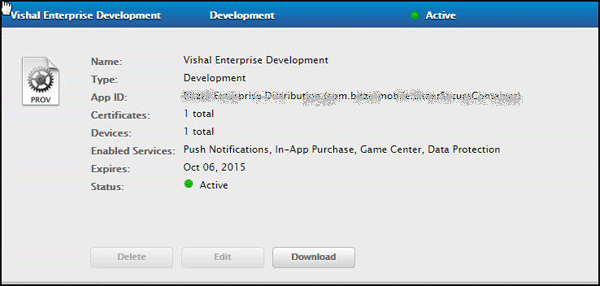
The file downloaded is
Vishal_Enterprise_Development.mobileprovision
Follow the steps to create a Development provisioning profile.
Summary
The enterprise certificate has been generated
for the workspace application and it has been
rebuilt. The ipa file(signed and generated)
for the workspace application is ready to be
deployed in a mobile device.
In this tutorial you learned to:
- Create artifacts required for provisioning profile
- Register an application ID
- Register a mobile device
- Create a provisioning profile
Credits
- Lead Curriculum Developers: Vishal Parashar, Shafi Ahmed